Monday, September 30, 2013

Capsicum Rice | Capsicum Bath Recipe | Navaratri Naivedyam Recipes

capsicum rice
Its been a long time I had prepared any variety rice in my kitchen and hence this space is starving of  rice varieties for a while.My mom used to prepare various Rice varieties for our lunch boxes and you would find rice varieties at least 3-4 times a week in my lunch box.Having various rice varieties for lunch during my school,college and office days I had kind of developed an aversion for it for a certain period and it took a while for me to come out of it.And that's the reason I started packing Roti-Sabzi-Dal fare to DH for his lunch box and since he does not carry lunch box now I always look for easy lunch options for myself.Needless to say that these Rice varieties are one of the easiest options if you are planning to prepare a meal for one.
capsicum masala rice
The concept of Bath(Bhat) varieties is famous in Karnataka and you find the same in many Upahara Darshinis(eating joints) across Bangalore which is usually served for a breakfast or lunch.There are various number of Bath varieties like - Vangibath, Tomato bath, Methi Batani Bath, Batani Bath, Bisi Bele Bath etc.Bath(Bhat) varieties are usually prepared in a different way with the addition of a bath masala powder or ground masala unlike the simple rice varieties.
Capsicum Bath is a very simple rice recipe prepared in a way similar to how we prepare Vangi Bath.You can prepare this rice in a jiffy if you have cooked rice ready or you can even use left over rice to prepare this.One can replace the green capsicums with the various colored bell peppers to make this rice more colorful.As this is a simple one pot meal you can pair it with a simple Onion-Tomato Raita and chips or salad and send it for a lunch box. This is a No-Onion-No-Garlic recipe and hence it even suits on festival days, try this easy rice variety for Navratri. For a complete list of recipes for Navratri check out here.
If you are looking for various Rice and Pulao varieties check out here for more recipes.
capsicum bath

Capsicum Rice Recipe | Capsicum Masala Bath:
Serves 2
Prep time:10 mins | Cooking time:20 mins | Total time:30 mins
Cuisine: South Indian  | Category: Rice Varieties - Main Course

Ingredients:
1 cup Rice (Sona masuri or Basmati)
3-4 large Capsicums
10-12 Cashew nuts,slit into halves
a sprig of Curry leaves
juice of 1 small Lemon
2 Red Chillies,broken
1/4 tsp Turmeric powder
1/4 tsp Sugar(optional)
1 tbsp Chana dal
2 tsp Urad dal
1/2 tsp Mustard seeds
Salt to taste
2-3 tbsp Oil
 
Method:
  • Prepare rice in the usual way you make and cool the rice completely.For 1 cup of sona masuri rice you would need 2 1/4 cups of water and for 1 heaped cup of Basmati rice you need 2 cups of water.
  • Remove the seeds from capsicum and cut it into thin 1/2" pieces.
  • Heat oil in a big kadai/pan and crackle mustard seeds.
  • Add chana dal,urad dal and cashew nuts and fry until the dals and nuts turn slight golden brown in color.
    Now add slit red chillies and curry leaves and fry for a minute.
  • Add chopped capsicum and saute it for 2 mins.Add sugar to it as it eases the process of frying and balance the flavors in the rice later.Saute it until the capsicum pieces turn soft.
  • Add salt,turmeric and mix and remove it from stove.
  • Add vangibath powder to it and mix well.Add cooled rice and lemon juice and mix it nicely.Now taste the rice and adjust it by adding enough salt, vangibath powder and lemon juice.
Serve it with simple Onion-Tomato Raita and chips/salad.

Notes:
  1. If you do not have vangi bath powder in hand,you can prepare instant masala like this.Heat 1 tsp of oil in a pan and roast 1.5 tsp of Urad dal, 1.5 tsp of Chana dal, 5-6 Red chillies, 1/2"Cinnamon, 2tbsp Coriander seeds and 1/2 tsp Cumin seeds and cool the mixture a bit and grind it to a coarse powder.
  2. You can add fresh/frozen Green Peas or potatoes along with capsicum pieces.If you are using potatoes add the potatoes first and let it cook completely before you add capsicum to it.
  3. You can add chopped coriander and grated fresh coconut to the rice at the end and mix.
  4. Instead of Capsicums you can use colored bell peppers too in the recipe.

Saturday, September 28, 2013

Navaratri Recipes 2013 | Navratri Recipes | Navratri Vrat Recipes

Navaratri will be celebrated from 5th oct- 13th October. Navratri festival is celebrated for nine days worshiping Durga devi in different forms on each day and on the 10th day Vijayadashami is celebrated.This festival is celebrated in most of the states in India in various forms. Dasara is celebrated in a grand manner especially in cities like Mysore and Calcutta.While in North,a fast is observed on those days and also celebrated with garba and dandiya where as in South,many people celebrate the festival by keeping Golu(an array of Idols) and pooja is performed on those 9 days inviting many ladies for haldi-kumkum.Various varieties of sundal and kheer varieties are prepared on those 9 days during Navratri to offer to the people who visit the Golu. We make a traditional sweet like holige or any thing equivalent on the first day and last day of Navratri and a simple sundal and kheer variety during the other days.I am compiling few recipes at one place which are ideally prepared in south Indian homes during Navratri for Pooja.I would have preferred to do a pictorial index but the list was so long that I went with the simple recipe index.I hope it is useful for you.Happy Navaratri to all !!
navaratri recipes

NAVARATRI RECIPES - SOUTH INDIAN:

Sundal varieties:
  1. Ammini Kozhukattai | Undrallu Guggillu
  2. Chana Dal Sundal
  3. Lobia Sundal/Alasandula Guggillu
  4. Avarekaalu Kadubu/Spiced Steamed Rice flour Dumplings
  5. Kabuli Chana Sundal
  6. Kala Chana Sundal/Black Chickpeas Sundal
  7. Peanut sundal
  8. Sweet corn Sundal 
  9. Mixed Bean Sundal 
  10. Kosambari | Moong dal Salad
Vada/Snack varieties:
  1. Alasandula(Lobia) Vada/Fritters
  2. Masala Vada/Chana dal Vada
  3. Medu Vada
  4. Mixed Dal Ambode(Vada)
  5. Mosaru Ambode/Dahi Dal Vada
  6. Dahi Vada/Perugu Vada/Mosaru Vade
  7. Saggubiyyam Bonda/Sago Bonda(with out onions)
Traditional Sweet Varieties:
  1. Hoornada Holige/Obbattu
  2. Halu Holige | Paal Poori | Paala Obabttu 
  3. Boorelu | Sukkinunde | Suzhiyan
  4. Karida Kadubu | Kari Kudumulu | Fried Sweet Dal Dumplings
  5. Garugu Hollige/ Hollige with rice flour-coconut filling
  6. Puran Poli | Pooran Poli | Bobbatlu
 Kheer/Payasam Varieties:
  1. Carrot Kheer
  2. Hayagreeva/Chana dal Sweet
  3. Korra biyyam Payasam | Foxtail Millet Kheer 
  4. Moong Dal Kheer / Pesara Pappu Payasam
  5. Palada
  6. Phool Makhana Kheer
  7. Poha Kheer/Aval Payasam
  8. Paal Payasam / Rice Milk Pudding
  9. Rava Payasam | Sooji Kheer 
  10. Rasayana | Balehannu Rasayan
  11. Sabudana Kheer | Sago Payasam
  12. Semiya Kesari 
  13. Semiya Kheer | Vermicelli Payasam
  14. Undrallu Payasam | Paal Kozhukattai
  15. Pappulo Undrallu
  16. Palathalikalu 
  17. Paal Payasam
  18. Mango Sheera
Rice Varieties:
  1. Aava Pettina Chintapandu Pulihora
  2. Chintapandu Pulihora- Andhra Style
  3. Cranberry Rice | Cranberry Puliyogre
  4. Dabbakaya Pulihora/Indian Grapefruit Rice
  5. Lemon Rice/Chitrannam
  6. Mamidikaya Pulihora/Maavinkay Chitranna
  7. Methi Peas Bath | Menthya Batani Anna
  8. Pulihora/Puliyogre
  9. Raw Mango Rice/Mamidikayi Gojju Annam
  10. Vangi Bath
  11. Rava Pulihora 
  12. Usirikaya Pulihora
NAVRATRI VRAT RECIPES - NORTH INDIAN:
 

People in North observe fast during those 9 days of Navratri,only few kinds of flours and vegetables are supposed to be eaten during vrat.Instead  of the regular salt, Sendha namak is used on the fasting days.Though I do not have many recipes in my blog I would like to share the recipes which comes under that category.

Navratri Vrat Recipes:

Sweets:
  1. Carrot-Beetroot Halwa using Condensed milk
  2. Carrot Phirni
  3. Phool Makhana Kheer
  4. Rava Payasam | Sooji Kheer 
  5. Sabudana Kheer | Sago Payasam
  6. Carrot Kheer 
  7. Basundi
  8. Orange Basundi
  9. Coconut Burfi/Koprapak/Kobbari Mithai
  10. Mango Fudge | Mango Burfi
  11. Lauki(Bottlegourd) Halwa
  12. Paneer Modak Peda  
  13. Semiya Kheer | Vermicelli Payasam
Beverages:
  1. Butterfruit(Avocado) Milkshake
  2. Chikoo(Sapota) Milkshake 
  3. Mango Milkshake
  4. Mango Banana Smoothie  
  5. Bonda Juice/Tender Coconut-Malai Juice
  6. Musk Melon Juice
  7. Neer More/Spiced Buttermilk
  8. Watermelon Juice
  9. Mango Lassi
  10. Strawberry-Banana Smoothie
  11. Strawberry Lassi
  12. Sweet Lassi
Snacks:
  1. Sabudana Thalipeeth
  2. Sabudana Tikki | Sabudana Cutlets
  3. Sabudana Khichdi - Maharastrian style
  4. Sabudhana Upma/Saggubiyyam Upma(with out onions)
  5. Spicy Phool Makhana | Roasted Lotus Seeds
  6. Aloo Jeera 
  7. Fruit Cocktail Sticks
  8. Fruit Chaat | Cut Fruits | Fruit Salad
  9. Sago Chiwda | Puffed Sago Snack   
  10. Alu Fry | Potato Fry - omit garlic in the recipe
  11. Groundnut Sundal/Peanut Sundal

Friday, September 27, 2013

How to make Sprouts at home | Home made Moong Sprouts

Preparing sprouts is again a weekly affair for me. I prepare sprouts twice a week as they are very healthy and rich in proteins. We prefer to eat sprouts salad as breakfast at least 2-3 days in a week and also in misal and usal and I usually reserve the hot breakfast variety for weekends. I prepare sprouts with whole Moong or Moth beans as they are quick to prepare and are good for salads compared to other beans as we don't need to cook them. Making sprouts at home is a very easy task but one should use good quality beans to make the sprouts. The climatic conditions play a key role in dictating the time required for sprouting. Sprouting time, in humid climate like Mumbai - moong beans would take 15-18 hrs to get a good size sprouts where as black chickpeas and other hard variety beans would take up to 2 days. Usually for moong beans it would not take more than 24 hours in any climatic conditions if you take the needed measures to prepare it.
how to make sprouts
I usually do not buy ready made sprouts though they are available in markets these days easily as I am not sure of water they use and also I doubt about the freshness of the sprouts. I buy alfalfa sprouts as I am yet to prepare my own alfalfa sprouts at home. Sprouts are very versatile and you can use them in various varieties ranging from salads, snacks like vada, breakfast varieties like sprouts poha, sprouts adai, sprouts sandwich and also in stir fries, gravies, misal, usal and also the steamed sprouts are used in various chaats like golgappa, dahi puri, dahi misal etc.
how to make sprouts
Try making the sprouts often and eat them to stay healthy. Eat healthy and stay longer!!

Check out few more DIY recipes in my blog:

homemade moong sprouts

Homemade Moong Sprouts Recipe:
Yields 3-4 cups
Prep time: 2 mins | Standing time: 20-24 hrs + Soaking time of 6-8 hrs
Category: Kitchen Basics

Ingredients:
1 cup whole green Moong beans (Green Gram/ Hara Moong/ Pesalu/ Hesarukaalu)
Water, to soak

Method:
  • Clean the moong beans by checking for any stones or broken beans and remove them.
  • Wash the moong beans 2-3 times and soak it in water (3-4 cups roughly) for 6-8 hours or overnight.
cleaned and soaked moong beans
  • Rinse again the soaked moong beans and place them in a container or drop them in a wet muslin cloth or let them stay in the container itself.
moong beans after soaking overnight and drained
  • If you are using container, cover it with a lid and place a heavy weight on it and keep it in a dark place. I used my marble chapati stone for it, but you can skip keeping any weight too.
covered and left to sprout for 12-15 hrs
  • Alternatively you can place them in a wet muslin cloth and bring the edges together and secure it loosely and then tie it to to any kitchen rod or anywhere.Keep checking in between, if the cloth has become dry sprinkle little water on it. 
tied and hanged in a wet muslin cloth to let them sprout
  • Keep it undisturbed for 12-15 hours.
  • If you are sprouting in a vessel you can check it after 12-15 hours roughly but do not try to pop it over or mix it.If the sprouts are of good size the way you want you can use them immediately, if not keep it covered and undisturbed for another 5-6 hrs. It depends on the climatic conditions, in Mumbai it takes 15-18 hrs to get good sized sprouts.In colder places it might even take one full day-24 hrs.I would nto suggest you to keep for more than 24 hrs as it will make sprouts bit sticky.
  • If you are using muslin cloth you can see the sprouts popping out from the cloth and hence you don't need to open it and see but make sure that the cloth would not become too dry in between as it will not help the sprouts to grow.
  • Once the sprouts are formed nicely, use it immediately or store in refrigerator in an air tight container for 1-2 days and use when required.
Use the sprouts in various recipes like stir fry, salads, filling for chaats, misal,snacks, usal, gravies, sprouts adai etc.
homemade sprouts

Notes:
  • If the sprouts become slightly sticky means you have kept it for longer than needed with more moisture in it.You can rinse them and use.
  • Once the sprouts are formed you use it immediately or in a day or two, if kept for longer they might taste slightly bitter.
  • You can follow the same process for various beans like Moth Beans, horse gram, green peas, yellow peas, white chickpeas, black chickpeas, black peas(kala vatana), black eyed peas(lobia) etc..basically any whole beans with skin. The sprouting time varies from bean to bean while the quickest one is moth beans which takes only 10-12 hrs and the black chickpeas and black peas(kala vatana) takes the longest 2 days, while the rest would be done in 24-30 hrs.
how to make sprouts

Now we have learnt how to make sprouts at home, so let us also look how we can use them in our cooking:

Wednesday, September 25, 2013

Pani Puri Recipe | Mumbai Style Ragda Pani Puri

pani puri
'Pani Puri' is the one of the most popular Chaats in India and does not need any introduction. It is the King of Chaats in my opinion and is my most favorite chaat with out any doubt. It is also known as 'Golgappa' in North and 'Puchka' in Calcutta and 'Pani Puri' in the rest of India. The debate between all these versions about which one tastes better than the other is never ending - either Mumbaiyya Pani puri or Delhi Golgappe or Kolkata Puchka, I do not bother much about which version it is as I absolutely love Pani puri and thoroughly enjoy all the versions. Every version differs from the other in the proportions of the ingredients used to make pani and also the fillings used which makes each version taste different from the other.
ragda pani puri
In Delhi style Golgappa the filling is mainly steamed moong sprouts with a combination of mashed potatoes and soft boondi(soaked in water and squeezed) or even soft cooked white chickpeas with potato.Where as in Puchka, the filling is with kala chana and potato combination and is totally spiced up with the bhaja masala,which plays a major role in bringing out the key flavors.In Mumbai style Pani Puri the filling used is ragda,which is softly cooked white peas and more over the filling used in Mumbai Pani puri is HOT unlike the other versions.
ragda pani puri
pani puri

Many of my North Indian friends complain that they do not like the idea of using hot ragda in pani puri which is Mumbai version and they always say that they love their Delhi style Golgappa. But as I am from south, I am used to eat pani puris in Bangalore and other places where the filling used is made up of hot gravied green peas. Hence I did not find the usage of hot ragada in pani puri strange and I totally enjoy it. But if you ask me -which version of Pani Puri I love the most? - I would definitely opt between 'Puchka' and 'Bangarpet style Pani Puri'. It is a really a tough one to choose between both these versions. For those who are hearing for the first time about 'Bangarpet Pani Puri', let me tell you a bit about it.Unlike the deep green or brown colored pani, this version of pani used in Bangarpet pani puri is a flavored and spiced up water which is transparent and almost looks like water and the filling used is hot gravied green peas and potatoes.The process of preparation of Bangarpet pani is totally different, it is an infused version unlike the other versions.I have already posted the recipe for Bangarpet Pani Puri, if you are interested check out more details- click here.
With out any further delay let us see how to prepare Mumbai style Pani Puri at home.
ragda pani puri
If you are interested check out other versions of Pani puri here:
ragda

Mumbai style Ragda Pani Puri Recipe:
Serves 2-3
Prep time:10 mins | Cooking time:15 mins | Total time:25 mins + chilling time
Cuisine: Indian | Category: Chaats

Ingredients:
24 homemade Pani puris (or store bought)
1 small Onion,finely chopped(optional)
1-2 tbsp. Coriander leaves,chopped

for ragda:
1/2 cup White peas
1/4 tsp Kala namak(black salt)
1/4 tsp Roasted Cumin powder
1/4 tsp Chaat masala
1/4 tsp Turmeric powder
a pinch of Asafoetida(hing,optional)
1/2 tsp Oil
Salt to taste

for pani:
3/4 cup Mint leaves
1/3 cup Coriander leaves
2 small Green chillies
1/2" Ginger,chopped
1 tbsp. Sugar
1 tsp Lemon juice
2 tsp Panipuri masala(I use Everest brand)
3/4 tsp roasted Cumin powder
3/4 tsp Kala namak(black salt)
1/2 tsp Chaat masala
Salt to taste
4-5 cups of water

Method:
for ragda:
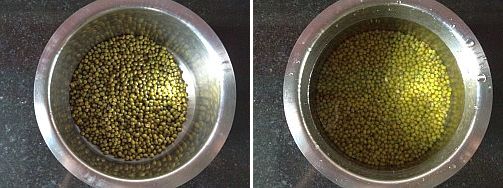
  • Wash and soak white peas for 5-6 hrs or overnight. Wash and drain again and add fresh water and pressure cook for 1 whistle and simmer it for 5-6 mins. White peas really cook fast and it is better if you simmer it after the first whistle otherwise it will become really mushy.
  • Heat oil in a pan/kadai and add asafoetida and then add cooked white peas, salt, turmeric powder and roasted cumin powder and simmer it for 5-6 mins until the mixture is thick. Ragda thickens gradually when it sits,do not make it very thin(runny) or dry.Ragda should be thick and slightly runny.
  • Add kala namak and chaat masala and mix well. Keep it HOT until you serve pani puri.
for pani:
  • Grind mint leaves and coriander leaves with ginger, green chilles, salt, sugar, lemon juice, chaat masala, cumin powder and black salt(kala namak) to a fine paste.
  • Reserve half the paste aside and mix the rest of the ground chutney with 4 cups of water and mix nicely. You can store the left over green chutney and use it for other chaats or freeze it for later use.
  • Add 3-4 tbsp. of Meetha(sweet) chutney and pani puri masala and mix well. Now taste the water and adjust the pani taste according to your wish by adding either extra sweet chutney or ground mint chutney or pani puri masala or more water. If you balance the pani right the pani puri tastes more delicious. It should be slightly chatpata but well balanced with flavors. Remember that the ragda is slightly bland and also we do not serve Meetha chutney along, so balance the flavors accordingly. Sprinkle some coriander leaves and chill it for 3-4 hrs until the flavours are blended well. Keep the pani COLD until serving. 
 to serve Ragda Pani Puri:
  • Arrange 8 puris in a plate with some ragda ,onion-coriander mixture aside and a bowl of pani.
  • Make holes in the puris and stuff it with 1 tbsp. hot ragda and top it with onion-coriander mixture and dip it in cold pani and enjoy!!
ragda pani puri
 Notes:
  • I strongly suggest to use Meetha chutney in the pani recipe as it elevates the taste of pani puri to a different extent. In case if you do not have Meetha chutney soak a gooseberry sized tamarind in 1/4 cup of water and extract pulp. Simmer it along with 4-5 tbsp. of sugar or Jaggery until it is thick and let it cool completely before you use it. Though you can use the tamarind mixture mixed with sugar directly, I suggest you to simmer the tamarind-sugar(jaggery) mixture which tastes better than just the plain tamarind-sugar mixture.
  • If you do not have pani puri masala in hand you can even use jaljeera powder instead. If you do not have both you can increase the quantity of chaat masala in the recipe.
  • This Ragda puri tastes best when the ragda is served hot and the pani is served chilled.
  • The usage of onions is entirely optional, I add it sometimes and skip sometimes.
  • You can slightly spice up the ragda by adding 1/2 tsp red chili powder to it while it is simmering.
  • If you like you can even add boiled and slightly mashed potato to the ragda mixture.
ragda pani puri

If you love chaats, check out few other chaat recipes here in my blog:

Monday, September 23, 2013

Tawa Idli | Spicy Tava Idli Recipe

tawa idli
Mumbai Street food is mostly fusion recipes and I just love to try everything which sounds interesting .Though I am an ardent fan of Bangalore style Idli and Dosa ,I would take a bow for the creativity of Mumbai when comes to street food especially for their innovations in the south Indian food.
tawa idli
Here in Mumbai you can get dosa with literally any flavor - like Pav Bhaji Dosa or Spring roll Dosa or Chinese Chopsuey Dosa or Schezwan Dosa etc to name a few and I am a fan of Schezwan dosa. Even the south Indian Idli has got a make over with few variations like Tawa Idli, Chili Idli, Dahi Idli , Idli Chaat etc.
mumbai style tawa idli
I usually do not have left over Idlis at my place but in order to prepare these yummy snacks I prepare more Idlis on weekends so that I can turn few of them to a simple and delicious evening snack. Tawa Idli is a closer cousin to Chili Idli but prepared with Indian spices. I prepare Tawa Idli in a way similar to how I prepare Chilli Parotta with just a few modifications and the addition of the special spice- Pav Bhaji Masala, which takes this Tawa Idli to a whole new level.
Tawa Idli makes a nice snack for Kids Tiffin box and it is also an ideal recipe to turn those Idli haters to Idli Lovers.
spicy tawa idli
If you are interested check out few interesting recipes with left over Idlis -
For Idli recipe - refer either Idli Recipe using Idli Rawa or Idli recipe using Idli Rice. You can use any of the recipes to prepare Idlis.
tawa idli

Tawa Idli | Spicy Tava Idli Recipe:
Serves 2
Prep time: 5 mins | Cooking time: 10 mins | Total time: 15 mins
Cuisine: Indian | Category: Snacks/Light Meals

Ingredients:
4-5 left over Idlis(Idli recipe- here and here)
1 medium Capsicum,finely chopped
1 medium Onion,finely chopped
1 medium Tomato,finely chopped
1-2 Green chillies,finely chopped
1/2" Ginger,grated
1 tbsp Coriander leaves
juice of 1/2 Lemon
1 1/2 tsp Pav Bhaji masala
1/2 tsp Red chili powder
1/4 tsp Turmeric powder
4-5 Curry leaves(optional)
1/4 tsp Cumin Seeds
2 tbsp Oil
Salt to taste

Method:
  • Cut idlis into medium cubes and keep it ready.Use left over idlis which are best for this.If you are using fresh Idlis make sure you cool them before you cut.
  • Heat oil in a pan and crackle cumin seeds.Add grated ginger, chopped green chillies and curry leaves and fry for a minute.
  • Add finely chopped onions and fry until they turn slight pink in color.Now add chopped capsicum pieces and fry for a  couple of minutes.
  • Add chopped tomatoes and fry until the mixture becomes pulpy,it takes 3-4 mins.
  • Now add all the masalas - red chili powder, pav bhaji masala, turmeric powder and salt and fry for 1-2 mins.If the mixture turns dry sprinkle a tsp of water and mix nicely.
  • Add the chopped idli cubes and mix well until the masalas coats the idli pieces nicely.
  • Increase the flame now and fry for 2-3 mins until the idli pieces get roasted slightly.
  • Switch off the flame.Add chopped coriander and lemon juice and mix.
Serve it hot just like that or with Coconut Chutney.

spicy tava idli
Notes:
  1. Adjust the spiciness according to your requirements.If you are preparing it for kids avoid green chillies in it.
  2. It tastes best when made spicy and served hot.
  3. You can follow the same process and use chopped pav buns or parottas instead of idli pieces in the recipe.

Friday, September 20, 2013

Capsicum Chutney | Chutney Recipes for Idli and Dosa

capsicum chutney
Most of the times Idli and Dosa would be accompanied with Coconut Chutney at my place as it is the most preferred chutney at home. However I do make variations for the regular coconut chutney like Red Coconut Chutney , Coconut Green chutney, Coconut chutney with Garlic, Coconut chutney with ginger etc. to give a twist each time so that we do not get bored. I do like other chutney varieties like Peanut Chutney, Onion Chutney, Tomato-Onion Chutney but DH is not very fond of them and he would prefer either Coconut chutney or Magaya Perugu Pacchadi . Apart from these chutneys one more chutney in common for both of us is this Capsicum chutney.
capsicum chutney
Capsicum chutney is a very simple and nice variation to regular chutney varieties. It does not need any coconut in the recipe. The addition of peanuts adds a nice taste where as capsicum gives a new flavour to the chutney. If you are bored of regular chutney varieties, try this capsicum chutney for a change to pair with your Idli and Dosa varieties. I am sure you would definitely love this chutney, give it a try and let me know how you liked it.
capsicum chutney

Check out other chutney varieties for Breakfast items:
capsicum chutney

Capsicum Chutney Recipe:Serves 2-3
Pep time: 10 mins | Cooking time: 10 mins | Total time: 20 mins
Cuisine: South Indian | Category: Chutney for Idli/Dosa - Accompaniments

Ingredients:
2 medium Green Capsicums, seeded and chopped
1 small Onion, chopped
1/4 cup Peanuts
2-3 Garlic pods
2-3 Green chillies
1-2 Red chillies
1 tsp Tamarind Pulp
Salt to taste
1 tbsp. Oil

to temper:
1 tbsp. Ghee/Oil
1/2 tsp Mustard seeds
1 tsp Urad dal
a sprig of Curry leaves
a pinch of Asafoetida

Method:
  • Dry roast ground nuts in a pan until the skin turns dark and remove them and let them cool. Remove the skin of ground nuts by rubbing them or keep the skips on if you wish.
  • Heat 1 tbsp. oil in a pan and add garlic pods, green chillies and red chillies and fry them until the chillies wilt and change their colour. Remove them and keep aside.
  • In the same pan add chopped onions and fry until they turn translucent and add chopped capsicum pieces and fry well until they wilt. It takes 4-5 mins roughly. Switch off the flame and let the mixture cool a bit. If you are using dry tamarind(mine is semi soft tamarind) add at this stage and mix in the mixture so that it will become soft.
  • Grind ground nuts with roasted green chillies, red chillies, garlic pods and salt to a coarse powder.
  • Add onion, capsicum and tamarind mixture and grind to a smooth or slightly coarse chutney in mixer. Remove the chutney into a bowl.
  • Heat oil/ghee in the same pan and crackle mustard seeds and then add urad dal, curry leaves and asafoetida and fry until the dal changes color and add this tempering to the chutney and mix well and cover it immediately.
Serve it with Idli and Dosa varieties.

Notes:
  1. You can use only green chillies or a combination of green and red chillies in the recipe.
  2. Green capsicum can be substituted with red capsicum in the recipe and also use red chillies instead of green chillies in the recipe.
  3. Adjust the spiciness according to your taste buds.
  4. I sometimes do not remove the skin of ground nuts, do not bother you would know about it once it is ground. 
capsicum chutney

Wednesday, September 18, 2013

Shahi Paneer Recipe - Restaurant style Gravies

shahi paneer
Paneer gravies like Paneer Makhani, Palak Paneer or Paneer Butter Masala are always a  hit and I am sure most of us prefer ordering at least one paneer gravy if we visit any restaurant. Another rich gravy in Paneer category is Shahi Paneer which is a royal recipe fit for special occasions. Shahi Paneer is a true rich gravy which is definitely a treat to any one.
restaurant style shahi paneer
The gravy for Shahi Paneer is not the usual tomato based one, it is prepared with less(or no) tomato and has a beautiful rich white gravy made up of onions, cashew nuts, cream, curd and milk and is scented with cardamom powder. This gravy is very aromatic and the taste of it lingers you even after a while you finish eating it.Take my words and try this Shahi Paneer recipe in your next party and I am sure everone will like it. I have mentioned few tips to make it low fat in case if those extra calories by cream is worrying you.
shahi paneer
Shahi Paneer pairs up nicely with Naans, Kulchas or any other Indian flat breads and even with Jeera Rice, Matar pulav etc. Make sure you have the soft quality paneer to prepare this as we are even going to use the paneer in the gravy as well which is a real twist to the actual recipe and makes it even more delicious. As we are adding curd and milk in the gravy one should be careful while adding them to avoid the curdling- read the recipe carefully before you proceed to prepare the recipe.
shahi paneer restaurant style

Check out various Paneer Recipes in my blog:
shahi paneer

Shahi Paneer Recipe:
Serves 2-3
Prep time:10 mins | Cooking time: 30 mins| Total time: 40mins
Cuisine: Mughlai-Indian | Category: Gravies - Main Course

Ingredients:
200 gms Homemade Paneer (Cottage cheese) (or store bought)
1 small Tomato, finely chopped
1 tsp Coriander power
1/2 tsp roasted Cumin powder
1/2 tsp Red chili powder
1/4 tsp Turmeric powder
1/2 tsp Kasuri Methi
3-4 tbsp. fresh cream or 1/4 cup Milk
2-3 tbsp. fresh Curd, beaten
1 Bay leaf
2 Cardamom pods, seeded and powdered
Salt to taste
2-3 tbsp. Oil/Ghee
2 tsp Coriander leaves, to garnish

to grind- Paste1:
2 Onions, roughly chopped
2-3 Green chillies

to grind- Paste2:
8-10 Cashew nuts
1/4 cup Warm milk
1/4 cup(roughly 50 gms) grated Paneer

Method:
  • Cut paneer into 1 1/2" squares of 1/2" thickness and dip them in medium hot water until its usage. You can even sauté them in butter for few minutes on both sides and then keep them immersed in hot water until its usage.
  • Remove the skins of cardamom pods and pound the cardamom seeds in a mortar and pestle to a fine powder.
  • Soak cashew nuts in warm milk for 10-15 mins.
  • Grind soaked cashew nuts with warm milk and paneer pieces(or grated paneer) to a smooth and creamy paste(let us say this paste no-2).
  • Bring 2-3 cups of water to a boil in a vessel and add roughly chopped onions and green chillies and boil until they turn slightly soft. Drain the onions and green chillies and once they come to room temperature. Grind them along with ginger-garlic paste to a very smooth puree(let us say this is paste no-1). The ginger-garlic paste I used had some turmeric powder and hence there is a slight change in color.
  • Heat oil/ghee in a pan/kadai and add bay leaf and add ground paste-1(onion paste) and fry it for 2 mins and then add chopped tomato and fry it nicely until the paste stops sticking to the pan. It takes nearly 5-7 mins.
  • Now add all the spice powders- red chili powder, garam masala, turmeric powder, roasted cumin powder and coriander powder and fry nicely until the whole mixture stop sticking to the pan. If necessary add few tbsp. of water while frying but do not let the masala burn at any stage.
  • Remove the pan from the stove and add nicely beaten yogurt(curd) and mix it well. Bring it back on the burner on LOW flame and add 1/3- 1/2 cup water approx. and mix nicely and bring the gravy to a boil. Do not increase the flame from now on wards to avoid the curdling of gravy. The gravy thickens as it sits and hence make the gravy slightly thinner so that it would be of nice consistency during serving time.
  • Add kasuri methi and salt to it and also the ground paste-2(cashew nut paste) and cream(milk) and mxi it nicely.
  • Add paneer pieces and let the gravy comes to a boil on very low flame. It takes nearly 3-4 mins.
  • Now add freshly pounded cardamom powder and give a gentle stir and switch off the flame.
  • Garnish it with coriander leaves and grated paneer.
Serve it hot with flat breads like  Naan/Roti/Kulcha or Jeera rice/Bagara Rice/Matar Pulao

shahi paneer

shahi paneer

Notes:
  1. Add nicely beaten curd and also add it to the pan by removing it from the flame to avoid curdling. From then onwards boil the gravy on low flame.
  2. Do not miss the addition of paneer while grinding the cashew nuts , this really adds the richness and taste to the gravy and also you can avoid cream and add some milk instead to the gravy.
  3. I love to cut the paneer pieces into squares for this gravy, you can cut them in cubes, triangles etc like the way you want.
  4. I avoided turmeric powder adding to the gravy as the ginger-garlic paste already had enough turmeric in it.
  5. Shahi Paneer is not a red colored based gravy. As we do not add more tomatoes and red chili powder to the gravy and also the addition of cream, cashew nut paste and milk at the end ensures that the gravy would be slightly whitish in color.
  6. Add cardamom powder at the end to retain the flavor of it in the gravy.
  7. You can even mash the paneer and add instead of grinding it but I prefer to grind it to get a smooth texture,You can do either ways.
shahi paneer
 
back to top