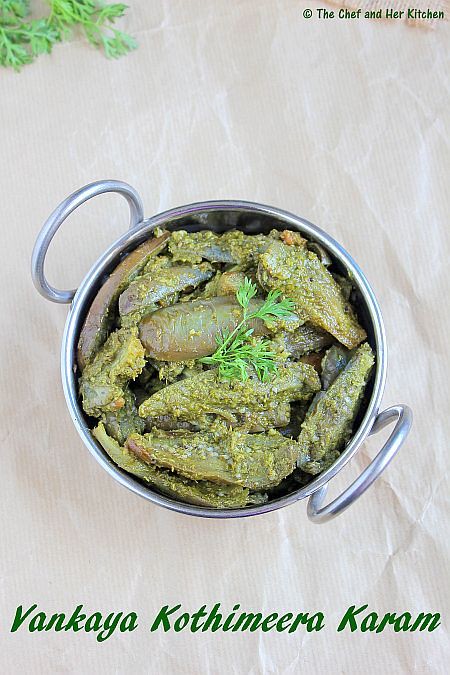
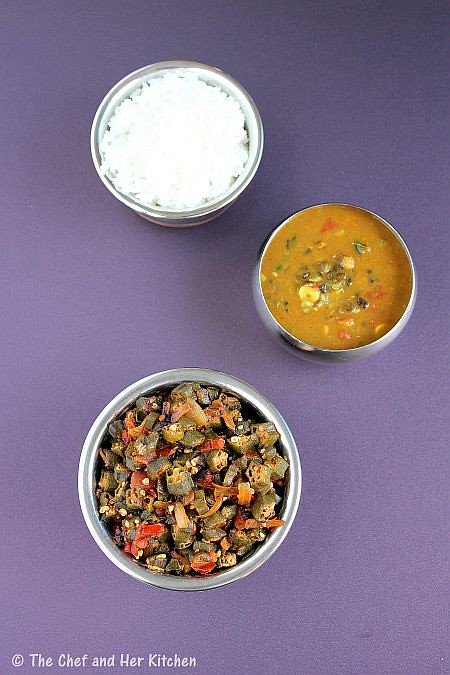
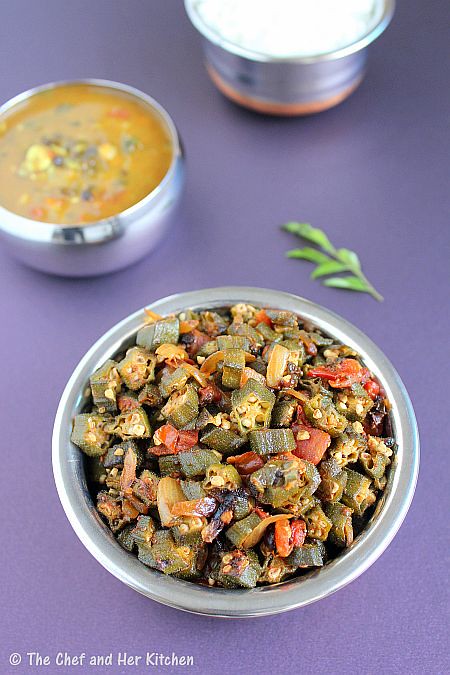
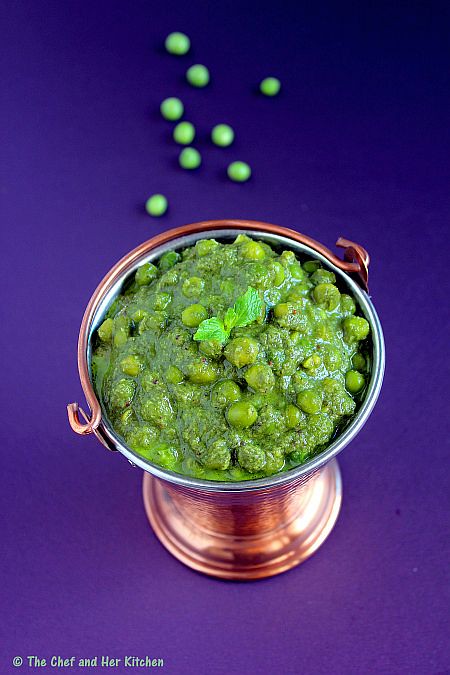
Wednesday, January 30, 2013

Carrot Rice Recipe | Easy Lunch Box Recipes

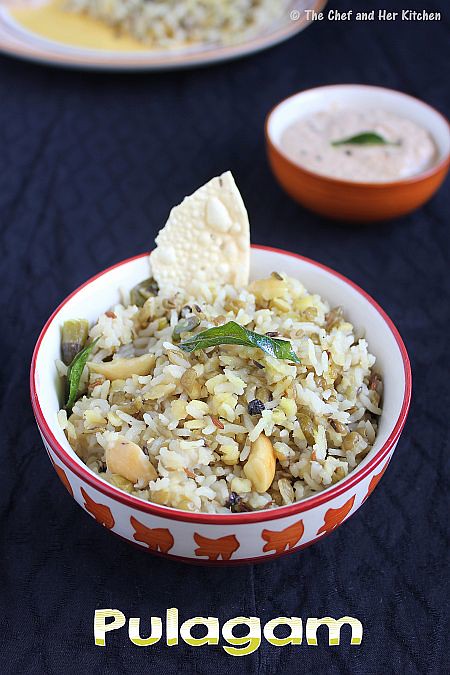
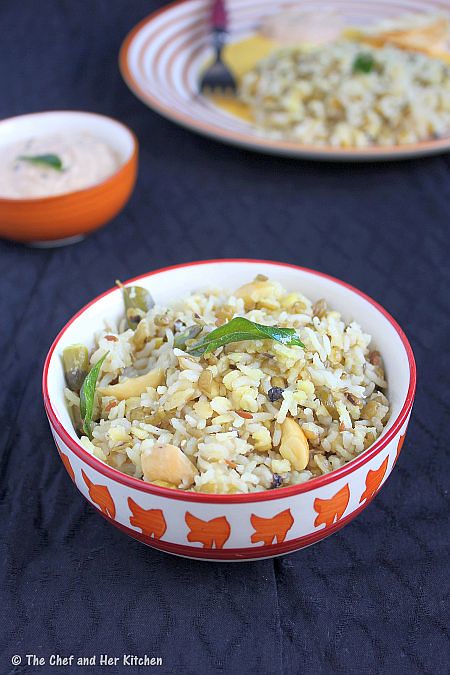
During my school and college days I used to carry various varieties of masala rice, pulavs,biriyanis, akki rotti and few breakfast items for my lunch box as they are not only easy to make one pot meals but also quite convenient to eat.Variety rices like Puliyogre,Tomato Bath,Lemon rice,Veg pulav,Peas pulav,Palak Rice,Veg biriyani,Vangibath,Bisibelebath,Carrot Rice,Capsicum rice,Garlic rice,Veg Fried rice,Jeera rice etc were the most frequent rice items which my mom used to prepare for our lunch box.These kind of variety rices when paired with raita and papad makes a perfect meal.
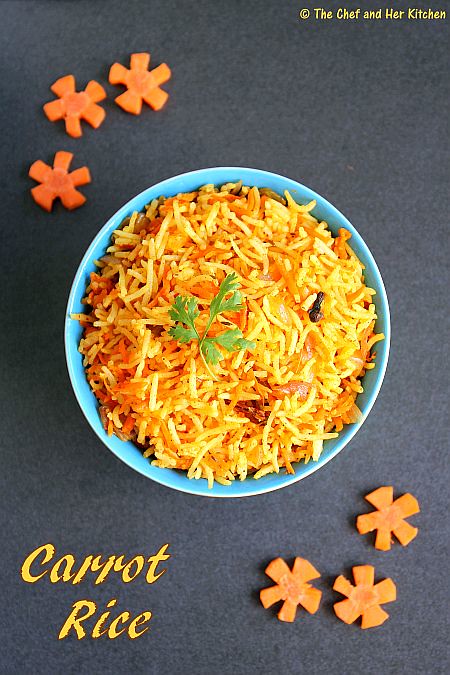
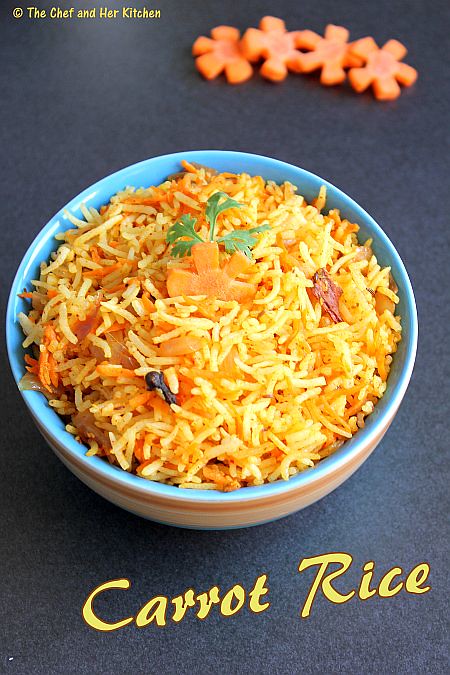
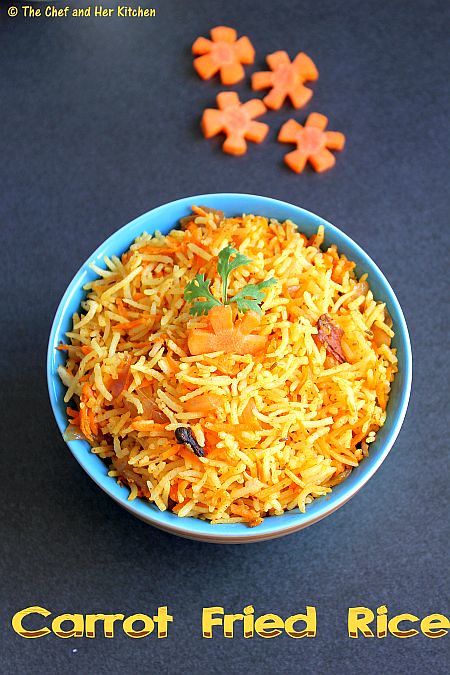
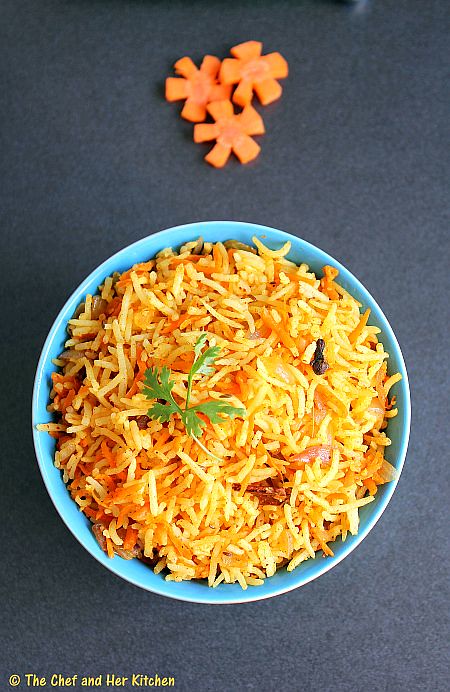
Today I am sharing a simple variety rice recipe - Carrot rice which is a very simple and easy one pot meal that can be prepared in less than an hour and is an ideal recipe for lunch box.I have mentioned the masaledar version of Carrot rice,if you want to make a typical south Indian version you can replace garam masala with sambar powder in the recipe.
Carrot Fried Rice Recipe:
(Serves 2)

Ingredients:
1 cup Basmati Rice
2 large Carrots,grated
1 big Onion,finely chopped
1 tbsp Coriander leaves,for garnish
8-10 Cashew nuts
1/2 tsp Red chili powder
1/2 tsp Garam masala
1/4 tsp Turmeric powder
juice of 1/2 Lemon
2-3 Cloves
1/2" Cinnamon
1 tsp Cumin seeds
Salt to taste
2 tbsp Oil
1 tbsp Ghee

Method:
  • Wash and soak basmati rice for 10 mins and cook it in rice cooker or pressure cooker with 2 cups of water.Cool the rice completely by spreading it on a wide plate.
  • Heat oil and ghee in a kadai and add cumin seeds and let them splutter and then add cinnamon and cloves and fry them.
  • Add cashew nuts and fry until they turn slight red in color.
  • Add sliced onions and fry them until they turn pink.Add ginger-garlic paste and fry well.
  • Add grated carrots and fry until the raw smell goes away.It takes 5-6 mins approximately.
  • Add turmeric powder,red chili powder,garam masala and fry the mixture nicely.
  • Add cooked and cooled basmati rice,salt and mix the rice nicely.
  • Add lemon juice to the rice mixture and mix well.
  • Garnish with coriander.
Serve it hot with Onion-tomato Raita or Boondi raita.
Notes:
  • You can replace garam masala with sambar powder in the recipe for a typical south Indian style rice.
  • Green peas or capsicum can also be added along with carrots in the recipe.
 

Monday, January 28, 2013

Babycorn Capsicum Stir Fry | Babycorn Capcium Dry Curry | Babycorn Recipes

Babycorn is my most favorite vegetable.I know I have mentioned that for many vegetables but Babycorn stands the top position in my favorite vegetable list and I do not get bored of it even if I eat the same for a week,such is my love for those baby corns.I like them more because of their slight sweet and crunchy texture.
I like to use babycorns in stir fries,pastas,salad,soups,pulavs,curry,gravies,pakoras etc.Steamed Babycorn-Mango Salad is another favorite of mine which is a popular street food in Bangalore.You can check Babycorn-Capcium Gravy is one of the most popular posts in my blog which got raving reviews from my readers for its taste,if you have not tried it I highly recommend to try that recipe.Today I am posting a simple yet delicious Babycorn Bell Pepper stir fry,I usually add various bell peppers if I have them in hand otherwise I use only Babycorn and capscium in the recipe.This stir fry goes well with rotis or rice or pulav.
Babycorn Capsicum Stir fry(Sabzi) Recipe:
(Serves 2)

Ingredients:
10-12 Babycorns
1/2 Red Capsicum
1/2 Yellow Capsicum
1 Green Capsicum
1 Onion,thinly sliced
4-5 Garlic pods,finely chopped
3/4" Ginger,finely chopped
2 Green chillies,finely chopped
1 tsp Kitchen king masala
1 tsp roasted Cumin powder
1/4 tsp Garam masala
1/2 tsp Amchur(dried mango) powder
1/4 tsp freshly ground Pepper or 1/2 tsp Red chili powder
a pinch of Turmeric powder
1 tsp Cumin seeds
Salt to taste
2 tbsp Oil

Method:
  • Cut Babycorn into 8 thin strips of 2" pieces.Microwave them for 2 mins or par boil them on the stove for 3 mins.They should be crunchy and should not become soft after they are cooked. Drain them and keep them ready.
  • Remove the seeds from the bell peppers and capsicum and cut them into thin strips of 2" length.
  • In a wok/kadai heat oil and crackle cumin seeds.
  • Add finely chopped ginger-garlic-green chillies and fry them for a minute on high flame.This process of stir frying will be done on high flame.So you need to be quick in adding the ingredients one after the other.
  • Add thinly sliced onions and fry them until they turn pink.
  • Add the par boiled baby corns and bell pepper strips and capsicum strips and fry them continuously for 3-4 mins on high flame giving a stir often.The vegetables should not loose their crunchiness and color while frying.So be quick in this process.
  • Add kitchen king masala,garam masala,roasted cumin powder,pepper powder(or red chili powder),turmeric powder and salt and continue frying for another 2 mins.Take care not to burn the masalas while frying.
Serve the stir fry hot with Roti/Naan/Chapati/Pulao.
Notes:
  1. If you do not have bell peppers,avoid them and use green capsicum instead in the recipe.
  2. I personally like to add pepper powder to baby corn stirfry,but you can add red chili powder too.
  3. I recommend to add kitchen king masala to this stir fry,it definitely makes it tastier.If you do not get it you can skip it and increase the masalas accordingly.You can even add a big dash of Pav Bhaji masala instead of kitchen king masala if you have.
  4. You can add Ginger-Garlic paste instead of chopped ginger and garlic in the recipe. 
  5. Adjust all the masalas according to your personal preference.

Thursday, January 24, 2013

Vankaya Kothimeera Karam | Brinjal Recipes

I have posted various Stuffed Brinjal recipes in my blog and all were a huge hit among my readers. I just love Brinjals and I somehow can't stop myself buying those tiny purple brinjals when I see them.My first preference would be either Bagara Baingan or any stuffed variety of brinjal like Vankaya Kobbari Karam,Vanakaya Ullipaya Karam,Gutti Vankaya(will post it some time later) or Vankaya Kothimeera Karam.
Today I am posting another famous Andhra recipe with Brinjals,one can either stuff them with the aromatic coriander stuffing or it can be prepared like a curry by cutting the brinjals into pieces.This is a very simple yet delicious and aromatic curry as it is loaded with lots of coriander.It pairs well with rice and even roti/chapati.If you have not tried this before do give a try,I am sure you will definitely like this.
 
Vankaya Kothimeera Karam | Aromatic Brinjal Coriander Curry Recipe:
(Serves 2)

Ingredients:
250 gms small Brinjals
2 cups loosely packed Coriander leaves
2 tbsp freshly grated Coconut
5-6 Green chillies
1/2" Ginger
1 tsp Cumin seeds
1 tsp Tamarind pulp
a sprig of Curry leaves
1/2 tsp Mustard seeds
2 tbsp Oil
Salt to taste

Method:
  • Cut each brinjal into 4 pieces and if you are using big brinjals cut them into 1" or 2" pieces.Drop them in a salted water for 10 mins,this way it will remove the bitterness if any in the brinjals.
  • Grind coriander leaves with grated coconut,cumin seeds,green chillies,salt and tamarind pulp to a smooth paste.
  • You can follow any of the two methods which I mention below to make these stuffed eggplants.
  • option-1: Heat oil in a small cooker and crackle mustard seeds and add curry leaves and add brinjal pieces and fry for 2 mins and add a generous pinch of salt on the eggplants.Add ground coriander paste and give a stir and fry for 2-3 mins and cover it with lid and pressure cook for 1 whistle on medium-high flame.Let the pressure drops off on its own.Open the cooker and check if any water is residing,if there is any water content switch on the stove and cook for 2 minutes on high flame with the lid open until water evaporates.
  • option-2:Heat oil in a wide kadai and crackle mustard seeds and add curry leaves and add brinjal pieces and fry for 2 minutes.Add a generous pinch of salt on the eggplants and give a stir  and add ground coriander paste and fry for 3-4 mins.Cover it with a deep lid and pour water and in the lid and let the eggplants cook with the steam produced in this manner over low flame.It takes roughly 12-15 mins.Keep checking in between and also stir once in a while.If the water evaporates in the lid add some more water to it,otherwise the eggplants will get burnt.
Serve them hot with hot rice,ghee and papad.You can serve it as a side dish for rasam,sambar and dal rice.It also pairs well with Roti/Chapati.

Notes:
  1. You can stuff the same mixture in baby eggplants and follow the same process.
  2. Adjust the spiciness according to your requirements. 
  3. You can even add a tbsp of fried gram while grinding the masala.
 

Monday, January 21, 2013

ADAI DOSA RECIPE | KARA ADAI | MIXED LENTIL DOSA

Adai's origin is from Tamilnadu where it is usually paired with the vegetable, 'Avial'.The batter for Adai is ground thicker and coarser than the regular dosa batter and it does not require any fermentation.The Adais are prepared slightly thicker than the regular dosa and they consume lots of oil as the batter is ground coarse. This version that I have made is more of a dosa and is thin and crisp. Adai is usually spicy as the batter has it all - so no need for any accompaniment. I though prefer to have it with a bit of jaggery and ghee.
Adai Dosa Recipe | Mixed Lentil Dosa Recipe :
(yields 18-20 adai)

Ingredients:
1/2 cup Raw rice(regular rice variety like sona masuri,ponni etc)
1/2 cup Idli rice
1/3 cup Toor dal
1/3 cup Chana dal
1/4 cup Moong dal
1/4 cup Urad dal
1/3 cup grated fresh Coconut
10-12 Curry leaves
4-5 Red chillies
3-4 Byadige Red chillies
1 tsp Cumin seeds
1/8 tsp Asafoetida
Salt to taste

to add to the batter:
1/4 cup chopped Coriander
2 tbsp chopped Curry leaves
Oil to roast adais

Method:
  • Soak rice for 4-5 hrs or over night.Soak chana dal,moong dal and toor dal in a separate container for 4-5 hrs or over night.Soak urad dal in another container for the same time (4-5 hrs).
  • Dry roast cumin seeds and red chillies(both the varieties regular and byadige) slightly until warm and let them cool.This process is just to make them crisp for better grinding.
  • Grind urad dal to a smooth and frothy paste by adding some water.Remove this mixture and keep aside.
  • Now grind soaked rice with the remaining dals,coconut,curry leaves,red chillies,cumin seeds and asafoetida to a smooth batter.I ground to a smooth batter as I wanted to prepare like dosa,you can even grind to a coarse batter.
  • Mix the urad dal batter with the ground batter and add enough salt to it and mix well.You can prepare adai dosa immediately with this batter if you want,I kept it aside for 3-4 hrs for little fermentation.
  • I am sure everyone knows how to make simple dosa,still I explain the process of making it for people who are not familiar with it.
  • Mix batter well and add chopped coriander and curry leaves to the batter and mix again.Pour a big ladle of batter onto a medium hot pan and spread it in the circular motion to form a uniform shaped dosa.You can spread the batter thick or thin according to your wish.
  • Pour 1-2 tsp oil approx over it and cover it with a lid.(No need to add more oil if using Non stick pan,you can completely replace oil with ghee for better taste if you are not calorie conscious).
  • Let it initially cook on low flame for 1-2 mins and remove the lid and increase the flame later and cook for a couple of mins until you see brown/red patches.You can turn it and roast the other side if you want.(Do not try to remove the dosa in between while it is roasting.We should remove it only when you are sure that the dosa is perfectly roasted.)
  • Serve it directly and do not drop them in hot boxes.It should be served on to the plate immediately to enjoy the flavor and crispiness of the dosa.
  • Reduce the flame for half a minute and then start preparing the next dosa.Do not pour the batter on high flame.
Serve it with spicy chutney or Avial.I served it with spicy coconut chutney and jaggery.
Notes:
  1. The addition of idly rice gives crispiness to adai,if you don't have it replace it with regular rice.
  2. Ideally the batter should be ground to a coarse mixture and is made thick which we are not really fond of,hence I made it into a very slight coarse dosa kind batter.It is left to your choice, either way it tastes good and left to you.
  3. You can start preparing them immediately but I prefer to leave it aside for few hours to let it ferment.Again it is my personal preference.
  4. You can add finely chopped onions/shallots to the adai batter just before making adai.If you add the onions you cannot spread like dosa,it will be slightly thicker and you need to roast on both sides.
  5. The addition of more oil to adai makes it crispier.
Variations:
  • You can add tender drumstick leaves or grated carrots or chopped spring onion greens to the batter.Each gives a different flavor and taste to adai.
  • You can even add ginger while grinding which gives a nice flavor to adai.
 

Thursday, January 17, 2013

PALAK PANEER PARATHA Recipe

We have parathas atleast once a week, as both of us are very fond of it .Stuffed parathas with home made North Indian style Mirch Achaar or Mango Achaar,cut onions and a bowl of dahi serves as a perfect meal for us.When it comes to filling, I usually experiment with various vegetables,lentils and greens-the filling options are actually endless.Though I prepare them often, they would not make it to the blog as I mostly prepare them for dinner.When I prepared this paratha last week for dinner, I made some extra portions so that I can have the same for lunch and also can post it in my blog.
Paneer paratha is quite common among many households and this paratha is bit different from the usual parathas,as the dough is mixed with spinach puree and the filling used here is very similar to the regular paneer paratha.
 
Rolling a perfect paratha needs some practice,it took me time to understand the technique to get the perfect paratha.Many follow the standard process of rolling paratha - like rolling the dough to a small chapati and then stuff it and seal the edges and roll again.I would not say it is a wrong method but according to me if the filling is spread all over the paratha upto the edges and also if a perfect pocket is formed(if the paratha puffs up) then I would say it is a perfect paratha.I have tried to explain the process of making paratha in detail with the step wise procedure which gives a perfect paratha with uniformly spread filling and also have perfect pocket.
Palak Paneer Paratha Recipe:
(makes 6 parathas)

Ingredients:
for dough:
1 1/2 cups Wheat flour
2 cups Spinach
1/2" Ginger
2-3 Green chillies
Salt to taste
2 tsp Oil
Water,to mix

for filling:
1 cup grated fresh Paneer
2-3 Green chillies,finely chopped
1 tsp grated Ginger
2 tbsp chopped Coriander
1 tsp Amchur(dried mango) powder
1 tsp roasted Cumin powder
Salt to taste

Wheat flour,for rolling
Ghee and Oil,to roast parathas

Method:
to make dough: 
  • Bring water to a boil in a big vessel and add salt to it.
  • Add spinach,green chillies and blanch the greens for 2 minutes.Strain the spinach and run cold water over it.Cool it completely.
  • Grind spinach with green chillies,ginger to a fine paste.
  • Add the ground spinach mixture to the wheat flour and add required salt and 1 tsp oil and mix well.
  • Add little water(if needed) and knead it into a smooth and soft dough.The dough should be slightly softer than the regular chapati dough for parathas as it will not only make easy to stuff the filling it will help in easy and even rolling of parathas.
  • Apply oil on top of the dough and cover it and keep it aside for at least half an hour.
to make filling:
  • Grate the paneer and put it in to the bowl.
  • Add finely chopped green chillies,grated ginger,chopped coriander and mix well.
  • Add amchur powder,salt and cumin powder and mix well and keep it ready.
to make paratha:
  • Pinch the dough and take a big size lemon sized dough and place the dough in your left hand palm.
  • Dip your right hand fingers in the flour and try to make a cup shape(which can hold 3-4 tbsp filling) out of the dough by moving your fingers pressing with the thumb in the center.Take care that the edges should be slightly thinner and in the center it should be thick.
  • Fill the cup with 3-4 tbsp filling and seal the two sides of the dough(it would look like Karanji now) and gently press the corners to get a big round ball out of it.See the pictures for better idea.
  • If you stuff the filling in the dough in this way you will get evenly filled paratha and it also forms like pocket.If you find all the above process bit difficult,you can easily roll a 3" circle out of the dough and place the filling in the center and pleat the dough and seal it by gathering the dough around the edges.
  • Slightly flatten the dough(stuffed with filling) with hands and dip it in the wheat flour and gently roll it to a 6" disc of 1/2" thickness.You should not apply more pressure while rolling,so roll it gently.
  • Flip it on to a hot tawa and fry it until you see bubbles.
  • Turn it and apply oil/ghee and fry and then turn and apply oil/ghee on the other side.
  • Fry the parathas on both sides until you get crisp brown patches on both sides.
Serve them piping hot with Aam ka Achar/Mirch ka Achaar,curd/masala dahi and sliced onions.

Notes:
  1. You can skip spinach puree while making dough and make it plain for Paneer Paratha.
  2. You can even mix various greens along with palak like methi,dill along with palak while making puree for the dough in the recipe
  3. Aloo can also be stuffed instead of paneer in the dough to make Palak Aloo Paratha,it tastes nice too.
This picture is to show you how the filling is evenly distributed till the edges and also have a perfect pocket.

Monday, January 14, 2013

Ladies Finger Curry | Bendakaya Kura | Okra Sabzi

Today I am sharing a very simple Ladies finger curry( Bendakaya Kura) which is typically Andhra style and it goes well with plain steamed rice.You can check another version of Bhindi Curry here which is equally delicious and pairs nicely with roti/chapati.
Ladies Finger Curry | Andhra style Bendakaya Kura Recipe:
(Serves 2-3)

Ingredients:
250 gms Ladies finger/Okra(Bendakaya)
1 big Onion,roughly chopped
2 small Tomatoes,finely chopped
1 tbsp Curd (optional)
2 tsp Coriander powder
1/2 tsp Cumin powder
3/4 tsp Red chili powder
a sprig of Curry leaves
2 tsp Chana dal
1 tsp Urad dal
1/2 tsp Mustard seeds
Salt to taste

Method:
  • Wash and wipe ladies fingers and pat them dry.Try to remove all the moisture from the ladies fingers,this will reduce the sliminess of the curry.
  • Trim the edges and cut them into thin roundels.
  • Heat oil in a kadai and crackle mustard seeds and add urad dal and chana dal and fry for a minute.
  • Add curry leaves,chopped onions and fry until they turn pink.
  • Add chopped ladies finger and fry for 3-4 minutes.
  • Add chopped tomatoes and curd and fry well.The addition of curds reduces the sliminess of okra.
  • You can cook this on open flame for another 7-8 minutes,this process will also retain the green color of ladies finger after getting cooked. (or) You can cover the kadai with lid and add water over it and steam cook the curry for 10-12 minutes.In this process we might loose the green color of okra.
  • Add red chili powder,coriander,salt and cumin powder and fry again for 2 minutes.
Serve it hot with Rice/Roti/Chapati.

 Notes:
  1. You can even add Garam masala in the recipe if you like.
  2. You can add 2-3 roughly chopped garlic pods in the recipe while sauteing onions.

Saturday, January 12, 2013

Sankranti Recipes | Pongal Recipes 2013

"Sankranti" or "Pongal"  is an important festival in South India and even in Maharashtra - important also because it is the first festival of the year!. Its marks the completion of the harvesting season. It is typically celeberated for three days with the first day being called as,"Bhogi", second day, "Sankranti" and the thrid day as "Kanuma". Each region in India that celebrates this festival in a similar manner. Pongal is the key preparation during this festival and this is made with freshly harvested rice.  Apart from that we also prepare various other items as highlighted below. You can go through the list and chose your menu for the festival .

Pongal Varieties with Accompaniments:
Rice Varieties:
Snacks Varieties:
Sweets:

Friday, January 11, 2013

Pulagam Pacchadi Recipe - Sankranti Recipe

Every region has their own specials and this Pulagam-Pacchadi is a combination which is quite popular in Rayalaseema region of Andhra.This can be prepared during Sankranti. Pulagam is a dry khichdi which is made up of rice and split green lentils unlike the regular Khichdi/pongal which is a soft version and made up of rice and yellow moong dal.

Pulagam is usually served with thick and coarse ground nut chutney in the Rayalaseema region and is a quite common meal in all house holds.Split green gram adds extra nutrition to the rice and also make it more tasty.You can give this dry khichdi a try for a change instead of pongal.
Pulagam Recipe | Rice and split Green gram dry Khichdi:
(Serves 2)

Ingredients:
1 cup Rice(sona masuri or equivalent)
1 cup split Green gram(split moong dal with skin)
3 cups Water(slightly less than 3 cups)
6-8 Cashew nuts,broken
3-4 Green chillies,slit
1/2" Ginger,finely chopped
8-10 Curry leaves
8-10 black Pepper corns,slightly crushed
1 tsp Cumin seeds
Salt to taste
2 tbsp Ghee
1 tbsp Oil

Method:
  • Wash and soak rice and green gram for at least half an hour.
  • Heat oil and ghee in a cooker and crackle cumin seeds.
  • Add broken cashew nuts,pepper corns,chopped ginger and green chillies and fry for a minute or two.
  • Add curry leaves and fry and add soaked and drained split moong dal and rice and fry for a couple of minutes.
  • Add water and salt and let it come to a boil.close it with lid and pressure cook for 3 whistles.Wait until the pressure drops.
Serve it with Palli pacchadi/Groundnut chutney.
Notes:
  1. You can replace split green gram with yellow moong dal,but split green gram makes it taste different and is highly recommended to prepare pulagam.
  2. The amount of water added makes the rice soft and moist but still with separate rice granules.You can add 1/4 cup water if you like it soft or reduce 1/4 cup water to make it bit more dry.

Palli (Verusenaga) Pacchadi | Groundnut Pacchadi :

Try this version of Palli (Verusenaga/groundnut) chutney with pulagam.It pairs nicely even with plain steamed rice or Idli/dosa.
Palli Pacchadi | Groundnut Pacchadi  Recipe:
 
Ingredients:
1/2 cup Groundnuts
a small Onion,sliced
1-2 Garlic pods(optional)
2-3 Red chillies
1 tsp Tamarind pulp
Salt to taste
1 tsp Oil

to temper:
1 tbsp Oil
1/2 tsp Mustard seeds
5-6 Curry leaves

Method:
  • Dry roast groundnuts and cool them.Peel the skins off and keep them aside.
  • In a pan heat 1 tsp oil and add red chillies and fry and remove them and keep aside.Add sliced onions and garlic pods and fry until they turn pink.Let the mixture cool.
  • Grind the roasted groundnuts with fried onion-garlic and red chillies,tamarind,salt to a thick and slight coarse paste.Do not grind it smooth.Add required water while grinding.
  • In the same pan heat 1 tbsp oil and crackle mustard seeds and curry leaves and add this tempering to the groundnut chutney and mix well.
Serve it with Pulagam/plain steamed Rice.You can even serve it with Idli/Dosa,in that case grind the chutney to a smooth paste.
Notes:
  1. You can even roast ground nuts in a tsp of oil.In that case you do not need to peel their skins.
  2. Red chillies can be replaced with green chillies for different flavor.
  3. Garlic pods can be avoided in the recipe if you wish.
  4. Grind it to a coarse and thick chutney,it goes nicely with pulagam and even plain steamed rice.

Wednesday, January 9, 2013

Tandoori Aloo Recipe | Indian Party Appetizers

Baby potatoes frequently appear in my pantry and I have blogged various recipes using them like Baby Potato Biriyani, Pudina Aloo, Aloo Palak, Dum Aloo, Chutney waale Dum Aloo, Baby Potato roast and Jeera Aloo. Baby potatoes make the dish look pretty and hence I replace them where ever I can use them instead of the usual potatoes.
Tandoori Aloo is made with the par boiled baby potatoes marinated in a spicy aromatic yogurt mixture and is grilled in oven until they are crisp.It can be served as a finger food or as an appetizer in parties.I sometime even stuff them in frankie rolls,they taste delicious too.
You can marinate them for long for up to 15 hrs or even upto a day,the more they marinate the better the flavor and taste of Tandoori Aloo.
Tandoori Aloo Recipe:
(Serves 3-4)

Ingredients:
20-22 Baby potatoes
1 1/3 cup Fresh Hung Curd(made with 2 cups fresh Curds)
1 1/2 tsp Ginger-Garlic paste
2 tbsp Roasted Chana powder (Besan)
1 tbsp Tandoori masala*(ready made)
1/2 tsp Turmeric powder
1/4 tsp Garam masala
1 tsp roasted Cumin powder
1 tsp Kasuri Methi
1 1/2 tsp Kashmiri Chili powder(gives good color and less spice)
a pinch of green and black Cardamom powder
1 tbsp Tomato Ketchup
2 tbsp Oil
Salt to taste

Oil,to bash over potatoes while grilling
1 tsp Chat masala,to sprinkle

Method:
  • Wash the baby potatoes and pressure cook for 1-2 whistles.Cool them.
  • Peel the potato skins and prick the potatoes with fork to make tiny holes in it.This will help in absorbing better flavors while it is marinating.
  • Pour the thick curd in a muslin cloth and place it in a strainer and place it on a vessel to trap the water from it.Keep it refrigerated until its usage,it takes 1-2hrs to get thick hung curd.
  • Add ginger garlic paste,turmeric powder,roasted cumin powder,red chili powder,tandoori masala,roasted chana powder,kasuri methi(crush it in your hands before adding),tomato ketchup,garam masala,cardamom powder,salt and oil whisk well until you get a uniform mixture.
  • Add boiled,peeled and pricked potatoes and mix well.
  • Marinate the potatoes in the yogurt mixture overnight or up to a day.The more you soak the more it will absorb flavors.
  • Preheat the oven at 180 degrees(350 F) for 10 minutes.
  • Spread a microwave foil over the baking sheet and grease it well with oil and carefully place the potatoes giving some space in between each other.
  • Bash or sprinkle some more oil over the potatoes and bake it in preheated oven for 15-20 mins.Keep an eye over the potatoes after 10 minutes.After 10 mins turn them over and bash the potatoes with extra oil and bake them again until they turn golden brown in color.
Sprinkle chat masala over the potatoes and serve them hot.

Serving suggestion:You can serve them over a bed of thinly sliced onions,capsicum,tomatoes with generous squeeze of lemon juice and sprinkle chat masala over the top of potatoes.You can serve them as they are or prick them with toothpicks and serve as an appetizer in parties.

*Tandoori masala is easily available in the shops which gives a nice flavor to potatoes.If you do not get it,you can still make these potatoes.Increase the quantity of Garam masala to 1 tsp and also add 1 tsp Coriander powder,1 tsp Red chili powder(spicy variety) and 1 tsp Chat masala to the yogurt mixture and mix well and follow the same recipe.
Notes:
  1. Do not pressure cook the potatoes for long,they should be parboiled as they are baked again in the oven.
  2. Marinating the potatoes for long will make the potatoes tasty,the more they soak the better they taste.
  3. If you want you can add a pinch of red food color to the yogurt mixture.I do not add food colors in my cooking and hence I avoided it.That is the reason I add Kashmiri chili powder and tomato ketchup which gives a better color to potatoes.

Monday, January 7, 2013

Pudina Peas Curry | Fresh Peas Masala Gravy

Fresh Peas are abundantly available in the markets these days and I am preparing lots of recipes using fresh peas like dry curries,tikkis,as a stuffing in parathas and various gravies.
I have tasted this Pudina Peas Gravy for the first time at my aunt's place long back during one of my visits to Bangalore and it was definitely a winner recipe for me.I still remember the taste of the curry which was really refreshing and a very delicious gravy.This is a typical south Indian gravy which is really delicious and is well balanced with the sweet fresh peas spiced up in the aromatic mint gravy.It is also a perfect recipe to make on any day as the recipe does not call for any onions and garlic.There are no masalas added in the recipe too,But I do add a few cloves and cinnamon in the tempering which is optional.In Kannada this Pudina Peas gravy  is called 'Hasi Batani Kaalu Gojju' where 'Hasi Batani Kaalu' stands for 'Fresh Peas' and 'Gojju' is typically a South Indian style 'Gravy'.
If you get hold of fresh peas,I would strongly recommend you to try this at least once as this is one of my favorite gravies and also use only fresh green peas for this,do not use frozen or dried variety for this.I would suggest you to try this Pudina Peas gravy with triangular folded chapatis like the south Indian way (where oil is applied in the inner layers and folded and rolled to a triangular chapati) instead of rotis as they pair up extremely well with the chapatis.
Pudina Peas Curry | Hasi Batani Kaalu Curry Recipe:
(Serves 2)

Ingredients:
2 cups fresh shelled Green Peas
1 cup loosely packed fresh Mint leaves
1/2 cup loosely packed  fresh Coriander leaves
1/4 cup grated fresh Coconut
7-8 Green chillies(adjust the quantity)
1 tbsp Fried gram
juice of 1/2 Lemon
1/2" Cinnamon(optional)
2-3 Cloves(optional)
a sprig of Curry leaves
1/2 tsp Mustard seeds
2 tbsp Oil
Salt to taste

Method:
  • Microwave the fresh green peas for 3-4 mins with a pinch of sugar.This will make sure the peas retain their green color through out the cooking process.Drain and keep them aside.
  • Heat a tsp of oil in a pan and add green chillies and saute until you see some blisters forming on them.
  • Grind mint leaves with coriander leaves,grated coconut,fried gram and fried green chillies to a smooth paste.Open the jar and keep otherwise you will loose the green color if it is closed for long.
  • Heat the remaining oil in the kadai and crackle mustard seeds and add cinnamon and cloves and let them splutter.
  • Add curry leaves and boiled and drained fresh green peas and fry for 2-3 minutes.
  • Add ground mint masala and fry the masala for 5-6 mins until the oil leaves the edges and the raw smell disappears.
  • Add 1 cup of water and salt to it and mix well and let it simmer for another 5 mins.You can cover it with lid slightly so that the gravy does not splutter outside.Do not cover the kadai/pan completely with the lid otherwise you will loose the lovely green color of the gravy.
  • Switch off the flame and add lemon juice to it and mix well.
Serve it hot with triangular Chapati/Parotta/Rotis or even Jeera rice.
 Notes:
  1. The addition of cinnamon and cloves is optional,in general we do not add it but its your wish to add it or not.
  2. You can add a small piece of ginger while grinding the mint paste.
 
back to top