Tuesday, January 30, 2018

Snake gourd Kootu Recipe | Pudalangai Kootu

snake gourd kootu
Snake gourd Kootu recipe with step by step photos.I rarely bring snake gourd home not that we don't like it but somehow it does not get its priority in my grocery list.My mom prepares various recipes with snake gourd like simple stir fry, dal, Pindi miriyam and even payasam.Last time when I got this vegetable I prepared this kootu and it was quite nice and paired nicely with rice.It is a very simple dal preparation with the addition of coconut which gives quite a unique taste to this kootu.I had posted Potlakaya(Snake gourd) Kobbari Koora in my blog long time back,check out the recipe here .
snake gourd kootu
Here is how to make snake gourd kootu with step by step photos:
Snake gourd Kootu Recipe | Pudalangai Kootu:

Serves 2-3 | Author: Prathibha
Prep time: 10 mins | Cooking time: 30 mins | Total time: 40 mins
Cuisine: South Indian | Category: Lentils/Maincourse

Ingredients:
1 long Snake gourd
1/3 cup Toor dal
2 tbsp Chana dal,optional
1/3 tsp Turmeric powder
Salt to taste

to grind:
1/4 cup grated/frozen Coconut
1 tsp Cumin seeds
3-4 Red chilies

to temper:
1 tsp Oil/ghee
1/2 tsp Mustard seeds
1 tsp Urad dal
a sprig of Curry leaves
2 Red chilies,broken
1/4 tsp Asafoetida

Method:
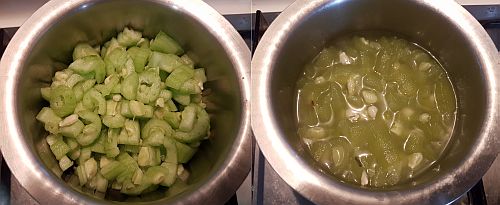
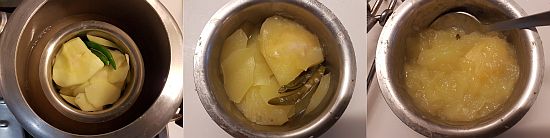
  • Peel the snake gourd and cut into half and scoop out the seeds and cut it into thin slices or small cubes and add enough water to it and boil until done.You can even pressure cook it for 2-3 whistles.
  • Grind coconut with red chilies and cumin seeds to a fine paste adding water.                      
               
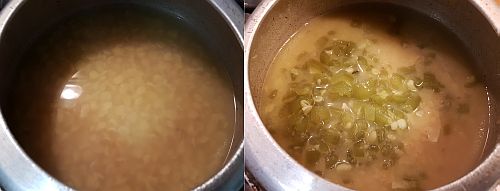
  • Wash and soak toor dal and chana dal for 10 mins and pressure cook adding enough water with turmeric powder and salt.
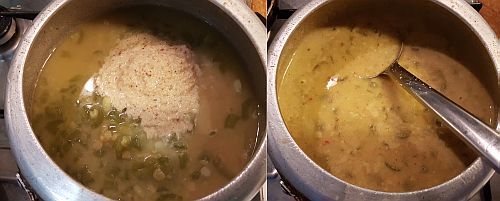
  • Mash the dal slightly and add cooked snake gourd pieces and ground coconut paste and let it come to a boil.Adjust the salt and the consistency of the gravy, it needs to be thick like dal.
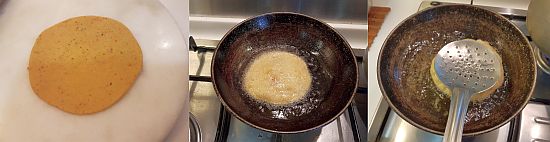
  • In a small tempering pan heat oil or ghee and crackle mustard seeds and add urad dal and fry until it turns red in color and then add red chilies,curry leaves and asafoetida and fry until the curry leaves wilt and add the tempering to the boiling lentil-vegetable mixture and mix it and close it.
Serve it hot with hot steamed rice and other accompaniments.

Notes:
  1. You can use moong dal instead of toor dal.I add chana dal as it gives a nice bite to the kootu.
  2. Cabbage or ridge gourd or Spinach can be substituted with snake gourd to make cabbage kootu or ridge gourd kootu or Keerai kootu respectively.
snake gourd kootu


Monday, January 22, 2018

Ragi Idli Dosa Recipe using Ragi flour | Ragi Idli | Ragi Dosa | Ragi Idli Dosa batter

ragi idli dosa
Ragi Idli Dosa recipe with step by step photos.Millets have become extremely popular these days and I have started including them on regular basis.Most of the days I am taking Millet rice instead of rice and I do not miss rice any more as the cooked millet is a good substitute for rice and pairs nicely with south indian curries,dals and sambar varieties.Finger millet is known for its high calcium and dietery fiber content and is known for its various health benefits.Ragi millet adds a very earthy taste to the dish and hence I try to include the ragi flour often in my menu in the form of Ragi SangatiRagi Rotti,Thalipeeth, Ragi Idli,Ragi dosa,Ragi Rava Upma,Ragi Cookies etc.
ragi idli using ragi flour
I prepare Ragi Idli using even Ragi Rava but today I am posting the recipe of idli dosa batter using ragi flour which can be used to make both idli and dosa.I usually prefer to make a spicy chutney to go along with ragi idli and dosa to balance the distinct flavor of ragi.However I like the ragi idli using ragi rava instead of ragi flour because of the usage of the rawa that gives the idli a better texture and softness,I will post that version sometime soon,but dosas come out nicely with this recipe and is a good way to feed those who are finicky to include this wonderful finger millet in their diet.If you want to use the whole finger millets instead of flour you can check out my ultimate multigrain dosa recipe where I have used the whole millets instead of the flours.
ragi dosa recipe using ragi flour

Check out other healthy dosa recipes in my blog:
ragi dosa recipe using ragi flour
ragi idli recipe
Here is how to make ragi idli dosa recipe with step by step photos:
Ragi Idli | Ragi Dosa | Ragi Idli Dosa Recipe:

Yields 28-32 Idlis/20-22 Dosas | Author: Prathibha
Prep time: 30 mins | Cooking time: 20 mins | Total time: 50 mins +  fermentation time
Cuisine: South Indian | Category: Breakfast

Ingredients:
1.5 cups Ragi flour(finger millet flour)
1.5 cups Idli Rice
3/4 cup whole white Urad
1/3 cup Poha(flattened rice)
1 tsp Methi seeds
Salt,to taste

Water,to grind
Oil,to grease

Method:
  • Soak the idli rice for 6-8 hrs.Soak whole white urad,poha  and fenugreek seeds for 4-5 hrs.
  • Wash the rice and dal properly and grind everything together with poha and fenugreek seeds to a smooth paste using enough water in the wet grinder for better results.
  • Add ragi flour to the ground batter and mix with hands thoroughly so that no lumps will be left.
  • The batter should neither be very thick like idli batter nor very thin.
  • Add enough salt to the ground batter just before removing the batter from grinder.Remove the batter into a larger container which gives enough room for the batter to rise.
  • Ferment the batter for 8-10 hrs at room temperature or keep it in oven in winters with light on for speeding up the process of fermentation.The fermented batter would be frothy and almost double in volume.
for making Idli:
  • Take out the required portion of batter(do not mix the whole batter while scooping out) and refrigerate the rest of batter.
  • Grease the idli plates with oil and pour a ladle of idli batter until each impression is filled 3/4th.You can even line it with a wet muslin cloth and pour the batter on top of it.
  • Steam it in idli steamer or pressure cooker(with out whistle) for 10-12 mins.Let it rest for another 5 mins.
  • With a idli spoon cleanly remove the idlis.Dip the idli spoon in water in between which helps to remove the idlis easily from the plate.If you have used muslin cloth just invert them into the hot box.
  • Keep them in hot box or serve directly on to a plate.Always serve idlis hot.
for making Dosa:
  • I am sure everyone knows how to make simple plain dosa,still I explain the process of making it for people who are not familiar with it.
  • If the dosa batter is taken out from refrigerator,take out the portion how much you need and let it come to the room temperature.
  • Mix the fermented dosa batter well.Check the consistency of dosa batter,it should be of pourable consistency,if needed add little water and mix well.
  • Pour a big ladle of batter onto a medium hot pan and spread it in the circular motion towards the outer edge to form a uniform round shaped dosa.Do not make this dosa either very thin nor very thick,if it is very thin your dosa will get hard once it is cold and if it is very thick it would become very chewy.
  • Pour 1 tbsp oil approx over it and cover it with a lid.
  • Let it roast on medium-high flame for 1-2 mins,remove the lid and increase the flame and roast for another 1 minute.Turn the dosa to the other side and fry for a minute and serve directly.
  • Reduce the flame for one minute and then start preparing the next dosa.Do not pour the batter on high flame,the batter will stick to the tawa.If you feel the tawa is over heated sprinkle some water over it before making next dosa.
Serve dosa with spicy chutney of your choice like Coconut chutney / Peanut Chutney / Tomato-Onion Chutney and Sambar.

Notes:
  1. Do not close the box with air tight lid while fermenting.Cover with a loose plate and once the  batter is fermented cover the box with air tight lid which helps in keeping the batter fresh for long.
  2. Always scoop out the required amount of batter from the box and keep the remaining batter refrigerated,do not mix the batter vigorously while removing it from the box.
  3. If the Idlis or dosas turn hard add a pinch of cooking soda and mix nicely and make Idlis n dosas,they will turn out nice and soft.
  4. Smear the pan with a half sliced onion every time you make dosa which gives a nice flavor to dosa.
ragi idli recipe

Tuesday, January 16, 2018

Masala Poori Recipe | Spicy Poori

spicy puri
Masala Poori with step by step photos.Masala poori is a spiced version of the regular poori which can be paired with any spicy gravies.I love to serve the masala poori with dubke waala Alu sabzi(slightly watery alu sabzi) but gravies like chole,matar paneer,meeti kaddu sabzi goes very well with these pooris.There are various variations to the regular Poori like Methi PooriPalak Puri or stuffed pooris which are usually called as Kachoris and there are few south Indian variations like Rice flour poori,Banana Poori(Mangalore Buns) which taste different and delicious.
Masala poori can be prepared instead of the usual poori and will be a hit in your parties or for a lazy sunday brunch.You can even add more spices in it and serve as a snack along with a cup of tea in the evening.Give the regular pooris a miss and try these simple yet flavorful pooris next time.
masala poori
Check out other poori varieties in my blog:
masala poori
Here is how to make masala poori recipe with step by step photos:
Masala Poori | Spicy Poori Recipe:
Serves 2 | Author: Prathibha
Prep time: 10 mins | Cooking time: 10 mins | Total time: 20 mins
Cuisine: North Indian | Category: Breakfast/Snacks

Ingredients:
1 cup Whole Wheat flour
1/2 tsp Carom seeds(Ajwain)
1/2 tsp Red chili powder
1/2 tsp Coriander powder
1/4 tsp Turmeric powder
2 tsp Oil
Salt,to taste

Method:
  • In a bowl take wheat flour and add all the spices - carom seeds,coriander powder, red chili powder, salt, turmeric powder and oil and mix it nicely with hands and add adequate water and make a tight dough.Apply oil on the dough and cover it and rest it for 15-20 mins.
  • Heat the oil in a kadai until it is hot.
  • Knead the dough again for a couple of minutes and then make gooseberry sized balls and roll them slightly thicker like how we do for poori.
  • Drop one poori at a time in a hot oil and fry it on medium-high flame and gently press it with a ladle so that it can puff up and turn it to the other side and fry for half a minute.
  • Drain the excess oil and remove them on to the kitchen towel.

Serve them hot with Alu sabzi/Chole/Matar Paneer/Meethi Kaddu sabzi.You can even serve them with pickle and boondi ka raita.

Notes:

  1. You can add 1-2 tbsp besan along with wheat flour for a rich taste.
  2. You can add spices of your choice like kasuri methi or fresh coriander to get additional flavor in the poori.
  3. The dough needs to be rolled fresh and fry immediately else they do not puff up nicely.
masala poori


Wednesday, January 3, 2018

Raw Mango Rasam | Maavinkay Saaru

raw mango rasam
Raw mango rasam with step by step photos.A typical south Indian meal always comprises of a rasam variety and it is my comfort food too. I am always happy to eat a simple meal of rice with a vegetable fry and rasam and would not complain about the other missing varietes as in a typical south Indian thali.My most favorite rasam varieties are Karnataka style Bele Saaru, Holige Saaru and Tomato Rasam but there are few other varieties like mint rasam,pacchi pulusu, pepper rasam, mango rasam, tomato dal rasam which I thoroughly enjoy too.
raw mango rasam
Preparing a good rasam is again an art, not everyone can prepare a well balanced rasam which makes a lip smacking meal when mixed with hot rice and paired with fryums.I do not like very thin rasam which is flavorless, the rasam should be of right consistency and even though it is thin it should not lack the flavors and should be perfectly balanced in taste.My FIL is a big fan of my rasam varieties, he always get excited the moment he sees a rasam on our lunch table.A simple rasam rice is always a comfort meal for south Indians like how a dal chawal is a comfort food for north Indians.
Check out other rasam varieties in my blog - 
raw mango rasam
Here is how to make raw mango rasam recipe with step by step photos.
Raw Mango Rasam Recipe:

Serves 2 | Author: Prathibha
Prep time: 5 mins | Cooking time: 25 mins | Total time: 30 mins
Cuisine: South Indian | Category: Main Course - Side dish

Ingredients:
1 raw Mango
2 Green chilies
1/2 tsp Turmeric powder
2 tsp Jaggery
Salt,to taste

to temper:
2 tsp Oil/Ghee
1/2 tsp Mustard seeds
2-3 Red chilies,broken
8-10 Curry leaves
1/4 tsp Asafoetida

Method:
  • Wash and peel the skin of raw mango and cut into slices and reserve the mango seed.In a bowl add cut mango slices,mango seed and green chilies and close it with lid(no need to add water) and pressure cook for 3 whistles.
  • Once it cools down mash it nicely with the back of a spoon or puree it in the mixer.Reserve the mango seed aside.
  • In a small pan heat oil/ghee and crackle mustard seeds,add broken red chilies, curry leaves and asafoetida and fry until the red chilies turn slight brown in color.
  • Add mashed mango puree along with the cooked mango seed and 1.25-1.5 cups of water and add turmeric powder, rasam powder,salt and jaggery and bring the rasam to a boil.Check the seasoning and adjust it.Boil it well.
Serve it hot with hot steamed rice,fry and papads.

Notes:
  1. You can add 1/3 cup of cooked and mashed toor dal or moong dal to the rasam while boiling for a different taste.
  2. You can serve it as a soup or hot beverage.
raw mango rasam

 
back to top