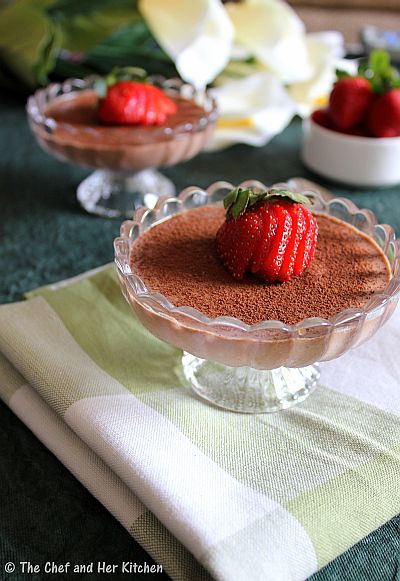
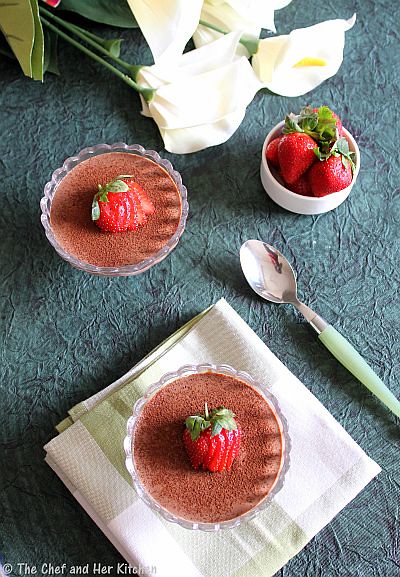
Monday, January 30, 2012

Kaarapodi | Idli Karam podi Recipe

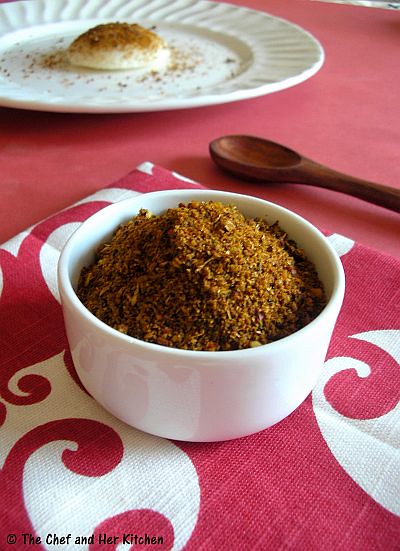
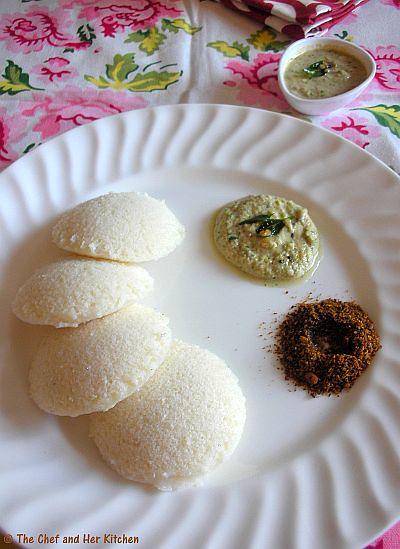
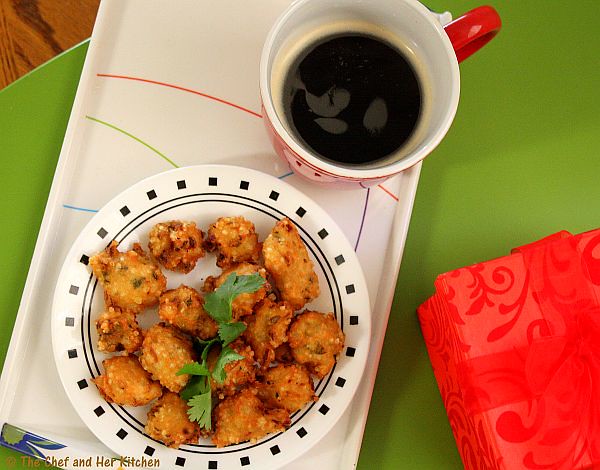
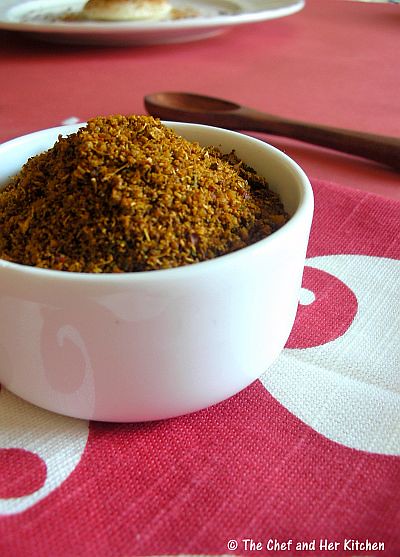
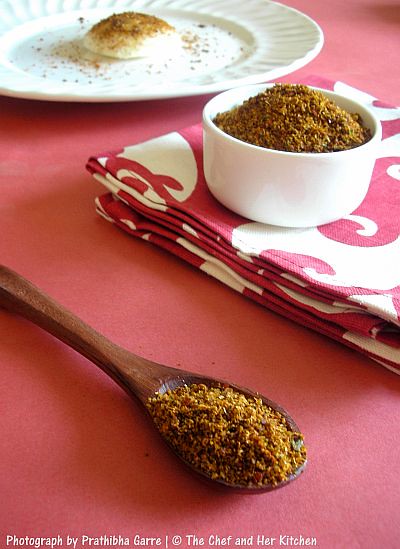
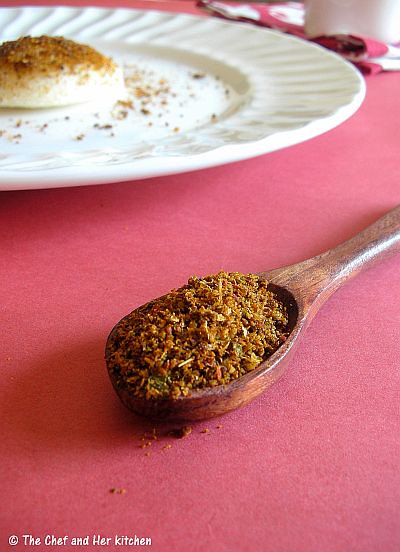
I had mentioned so many times that my MIL is an expert when comes to pickles and powders.Every year she sends me a huge supply of various kinds of pickles and powders which lasts in my pantry at least for few months.This is one of the famous powders/podi recipe of Andhra.It was quite new to me when I had for the first time and liked it instantly with idli,It is a very versatile powder and can be eaten with idly, dosa, paniyaram or uthappam.I love to sprinkle this podi over dosa for a variation.

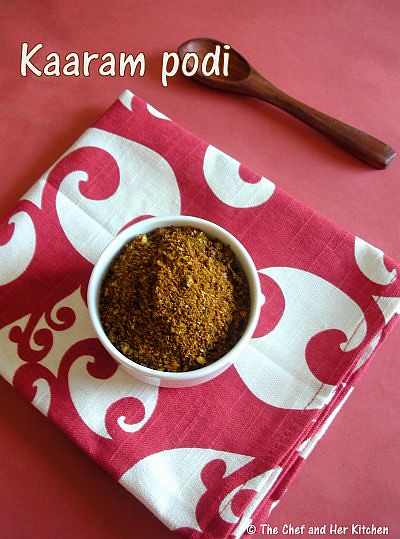
Idli Kaarapodi Recipe:
(makes around 1 1/2 cups podi approx)

Ingredients:
2/3 rd cup Coriander seeds
3 tbsp Chana dal
3 tbsp Urad dal
1 tsp Cumin seeds
1/2 cup Curry leaves
8-10 Red chillies
5-6 Garlic pods(with skin)
1 small lemon sized Tamarind
Salt to taste(approx 1 tbsp)
2 tsp Oil
Method:
  • Clean and wash curry leaves and remove extra water and spread it on a dry cloth to let the leaves dry completely with out any water.Leave it for 3-4hrs.
  • Heat 1/2 tsp oil in a thick bottomed kadai and fry chana dal until it is red in color and remove it and keep it aside.
  • Again heat 1/2 tsp oil and add urad dal and fry until it is red in color and remove it and keep it aside.
  • Again heat 1/2 tsp oil and add coriander seeds and fry until they turn slightly brown and remove it and keep it aside.
  • Heat 1/4 tsp oil and add cumin seeds and red chillies and fry until crisp and remove it and keep it aside.
  • Heat 1/4 tsp oil and add curry leaves and fry until they are crisp and remove it and keep it aside.Switch off the flame.
  • While the kadai(pan) is hot add tamarind and fry for half a minute and keep it aside.
  • Once everything comes to room temperature grind fried chana dal,urad dal,red chillies,cumin seeds and coriander seeds to a coarse powder.
  • Add fried curry leaves,salt and tamarind to it and grind again to a coarse powder.
  • Add whole garlic pods(with skin) and run it in whipper mode now or run it just for 30 secs in the regular mode.The powder should be coarse not very fine.
  • Once it cools remove it and keep it in a air tight container.
  • This stays fresh for long,approx 2 months.
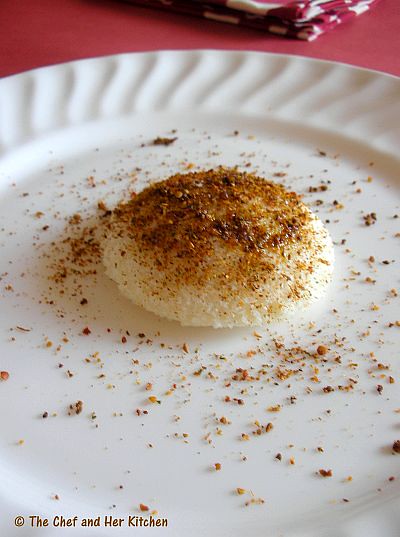
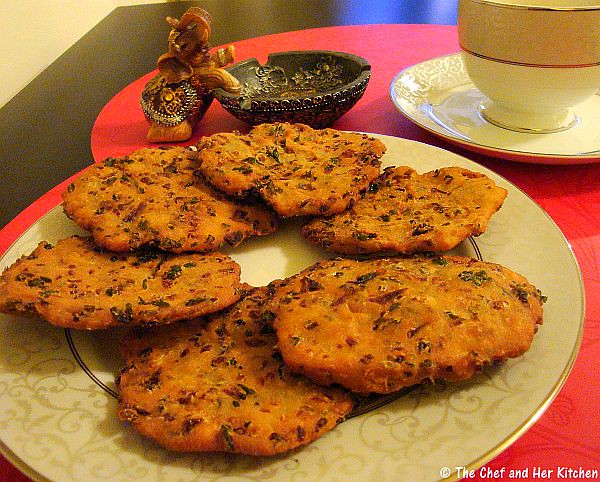
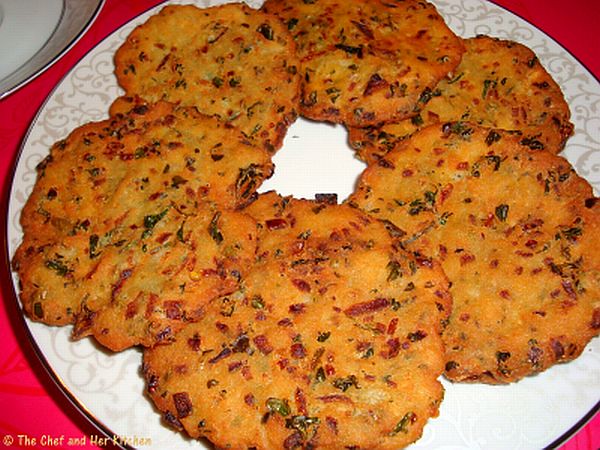
Serve this powder with Idli/Dosa/Uthappam/Paniyaram.While serving it make a well in 1tbsp powder in the plate and pour 1/2 tsp ghee in it and mix well.

Notes:
  1. Make sure you fry all the ingredients well and let the curry leaves be completely dry.
  2. Always use a dry spoon when taking out the powder.
  3. Keep it in air tight container to seal the aroma of this podi.
  4. I gave the amount of salt approximately,please add the required amount using your judgement.

Thursday, January 26, 2012

Palakura Pappu | Spinach/Palak Dal

This is a very basic recipe and is quite common in every house hold.The recipe might slightly vary from home to home with few ingredients.This is the basic dal recipe which I follow and it works for few vegetables and greens.I have mentioned variations in the notes to convert this dal according to the vegetable or greens.

Spinach/Palak Dal | Palakura Pappu Recipe:
(yields for 3-4 persons)

Ingredients:
1/2 cup Toor dal
1 big bunch of Spinach/Palak(2 cups palak,chopped)
1 medium Onion,roughly chopped
5-6 Green chillies,slit
1/4 tsp Turmeric powder
1 tsp Coriander powder
1/2 tsp Cumin powder
2 tsp Oil
Salt to taste

for tadka:
1-2 tsp Ghee
1/2 tsp Mustard seeds
1/2 tsp Cumin seeds
3-4 Garlic pods
1 Red chili,broken
a pinch of Asafoetida
a sprig of Curry leaves
Method:
  • Wash and soak toor dal for 10 mins.
  • Heat oil in a pressure cooker add slit green chillies and fry for half a minute.
  • Add chopped onions and fry well and chopped palak and fry well until the leaves wilt.
  • Add soaked toor dal(removing water) and fry for a minute.
  • Add turmeric powder,coriander and cumin powder and fry for a minute again.
  • Add salt and enough water(roughly 2 cups) and pressure cook for 3 whistles.
  • Once the pressure drops remove the lid and keep the dal on low-medium flame and simmer for 5-6 mins to the consistency you need.You can use a dal masher and slight;y mash the dal at this stage.If you want it thin add more water,otherwise let it thicken until the desired consistency.Switch off the flame.
  • In a small tadka pan heat ghee and crackle mustard seeds,jeera and crushed garlic pods and fry well.Add curry leaves,red chili and asafoetida and fry for half a minute.
  • Add the tadka to the prepared dal and give a nice mix and cover it with lid.
Serve it hot with rice or roti.

Notes:
  1. You can replace moong dal or masoor dal with toor dal in the above recipe and follow the same procedure.
  2. This dal tastes nice without any sour factor from tamarind or lemon.If you want sourness in the dal add tamarind juice after the dal is cooked and when boiling it for the second time.
  3. You can follow the same procedure to make the dals like yellow cucumber,ridge gourd,bottle gourd and methi just by replacing the palak with chopped vegetables/greens.
  4. For a Vegan version replace ghee by equal amounts of oil in the recipe.

Monday, January 23, 2012

Idli Recipe using Idli Rava

Idli is the most humble breakfast in many south Indian homes,though I do not make it on a daily basis I do it regularly at least once in 2 weeks.I usually prefer the Idlis made out of Idli Rice as I like the taste and texture of Idlis better than the Idli rawa ones.Today I am posting the idli recipe with idli rawa which helps people who don't get idli rice and also those who don't have wet grinder.
Idli might sound a very simple tiffin but it needs lot of practice to get soft, fluffy and airy idlis.In spite of being a south Indian not everyone can be able to succeed in making good idlis.There are many factors which decide the quality of idli like the quality of urad dal or idli rawa and the climatic conditions and the procedure of grinding the batter using a grinder or mixie.I have shared few tips based on my experience and advice from elders to get soft idlis,I hope it would help you.This recipe is meant for beginners and hence I tried to mention in more details.
 
Check out few Idli varieties and their variations using the basic Idli batter here..
Idli using Idli Rawa Recipe:

Ingredients:

2 1/2 cups Idli rawa(I use 3 cups Idli rawa Priya brand)
1 cup whole white Urad dal
1/4 cup Flattened rice/Poha
1 tsp Fenugreek seeds
Salt to taste

Method:
  • Soak urad dal and fenugreek seeds in water for 3-4 hrs.
  • Soak poha and idli rawa in water separately for 2 hrs.
  • Drain the water from urad dal and fenugreek mixture and squeeze out extra water from poha and idli rawa and keep them separately.
  • Gring urad dal and fenugreesk seeds mixture along with poha to a very fine and smooth mixture in wet grinder.Add little water in between for easy grinding.It takes approximately 15-20 mins.To test whether the urad dal is ground or not drop a little portion of urad batter in a bowl of water,if it floats it means your urad dal batter is well ground.
  • Add squeezed idli rawa to the urad dal batter and grind again for 5 mins.Do not add much water,but if water is required feel free to add water to get thick and semi smooth consistency of batter.This step is optional,you can mix the soaked and squeezed idli rawa directly into the urad dal batter,but I prefer to grind it further to a semi smooth batter as it give fluffier idlis.
  • Take out the batter into a big vessel and add salt to it and mix it with hands,cover it with a loose bottom plate.Take care that the batter comes to half the height of the vessel as the batter doubles after fermentation.It is believed that the heat in hands helps in speeding up the fermentation process.Some prefer to add salt while making idlis,so it is left to you when you want to add but please do not forget to add salt.
  • Keep the vessel in a warm place.As I stay in India I leave the batter outside for 8-9 hrs or overnight for fermentation.If you stay in col regions it is better you leave the batter in a preheated oven overnight.
  • Once the batter is fermented it might have doubled in size.Do not over mix the batter,take the batter how much ever you want into another vessel and keep the remaining portion refrigerated until its next usage.
  • Now check the consistency of batter,if you feel the batter is very thick add little water.If you did not add salt while grinding add it now and mix well.
  • Grease the idli plates and switch on the steamer with enough water.I use my cooker and steam without whistle(weight).Pour the idli batter upto 3/4th of idli impression and place stack up all the idli plates and steam for 10-12 mins.Rest it for another 3-4 mins.
  • Dip a clean wide spoon in water and remove the idlis from the plate.Keep dipping the spoon in water in between which helps in taking out the idli easily.Link
  • Keep them in hot box or serve directly on to a plate.Always serve idlis hot.
Serve them hot with either coconut chutney /peanut chutney/tomato-onion chutney/karapodi/chutney podi/allam pachadi/sambar.

Notes:
  1. Use an air-tight container for storing the batter.I usually remove the batter into my tupperware container and cover it with a normal loose steel plate while it is fermenting and once it is fermented I cover it with the lid and refrigerate the batter,this way the batter will be fresh and does not turn sour.
  2. The idli batter turns sour quickly if you add salt while grinding the batter and that is the reason few add salt while making idlis.It is your wish to follow which way you want.
  3. I prefer to use whole urad dal,if you do not get it use regular ural dal(broken).
  4. Addition of poha is optional but it gives you very soft and fluffy idlis.You can even use a handful of sago instead of poha for the same..
  5. If the quality of idli rawa and urad dal are good you get soft and fluffy idlis.I generally add 3 cups of idli rawa(to 1 cup urad dal) as I use priya brand which is apparently very good.If you do not get that try the proportions like 1 cup urad dal : 2 1/2 cups idli rawa and if even this proportion does not give you soft idlis try 1 cup urad dal : 2 cups idli rawa.
  6. If you are using wet grinder you can go up to 3 cups of idli rawa for 1 cup of urad dal,but if you are using mixie to grind the batter I suggest you to go with the proportion of 1 cup urad dal: 2 cups idli rawa.
  7. Once the batter is fermented do no stir it much which makes the batter looses its air bubbles and in return the idlis will not be softer.
  8. After 2-3 days the idlis might not turn soft with the same batter,you can add a fat pinch of cooking soda mixed with 2 tbsp water into the batter and mix it well and make idlis.Your idlis would be definitely soft.
  9. If your idli batter turn soar,try this Masala Idli which is a perfect fix for the sour idli batter.
  10. You can use the same batter and make dibba rotti(means thick dosa),add lots of oil while frying it which gives crispy and crusty dibbarotti.

Thursday, January 19, 2012

A Glimpse of Family Food-Tasty Thursday(FF-TT) Series

I would like to thank all my cousins Ashwini,Savitha and Chaitra for sending the lovely entries to my event "Family Food Tasty Thursday-Snacks/Chaats" series and making it into a successful event like its earlier sequel "Family Food Friday-Breakfast" series. I hope you all enjoyed my "Family Food-Tasty Thursdays "series as much as I enjoyed hosting it.The only difference in the season -2 was even I posted the recipes along with my cousins and followed the same theme 'snacks'. This is just a small recap of all the recipes posted in this series for a quick reference and also for those who missed few posts.

Posts by My Cousins:

Chaitra:


Ashwini:

Savitha:

Prashanth:
Posts by ME:


Thursday, January 12, 2012

Maddur Vada | Maddur Vade...FF-TT # 8

This week's entry for my 'Family food-Tasty Thursdays'(FF-TT) series was sent by Savitha.
Maddur vada(or Maddur Vade as it is called) is another famous snack item of Karnataka which got its name from a little town called 'Maddur' which is situated in between Bangalore and Mysore.These vadas are a good evening snack and also it is paired with coconut chutney and are served as breakfast in many food joints in Bangalore.These are very easy to make and are also very tasty.They have a crispy crust and slightly soft and flaky texture when you bite in the vada and the sweetness of fried onions which takes this to another level makes this vada tastes very special.If you taste these once I am sure you will get hooked to its taste.Do not miss to try this famous maddur vada if you ever visit this place.

Maddur Vada Recipe:
(makes around 15 vadas )

Ingredients:
1 cup Maida
1/2 cup Chiroti Rawa/super fine Sooji
1/4 cup Rice flour
2 small or 1 large Onion
1 1/2 tsp Green Chili Paste
1/2 cup finely chopped Coriander
2 sprigs Curry leaves,finely chopped
2 tbsp Ghee(solid type,do not melt it)
Salt to taste
Oil for deep frying

Method:
  • Mix all the ingredients well and add very little water to the mix (especially because onion oozes out some water) to the mixture to bring it chapati dough consistency.
  • Leave the dough to rest for about 10-15 min.
  • Alternatively you can mix all the ingredients(except water) and leave it aside for 10-15 mins and sprinkle in little water and make it to a chapati dough.
  • Grease the baking mat(or a polythene like milk cover) with oil, take about lemon sized dough and pat it on the baking mat with your hand using little oil and make a circle.Pat into a 3" diameter and 1/4" thick vadas.
  • Take the patted dough and slide it carefully into hot oil for deep frying.Fry these vadas on low to medium flame.
  • Fry the vada until it turns golden brown and becomes little crispy.
Serve these hot vadas with coconut chutney and enjoy with a cup of tea or coffee.They taste equally good even at room temperature.

Notes:
  1. Try to add very little water while making the dough .The best way to prepare the dough is to prepare the doigh in small quantities freshly to avoid the dough gets soggy.
  2. You can replace ghee with 1/4 cup hot oil in the dough.
  3. Fry them on low-medium flame to get evenly fried brown vadas.
  4. You can add a pinch of baking soda to the dough to get crisp vadas,but it is optional.

Monday, January 9, 2012

Nippat Masala..Karnataka Chaat variety

Chaats take a different dimension in South India especially in Karnataka.Though you get the usual chaats like pani poori,sev poori,bhel etc in every chaat center there are some unusual chaats which are quite popular in Karnataka but not known to many(outside Karnataka).You can see lots of chaat gaadis(carts) and small shops spread across Bangalore which serves these awesome chaats. The various chaats which are quite famous are nippat masala, churmuri, tomato slice, chakli masala, chips masala, bele masala,tikki puri and many more items.You can find these kind of small gaadis especially in front of schools,colleges and parks. They are pretty cheap and also a good time pass snacks for those lengthy chit chats.Today I would like to introduce one of those chaats/snacks called nippat masala.The crisp rice flour discs (nippat / thattai) that are topped with carrot-onion mixture and is generously sprinkled with chaat chutneys and masalas and layered with crisp murmur and congress kadalebeeja(spiced up peanuts).This is really a delight to the taste buds with the balance of flavors and textures of the various ingredients in the recipe.
Nippat Masala Recipe:
(Serves 2)

Ingredients:
16 small Nippat/Nippattu/Thattai (or 4 big ones)
1 Tomato,finely chopped
1 Onion,finely chopped
1 Carrot,grated
1/4 cup fine Sev
1/4 cup Congress Kadalekayi(spiced Peanuts)
1 cup Puffed rice/Murmur
2-3 tbsp finely chopped Coriander
4-5 tbsp Green Chutney
4-5 tbsp Sweet Chutney(meetha)
1 tsp Red chili powder
1 tsp Chaat masala
Salt to taste
2 tsp Ghee
Method:
  • Mix finely chopped onions with grated carrot and chopped coriander and keep it aside.
  • Keep all the items ready before plating them as these are supposed to be make quick and eat immediately.
  • Arrange 7-8 pieces of small nippats in a plate and spread a drop of ghee on each nippat.
  • Apply 1/2 tsp green chutney and 1/2 tsp meetha chutney on each nippat.This quantity is personally your choice and according to your taste buds.
  • Sprinkle a pinch of salt,red chili powder and chaat masala all over the nippats.Sprinkle them according to your taste buds.
  • Take a handful of onion-carrot-coriander mixture and place 1 tbsp of mixture on each nippat.
  • Sprinkle few chopped tomatoes all over.
  • Next comes the layer of sev and congress kadalekayi.Be generous with this as it gives a nice taste to the masala.
  • Finally top it with a big handful of murmur.Repeat with another plate or simultaneously prepare both the plates.If you are using big nippat instead of the smaller ones follow the same process and slightly press at the end to break the nippat into pieces.
Serve the plate immediately.Lift each nippat with all the masala over it and dump into your mouth and enjoy the taste.
Notes:
  • There is no hard rule for the measurements in the recipe.You can play with those ingredients and also can tweak in the recipe according to your taste buds.
  • Using ghee is optional,but it enhances the taste of nippat masala.
  • You can use jeera powder instead of chaat masala in the above recipe.
  • You can follow the same recipe and replace nippat with small chakli which makes it 'Chakli masala'.
  • You can follow the same recipe and replace nippat with tomato slices which makes it 'Tomato slice masala'.This is a guilt free snack for those who are really calorie conscious.You can add avoid ghee in tomato masala recipe.

Thursday, January 5, 2012

Saggubiyyam Bonda | Sago Bonda....FF-TT # 7

I took a small break from my Family Food Series and posted few cakes and dessert recipes which were apt for the season.Now I am back with the series again continuing with the same theme 'Snacks'.
This week's entry for my 'Family food-Tasty Thursdays'(FF-TT) series was sent by Chaitra. She has sent our family favorite snack called Sago(saggubiyyam) bonda.It is quite common at our place and is almost a favorite with everyone.Many prepare these bondas with left over dosa batter,we prepare this in a different way which is why it is more special at our place.
These bondas are quite crispy and tangy because of the addition of sour curds which imparts a very good flavor to bondas.They are quite plumpy with a crisp crust outside and spongy texture inside and they also stay crisp for long time.These hot,crisp and tangy bondas are perfect for these chilling winter evenings to munch with a cup of tea.
Saggubiyyam(Sago) Bonda Recipe:
(Makes around 25-30 small bondas)

Ingredients:
1/4 cup Nylon Sabudana(small sago)
1/4 cup Sour curds
1/4 cup Chiroti(fine) Rava
1/3 cup Rice flour
2 medium Onions,finely chopped
1/4 cup Coriander,finely chopped
1 tsp finely chopped Ginger
2 tsp Green chilli paste
Salt to taste
Oil for deep frying

Method:
  • Soak Sabudana in sour curds for about 7 hrs or overnight.
  • Add all the other ingredients and make it to a pakoda style batter,if needed add little extra curds.It should be very thick batter(slightly thicker than idly batter).
  • Mean while heat oil in a kadai.
  • Drop the small amla sized bondas/pakoda using a spoon or hand in to the oil and fry them on medium heat. Do not disturb them while frying until you get the desired golden brown color on one side.The bondas need not to be evenly sized,so do not bother about the shape and size of them.Turn them around and fry till it is golden brown.Drain the excess oil on a tissue paper.
Serve them hot.These usually these do not need accompaniments,but you can serve them with either coconut chutney or tomato sauce.

Notes:

  1. These can be made even 2 hrs ahead. These stay crispy for a long time.
  2. They will absorb more oil if you add water and also they will splutter,hence while mixing the bonda batter do no add water and add the required amount of curd instead of water.
  3. Nylon sago is good to use for this,if you don't get that use the regular sago.
  4. You can add a pinch of soda if you want still crispy bondas,but it is optional.
  5. If your batter is thin add little extra rice flour and if your batter is thick add extra curds to it to get the required consistency.

Monday, January 2, 2012

Eggless Chocolate Custard | Eggless Chocolate Pudding..A Sweet start to 2012

First of all I wish you all 'WISH YOU A VERY HAPPY AND PROSPEROUS NEW YEAR'. I hope all are enjoying the new year and I would like to welcome the new year with a sweet beginning.
I like to eat chocolate based desserts more than eating just a plain chocolate.This chocolate pudding is no exemption as it is one of the most easiest and tasty pudding recipes. I used to make a simple chocolate pudding recipe before which was a bit low fat version with no cream but I always was in search of a perfect recipe.When I came through this recipe I liked the richness of dessert and I also tweaked in the recipe with some more improvisations and settled with this recipe.This pudding has silky smooth and melting kind of texture which makes you crave for more.It is definitely a crowd pleaser,try out for your next party and I am sure you would be happy with your decision.
Eggless Chocolate Pudding Recipe:
(Serves 5-6 medium size cups)
Slightly adapted from: Divine Taste

Ingredients:
500 ml(2 cups) Milk(full cream or normal)
200 ml(3/4 cup) fresh Cream(I used Amul 25% fat cream)
5 gms(2 tsp) Agar agar(china grass)
1/2 cup Water
1/2 cup Sugar
1/4 cup(heaped) Cocoa powder
1/4 cup Custard powder/Corn flour
1-2 tbsp Chocolate chips(optional)
1 tsp Vanilla extract
Cocoa powder for dusting

Method:
  • Cut agar agar strip(if using Indian variety) into small pieces and soak agar agar in water for 1/2 hr.If you are using agar agar powder just soak it in water.
  • Take 1/2 cup of milk and mix in the cocoa powder and custard powder/corn flour well until it is mixed well and no lumps are formed.
  • Heat milk in a thick sauce pan over medium flame and add cream and sugar to it and mix well.
  • Once it comes to a boil add the cocoa-custard powder mixture and mix well and boil for 5-6 mins until the mixture coats the back of the spoon.If you draw a line on the backside ladle of spoon the line should stay which means the custard is ready.
  • Add Chocolate chips and mix well.This step is entirely optional but gives a nice chocolatey flavor to the pudding.
  • Meanwhile boil agar agar in the same water it is soaked until the strands are melted and the water is clear and starts forming a jelly like texture in the sides.
  • Add the agar agar mixture to the boiling chocolate custard mixture and mix well and boil for a minute.Add vanilla essence and mix well and switch off the flame.
  • Pour the mixture into the individual pudding molds/cups and let them come to the room temperature.
  • Cover it with cling wrap and refrigerate it for 3-4 hrs or overnight.
  • Sprinkle cocoa powder or decorate with chocolate shavings or sliced strawberry.
Serve chilled.
Notes:
  1. The original recipe did not use agar agar,it is entirely optional as it does not effect the taste of it.As I wanted to set the custard I added it to the mixture and it is beautifully set.
  2. The addition of chocolate chips are optional but gives a nice chocolaty flavor to the custard.
  3. Rinse the cups/molds with water before pouring the mixture which helps in easy unmolding later.
  4. I used custard powder but you can make it with cornflour as the original recipe suggested.

 
back to top