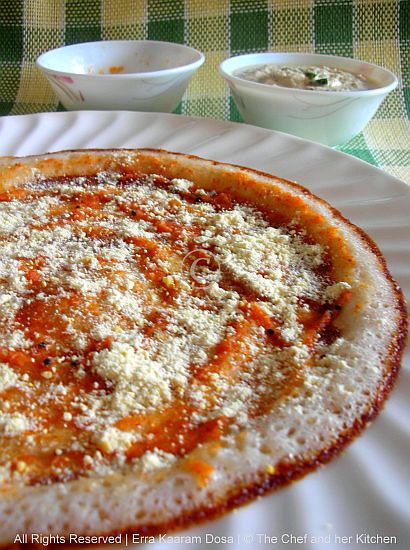
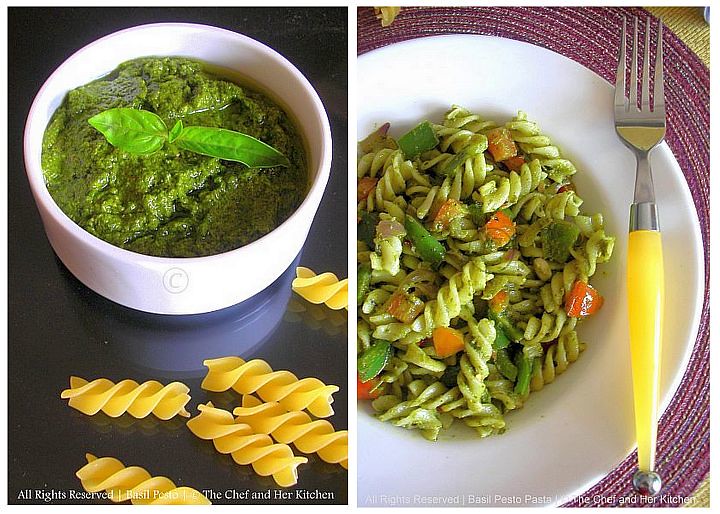
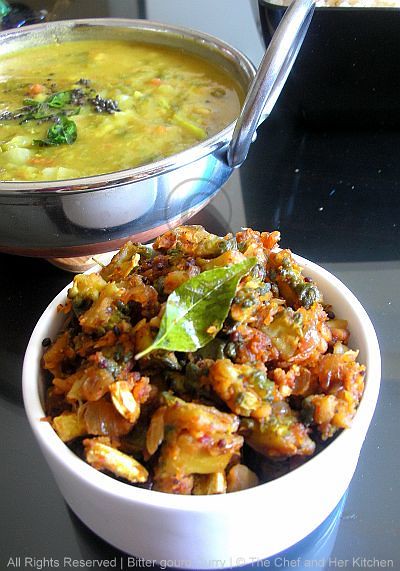
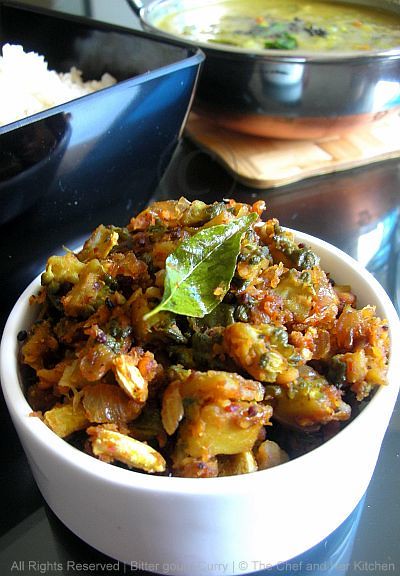
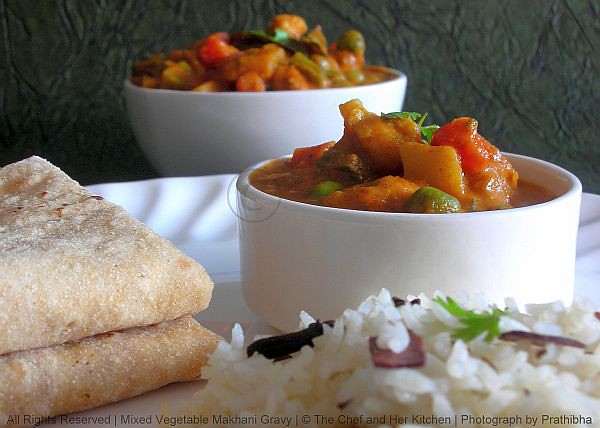
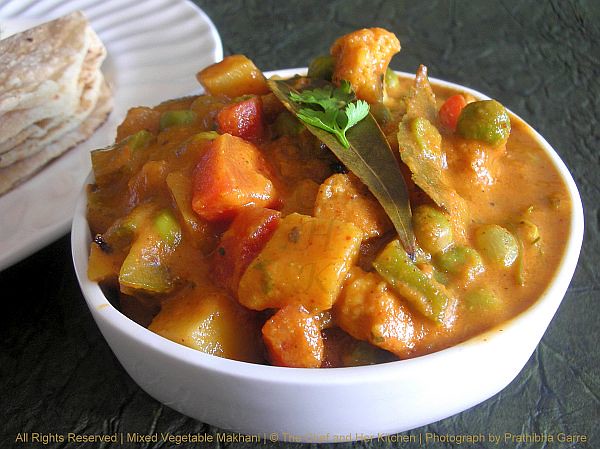
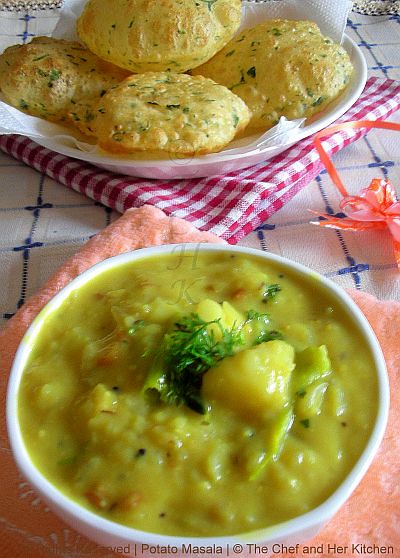
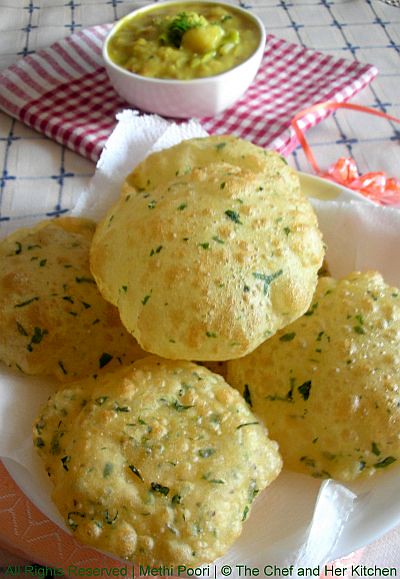
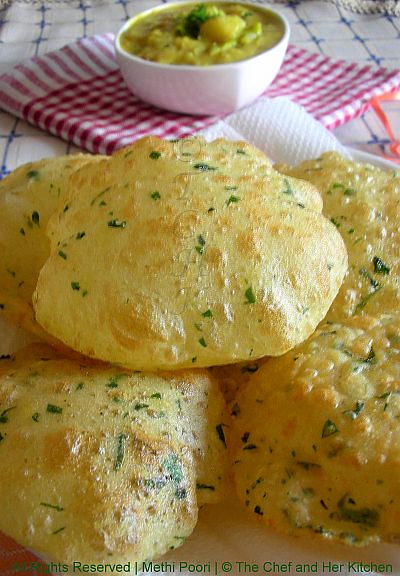
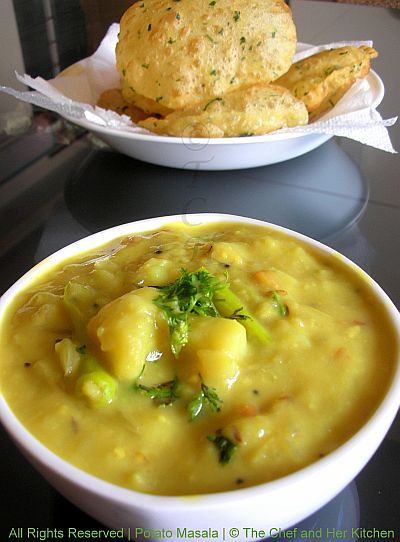
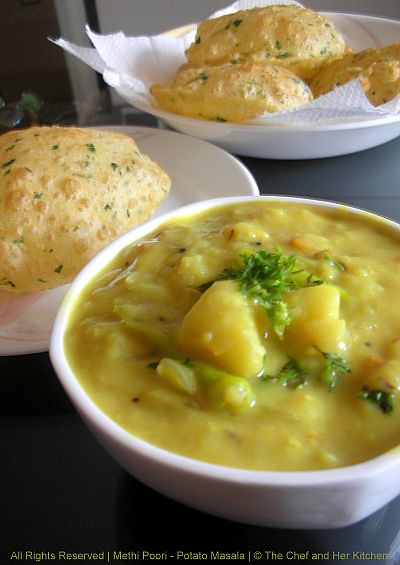
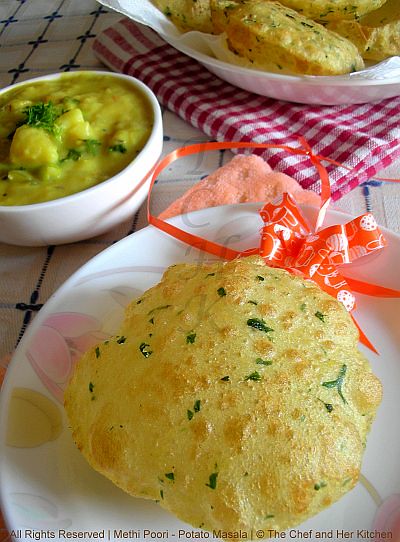
Thursday, March 31, 2011

Eggless Cocoa Walnut Brownies....and my 200th Post!!

Reason no.1: This is 'my 200th post!!'
Reason no.2: 'Last Sunday was my birthday' and thanks a lot for all your lovely wishes which made my day very special.
Reason no.3: The 'temptation' created by our fellow bloggers by posting different amazing brownie recipes in the last couple of weeks for Divya's 'Best Brownie' event.
Reason no.4: And finally 'the magnificent and the most amazing win of India against Pakistan' in the world cup semi finals which made us on the way for the most awaiting finals.
These are the various reasons which forced me to make my brownies post to happen soon in my blog to celebrate and enjoy the moments.

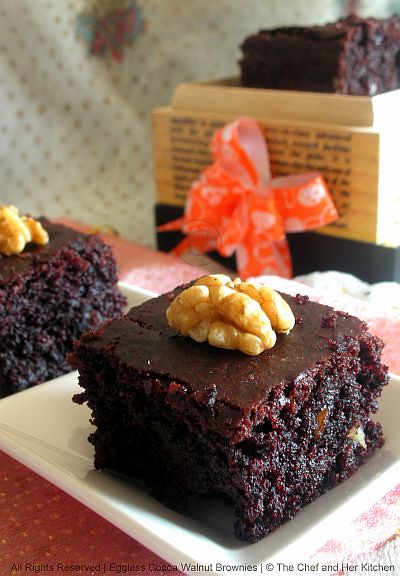
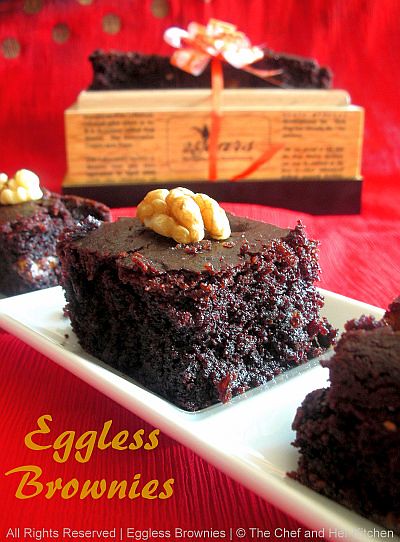
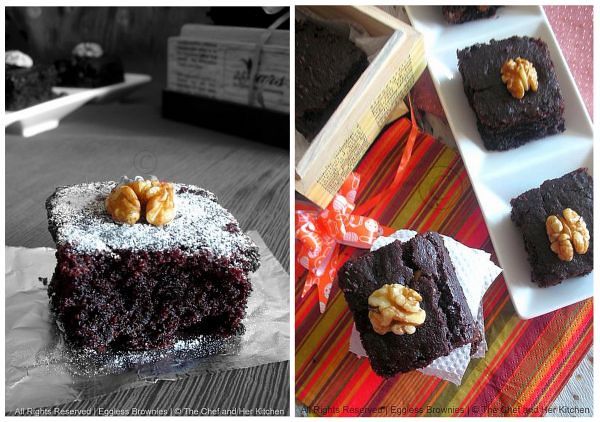
I have already posted a Brownie recipe here which has eggs. I always look for eggless recipes,not that we do not eat eggs but I can bake them for my mom who does not eat eggs. I tried this egg less version of brownies from sanjana's blog and I already made them a couple of times because of the simplicity of the recipe. Mine turned to be fudgy but slightly cakey textured ones unlike those beautiful ones of sanjana's,nevertheless the taste was amazing and loaded with chocolate.If you are looking for an egg less brownie recipe,you can blindly follow this recipe and enjoy making those gorgeous beauties.Even our blogger friend Nithya has tried these brownies recently and posted them here and if you are looking for another eggless brownie recipe check out Raks space for her brownie recipe.

And finally,these brownies along with the other version of 'Brownies with eggs' are going to participate in Divya's 'Best Brownie' event.

Ingredients:
1 cup all purpose flour
1/2 cup cocoa powder(I used cadbury's)
3/4 cup icing sugar + 1tbsp icing sugar(for dusting)
1 tsp baking soda
a generous pinch of salt
5 tbsp melted unsalted butter or 5 tbsp regular vegetable oil
1 tsp vanilla essence
1 cup buttermilk
2 tsp instant coffee( I used nescafe)
1/4 cup chopped walnuts + 1tbsp chopped walnuts(for topping)
1/4 cup chopped dark chocolate pieces or chocolate chips

Method:
  • Sift all purpose flour,icing sugar,baking soda,salt and cocoa powder together a couple of times until you get a uniform mixture of them.
  • Melt instant coffee powder in a tbsp of hot water and let it cool.
  • Melt butter in a deep pan on low heat and let it cool.If you are using oil ignore this step.
  • Whisk in the melted butter/oil into the butter milk and add vanilla essence and coffee decoction and whisk again until you get a uniform mixture.
  • Now fold in the dry ingredients into wet ingredients and mix very gently with a spatula or spoon.
  • Dust the chopped walnuts and choco chips/dark chocolate pieces with a tsp of flour and fold the dried nuts and chocolate pieces into the batter.
  • Grease an 8" square tin and line up a parchment paper or aluminum foil with the edges hanging over the tin slightly and transfer the batter mixture in it to get 1" thick layer of the mixture.
  • Sprinkle the remaining walnuts and bake for 25-30 mins at 180 degrees or till done.
  • Cool it completely and remove it from tin and cut it into squares.
Serve it warm as they are or with vanilla ice cream with some chopped nuts and chocolate sauce.Experience the heaven which melts in your mouth.

Notes:
  • I have used walnuts,you can use nuts of your choice like pecans, hazelnuts, walnuts, cashewnuts and you can even chopped dates,cranberries,raisins etc.
  • The original recipe did not have vanilla essence in it,I added to get the extra flavor to it.
  • You can pour it in a 9" square tin to get thin brownies than mine.
  • I have added more quantity of nuts and chocolate pieces as we like to bite into them in brownie,you can reduce or increase the quantity according to your wish.
  • To make buttermilk,whisk in 2 tbsp of thick fresh curds in approximate 1 cup of water to get a cup of buttermilk.
  • If you are using salted butter,avoid adding salt to it.
  • The original recipe had 3/4th cup of icing sugar,I have added extra 2 tbsp icing sugar approximately which was even perfect,not too sweet.
  • You can powder your sugar and use it for d recipe instead of icing sugar.
  • These brownies have a bit of texture of cake,but taste wise it was amazing.
If you are interested,check out my earlier 50th,100th and 150th milestone posts here.

Monday, March 28, 2011

Erra Kaaram Dosa...from Rayalaseema!!

This dosa takes me back to my college days completely and brings back the sweet memories of those beautiful and fun days which I spent with friends.Though I used to carry lunch box for college regularly,there were days I asked my mom not to give me lunch box so that I can go out with friends for lunch outside.Even though we had college canteen and few other stalls near my college,still we preferred going to one small stall where an old lady used to make these fresh and hot erra kaaram dosas.Even though we stayed in Kadapa for more than 20 years,that was the first time I tasted these erra kaaram dosas and developed the taste instantly.Eating with friends is definitely fun as we all used to eat in single plate and we never kept the track of the number of dosas that used to go in our tummy . We used to order continuously until we three of us are completely stuffed and happy.I am dedicating this post to my friends 'R' and 'S' for those most memorable days we spent together in college.
Erra kaaram dosa is quite famous in Rayalaseema region of Andhra Pradesh,especially in Kadapa district.'Erra kaaram' means 'red chutney' which is smeared on dosa and dalia powder is sprinkled liberally over dosa to neutralize the heat from the red chutney.Many of us might be preparing a similar chutney for mysore masala dosa but this chutney is less garlicky and the combination of this pungent chutney with dalia powder makes this dosa extra special and different from the other dosas.Generally I roast my dosas only one side to retain the crispyness of dosas,but these dosas are roasted on both sides which makes the dosa less crispier but taste wise no compromise in it.
Many of us end up making lots of dosa batter which lasts for several days,you can try these dosas on one of those days instead of plain dosa or masala dosa.I am sure you might end up eating atleast one more than your usual capacity.

Ingredients:

for Dosa batter:
4 cups normal rice(I used sona masuri)
1 cup urad dal
1 cup chana,moong,toor dal mix(1/3 cup each)
1 cup poha
1 tsp methi seeds
salt to taste
oil/ghee to roast dosa

for Erra Kaaram(red chutney):
2 onions,quartered
3-4 garlic pods(optional)
1 tsp red chili powder or 4-5 red chillies
1/2 tsp tamarind pulp
salt to taste
1 tbsp sesame oil/ghee
1/2 tsp mustard seeds

for Pappula Podi:
1/3 cup fried gram/chutney dal(putnala pappu)
1 garlic pod
salt to taste


Method:

for Dosa batter:
  • Wash rice,dals and methi seeds all together for 2-3 times in running water and soak them for 6-8hrs or overnight.
  • Next day morning soak poha for an hour before starting the grinding process of the batter.
  • Grind everything together to a smooth paste in the wet grinder for better results.Add enough salt to the ground batter and mix well and let it ferment for 9-10 hrs at room temperature or keep it in hot oven in winters for speeding up the process of fermentation.
for Erra Kaaram:
  • Grind chopped onions,garlic pods,red chili powder,salt with tamarind pulp to a smooth paste.If you are using red chillies instead of red chili powder,dry roast red chillies for few minutes until crisp and use it for blending.
  • Heat sesame oil and crackle mustard seeds and add this to the chutney and mix well.Use ghee for tadka to make it extra tastier.
Note:
Some people might not like the flavor of raw onion and garlic,then you can fry the erra kaaram in oil until the raw smell goes away.But I like this to be done raw to enjoy the full flavor of erra kaaram dosa.


for Pappula Podi:
  • Grind fried gram with salt to a fine powder and add a garlic pod and run the mixie again and transfer to a bowl.
for making Erra Kaaram Dosa:
  • I am sure everyone knows how to make simple plain dosa,still I explain the process of making it for people who are not familiar with it.
  • Mix the fermented dosa batter well.Pour a big ladle of batter onto a medium hot pan and spread it in the circular motion to form a uniform round shaped dosa.
  • Pour 1 tbsp oil approx over it and cover it with a lid.(No need to add more oil if using Non stick pan,you can completely replace oil with ghee for better taste if you are not calorie conscious).
  • Let it initially cook on low flame for 1-2 mins and remove the lid and turn the dosa to the other side and roast for a minute.Now increase the flame and cook for a couple of mins until you see brown/red patches.
  • Quickly spread the erra kaaram/red chutney all over the dosa and sprinkle pappula podi all over liberally and pour some ghee over dosa(truly optional) and fold it to half.
  • Brush the dosa with ghee and place it in the center of the pan to make it more crispier.How ever it is optional.
  • Serve it directly and do not drop them in hot boxes.It should be served on to the plate immediately to enjoy the flavor and crispiness of the dosa.
  • Reduce the flame for one minute and then start preparing the next dosa.Do not pour the batter on high flame,the batter will stick to the tawa.If you feel the tawa is over heated sprinkle some water over it before making next dosa.
Serve dosa with chutney of your choice like coconut chutney/groundnut chutney/mint chutney/tomato chutney/tomato onion chutney.I served erra kaaram dosa with coconut chutney.

Variation:
  • You can even place the potato palya in centre of dosa and fold into half to make erra kaaram masala dosa.
Note:
  • For a vegan version use oil instead of ghee while frying as well as in the chutney.

Thursday, March 24, 2011

Basil Pesto with Spiral Pasta

It is quite obvious to guess my next recipe after posting basil pesto that it would be none other than a pasta recipe.Every time I go for shopping I always tend to buy new shapes of pasta as I get bored of the same old shapes.I generally pair the pasta with the sauces that suits it like penne,spiral,farfelle goes very well with simple sauces like pesto and marinara,where as macaroni goes with a creamy sauce and spaghetti goes well with thin sauces.I am not a pasta expert,I am sharing you all the tips with my experience with pasta.Today I even read an article about the pairing of sauces with the pastas which widened my knowledge a bit more.

Many of you know that Pesto is the most favorite sauce at my place compared to other sauces and basil pesto is the hot favorite one for both of us.It is just burst of flavors with the freshness from basil and the creaminess from nuts,cheese and EVOO.I generally add bechamel sauce to my pasta to make it into more saucy consistency,but to day I am sharing you the most simple pasta with basil pesto,one can go creative with the ingredients that go in it to make it according to your taste buds.
Ingredients:
2 cups spiral pasta(or any other pasta)
1/2 cup basil pesto
1 onion,sliced
3-4 garlic pods,sliced
1 tomato,seeded and diced
1 capsicum,seeded and diced
1 tsp mixed herbs
1/2 tsp chili flakes
1/2 tsp ground pepper
1 tbsp grated parmesan(optional)
8-10 basil leaves,torn
2 tbsp extra virgin olive oil (EVOO)
salt to taste

Method:

To Cook Pasta:
  • Cook according to the instruction of your package or follow this procedure:
  • Bring water to boil in a big pot (filled to its half) and add salt,1 tsp olive oil and pasta and cook over medium flame for 10-12 mins until al dente(cooked and tender to teeth).
  • Drain and reserve 1/2 cup of water for later usage.you can even give a cold bath to the pasta by running it under fresh tap water which helps in keeping the pasta separate.
To make Pesto Pasta:
  • Heat olive oil in a wide bottomed pan and fry sliced garlic until slight brown and crisp and add thinly sliced onions and fry until they are pink and soft.
  • Now add sliced capsicum and diced tomato and saute it for few minutes.
  • Add the basil pesto sauce and mix well.Add 4-5 tbsp of reserved pasta liquid if required add more to get a medium sauce consistency.
  • Add cooked pasta and mix well until all the pasta is covered with the sauce and is warm.Now add red chili flakes,Italian herbs,basil leaves,salt and pepper and mix well.
  • Dish it out to the serving platter and sprinkle some cheese over it.Garnish with basil.
Serve it hot or warm with Lime Soda or drink of your choice.


Notes:
  1. You can even add bechamel sauce in the above recipe to give a nice creamy texture to the pasta.
  2. You can add more Parmesan cheese while preparing sauce in the above recipe to make pasta more cheesy.
  3. You can replace spiral pasta with any of the pasta like penne,macaroni ,farfelle or any other pasta of your choice.
  4. You can add colored bell peppers,finely chopped carrot,blanched broccoli,thinly sliced mushrooms,blanched asparagus,zucchini to the pasta
  5. You can even fill the pasta in a baking dish and cover with grated Parmesan cheese(1/4-1/2 cup) and cover it with a foil and bake it in oven @ 160 degrees for 20 mins until the cheese melts.Serve it hot right from the oven.This would be a exclusive dish for parties especially or for special romantic dinners.
  6. For a Vegan version avoid parmesan cheese while making pesto,it tastes even delicious without cheese in it.

Monday, March 21, 2011

Fresh Basil Pesto

At our place pasta means pesto pasta and that too basil pesto is the most common sauce we prefer for pasta.I generally get a small pack of basil which is just enough for the one time preparation of pasta.So I always make it fresh and use it immediately,so never got to photograph it and post it here.Recently I found a store where I can buy bulk quantity of this flavorful basil at really low price,so I got excited and ordered 200gms of basil which was a really huge quantity for me.I decided to make pesto out of it and tried to store it for long and I used it in pastas a couple of times and as a spread for my daily sandwiches and also in salads.It was really handy to use it when required in small or larger proportions.I have taken this photograph after 5-6 days after I prepared pesto,look at it still it looks fresh.You can check another version of my pesto, spinach pesto pasta here.

Ingredients:
200gms,roughly 4-5 cups loosely packed fresh basil
1/3 cup extra virgin olive oil(EVOO) + 3 tbsp EVOO to store the pesto
1/3 cup pine nuts or walnuts
1/4 cup grated parmesan cheese
4-5 garlic pods
3/4tsp roughly ground pepper
juice of 1/2 lemon
salt to taste

Method:
  • Separate the basil leaves from the tiny stems and wash them and let them drain all excess water.Try to spread over a kitchen towel to remove excess moisture.
  • In a mixer add basil leaves,pine nuts/walnuts,garlic pods,pepper,add half the quantity of olive oil,lemon juice,parmesan cheese,salt and ground to a medium coarse paste.Add the remaining olive oil in stages in between to ease the process of grinding.Do not add water to grind it,the EVOO and lemon juice them selves are enough to grind into a uniform paste.
  • Now check for the taste and adjust the salt for the pesto.
  • Take a clean glass jar and pour a tsp of EVOO in the bottom and scoop in two 2tbsp of pesto and again pour a tsp of EVOO over it and scoop in pesto and repeat the process and make sure you pour 2 tsp EVOO over the top.If you layer you pesto with EVOO, you can store the pesto for upto 7-10 days and use it when required.
Use it in pastas,salads,spread on toast or sandwiches,gnocchi etc.

Notes:
  1. Traditionally pine nuts are used to make pesto,if not available you can substitute with walnuts.
  2. I have used more quantity of EVOO which helps it in storing for long and use it when required.Might be the top layer of pesto turn slightly dark,but inside it stays fresh and looks freshly ground.Use a clean spoon all the time and make sure olive oil floats on top of pesto all the time.
  3. You can reduce the amount of parmesan cheese added and while making pasta you can use bechamel sauce for extra creaminess and richness.
  4. For a Vegan version avoid parmesan cheese while making pesto,it tastes even delicious without cheese in it.

Thursday, March 17, 2011

Bitter gourd Curry

Many of you would be knowing that bitter gourd is a favorite veggie at our home and of course not for me,it is favorite to everyone at my in laws place.This vegetable finds its place at least once in a week and especially during week end lunches.Most of the times I make fry out of it and I even opt for a quick,faster and a low cal version.Oven works best for me for making any of these vegetable fries with out consuming so much oil,it consumes hardly a tsp of oil.My husband can eat bitter gourd fry as a snack as he likes it very much,so most of the fry which I make will go into his plate and I just take a small portion to taste it.
Coming to this recipe I had adapted this version from one of my cook book's collection as I found the recipe simple and I know that bitter gourd and onion goes well with each other.The outcome was good and even I enjoyed it having with rice.If you are a bitter gourd lover you will definitely love it and even though if you are not you might start liking it,so better give a try.

Ingredients:
4-5 medium bitter gourds
2 big onions
a lemon size tamarind
1/2 tsp turmeric powder
1 tsp grated jaggery
a sprig of curry leaves
salt to taste
2 tbsp oil

To grind:
1 1/2 tbsp chana dal
4-5 red chillies
3 flakes of garlic
3-4 small onions
2 tbsp dry coconut,grated

Method:
  • Chop bitter gourd into small cubes and add turmeric to it and leave it aside for half an hour.Squeeze the bitter gourd pieces and keep them aside.
  • Extract tamarind pulp and dilute with enough water to cook bitter gourd pieces.
  • Boil the thin tamarind water and add salt,turmeric and bitter gourd pieces to it and cook until soft.Strain the pieced and keep them aside.
  • Mean while finely chop the onions and keep them aside.
  • Heat a tsp of oil and and add bengal gram(chana dal),red chillies and fry well.Add dry grated coconut and fry again.
  • At the end add garlic and shallots and fry for a minute and let the mixture cool down a bit.Add little water to it and grind to a smooth paste.
  • Heat remaining oil in a pan and fry onions until light golden in color.Add curry leaves and cooked bitter gourd pieces and fry on a slow flame until it is slightly crispy and brown in color.
  • Add ground paste,jaggery and salt and fry until the mixture dries up and coats the bitter gourd pieces properly.
Serve it hot with hot piping rice,dal,rasam and papad.

Monday, March 14, 2011

Subz Makhani / Mixed Vegetable Makhani and Jeera Rice

Mixed Vegetable Makhani / Subz Makhani:

Mixed vegetable recipes finds its place in my menu when my refrigerator is on clean up spree or when my refrigerator is loaded with all fresh vegetables.I always do have vegetables like carrots, potatoes, beans and capsicum in my refrigerator as I do no use the whole variety in one dish.So I end up having few quantities of vegetables which when combined together makes delicious mixed vegetables curries like M.V stir fry,M.V kurma,M.V saagu,M.V. makhani,M.V.Kadai, M.V.Pulao etc etc.With few modifications in the process of cooking one can make this curry really rich like how we get in restaurants or a regular version which is good enough for parties or a very low cal version to include it in menu very often.I have mentioned all the tips in my notes to make it a restaurant style version and a low cal version.Feel free to adapt the recipe according to your taste and requirement.This is a very lengthy post,so please bear with it.

Ingredients:
vegetables:
2 medium carrots,diced small
2 medium potatoes,diced small
15-18 french beans,chopped small
1 capsicum,seeds removed and diced small
1/4 cup cauliflower florets,small
1/2 cup fresh or frozen green peas
1/2 cup paneer cubes,diced small

for makhani gravy:
2 onions,sliced
3 tomatoes,blanched and skin removed
2 tsp Ginger-Garlic paste1 tbsp chopped coriander
2 tsp kashmiri red chili powder
1 tsp coriander powder
1 tsp cumin powder
1/2 tsp Garam masala
1 tsp kasuri methi
a pinch of turmeric powder
a pinch of sugar
1 bay leaf
1 laung
a small piece of cinnamon(1/4")
1/2 tsp jeera
2 tbsp oil
1 tbsp butter

for richness to the gravy:
1/4 cup cashewnuts
1/4 cup cream
(or)
1/2 cup milk
1 tbsp water melon seeds

Method:
  • Dice all the vegetables uniformly to get even sizes.Microwave the vegetables like carrots, potatoes, beans and peas for 3-4 mins until tender but firm and crunchy.
  • Make a cross on tomatoes and blanch them in hot water for 3-4 mins.Remove the skin and chop them roughly.
  • Blanch the cashew nuts in the same hot water for a couple of minutes and remove them.
  • Heat 2 tsp oil in a pan and fry ginger and garlic pieces until slight brown,add sliced onions and fry until it is brown in color.Add a pinch of sugar while frying onion,it speeds up the caramelize process of onion.Let this mixture cool a bit.
  • Heat 1 tsp of oil and toss in paneer cubes and capsicum cubes and saute for 2 mins until tender.
  • Grind the onion mixture and chopped tomatoes into a very fine paste adding water if required.
  • Grind the cashews also to a very fine paste using the same water in which it is soaked.
  • Heat 1 tbsp of oil in the same pan and add bay leaf,laung and cinnamon and crackle jeera and then add the pureed onion-tomato mixture into it and add coriander powder,jeera powder,turmeric,enough salt and let it come to a boil.
  • Add the finely ground cashew mixture and mix well,let it cook for a couple of minutes.Add more water to get the right consistency.(I have replaced this by adding watermelon seeds to the onion tomato mixture while grinding)
  • Now add the boiled vegetables,fried paneer and capsicum pieces,red chili powder,garam masala and kasuri methi(slightly roast it on pan and crush it with your hand before adding) to it and mix well.
  • Now reduce the flame or remove the pan from the stove and stir in fresh cream and let it come to a boil on low heat and turn off the flame.This process helps in avaoiding the curdling of cream or milk when added to gravy.( Here I did not add cream to the gravy,I added warm milk to it)
  • Add butter to it and garnish with coriander.Adding butter at the end will enhance the taste.(I even avoided this step to make it a low cal version)
Serve it hot with Roti's/Paratha's/Naan/Kulcha/Jeera chawal/pulao.

Notes for low cal version:
  • I added watermelon seed paste instead of cashew paste as the fat content in water melon seeds is lesser than the cashew nuts.More over the taste provided by water melon paste to the gravy is better than the cashew nut paste,it gives a particular dhaba style gravy.
  • You can avoid cream in the above recipe and add little milk instead or completely avoid it for low-fat version.
  • Avoid adding butter and reduce the amount of oil from 2tbsp oil to 2tsp oil for the complete cooking process.
Notes for Restaurant style Subz Makhani:
  • Deep fry the vegetables until they are light golden in color slightly crisp,do not let them become very crispy and change in color.
  • Be liberal in the usage of oil,butter and cream at the respective stages of cooking.

Jeera Rice-Ver 2:

I have already posted a version of it in my earlier post here.The only difference in between that version and this version is I even add caramelized onions and fried jeera and cashewnuts to the jeera rice at the end apart from the procedure what I mentioned below.That really gives a very nice twist to the regular jeera rice and is more flavorful and is apt for parties.Me and my husband can eat that version of jeera rice with some simple raitha as well.As my husband loves the other version very much I often end up making it more than this simple version.Today I am posting the traditional version of jeera rice.

Ingredients:
1 1/2 cups Basmati rice
4-5 laung
1" cinnamon,broken
2 bay leaves
1 1/2 tbsp jeera
1 tbsp butter or ghee
1 tsp oil
salt to taste

Method:
  • Wash and soak basmati rice for 10 mins,drain the water and keep it aside.
  • Heat butter and oil together in a pan and add bayleaves,laung and cinnamon and crackle them.
  • Add jeera and let them crackle and add drained basmati rice and stir for few minutes until it is dry.
  • Add 1 3/4 cups of water to it and add enough salt to it and let it cook.I generally transfer this to rice cooker and let it cook in rice cooker to get nice and fluffy rice.You can even pressure cook this for 2 whistles.
Serve it hot with any gravy/dal/rajma/raitha.

Notes for a much tastier Jeera rice apt for Parties:
  • Caramelize thinly sliced onions(about 2 onions) in 2 tbsp butter and 1tsp oil until deep golden brown color and crisp(add sugar while frying the onions which makes the process faster and easier) and remove it aside.
  • In the same pan fry cashews(12-15) and keep it aside.
  • In the same pan fry a tsp of jeera and add the fried jeera,cashewnuts and caramelized onions to the prepared jeera rice and give a nice stir.

Thursday, March 10, 2011

Pappu Biyyam / Pabbiyyam / Chana dal Rice

'Pappu' means dal in telugu and 'Biyyam' means rice,so if you combine both it literally means 'Dal Rice'.This is a typical dish prepared only in the Telangana region of Andhra.My parents used to stay in Khammam for several years before I was born,which comes under Telangana region and that is where my mom has learnt this from her neighbor.She used to do it occasionally and some how my brother has developed a special liking for it and he always used to ask her to make this rice and gradually it became a part of our menu at home.This is usually made either for breakfast or for lunch or dinner as it is a single pot meal.My mom used to give this rice for our lunch boxes as this does not require any side dish and is very easy to prepare provided you have soaked chana dal in hand.One more interesting thing about this rice is there are no whole spices in this rice other than the natural flavors,the sweetness of chana dal is enhanced with the special flavor of garlic.You need to use more garlic for this as that is the key ingredient in providing the flavor for the dish.If you are a garlic lover this rice is definitely a treat for you.this rice is really a saver when we run out of vegetables as this requires very basic ingredients which are always available in our pantry.I am posting the more authentic version of it,if you want to add mixed vegetables you can add but to taste the real pappu biyyam you need to make it with out adding them.Pickles like Andhra Avakay(mango pickle) or allam Avakay (Ginger flavored mango pickle)would be a awesome combination with this rice.
Ingredients:
1 cup regular Rice like sona masuri(I used jeeraga samba,you can even use basmati)
1/2 cup chana dal
2 big onions,sliced or roughly diced
14-15 garlic pods,keep the skin on
4-5 green chillies,slit
a sprig of curry leaves
juice of 1/2 lemon
a pinch of turmeric(optional)
1 tbsp chana dal,for tadka
2 tsp urad dal
1/2 tsp mustard seeds
2 tbsp oil or 1tbsp oil and 1 tbsp ghee
salt to taste

Method:
  • Soak rice and chana dal for half an hour.If you are using sona masuri or similar rice soak for half an hour,if you are using basmati or jeeraga samba soak it for 10-12 mins.If you are hurry and did not soak chana dal,boil chana dal in hot water until it is soft but still firm.
  • Separate the garlic pods from the whole garlic but do retain the thin layer of garlic pods.In that way it does not become mushy after it is cooked as this is the main ingredient which gives so much of flavor to rice.
  • In a pressure cooker or thick bottomed kadai heat oil/ghee and crackle the mustard seeds.
  • Add chana dal(for tadka) and urad dal and fry until brown.Add a sprig of washed curry leaves and add slitted ans sliced green chillies and fry well.
  • Add sliced/diced onions,turmeric and garlic pods and fry until the onions turn translucent.
  • Add soaked and drained chana dal and fry for a couple of minutes.
  • Add 2 cups of water if you are using sona masuri,otherwise use 1 and 3/4 th cups of water if using basmati or jeeraga samba and let it come to a boil.
  • Once the water starts boiling add soaked and drained rice and salt and lemon juice and stir well and close the lid and pressure cook for 1 whistle and simmer the flame for 6-8 mins.If you are using thick bottomed kadai,close the lid and let it cook until the water is evaporated.
Serve it hot with raitha,papad and pickle.I served it with tomato raitha,allam avakay and papad.

Note:
  • For a Vegan version use only oil in the recipe.

Monday, March 7, 2011

Methi Poori and Potato Masala...a Classic Combo!!

Poori is really a big fare at home as I make it very rare might be once in 3-4 months.So,when I make it we enjoy it to the fullest extent with out bothering about those extra calories.Poori is again a very versatile Indian bread which is paired with various curries all over the country.In Andhra,Poori is served with this famous potato masala or potato palya which is a dry version and where as in Karnataka,poori is served with vegetable saagu(which I have blogged before)and in most of the other regions it is served with chole,potato curry or kurma or tomato or aloo rasa.I personally like poori with any of the curries I mentioned above but this combination is really special at home for two reasons.During my college days my hostel friends used to get this combination atleast once a week for their lunch boxes and this is the only item which used to tempt me to exchange the home made food to the hostel food and the other reason is this is my hubby's favorite combo as his taste buds are pampered with this combo from childhood.This combination would really a great treat for kids as well as the potato masala is made with less spices but very flavorful which suits the taste buds of all kind of people and especially kids.

Generally pooris are made with wheat flour,but I like my pooris soft and chewy at the same time and should be good for lunch box.So I generally add few handfuls of maida along with wheat flour which not
only gives a wonderful bright color to poori instead of brown but also makes poori soft and chewy.I generally do various versions of poori like simple regular poori,methi poori,spinach poori,tomato poori,beetroot or carrot poori,haldi ajwain waali poori,masala poori and some stuffed versions of poori which are equally delicious.

Methi Poori:

Ingredients:
1 cup whole wheat flour
1+1/2 handful all purpose flour
1 cup methi leaves
1/2 tsp ajwain
1 tbsp curds
1/4 cup milk
1 tbsp oil
salt to taste
oil for deep frying
Method:
  • Carefully remove the methi leaves from the stems,take care not to retain any of the stems,otherwise poori might not fluff up.Wash the leaves and finely chop them and mix in salt and turmeric powder and leave it aside for 5 mins.Squeeze out the extra water from it.
  • Sieve wheat flour and all purpose flour and mix well.
  • Add chopped methi leaves,curds,ajwain,salt and oil to it and mix well.Pour milk and water in middle and mix the dough using three fingers(or prepare normally) and knead well until you get a smooth stiff and pliable dough.The dough should be little stiffer than roti dough.Grease oil all over the dough and leave it aside for half an hour.
  • When you are ready to make pooris,heat the oil in a thick bottomed frying pan over low flame.
  • Make small rounds out of it and flatten it into small poori's applying oil or flour.Roll it carefully taking care to avoid the folds forming while making pooris.
  • Deep fry in medium hot oil until it puff's up.Try to slightly press the pooris with handle after it is dropped in the oil which helps in puffing up completely.
Serve hot with potato masala or curry of your choice.

Potato Masala:
Ingredients:
3 big potatoes
1 big onion,roughly sliced
4-5 green chillies,slit and chopped
a sprig of curry leaves
1 tbsp chopped coriander
1 tbsp besan/chickpeas flour
1/4 tsp turmeric powder
1 tbsp chana dal
1 tsp urad dal
1/2 tsp mustard seeds
a pinch of hing
juice of half lemon
2 tsp oil
salt to taste
Method:
  • Pressure cook potatoes for 3 whistles until soft.Peel the skin and mash it roughly with fork or hands,do not mash it completely it should be chunky.
  • Heat oil in a pan and crackle mustard seeds.Add chana dal and urad dal and fry until the dals turn slight brown.
  • Add curry leaves,green chillies and hing and fry well.
  • Add the chopped onions and fry until the onions are translucent and add slightly mashed potatoes and stir well.
  • Mean while in a small bowl mix besan with one cup of water and whisk well to get a uniform mixture with out any lumps.
  • Add turmeric powder and enough salt to it and mix well.
  • Add the besan mixture and cover it and cook for 4-5 mins over low flame until the rawness from besan mixture disappears.
  • Add more water if you want your gravy bit thin,add water and boil according to the desired consistency.
  • Add lemon juice and chopped coriander and give a nice stir and remove it from stove immediately.
Serve it hot with poori/chapathy.

Note:
  1. For variation you can add fresh or frozen green peas to the curry.
  2. You can add tomato along with onions which makes the curry taste bit different.
  3. You can avoid lemon juice in the above curry.

A Happy NOTE:


EC of Simple Indian Food has featured me in her famous series-Sunday Super Blogger for this week,I personally thank EC for giving me this wonderful opportunity and I am really excited as I got featured in her series.If you guys like me and want to know more about me please feel free to check EC's space or this link.

Thursday, March 3, 2011

Arugula Salad

Arugula belongs to mustard greens family and is very pungent when compared to normal lettuce.So I have paired it with strawberries,cape gooseberries which are perfectly complemented with each other.All the flavors like the pungency from arugula is well balanced with the sweetness and tartness of strawberries,gooseberries and balsamic-honey vinaigrette.A liberal dose of EVOO and dijon mustard have added their own flavors to the salad.

Ingredients:
2 cups Arugula leaves(roquette lettuce)
6-8 strawberries,sliced
10-12 cape gooseberries,halved
1/2 zucchini,quartered and thinly sliced
1 medium cucumber,peeled,quartered and thinly sliced
a handful of black olives,chopped
1/4 cup of toasted walnuts

for dressing:
1/4 cup extra virgin olive oil(EVOO)
1 tsp balsamic vinegar
1/4 tsp lemon juice
1 tsp dijon mustard
1 garlic pod,grated
2 tsp honey
3/4 tsp coarsely ground pepper
salt to taste

Method:
  • Clean the greens,vegetables and fruits and chop them as mentioned or according to your choice.No need to chop the arugula leaves,just trim them,wash and drain them to remove the extra water.
  • Arrange the leaves in a wide serving plate and drop in the rest of the sliced vegetables,fruits,nuts and nuts.
  • In a small bowl,mix all the ingredients required for dressing and whisk in until everything blends well.Chill the dressing until its usage atleast for half an hour.
  • During serving pour the dressing over the bed of salad or mix in the dressing with the salad and serve.It tastes best when eaten fresh.
Serve it with bread,soup or pasta or as a meal itself.

Note:
You can use colored bell peppers or cherry tomatoes in the salad.
 
back to top