Saturday, March 30, 2013

Rasam Powder Recipe | Andhra Style Rasam Powder

I have posted  Andhra style Sambar Powder recipe recently and today I am posting Andhra style Rasam powder recipe which I got from my MIL.The addition of liberal quantity of cumin seeds, pepper corns and coriander seeds makes the rasam flavorful and spicy.A small quantity of toor dal is added to the powder which helps in thickening the rasam.It is a very simple and basic recipe which might help many who are new to kitchen.
Andhra Style Rasam Powder Recipe:
(stores upto a month)

Ingredients:
1 1/2 cups Coriander seeds
1/3 cup Toor dal(split Pigeon peas)
2 tbsp Cumin seeds
3 tbsp black Peppercorns

Method:
  • In a thick kadai dry roast coriander seeds until they turn slight brown in color and keep them aside.
  • In the same kadai dry roast toor dal until red in color and keep them aside.
  • Add cumin seeds and peppercorns and fry them separately and keep them aside.
  • Once they cool down grind them to a fine powder.
  • Store it in an air tight container.
Add a couple of tsps of rasam powder while making rasam.

Notes:
  • You can dry roast and add 10-12 red chillies while making the rasam powder.
You can use this Rasam powder in the following rasams:
 

Friday, March 29, 2013

Beetroot Spicy Curry | Beetroot Stir fry Recipe

Beetroot Soicy Curry
Simple stir fries and curries are a part of our daily meal.They are not only quick to make but also makes a healthy side dish for rice and rotis.I am posting a spicy version of Beetroot stir fry which I absolutely love and the recipe is so versatile and can be adapted for many vegetables,do check the notes for more variations of this recipe.If you are bored of usual simple stir fries you should try this spicy version of stir fry which is really delicious.You can check out another version of simple Beetroot stir fry here.
Beetroot Soicy Curry

Beetroot Spicy Curry Recipe:
(Serves 2)

Ingredients:
2 medium Beetroots
1 tbsp roasted(fried) Gram powder(chutney dalia)
2 Red chillies,broken
a sprig of Curry leaves
2 tsp Chana dal
1 tsp Urad dal
1/2 tsp Mustard seeds
1-2 tbsp Oil
Salt to taste

Method:
  • Wash,peel and cut the beetroot into tiny cubes or small pieces or cut into thin lengthy pieces.
  • Heat oil in a thick bottomed kadai/pan and crackle mustard seeds.
  • Add Chana dal and urad dal and fry until they turn in red color.
  • Add broken red chillies and curry leaves and fry them until they turn crisp.
  • Now add chopped beetroot pieces and fry or 2 mins.
  • Add 2-3 tbsp of water and cover it and cook for 7-8 mins until the beetroot is soft and cooked.If it is not cooked cook for another few mins,add few tbsp of water if required
  • Remove the lid and increase the flame and cook until the moisture is evaporated.
  • Add salt,vangibath powder and mix well and cook for another 2 mins on low flame.
  • Now add roasted gram powder to it and give a nice stir and remove it from flame immediately.
Serve it hot with Rice/Roti/Chapati.

Notes:
  1. You can follow the same process for vegetables like Carrots, Broadbeans(chikkudukaya), French beans, Long beans, Cluster beans, Potatoes etc.You need to adjust the cooking time accordingly.
  2. If you do not have Vangibath powder,you can add normal chili powder along with roasted gram powder in the recipe.
  3. Beetroot pieces can be steamed ahead and add to the tempering and add the powders at the end.
  4. You can add 1 tbsp of dry coconut powder at the end,as my vangibath powder has that I did not add it extra.But even if you add extra it adds a nice taste to the curry.
Beetroot Soicy Curry

You can check out another version of Simple Beetroot stir fry recipe here.

Wednesday, March 27, 2013

Mixed Vegetable Pickle | Mixed Vegetable Achar - spicy version

mixed vegetable pickle

Before I get to the post ,I wish all my readers and friends a very HAPPY HOLI !!

I have posted Mixed Vegetable Achar recipe some time back but that was not a spicy version so today, I am posting a spicy version of Mixed Vegetable. The preparation is similar to Mixed Veg Achar which I posted earlier -just a few minor tweaks though.
mixed vegetable pickle
Personally, I prefer the non spicy version due to its appetizing green color and because it goes very well with Parathas.However, when my MIL makes the non spicy Mixed Vegetable Pickle she also prepares a small portion of Spicy version along with it.The recipe for both is similar but the addition of red chili powder plays a key role in changing the taste of the pickle.My MIL says that the addition of Saunf(fennel seed) powder to the spicy version of Mixed Veg pickle is optional but I do recommend to add that, as it gives a nice flavor to the pickle.
mixed vegetable achar

Spicy Mixed Vegetable Pickle Recipe:
shelf life: upto 1 year

Ingredients:

2 tbsp Nigella Seeds(Kalonji)
3 tbsp Vinegar
1/2 liter Mustard Oil

Vegetables (8 cups of  cut vegetables):
2-3 Carrots,peeled and cut into 1" thin long pieces
1 small Cauliflower,separate and cut into small florets
2 Radish,peeled and cut into 1" thin long pieces
1 Raw mango,cut into 1" thin long pieces
15-20 French Beans,remove the strings and cut into 1" thin long pieces
5-6 Lemons,cut into 8 pieces length wise
8-10 Gooseberry,cut into 6-8 pieces length wise(remove the seeds)
100 gms light colored Green chillies,cut into 2 pieces
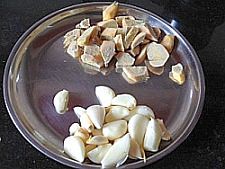
1 whole Garlic pods,separate into pods and remove the skin
100 gms Ginger or Mango Ginger,peeled and cut into 1" thin strips

Powders:
2 cups Red chili powder
2 cups Mustard powder
1 3/4 cups Salt
1 tbsp Fenugreek powder
50 gms Amchur(Dried mango) powder
50 gms Fennel seeds(Saunf) powder,ground to a very coarse powder
2 tbsp Turmeric powder

Method:

Cleaning,Cutting and drying the Vegetables:
  • Wash and wipe all the vegetables with a dry cloth.Cut various vegetables as per the instructions I mentioned above.Take care that you cut all the vegetables into a similar length and sized pieces.
  • Spread them over a dry cloth in sun and let them dry completely.You should take care that the vegetables are dry with out any moisture content in it.If you have really good sun it should take half day otherwise you can keep it in shade up to a day.
for making pickle:
  • Keep ready the sterilized and sun dried jars ready before you start pickling.
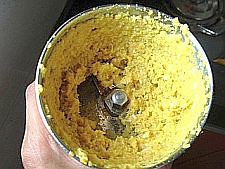
  • Grind fenugreek seeds to a fine powder.
  • Grind saunf in whipper mode until coarse powder.Do not run it for long time just run it for 2-3 times until you get coarse powder.
  • Now take a big bowl and mix the saunf and fenugreek powder,red chili powder,mustard powder,salt,kalonji seeds,mustard tukda and turmeric powder until everything is mixed well.
  • Now take another wide small bowl and take 1 cup of mixed powders and add sufficient mustard oil until the mixture is wet completely and mix with hands.
  • Take 2 cups of vegetable pieces at a time and apply the mixture all over the mixed vegetable pieces with your hands.Using your hands for this step is better than mixing it up with ladle.
  • Put the masala coated vegetable pieces in a big bowl and repeat the process of coating the vegetable pieces in small portions and put them in a big bowl.
  • Once all the vegetable pieces are mixed,add vinegar and remaining pickle masala and mix well again.
  • Carefully fill the sterilized jars with the vegetable pieces and pour the remaining oil over it.
  • Cover the jar with lid and keep it aside for 3 days.
  • On day-1 check it some oil might have started floating over the pickle.Do not panic if the oil does not float on day-1,if not on day-1 you will see oil floating on day-2.
  • Mix with a clean and dry ladle all over and repeat the same process on day-3.
  • Now taste the masala mixture in the pickle,it should be perfect and slightly salty as the pickle has to be yet marinated for atleast one week before its usage.But if you feel the salt is less add a tsp or 2tsps of salt to it and mix well.I don't think it would be necessary if you follow the measurements accurate.
  • On the day-3 if you see the oil is floating on the pickle up to an 1/2" height then it is perfect.Otherwise add extra mustard oil over the top until the oil floats on top.
  • Store it in air-tight tupper ware container or glass bottles.This way your pickle stores for long with freshness in it and even the vegetable pieces do not get soft.
Serve it with piping hot Parathas/Theplas or it can be served with Rotis/Naans/Kulchas/Pulavs. 

Other Vegetable Options:
  • Shalgum(Turnip) and Lotus Stem(Kamal Kakdi/Bhein) can also be added to the pickle according to the availability of them.
Notes:
  • Always transfer a small portion of pickle into a small jar and use a clean and dry spoon.
  • Increase the amount of mustard oil as required in the recipe.The basic thumb rule is to make the oil float over the pickle after 3 days.So feel free to add extra mustard oil.
  • Do not replace or remove any of the ingredients in the recipe,all the ingredients are must to get a tasty Vegetable achaar in North Indian style.
  • This pickle stays good for an year.It might turn slightly sour after 5-6 months but it is good to eat with hot hot parathas and curd.
  • You can easily halve the recipe,the basic rule is to use 4 cups of vegetable pieces with 1 cup(slightly less than 1 cup) of salt,1 cup red chili powder and 1 cup mustard powder.  
mixed vegetable achar

Summers are here and Mangoes are in season ,do not miss out to check various authentic Andhra Mango pickles and also the famous Punjabi Aam ka Achar recipe here.

Monday, March 25, 2013

Baby Corn Pakora | Babycorn Recipes

Babycorn Pakora
Last week, I purchased a large quantity of my my favourite veggie, "babycorn" and used them in two dishes which I prepared, Babycorn Bell peppers Stir fry and Babycorn Capcium Gravy . I though saved a few, for making my favorite babycorn fritters (not the usual besan based pakoras) over the weekend.
Babycorn Pakora
 I dream about food at times and in one of those dreams , I had a mental note that I would have my sunday evening tea with those babycorn fritters.When I started blanching the babycorns and started preparing the batter, I realized that I have run out of maida (all purpose flour) which is essential for preparing these yummy fritters. I had to hence change my plans and converted them into these beautiful pakoras.These Pakoras look deceptive and look very much like our Mirch Bajjis becauss of their shape.Though I could not make what I wanted, we enjoyed these golden crisps with our cup of tea.I though plan to post those delicious Babycorn Fritters next time I prepare it.
 Babycorn Pakora
Also check out other Babycorn recipes in my blog.
Babycorn Pakora

Babycorn Pakora Recipe:
(Serves 2-3)

Ingredients:
12-15 tender Baby corns
Oil,to deep fry

for Batter:
1 cup Besan/Chickpea flour
1/4 cup Rice flour
1 tsp Red chilli powder
a pinch of Turmeric powder
1 tsp Ginger-Garlic paste
1/4 tsp Garam masala (optional)
a pinch of Asafoetida or 1/2 tsp Carom seeds
1/4 tsp Baking soda
2 tsp hot Oil
Salt to taste

Method:
  • Cut baby corns into 2 pieces lengthwise and par boil them in hot water with salt for 1-2 minutes.Do not boil for long.You can even add a pinch of turmeric powder while boiling them.Drain them and keep them aside.
babycorns
  • Mix all the items(mentioned under 'for Batter') well and make it into a smooth paste by adding enough water.Add the water slowly and use a wire whisk and whisk to the consistency of thick idly batter consistency and make sure you don't add too much water at once.The more you beat the mixture the better and fluffy the pakoras would be.You should ideally beat the batter for 3-4 mins.
pakora batter
  • Mean while heat oil for deep frying.
  • Hold the tips of baby corns and dip each of them in batter and individually and drop them slowly into hot oil and deep fry them till it becomes golden brown in color on medium flame.
pakoras
  • Drain them on to a kitchen towel to remove excess oil.
Serve them hot with Imli Chutney/Green Chutney/Tomato Sauce.
babycorn Pakora
Notes:
  1. You can use the same process for making pakoras like Cauliflower,Broccoli and Poblano peppers(remove the seeds) by blanching them in hot water initially and follow the same process.
  2. You can use the same batter as base for all pakora varieties like Potato(cut into thin slices),Brinjal(cut into thin slices),Onion(thin round slices as well as lengthwise) and Capsicum rings.
  3. The addition of garam masala is completely optional,as babycorn is a bland vegetable I added it to spice up the batter.
  4. The addition of rice flour makes the pakoras crisp.
  5. I like to add hot oil to the batter mixture as it will make the pakoras crisp and also makes them consume less oil.Make sure you beat the batter which will makes the pakoras more fluffy.
babycorn Pakora

You can try this for HOLI Snack,also check out other HOLI recipes here . If you have not decided your menu for Holi,go through my list and I hope it will help you in fixing your menu. I also recommend you try the famous Delhi style Matar Kachori and Alu ki Sabzi and pair it with Shahi Tukra which is ideal for HOLI breakfast/brunch and make it more special.

I could not stop myself from posting another pic for you all....
babycorn pakora

Saturday, March 23, 2013

HOLI RECIPES | HOLI SPECIALS


HOLI - the festival of Colors is nearing and it falls on March 27th next week.It is a major festival celebrated in all parts of India with lots of enthusiasm. During Holi people play with colors and color sprinklers and is usually followed with music,dance and the most important -lavish food.I am sharing you a list of recipes in my blog which might be helpful in case if you are planning to have a party or you want to make something special for the festival.

 (pic source:google)

HOLI Special - SWEETS | KHEER | HALWA
HOLI Special - SNACKS | APPETIZERS | CHAATS
 MAINCOURSE

Flat Breads | Poori:
Pulao | Biriyani:
Side dish - Dry curries:
Side dish - Gravies:
Side dish - Dals | Lentils:
BEVERAGES

Friday, March 22, 2013

Banana Milkshake | Easy Milkshake Recipes

Summers have already begun in Mumbai and its scorching hot in the afternoon.I usually prefer to stay indoors in Summers and also love to go for my walks in the evening rather than mornings.
We usually prefer to eat whole fruits rather than having them in the form of juice to retain the fiber of the fruit.But in summers, as we tend to drink something cold I usually make milkshakes or juices from various fruits. Though my ideal choice of fruit for milkshake would be either 'Mango' or 'Chikoo', I do like other fruit milkshakes and of course all the new concoctions with nutella, jam, peanut butter etc.
 Check out various milkshake/smoothie recipes which I have blogged earlier.
Banana is a very versatile fruit and is available in all seasons and my favorite variety among bananas is 'Yelakki Banana'. I like to use bananas in custard, milkshakes, fruit salad or eat just as it is.
Check out another interesting preparation with Banana - Balehannu Rasayana which is ideal to use ripen bananas sitting in your kitchen counter.

Banana Milkshake Recipe:
(Serves 2)

Ingredients:
1 big ripen Banana(any variety should do)
3-4 tbsp Sugar
2 cups cold Milk 
2 scoops of Vanilla ice cream (optional)
few drops of Vanilla essence (optional)

Method:
  • Remove the skin and cut the banana into pieces.
  • In a mixer/blender add banana pieces, sugar, vanilla essence and 1/2 cup of milk and blend into a smooth puree.Check the sweetness and if needed add extra sugar.
  • Add remaining 1 1/2 cups of milk and vanilla ice cream and run again to the desired consistency.Add more milk if you need a thin milkshake and also adjust the sugar accordingly.
Serve the chilled Banana milk shake immediately.
Notes:
  1. Sugar should be adjusted according to the sweetness of banana and also to your desired sweetness.Sugar can be replaced with honey too.
  2. Banana milkshake changes its color quickly and hence in order to avoid that you can add few drops of lemon juice to milkshake to avoid discoloration.You should not add more just 2-3 drops should be fine.If you are serving it immediately you do not need to add it.
  3. Milk also is to be adjusted according to your desired thickness.
  4. Addition of ice cream is entirely optional,it adds a nice creamy touch to milkshake.
  5. Vanilla essence enhances the flavor of banana milkshake,it is optional if you do not like any other flavor in the milkshake.
  6. Banana pairs up with many fruits,you can even use mix of fruits like Avocado-Banana, Strawberry-Banana, Apple-Banana etc to prepare milkshake.
  7. You can even add a tbsp of nutella to make it nutella banana milkshake or even a tbsp of grated dark chocolate to make Choco banana milkshake.The options are endless.

Wednesday, March 20, 2013

Matar Kachori(Green Peas Kachori) and Alu Sabzi - Delhi style

I have mentioned in many of my posts that fried foods appear very rarely at home and when I make it we relish them to the fullest extent.TH has a profound love for Medu wada and Chole Batura,especially the way his mom prepares.Ohhh!! Did I tell anytime about my MIL's Chole Batura?? Hubby loves his mom's Chole batura very much and he always keep it as a benchmark when I prepare it;of course I do follow the same recipe and also learnt from her to please him.I have been planning to post my MIL's chole batura recipe from ages but somehow it never happened as we cannot control ourselves on the day we make it at home.I think I should be posting this recipe soon- stay tuned.
Coming back to today's post...during the green peas season we shelled several kilos of fresh green peas and I used them in various dishes. I  could not control myself to prepare this stuffed Matar Kachori which is a typical Delhi preparation.
This Matar Kachori is a cross in between regular khasta kachori and stuffed poori and is usually served as breakfast or evening tiffin.It tastes best when served with Aloo sabzi which is a thin alu gravy spiced up in masalas. Do definitely give this recipe a try if you love variety food and especially the typical Delhi style street food.However this needs a bit of preparation but its worth the effort.

You can check out other varieties using fresh Green Peas here:

Matar Kachori Recipe:
(makes 12-14 kachoris)
source:Nita Mehta

Ingredients:
for dough:
2 cups All purpose flour(Maida)
a pinch of Baking powder
1/2 tsp Salt
2 tbsp Ghee
1/2 cup water to knead,approx
Oil,to deep fry

for filling:
2 cups fresh/frozen Grren Peas
2 tbsp Chickpea flour(Besan)
1 tsp Coriander powder
1/4 tsp grated Ginger
2 Green chillies,finely chopped
1/4 tsp Red chili powder
3/4 tsp Chaat masala
3/4 tsp Amchur powder
1/2 tsp Garam masala
1/4 tsp Cumin seeds
2 pinches Asafoetida(Hing)
1 tsp Salt,approx
1 tbsp Ghee

Method:
to prepare dough:
  • Sift flour with baking powder and salt through a sieve.
  • Add ghee and mxi well till it appears like bread crumbs.Knead well with water to a soft and pliable dough.Keep it aside for half an hour.
to prepare filling:
  • Bring 4-5 cups of water with 1 tsp salt and 1 tsp sugar.Add peas to the boiling water and boil for 4-5 mins.Let the peas sit in hot water for another 10-15 minutes.Strain and keep aside.Mash the peas lightly with a back of a big spoon or a masher.
  • Heat ghee in a kadai,add asafoetida and cumin seeds.
  • Reduce the heat and add grated ginger,coriander powder and turmeric powder and fry for a minute.
  • Add the chopped green chilli and fry again for a minute.
  • Add slightly mashed peas to it and mix well.Fry for 7-8 mins on low heat until it turns slightly brown.
  • Add the salt,red chili powder,chaat masala,amchoor powder,garam masala and besan and fry for another 2 mins.Remove it and let the mixture cool.
to make Matar Kachori:
  • Heat oil in a kadai for deep frying the kachoris.
  • Pinch a lemon sized ball out of the dough and flatten it to small poori.
  • Fill  2-3 tbsp peas mixture and cover it to form a ball and flatten it slightly .Do not roll it much or do not keep it very thick.
 
  • Gently drop 2-3 pieces at a time into the hot oil in kadai(depends on the size of kadai and quantity of oil you are using) and fry them until they turn brown.When you put the kachoris in oil you should keep the flame in HIGH and reduce it later and fry them on LOW flame until they turn brown.Flip it in between.
Serve it with Aloo Sabzi(recipe below),sliced Onions and North Indian Aam ka Achar or Mixed Veg Pickle.
Notes:
  • The original recipe asked for 1/2 tsp baking powder and also mentioned to use warm water for kneading.As I wanted my kachoris to be neither too hard like a regular kachori nor too soft like a stuffed poori,hence I had done few changes like adding less baking powder and also used regular water in the recipe.It is your wish to adapt the recipe how you want.

Alu Sabzi | Thin Potato Gravy Recipe:
(Serves 3-4)

Ingredients:
3-4 large Potatoes
1 tsp Coriander powder
3/4 tsp Red chili powder
1 tbsp Aam ke Achar ka masala
1 green chilli,finely chopped
2 tbsp chopped Coriander leaves
1 tsp grated Ginger
1/2 tsp Turmeric powder
1/4 tsp Fenugreek seeds(Methi)
1 tsp Fennel seeds(Saunf)
3/4 tsp Cumin seeds
a fat pinch of Asafoetida
1 1/2 tsp Salt,approx
3 tbsp Ghee/Oil

Method:
  • Pressure cook potatoes for 3 whistles and peel the skin and cut each potato into 8-10 chunks and mash pieces roughly.
  • Heat ghee in a kadai and keep the flame on LOW and add asafoetida, cumin seeds, fennel seeds and fenugreek seeds.
  • When the fenugreek seeds starts turning brown add turmeric powder,coriander powder and red chili powder and fry for 1 minute on low heat.
  • Add aam ke achar ka masala and fry again for a minute.
  • Add cooked potatoes and chopped green chilli,coriander and grated ginger.Stir fry on medium heat for 3-4 mins.
  • Add 2- 21/2 cups of water and bring to a boil.Reduce heat and cook for another 10 mins.This gravy would be slightly watery than the regular gravies,so adjust the consistency accordingly.
Serve it hot with Matar Kachori /Poori.

Try this Matar Kachori with the aloo sabzi for this weekend brunch or breakfast.i would say it is the perfect way to start the weekend.One more look of this delicious Matar kachori with alu sabzi and mirch ka achar..I am hungry again seeing this pic!!

Monday, March 18, 2013

Special Candied Amla | Dry Amla Candy | Post meal Digestives

Amlas(Indian Gooseberries) are considered very good for health and as they are rich in vitamin-C, it is suggested to include them in one's daily diet.As these are available only in a particular season, we usually make various varieties with it and preserve it for the rest of the year.We make niluva pacchadi,pickle,dried amla gratings-salted version and candied amla varieties with it.
These candied amlas are quite addictive and they can be eaten as a post meal digestive or when ever you want to eat something which is tongue tickling.This is a special recipe which my MIL prepares using rock candy(not the sugar) and hence it is suggested even for diabetic people.I must warn you that these candied amla berries are extremely addictive,we have already finished a huge batch of them and are planning to prepare the next one!

Special Candied Amla Recipe:
stores upto 5-6 months 

Ingredients:
1 kg Amla/Gooseberries
200 gms Kalakanda(Patika bellam)/Rock Candy/Mishri
1 tbsp Cumin powder
2 tbsp Ginger juice
2 tbsp Lemon juice

Method:
  • Clean and wipe the gooseberries and place them in a bowl.
  • In a cooker fill water in the bottom and place a rack to get some height in it and place this vessel with gooseberries and pressure cook for 2 whistles.You should not pour water in the container which is filled with gooseberries.
  • Once they are cooled down,cut them into pieces and discard the seeds.
  • Crush the rock candy(patika bellam/mishri) into a powder and take it into a bowl.
  • Grate approx 2 " ginger and press it in your hands to extract juice.
  • Add cumin powder,ginger juice to the powdered rock candy and mix well.
  • Add the chopped gooseberry pieces to it and mix well.
  • Transfer this to a kadai and keep it on low-medium flame and mix it occasionally.
  • You can stir it in between carefully,try not to crush them while mixing it.
  • Cook it for 12-15 mins until the mixture becomes sticky and sticks to the gooseberries.
  • Remove it from stove and add lemon juice and mix well.
  • Dry them on a clean plastic sheet in sun for 2-3 days until they are dried completely.
  • Store it in an air tight container.It stays good for several months.
Eat them after a meal and also during journeys or just like that.
Notes:
  • Do not get confused with rock candy which is patika bellam and patika(which looks similar to patika bellam but it is totally different).
  • Patika bellam is called Kalakanda in telugu,mishri in hindi,rock candy in english,kallu sakkare in kannada.

Saturday, March 16, 2013

Homemade Ginger Garlic Paste | How to make Ginger-Garlic Paste

Today I am back again to highlighting the must have basic items in Kitchen. This post is about the preparation of - 'Ginger-Garlic Paste,' an essential item to have handy while cooking. As I use ginger-garlic paste in most of my curries, pulaos etc, I always store a jar of  it, in my refrigerator.Though we get readily available Ginger garlic paste in the market, I never buy it, as the smell of preservatives used in it puts me off and in any case, nothing beats home made freshly prepared Ginger Garlic paste.I usually make small quantities, which lasts for 2 weeks.
Ginger Garlic paste:
shelf life:3-4 weeks when refrigerated

Ingredients:
200 gms Ginger
200 gms Garlic
2 tsp Salt approx
1/4 tsp Turmeric Powder
1 tsp Oil

Method:
  • Wash and peel the skin of ginger and wipe it with a clean cloth and cut it into small pieces and spread them on a kitchen towel for half an hour.
  • Peel the skins off the garlic pods and keep them ready.
  • In a mixer grind ginger and garlic with salt,oil and turmeric powder to a coarse paste in a whipper mode.
  • Grind it in intervals rather than grinding them in a single pulse.Do not add water while grinding which will reduce the shelf life of the paste.If you want smooth paste you can grind it for long.
Store the mixture in a clean jar in refrigerator.It can be stored for 3-4 weeks and use it when required.

Notes:
  1. Always use a clean spoon to scoop out the required amount of ginger-garlic paste.
  2. You can skip turmeric powder but it preserves the color of ginger garlic paste for long.
  3. In order to peel the garlic pods I always cut the tip of garlic pod or smash it on a hard surface and peel it off,it peels off easily.
 
back to top