Showing posts with label Snacks. Show all posts

Monday, October 9, 2017

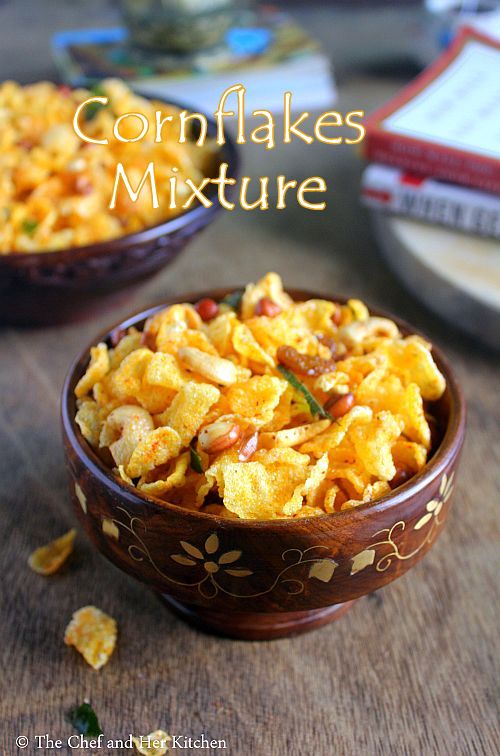
Cornflakes Mixture Recipe | Cornflakes Chivda | Easy Diwali Snacks

cornflakes mixture
Cornflakes mixture recipe with step by step photos.Diwali is just around the corner and many would have started the preparation process and cleaning the house for the festival.We have a tradition to give sweets or dry fruits along with diyas/gifts to friends and family.Every year I try to make few sweets and savories as I like to share the homemade sweets and snacks rather than the store bought and there are few exceptions at time when I am pressed for time I buy the ready stuff to share with friends.
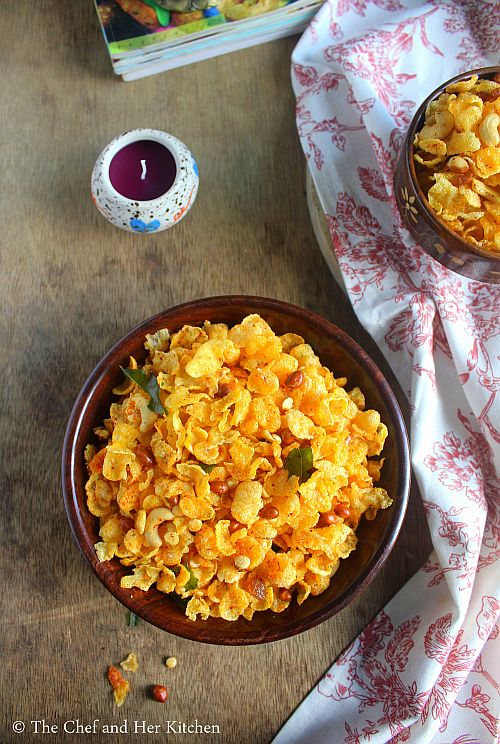
cornflakes mixture
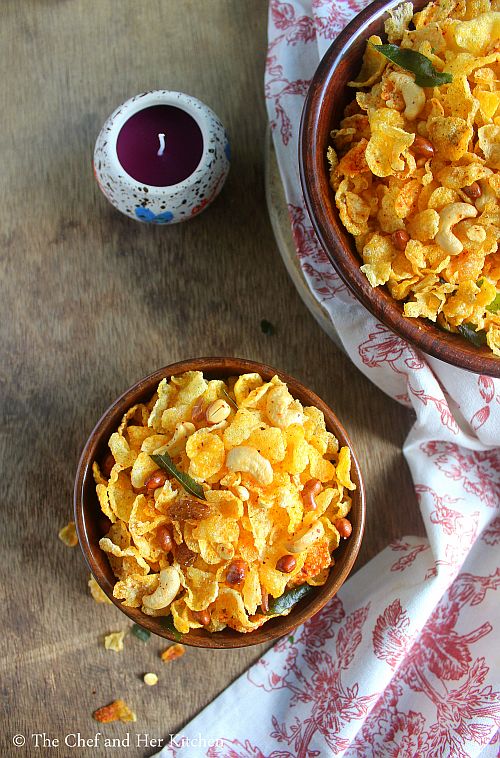
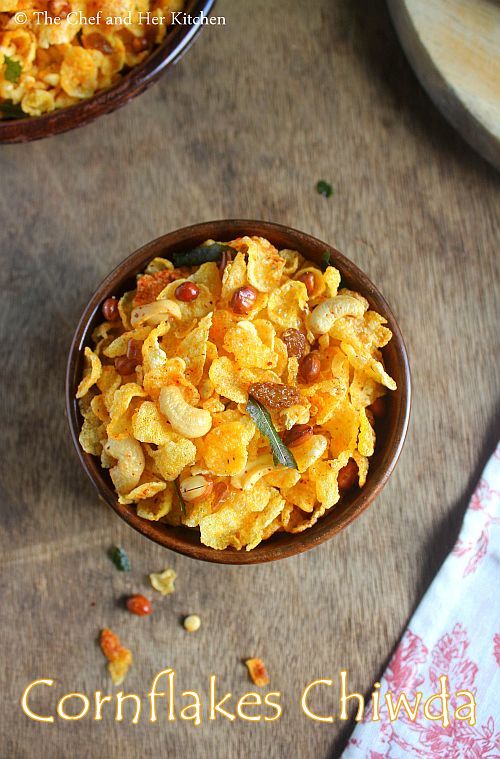
Cornflakes mixture is very light and crunchy snack to eat along with a cup of tea.It is a very simple mixture recipe which can be prepared with minimal ingredients available in the pantry.It is a very simple recipe compared to other mixtures or savories as we just need to deep fry all the ingredients separately and mix it with minimal spices at the end.I am posting a simple cornflakes chiwda recipe but one can add various ingredients like poha or sev to make it a bit heavy kind of mixture.Cornflakes consume less oil compared to other mixtures or sev varieties but make sure you use the fresh stock of raw cornflakes(not the cereal variety).
cornflakes mixture
Check out other Diwali savouries in my blog here:
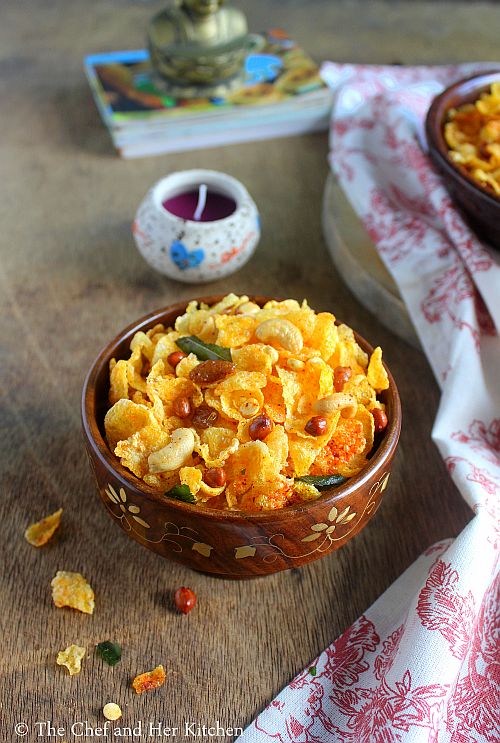
cornflakes chiwda
Here is how to make cornflakes mixture recipe with step by step photos.
Cornflakes Mixture | Cornflakes Chiwda Recipe:

Yields 1 medium box
Prep time:5 mins | Cooking time: 20 mins | Total time: 30 mins
Cuisine: Indian | Category: Snacks

Ingredients:
2 cups raw Cornflakes
1/3 cup raw Peanuts
1/4 cup Cashew nuts,halved
1/4 cup Fried gram
1/4 cup Raisins
1/4 cup Curry leaves,washed and pat dried
1.5 tsp Red chili powder
3/4 tsp roasted Cumin powder
1/8 tsp Citric acid/Lemon salt
Salt,to taste or Kala namak(black salt)
Oil,to deep fry

Method:


  • Keep all the ingredients ready and heat oil in a thick kadai.
  • Once the oil is hot add peanuts and deep fry them until they turn slight red in color and remove them with a slotted spoon and put it in a steel bowl or steel strainer.
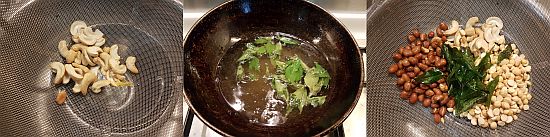
  • Repeat the process and fry all the ingredients like cashew nuts,fried gram,curry leaves and corn flakes separately.Every ingredient takes different time to get fried,so make sure you fry each ingredient separately and cornflakes need to be fried in several batches.
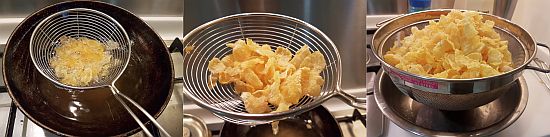
  • Finally add raisins and fry until they are plumped up and drain them immediately,do not fry them for long as they will harden or burn.
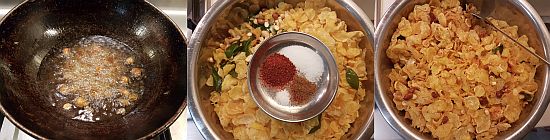
  • Once all the ingredients are fried put them in a large bowl and add salt,red chili powder, roasted cumin powder and citric acid and mix quickly while the fried ingredients are still hot/warm so that they get blended and coated well with the masalas.
Once it is cooled down store it in an air tight container.

Notes:
  1. This stays good for 2-3 weeks when stored properly in an air tight container.
  2. You can add the ingredients more or less according to your wish.
  3. You can even add sliced or whole fried almonds or fried poha or sev or bhujia or kara sev to the cornflakes mixture.
  4. You can even add little powdered sugar while mixing the mixture but I do not prefer to add it.
  5. The addition of citric acid is optional but one can even add kala namak(black salt) or chaat masala for different flavor.
  6. If you want to keep the spices simple avoid cumin powder too in the recipe.
  7. Make sure that you always deep fry the cornflakes on medium flame, if it is fried on low flame(or oil is not hot enough) it will consume lot of oil.
cornflakes chiwda

Tuesday, September 5, 2017

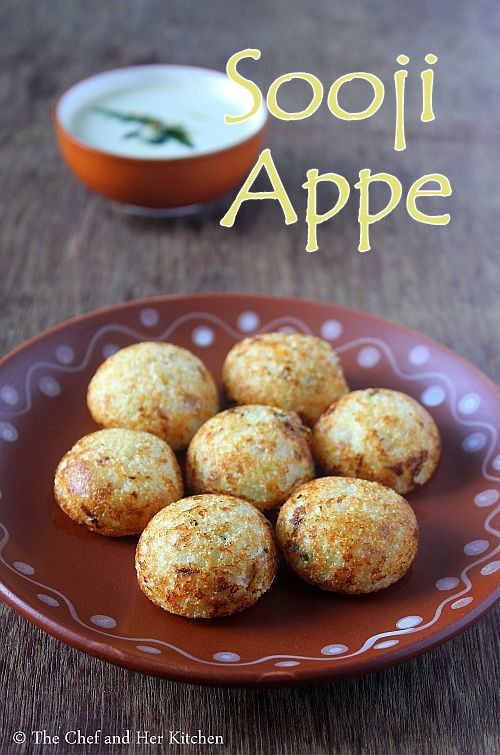
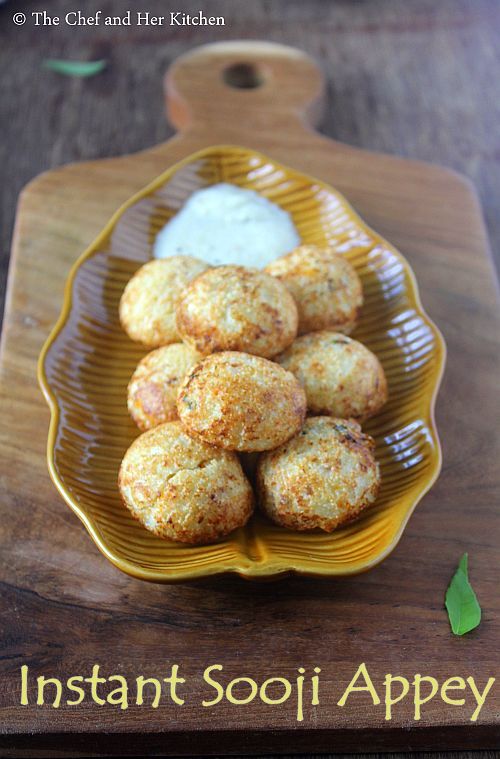
Instant Sooji Appe | Instant Rava Paniyaram Recipe | Rava Appe

sooji appe
Instant sooji appe recipe with step by step photos.It is always a difficult task for me to plan the breakfast as I decide what to prepare the stuff instantly most of the times rather than planning it in advance and only on weekends I plan my breakfast menu the previous night.My weekend breakfasts are elaborate where as on weekdays it would be a quick fix or easy breakfast options.Appey or Paddu or Paniyaram or Gunta Ponganalu or Gunta Punugulu is one of the favorite breakfasts for me.We usually make Gunta ponganalu with left over Idli/dosa batter or avalakki paddu or instant oats paniyaram or this instant sooji appey.
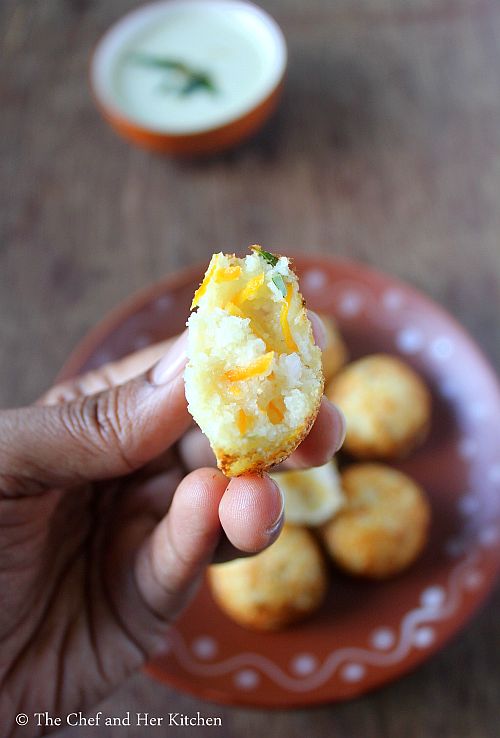
sooji appe
rava paniyaram
Sooji appey does not need any fermentation and can be prepared instantly with the easily available ingredients at home.This recipe is very similar to my oats paniyaram recipe just that I do not add oats to it.
Check out other appey recipes -  Gunta ponganalu with left over Idli/dosa batter, avalakki paddu ,instant oats paniyaram.
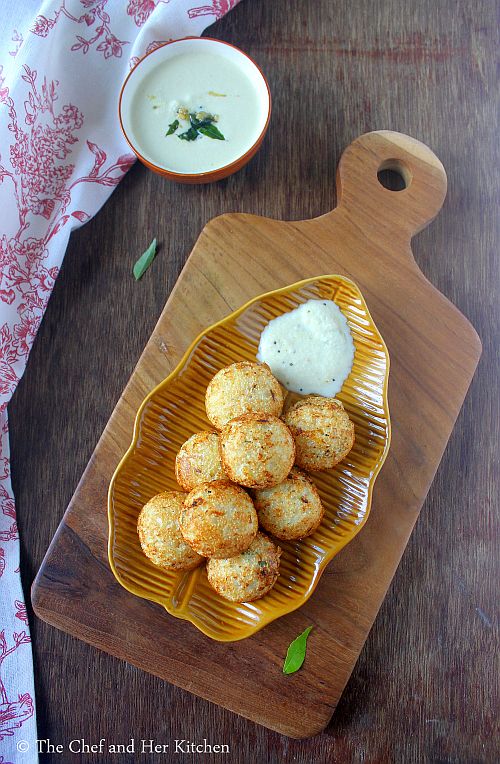
sooji appey
Here is how to make instant rava paniyaram with step by step photos:
Instant Rava Paniyaram | Sooji Appe | Rava Appey Recipe:

Serves 2
Prep time: 10 mins | Cooking time: 20 mins | Total time: 30 mins+ standing time
Cuisine: South Indian | Category: Breakfast/Tiffin

Ingredients:
1 cup Sooji/Rava
1/2 cup sour Curd
1 big Onion,finely chopped
1 Carrot,grated
1/4 cup grated fresh Coconut
3 tbsp chopped Coriander
2-3 tbsp chopped Curry leaves
1/2 tsp Cumin seeds
1 tsp Eno/Fruit salt
1/4 tsp Cooking Soda
Salt to taste

Method:
  • Dry roast sooji lightly and do not roast much.
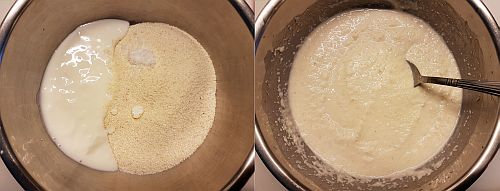
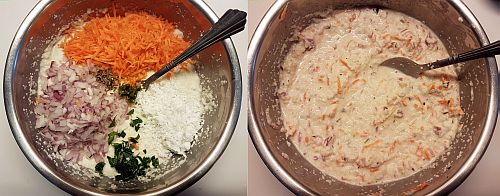
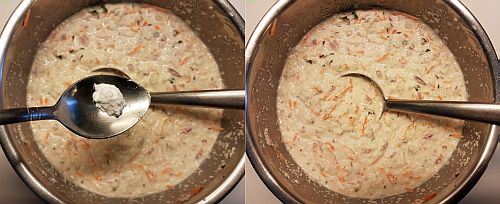
  • Beat curd well and add it to a big bowl add sooji and mix well.Add enough water to it to get the consistency of dosa batter.
  • Add salt and cooking soda to the mixed batter and leave it aside for 1 hr.You should leave it at least for 20 mins aside.
  • Add finely chopped onions, grated carrot,grated coconut,coriander, curry leaves along with green chilli paste,cumin seeds and mix well.
  • Check the consistency of batter,it might become thick as the sooji absorbs water when it is soaked.Add extra required water to it to get the dosa batter consistency.
  • Just before making paniyaram add eno to the batter and mix well.
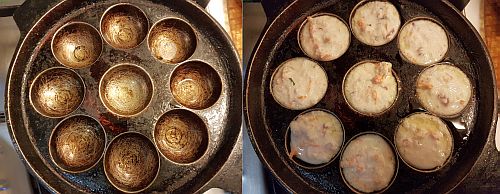
  • Heat the paniyaram/gunta panganalu pan/Aebliskever pan and add 1/2 tsp of oil in each impression.When it is piping hot keep the flame on LOW and pour the batter using a table spoon until it covers 3/4 th and pour some more oil over it and cover it with a lid.Let it roast on low-medium flame until golden brown in color.
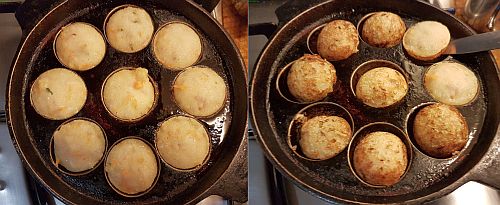
  • When you see the edges turning golden in color use a sharp knife and run it around the edges of  each paniyaram and turn them to the other side and roast until golden brown on both the sides.

Notes:
  1. You can add blanched corn to the batter and make paniyaram.
  2. Make sure that you use sour curd to make this.
  3. You can refrigerate the batter and use it on next day as well.Add eno to the batter before using it.
  4. If you do not have eno you can use only cooking soda in the recipe.
instant sooji appey

Monday, August 28, 2017

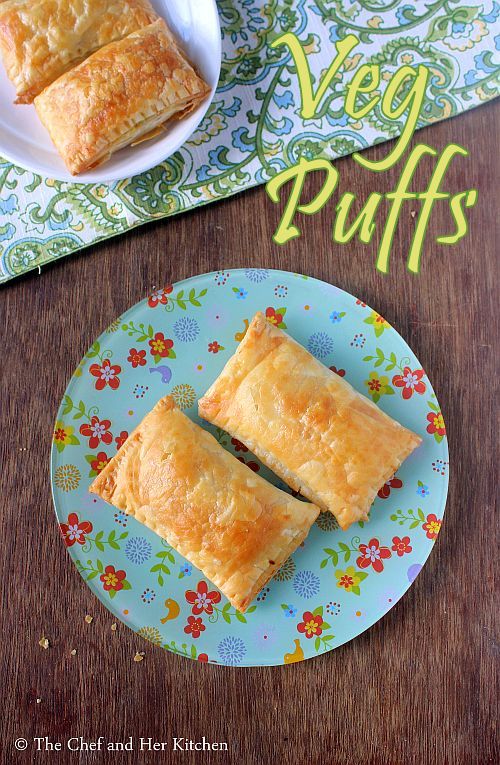
Vegetable Puffs Recipe | Veg Puffs recipe using ready puff pastry sheets

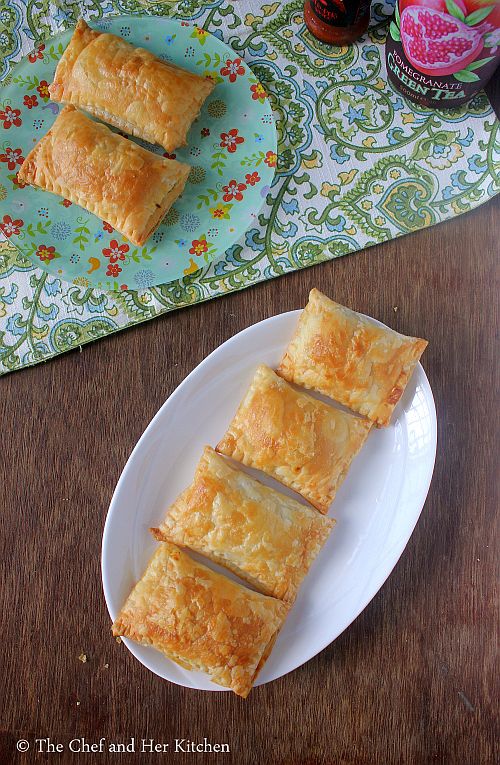
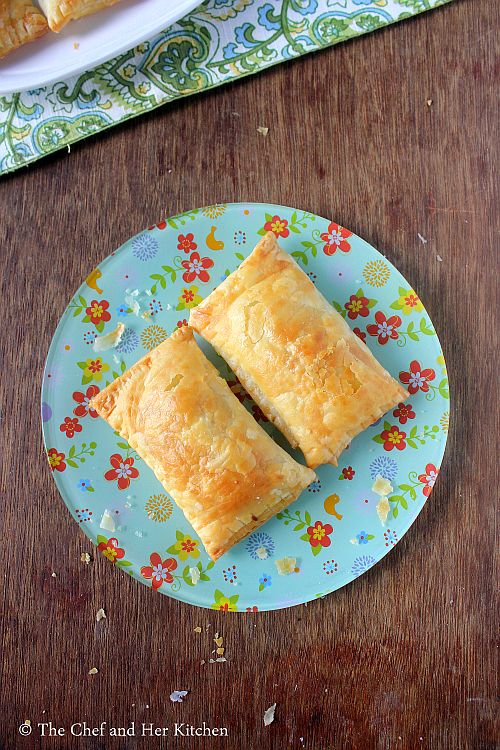
veg puffs
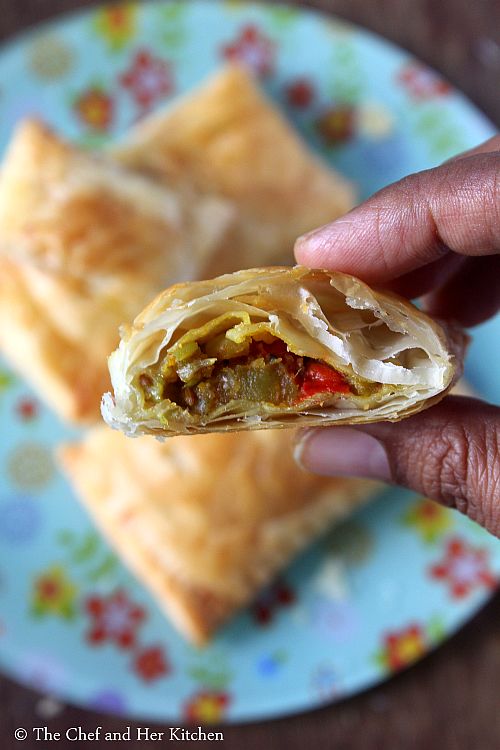
Veg puffs recipe using ready puff pastry sheets at home with step by step photos.Vegetable puffs or Veg puffs is one of the popular snacks in most of the bakeries across the country. A spicy vegetable filling is filled in a puff pastry and baked to golden brown which gives a crisp yet a soft bite to the puffs and the butter loaded puff pastry lends a slight sweet and very buttery texture to the final baked puffs.
veg puffs
Veg puffs and Egg puffs were one of those most common snacks which we used to get home when we were kids.Though I do not prefer to eat eggs in the omlette form or any other forms I do not mind to eat it in a boiled form or use it in bakes. Veg puffs taste best when they are served hot/warm with tomato sauce along with a cup of tea/coffee and also you can carry them for a picnic too and they taste good even at room temperature.
vegetable puffs
I usually use ready puff pastry sheets which are pre rolled and all you need to thaw a couple of sheets and prepare the filling and bake them as mentioned below, it is a very good and filling snack and is definitely a crowd pleaser.But you also get puff pastry dough where one can roll the dough and follow the same process to bake them or one can prepare their own puff pastry dough and follow the recipe. I personally have never attempted to make my own puff pastry dough just because I need small quantities at a time and also the rolled sheets are available easily and I would love to attempt to make my own puff pastry dough one day.
vegetable puffs
Check out other snack recipes in my blog - Vegetable ChopsVegetable SandwichVegetable Idli,  Onion Samosa, Veg Uthappam.
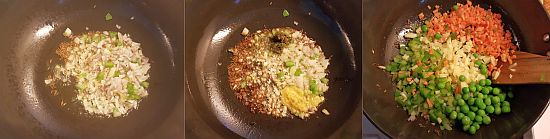
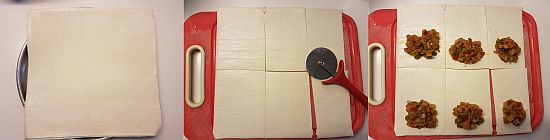
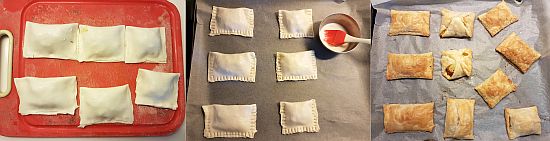
Here is how to make vegetable puffs recipe with step by step photos:
Vegetable Puffs Recipe:

yields: 8-10 puffs | Author: Prathibha
Prep time: 20 mins | Cooking time: 20 mins | Total time: 40 mins + baking time
Cuisine: Indian | Category: Snacks

Ingredients:
3-4 Puff pastry sheets,frozen/homemade
1 tbsp Milk, to brush on top

for the filling:
1 large Potato,peeled and finely chopped
1 medium Carrot,peeled and finely chopped
1 small Capsicum, finely chopped
1/3 cup Green Peas,fresh/frozen
1 Onion, finely chopped
1.5 tsp Ginger-garlic paste
1 tsp Green chili paste
1/2 tsp Red chili powder
1/2 tsp Garam masala
1/2 tsp Turmeric powder
1 tsp Amchur pwoder
1.5 tbsp Oil
2 tbsp chopped Coriander leaves
Salt,to taste

Method:
for the filling:
  • Heat oil in a kadai and crackle cumin seeds and then add finely chopped onions, ginger-garlic paste and green chili paste and fry them until the onions turns slight pink in color.
  • Add the chopped vegetables and fry well for 2-3 mins and then add salt and turmeric powder annd add 1/2 cup of water and cover it and cook until the vegetables are done.Add more water of required in between but make sure you use less water as we want our mixture to be dry at the end not soft and mushy.
  • Once the vegetables are cooked add red chili powder, garam masala, amchur powder and mix nicely and cook for another 2-3 mins.
  • Add coriander leaves and mix well and let it cool a bit.

rolling,filling and baking the veg puffs:
  • Thaw the puff pastry sheets as per the instructions mentioned on the pack. Mine were already rolled so I did not need to roll them.But if you need to roll the pastry follow the instructions mentioned on the pack, roll the puff pastry by sprinkling some flour on the puff pastry and roll it into a large square preferably of 1/2 cm thickness and cut into long rectangles or squares and keep them ready.Check the pictures for a rough idea to get the size of the squares/rectangles in which the puff pastry is to be cut.
  • Preheat the oven at 180 deg C/350 deg F for 12-15 mins.
  • Place 2 tbsp of filling on one side of the puff pastry and brush some water at the edges and fold from the other side and close it gently,you can use a fork and press it to create some patterns at the corners.
  • Arrange them on a baking tray lined with a parchment paper and brush with milk on top of the puffs.
  • Bake the puffs in a preheated oven for 30-35 mins until the puffs are golden brown in color.Keep an eye after 25 mins and check whether they are done or not.
  • Remove them and let them sit in the tray for a while and put it in the wirerack to cool if not serving immediately.
Serve them hot/warm with tomato sauce.

Notes:
  1. You can even steam or pressure cook the cut vegetables and then add to the fried onion mixture and follow the same process.
  2. You can add small cubes of paneer to the vegetable mixture to make paneer puffs.
  3. If you like to prepare Egg puffs, you can boil a couple of eggs and peel them and cut into halves and add the cut eggs to the vegetable mixture and mix nicely until it coats the eggs nicely.Place some vegetable mixture and one halved egg(flat surface down) at the center of the puff pastry square and join the edges on top of the egg to give a shape like danish pastry.
vegetable puffs
Technorati Tags: ,,,,,,

Thursday, August 3, 2017

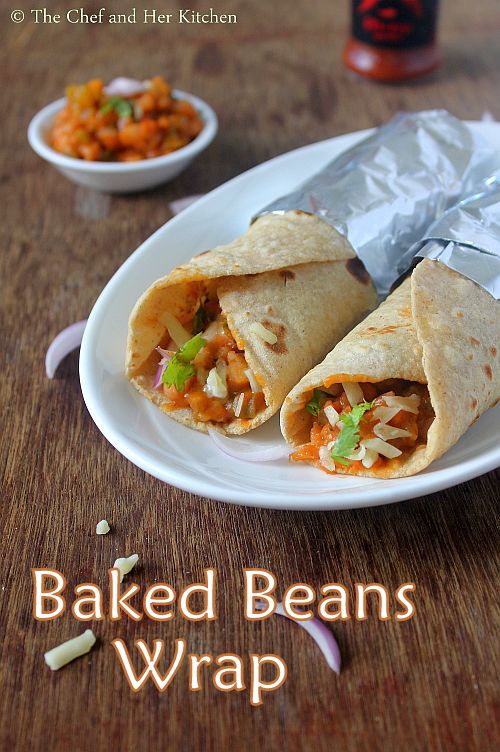
Baked Bean Wraps | Veg Wraps and Rolls Recipes

baked beans wrap
Baked bean wrap recipe with step by step photos.Wraps and rolls are always fun to eat and one can play with the fillings like mixed vegetables, potatoes, paneer, baked beans, grilled vegetables etc. Wraps taste best when eaten fresh otherwise they tend to become soggy because of the moisture which is absorbed by the rotis from the filling,however the dry fillings like tandoori potatoes, paneer tikka stay pretty good even if you pack it for a meal.
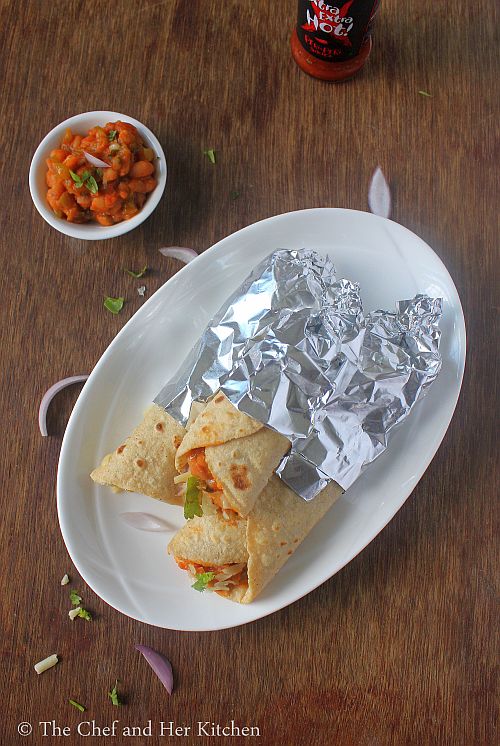
baked beans wrap
I have used baked beans for the filling but one can use even the cooked kidney beans/rajma instead of the baked beans.One can prepare the filling ahead and fill the wraps just before serving and it makes an easy snack for a tea party.The filling is very versatile and one can top it on the bruschetta as a quick appetizer.
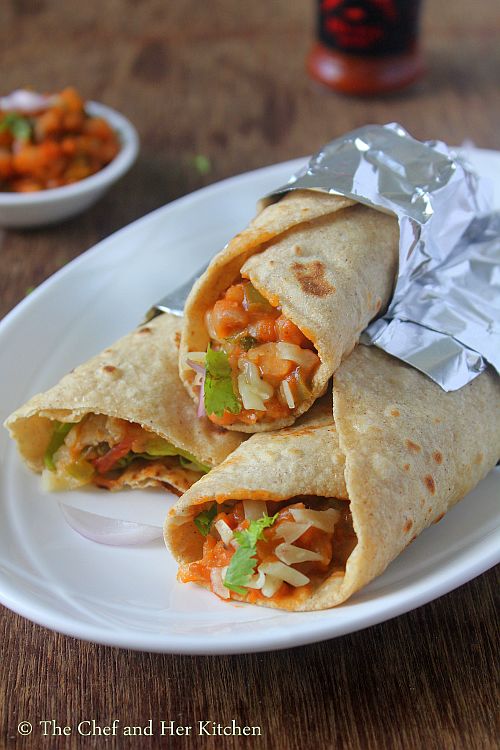
baked beans roll
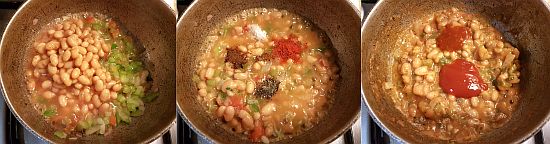
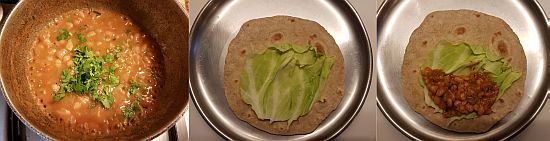
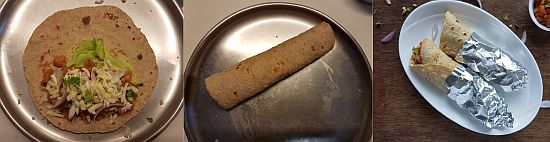
Here is how to make baked bean wrap recipe with step by step photos.
Baked Bean Wraps Recipe:

yields: 5-6 wraps | Author: Prathibha
Prep time: 15 mins | Cooking time: 15 mins | Total time: 30 mins
Cuisine: International | Category: Snacks/Breakfast

Ingredients:
6 Tortillas/big wheat flour Rotis
big layers of cabbage/lettuce, washed and dried
1/2 cup shredded Mozarella/Cheddar cheese
1 Onion,sliced into thin

for filling:
1 tin baked beans/canned black beans
1 small Onion,finely chopped
1 small Capsicum,finely chopped
1/2 Tomato,chopped
2 Garlic cloves, finely chopped
1-2 Green chilies, finely chopped
2 tbsp Coriander leaves
1 tbsp Tomato sauce
1 tbsp Hot sauce/Red chili sauce
1/2 tsp Red chili powder
1/4 tsp Black pepper powder
1/2 tsp Garam masala,optional
Salt,to taste

Method:
for filling:
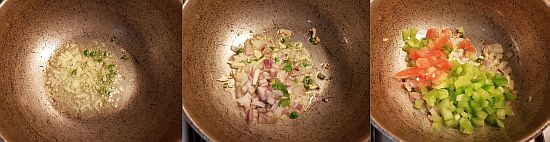
  • Heat oil in a kadai and add finely chopped garlic cloves and green chilies and fry them till brown.
  • Add finely chopped onions and fry until the onions turns translucent and then add chopped capsicum and tomato and fry until the tomato becomes mushy.
  • Now add canned beans,red chili powder,pepper powder, garam masala and little salt(as the canned beans already have it use less) and cook until the mixture becomes thick.
  • Now add tomato sauce and hot sauce and cook for another minute and add coriander leaves at the end.
to prepare wraps:


  • Take a tortilla or roti on a dry plate and place a layer of cabbage/lettuce at one corner and spread 3-4 tbsp of baked beans mixture on one side and add some shredded cheese and sliced onions and roll it tightly to a wrap and follow the same process with the rest.
  • You can grill it again in the griller or roast it on the tawa again on both the sides.However this step is optional.
  • Cut into halves diagonally  or serve them as it is by wrapping them with a foil.Consume it immediately.
Notes:
  1. If you do not have baked beans you can use cooked kidney beans(rajma) and add 2-3 tbsp ready tomato paste while sauteing the onions.
  2. You can add other colored bell peppers along with capsicum in the recipe.
  3. The additon of garam masala is optional, you can add mixed herbs instead.
  4. It tastes best when served immediately, else they become soggy. Cabbage/lettuce helps the roll not to become soggy for a while.
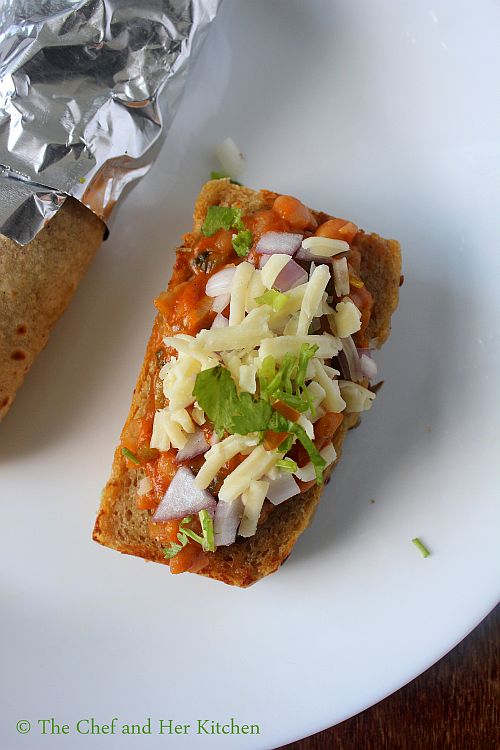
  5. The baked beans filling can be used as a topping on the toasted bread or sliced baked baguette.
baked beans bruschetta

Monday, July 31, 2017

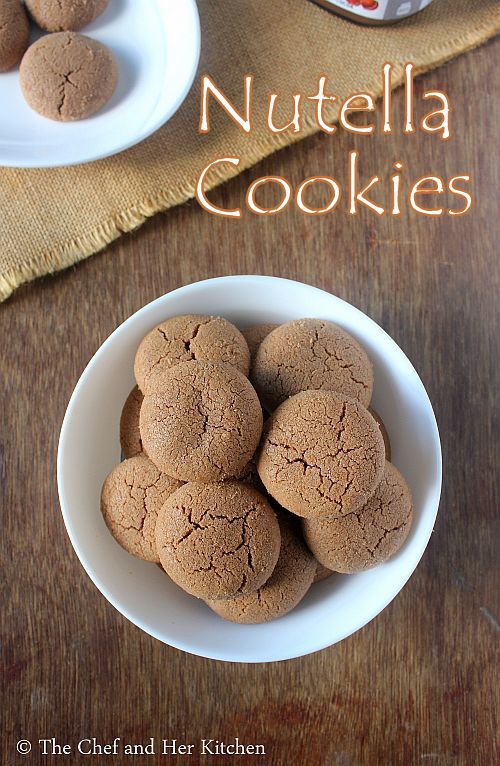
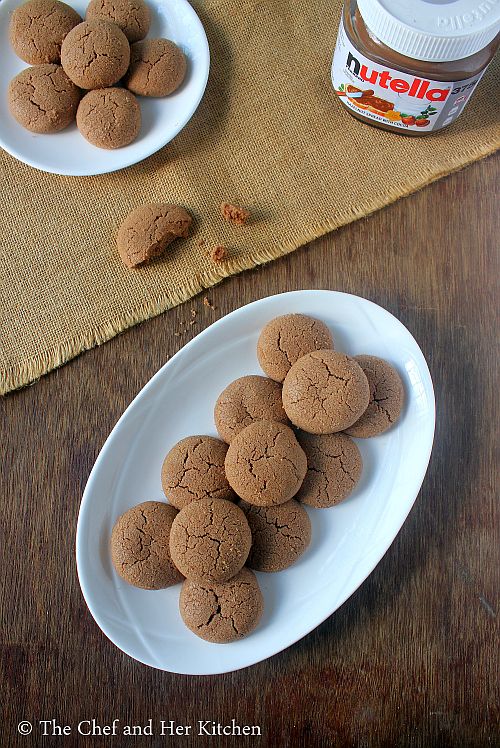
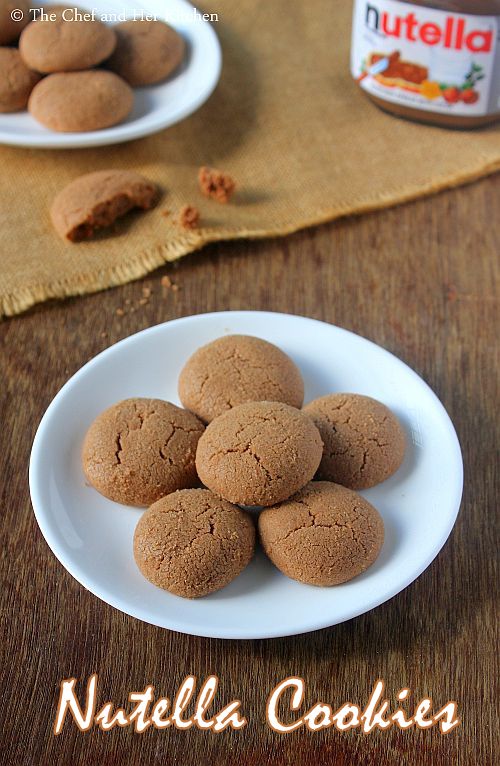
Nutella Cookies | Eggless Cookie Recipes

nutella cookies
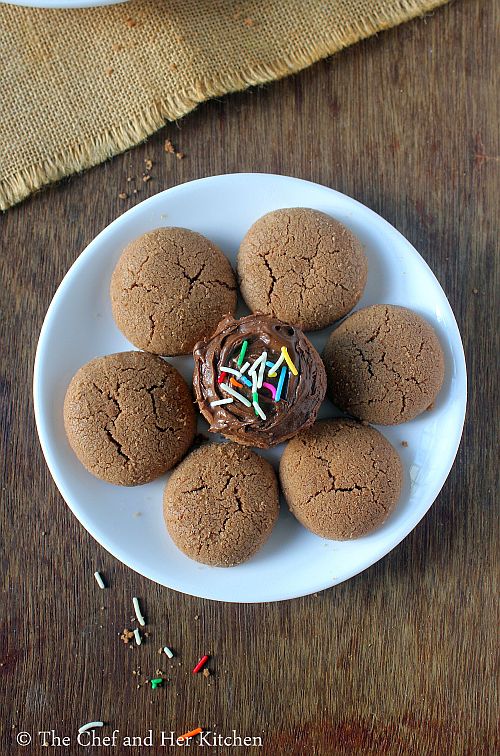
Eggless Nutella cookies recipe with step by step photos. I have posted recently various cookies recipes in my blog as I have been experimenting various cookies for my little one.Nutella is always a hit among the kids and so are these cookies.These cookies are loaded with nutella and one can even add little more nutella frosting on top and add few sprinkles to make it even more attractive for the kids.
nutella cookies
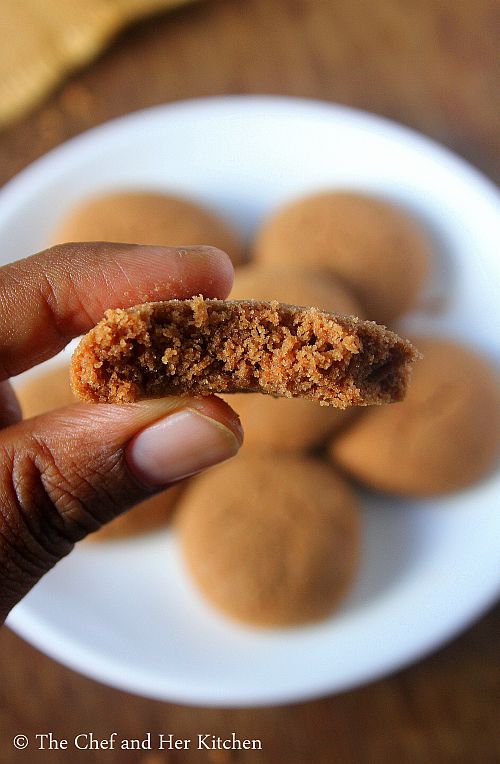
Nutella cookies are extremely easy to prepare,do give a try to treat your little ones with the home made cookies.Cookies always taste best with a glass of chilled milk and my little one loves to dunk the cookie in the milk and eat it.Home made cookies are lot better in terms of quality compared to the store bought ones and also one can reduce the quantity of sugar and butter that goes in it and hence I choose to bake my own cookies.
nutella cookies
nutella cookies
Check out other cookies recipes in my blog:
nutella cookies
Here is how to make eggless nutella cookies recipe with step by step photos:
Eggless Nutella Cookies Recipe:
yields : 16-18 cookies | Author: Prathibha
Prep time: 15 mins | Baking time: 12 mins | Total time: 30 mins
Cuisine: International | Category: Snacks-Cookies

Ingredients:
1/2 cup All purpose flour
1/4 tsp Baking powder
3 tbsp Sugar,powdered
3 tbsp Butter,at room temperature
3 tbsp Nutella
1/4 tsp Vanilla essence
1-2 tsp Milk,if needed

Method:
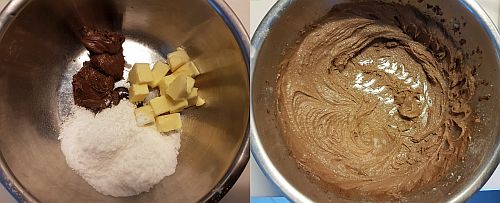
  • In a bowl add butter at room temperature, sugar , nutella and vanilla essence and whisk it using a hand whisker until you get a creamy mixture.
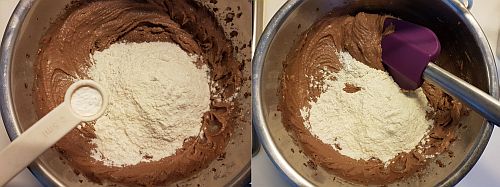
  • Add flour and baking powder to the creamed butter-nutella mixture and mix it nicely.If needed add a couple of teaspoons of milk to form a dough.Do not knead it just gather the mixture to a dough, add little milk just to form a dough.I did not add any milk as it was not needed.
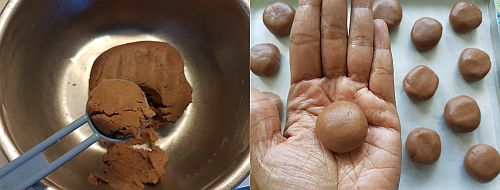
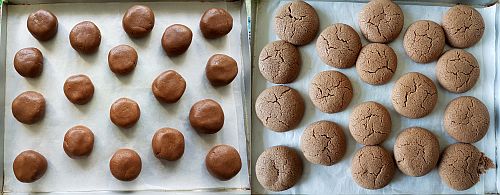
  • Use a measuring spoon ,I used 1/2 tbsp spoon and scoop out the mixture and form a ball with it and press it slightly and place it on the parchment paper or baking sheet laid on the baking tray.
  • Repeat the process and prepare all the cookies and place it on the parchment giving some space in between for them to expand while baking. Keep the tray in the fridge for 10 mins until the oven gets preheated,you can bake it immediately in the preheated oven but there are chances that they might not have proper shapes and expand more.
  • Preheat the oven at 180 deg C/350 deg F for 12-15 mins.
  • Place the baking tray in the oven and bake for 12-15 mins. Do not bake them for long as they will turn hard if baked for long, just bake until they are nicely puffed up.
  • When you touch the top of the cookie it will be soft but will hold its shape as it gets cooled.
  • Remove the tray and let the cookies sit on the tray for 8-10 mins and then slowly remove them on to the wire rack and let them cool completely.
Store them in an air tight container.Serve with a glass of chilled milk.

Notes:
  1. Add little milk just enough to gather the mixture to form a dough, do not knead it.
  2. You can add chocolate chips while making the dough for Choco chip Nutella cookies.
  3. I usually prefer to chill the cookies spread on the baking tray before baking to avoid them to spread more while baking.
  4. You can sieve the flour with the baking powder before adding to the wet ingredients.
  5. Add 1-2 tsp of Corn flour along with the flour which gives lighter cookies.
  6. You can double the ingredients for a large batch of cookies.
nutella cookies

Monday, July 24, 2017

Stuffed Mushrooms Recipe | Vegetarian Stuffed Mushrooms

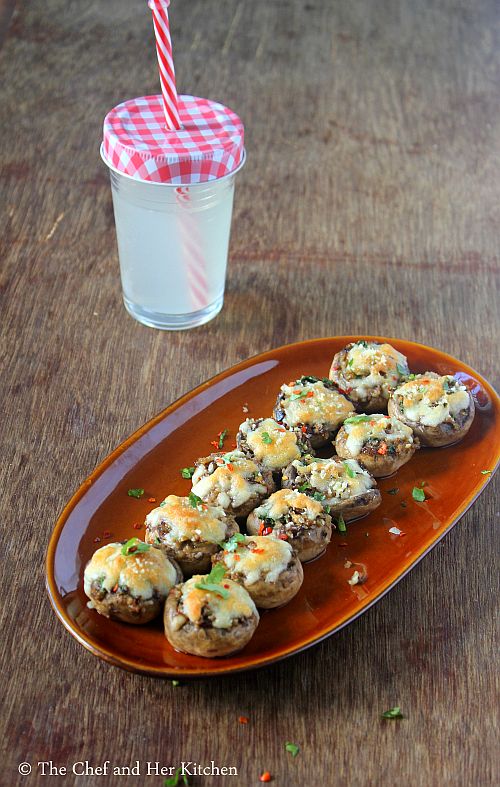
stuffed mushrooms
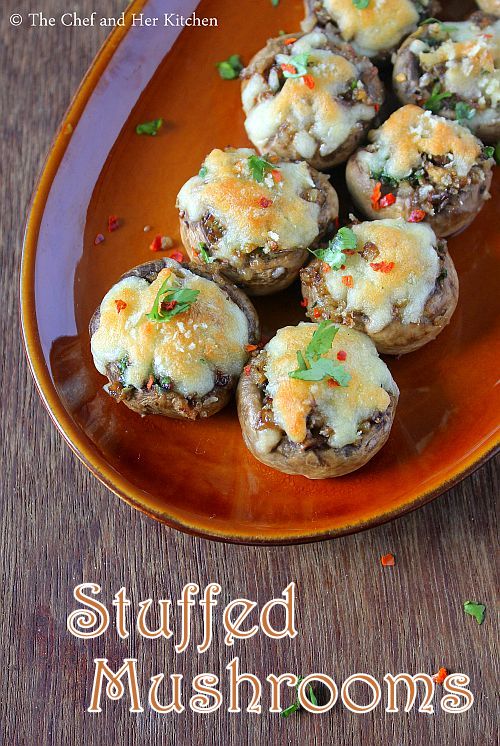
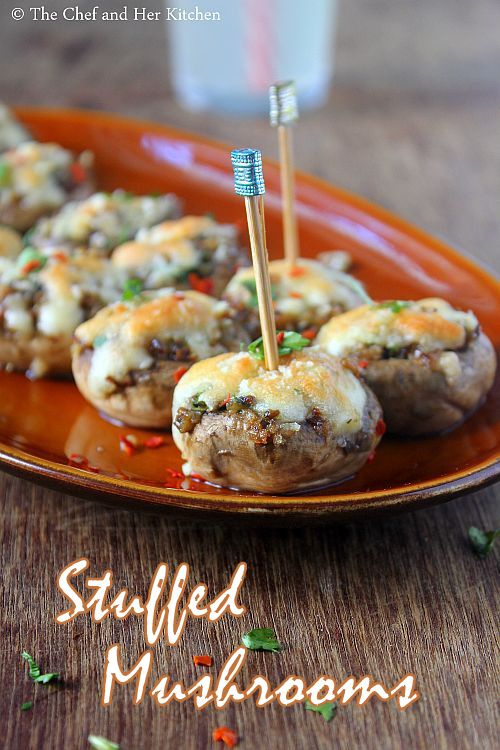
Stuffed Mushrooms with a vegetarian filling recipe with step by step photos. Mushrooms are very versatile and can be used in various ways to create delicious starters, snacks,pulav, biryani,gravies,stir-fry,curry etc. Among all the mushrooms recipes this stuffed mushroom recipe is my most favorite, it is not only easy to prepare but also tastes delicious.If the preparation work of mushrooms is done, it takes hardly any time to cook them and stuff them and bake.It is an ideal recipe for starters in the parties, one can prepare the filling ahead and stuff the mushrooms and keep them ready and bake in the oven at the last minute.These stuffed mushrooms taste best when served hot and consumed immediately, otherwise they become soggy.
stuffed mushrooms
Stuffed Vegetables make any meal interesting and I always love stuffed colored bell peppers, stuffed jalapeno poppers, Indian style stuffed peppers,Stuffed Brinjals ,stuffed mushrooms which can jazz up any meal.
You can check few stuffed vegetables recipes in my blog - 
stuffed mushrooms
You can check other mushroom recipes in my blog- Mushroom BiryaniMatar Mushroom MasalaMushroom Chettinadu,Palak Mushroom.
stuffed mushrooms
Here is how to make stuffed mushrooms recipe with step by step photos.
Stuffed Mushrooms Recipe with Veg filling:
Serves 3-4 | Author: Prathibha
Prep time: 15 mins | Cooking time: 10 mins | Total time: 25 mins + 20 mins baking time
Cuisine: International | Category: Starters/Sancks

Ingredients:
15-20 white button Mushrooms
1/4 cup grated Mozarella/Cheddar/Processed cheese
1/4 cup Bread crumbs
1 small Onion,finely chopped
2-3 Garlic cloves,finely chopped
2-3 tbsp chopped Coriander leaves
2 tsp Mixed herbs
3/4 tsp Pepper powder
2-3 tbsp Olive oil
Salt, to taste

Method:
  • Gently rub and wash the mushrooms.I usually rub them with rice flour gently and wash them under running water.Carefully remove the stalks and trim off the tip portion of the stalk and cut the stalk into fine pieces and keep aside.
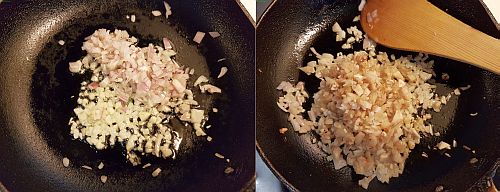
  • Heat 1 tbsp Olive oil in a pan and add finely chopped garlic and fry until it turns slight brown in color and then add finely chopped onion and fry until the onion turns light brown in color.
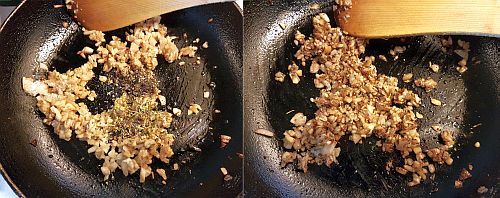
  • Add the chopped mushroom stalks and saute them, they initially release water and let them cook more until the water is absorbed completely.
  • Add the mixed herbs, pepper powder, salt and cook for another 2 mins.
  • Let the mixture cool a bit.
  • Meanwhile preheat the oven at 180 deg C/375  deg F for 10 mins.
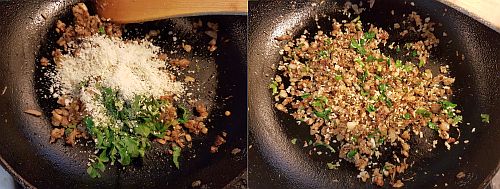
  • Now add the bread crumbs and chopped coriander leaves to the cooked mushroom stalk mixture and mix it well.
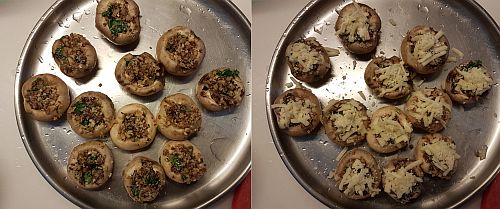
  • Stuff the mushrooms with 2-3 tsp filling and sprinkle some grated cheese(of your choice) and little bit of bread crumbs and keep them ready.
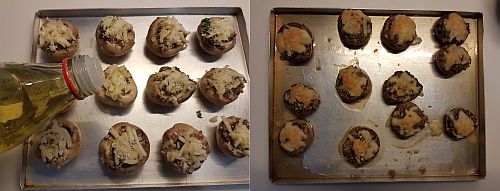
  • Arrange the stuffed mushrooms on a greased tray and dot them with olive oil and bake them in the oven at 170 deg C for 20-25 mins until they are done, they release water and starts to slightly drying up.When start drying up you can remove them from the oven.
Serve them immediately by adding freshly chopped coriander leaves.

Notes:
  1. They taste best when served immediately and consumed hot, else they turn soggy and will not taste good.
  2. Once the mushroom started releasing water in the oven means it is done but I usually keep it for little longer until it starts slightly drying up otherwise I find them bit raw.So it is your wish,you can remove them when you see the water starts forming under the mushrooms while baking.
  3. The bread crumbs add a nice crispy texture on top so do not skip in the filling as well as add a little while topping them with cheese.
  4. For a vegan version avoid cheese on top.
stuffed mushrooms

 
back to top