Showing posts with label Cooking With Family(CWF) Series. Show all posts

Thursday, January 19, 2012

A Glimpse of Family Food-Tasty Thursday(FF-TT) Series

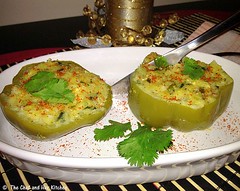
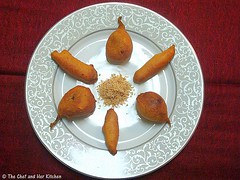
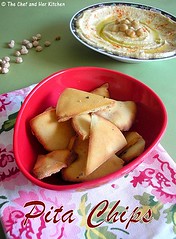
I would like to thank all my cousins Ashwini,Savitha and Chaitra for sending the lovely entries to my event "Family Food Tasty Thursday-Snacks/Chaats" series and making it into a successful event like its earlier sequel "Family Food Friday-Breakfast" series. I hope you all enjoyed my "Family Food-Tasty Thursdays "series as much as I enjoyed hosting it.The only difference in the season -2 was even I posted the recipes along with my cousins and followed the same theme 'snacks'. This is just a small recap of all the recipes posted in this series for a quick reference and also for those who missed few posts.

Posts by My Cousins:

Chaitra:


Ashwini:

Savitha:

Prashanth:
Posts by ME:


Thursday, January 12, 2012

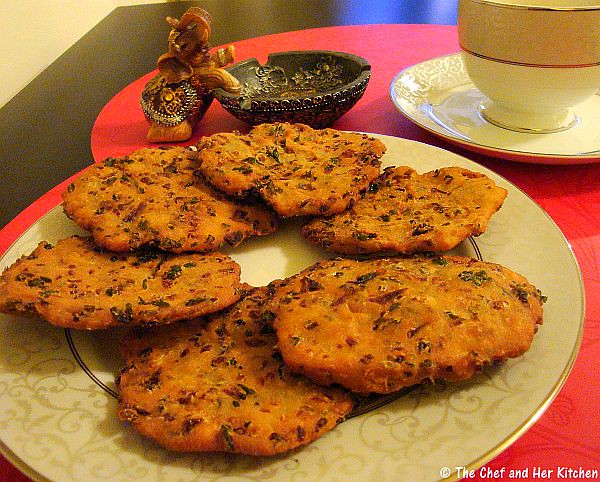
Maddur Vada | Maddur Vade...FF-TT # 8

This week's entry for my 'Family food-Tasty Thursdays'(FF-TT) series was sent by Savitha.
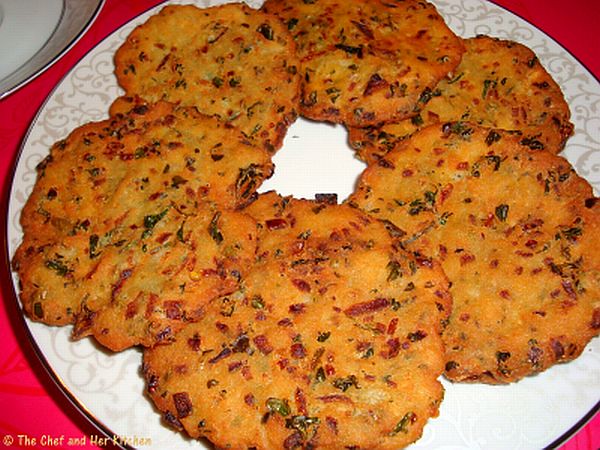
Maddur vada(or Maddur Vade as it is called) is another famous snack item of Karnataka which got its name from a little town called 'Maddur' which is situated in between Bangalore and Mysore.These vadas are a good evening snack and also it is paired with coconut chutney and are served as breakfast in many food joints in Bangalore.These are very easy to make and are also very tasty.They have a crispy crust and slightly soft and flaky texture when you bite in the vada and the sweetness of fried onions which takes this to another level makes this vada tastes very special.If you taste these once I am sure you will get hooked to its taste.Do not miss to try this famous maddur vada if you ever visit this place.

Maddur Vada Recipe:
(makes around 15 vadas )

Ingredients:
1 cup Maida
1/2 cup Chiroti Rawa/super fine Sooji
1/4 cup Rice flour
2 small or 1 large Onion
1 1/2 tsp Green Chili Paste
1/2 cup finely chopped Coriander
2 sprigs Curry leaves,finely chopped
2 tbsp Ghee(solid type,do not melt it)
Salt to taste
Oil for deep frying

Method:
  • Mix all the ingredients well and add very little water to the mix (especially because onion oozes out some water) to the mixture to bring it chapati dough consistency.
  • Leave the dough to rest for about 10-15 min.
  • Alternatively you can mix all the ingredients(except water) and leave it aside for 10-15 mins and sprinkle in little water and make it to a chapati dough.
  • Grease the baking mat(or a polythene like milk cover) with oil, take about lemon sized dough and pat it on the baking mat with your hand using little oil and make a circle.Pat into a 3" diameter and 1/4" thick vadas.
  • Take the patted dough and slide it carefully into hot oil for deep frying.Fry these vadas on low to medium flame.
  • Fry the vada until it turns golden brown and becomes little crispy.
Serve these hot vadas with coconut chutney and enjoy with a cup of tea or coffee.They taste equally good even at room temperature.

Notes:
  1. Try to add very little water while making the dough .The best way to prepare the dough is to prepare the doigh in small quantities freshly to avoid the dough gets soggy.
  2. You can replace ghee with 1/4 cup hot oil in the dough.
  3. Fry them on low-medium flame to get evenly fried brown vadas.
  4. You can add a pinch of baking soda to the dough to get crisp vadas,but it is optional.

Thursday, January 5, 2012

Saggubiyyam Bonda | Sago Bonda....FF-TT # 7

I took a small break from my Family Food Series and posted few cakes and dessert recipes which were apt for the season.Now I am back with the series again continuing with the same theme 'Snacks'.
This week's entry for my 'Family food-Tasty Thursdays'(FF-TT) series was sent by Chaitra. She has sent our family favorite snack called Sago(saggubiyyam) bonda.It is quite common at our place and is almost a favorite with everyone.Many prepare these bondas with left over dosa batter,we prepare this in a different way which is why it is more special at our place.
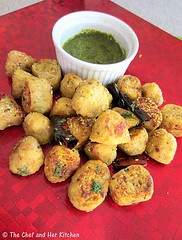
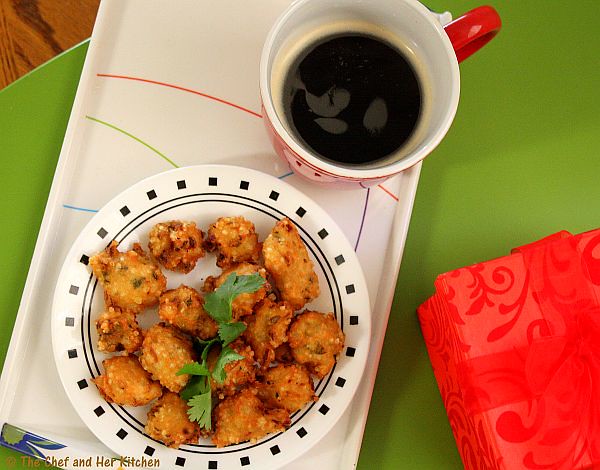
These bondas are quite crispy and tangy because of the addition of sour curds which imparts a very good flavor to bondas.They are quite plumpy with a crisp crust outside and spongy texture inside and they also stay crisp for long time.These hot,crisp and tangy bondas are perfect for these chilling winter evenings to munch with a cup of tea.
Saggubiyyam(Sago) Bonda Recipe:
(Makes around 25-30 small bondas)

Ingredients:
1/4 cup Nylon Sabudana(small sago)
1/4 cup Sour curds
1/4 cup Chiroti(fine) Rava
1/3 cup Rice flour
2 medium Onions,finely chopped
1/4 cup Coriander,finely chopped
1 tsp finely chopped Ginger
2 tsp Green chilli paste
Salt to taste
Oil for deep frying

Method:
  • Soak Sabudana in sour curds for about 7 hrs or overnight.
  • Add all the other ingredients and make it to a pakoda style batter,if needed add little extra curds.It should be very thick batter(slightly thicker than idly batter).
  • Mean while heat oil in a kadai.
  • Drop the small amla sized bondas/pakoda using a spoon or hand in to the oil and fry them on medium heat. Do not disturb them while frying until you get the desired golden brown color on one side.The bondas need not to be evenly sized,so do not bother about the shape and size of them.Turn them around and fry till it is golden brown.Drain the excess oil on a tissue paper.
Serve them hot.These usually these do not need accompaniments,but you can serve them with either coconut chutney or tomato sauce.

Notes:

  1. These can be made even 2 hrs ahead. These stay crispy for a long time.
  2. They will absorb more oil if you add water and also they will splutter,hence while mixing the bonda batter do no add water and add the required amount of curd instead of water.
  3. Nylon sago is good to use for this,if you don't get that use the regular sago.
  4. You can add a pinch of soda if you want still crispy bondas,but it is optional.
  5. If your batter is thin add little extra rice flour and if your batter is thick add extra curds to it to get the required consistency.

Monday, December 19, 2011

Canapes with Italian Style Corn filling | Party Recipes

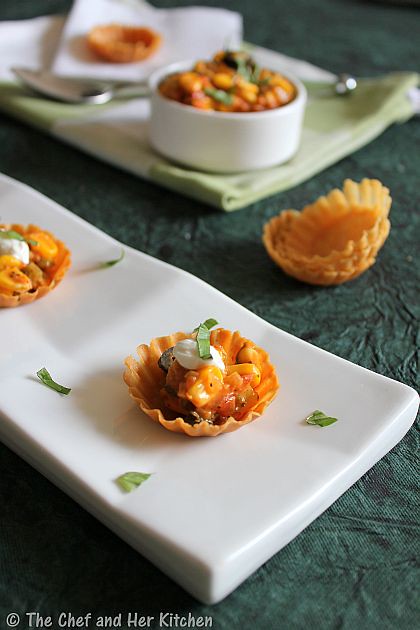
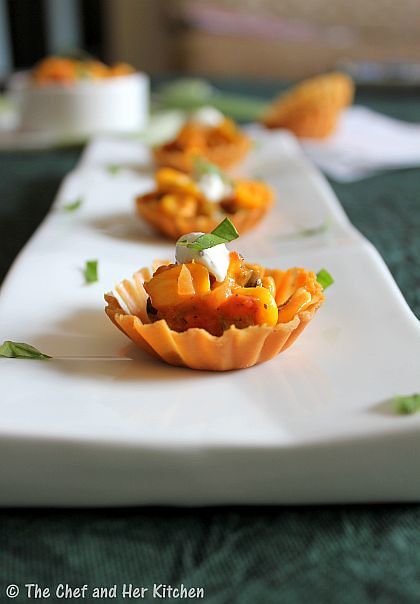
Finger food is always a must for any party and these canapes are ideal for parties.They are very easy to make and can be made well ahead and all we need is few minutes to arrange them before serving.This is one of my versions for canapes which is made in Italian style and is perfect for kids or adults.It is a great party food,try this simple n delicious snack to impress your guests.
Canapes with Italian style Corn filling Recipe:
(serves 7-8 for finger food)

Ingredients:

18-20 Canapes/Basket Canapes
2-3 tbsp Sour cream(see the notes for a home made version)
8-10 fresh Italian Basil leaves,finely sliced

for Filling:
1 cup Sweet Corn
3/4 cup finely chopped colored Bell peppers(I used only green)
1 medium Onion,finely chopped
3 Tomatoes
2-3 Garlic pods,grated
5-6 Black Olives,sliced
1 tsp Mixed Italian Herbs
1 tbsp Tomato sauce
2 tbsp Cream
3/4 tsp Black pepper powder( to taste)
Salt to taste
1 tsp Butter
1 tsp Olive Oil
Method:
for Filling:
  • Put a cross on a tomato and blanch it in hot water until the skin comes out(it takes maximum 2-3 mins).Cool it and then peel off the skin and take out the eye of tomato and finely chop it.
  • Boil sweet corn until it is tender and keep it aside.
  • Heat olive oil and butter in a kadai and add grated garlic and fry it and add finely chopped onion and fry well until it is translucent.
  • Add finely chopped bell peppers and fry on high flame until it is slightly cooked but still crispy to bite.
  • Add chopped tomatoes(boiled) and corn and cook well until the tomatoes are slightly mushy.
  • Add boiled sweet corn and Italian herbs to it and cook for 3-4 mins.
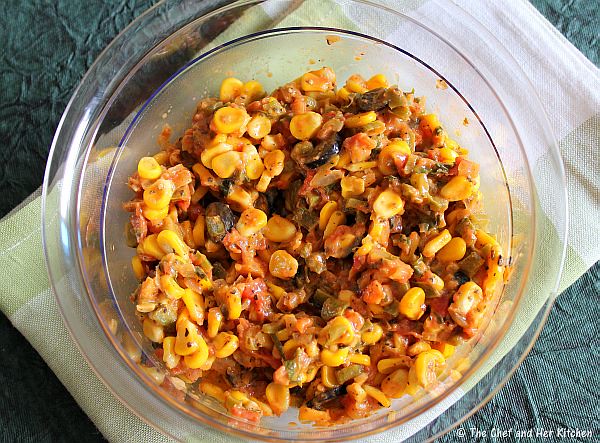
  • Add tomato sauce,cream,salt,sliced black olives and required black pepper powder to it and cook for 2 minutes.Take care that the mixture is neither completely dry nor it should be like gravy.The mixture should look like how it is in the picture.
  • Cool the mixture completely.
for Serving Canapes:
  1. Arrange your canapes in a serving platter and keep 1-2 tbsp filling in the canapes.
  2. Pour a dash of sour cream(1/4-1/2 tsp) and garnish with freshly sliced basil leaves.Serve them immediately.They might turn soggy if kept for long time.
Notes:
To make Sour cream:
  • Beat the cream(1/2 cup) until thick and add 1-2 tsp curd and mix well.Add a pinch of salt and pepper while mixing it.
  • If you want a low calorie version mix more of hung curd(1/2 cup) and 2-3 tbsp cream to make sour cream.Season with salt and pepper.

Variations:

  1. You can replace sweet corn with finely chopped blanched baby corn and follow the same process for filling.
  2. You can replace those basket canapes with the ready available canapes.They need to be deep fried before using.
  3. You can even replace canapes with savory crackers like monaco or any salty crackers. Adjust the filling according to the size of crackers.

Thursday, December 15, 2011

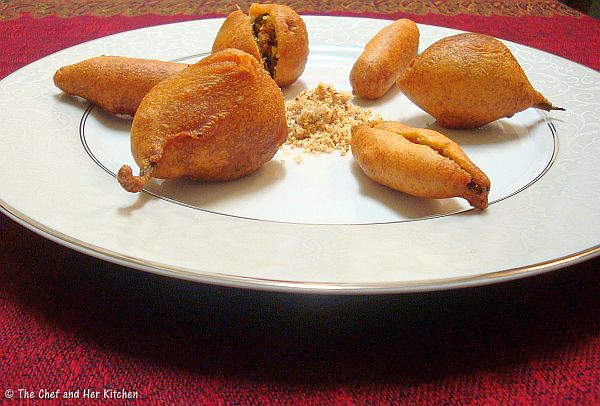
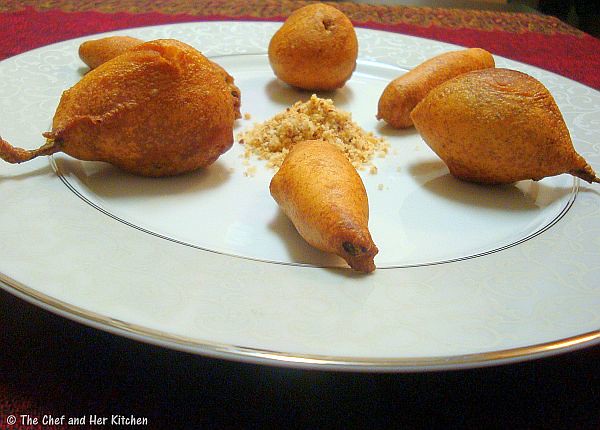
Eggplant and Okra Bajjis(Fritters) with Chili-Garlic Stuffing...FF-TT # 6

This week's entry is sent to me by Savitha. I loved this entry totally,I have tasted brinjal bajji and I quite liked it but never tasted okra bajji and I am quite tempted to make it soon.
A couple of bajjis and a steaming cup of tea,what else can anyone asks for on a cold winter evening?Try this simple yet different and tasty bajjis which are perfect for these winters.The stuffing inside the bajjis makes it even more tastier.

Eggplant and Okra Bajji(Bonda) with Chilli Garlic Stuffing Recipe:
(makes 10+10 bajjis)

Ingredients:
10 baby Eggplants/Brinjals,pick small ones
10 Okra,small ones
Oil,to deep fry

for Batter:
1 1/2 cups Besan/Chickpea flour
3/4 cup Rice flour
1 tsp Red chilli powder
a pinch of Hing
1/4 tsp Baking soda
5 tsp hot Oil
Salt to taste

for Stuffing mixture:
1/2 cup grated dry Coconut
2tsp Daliya/Fried gram
4-5 pods of garlic
7-8 Red chillies
Salt to taste

Method:
  • Grind all the items together mentioned under 'for stuffing mixture' to a smooth powder and keep it aside.
  • Wash and dry all the Eggplants and Okra well.

  • Slit eggplants into 4 quarters without taking out the stem of the eggplant.
  • Slit the Okra vertically in the middle.
  • Deep fry all the eggplants and okras in the oil until it becomes soft and tender.Drain them on the kitchen towel to remove excess oil.
  • Let it cool for sometime and then fill the eggplant and okra with stuffing mixture.

  • Mix all the items(mentioned under 'for Batter') well and make it into a smooth paste by adding water.The consistency should be like idly batter consistency and make sure u don't add too much water at once.
  • Mean while heat oil for deep frying.
  • Hold the tips of okras and stems of eggplants and dip each of them in batter and individually and drop them slowly into hot oil and deep fry them till it becomes golden brown in color on medium flame.
Serve them hot with mint and tamarind chutney.

Serving Suggestion:
  • You can slit them in between and stuff with finely chopped onions,grated carrot and coriander.Squeeze a dash of lemon and sprinkle a pinch of salt and serve them.

Monday, December 12, 2011

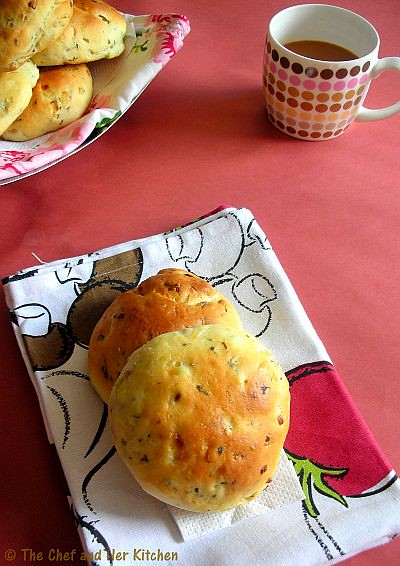
Khara Buns | Savory Buns..Iyengar Bakery Style!!

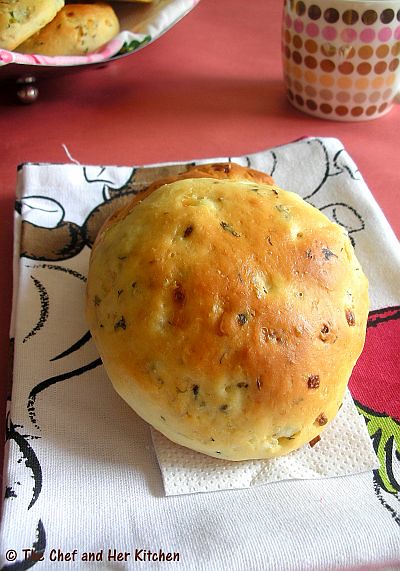
One more thing I love about Bangalore is those Iyengar bakeries which are widely spread across the city though few of them are pretty famous and are serving from few decades.Though there are so many stuffs to try in those bakeries,one should not miss to taste khara bun,palya bun,khara bread,plain cake,benne biscuit,khara biscuit,coconut cookies and baking nipattu as I am really fond of all these varieties.V.B bakery in V.V.puram is one of those oldest bakeries in Bangalore which sells few amazing bakery stuff and is also very famous in that area.

There are lots of variations for savory buns in Blogosphere,the version I am posting today looks and tastes similar to what we get in those Iyengar's bakeries and hence to avoid the confusion I named it as Iyengar bakery style and please note that this is not an authentic recipe from Iyengar bakery.I just like to eat those spicy soft buns as my evening snack with a cup of tea.

Khara Buns | Savory Buns Recipe:
(yields 7-8 buns)

Ingredients:
1 1/2 cups All purpose flour/Maida + 2-3 tbsp extra flour approx while kneading if necessary
1 1/2 tsp active dried Yeast
1/4 cup Milk
1/2 cup Water
1 1/2 tsp Sugar
2 tbsp Butter
1 tsp Salt

for masala:
3/4 cup finely chopped Onions
5-6 Green chillies,coarsely ground
a sprig of Curry leaves,finely chopped
1/3 cup chopped Coriander
1 tsp Cumin seeds
Salt to taste
1 tsp Oil

Other ingredients:
1 tbsp Butter,to brush the buns
1 tbsp Milk,to brush the buns
1 tsp Sesame seeds(optional),to sprinkle over the buns

Method:
  • Microwave water and milk together for 30 seconds until it is luke warm to touch.Pour this into a wide bottomed bowl.It should be luke warm to touch otherwise the yeast will not proof.
  • Dissolve in the sugar and yeast in it and mix thoroughly until dissolved.Leave this aside for 10-15 mins until the yeast mixture becomes frothy.This is the important step in proceeding further to the recipe.If the yeast does not proof throw it and start the process again from the scratch.
  • Meanwhile heat olive oil or regular oil in a pan and crackle cumin seeds over low flame and add very finely chopped onion and fry until it is translucent,add a pinch of salt in between to ease the process.Add coarsely ground chilli paste and stir fry for a minute.Add enough salt to it and do remember that we add salt even to the dough.Keep it aside until the mixture is cooled.
  • Add finely chopped coriander to it and mix well.
  • Stir in the melted butter and salt to the frothy yeast mixture and slowly add one cup of flour into it and mix well,I used a wire whisk for this purpose.Add the remaining flour slowly and mix until you get a lump of smooth dough.
  • Now put some flour on the broad white board or feel free to use the well cleaned and wiped kitchen platform(like I did) and take the lump in both hands and knead the bread towards you.
  • Follow the same method and knead it properly for 10 mins roughly until you get a non-sticky but still smooth dough.Add flour in between when the dough is sticky.
  • Now slightly press the dough with your hands to flatten it and keep the masala(fried onion mixture) in the centre and fold it from all the sides like how we do for stuffed paratha's.
  • Slowly start kneading again for 12-15 mins until the mixture is very well incorporated in the dough.The dough might become sticky because of the onions,so please feel free to add the flour when required while kneading the dough.
  • Cover this place of platform or the board with some cloth or paper as we need to use this place again for kneading.
  • Now grease your hands and a empty big bowl with oil and coat the dough with oil slightly and place it in the greased bowl.Cover with a clean kitchen towel and keep it in warm place until the dough doubles almost.It takes almost one to one-and-half hours depending the climatic conditions.I preheated my microwave for 20 seconds and kept the bowl in it.
  • After the first rise the dough would have doubled in size,knead the dough again gently for 7-8 mins,this process is important as it assures of removing air bubbles formed in the dough.
  • Divide the dough into 7-8 portions and shape them into buns and place them on a baking tray with space in between.You can line your baking tray with parchment paper.
  • Keep them again in the warm place for 45 mins - 1 hour for the final rise.Mean while preheat the oven at 220 degrees for 10 mins when you are about to finish the rising time of bread.
  • Brush the top of buns with milk very gently over the nicely risen buns and keep it in preheated oven and bake them at 180 degrees C for 15-18 mins until the top portion of the buns turn slightly golden and the buns should sound hollow when tapped the crust with hand.
  • Brush the top of buns with butter immediately after removing them from oven.This helps in giving the shine to the crust and also makes the crust softer and also makes the buns smell better.
Slice the bun into two halves and apply generously a dollop of fresh butter on it and enjoy them with a cup of tea/coffee.

Notes:
  1. You can add the finely chopped onions directly to the dough,but I recommend you to saute the onions before adding to the dough as I read somewhere that the raw onions might kill the yeast.
  2. You can add finely chopped dill leaves while sauteing the onions for different flavor.
Another interesting serving suggestion:

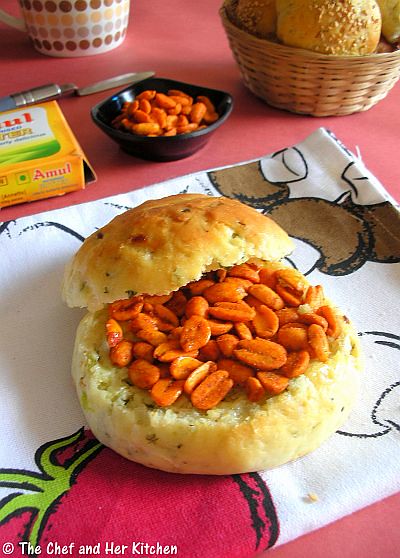
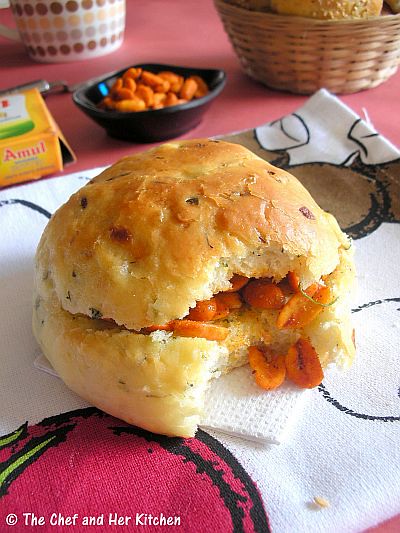
In VB bakery,Bangalore they serve these buns which are cut and slathered with LOTS of fresh butter and a layer of congress kadale(spiced up peanuts) which is called 'Bun-Butter-Congress' which is an absolute favorite to me and hubby.Go easy on butter and apply a nice thick coat of butter to enjoy those spicy buttery nutty buns...its damn tasty!!!!

Thursday, December 8, 2011

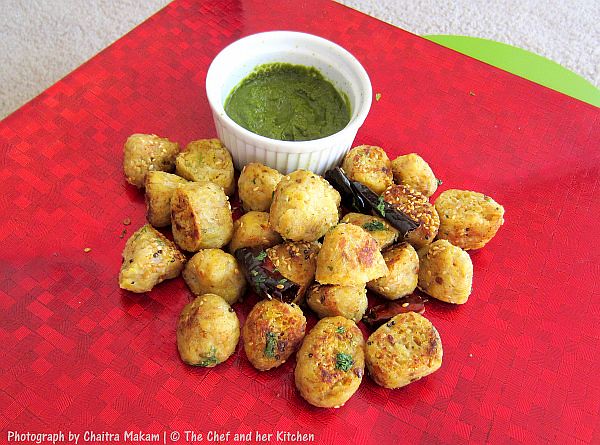
Mooli Muthia | Steamed Radish Dumplings...FF-TT # 5

This week's entry for my 'Family food-Tasty Thursdays' series was sent by Chaitra . She also added a small note with the recipe and pictures.
Chaitra says in her own words 'This recipe is based on the cabbage Muthiya on Manjulas kitchen. That recipe is our house favorite and I have made a ton of times. I and my husband love mooli,so wanted to try it with mooli. I use Jowar here as the earthy flavor of jowar tames the pungent flavor of mooli. Hope you all like it as much as we do.'

Mooli Muthia Recipe:
(Serves 2-3)

Ingredients:
2 cups grated Mooli/Radish
1 tbsp Whole wheat flour
1/2 cup Jowar flour
1/2 tsp Green chili paste
1 tsp Jeera powder
1 tsp Ajwain
1 tsp Saunf powder
a pinch of turmeric
a pinch of lemon Salt
1 tbsp Oil
Salt to taste

for Tadka:
1 tbsp Oil
2 Red Chilies broken
1 tsp Sesame seeds
Cilantro for Garnish


Method:
  • Take the grated Radish in a bowl. Add all the rest of the ingredients(except the ingredients for tadka) and mix until it forms a very soft dough like texture.
  • You might need to add a little more or less of Jowar flour depending on the freshness of radish.
  • Make small balls with the dough and place them on a greased steamer and steam them for about 20 mins.
  • To check it whether its done use the toothpick method.Just prick them with the tooth pick,if it comes out clean then it is done otherwise it needs to be cooked for longer time.
  • Let them cool completely. Cut them into bite sized pieces and keep them ready for the tadka. Heat oil in a nonstick pan. Add the red chilies and sesame seeds together.
  • Once the seeds start to splutter add the cut dumplings and reduce the flame to low and toast them for about 5 mins stirring often so that all sides gets crispy.
Serve them hot/warm with green chutney.

Notes:
  • Make the mixture before you are ready to steam otherwise the dough will leave water if kept for long time.
Variations:
  • You can use finely shredded cabbage or grated bottle gourd or grated zucchini instead of grated mooli and follow the same process.
  • You can also use besan(chickpea flour) instead of jowar flour.

Monday, December 5, 2011

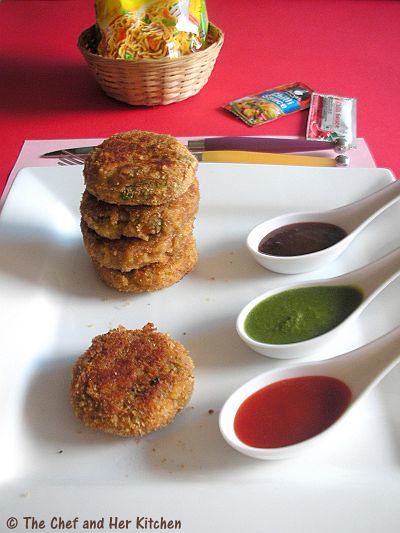
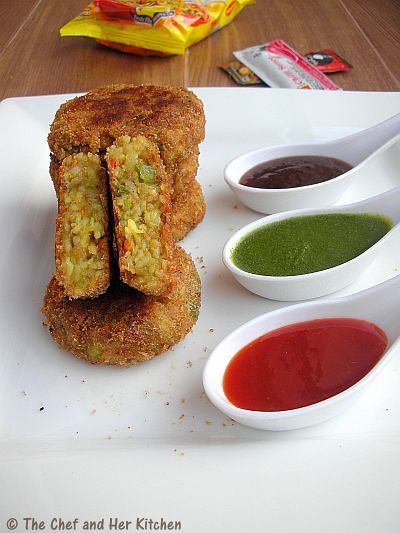
Maggi Noodles Cutlet | Noodles Tikki

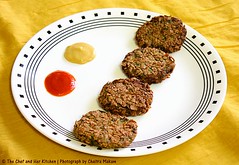
I have tasted a maggi bonda in a college canteen in Bangalore few years back and loved it instantly.These cutlets are almost inspired by the idea of that bonda and is prepared to suit our taste buds.This recipe is ideal when you have left over maggi or any other noodles and is a nice way to turn them to a delightful evening snack.But there is no way that we have left over noodles at our place and hence I have to prepare noodles specifically for making these cutlets.We just need half a packet of noodles for the cutlets but I always end up preparing a full packet and will let you know in the process what I do with the remaining half packet.

There are no hard rules to make these cutlets,you can add the vegetables,masalas according to your taste buds.I covered the cutlets with a coat of bread crumbs to give a nice and even look to the cutlets,if you leave that step you will get the tikkis with visible strands of noodles which is also equally tempting.Now let us just get in to the recipe with out wasting much time.


Maggi Noodles Cutlet Recipe:
(makes around 12-14)

Ingredients:
1 pack Maggi masala noodles
2 white/wheat Bread slices
1 big Potato
1/4 cup fresh/frozen green Peas
1 Carrot,finely chopped
1 Capsicum,finely chopped
1 Onion,finely chopped
2-3 Green chillies,finely chopped
1 tsp Ginger-Garlic paste
1/4 cup chopped fresh Coriander leaves
1/2 tsp Garam masala
1/2 tsp Chaat masala
juice of 1/2 Lemon
1 tsp Oil
Salt to taste

to coat:
2 tbsp Maida
3/4 cup approximately Bread crumbs

Oil,for shallow frying

Method:
  • Bread the noodles into small pieces(do not drop the whole noodle block) before preparing them.Prepare maggi noodles with taste maker according to the instructions given on the pack.I told you that we just need only half packet to make tikkis and guess what I did with the remaining half?? so simple..I just ate the piping hot noodles while the remaining portion is being cooled.I love maggi very much that I can eat it any time of the day.If you are not in a mood to eat,prepare just half a packet of noodles for the tikkis.(you can either add or avoid adding the taste maker).
  • Boil potatoes and green peas in microwave or cooker and slightly mash them and keep them aside.Mash the potatoes well and mash the peas lightly.
  • Drop finely chopped carrots and capsicum in hot water and keep for 2 mins and strain them and keep aside.
  • Heat a tsp of oil in a pan and add finely chopped green chillies and fry well and add finely chopped onions and ginger-garlic paste and fry slightly until they are translucent.Cool the mixture.
  • Tear the bread slices and run them in a mixer to a coarse powder.
  • In a big bowl add mashed potatoes and green peas,blanched carrot and capsicum,fried onion and green chilli mixture,finely chopped coriander,lemon juice and ground bread crumbs and mix well.
  • Add salt,garam masala and chaat masala to it and mix it well again.Take care that everything is mixed well as once we add noodles we cannot mix it thoroughly.
  • Add cooked and cooled noodles to it and gently mix in the vegetable mixture.Do not knead the mixture,gently handle it otherwise noodles turn to a paste loosing its texture.
  • Start making round tikkis of 2 " wide and 3/4 " thickness with the mixture.You will get around 12-14 tikkis with this mixture.
  • Make a slurry out of maida,mix maida with 4-5 tbsp water and whisk well to form a thin paste.It should neither be very thick nor very thin.
  • Arrange bread crumbs on a wide plate and spread them.
  • With the help of spoon drop one tikki at a time in the slurry and then drop it into the bread crumb mixture.With the help of your hands coat the bread crumbs all over the tikki and arrange it on a plate.Repeat the process for all the tikkis and arrange them in a single layer on a plate.
  • Cover the plate with a cling film or a plate and refrigerate for an hour.This helps the cutlet to be firm and hold its shape especially when deep frying.You can avoid this step if you are pressed for time.
  • Apply few tbsp of oil on a thick hot tawa and arrange the cutlets in a single layer and shallow fry them on both sides until golden and crisp.You can even deep fry if you are making for a big crowd(but make sure you rest them in fridge for an hour at least before frying).
Sprinkle some chaat masala over the cutlets and serve them hot with green chutney,tamarind chutney and tomato sauce.

Notes:
  1. You can even vegetables like green beans,capsicum and cauliflower.You need to blanch them and chop them finely and add to the mixture.
  2. You can avoid the process of dipping the cutlets in slurry and coating them with bread crumbs.This gives a thick and crispy crust to the cutlet,it is optional.
  3. If your cutlet is not holding its shape while making you can add another bread slice(run in the mixer to powder) to it and mix and start making cutlets.
  4. Addition of taste maker while making noodles is completely optional.I like the flavor of the taste maker to be prominent in tikki and hence I suggest you to use it.
  5. You can use any variety of noodles like atta noodles or some other brand or plain noodles with or with out taste maker as we do add few spices to the tikki.
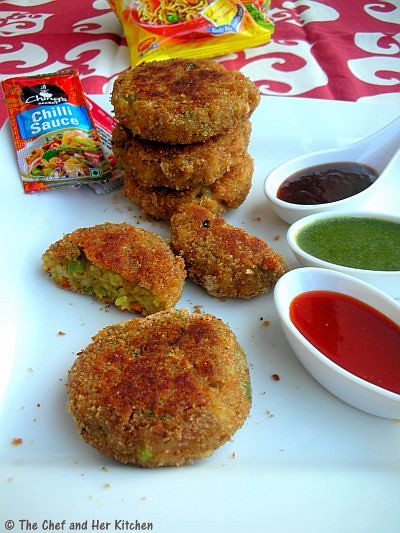
  6. This is almost a similar recipe for my vegetable cutlet other than the noodles part just with few more vegetables.So if you avoid noodles in it,this will become vegetable cutlet.

Thursday, December 1, 2011

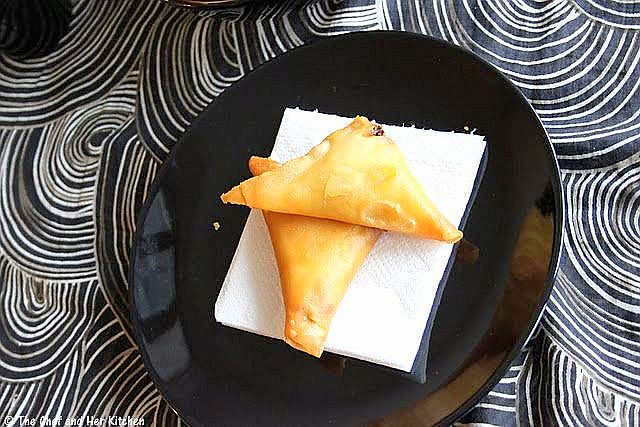
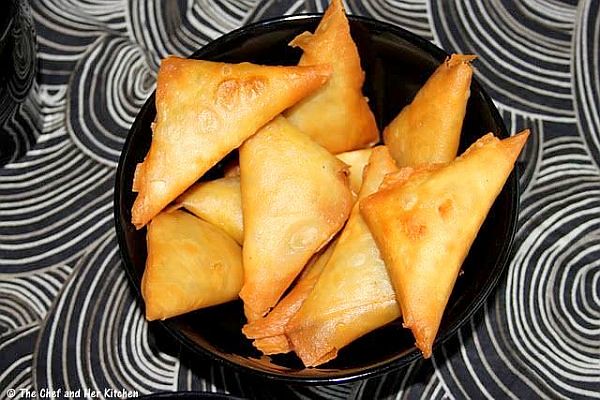
Onion Samosa | Ullipaya Samosa | Irani Samosa...FF-TT # 4

This week's entry is sent to me by my brother 'PRASHI' and I hope you all remember him,he had sent two sensational entries Davanagere Benne Dosa and Khara bath in my last season which got lot of appreciation from everyone.He loves cooking and also he is very particular about the taste of food, though he cooks rarely he tries to make it perfect whatever he prepares. After a couple of trials and few web searches he had settled with this recipe for one of his favorite snacks onion samosa and now my S-I-L continued making them with his recipe.If you would like to see the earlier entries for the series please check here.

Onion samosa is very popular in south especially in Hyderabad.You find them everywhere like in movie theaters,small Irani cafes,tea shops and in almost every snack shop.These samosas are very small in size and different in shape unlike the famous Punjabi samosa and they are also called Irani samosa.The sweet juice of onion in each and every crispy bite of samosa makes you to crave for more and one can't be satisfied with a single samosa and hence we end up eating more,I am warning you ahead that they are quite addictive,so don't blame me later ok??.This is a perfect snack with your evening cup of tea/coffee or as a party appetizer.These onion samosas are very easy to make if you get the ready made frozen samosa leaves and you can even make them ahead as it stays crispy for long at least for a couple of hours.

Onion Samosa Recipe:
(makes 16-18 pieces)

Ingredients:
16-18 store brought frozen Samosa leaves
2 medium Onions chopped,length wise
1 cup thin Poha/Flattened rice
1/8 tsp Turmeric powder
1 tsp Red chilli powder
2 tsp Cornflour
2 tbsp Water
1 tbsp Oil
Salt to taste
Oil for deep frying

Method:
  • Defrost the samosa leaves for 45 minutes. This step is important otherwise your leaves will tear into peaces easily and will not be pliable.
  • Heat 1 tbsp oil in a pan and add sliced onions and fry just till tender and turn pinkish in color.
  • Add turmeric powder and salt, fry for a couple of minutes.
  • Now remove from stove, add chilli powder and poha and mix well. Keep it aside to cool.
  • Mix cornflour and water in a bowl to form a paste and keep it aside.
  • Take one samosa leave and fold one edge of it to the other end to form a triangle. And now fold this triangle 2 more times to form into a cone.See the pictorial for clear idea.

  • Now fill 1 Tbsp of the onion mixture into the cone.
  • Seal the edges well with cornflour paste to form a neat triangle samosa.
  • Repeat the steps with other samosa leaves.
  • Mean while heat oil in the kadai.
  • Deep fry these samosas on medium heat until they are fried 80% and drain them on a kitchen tissue.
  • After frying all the samosas, repeat frying the 80% fried samosas again to do double frying until the samosas are crisp and golden in color.
  • Fry and drain it on a kitchen tissue.
Serve it hot or cold with tomato ketchup or coffee or Tea.


Notes:
  1. You can fry samosas at once full 100%, but double frying the samosa makes it much crispier.It looks bit oily because of this.
  2. Addition of poha absorbs excess water in the onion mixture which avoids your samosa being soggy.This helps in keeping the samosa crispy for hours together so that you can make them in advance and keep.
  3. You can add chaat masala or Garam masala if you want bit chatpata flavor.But I prepare them without it to enjoy the simple and juicy flavors of onion.
 
back to top