Vegetables


- Avarekalu Mixture | Hyacinth Bean Snack - Bangalore special
- Butter Murukku | Benne Murukku
- Chakli | Murukku -easy version
- Karam Gavvalu - Andhra Special
- Kodubale | Kodbale
- Nippattu | Nippat Recipe
- Spicy Diamond Cuts
Also check out the wide collection of Diwali Sweets Recipes and Payasam/Kheer Varieties.

Shelf life: 2-3 weeks | Author: Prathibha
Prep time: 10 mins | Cooking time: 40 mins | Total time: 50 mins
Cuisine: South Indian | Category: Snacks
Ingredients:
2 cups Homemade Rice flour
1/2 - 3/4 cup sour thick Curds
thick Sour butter milk,to mix the dough
1.5 tbsp white Sesame seeds
1.5 tsp Chili powder
Salt to taste( approx 1 heaped tsp)
2 tbsp hot Oil
Oil,to deep fry
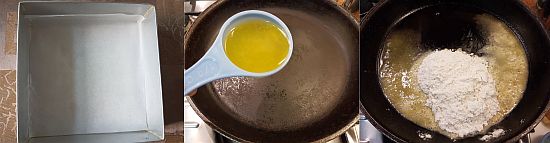
Method:
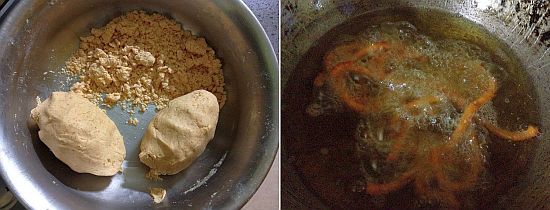
- In a bowl add rice flour,salt,chili powder and sesame seeds to it and mix it nicely.
- Pour hot oil on top of the flour and carefully mix with the ladle,do not use your hands to mix it immediately.Leave it aside for 2-3 mins.
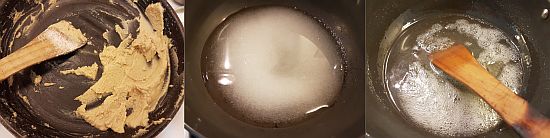
- Now add the sour thick curd and mix the flour well with hands until the oil and curd is incorporated in to the flour nicely.
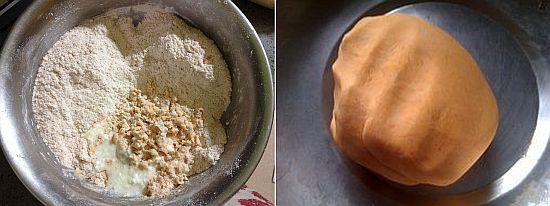
- Divide the flour equally into 2-3 parts if you are making in large batch or else knead into one portion.
- Sprinkle the buttermilk to one portion and prepare a thick dough.
- Meanwhile heat oil in the kadai.
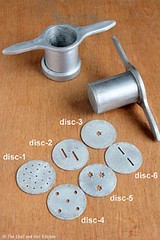
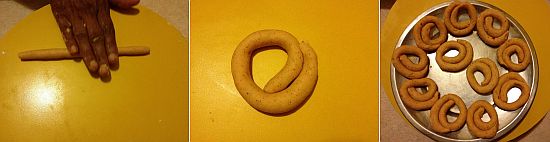
- Use a 5 eyed disc-thick round sev (disc-4 in the above pic) in the murukku maker and fill the dough in it.
- Carefully press the dough in to the hot oil directly in a circular motion.Do this process carefully otherwise the oil might spill.
- If your murukku looks smooth and slight serrated edges then it is the correct consistency it will give nice hollow and crisp but soft to bite kind of murukku.If the surface is very hard and becomes very thin it will yield hard to munch kind of murukku.In that case slightly sprinkle some water to make the dough bit smooth and then proceed.
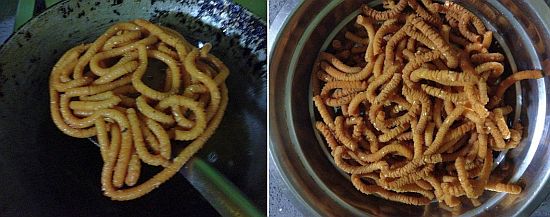
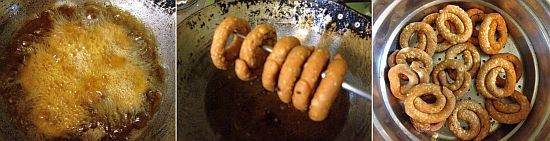
- Deep fry over the medium-high flame until the murukku turn golden brown in color and the bubbles subsides in the oil.
- Drain excess oil on to kitchen napkin.
- While it is frying add buttermilk to the 2nd portion and repeat the same process of preparing dough and frying and repeat until all the flour is over.It is always better to make dough in small portions than preparing the dough at once.
Let all the murukkus come down to room temperature.Store it in air tight container.
Notes:
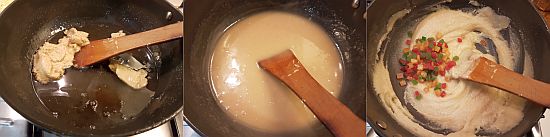
- You can add 1/2 cup soaked sago to make it into sago murukku.Choose small sized sago for it,if the sago is big it might break into pieces when it is pressed it into oil.
- Always mix the dough in small portions,this way it will not make the dough very soft and in turn reduces the oil consumption.
- If your murukku looks smooth then it is the correct consistency it will give nice hollow and crisp but soft to bite kind of murukku.If the surface is very hard it will yield hard to munch kind of murukku.In that case slightly sprinkle some water to make the dough bit smooth and then proceed.
- If the murukku turns very hard to bite,it means the amount of hot oil you added to the dough is not enough.Add 1-2 tbsp more and make the next batch.