Thursday, June 29, 2017

Vegan Thai Mango Pudding | Thai style Mango Pudding using Coconut Milk

thai mango pudding
Vegan Mango Pudding recipe with step by step photos.I never miss to make desserts using mangoes during the mango season.I love mangoes to the core and try to enjoy it to the fullest extent until the season lasts.Today I am posting a dessert which is known as Thai Mango Coconut Pudding which is prepared using a mixture of mango puree  and coconut milk and is set by using either agar agar or gelatine in the recipe.This version is bit different from Thai Mango Coconut Jelly which is a layered set jelly with two layers of mango and coconut and is set in a big mold and then cut into pieces,where as in today's version we are mixing both the mango pulp and coconut milk and is set in individual portions.
When I have guests or a party I prefer to make the desserts which can be made ahead and keep it ready to reduce the effort of cooking on the desired day.Hence I always prefer the desserts like Mousse, Pannacotta, pudding etc which can be made on the previous day and I love the layered and set desserts using agar agar, the desserts are easy to make and when set in glass molds they look even more tempting.
vegan mango pudding
Check out other quick desserts in my blog:
Here is how to make mango pudding using coconut milk recipe with step by step photos.

Vegan Mango Pudding Recipe:
Serves 5-6 | Author: Prathibha
Prep time: 15 mins | Cooking time: 15 mins | Total time: 30 mins+setting time
Cuisine: International | Category: Desserts

Ingredients:
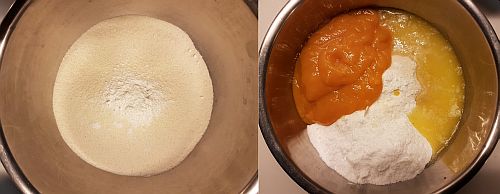
1 cup(250 ml) Mango pulp,pureed from 2 ripen mangoes
1 cup(250 ml) Coconut milk,ready or homemade
1/2 cup(125 ml) Water
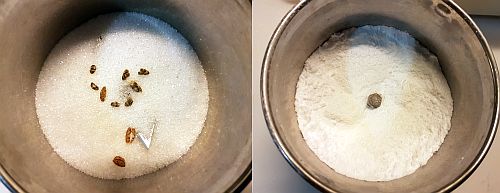
1/3 cup Sugar
1.5 tsp Agar Agar powder or 5gms China grass(read notes)
1.5 tsp Lemon juice

Method:
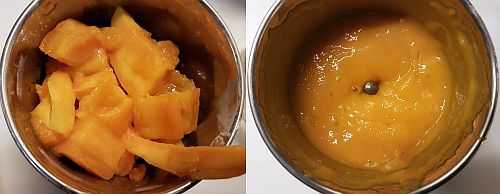
  • Cut mango into pieces and puree it into a smooth mixture and keep it ready.Reserve few mango pieces for garnishing.
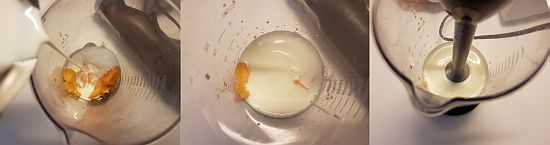
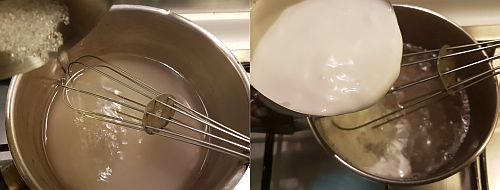
  • Dissolve agar agar powder in water and let it come to a boil.
  • Add sugar to it and let it dissolve completely.Reduce the flame and add coconut milk and let it come to a boil, do not need to boil it.Switch off the flame.Remove it from the stove.
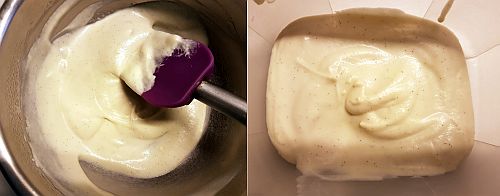
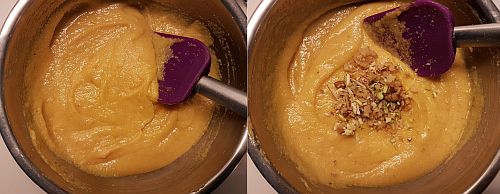
  • Add the mango puree and mix it nicely until it is blended and then add lemon juice and mix it again.
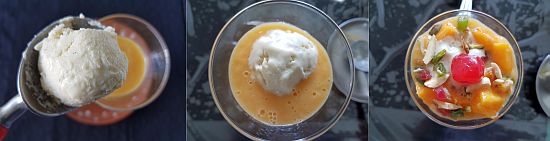
  • Pour it into individual moulds and let it cool for a while and then refrigerate it for a couple of hours or overnight until it is set.
Garnish with mango pieces and mint leaf and serve it.

Notes:
  1. If you are using china grass cut it into small strips and soak it in water for half an hour and then follow the recipe.If you are using gelatine let it bloom in warm water and then follow the recipe.
  2. You can even mix few mango pieces in the mango coconut mixture and then pour it into the molds.
  3. Do not skip the lemon juice in the recipe, it elevates the taste of mango flavor in the recipe.
  4. You can use regular cream instead of coconut milk and follow the same recipe.
  5. You can refrigerate the dessert and use it in 2 days.
  6. I like my dessert to be silky soft and hence I used 1.5 tsp agar agar powder, if you want it to set like a jelly use 2 tsp agar agar powder in the recipe.
thai mango coconut pudding

Tuesday, June 27, 2017

Eggless Peanut Butter Cookies Recipe | Eggless Cookie Recipes

peanut butter cookies
Eggless Peanut Butter cookies recipe with step by step photos.Peanut butter has nutty and buttery flavor and I love to spread it on bread toast or use it in cookies or brownies or muesli bars, it enhances the taste for sure.These days it has become a norm to bake cookies once or twice a week and loving the freshly home baked cookies.I already feel that I have put on few kilos because of my recent craze for baking often as earlier it used to be a monthly affair but now I bake very often.

These peanut butter cookies are soft to bite loaded with peanut butter taste and tastes absolutely delicious.Cookies always taste best with a glass of chilled milk and my little one loves to dunk the cookie in the milk and eat it.Home made cookies are lot better in terms of quality compared to the store bought ones and also one can reduce the quantity of sugar and butter that goes in it and hence I choose to bake my own cookies.
peanut butter cookies

Check out other cookies recipes in my blog:
peanut butter cookies
Here is how to make eggless peanut butter cookies recipe with step by step photos:
Eggless Peanut Butter Cookies Recipe:
yields : 12-14 cookies | Author: Prathibha
Prep time: 15 mins | Baking time: 12 mins | Total time: 30 mins
Cuisine: International | Category: Snacks-Cookies

Ingredients:
1/2 cup All purpose flour
1/4 tsp Baking powder
1/4 cup Demerara Sugar/regular Sugar,powdered
3 tbsp Butter,at room temperature
1/4 cup chunky Peanut Butter
1/4 tsp Vanilla essence
1-1.5 tbsp Milk

Method:
  • In a bowl add butter at room temperature, sugar , peanut butter and vanilla essence and whisk it using a hand whisker until you get a creamy mixture.
  • Add flour and baking powder to the creamed butter-peanut butter mixture and mix it nicely.Add a couple of teaspoons of milk to form a dough.Do not knead it just gather the mixture to a dough, add little milk just to form a dough.
  • Use a measuring spoon ,I used 1/2 tbsp spoon and scoop out the mixture and form a ball with it and press it slightly and place it on the parchment paper or baking sheet laid on the baking tray.
  • Use a fork and make an impression with it gently, you can even avoid it or make a criss cross pattern with the fork or knife gently.
  • Repeat the process and prepare all the cookies and place it on the parchment giving space in between for them to expand while baking,they expand quite a bit. Keep the tray in the fridge for 10 mins until the oven gets preheated.
  • Preheat the oven at 180 deg C/350 deg F for 12-15 mins.
  • Place the baking tray in the oven and bake at 170 deg C for 15-17 mins until the sides start to become brown.Keep an eye after 12 mins and check it.
  • When you touch the top of the cookie it will be soft but will hold its shape as it gets cooled.
  • Remove the tray and let the cookies sit on the tray for 8-10 mins and then slowly remove them on to the wire rack and let them cool completely.
Store them in an air tight container.Serve with a glass of chilled milk.

Notes:
  1. Add little milk just enough to gather the mixture to form a dough, do not knead it.
  2. You can add peanut butter chips while making the dough.
  3. Chill the cookies that are placed on the baking tray before baking to avoid them to spread more while baking.
  4. You can sieve the flour with the baking powder before adding to the wet ingredients.
  5. Add 1-2 tsp of Corn flour along with the flour which gives lighter cookies.
  6. I forgot to use brown sugar and used the regular sugar in the recipe but I added a tbsp later for the flavor.
peanut butter cookies

Thursday, June 22, 2017

Mango Mastani Recipe | Mango Recipes

mango mastani
Mango Mastani Recipe with step by step photos.Mango mastani is a famous Pune's drink which is nothing but a thick mango milkshake topped with vanilla ice cream,nuts,chopped mango pieces,tutti frutti and glaced cherries.Few days back I had happened to see this mango mastani recipe in Sanjeev Kapoor's site and wanted to give a try and coincidentally this recipe was flodded in the blogosphere and the urge to try it became quite strong that I tried it immediately but took my time to post it on the blog.
mango mastani
Mango mastani is definitely a delicious glass of mango drink and it has all my favorite things - mango milkshake, ice cream, nuts and cherries, so how can it go wrong in taste.Each sip and bite is so delectable that I can understand why it got its name. According to my internet search this drink was named after the beautiful queen mastani who was wife of bajirao mastani and I have not explored more into it's depth so I cannot tell more than this.
mango mastani
Check out other mango desserts recipes in my blog - AamrasMango FudgeMango Ice-creamMango KulfiMango PannacottaMango PhirniMango SheeraMango ShrikandNo Churn Eggless Mango Ice-Cream
mango mastani
Here is how to make mango mastani recipe with step by step photos.
Mango Mastani Recipe:

Serves 2
Prep time: 10 mins | Cooking time: NIL | Total time: 10 mins
Cuisine: Indian | Category: Beverages

Ingredients:
2 large ripen Mangoes(Alphonsos or Kesar)
1.5 cup full cream Milk,boiled cooled and chilled
2-3 tbsp Sugar
2-4 scoops of Mango Ice cream/Vanilla ice cream
2 tbsp sliced dry fruits(pistachios,almonds and cashewnuts
2 tsp mixed color tutti frutti
2-4 glaced Cherries

Method:
  • Wash and peel the skin of the mangoes and cut into cubes and reserve few chopped mango pieces and add the remaining to the blender.
  • Add boiled,cooled and chilled milk to the blender along with chopped mangoes and sugar and blend into a thick puree.
  • Add few mango pieces in to 2 serving glasses and pour the thick milkshake on top of it until little more than 3/4th of glass giving enough space for the ice cream and the other ingredients.
  • Now add 1-2 scoops of either vanilla or mango ice cream in both the glasses.
  • Now top it with few chopped mango pieces, dry fruits, tutti frutti and place a cherry on top of the ice cream.
Serve it immediately with a spoon and straw.

Notes:
  • There are no hard and fast rules for making this milkshake ,use the quantities according to your personal preference.
mango mastani
Technorati Tags: ,,,,,

Monday, June 19, 2017

Eggless Vanilla Ice cream Recipe | Easy Homemade Vanilla Ice cream

eggless vanilla ice cream
Basic Vanilla Ice cream recipe with step by step photos. Vanilla ice cream is the most basic ice cream variety and I am sure everyone would love it. Vanilla ice cream is so versatile that it can be eaten as it is as a dessert or can top your milkshakes,puddings,fruit salad,brownies,cake with the vanilla ice cream and enjoy.Vanilla ice cream is also served along with the famous Indian desserts like gulab jamun and Carrot halwa.I somehow love the taste of the warm halwa/ jamun/ chocolatebrownies with the cold ice cream, it tastes just divine!!
vanilla ice cream
My mom used to make ice creams at home when we were kids, she used to use CMC and GMS to make the ice cream and the end product used to be creamy and delicious like the store bought ice creams. However I never tried it that way and always opted the easy peasy version of ice creams using the whipped heavy cream and was always happy with the end results.The version I am posting today is very easy and no churn vanilla ice cream recipe which can be prepared with just three ingredients and all you need is 10 minutes to prepare a tub of this luscious versatile vanilla ice cream. You just need a beater to beat the cream and mix in the condensed milk and vanilla and you are done!
This is a basic method of preparing ice cream and one can prepare various flavors using the same method - Mango Ice cream, mixed berry ice cream, strawberry ice cream, pistachio ice cream, butter scotch ice cream, Gulkand ice cream, rose ice cream to name a few.You can play with the flavors of your choice and create delicious ice creams easily at home.
homemade vanilla icecream
Check out the other frozen desserts/ice creams I have posted in my blog so far - Mango Ice cream , Mango Kulfi , Gulkand ice creamStrawberry Frozen Yogurt/Froyo
Here is how to make easy no churn eggless vanilla ice cream recipe with step by step photos.
Eggless Homemade Vanilla Ice cream Recipe:
yields: 1 small tub | Author: Prathibha
Prep time: 10 mins | Cooking time: NIL | Total time: 10 mins +  6-8 hrs of freezing
Cuisine: International | Category: Frozen Desserts/Ice creams

Ingredients:
1 cup fresh heavy cream(30% fat)
2/3 cup Condensed milk
1/2 tsp good quality Vanilla paste or 1 tsp Vanilla essence or 1 Vanilla bean

Method:
  • Chill the bowl and the beater blades in the freezer for an hour.Keep the cream chilled too.
  • Now beat the cream using an electric mixer until it forms soft peaks, it roughly takes 6-8 mins.
  • Add 1/2 cup condensed milk and whisk it until it is mixed nicely,check the taste and add more condensed milk if needed and whisk again.
  • Add vanilla pasta or essence or scraped vanilla bean(discard the bean use only the scraped vanilla paste inside) and whisk it again.
  • Pour it into a freezer safe box and freeze it until set for roughly 7-8 hours.
Scoop and serve it.You can serve it as it is as on top of milkshakes,fruit salad or a warm brownie or pudding.You can even top the ice cream with some nuts and chocolate sauce and enjoy.

Notes:
  1. As we are whisking the cream nicely we do not need to churn it again in between and it still turns out quite creamy.
  2. If you do not get heavy cream in India, you can even use amul cream too.
  3. Use the best quality vanilla for this, I use vanilla bean paste or freshly scraped vanilla for all the bakes, it really enhances the flavor of the final product.
  4. Please be careful when you are beating the cream, once the soft peaks are forms do not beat it more else it might turn to a butter.
eggless vanilla ice cream
Technorati Tags: ,,,,,,

Thursday, June 15, 2017

Mango Semolina Cake | Eggless Mango Cake Recipe

eggless mango cake
Eggless mango semolina cake recipe with step by step photos.Mangoes are in season and why not use it in various recipes and enjoy the mango flavors at its best.I had posted earlier a Mango Pound Cake recipe which has eggs in it.Today I am posting an easy version of eggless mango cake using semolina. I had prepared this eggless mango cake recipes followed by the recipe here many times before but never got to post it here in my blog. This mango cake is made with semolina and I must say that it tastes almost like mango sooji halwa but in a lighter cake form and tastes absolutely delicious.Also it is a simple recipe with easily available ingredients in the kitchen.So what are you waiting for? do give it a try before this mango season and treat your friends and family with this delicious cake.
eggless mango semolina cake
Check out other mango desserts recipes in my blog - AamrasMango FudgeMango Ice-creamMango KulfiMango PannacottaMango PhirniMango SheeraMango ShrikandNo Churn Eggless Mango Ice-Cream
mango semolina cake
Here is how to make mango semolina cake with step by step photos:
Eggless Mango Semolina Cake Recipe:

Yields: 1 loaf  | Recipe source: here
Prep time: 15 mins |  Baking time:25-30 mins | Total time: 45 mins
Cuisine: Indian | Category: Eggless Baking

Ingredients:
1 cup Fine Semolina(Chiroti rawa)
1 cup Mango puree( puree from 2 large ripen alphonso mangoes)
1/2 cup Sugar
1/3 cup Butter,melted or 1/3 cup Oil
1 tsp Baking powder
4 Cardamoms,seeds
1/4 cup mixed sliced Nuts(pistachios,almonds,walnuts)

Method:
  • Powder the sugar and cardamom seeds to a fine powder.
  • Cut mangoes into pieces and grind it to a fine puree.
  • Add baking powder to the semolina and mix it well.
  • Add melted butter(or oil), mango puree to the semolina and mix it nicely and leave it aside for 15 mins until the semolina mixture becomes thick by absorbing the mango puree.
  • Preheat the oven at 180 deg C / 350 deg F for 12-15 mins.
  • Now add chopped nuts(reserve few to add on top) to the mango semolina mixture and mix it nicely and pour it into the greased loaf tin and bake at 170 deg C for 25-30 mins, keep an eye after 25 mins,it might get browned faster.
  • Do a toothpick test, if you prick in the center of the cake and remove, if it comes out clean means it is done.
  • Remove the pan from the oven and rest it for 10 mins in the pan and then turn it on the wire rack and let it cool completely.
Slice and serve it as a snack or dessert.

Notes:

  1. Always use good quality mangoes , the final color of the cake depends on the color of the mangoes.
  2. You can use even tinned mango pulp instead of the fresh mango pulp.
  3. The mangoes I used were very sweet and 1/2 cup of sugar was enough for it, if your mangoes are not sweet you can increase it to 3/4 cup.
  4. The original recipe asked for 1/2 cup butter, but I have used 1/3 cup melted butter and it worked fine too.
  5. You can use regular semolina too by grinding it in the mixie briefly.Do not roast the rawa.
  6. If the semolina mixture does not become thick even after 15 mins leave it for another 5 mins.
mango sooji cake

Monday, June 12, 2017

Moong dal Chilla Recipe | Moong dal Cheela

moong dal cheela
Moong dal Chilla recipe with step by step photos. Moong dal Cheela is similar to Andhra Pesarattu, yellow moong dal is used in cheela where as whole moong is used in Pesarattu but there is a lot of change in taste and texture of both the dosa varieties. Pesarattu is either stuffed with upma or onion-chili-ginger mixture and is served with Ginger Chutney where as Cheela can be prepared with or without cottage cheese mixture and is served with Chaat chutneys or Tomato sauce. Pesarattu is bit heavy where as cheela is bit light on tummy but I absolutely love both the variations.
moong dal cheela
Cheelas are prepared in the North India like how dosa is prepared in south India. Besan Cheela,Sooji Cheela and Moong dal Cheela are the most prepared ones. Cheela is also known as Puda or Pudla in some parts of  India.
moong dal chilla
moong dal chilla
Moong dal Cheela is protein rich and nutritious too,hence can be served for a filling breakfast or snacks, it can be even packed as rolls for lunch box and it stays good too.I have added green chilies and ginger while grinding the batter but you can avoid it if you want to prepare it for young kids.Also the batter can be prepared ahead and prepare cheelas or you can grind the batter and start preparing cheelas as it does not require any fermentation.
moong dal cheela
Here is how to prepare Moong dal Cheela recipe with step by step photos.
Moong dal Cheela Recipe:

Yields: 8-10 | Author: Prathibha
Prep time: 20 mins | Cooking time: 10 mins | Total time: 30 mins
Cuisine: Indian  | Category: Breakfast/Snacks

Ingredients:
1 1/4 cups Green Gram(yellow Moong dal),de-husked,split
2 tbsp Bengal gram(Chana dal)
2 Green chilies,chopped
3/4: Ginger,chopped
a pinch of Asafoetida
Salt, to taste
Oil,to roast cheelas

for the filling:
1/2 cup fresh Cottage Cheese(Paneer),finely chopped
2 tbsp Coriander leaves
a pinch of  Salt

Method:

  • Soak moong dal and chana dal together for 2-3 hours and wash them and drain the water and grind the lentils with chopped green chilies and ginger to a fine paste,add required amount of water while grinding the batter. Add salt and asafoetida and mix well.The consistency of the batter should be similar to the regular dosa batter.
  • Mix the finely chopped paneer pieces with coriander leaves and salt nicely and keep it ready.
  • Heat the dosa tawa nicely and pour a ladle of batter and spread it in a circular motion to form a dosa, you can spread the cheela according to your desired thickness.
  • Pour a tsp of oil around the edges and on the cheela and cover it and cook on medium flame for a minute until the dosa starts turning brown.
  • Place a tbsp of cottage cheese mixture on one side of the cheela and fold it into half.
Serve it hot with Green chutney and Meetha chutney or Tomato sauce.

Notes:
  1. You can avoid chana dal in the recipe and prepare only with moong dal.
  2. If you want crispy moong dal cheelas you can add a tbsp of rice flour or sooji to the prepared batter and mix it nicely before making the cheelas.
  3. You can even place the paneer mixture in one corner of the cheela and roll it to form a roll and can be cut into two and can be packed for lunch box or for chaat parties.
moong dal cheela
 
back to top