Thursday, April 27, 2017

Mangalore Bonda Recipe | Goli Baje | Mangalore Bajji

mangalore bajji
Mangalore onbda recipe with step by step photos.Mangalore Bonda is a popular Karnataka snack which is originated from Mangalore but is famous across many South Indian hotels.It is also known as Mangalore Bajji and it is called as Goli Baje in Tulu,a native language of Mangalore.
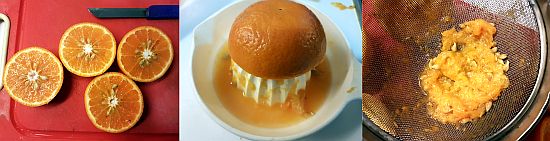
When we had gone for a family trip to a few places in Karnataka, I finally got a chance to taste authentic Mangalorean dishes for the first time. I have posted few recipes - Mangalore Buns and Bonda Juice recipes which I posted long back, even those recipes were inspired from my Mangalore trip.Though Mangalore cuisine is predominantly non-vegetarian, it has various breakfast and snack options which tastes really good and I am kind of addicted to them. Few of my personal favorites from Mangalore are Goli BajeMangalore Buns, Neer Dosa, Churmuri, Kadubu, Bonda Juice to name a few.
mangalore bonda
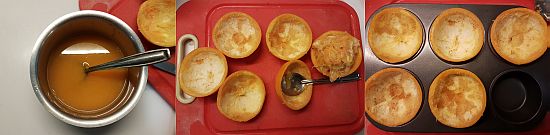
Mangalore Bonda is a very simple Bonda recipe with no grinding required and is made out of maida and sour curd as main ingredients unlike the regular bondas made out of rice batter or besan.The preparation process is very simple and quick to make just that you need to rest the batter for enough time,it gives a nice distinct taste and also helps in puffing up in the oil nicely. They can be served in Breakfast or as a snack. In hotels for breakfast it is usually served in the size of small oranges and at home it is usually prepared like small fritters in the size of amlas.You do not need to do any shaping, you can drop a spoonful of batter in the hot oil.If the batter has a right consistency, the moment you put the batter in the hot oil it puffs up nicely and forms like a ball.
Check out other bonda and bajji snacks recipes in my blog:
mangalore bonda
Here is how to make Goli baje with step by step photos:
Goli Baje | Mangalore Bonda Recipe:
Serves 2-3 | Author: Prathibha
Prep time: 5 mins | Cooking time: 15 mins | Total time: 20 mins + fermentation time
Cuisine: Mangalorean | Category: Snacks

Ingredients:
1 cup All purpose flour/Maida
1 tbsp Rice flour
1/2 - 2/3 cup Sour curd,more if needed
2-3 Green chilies, finely chopped
2 tbsp finely chopped Coriander leaves
1 tbsp finely chopped Curry leaves
1.5 tsp finely chopped Ginger
2-3 tbsp finely chopped Onions,optional
1 tbsp finely chopped Coconut pieces,optional
1/4 tsp Cooking soda
Salt to taste
Oil,to deep fry

Method:
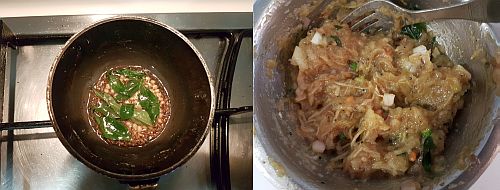
  • Mix the flour and rice flour with sour curd and salt and mix it nicely to a smooth thick batter of dropping consistency, it should not be either very loose or very hard and should be slightly thicker than the idli batter consistency but not hard like chapathi dough,add sour curd if required.
  • Cover it and let it ferment for 3-4 hours.
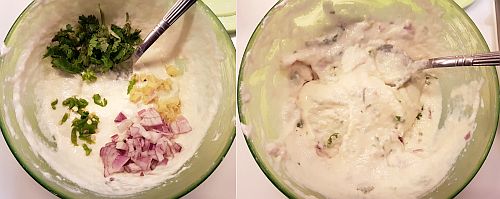
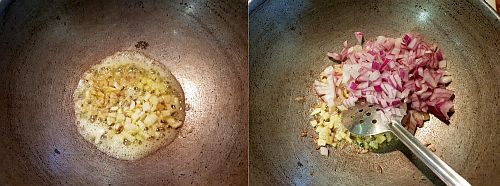
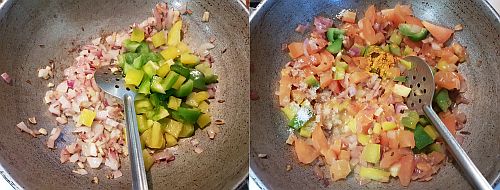
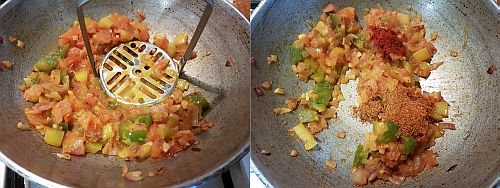
  • Add chopped green chilies,coriander leaves, curry leaves,ginger,coconut pieces and onions and mix it nicely.
  • Heat oil in a thick kadai .
  • Now mix in the cooking soda to the batter and mix it nicely.
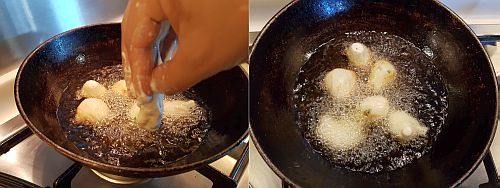
  • Wet your fingers and drop in small amla sized portions of the batter in the oil , add 6-7 per batch at a time and do not over crowd the pan.Wet your hands every time you drop in the batter for uniformly looking round fritters.You can even make big lemon sized balls if you are preparing for breakfast and in that case do not add more than 2-3 at a time.
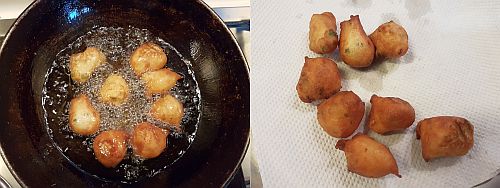
  • Fry them until they turn golden brown in color on medium flame.
Serve them hot with Coconut chutney.It is better to eat them hot else they will turn chewy.

Notes:
  1. Use only sour curd for the recipe as it gives unique taste to the bajjis. 
  2. Fermentation process is also very important for soft,fluffy bajji else they would come hard.
  3. I did not have coconut pieces at that time, but they add nice bites to the bajjis. I like to add onions for my fritters,but you can avoid it completely.
  4. Add soda to the batter just before making them.
  5. The addition of rice flour adds a nice crispyness to the fritters, you can avoid it if you do not have it.
goli baje

Monday, April 24, 2017

Orange Jelly Recipe | Fresh Orange Jelly Recipe using Agar Agar

fresh orange jelly
Orange Jelly recipe with step by step photos.Jelly is always a hit with the kids and my LO is no exception.Though I prepare the jelly using the readily available jelly mix occasionally,I do not prefer to give the commercially available ones to my LO on regular basis just because of the synthetic colors and additives in it.Also, there is no additional nutrition in those jellies which are made using the ready mixes.Hence I usually prefer to make the jelly using fresh fruit juices for my LO.The fresh fruit juice not only adds nutrition and fiber to the jelly but also adds wonderful fresh taste to the jelly. If your kids are poor eaters of fruits then these jellies might make them eat fruit in a different form,though nothing can be compared to eating the fresh fruits.
fresh orange jelly
I have used fresh orange juice to make orange jelly but one can use fruit juices like mango, grapes, litchi, pineapple,watermelon, mosambi etc to make the respective flavor jellies.You can even add tiny bits of fresh fruits to the mould while setting the jelly, it adds a nice bite to the jelly.
orange jelly using agar agar
Coming to today's post - I am posting a fresh Orange jelly recipe using agar agar. I also had set the jelly in the orange cups by scooping out the fibrous portion, this made the jelly look more beautiful and interesting for the kids to eat.This would be definitely a hit in kid's birthday parties and I am sure even the adults would be impressed with this. Try this jelly recipe to impress your kids.
orange jelly
Here is how to make fresh Orange jelly recipe with step by step photos:
Fresh Orange Jelly Recipe:
Yields 6 portions | Author: Prathibha
Prep time: 15 mins | Cooking time: 10 mins | Total time: 25 mins
Cuisine: Indian | Category: Desserts

Ingredients:
3 large juicy sweet Oranges(approx 1 cup juice)
1/2 cup Water
3-4 tbsp Sugar or to taste
1/2 tsp Lemon juice
5 gms(2 tsp) Agar Agar(flakes or powder)

Method:
  • Wash and cut the Oranges into halves and using a hand juicer extract the juice by taking care that the orange shells are not broken.I passed it through a sieve to remove the fibers and seeds collected. Measure the juice, it should be approx 1 cup.
  • Scrape out the fibers from the oranges ,discard the fibers and arrange the orange cups in a muffin pan.
  • Cut the agar agar flakes and soak it in half cup of water for 10-15 mins and boil it until the agar agar melts completely and comes to a rolling boil.
  • Add sugar to the agar agar solution and let it melt nicely.
  • Now add the extracted orange juice to it and add lemon juice and mix and cook for a minute and remove it form heat.
  • Pour it in the prepared orange cups or jelly molds and leave them undisturbed until set or approx 30 mins.
  • Refrigerate it for a couple of hours and then cut the orange cups into wedges.
Serve them cold. You can eat them as it is or use in your puddings and custards.

Notes:
  1. You can use canned orange juice too, but adjust the sugar quantity accordingly.
  2. Instead of Agar agar you can use 1 tsp of Gelatine in the recipe.
  3. The addition of lemon juice is optional in the recipe but it elevates the taste of the jelly.
  4. This recipe yields a slightly firm jelly.If you want a soft jelly you can increase the water quantity to 1 cup, in total 500 ml of liquid(water and orange juice) for 5 gms of Agar Agar. 
  5. You can use fruit juices like mango, grapes, litchi, pineapple,watermelon, mosambi etc to make the respective flavor jellies.
  6. You can even add tiny bits of fresh fruits to the mould while setting the jelly, it adds a nice bite to the jelly.
orange jelly

Wednesday, April 19, 2017

Vegetarian Burmese Khow Suey Recipe | Veg Khowsuey

vegetarian khowsuey
Vegetarian Burmese Khowsuey Recipe with step by step photos.Sometimes we fall in love with few dishes at the very first bite and this Burmese Khow suey was one such dish for me which bowled me for the very first time I had tried in a restaurant back in Mumbai long time ago.When ever I visit that restaurant it had become a norm to order this dish for me with out any fail.Mildly spiced gravy poured over a bed of noodles and is topped with various condiments which adds a nice texture in each and every bite.The crunchy bits of fried garlic, onion and crushed roasted peanuts need a special mention as I just love them in my toppings and I always add them generously to jazz up my khowsuey bowl.
burmese khow suey
burmese khow suey
I wanted to recreate this restaurant magic at home so that I can pep up my weekend meals a bit and got referred to this recipe  while I was searching for the recipe and I modified the recipe a bit to suit my convenience and I must admit that it turned out really delicious. This has become quite regular at home as the idea of making your own khow suey bowls from an elaborate spread of condiments and toppings is much appreciated by everyone at home and also it is fun to create your own khowsuey bowls according to your taste buds.
burmese khow suey
burmese khow suey
Before I jump into the recipe I am warning you - do not get worried seeing the number of ingredients and the long procedure I had mentioned, it is actually quite simple to make. It is easier to make than the regular Chinese Veg Hakka Noodles with manchurian or your usual roti-sabzi-dal fare. Just that you need to chop a lot of vegetables and deep fry a few things for toppings which you can do prior hand. This is one such dish which can wow your guests for sure if you serve at your parties.So, what else you are waiting for? try this recipe at home to impress your family or friends and enjoy the whole hearty meal at home.
burmese veg khow suey
Check out other noodle based recipes in my blog - Chinese Veg Hakka Noodles and Schezwan Vegetable Noodles.
burmese khow suey
Here is how to make Vegetarian Burmese khowsuey recipe with step by step photos:
Vegetarian Burmese Khow Suey Recipe:

Serves 3-4 | Author: Prathibha
Prep time: 20 mins | Cooking time: 30 mins | Total time: 45 mins
Cuisine: Burmese-International | Category: Main Course

Ingredients:
1 packet (200 gms) Noodles
1 cup Coconut Milk,I used ready made
1 cup Vegetable stock or 1 Veg stock cube
2 tbsp Chickpea flour/Besan
1 tsp Pepper powder
Salt, to taste
1 tbsp Oil

for paste:
1 large Onion,chopped
5-6 Garlic cloves
1" Ginger,chopped
1 tsp Coriander seeds
2" Lemon Grass stalk,chopped( I used 1.5 tbsp Green Thai Curry paste)
1/2 tsp Turmeric powder

Vegetables:
5-6 Babycorns,cut into batons
1 large Carrot,peeled and cut into batons
7-8 french Beans,cut into 1/2" long pieces
1/2 cup finely chopped Cabbage
1/4 cup finely chopped Green Capsicum
1/4 cup finely chopped Red Bellpepper
1/4 cup finely chopped Onion
other options- Cauliflower,broccoli,peas,corn

for toppings:
1/2 cup deep fried noodles(I did not add)
1/4 cup browned Onions
2-3 tbsp deep fried finely chopped Garlic
1/3 cup roasted salted peanuts,slightly crushed
2-3 tbsp chopped Spring Onions
2-3 tbsp chopped Coriander
4-6 Lemon wedges
2-3 Green chilies,finely chopped and soaked in 2 tbsp vinegar for a day
1 tsp Red chili flakes
Tofu(pan roasted) or Boiled Egg wedges,optional

Method:
pre preparations:
  • Boil Noodles as per the instructions on the pack and keep it ready.
  • Dry roast chickpea flour until it becomes aromatic and keep it ready.
  • Blanch the vegetables - babycorn,carrot,beans in hot water individually until they are slightly soft but still maintain their crunch.If you are using other vegetables like cauliflower, broccoli,corn or peas blanch them accordingly too.
for Gravy:
  • Grind the ingredients mentioned under the section- for paste - onion, ginger,coriander seeds, garlic , turmeric powder and lemon grass stalk( I used green thai curry paste as I did not have lemon grass in hand) to a fine paste.
  • In a big pot/kadai heat oil and then add ground paste and fry until the mixture leaves the oil at the edges.Add roasted chickpea flour and fry nicely until it is mixed.
  • Now reduce the flame and add the stock slowly and keep mixing it with the whisk nicely to avoid the lump formation.
  • If you want to add vegetables to the gravy,  you can add them at this stage and let them cook in the gravy,but I like to keep it separate to maintain their crunch.
  • Add salt and pepper powder to it and let the mixture come to a boil and then add coconut milk and mix it nicely and let it come to boil.Add more water if needed to get the consistency of a gravy which is neither thin nor very thick.Cover and keep it aside.
for toppings:
  • Deep fry finely chopped garlic and onion separately until they turn brown and crisp.
  • Finely chop green chilies and soak in vinegar, it is better to let it soak for long as it makes the green chili bits spicy and tangy.
to assemble:
  • Keep the gravy hot.
  • Keep all the toppings,noodles and gravy ready.
  • for each portion of khowsuey - Place a portion of boiled noodles in a serving deep bowl and add few blanched vegetables(babycorn,carrot and beans) and also add finely chopped raw vegetables (cabbage,green and red capsicum,onion) and pour 2-3 ladles of hot gravy all over the noodles and vegetables.Now garnish with a generous amounts of deep fried garlic-onion bites, crushed roasted peanuts, spring onions, chili flakes, green chilies(soaked in vinegar), coriander, deep fried noodles(if using) and squeeze lemon all over it.You can add pan fried tofu cubes or boiled egg wedges on top while serving if you want.
  • Repeat for all the portions.Add the noodles,gravy,vegetables,toppings quantities as per your wish.
Serve it hot.Enjoy!!

Notes:
  1. You can add vegetables while preparing the gravy but I prefer to keep it separate and serve them so that it maintains its crunch and we can add them as per our wish.
  2. Be generous with toppings- fried garlic, fried onions, crushed peanuts. They add nice taste to khowsuey.
  3. You can even add glass noodles or rice noodles or a combination of noodles,but I use regular noodles.
  4. It is fun to serve everything at the dinner table so that one can create their own khowsuey bowls as per their taste.Hence keep everything ready and heat the gravy just before serving.
  5. I did not have lemon grass in hand and hence I added Thai green curry paste which had good amount of lemon grass in it and it was quite good.
burmese veg khow suey

Monday, April 17, 2017

Kalchina Vankaya Pacchadi | Smoked Eggplant Chutney

kalchina vankaya pacchadi
Kalchina Vankaya Pacchadi recipe with step by step photos.I have mentioned many times in my earlier posts that pacchadis(chutneys) are a must in every Andhra meal and we prepare various pacchadis with vegetables and lentils. I have posted many pacchadi varieties in my blog before and today I am adding one more pacchadi recipe to my collection. My MIL is a source for various pacchadi and pickle recipes for me and even this recipe is one of her pacchadi varieties. 
We prepare two types of  Vankaya Pacchadi- one is like the regular pacchadis where the brinjal pieces are fried along with the lentils and spices and then ground to a coarse chutney and the other one is this smoked version where eggplant is charred and then mashed and mixed with spices and is given a tempering. I like both the versions but this version is my favorite because of the smokiness of the charred eggplant.This is somewhat similar to the Punjabi Baingan Bharta but in a south Indian way. We add tamarind pulp to the chutney for a sour taste which itself gives a nice and distinct taste to the chutney.Some like to add sauteed onions to the chutney but I like to add raw onions as it gives a nice crunch and complements the smoky eggplant mash well.
kalchina vankaya pacchadi
Brinjal is one of the most loved vegetable in Andhra and we make various varieties with Brinjal - Vankaya Kobbari KaramVankaya Kothimeera KaramVankaya Ullipaya KaramBagara Baingan , Bharli Vangi, Gutti Vankaya with it.
Check out other Andhra style Pacchadi varieties in my blog:

Here is the recipe for Kalchina Vankaya Pacchadi with step by step photos:

Kalchina Vankaya Pacchadi | Smoked Eggplant Chutney:
Serves 2-3 | Author: Prathibha
Prep time: 5 mins | Cooking time: 10 mins | Total time: 15 mins
Cuisine: South Indian | Category: Accompaniments-Pacchadi

Ingredients:
2 medium sized long Brinjals or 5-6 small brinjals
1 amla sized Tamarind ball
1 small Onion,finely chopped
2-3 Green Chilies,finely chopped
Salt,to taste

to temper:
2 tsp Oil
1/2 tsp Mustard seeds
1/4 tsp Cumin seeds,optional
2 tsp Urad dal
a sprig of Curry leaves
a pinch of Asafoetida

Method:
  • Soak tamarind in little water and remove the pulp and keep it aside.
  • Wash and wipe the large eggplant and apply oil all over the skin and poke it with a fork and place it on a open flame over medium heat. Keep rotating it in between in all directions until the whole eggplant is evenly roasted.You can even bake it in the oven at 350 deg F until they are done by rotating them in between. Check it for doneness by inserting a knife, if it slides easily which indicates that it is done.Also the eggplant would have become soggy. Put it in a bowl of water immediately and leave it for 10 mins.
  • Peel out the charred skin of the eggplant and also the stalk and mash it roughly with a masher. You can even chop it finely or run it in mixie in a whipper mode once.
  • Mix the mashed brinjal with finely chopped green chilies and onions,salt and tamarind pulp and mix it nicely.Check the taste and adjust the seasoning accordingly.
  • In a small tempering pan heat oil and crackle mustard seeds, cumin seeds, urad dal, curry leaves and asafoetida and fry until the urad dal turns slight brown in color.
  • Add the tempering to the eggplant mixture and mix it nicely.
Serve it with hot steamed rice and ghee.You can serve it with rotis.

Notes:
  1. If  you do not like raw onions, you can even fry them slightly along with the tempering or you can avoid adding them to the pacchadi. I like the crunchiness of raw onions in the chutney, hence I add them raw.
  2. This chutney(pacchadi) tastes best when done with the small brinjals or the medium long brinjals.
kalchina vankaya pacchadi

Wednesday, April 5, 2017

Masala Pav Recipe | Mumbai style Masala Pav | How to make Masala Pav

masala pav
Mumbai style masala pav recipe with step by step photos.Masala Pav is another snack from the streets of Mumbai which is a delicious snack served in the same stalls where Pav Bhaji is sold.It is not so popular in the other parts of the country but in Mumbai it is a very hot selling chaat after Pav Bhaji.I would rather say it is a simple version of  Pav Bhaji and is light on stomach.
masala pav
Masala pav is prepared with just few ingredients-onions, tomato and capsicum play a vital role in the recipe and the addition of pav bhaji masala gives a similar taste of pav bhaji but the preparation process is lot simpler version compared it.The butter ladened pavs stuffed with the spicy onion-tomato-capsicum mixture is a perfect tea time snack or makes a simple breakfast too.The street style Masala pav uses a small portion of bhaji(pav bhaji's gravy) in the recipe but it is not compulsory to use it.If  you have prepared pav bhaji previous night you can keep some masala and add it to the masala pav mixture to prepare masala pav the next day.My favorite place for Masala pav was DP's in Matunga where we friends used to hang out for our quick evening chaat sessions.
mumbai masala pav
Check out other popular Mumbai street  style Chaat recipes here in my blog:
mumbai masala pav
Here is how to make Mumbai style masala pav recipe with step by step photos:
Mumbai Street style Masala Pav Recipe:
Serves 2  | Author: Prathibha
Prep time: 10 mins | Cooking time: 10 mins | Total time: 20 mins
Cuisine: Mumbai Street Food | Category: Snacks/Chaats

Ingredients:
4-6 Ladi Pav Buns
1 large Onion,finely chopped
2 large Tomatoes,finely chopped
1 medium Green Capsicum,finely chopped
2-3 Garlic pods, finely chopped
3/4 tsp Red chili powder
1/4 tsp Turmeric powder
1-1.5 tbsp Pav Bhaji masala
2 tbsp chopped Coriander leaves
1/2 tsp Cumin seeds
Salt,to taste
4 tbsp Butter

Lemon wedges,to serve
finely chopped Onions,to serve

Method:
  • Heat 2 tbsp butter in a pan and add cumin seeds and let them splutter and then add finely chopped garlic and fry for half a minute.Alternatively you can use Ginger-garlic paste in the recipe.
  • Add finely chopped onions and fry until they turn translucent.
  • Now add finely chopped capsicum and fry for a minute and then add finely chopped tomatoes,salt and turmeric powder and fry until the tomatoes become mushy. Slightly mash them with a masher.
  • Add red chili powder and pav bhaji masala powder and cook for another 2 mins.Add 3-4 tbsp water to it and cook for 3-4 mins until the masala becomes thick.If your tomatoes are juicy enough to give you a nice thick gravy, you can avoid adding the water in the recipe,but it helps in blending the flavors but make sure that you will not loose the crunch of capsicum in the recipe.
  • Add coriander leaves at the end.
  • Heat a griddle add butter and place the slit buns and fry for half a minute and remove them.
  • Add 2 tbsp of prepared masala to the griddle and place the pav buns on it facing the center sides(which are roasted earlier) and place spread some more masala on top of it and fold.
Sprinkle finely chopped onions and coriander leaves on top of it and serve it hot with lemon wedges.

Notes:
  1. In case if you do not have pav buns, you can either use burger buns or hot dog buns.
  2. You can sprinkle some grated cheese on top to make it Cheese masala pav.
  3. You can add a ground paste of soaked red chilies and garlic in the oil instead of garlic and red chili powder.It gives a nice bright red color like the street style masala pav.
  4. I had less capsicum and hence I used some yellow bell pepper in the recipe.
masala pav
 
back to top