Thursday, February 27, 2014

Aloo Broccoli Sabzi | Broccoli Recipes

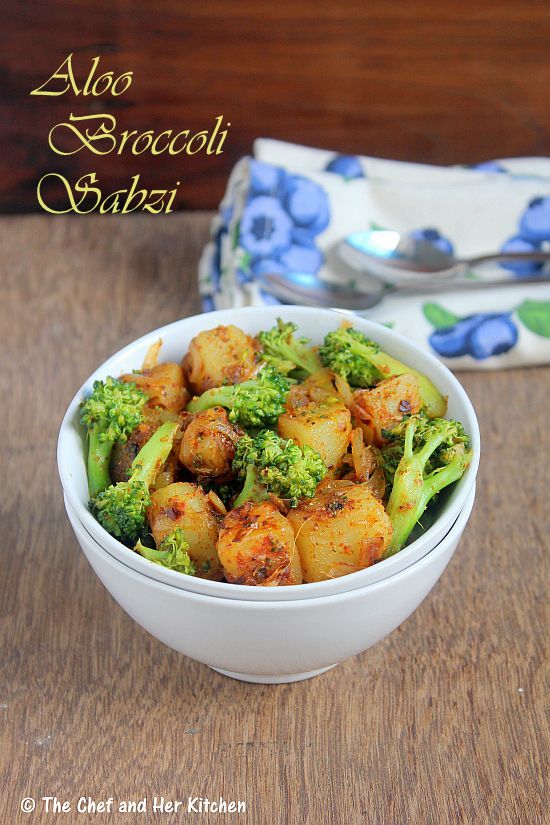
aloo broccoli sabzi
On a daily basis, I prepare north Indian curries with various vegetables to pair with my phulkas or bhakris.I find it boring to eat the same combination of vegetables in the curries and hence end up trying it with new combinations or flavors.I have successfully adapted broccoli into my Indian cooking and have tried using broccoli in various curries,stir fries, parathas, tikki etc. I prepare Aloo Broccoli Sabzi in a way largely similar to how I prepare Aloo Gobi sabzi with few modifications and I must say it tastes delicious.
If you are interested, check out other Broccoli recipes which I adapted into my Indian cooking successfully - Broccoli Tikkis , Broccoli stir fry . Check out other Broccoli recipes here.
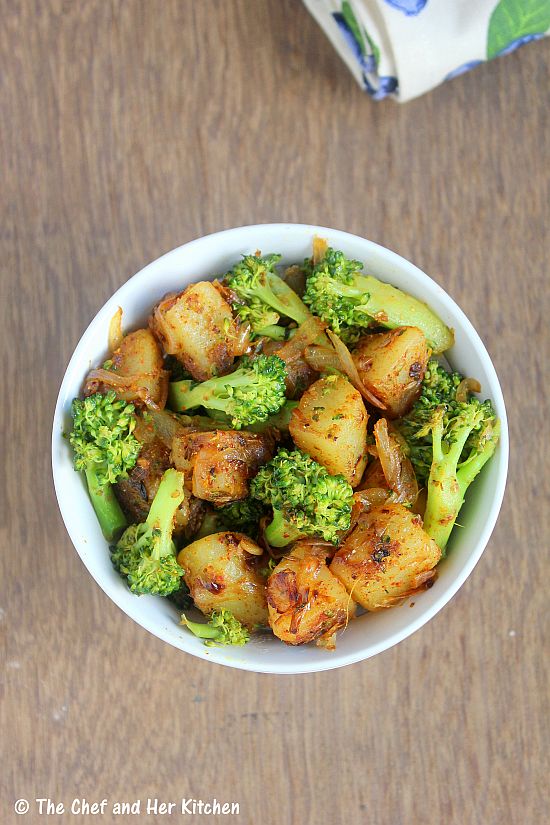
potato broccoli curry

Aloo Broccoli Sabzi Recipe:
Serves 2
Prep time:10 mins | Cooking time:20 mins | Total time:30 mins
Cuisine: North Indian | Category: Side dish - Main Course

Ingredients:
2 medium Potatoes,boiled
1 small Broccoli,cut into florets
1 medium Onion,finely chopped
1 tsp Coriander powder
1/2 tsp Cumin powder
1/4 tsp Garam masala or 1 tsp Kitchen King masala
1/2 tsp Amchur powder
3/4 tsp Red chili powder
1/4 tsp Turmeric powder
1/2 tsp Cumin seeds
Salt to taste
1.5 tbsp Oil

Method:
  • Peel the boiled potatoes and cut into big cubes.
  • Par boil the broccoli florets in hot water for 3-4 mins until they are half cooked.
  • Heat oil in a kadai/pan and crackle cumin seeds and add chopped onions and fry well until they turn slight pink in color.
  • Add ginger-garlic paste and fry until the raw smell disappears.
  • Now add cubed potatoes and par boiled broccoli florets and fry well for 7-8 mins until the potato cubes turn golden in color and also becomes slightly crisp.Prick a fork into broccoli florets to check whether they are done or not,if they are not done cover it cook for another 2-3 mins.
  • Add all the masalas like red chili powder, coriander powder, cumin powder, garam masala(or kitchen king masala), turmeric powder, amchur powder and salt and mix well and cover it and cook for 2-3 mins.
Serve it hot with Rice / Rotis / Chapatis or Pulaos.
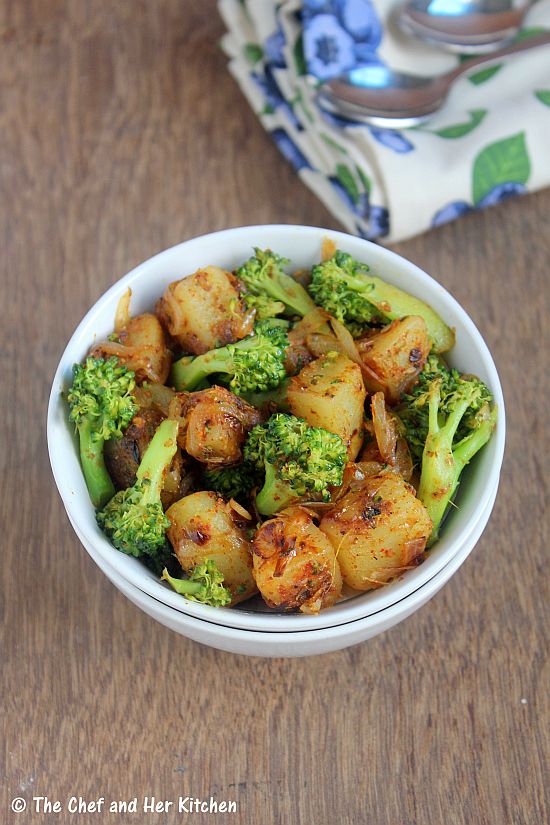
aloo broccoli sabzi
Notes:
  1. You can even add tomato along with onions in the recipe.I like to prepare this dry and hence I do no prefer tomatoes in the recipe.
  2. You can apply a layer of tomato ketchup on a roti and place this curry in the center lengthwise and wrap into a roll and give your kids.You can sprinkle some chaat masala on the curry if like when making the rolls.
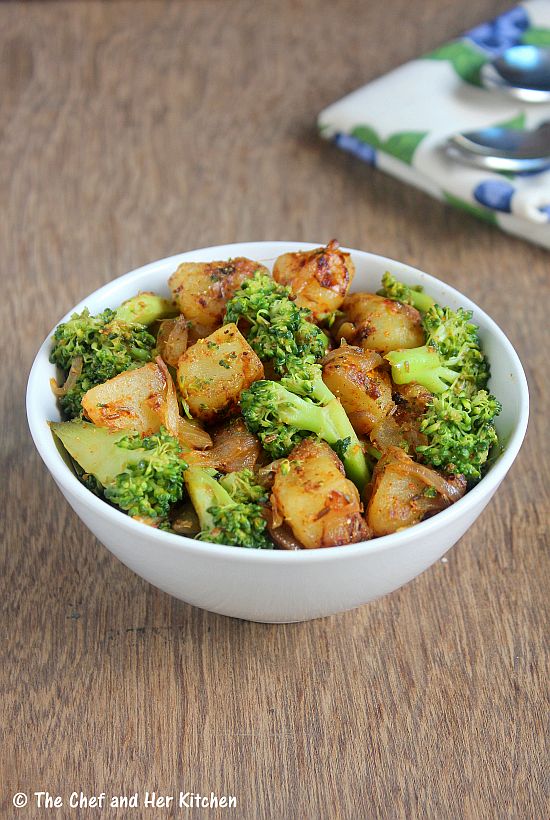
aloo broccoli sabzi

Monday, February 17, 2014

Bagara Rice | Hyderabadi Bagara Rice Recipe

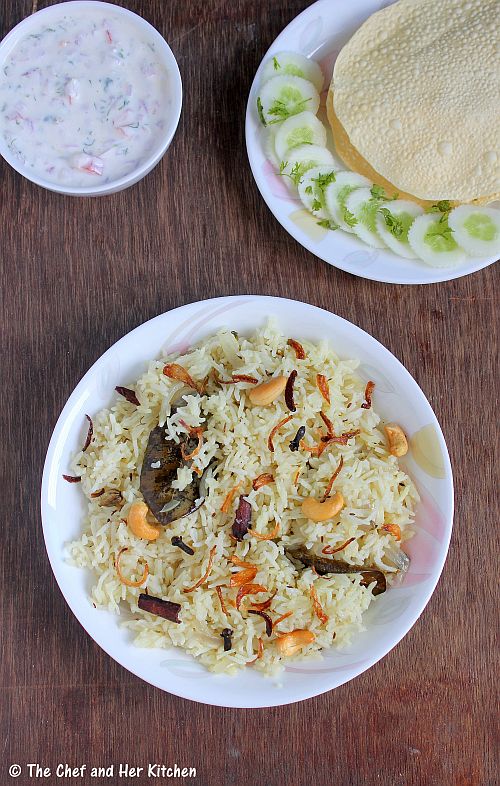
bagara rice
Bagara Rice or Bagara Chawal or Bagara Annam is a simple Hyderabadi rice recipe which can be prepared in a jiffy with not much of extra work.'Bagar meaning tempering, is basically an easy peasy plain Biryani recipe without any vegetables and masala powders.Bagara rice is also a popular rice dish in weddings or functions in Hyderabad apart from the famous Vegetable Dum Biriyani.
hyderabadi bagara rice
This Bagara Rice pairs up beautifully with spicy curries like Bagara Baingan , Mirchi ka Salan , Kala Chana masala or any spicy gravy.It is ideal to prepare these kind of simple rice varieties when you are making elaborate menu during parties as it is quick to prepare and reduces the effort.

Check out other Hyderabadi specials in my blog:
hyderabadi bagara rice

Hyderabadi Bagara Rice Recipe:
Serves 2
Prep time:10 mins | Cooking time:30 mins | Total time:40 mins
Cuisine: Hyderabadi - Indian | Category: Rice | Pulav

Ingredients:
1 heaped cup Basmati Rice
1 big Onion, finely sliced
2 tsp Ginger-Garlic paste
12-15 Cashew nuts ,split into halves(optional)
8-10 Mint leaves(optional)
3/4" Cinnamon
3-4 Cloves
2-3 Green Cardamom
1-2 Bay leaves
1 tsp Shahjeera (black cumin seeds)
Salt to taste
1 tbsp Oil
1 tbsp Ghee

Method:
  • Wash and soak basmati rice in water for 10 mins.Do not wash more than twice as it looses its fragrance.
  • Heat oil and ghee in a thick kadai/pan(or cooker) and fry cashew nuts until they turn golden in color and remove them and keep aside.In the same oil add shahi jeera and let them crackle.
  • Add cloves,green cardamom,cinnamon and bay leaves and fry them for a minute.Slighly open the cardamom pods before adding so that they do not splutter.
  • Add  thinly sliced onions and fry until they become translucent and then add ginger-garlic paste and fry well.
  • Add drained basmati rice and fry well for a couple of minutes until its dry,do this step carefully as the rice might get broken.
  • Add 2 cups of water and let it come to a boil and add salt and mint leaves and cover it and let it simmer for 12-15 mins until done.If you are preparing it in cooker,pressure cook for 1 whistle and simmer it for 5-7 mins.
  • When the pressure drops,gently fluff it up using a fork and add fried cashew  nuts and mix.
  • Garnish with fried onions(optional) and cashew nuts.
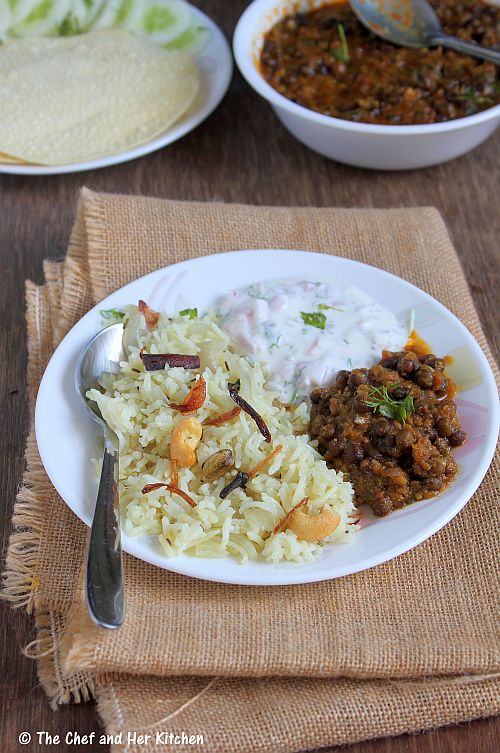
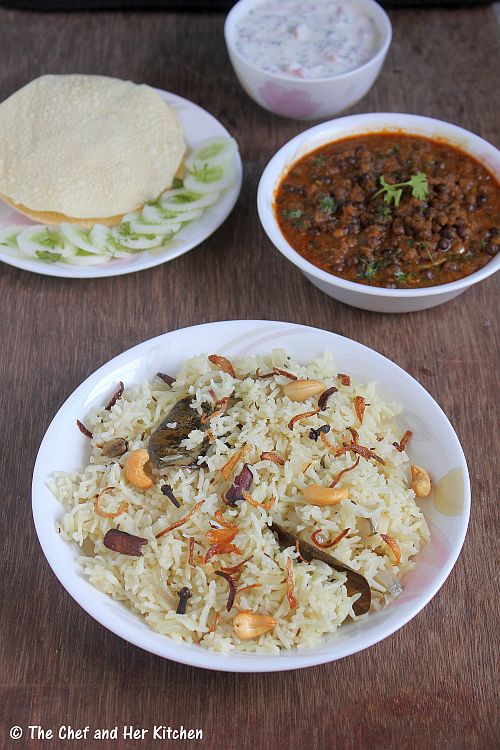
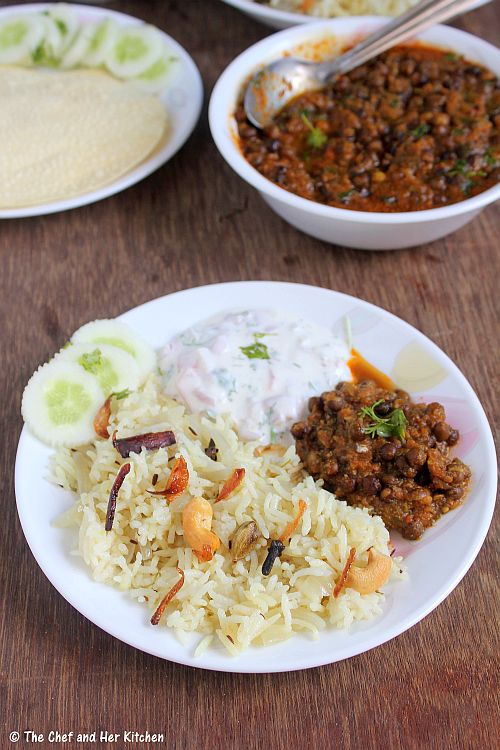
Serve it hot with Bagara Baingan | Mirchi ka Salan | Kala Chana masala or any spicy gravy and raitha,papad.I served it with Kala Vatana Curry.

bagara rice
Notes:
  1. Mint leaves are optional in the recipe.I usually add it if I have them otherwise I ignore adding them.
  2. This is a mild spiced rice recipe which pairs well with any spicy curry.
  3. You can add vegetables like carrots,peas,potatoes,beans,capsicum and make vegetable pulao following the same recipe.
  4. The addition of ghee enhances the flavor of rice and pulaos,hence do not skip it.
  5. You can add 1-2 green chillies,slit along with onions.However it is optional.
bagara rice
 

Tuesday, February 4, 2014

Kala Vatana Usal | Black Peas Curry Recipe

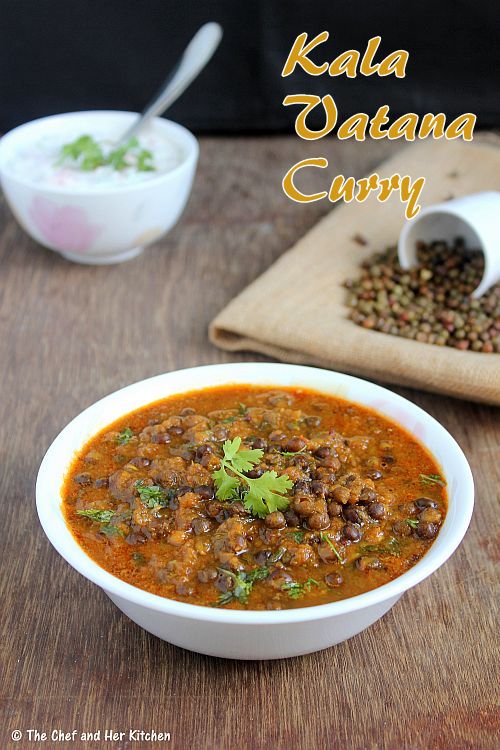
kala vatana curry
I have been exposed to various Maharashtrian dishes as I stay in Mumbai hence I have adapted many Maharastrian recipes in my daily cooking. I think that Maharashtrian style cooking is very similar to that in Karnataka and it is just that its a bit more spicy. As we do not eat much spicy food or masalas in our regular diet, I reduce the quantum of masalas drastically in the recipes.
kala vatana sambar
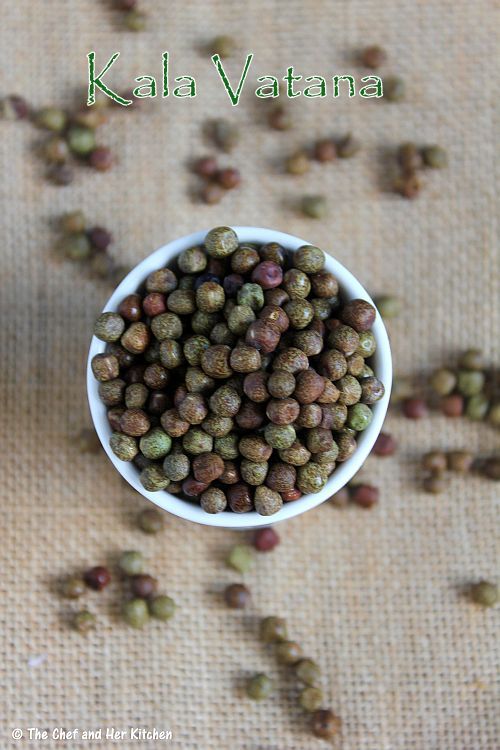
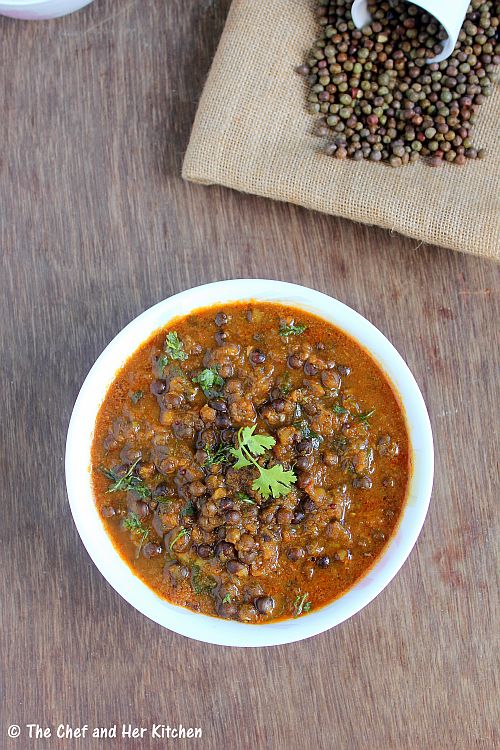
I have tasted Kala vatana which is Black Peas,only after shifting to Mumbai and DH who is a big fan of Kala chana loved this Kala vatana too and hence it became quite regular in our diet.Black peas is slightly harder than the regular peas and hence it takes more time to cook and also holds up its shape and gives a nice bite even after it is cooked.Ironically these black peas do not look black in color,they are slightly brownish with a green tint,I really wonder why they call this black peas(kala vatana).
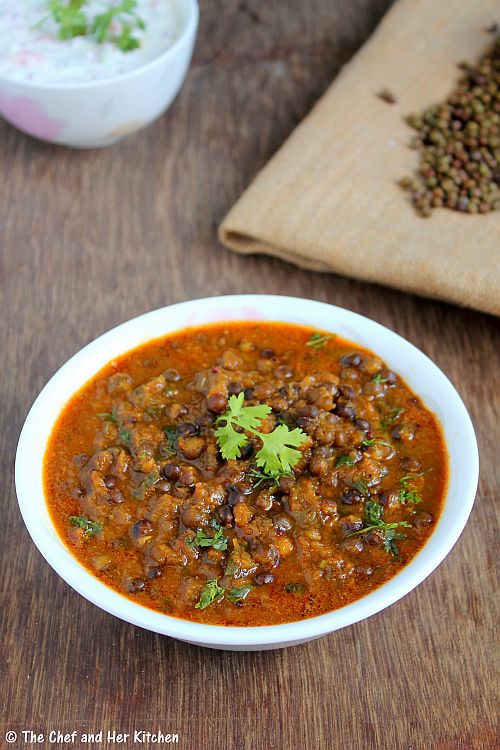
kala vatana image
Kala Vatana Usal is also called as Kala Vatana Amti or Kala Vatana Sambar in Maharasthra.Usually this Kala vatana gravy is paired with Malvani Vade or Kombdi Vade,which is again a Mahasthrian special.Kombdi Vade is basically a mixed flour puri with few spices and dals and is usually paired with non vegetarian curries, but for vegetarians this Kala Vatana Curry pairs up nicely with the Kombdi Vades.I will post those vades sometime later.

If you are interested look into these traditional Maharasthrian recipes in my blog.
kala vatana sambar
 
Kala Vatana Usal | Black Peas Curry Recipe:
Serves 2
Prep time:10 mins | Cooking time: 50 mins | Total time: 1 hr + soaking time
Cuisine: Maharashtra-Indian | Category: Side dish

Ingredients:
1 cup Kala Vatana(black peas)
2 medium Onions,1 sliced and 1 finely chopped
1 Tomato,chopped
1/2 cup grated fresh Coconut
3-4 Garlic pods
1/2" Ginger,chopped
1 tbsp Kala masala/Goda masala or 1/2 tsp Garam masala(see notes)
1/2 tsp Red chili powder
1 tsp Coriander powder
1/2 tsp Turmeric powder
1 tbsp Coriander leaves,to garnish
Salt to taste
2 tbsp Oil

Method:
  • Clean and wash kala vatana(black peas) and soak them in water for 8-9 hrs or overnight.
  • Rinse the peas again and pressure cook for 3-4 whistles and simmer for 10-12 mins.Black peas takes more time to cook compared to other peas,keep this in mind while cooking it.
  • Heat 2 tsp oil and add sliced onion and ginger and garlic and fry for 2 mins until it turns slight brown in color.Add grated coconut to it and fry for a couple of minutes until the coconut turns slight red in color..Cool the  mixture and grind to a fine paste.
  • Heat the remaining oil and add chopped onions and fry well until they turn pink in color.
  • Add chopped tomatoes to it and fry well.Now add ground paste, coriander powder, turmeric powder and red chili powder and fry until the gravy leaves the oil in the sides.It takes around 5-6 mins as the masala is already cooked.
  • Add boiled black peas and fry for a minute along with masala.Add enough water(roughly 2 cups) and salt and boil it for 10-12 mins over low- medium flame.You can adjust the consistency according to your requirements.I prefer to keep it thick for rotis/vades and slightly thin for rice.
  • Add chopped coriander leaves at the end.
Serve it hot with roti/Malvani(Kombdi)Vade/puris or rice.I have served it with Bagara rice.

black peas gravy
Notes:
  1. You need to use Maharasthrian Kala masala for its authentic taste,but if you do not have it you can use Garam masala to it.Also apart from adding garam masala you also need to add 1 tsp fennel seeds,1 tbsp khus khus and 1-2 dagad phool(black stone flower) and 2 strings of mace while frying onion masala and grind along with it.
  2. You can follow the same recipe for yellow peas or Kala chana(black chickpeas),matki(moth bean) sprouts or Moong(whole moong) sprouts.I love all the versions.
  3. You can even sprout the black peas and use in the recipe instead of just soaked ones.
  4. Black peas takes more time to cook compared to other peas,keep this in mind while cooking it.
kala vatana usal

Friday, January 31, 2014

How to make Roasted Cumin Powder | Homemade Jeera Powder

cumin powder
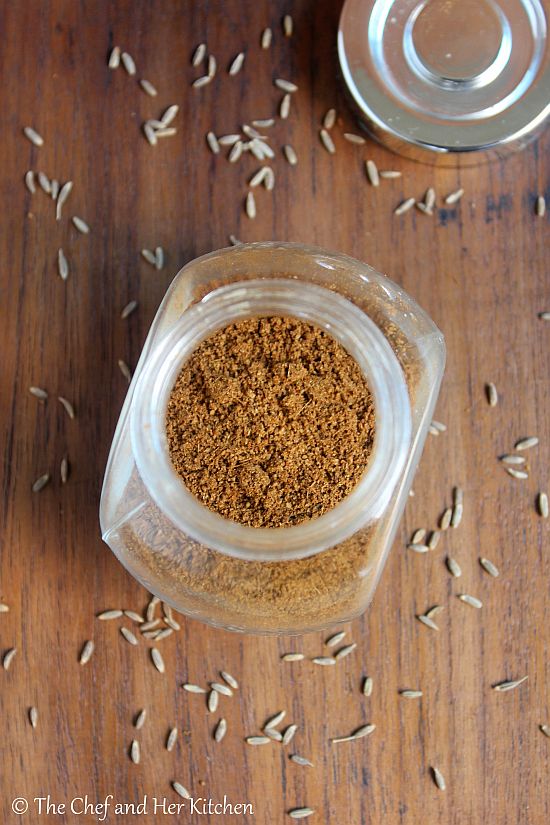
When it comes to basic spices and pastes used for cooking, I never purchase them. I usually prepare the basic spice powders like cumin powder, coriander powder, Garam masala etc and various south Indian masala powders at home. I have not still ventured into the preparation of various masalas like Pav bhaji masala, Chole masala, Kitchen king masala etc at home as I am a bit lazy in preparing them. But I will definitely try recreating the same masalas at home one day and would love to post them in my blog.
I always wonder why some one would buy these basic powders like cumin powder and coriander powder while the preparation of the same is very simple and easy and does not take much time. More over the freshness, fragrance of these home made powders is not at all comparable to the store bought powders. Roasted Cumin powder is a very important basic spice in Indian kitchen as it plays an important role in day to day curries and gravies and also plays a key role in Indian Chaats.
roasted cumin powder
This is a simple recipe which I am posting for Beginners. It doesn't need much effort to prepare this Cumin powder at home and it will definitely enhance the taste of your food.
If you are interested check out the preparation of other spice powders at home:
roasted cumin powder

Homemade Roasted Cumin powder:
Shelf life:1-2 months
Grinding time:2 mins | Roasting time:5 mins | Total time:7 mins + cooling time
Cuisine: Indian | Category: Spices - Kitchen Basics
Ingredients:
1/2 cup Cumin seeds(Jeera)
Method:
  • Clean the cumin seeds and dry roast in a pan over medium flame until you get a nice aroma and they start turning nice brown in color by stirring it occasionally. Take care that you do not turn them black otherwise it will give bitter taste to powder. They will also start popping once they turn the brown color. Switch off and let it cool.
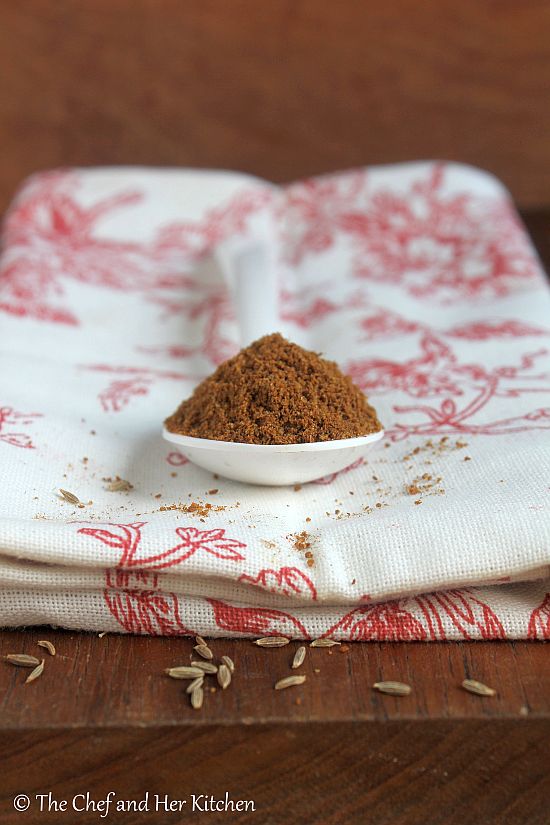
  • Grind it into a powder in mixer or spice grinder. I do not grind it to a very fine powder, I keep it slightly coarse as it adds a nice taste to chaats or any other curries. If you want you can grind it to a fine powder or keep few bits of cumin seeds here and there.
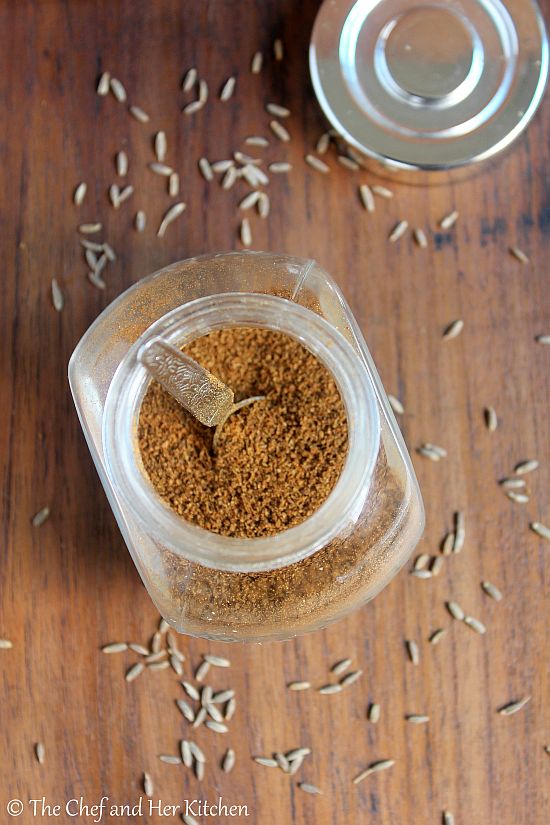
  • Allow the powder to cool for sometime and store it an air tight glass container.
Use it in Chaats, Gravies and Curries as mentioned in the recipe.
Notes:
  • Use a clean and dry spoon always or keep a spoon in the container itself.
  • Do not turn the cumin seeds black otherwise it will give bitter taste to powder.
  • I always prepare in small quantities so that the freshness of the spice would not be lost.
  • This much quantity would easily be sufficient for a month for me. But it depends on the family size and usage as well.
jeera powder

Tuesday, January 21, 2014

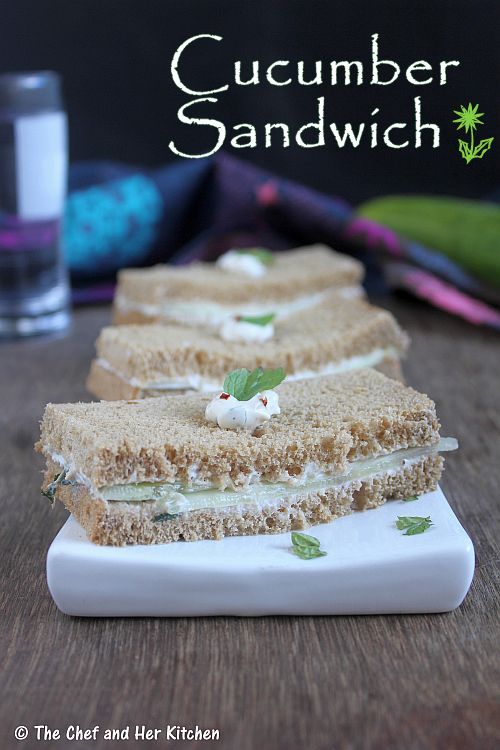
Cucumber Sandwich | Easy Sandwich Recipes


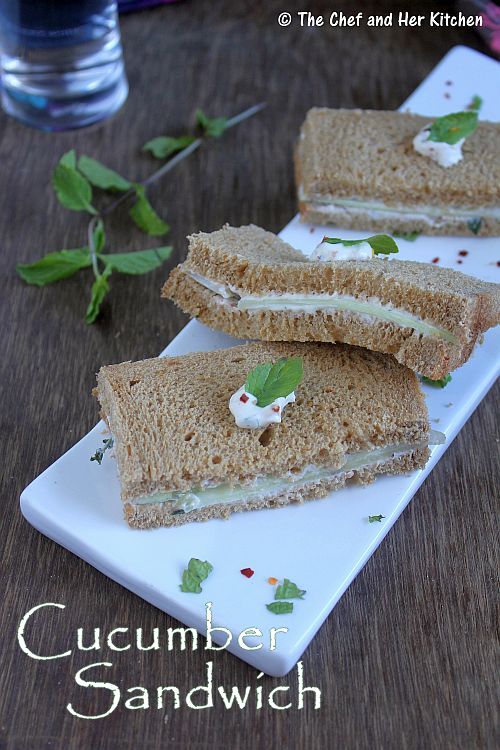
cucumber sandwich
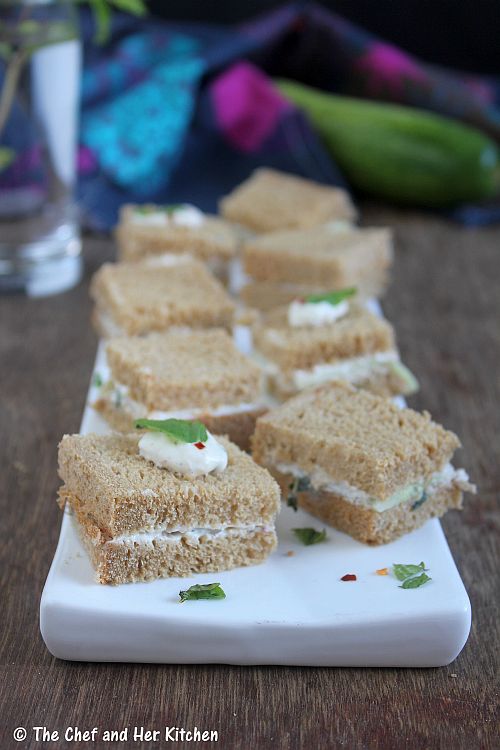
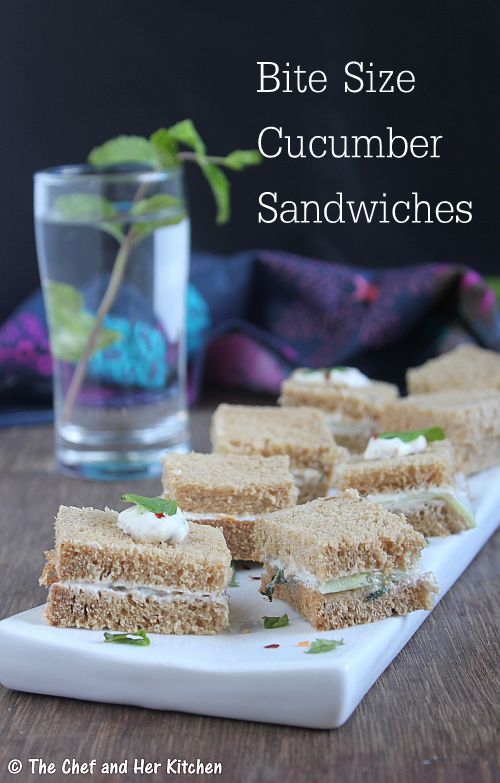
Sandwiches are one of the easiest breakfast options.At our place, I prefer the grilled sandwich varieties whereas TH prefers fresh sandwich and hence most of the time I end up preparing a fresh Vegetable sandwich and pack it for him and grill the same for me. I prefer making fresh sandwiches for parties as they can be cut into ribbon size or bit sized sandwiches which are great to serve as finger food.They are not only easy to prepare but also looks inviting too.

cucumber sandwich
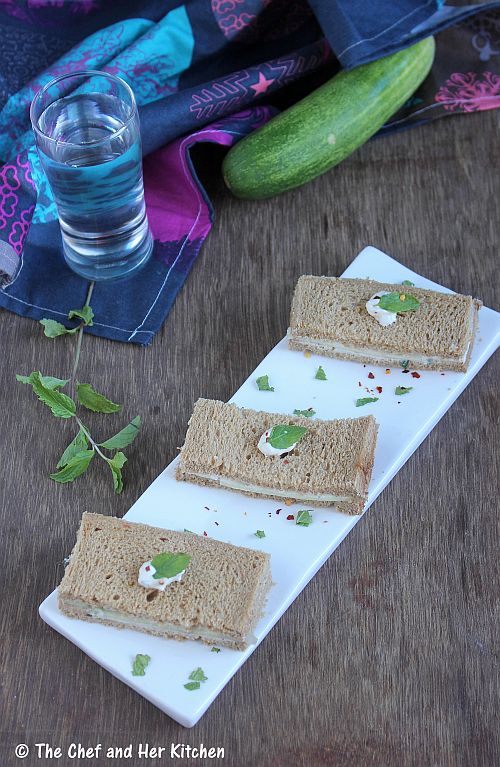
Coming to today's post,Cucumber sandwich recipe is very simple and even a kid can prepare it.I make it in two ways- sometimes using cream cheese and sometimes using hung curd and I love both the versions.As the hung curd version is more healthy I prefer to use it more often and I also reduce the butter content for a regular sandwich. When I prepare for parties or pack for lunch box I give a good coat of butter though otherwise the sandwich becomes soggy. 
cucumber cream cheese sandwich


cucumber cream cheese sandwich

Cucumber Sandwich Recipe:
Serves 2
Prep time:10 mins | Cooking time:nil | Total time:10 mins
Cuisine: International | Category: Breakfast/Appetizers

Ingredients:
6 Bread slices
1 large Cucumber
1/2 cup Hung Curd or Sour cream
1/3 cup Mint leaves,finely chopped
1/2 tsp Pepper Powder 
1/2 tsp Chili flakes (optional)
Butter,softened
Salt to taste

Method:
  • To prepare hung curd you can hand thick yogurt in a muslin cloth for 3-4 hrs.Add 1/2 tsp lemon juice to it and beat lightly.
  • Mix the hung curd (or sour cream) with salt, pepper powder, chili flakes and chopped mint leaves and keep it ready.
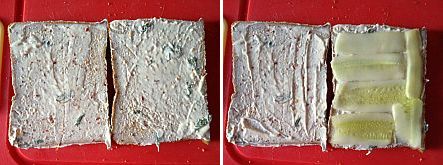
  • Peel the cucumber and slice them thinly in a slicer either horizontally to get thin discs or vertical to get thin strips.Alternatively if you have good knife skills slice them thinly.
  • Apply butter generously to one side of bread and repeat for all the bread slices.
  • Now apply a coat of sour cream mixture liberally on the butter ladened bread slices.
  • Arrange the sliced cucumber pieces evenly on one slice and cover it with another bread slice.Repeat the same to prepare other 2 sandwiches.
  • Press the sandwich slightly with your hands and cut the edges of the sandwich using a serrated knife.
  • Cut into halves or strips or bite sized pieces.
Serve it with the remaining sour cream/tomato ketchup.

cucumber sour cream sandwich
Notes:
  1. You can use Cream cheese instead of sour cream or hung curd in the recipe.
  2. Mixed dried herbs can be used instead of mint leaves in the recipe.
  3. If you like cheese,line a cheese slice on cucumbers while making the sandwich.

sour cream cucumber sandwich

Monday, January 13, 2014

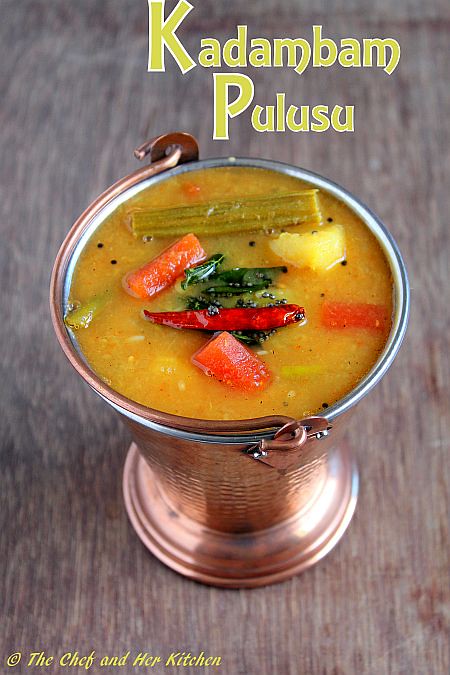
Mukkala Pulusu | Kadambam Pulusu | Dappalam

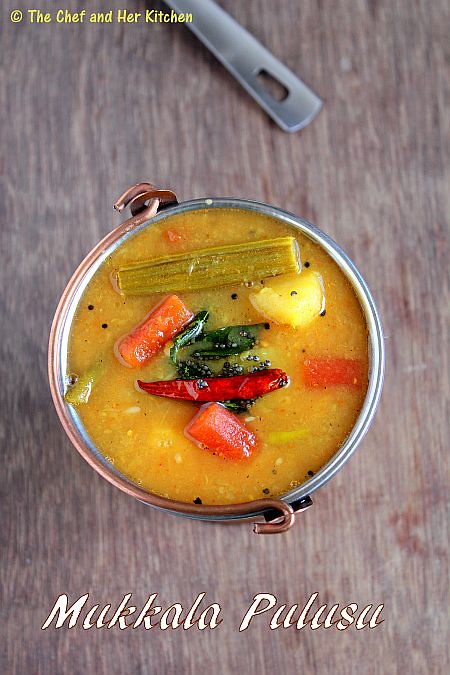
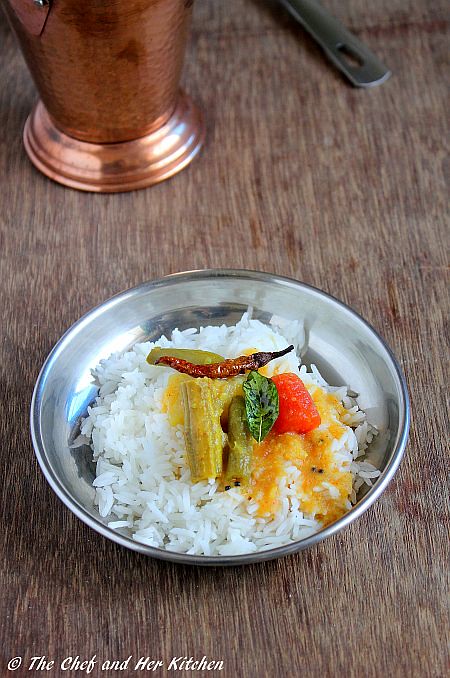
'Mukkalu' in Telugu literally means 'Pieces' and 'Pulusu' means 'Stew'. In Mukkala Pulusu, we use various vegetables which are chopped into big chunks, cooked in tamarind extract and spiced up slightly.It is usually paired with Mudda pappu(mashed plain toor dal) and papds/fryums which is the ideal combination.While a few add some rice flour mixed in water to thicken this pulusu, I usually prefer to add some toor dal as it not only thickens the pulusu, it also adds to the taste.
Usually Pulusu would be prepared with a combination of leftover vegetables but I usually buy various vegetables in small quantities to prepare this pulusu.I love this dish very much and hence I prepare it more often than I prepare sambar.
Though the ingredients that we add in Pulusu and sambar are similar,the taste of pulusu is totally different from Sambar.We add less quantity of toor dal and more vegetables in pulusu unlike Sambar where we add more quantity of toor dal and less vegetables. Pulusu is very tangy,spicy and slightly sweet compared to sambar.

Mukkala Pulusu | Andhra Style Mixed Vegetable Stew Recipe:
(Serves 3-4)

Ingredients:
1/4 cup Toor dal
1 very big lemon sized Tamarind
2 tbsp grated Jaggery
1 1/2 tbsp Sambar powder or 1 tsp Red chili powder
5-6 Curry leaves
1/4 tsp Turmeric powder
Salt to taste

Vegetables:
1 Drumstick,cut into 1 1/2" pieces
7-8 Pumpkin pieces of 1" cubes
7-8 Bottle gourd pieces of 1" cubes
1 Carrot,cut into big chunks
1 small Sweet Potato,cut into big chunks
5-6 French Beans,cut into 1 1/2" pieces
1 Onion,cut into 8 quarters
1 Tomato,cut into 8 quarters
2 light colored Green chillies,slit
(other optional vegetables - potatoes,brinjal,ladies finger,raw papaya,winter melon)

to temper:
1 tbsp Oil
1 tsp Mustard seeds
2 Red chillies
a sprig of Curry leaves
a pinch of Asafoetida

Method:
  • Pressure cook toor dal for 3 whistles until done.Mash the toor dal nicely and keep it aside.
  • Soak tamarind in water for 10-15 mins and remove tamarind pulp and keep it aside.Add 1 cup of water to it.
  • Add chopped vegetables(chop the vegetables in big chunks),slit green chillies,onions,tomatoes,few curry leaves to the tamarind pulp and add salt and turmeric powder and pressure cook for one whistle.
  • After the pressure drops down add cooked dal to the boiled vegetables and add grated jaggery,salt and sambar powder(or red chili powder) and cook for few more minutes until you get the required consistency..The consistency should neither be very thick nor very thin.
  • Meanwhile heat oil in a small tadka pan and crackle mustard seeds,red chillies,curry leaves and asafoetida and fry well and add this to the boiling Pulusu(stew).
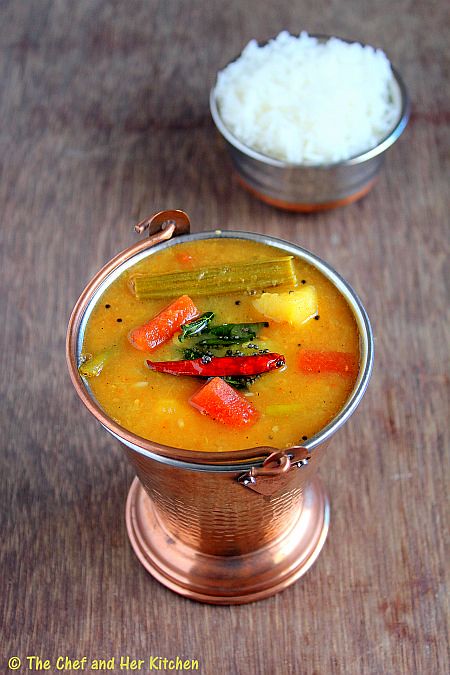
Serve it hot with rice and papad/Curd chili/fryums.You can serve it with cooked and mashed toor dal(mudda pappu).
Notes:
  1. I usually add vegetables like drumsticks,pumpkin,bottlegourd,beans,carrot,sweet potato which I strongly recommend to use them as they impart a nice flavor to the stew.But you can add other vegetables like brinjal,ladies finger,winter melon,potatoes too in the recipe.If you are using ladies finger I would suggest to saute them in oil before you boil it with other vegetables.
  2. Few do not add toor dal in the recipe,in that case you can thicken then pulusu/stew with a tbsp of rice flour(which is mixed in water) and boil it along with pulusu until you get desired consistency.But I always prefer to add the dal to thicken instead of rice flour mixture.It is your wish,but do not add more amount of toor dal as it will change the taste of it.
  3. We use more amount of tamarind pulp in the recipe,so adjust the jaggery and salt according to your taste buds.
  4. You can add red chili powder or sambar powder or a mix of both in the recipe.
  5. Always cut vegetables into big chunks for this pulusu.


Tuesday, January 7, 2014

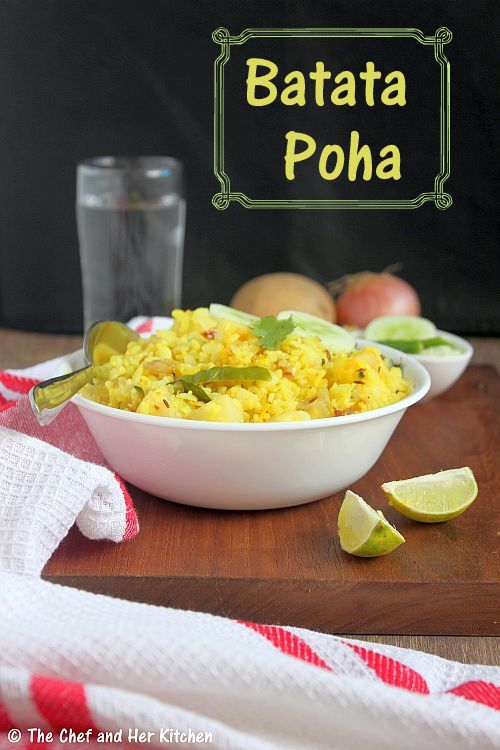
Batata Poha | Kanda Batata Poha Recipe | Poha Recipes

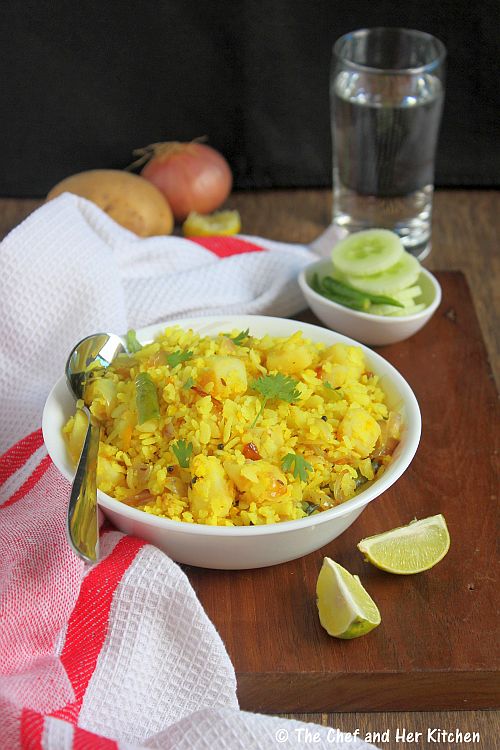
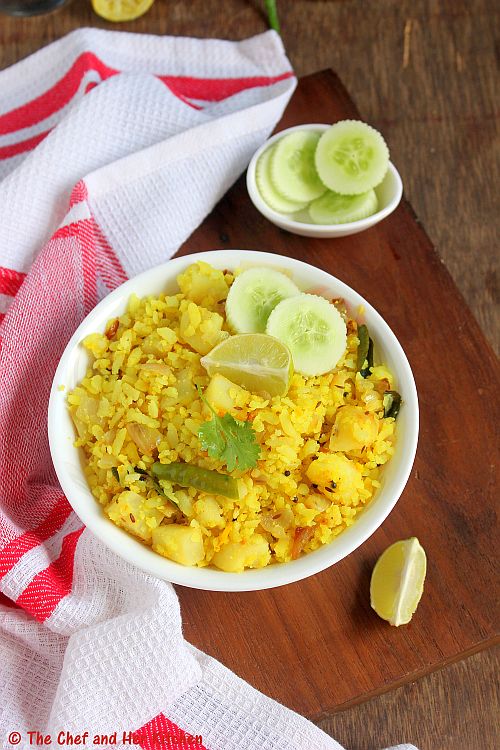
potato poha
'Batata Poha' or 'Potato Poha' is a typical Mahasthrian breakfast variety which is very popular along with 'Kanda Poha',which means 'Onion Poha'.'Batata' in Marathi means 'Potato' where as 'Kanda' means 'Onion', which I got to know only after coming to Mumbai. Maharasthrians have profound love for Potatoes,which is used as the main ingredients for many recipes like Batata vada, Sabudana Khichdi, Batata poha and also as a base for many cutlets and fillings. If you are preparing this for festivals like Janmashtami, you can avoid onion in the recipe.
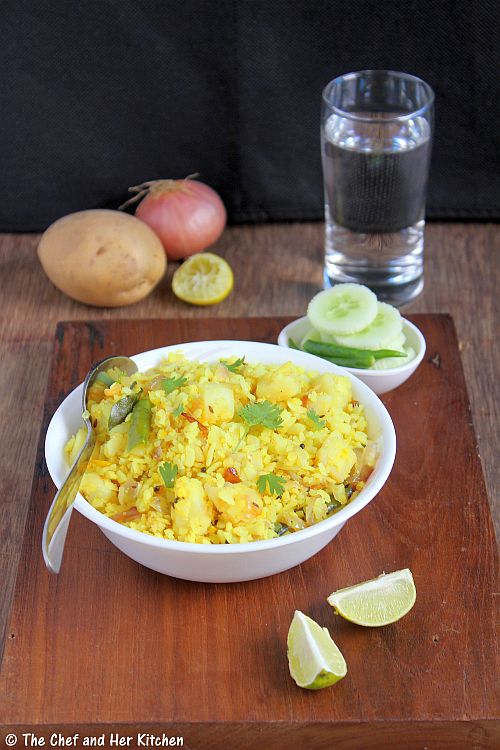
potato poha
Poha is a very common breakfast at my place, we prepare various varieties of Poha in our house like Lemon Poha,Coconut Poha,Tamarind Poha,Coriander Poha.'Kanda Poha' is very similar to the south Indian variety of 'Lemon Poha' with minor variations in the tempering part. I got introduced to 'Batata Poha' only after coming to Mumbai and has become our favorite on weekends. As it has both potatoes(batata) and onions(kanda) it is called 'Kanda Batata Poha'.I usually prefer to prepare poha when I want to prepare something quick or have not planned my breakfast ahead. Yes, I plan my breakfast ahead as it is the most important meal of the day.You can check lots of options for Breakfast varieties in my blog here.

Check out various Poha varieties in my blog here.
aloo poha

Batata Poha | Aloo(Potato) Poha Recipe:
Serves 2
Prep time:10 mins+soaking time | Cooking time:15 mins | Total time: 25 mins
Cuisine: Indian | Category : Breakfast/Snacks
Ingredients:
2 cups Poha(flattened Rice/atukulu)
2 Potatoes,diced or sliced thin
1 large Onion,thinly sliced
2-3 tbsp Peanuts,roasted and skinned
5-6 Green Chillies,slit
1 tsp Cumin seeds
1/2 tsp Mustard seeds
1/4 tsp Turmeric powder
8-10 Curry leaves
2 tbsp chopped Coriander
juice of 1 small Lemon
1 tsp Sugar(optional,see notes)
2 tbsp oil
Salt to taste

Method:
  • Wash and soak poha in enough water(just add up to the level of poha) for 8-10 mins.As I have a slight medium thick variety it did not take much time.If you are using thick variety soak it with little more water and also for long time,say 15-20 mins.
  • Pressure cook potatoes and peel the skin and dice it into pieces.If you want you can avoid this step and add thinly sliced potatoes in the tempering directly,but it takes bit longer to cook.You can prepare either ways.
  • Heat oil and crackle mustard seeds and cumin seeds.
  • Add cut green chillies,curry leaves and fry for a minute,add sliced onions and fry until they are crisp and pink.
  • Add boiled and diced potatoes and fry well.If you are using raw potatoes,add finely chopped potatoes along with onions and cover it cook until they are done,it takes bit longer time.
  • Add turmeric powder,salt and poha and give a good stir until everything is mixed properly.
  • Add roasted and skinned groundnuts,lemon juice,chopped coriander and sugar(if using) just before removing from stove and mix well.
Serve it hot with chips/sev/chiwda/sliced cucumber and lemon wedges.
batata poha
Notes:
  1. If thick variety of poha is used you need to soak in more water for 20 mins and drain off excess water before using in the recipe.
  2. You can add potatoes either directly in the tempering and cook along with onions,it is a bit longer process or you can use boiled and chopped potatoes in tempering which is a quick process.If you are using them in tempering,chop them fine as they will cook faster.I like the bite of soft potato cubes in poha,hence I boil it ahead and use it.If you want crunchy potatoes you can fry them until crisp separately and add to poha at the end.
  3. If you want you can even add green peas along with potatoes in the recipe.I suggest if you add peas avoid peanuts in the recipe,use either one of them.
  4. You can avoid potatoes and prepare poha just with onions,which is called Kanda Poha(Onion Poha).
  5. You can even avoid onions in the recipe and make only with potatoes.
  6. The addition of sugar is entirely optional,it adds a typical Maharasthrian touch to poha.
batata poha

Monday, December 30, 2013

Tomato Kothimeera Pacchadi | Pacchadi Recipes

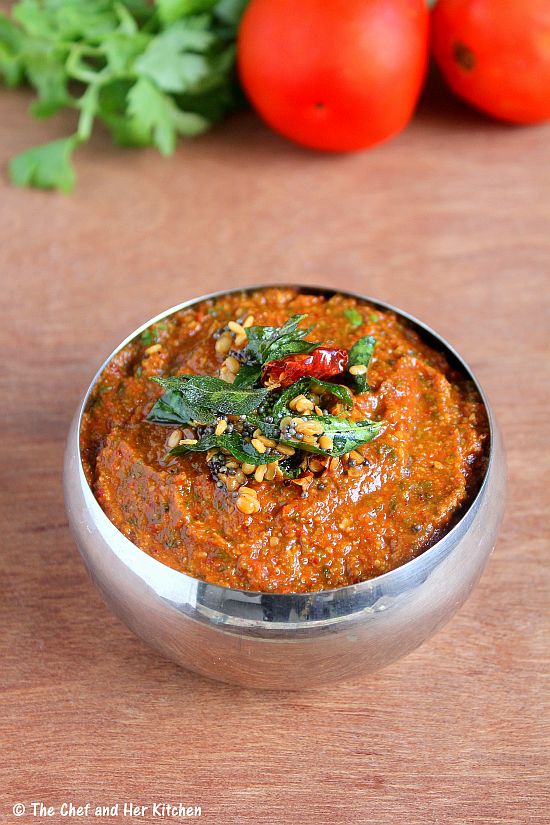
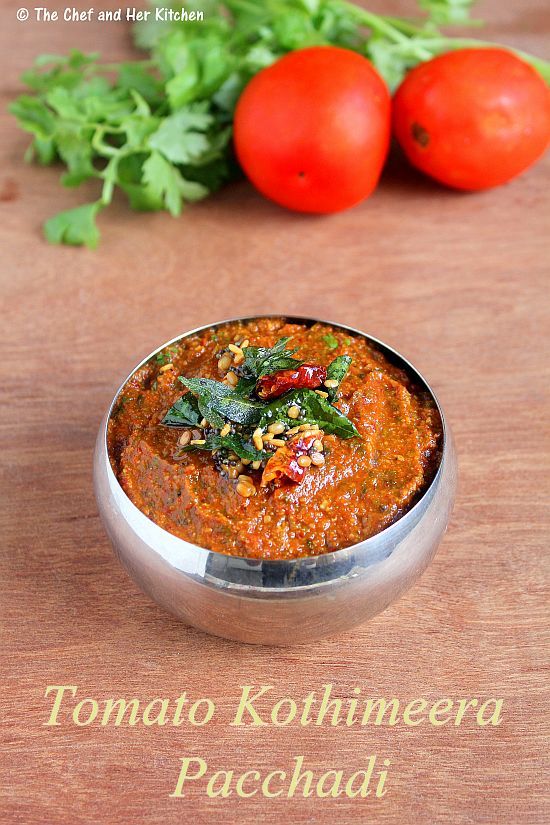
tomato kothimeera pacchadi
I am a big fan of Andhra style Pacchadis which is usually mixed with hot rice and ghee.Ideally Pacchadis are prepared in a stone mortar, as in the olden days and hence these kind of pacchadis are called 'Roti Pacchadis', where 'roti' stands for 'stone mortar' in telugu. Pacchadis can be prepared with various vegetables, greens and dals and the texture should be very thick and slightly coarse unlike the chutneys we prepare for the breakfast items. Today I am sharing a simple Pacchadi recipe with Tomatoes and coriander - Tomato Kothimeera Pacchadi which serves as a nice combination with rice.

tomato kothimeera pacchadi


Tomato Kothimeera Pacchadi | Tomato Coriander Chutney for Rice:
Serves 4-5
Prep time:10 mins | Cooking time:15 mins | Total time: 25 mins
Cuisine: South Indian | Category: Pacchadis-Accompaniments

Ingredients:
3-4 large ripen Tomatoes,roughly chopped
a small bunch of Coriander leaves(roughly 1.5 cups)
2 tbsp Urad dal
1 tsp Cumin seeds
5-6 Red chillies
a small cherry size Tamarind
Salt to taste
1 tbsp Oil

to temper:
1 tsp Oil/Ghee
1/2 tsp Mustard seeds
1 tsp Urad dal
a sprig of Curry leaves
1 Red chili,broken
a pinch of Asafoetida

Method:
  • Clean the coriander leaves and retain tender stems along with the leaves and chop it roughly.
  • Heat oil in a pan/kadai and add urad dal and roast until it turns slight red in color.Remove and keep the urad dal aside.
  • In the same pan add cumin seeds and red chillies and fry them until they are roasted and remove them aside.
  • Now in the same pan add chopped tomatoes and fry for a minute and cover it and cook until it turns pulpy.It takes 4-5 mins.
  • Add chopped coriander leaves along with the tender stems and tamarind to it and fry for another 3-4 mins until the mixture becomes slightly dry.Cool the mixture slightly.
  • Grind roasted urad dal with roasted red chillies,cumin seeds and salt to a coarse powder.Add cooled tomato - coriander mixture and grind it to a coarse paste.I usually do it in whipper mode to get slight coarse and pulpy pacchadi.
  • Heat oil/ghee in a small tempering pan and crackle mustard seeds and add urad dal and red chillies,curry leaves and asafoetida and fry until they wilt and add this tempering to the pacchadi.
Serve it with hot steamed rice and ghee.

Notes:
  1. You can store it in refrigerator for 2-3 days in an air tight container.
  2. If you are preparing this chutney for Idli or Dosa,grind the chutney to a smooth paste instead of coarse paste.
  3. If you find the pacchadi very tangy add a pinch of sugar or jaggery while grinding the chutney.

Monday, December 23, 2013

Garlic Rice | South Indian Rice Varieties

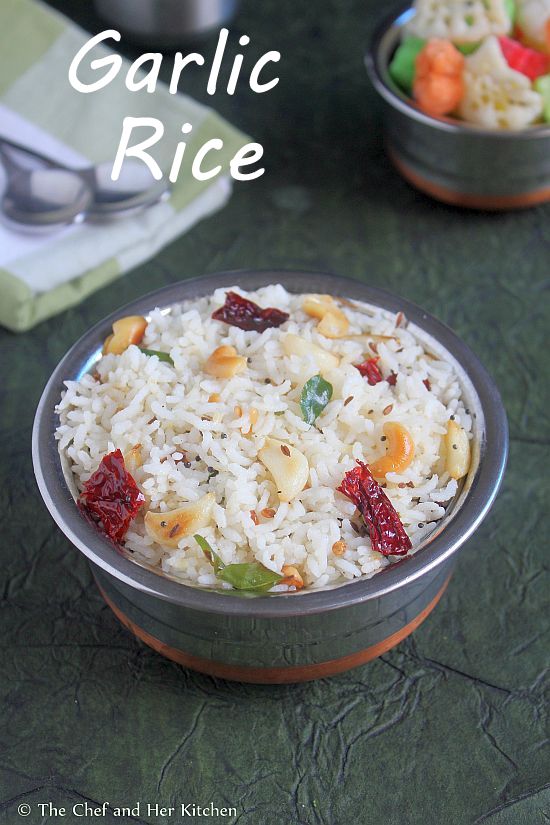
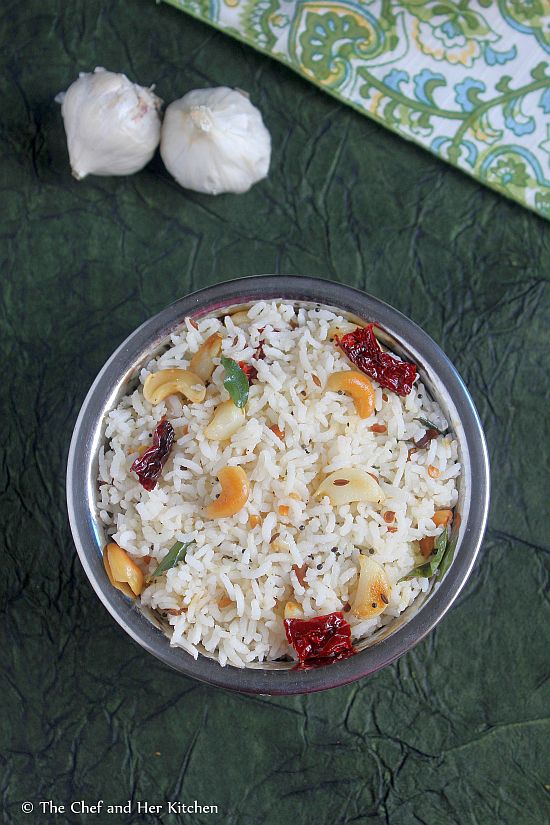
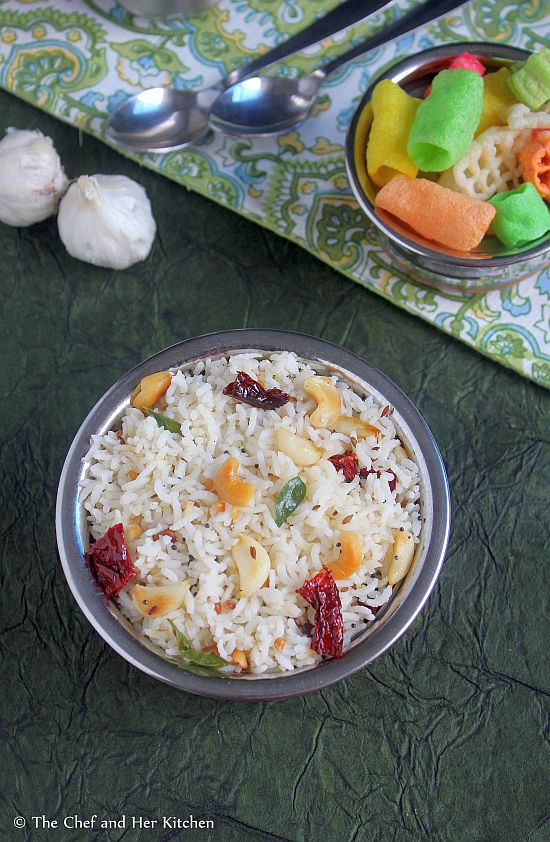
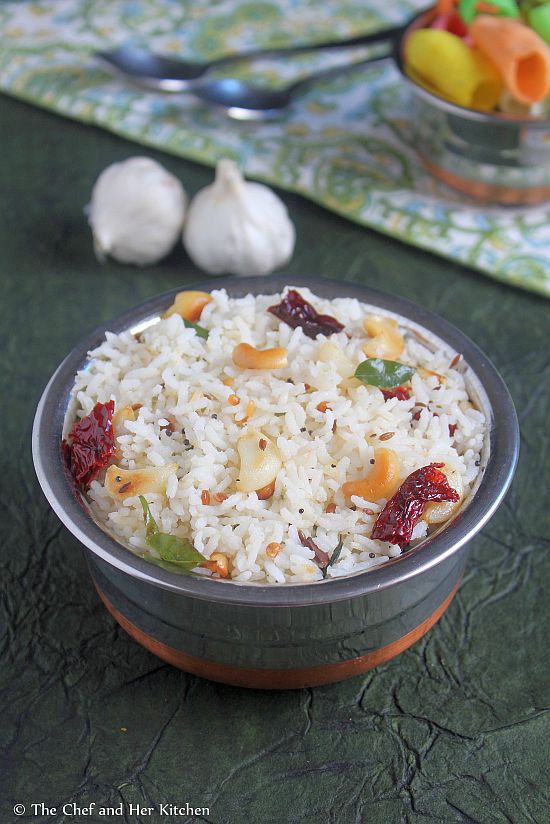
garlic rice
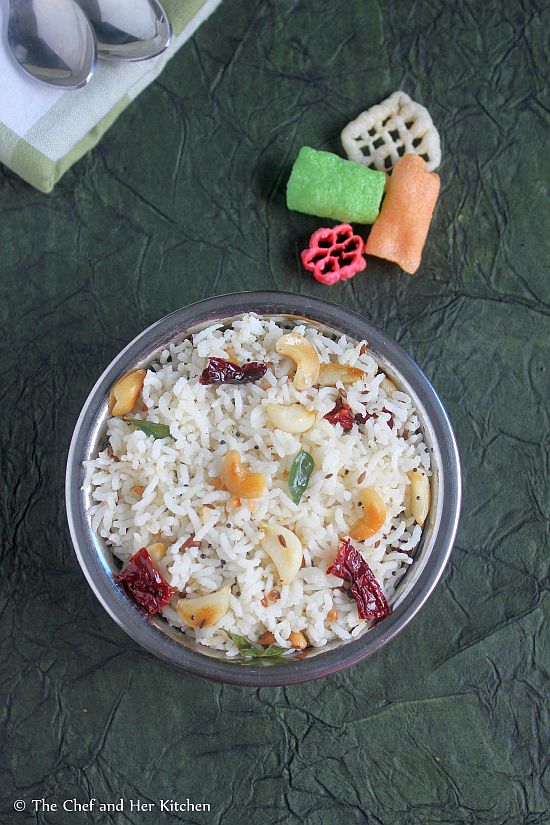
There are rare instances when I have left over rice at home and if I have it, I usually turn it into a variety rice or fried rice.While the most common rice variety with the left over rice is the Talimpu Annam (Seasoned Rice or Phodnicha Bhaat),I like to prepare this garlic rice as well.One can prepare it with fresh rice but make sure it is cooled nicely.In fact my mom always prepares this with fresh rice and she used to pack it for my lunch box.This recipe requires lot of garlic and if you are a garlic lover I am sure you will love this rice.
garlic rice
Typically for South Indian rice varieties, we use either Sona masuri rice or equivalent varieties like Ponni or Surti Kolam etc based on the availability in that area.However I do not suggest Basmati rice for few south Indian recipes as it does not bring out the exact taste of rice.For south Indian rice varieties the rice needs to be soft and fluffy and should not have any fragrance and hence Basmati rice is not ideal for a few Rice based preparations.
garlic rice

Garlic Rice Recipe:
Serves 2
Prep time:10 mins | Cooking time:20 mins | Total time:30 mins
Cuisine: South Indian | Category: Rice Varieties - Main Course

Ingredients:
1 cup Raw Rice (Sona masuri or equivalent)
18-20 small Garlic pods
8-10 Cashew nuts,slit into halves
4-5 Red chillies,broken
8-10 Black Pepper corns,coarsely ground
juice of 1/2 Lemon(optional)
a sprig of Curry leaves
1 tbsp Chana dal
1 tsp Urad dal
1/2 tsp Mustard seeds
2 tbsp Oil
1 tbsp Ghee
Salt to taste

Method:
  • Cook Rice and spread it in a plate to let it cool down and make sure that the rice grains stay separate.You can use 2 1/4 cups of water for 1 cup of sona masuri and cook it in pressure cooker or rice cooker.
  • Heat oil and ghee in a deep kadai/pan and crackle mustard seeds.
  • Add chana dal, urad dal and cashew nuts and fry until they turn slight golden in color.
  • Now add garlic pods and fry until they turn slightly brown.You do not need to fry until crisp,the garlic pods should be soft but cooked well.
  • Add red chillies,curry leaves and freshly ground pepper powder and fry again for a minute.
  • Switch off the flame and add the tempering to the spread cooled rice.Add salt and lemon juice(if adding) to it and mix it nicely.Now taste it and adjust the seasoning according to your wish.
Serve it with Chips/Fryums.

garlic rice

Notes:
  1. I have mentioned standard Indian size garlic pods in the recipe.If you are using the big sized ones reduce the number to 6-8 pods and slice them into fat bits,do not slice them thin.
  2. Use spicy variety red chillies as the main spice we used here is red chillies.Also use freshly ground coarse pepper corns,it is added for the flavor.
  3. This rice tastes nice if it is prepared spicy.But you can prepare it according to your spice levels.
  4. I mentioned lemon juice as optional but it balances the taste,so I recommend to use it.But add it accordingly to balance the flavors of rice.
  5. You can even use left over rice to prepare this.
  6. Do not use Basmati rice for this rice,use sona masuri or ponni or surti kolam or any equivalent variety to prepare this.
Wednesday, December 18, 2013

Thalipeeth Recipe | Maharasthra Recipes

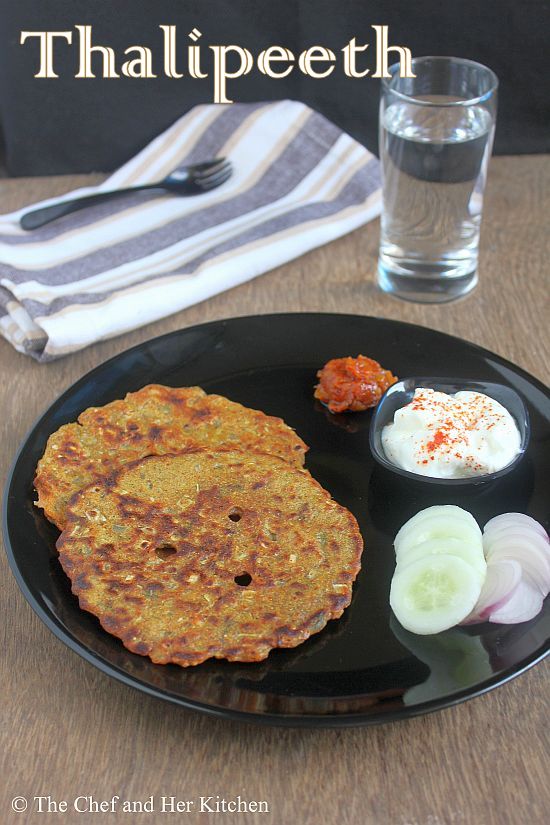
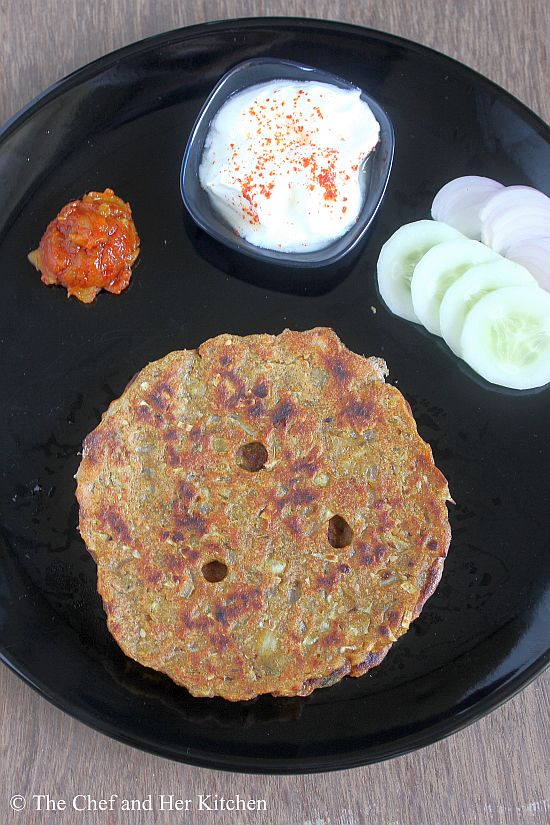
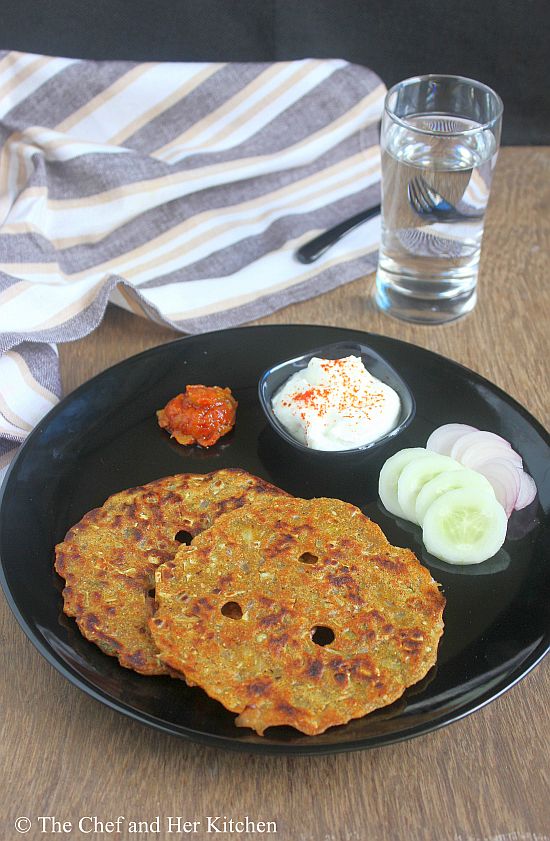
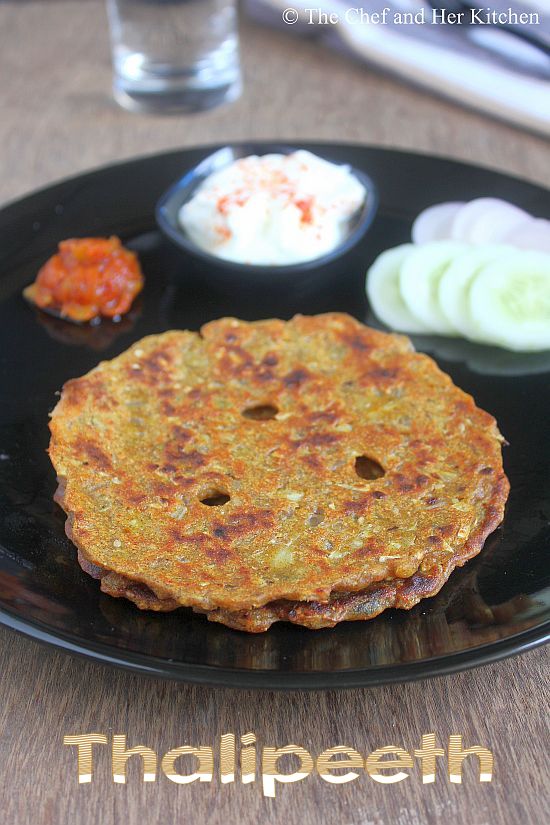
thalipeeth
Thalipeeth is a flat bread made up of Bhajani,which is basically a flour mix of various grains and pulses.Bhajani(thalipeeth flour) is easily available in Mumbai and is used to prepare thalipeeth and chakli varieties.I use bhajani for thalipeeth but if you do not have it you can make thalipeeth with various flours available in your pantry. I have mentioned my instant bhajani proportions too in the recipe. I have posted another Mahrasthrian thalipeeth variety- Sabudana Thalipeeth recipe earlier which tastes delicious too.
maharasthrian thalipeeth
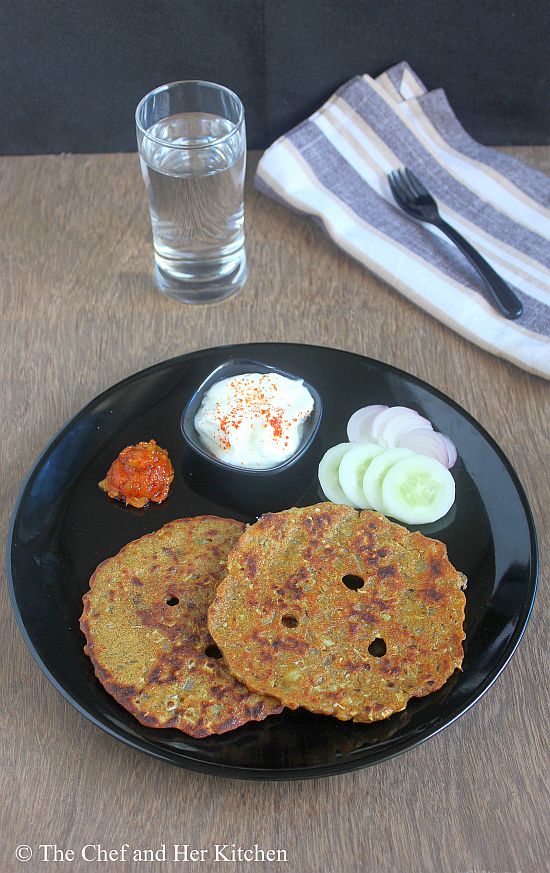
In Karnataka, we prepare Masala Akki rotti, Ragi Rotti which is prepared in a similar way like thalipeeth.Hence it was easily adapted in our menu and I usually prepare it for breakfast or dinner. To my surprise TH has become a fan of Thalipeeth after he tasted it in a famous Maharasthrian joint in Mumbai.There,the Thalipeeth is deep fried instead of shallow fry and hence it tastes even better.Thalipeeth is usually paired with spiced curd and pickle,which makes it a complete meal.As it is made up of mixed flours it is healthy and also quite heavy, so a couple of thalipeeth should be sufficient for a meal.
thalipeeth recipe
Check out similar rotti/thalipeeth varieties in my blog.
thalipeeth

Thalipeeth Recipe:
Serves: 2-3 | Yields: 7-8 Thalipeeth
Prep time:10 mins | Cook time:20 mins | Total time:30 mins
Cuisine: Mahrasthrian - Indian | Category: Breakfast/Snacks

Ingredients:
2 cups Bhajani (instant version recipe follows)
2 Onions,finely chopped
2 tbsp Chopped Coriander seeds
1/4 cup coarsely ground Groundnuts(optional)
1 tbsp Sesame seeds
1 tsp Coriander powder
1/2 tsp roasted Cumin powder
1/2 tsp Red chili powder
Salt to taste
Oil,to roast

for quick Bhajani(Thalipeeth flour),I used:
1/2 cup Jowar flour
1/2 cup Bajra flour
1/4 cup Rice flour
1/4 cup Ragi flour
1/4 cup Besan(Chickpea flour)
1/4 cup wheat flour

Method:
  1. In a big bowl combine all the flours,if you are using bhajani add it to the bowl.
  2. Add finely chopped onions, green chili paste, chopped coriander, sesame seeds, ground nut powder, coriander powder, cumin powder, red chili powder and salt and mix well.
  3. Add water to it and knead it to a soft dough,I usually use warm water to knead the dough.It should be smoother than the chapati dough.The dough would be slightly sticky because the combination of various flours.
  4. Grease a plastic sheet and take a small orange sized ball and pat it to form a 4-5" diameter disc of 1/2" thickness.You need to wet your hands for easy spreading.Slightly press the edges with your fingers to give a nice circle.Make few holes in between.
    Transfer it carefully on to a hot tawa and pour oil in the holes and also around the edges and cover it with lid.You can smear some water on top of the thalipeeth,this will make sure that the thalipeeth would not get dry.
  5. Let it roast it on medium flame for 2-3 mins,once it is brown at the edges turn to the other side and roast again.
    Repeat the same for the remaining dough to make thalipeeth.
Serve it hot with Mango Thokku, spiced Curd and salad.

thalipeeth

Notes:
  1. We get Bhajani easily in Mumbai,I use it most of the time and if I don't have it I mix the flours in the above mentioned proportion.Basically you can use all the flours in your pantry.
  2. If you want to make bhajani(thalipeeth flour) at home,dry roast 1 cup Jowar grains,1 cup Bajra grains,1/2 cup rice,1/2 cup wheat grains,1/4 cup Chana dal,1/4 cup Urad dal,2 tbsp Coriander seeds and 1 tbsp Cumin seeds separately until they are aromatic and cool them and grind it in a mixer or get it done in a flour mill.
  3. The addition of ground nut powder is completely optional but I recommend to use it for an extra taste.
  4. You can add finely chopped vegetables like cabbage,methi leaves,spinach leaves or grated vegetables like cucumber,bottle gourd,radish to make thalipeeth.
 
back to top