Tuesday, June 24, 2014

Eggplant Pasta | Easy Pasta Recipes

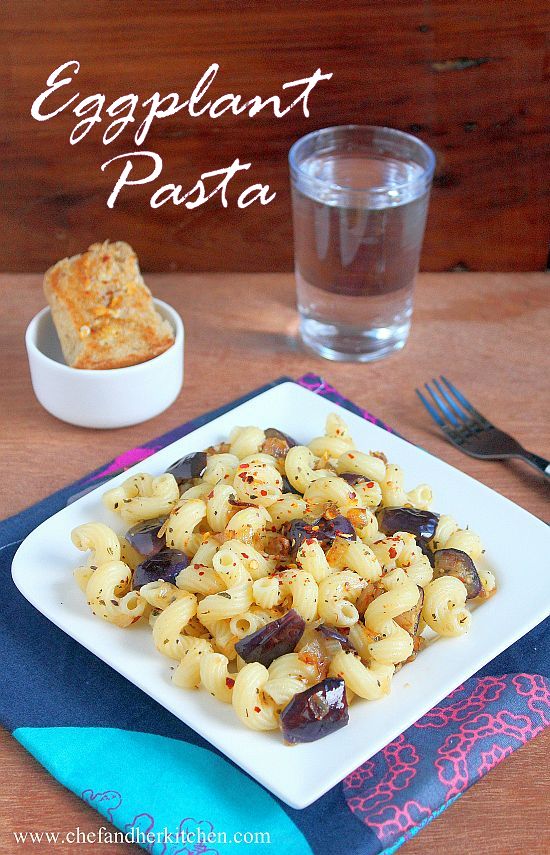
eggplant pasta
Pasta is one of the easiest options I would look for when I am pressed for time or if I am lazy to cook something elaborate.I must say that I am lucky that DH prefers the simple kind of pastas like Aglio E Olio or a simple pesto based Pasta than the heavy sauce and cheese loaded pastas.Hence making pastas is easy for me. Infact I have also started preferring these simple yet flavorful pasta.
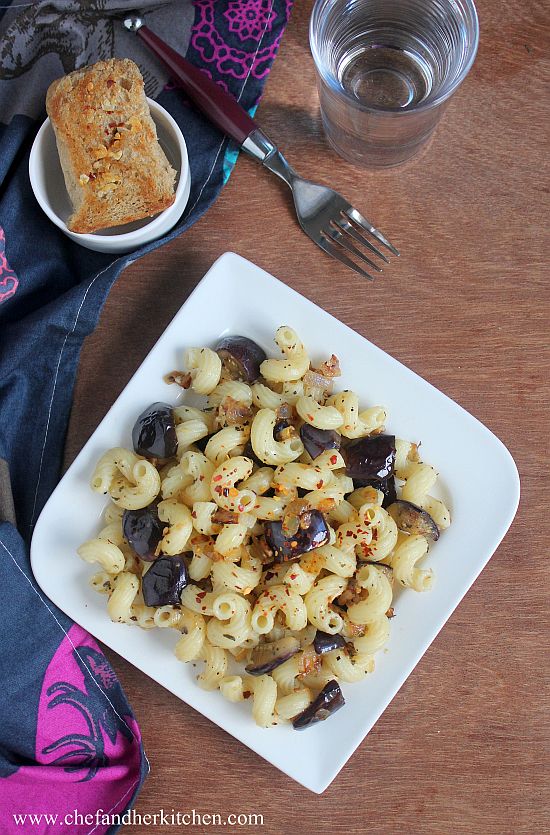
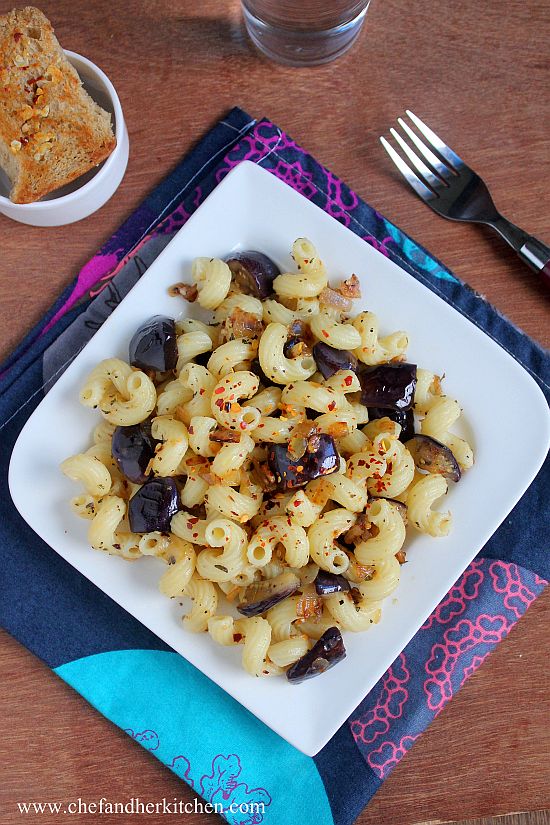
pasta with eggplants
As I find Aglio E Olio bit dry for my liking, I usually serve it with grilled vegetables or eggplants.The soft and fleshy eggplants make a nice combination with the pasta and we started liking it and slowly I turned out the entire dish into a single one and that is how the Eggplant pasta started featuring at my place.

In case you are interested check out other Pasta recipes here -
pasta with eggplants

Eggplant Pasta Recipe:
Serves 2
Prep time:10 mins | Cooking time:20 mins | Total time:30 mins
Cuisine: Italian | Category: Pasta - Main Course

Ingredients:
2 cups Pasta(of any shape)
2-3 long thin Purple Eggplants
1 Onion,finely chopped
6-8 Garlic cloves,finely chopped
1/2 tsp Pepper powder,freshly ground
1/2 tsp Red chili flakes
1 tsp Mixed Italian Herbs
2 tbsp Olive Oil
1 tbsp Extra virgin Olive oil
Salt to taste

Method:
  • Bring water to a boil with salt and add a tsp of olive oil in a big pot add pasta and cook for 8-10 mins until it is al dente or follow the instructions on your package.Drain the pasta and keep it aside.
  • Meanwhile chop eggplants into small cubes or cut them into thin 1" length pieces and drop them in salted water for 10 mins.This will remove the bitterness of eggplants and also would not let it turn black.Squeeze slightly the extra water and pat dry it.You can either grill them in oven with some olive oil and salt for 15-20 mins until done or saute it in olive oil in a pan until they are soft and cooked.
  • Heat olive oil in a pan and add finely chopped garlic and fry until it turns slight red in color and then add chopped onions and fry well until they turn translucent and turn slight pink.
  • Add grilled or sauteed eggplant cubes/pieces and fry for 1-2 mins.
  • Add red chili flakes, mixed herbs, pepper powder and salt and fry for 1-2 mins.
  • Add cooked and drained pasta to it and mix well until the mixture coats the pasta.
Serve it hot and drizzle on top with Extra virgin olive oil and shaved Parmesan cheese.I served it with Garlic Bread and lemonade.
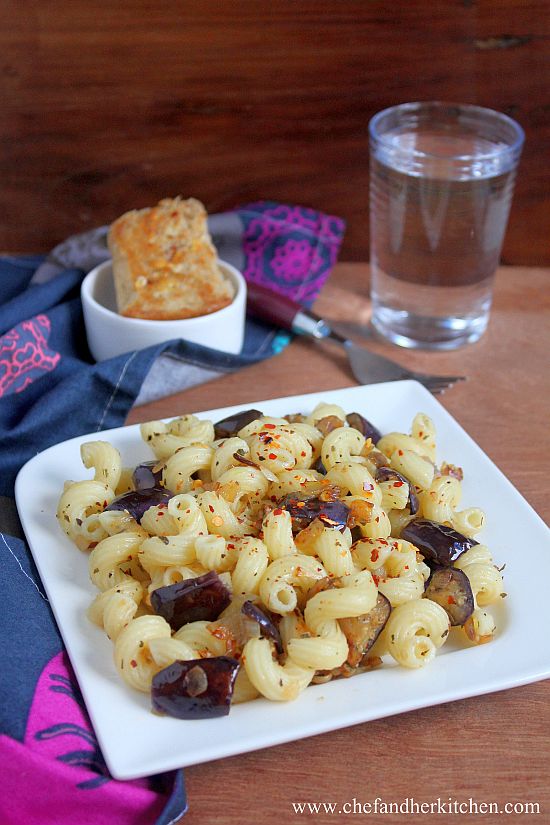
eggplant pasta recipe
Notes:
  1. You can use herbs of your choice like fresh basil or oregano in the recipe instead of mixed dried herbs. 
  2. If you like you can add Parmesan cheese into the pasta while it is on heat.
  3. Chopped canned tomatoes or blanched,peeled and chopped tomatoes also can be added along with onions in the recipe.
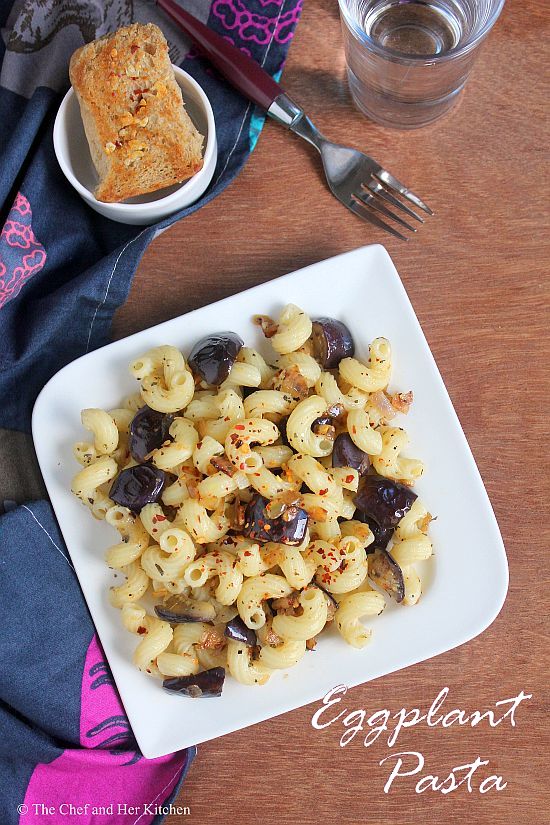
eggplant pasta recipe

Monday, June 16, 2014

Gawar aur Aloo ki Sabzi | Cluster Beans-Potato Curry

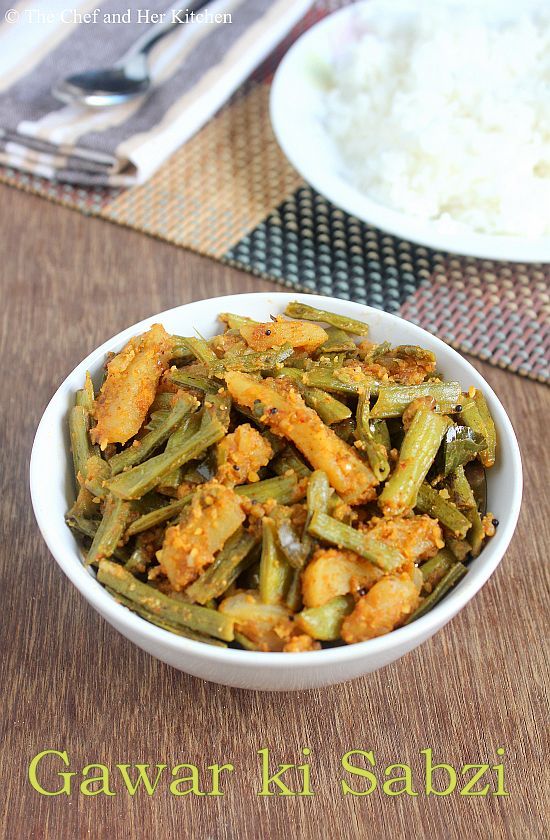
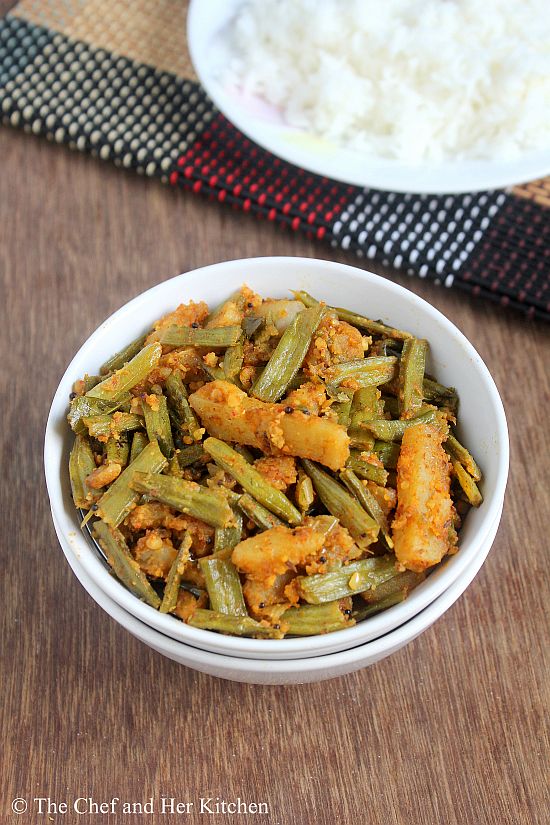
 Gawar ki Sabzi
We get very good and tender Cluster beans in Mumbai and hence it is again one routine vegetable which appears frequently at my place.Cluster beans take a bit of time to clean, chop and cook but it has good fiber content and hence I include it often.'Cluster beans' are called 'Gawar ki Phalli' in Hindi and 'Goruchikkudu' in Telugu.
I have posted a south Indian style Cluster beans curry(Goruchikkudu kura) earlier and today I am sharing a Maharasthrian version called - Gawarchi Bhaji which can be paired with rice or rotis.I usually pair cluster beans with potatoes as they make a nice combination with rotis. The addition of groundnut powder enhances the taste of the curry, do give this version a try next time.
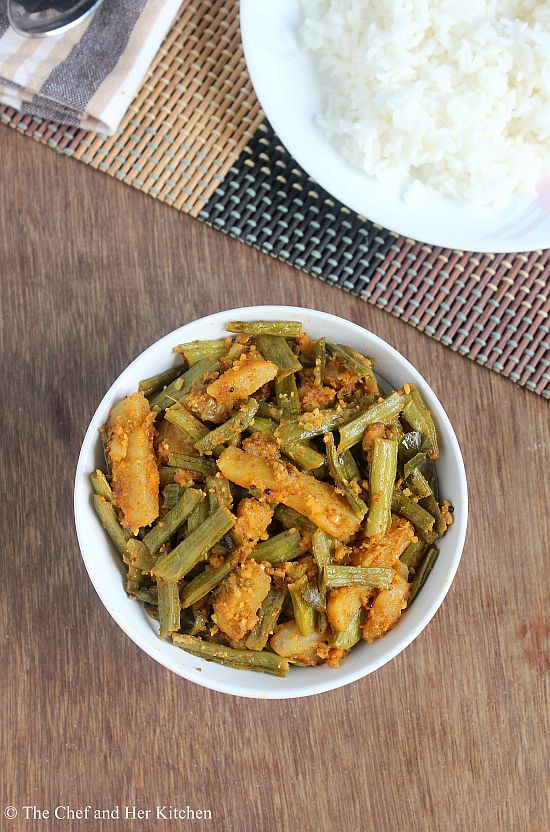
cluster beans potato curry

Gawar ki Sabzi with Aloo | Cluster beans - Potato Curry Maharasthrian style:
Serves 2-3
Prep time:20 mins | Cooking time:30 mins | Total time:50 mins
Cuisine:Maharashtrian-India | Category:Curry-Side dish

Ingredients:
250 gms tender Cluster beans
1 large Potato
1 Onion,chopped
2-3 tbsp roasted Groundnut powder
3/4 tsp Red chili powder
1/4 tsp Garam masala or 1 tsp Goda masala
1 tsp Coriander powder
1/4 tsp Turmeric powder
3/4 tsp roasted Cumin powder
6-8 Curry leaves,chopped
1 tsp Cumin seeds
1/2 tsp mustard seeds
2 tbsp Oil
Salt to taste

Method:
  • Wash and wipe cluster beans and remove the ends and stings and pluck them into 1" pieces using hands.Steam it for 10 mins or 2 whistles in pressure cooker.You can skip steaming if you want to cook it directly.
  • Peel the potatoes and cut into thin fingers of  1" length.
  • Heat oil in a big thick kadai /pan and crackle mustard seeds and cumin seeds.
  • Add chopped onions and curry leaves and fry until they turn translucent.
  • Add potato fingers to it and fry for 2-3 mins.Sprinkle some water and cover it and cook for 5-7 mins until it is 3/4th cooked.(If you are cooking cluster beans directly add them along with potatoes and cook them together.You need to add required water to let it cook,so keep checking in between if it needs more water,sprinkle water in regular intervals so that the vegetables would not get burnt).Add steamed cluster beans and cook for another 3-4 mins until the potatoes are done.
  • Add all the spices and salt and mix nicely.Cover it and cook for 2-3 mins.
  • Switch off the flame and add roasted ground nuts powder and mix it.
Serve it hot with Roti/Phulka/Rice.

Notes:
  1. You can avoid potatoes and prepare this only with cluster beans.
  2. I like it to be a slightly dry version.If you want you can make it to a slight gravy by adding water and more ground nut powder and boil at the end.
  3. You can prepare this curry in a pressure cooker by following the same process and pressure cook with little water for 1-2 whistles.Once the steam subsides,increase the flame and let the water evaporate if you prefer a dry version or serve as it is if you like gravy version
  4. You can add grated coconut or dry coconut powder along with ground nut powder at the end.

Monday, June 9, 2014

Baby Corn Korma | Babycorn Peas Kurma Recipe

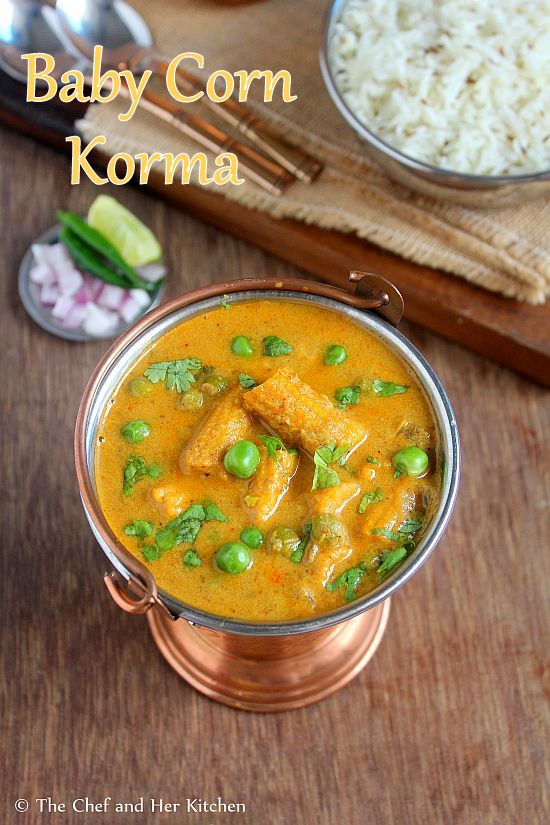
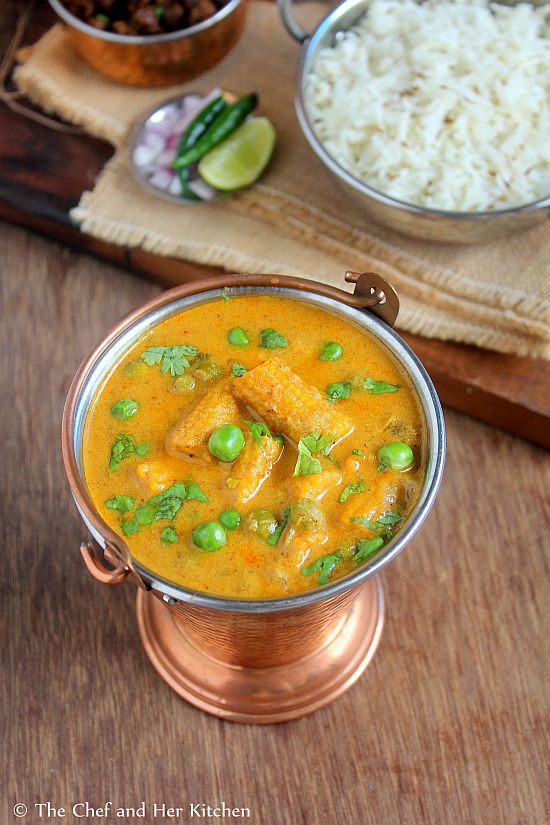
baby corn korma
Babycorn Capsicum Curry is one of the most liked recipes in my blog and has got a very good feedback. In fact, it is even my favorite curry and my first choice when I have Babycorns at home.The crunch of baby corns is what I love the most and it adds a nice texture to any curry.I love preparing stir fries , pulaos, fritters and also this Korma. Baby corn Korma has become the latest favorite at my place. The aroma of the fresh spices, especially the cardamom and kasuri methi and the slight hint of sweetness from cashew nuts and coconut paste with the bite of crunchy baby corn pieces makes this dish extremely delicious. I bet the flavors lingers with you even after a while.
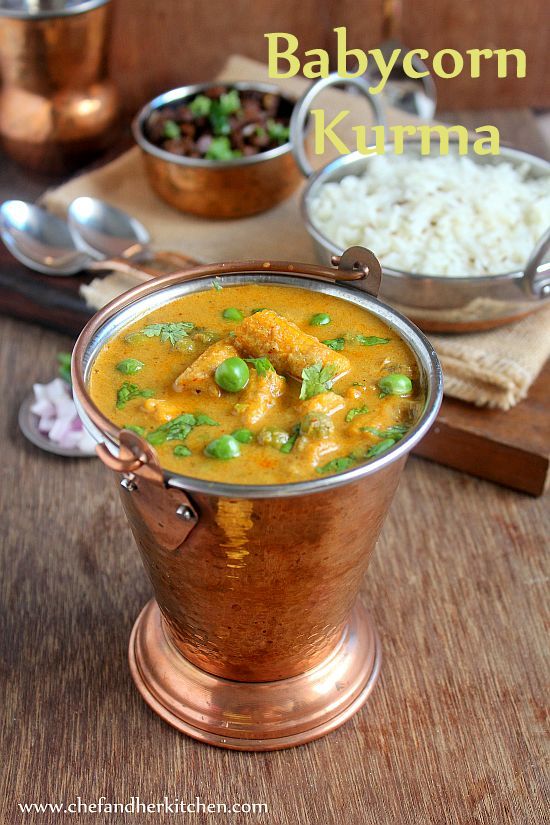
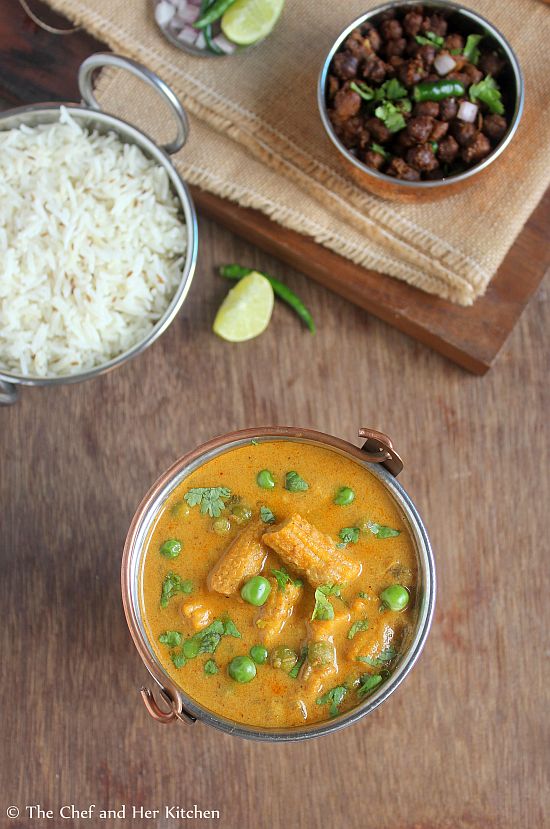
babycorn kurma
You pair with simple rotis or laccha parathas or jeera rice,it is absolutely a winning combo.I would vouch for this Baby corn Korma recipe as  much as I love my Babycorn Capsicum Curry.Do give it a try once and I am sure you will like it.You can definitely make this for any party and just wait to receive the compliments.

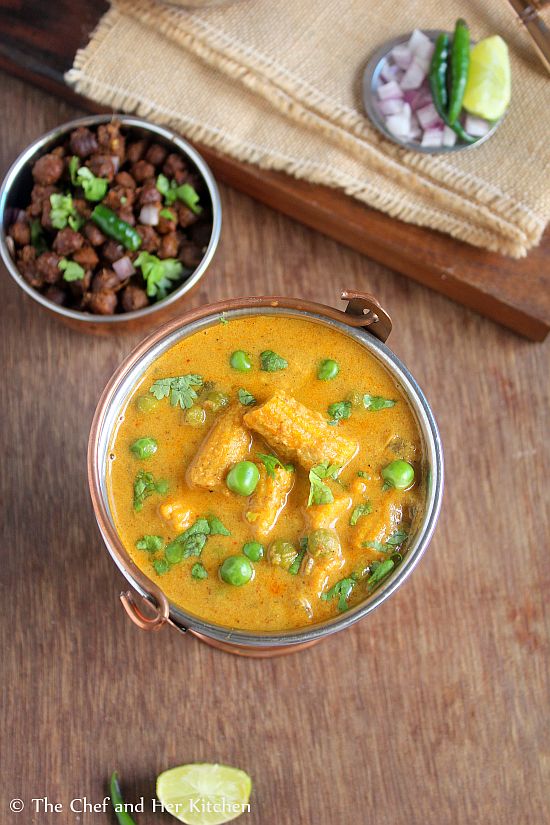
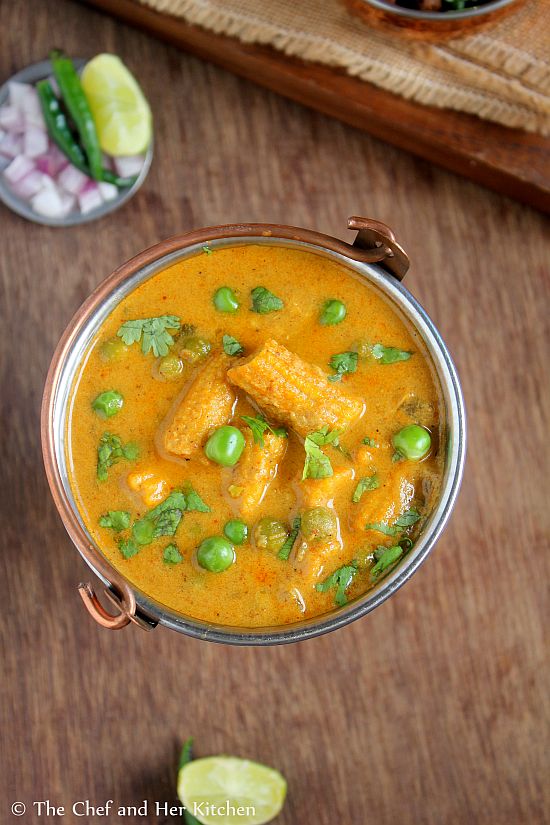
baby corn korma

Check out other Babycorn recipes in my blog.
babycorn peas kurma

Baby Corn Korma Recipe:
Serves 3-4
Prep time:15 mins | Cooking time: 25 mins | Total time:40 mins
Cuisine: Indian | Category: Side Dish - Main Course

Ingredients:
12-15 Baby corns,each cut into 4 cylindrical pieces
1/2 cup fresh/frozen Green Peas
1 large Onion,finely chopped
2-3 tbsp fresh Curd,nicely beaten
1 tsp Kasuri Methi
1 tbsp chopped Coriander
1/4 tsp Turmeric powder
3/4 tsp Red chili powder
1 1/2 tbsp Oil
1 tbsp Ghee
Salt to taste
Lemon wedges, to serve

to temper:
1 Bayleaf
2 Green cardamoms,crushed with a pestle
2-3 Cloves
1" Cinnamon
1 Green chili,slit

to Grind:
1/4 cup grated fresh Coconut
1 large Tomato,chopped
8-10 Cashewnuts
1 tbsp Corinader seeds
1 tsp Cumin seeds
5-6 black Pepper corns
3/4 tsp Fennel seeds(Saunf)

Method:
  • Par boil baby corns and green peas in hot water for 3-4 mins.Drain and keep them aside.
  • Meanwhile heat 1/2 tsp oil and add coriander seeds, cumin seeds and pepper corns and fry nicely.You can even dry roast them if you want.Remove them from the pan and let them cool.
  • Grind roasted coriander seeds, cumin seeds and pepper corns with raw fennel seeds to a coarse powder.
  • Add cashew nuts, grated fresh coconut and tomato and grind it to a smooth paste.If necessary add some water but make sure you grind it to a smooth paste.
  • In a wide non stick pan heat 2 tsp oil and add baby corn pieces and green peas and saute them for 4-5 mins until they turn slightly golden in color.
  • In another thick kadai/pan heat 1 tbsp oil and 1 tbsp ghee and add a bay leaf, cloves, cinnamon, green cardamoms(crush the cardamoms with a pestle before adding which is important to give the korma a nice flavor) and slit green chilli and fry for half a minute.
  • Add finely chopped onions and fry until they turn translucent.Now add ginger-garlic paste and fry well for a minute.
  • Add the ground masala paste and fry nicely for 3-4 mins until the raw smell goes away.
  • Add turmeric powder, red chili powder and garam masala and fry well for 2 mins.If the masala is completely dry add a tbsp of water and fry again, but do not let it burn.
  • Add roasted baby corn pieces and green peas and add enough water (roughly 1- 1.25 cups) to get your required consistency.
  • Also add salt, kasuri methi and curd(make sure you have beaten the curd nicely before adding) and mix it nicely.Simmer it and cook for 7-8 mins.Adjust the consistency of gravy by adding or reducing the water accordingly.
  • Switch off the flame.Add coriander at the end and mix well.You can add lemon juice now or serve the lemon wedges along with gravy.
Serve it hot with Rotis/Parathas/Naans/Jeera rice/Ghee rice.
babycorn peas masala
Notes:
  1. You can prepare the entire process in a pressure cooker.In that case follow the grinding process as mentioned above,but you don't need to par boil and roast the baby corn and green peas ahead.You can do the tempering and roasting the masala along with the spices in the pressure cooker as mentioned above and then add baby corn pieces and green peas and fry them for 2-3 mins and then add water along with salt, kasuri  methi and beaten curds and pressure cook for 1 whistle.Once the pressure drops remove the lid and boil it again for 2-3 mins and add coriander and lemon juice after you switch it off.
  2. This Korma tastes best when it is made spicy but you can adjust according to your wish by reducing the chili powder.Do remember we are adding pepper corns while grinding.
  3. If you like you can add fried paneer pieces at the end to the korma.
  4. Make sure you crush the green cardamom with a pestle before adding to the tempering.This adds a nice aroma to the korma.
  5. Also do not forget to beat the curds well before adding,otherwise it will curdle.
babycorn korma

Technorati Tags: , , , , , ,

Monday, June 2, 2014

Schezwan Vegetable Noodles | Indo Chinese Recipes


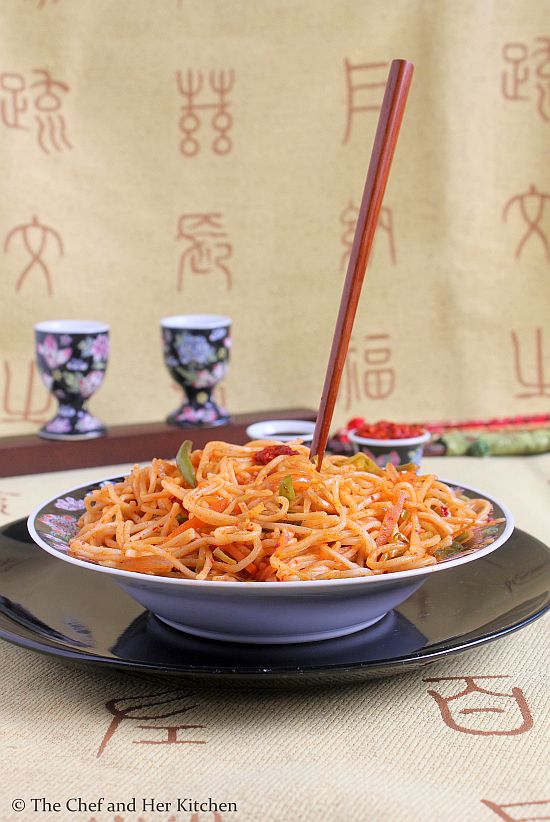
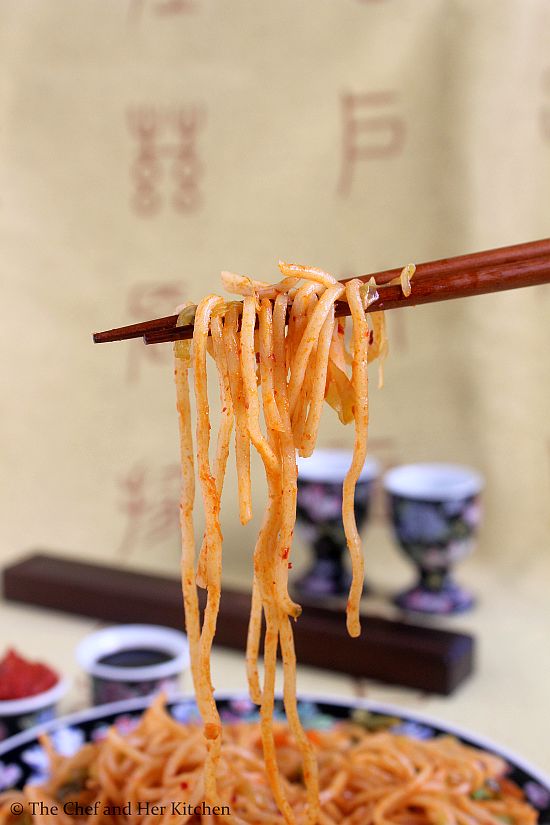
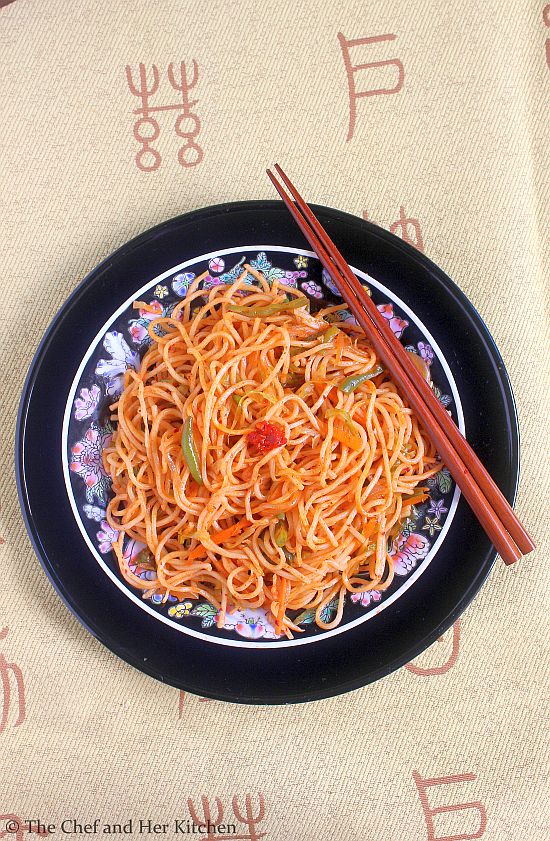
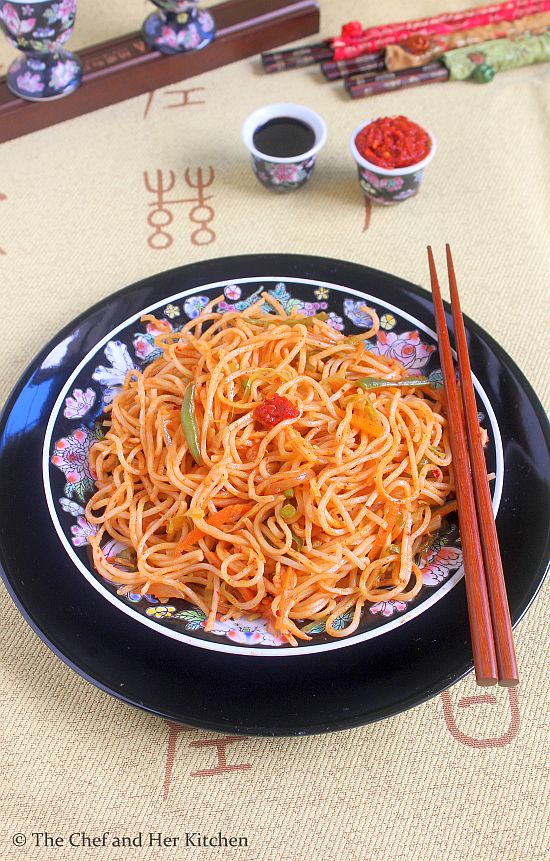
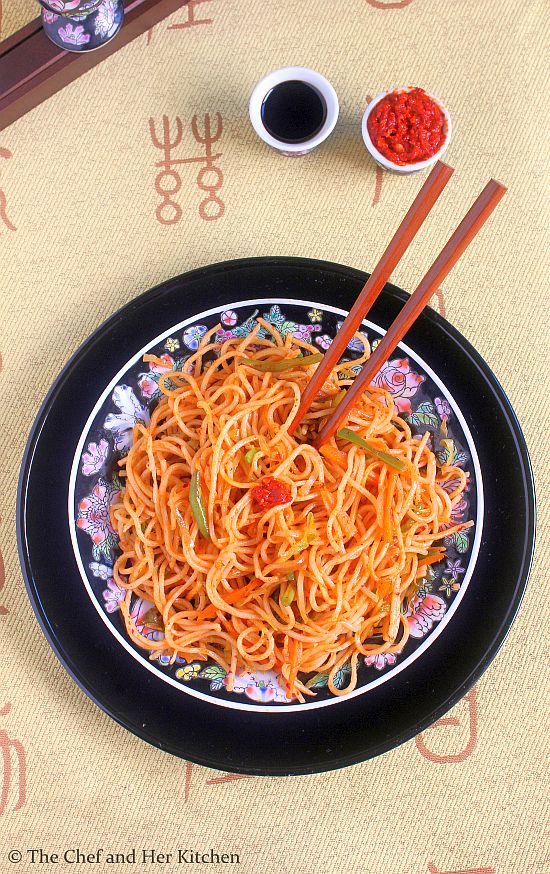
schezwan veg noodles
Noodles and Pasta varieties are always a favourite among kids and adults.When it comes to main course in Chinese I would definitely opt noodles over fried rice but I absolutely enjoy both but my taste buds slightly incline towards noodles any day. Schezwan flavour complements noodles very well and is my favourite too. Usually for Hakka noodles a side dish like Manchurian gravy is more preferred but for Schezwan noodles you do not need any side dish to accompany it with as the noodles are already flavoured with the schezwan sauce and tastes nice on its own.
chinese schezwan veg noodles
One can prepare schezwan sauce before and keep it ready. Once you have all the preparation work done you can toss the noodles in no time. I always love to watch how they toss in such high flames in restaurants, it adds a nice smoky flavour to the dishes.Chinese dishes tastes best when it is served piping hot and slightly spicy, one can adjust the amount of sauce according to the personal preferences.
schezwan veg noodles


If you are interested check out other Indo-Chinese recipes in my blog.
Schezwan Vegetable Noodles Recipe:
Serves 2
Prep time:15 mins | Cooking time:10 mins | Total time: 25 mins
Cuisine: Indo-Chinese | Category: Noodles - Main Course

Ingredients:
1 pack(200 gms) Vegetarian Hakka Noodles
1/3 cup Schezwan Sauce
1 Onion, finely sliced
1" Ginger, julienne into thin strips
3-4 Garlic pods, finely chopped
1/4 tsp freshly ground Black pepper/White pepper
1 tsp dark Soya sauce
1 tsp white Vinegar
2 tbsp Olive oil
2 tbsp Sesame oil
Salt to taste

Vegetables needed:
1 cup finely shredded Cabbage, length wise
1 big Carrot, julienne into thin strips
1 Capsicum, julienne into thin strips
12-15 French beans, thinly sliced lenth wise
6-8 Spring onions, whites-sliced thin;greens-finely chopped

Method:
  • Bring 7-8 cups of water to a boil in a pan and add salt and one tsp of sesame  oil to it and add hakka noodles and cook according to the instructions. The noodles should hold its shape and firm to bite, this process should take 8-10 mins. Keep an eye at the end so that the noodles will not become soggy.
  • Drain the noodles in a colander and pour cold water over it and wash the starch completely from the cooked noodles, this helps in retaining non-sticky noodles.
  • Heat olive oil and sesame oil in a big wok over a high flame and then add ginger strips and chopped garlic and saute it well.
  • Add finely sliced onion, spring onion whites and shredded cabbage and fry in high flame.
  • Add julienne carrots, beans and fry well until they are half cooked. Take care that it would not loose the crunch of vegetables, they should be firm to bite.
  • Add capsicum strips to it and toss it again.
  • Add schezwan sauce, pepper powder, soya sauce, vinegar and fry for a minute. Add salt and do remember that the sauces already have some salt so do not add more salt.
  • Add cooked noodles and chopped spring onion greens and toss well until it is mixed properly and toss on high flame for 2-3 mins until the noodles are piping hot. Toss it continuously so that they would not stick to bottom.
Serve it hot with any manchurian gravy side dish or tomato sauce.

schezwan veg noodles

Notes:
  • The entire process of sauteing would be done under 8-10 mins, so be quick while sautéing the vegetables and noodles and also take care not to loose the crunchiness of vegetables.
  • You can use white pepper powder or black pepper powder and it is preferred to use freshly ground black pepper in the recipe.
  • Be liberal in using oil as it helps the noodles not to turn sticky and in Chinese cooking it is always advisable to use more oil.
  • I have used olive oil and sesame oil in the recipe as it gives a nice flavor to noodles.If you do not have olive oil in hand the best substitute for olive oil is sesame oil in Chinese cooking as sesame oil is primarily used in Chinese cooking as the oil itself has nutty flavor which enhances the taste of Chinese dishes.
  • In Chinese cooking ajinamoto(tasting salt) is added for extra taste,I do not use it in my cooking and hence not mentioned in the recipe. If you are using it, add 1/2 tsp of ajinamoto while adding salt and sauces to the wok.
schezwan veg noodles


Monday, May 26, 2014

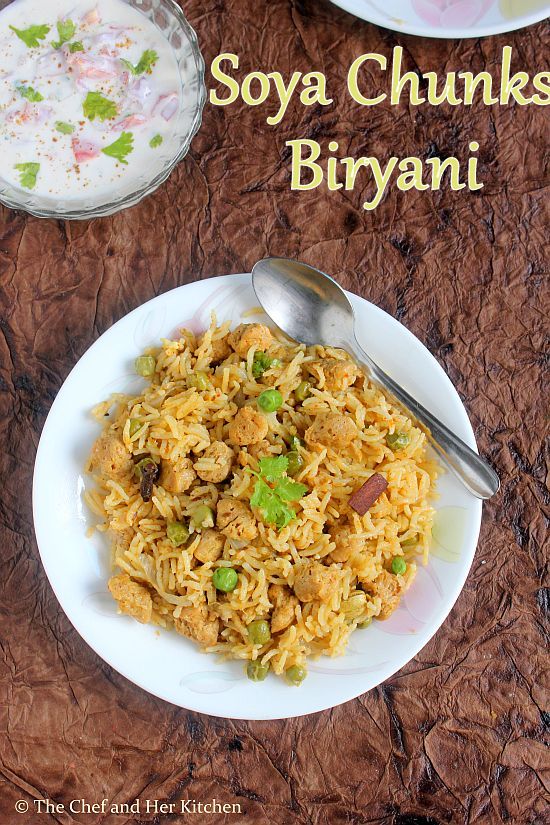
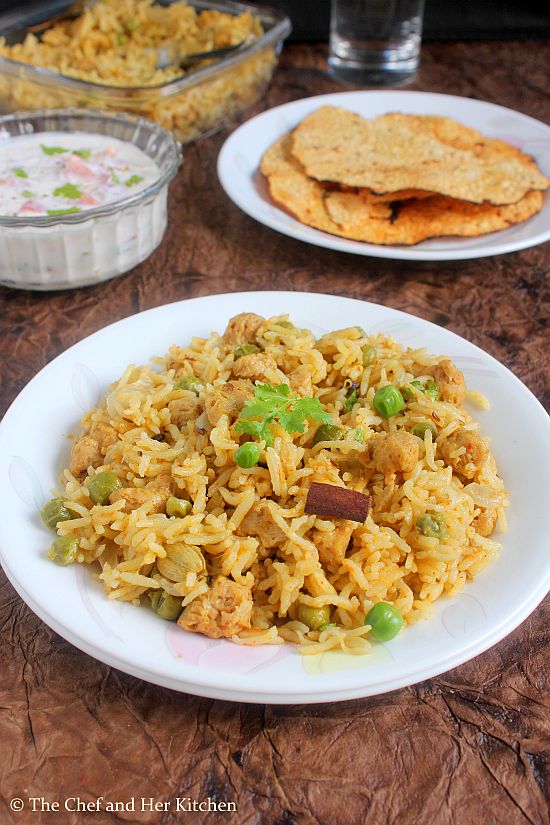
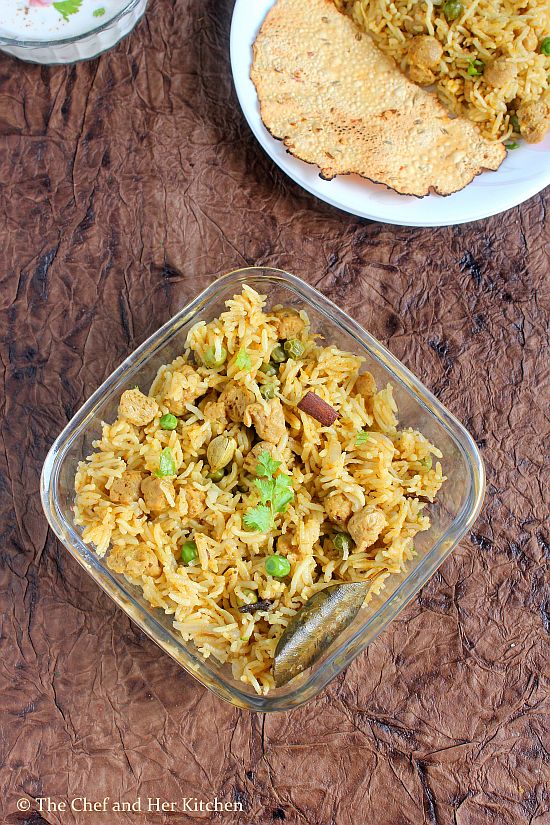
Soya Chunks Biryani Recipe | Soya Chunks Recipes

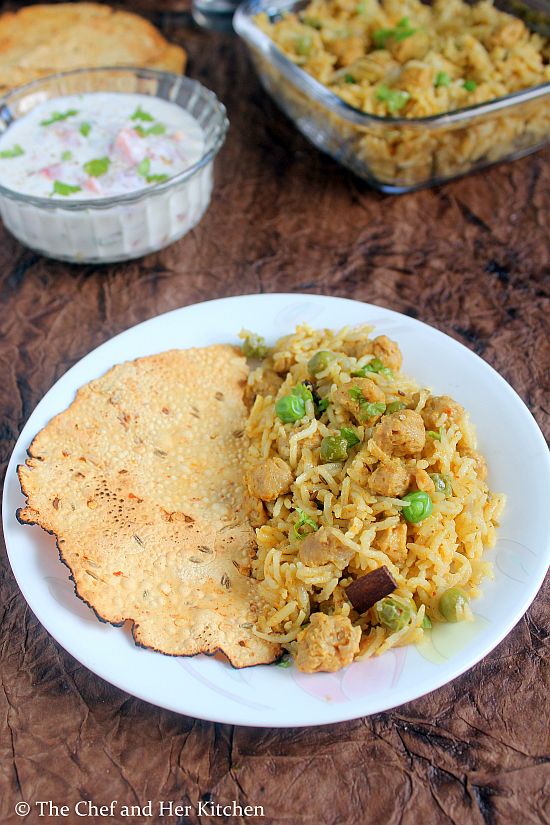
soya chunks biryani
I love Pulaos and Biryanis for the fact that they are one pot meal and can be prepared quickly,while few Biryani recipes are bit complicated and time consuming. I reserve the Dum Biryanis for occasions and always adopt a simple one pot pressure cooker method for daily basis. These kind of one pot dishes are ideal for lunch box or for a week end lunch.
nutrela biryani
 I usually add soya chunks even to my vegetable pulaos but in moderate amounts. Soya chunks is also known as 'Nutrela' or 'Meal Maker'.Soya chunks has meaty texture and is a very good source of proteins for vegetarians, hence I include it in many of the gravies and pulaos on daily basis. As Soya chunks are bland in taste you need to spice it up a bit but they observe the flavours beautifully and make the dish delicious. We get soya chunks in two sizes and I prefer to use the mini soya chunks over the bigger ones. I follow more or less a similar recipe for most of my one pot biryanis and love the flavourful outcome all the time. Pair it with Onion-Tomato raita and papad and enjoy the delicious meal with your family.
meal maker biryani
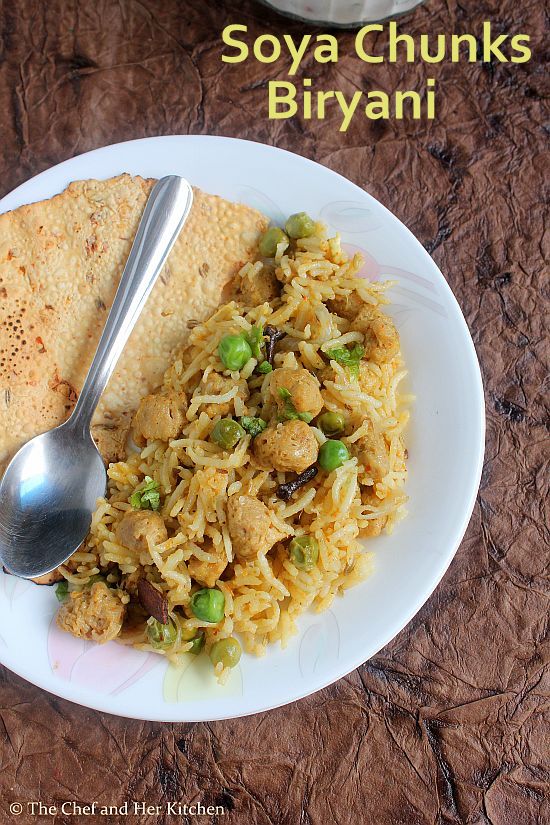
soya chunks biryani

Soya Chunks Biryani Recipe:
Serves 2
Prep time: 10 mins | Cooking time: 20 mins | Total time: 30 mins
Cuisine: Indian | Category: Pulao/Biryani - Main Course

Ingredients:
1 heaped cup Basmati rice
3/4 cup mini Soya Chunks
1/3 cup fresh/frozen Green peas
2 cups Coconut Milk(medium consistency,see notes)
1 large Onion,finely sliced
1 tsp Biryani Masala or 1/4 tsp Garam masala
1/2 tsp Red chili powder
1/4 tsp Turmeric powder
few mint leaves
1 Bayleaf
1/2" Cinnamon
2 Cloves
1 Cardamom, slightly crushed
1 tsp Shahjeera(black Cumin seeds)
Salt to taste
2 tbsp Oil
1 tbsp Ghee

to grind:
1 Tomato,chopped
2 Green chillies
1/4 cup Mint leaves
1/8 cup Coriander leaves
4-5 Garlic pods
3/4" Ginger,chopped
1/2" Cinnamon
2 Cloves
1 tsp Fennel seeds(saunf)

Method:
  • Grind all the ingredients mentioned under 'to grind' to a smooth paste and keep it aside. 
  • Wash and soak basmati rice in water for 10 mins.
  • Boil 2-3 cups of water in a vessel and add soya chunks and boil for 2-3 minutes or immerse in hot water for 7-8 mins.Drain them and drop them again in cold water and squeeze them and repeat the cold bath once again and squeeze them and keep aside.This process ensures to remove the raw smell from soya chunks. 
  • Heat oil and ghee in a cooker and add bayleaf followed by shahjeera, cloves, cardamom and cinnamon and fry for half a minute. 
  • Add sliced onions and fry well until they turn pink color.
  • Add green peas and boiled and squeezed soya chunks and fry well for a minute. 
  • Now add ground masala and fry well for 2-3 minutes until the raw smell disappears.
  • Now add turmeric powder, red chili powder or Garam masala(or biryani masala) and fry for a minute again.
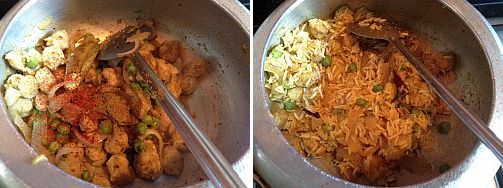
  • Add soaked and drained basmati rice and fry for a minute until the moisture in the rice dries.Do not roast for long as the rice would break.
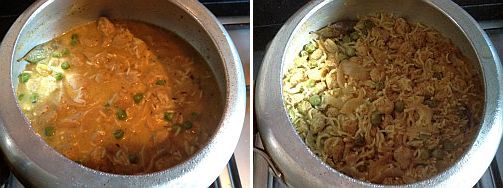
  • Add coconut milk to it, mint leaves and salt and bring it to a boil and cover it and pressure cook for 1 whistle and simmer it for 7-8 mins.Switch it off and let the pressure drops on its own.Fluff up the rice with a fork.
Serve it hot with Tomato-Onion raita and papad.
soya chunks biryani
Notes:
  • If you use tinned Coconut milk which is of thick consistency you can dilute 1 cup of coconut milk with 1 cup of water to get 2 cups of thin coconut milk.You can even mix coconut milk powder in hot water to get the desired consistency as mentioned on the pack.
  • You can use water instead of coconut milk in the recipe. In that case I recommend you to add 2 tbsp beaten curd before adding water and fry slightly.
  • Along with soya chunks,you can add vegetables like carrots, beans, potatoes, cauliflower, capsicum and reduce the quantity of soya chunks in the recipe.
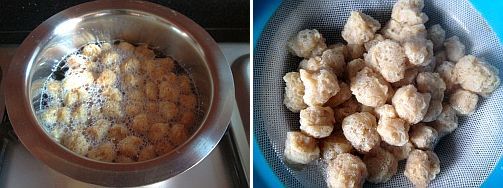
soya chunks biryani

Wednesday, May 21, 2014

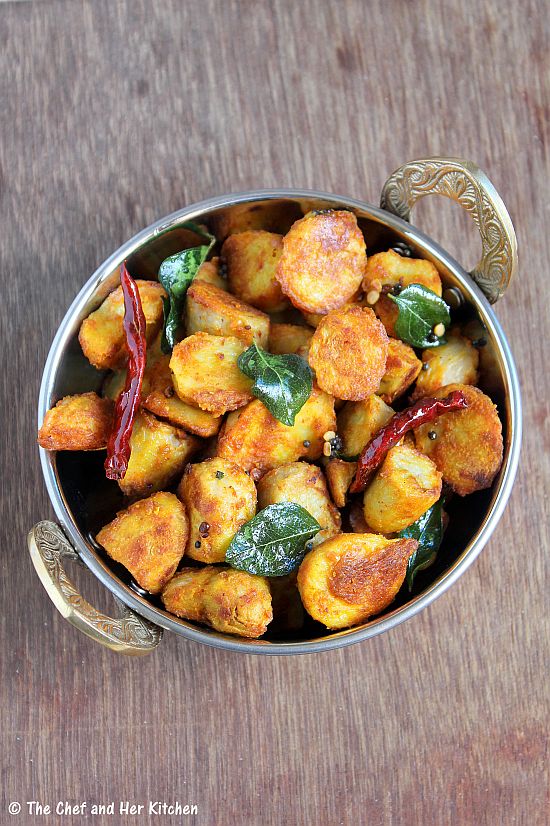
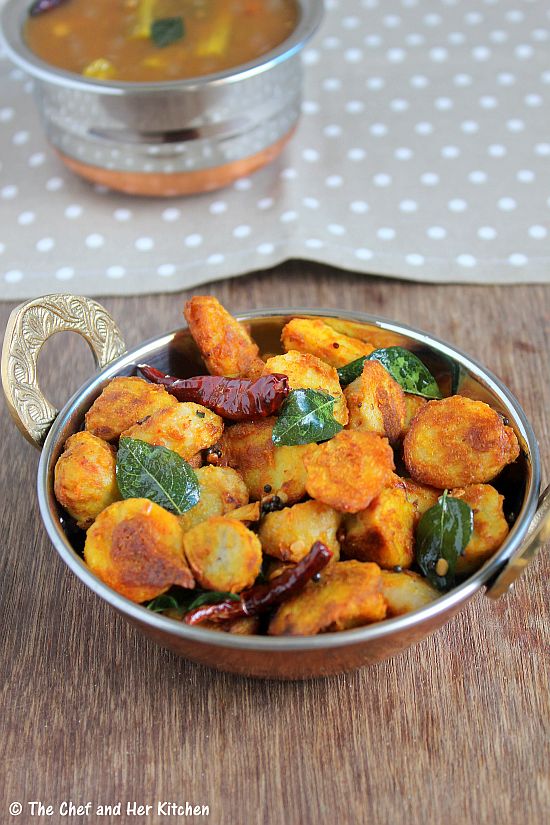
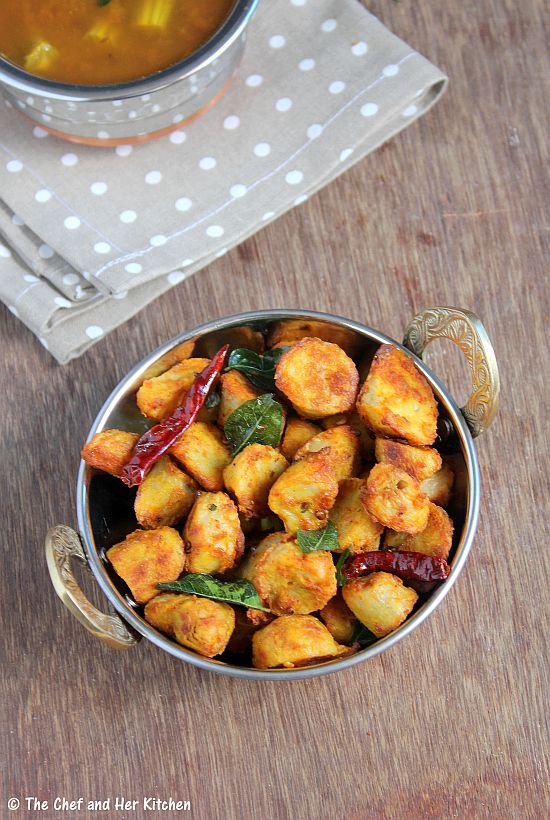
Arbi Roast | Chamadumpa Vepudu

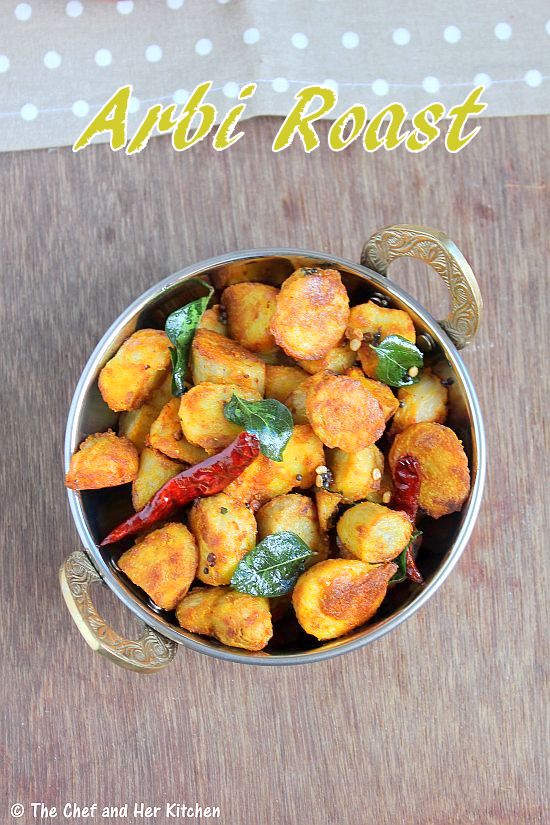
arbi roast
According to me, Arbi(Taro root) is one of the most tastiest vegetables and I prepare it almost every weekend as TH is also very fond of it. I make mostly dry preparations like arbi fry,arbi roast to pair with rice or as marinated dahi arbi roast or arbi ajwaini which pairs nicely with rotis.Arbi fry tastes best when it is deep fried and as I do not use much oil in my cooking I prefer to do it in my oven which not only saves my time but also consumes very less oil. I use my oven often in my cooking and it helps in preparing most of the vegetable fries - potatoes, ladies finger, raw banana, yam with very less oil.
chamadumpa fry
Check out other fry recipes in my blog.
chamadumpa vepudu

Arbi(Taro root) Roast | Chamadumpa Vepudu:
Serves 2
Prep time: 10 mins | Cooking time: 30 mins | Total time: 1hr(with cooling time)
Cuisine: South Indian | Category: Stir fry|Curry

Ingredients:
250 gms Arbi(Taro root)
1 tbsp Rice flour
1 tsp Red chili powder
1/4 tsp Turmeric powder
1/2 tsp Amchur powder(optional)
Salt to taste
1 tbsp Oil

to temper:
1 tsp Urad dal
1/2 tsp Mustard seeds
2 Red chillies,broken 
a sprig of Curry leaves
1 tbsp Oil

Method:
  • Soak arbi in water for some time and rub it nicely to remove extra dirt and wash it  properly in few changes of water.Pressure cook arbi with enough water for 1 whistle.Let them cool completely.Peel the skin and chop them into big chunks.
  • In a bowl add chopped taro root(arbi) and sprinkle rice flour, red chili powder, turmeric powder, amchur powder, salt and oil to it and gently mix so that the spice mix coats all the pieces nicely.You can add more rice flour if you need and also adjust the seasonings according to your wish.
  • Now follow any of these 3 methods which I mentioned below.I followed the oven method which is healthy and less calorie version and also yields very crispy fry.
method1:
  • Line the baking tray with silver foil and arrange these slices in a single layer and sprinkle some oil over it and bake in oven at 160 deg for 20-25 mins.Keep an eye after 20 mins so that they will not get burnt.If the edges are crispy and changes its color means its done.Do not over bake them,they will become tough.
method2:
  • Deep fry them in oil until golden brown and crisp.
method3:
  • In a wide non-stick kadai heat 2 tbsp oil and arrange the taro root pieces in a single layer and let them fry for 12-15 mins until crisp.Give a stir in between so that they don't get burnt.
  • Heat the kadai and add 1 tbsp oil and heat it.
  • Add mustard seeds and let them crackle and then add urad dal,red chillies and curry leaves to it.
  • Add fried taro root chunks (prepared by following any of the three methods mentioned above) and fry them on medium-high flame for 2-3 mins.
Serve them hot with rice or as a side dish for sambar/rasam with rice.
chamadumpa vepudu

Notes:
  1. These kind of roasts/fry will loose their crispiness after a while,so its better to serve immediately.
  2. In case you want to serve later you can roast them again in the same pan for 4-5 mins on medium flame to get the crispiness back at the time of serving.
  3. You can follow the same process for potatoes,baby potatoes and Raw Bananas.
  4. You can replace rice flour with besan(chickpea flour).
  5. You can add sambar powder along with red chili powder in the recipe.
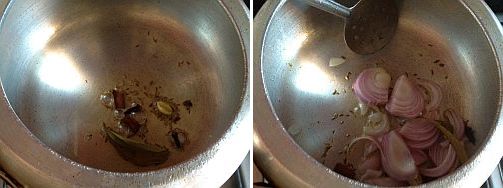
  6. Do not cook for long as the taro root will get mushy.

Monday, May 12, 2014

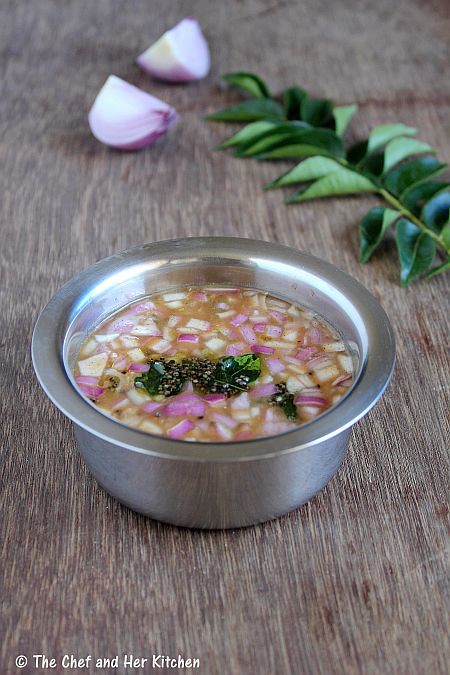
Pacchi Pulusu | Raw Tamarind Rasam | Easy Rasam Varieties

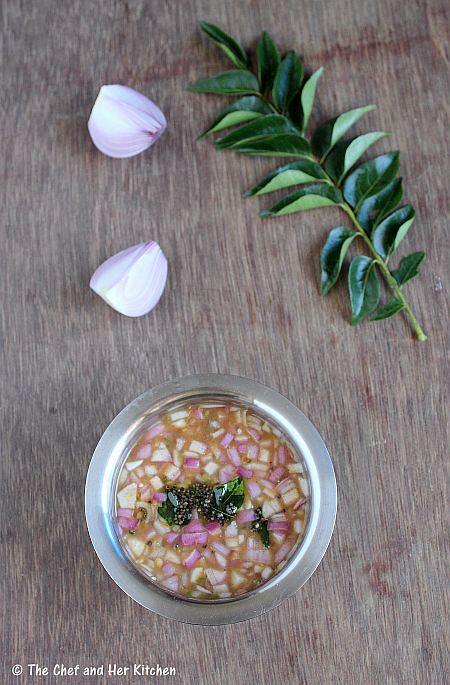
'Pacchi Pulusu' in Telugu literally translates to 'Raw Stew'. We even call it as 'Pacchi Chaaru' or 'Pacchaaru'. It is a raw tamarind stew where the tangy taste of tamarind is balanced with spicy one  from green chillies and sweetish tinge from jaggery. Finely chopped raw onions are added to it for extra crunch.This is the the usual method of preparing pacchi pulusu,but at my MIL's place they add roasted urad dal powder to it and it is called 'Minapa pindi Pachi Pulusu ' (Urad dal powder tamarind stew).The addition of urad dal powder not only adds thickness but also helps balances the taste of Pacchi Pulusu. It is though optional to add the tempering to the rasam.This is an ideal preparation if you are craving for something tangy to tickle your taste buds.You can check out another version of pacchi pulusu called 'Aratikaya(Raw Banana) Pacchi Pulusu' in my blog.


Pacchi Pulusu | Pacchi Chaaru | Raw Tamarind Rasam Recipe:

(serves 2)

Ingredients:
1 big lemon sized Tamarind
2-3 tbsp grated Jaggery
2 tbsp roasted Urad dal powder*(optional,see notes)
2-3 Green chillies
1 Onion,finely chopped
Salt to taste

to temper(optional):
1 tsp Oil/Ghee
1/2 tsp Mustard seeds
a sprig of Curry leaves

Method:
  • Soak tamarind in water for 10-15 mins and extract the pulp and dilute the tamarind pulp with approx 1- 1 1/4 cups of water.
  • Add grated jaggery,urad dal powder(if using) and salt to it and mix and make sure that no lumps are formed.
  • Traditionally green chillies are squeezed directly with hand in the above mixture.This process might create some burning sensation in your palms,hence I usually use my mortar and pestle to crush the slit chillies a bit and add to the rasam.You do not need to grind the chillies to a paste,just crush it roughly and add.
  • Now mix everything well and taste the rasam at this point.Adjust the consistency of rasam and also the sweet,spicyness,tangyness and salt in it.The taste depends on individual taste buds and hence adjust it according to your taste buds.
  • Add finely chopped onion to it and mix well.The more the onions the better the taste is.
  • This step of tempering is optional but I do it sometimes.Heat oil/ghee in a small tempering pan and crackle mustard seeds and add curry leaves and fry them and add them to the rasam.
  • Let it stand for half an hour for the flavors blend well.If you wish you can serve immediately.
Serve it with hot rice and papad/fryums.This rasam would be at room temperature as we do not heat it.

*making urad dal flour:
  • Dry roast whole urad with skin(or white urad dal) over medium flame until you get nice aroma and well roasted ,it takes around 4-5 mins and let it cool and then powder them into a smooth powder.
  • This can be refrigerated 3-4 months and can be used to prepare Andhra famous sweet called  'Sunnunda' and this 'Pacchi pulusu'.
Notes:
  1. Usually in regular 'Pacchi Pulusu' we do  not add roasted urad dal powder.If I have the roasted urad dal powder in hand I usually add it otherwise it is optional.It adds the thickness as well as the taste to Pachhi Pulusu.
  2. I have mentioned in the method about how to crush green chillies.So do not attempt doing it using your hands unless you are used to it.
  3. This recipe depends on your taste buds and there are no actual measurements to make this rasam.You need the adjust the consistency,spicyness,tangyness,sweetness and salt according to your wish.

Monday, May 5, 2014

Vegetable Idli Recipe | Idli Varieties | Breakfast Recipes

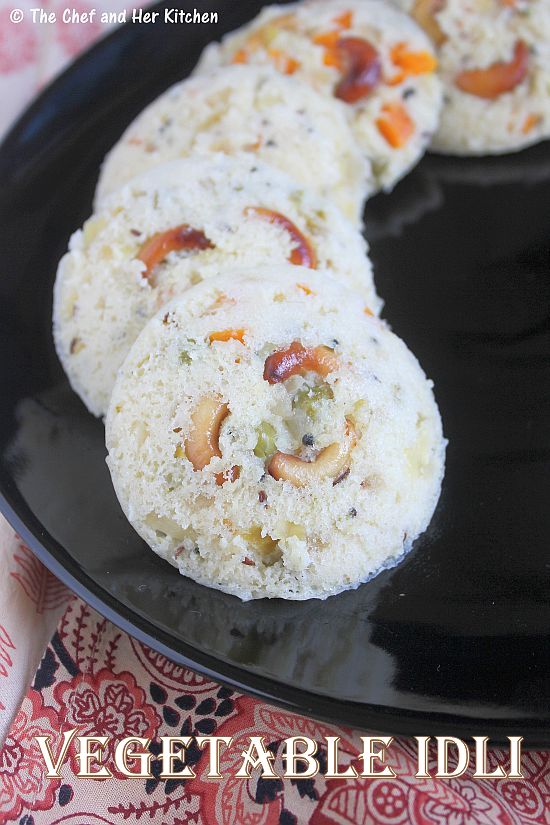
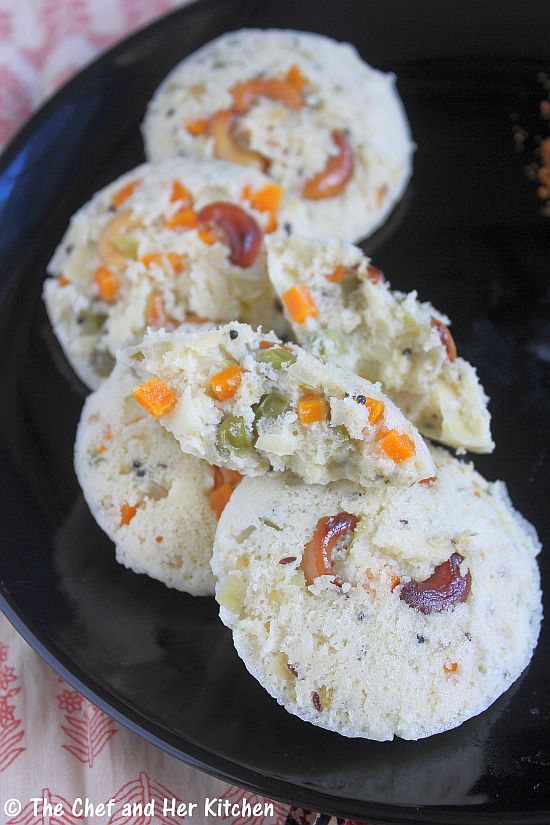
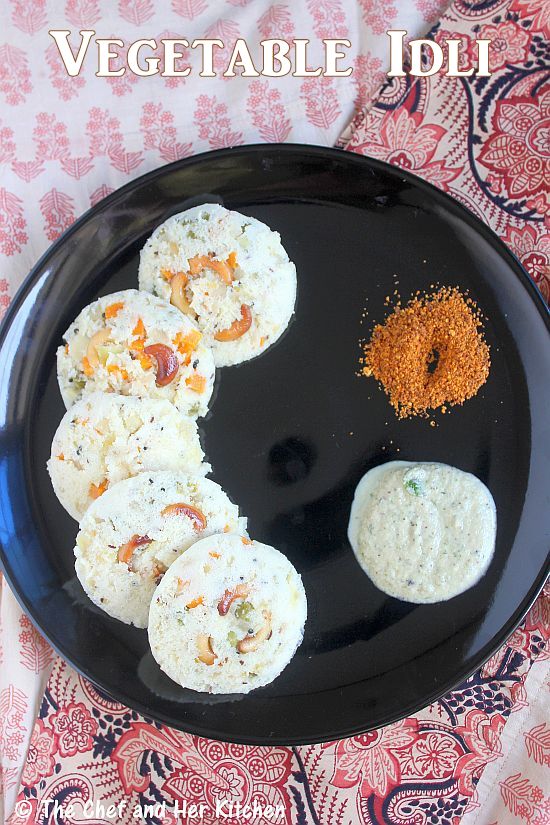
vegetable idli
I always look for interesting Breakfast options as that is my favorite meal of the day.I cannot stick to the same dish every time as I get bored of it.I like to eat Idli but I do not prefer to eat it in the same form in a row for breakfast.I always try to prepare various options with it and make it more interesting.If you are someone like me, try this Vegetable Idli for a change instead of regular idli.It is a great way to sneak vegetables for your kids.
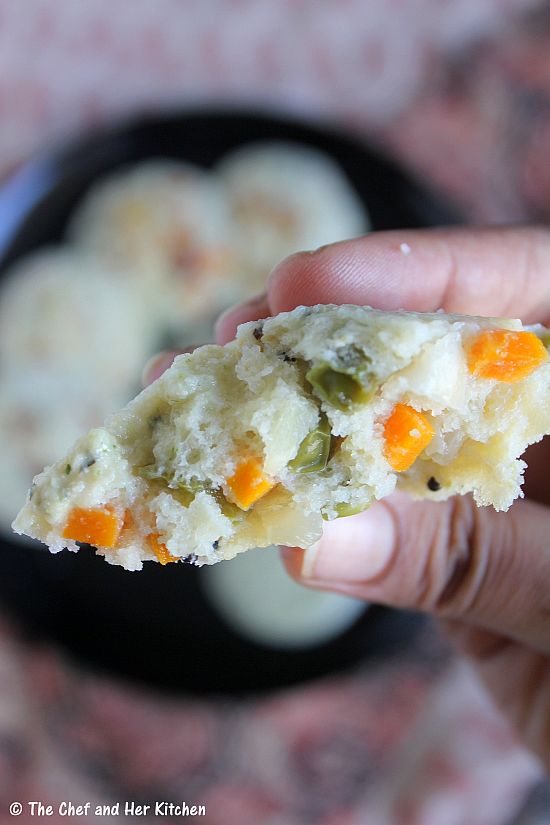
vegetable idli

Also check out other interesting Idli varieties:
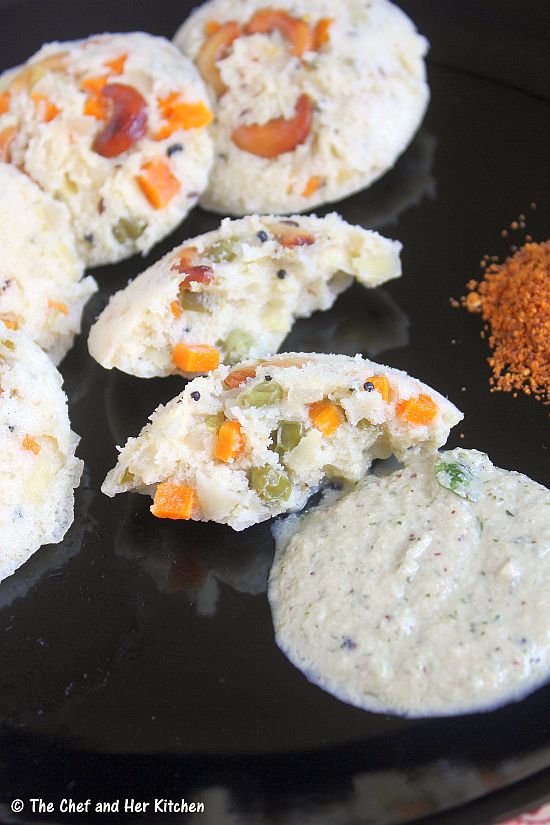
vegetable idli

Vegetable Idli Recipe:
yields: 12 idlis
Prep time: 10 mins | Cooking time: 20 mins | Total time: 30 mins + cooling time
Cuisine: South Indian | Category : Breakfast

Ingredients:
3 cups Idli batter
12-15 Cashew nuts,split into two halves
1/4 tsp cooking soda
1 tbsp Ghee
for vegetable mixture:
1 medium Carrot,finely chopped
1/4 cup Cabbage,finely chopped
10-12 French Beans,finely chopped
1 small Capsicum,finely chopped
1/4 cup fresh/frozen Green Peas
2 tbsp grated fresh Coconut
1 medium Onion,finely chopped
2-3 tbsp chopped Coriander
a sprig of Curry leaves,chopped
2 tsp Green chilli paste
1/2 tsp mustard seeds
1 tbsp Oil
Salt to taste

Method:
to prepare Vegetable mixture:
  • Heat ghee in a kadai and add halved cashew nuts and fry them until light golden in color.Remove and keep them aside.
  • Heat oil in a kadai and crackle mustard seeds and add finely chopped onions,curry leaves and saute until it is slight pink in color.Add green chilli paste to it and fry well.
  • Add chopped carrots,beans and green peas and fry well for 4-5 mins until they are slightly cooked.
  • Add chopped cabbage and capsicum and fry for another 2-3 mins.You don't need to make the vegatables really soft,if they are slightly crunchy its fine as we steam the batter they will get cooked nicely.
  • Add enough salt and mix well.
  • Switch off the flame and let the mixture cool a bit.
  • Add coriander,grated coconut to it and mix well. 
to prepare Vegetable Idli:
  • Add fried vegetable mixture to the batter and mix well.
    Add cooking soda to a ladle and mix it with a tsp of water and add this to the batter and mix it well,the batter becomes bit light.
    Grease the idli plates with oil and place roasted cashew nuts and pour a ladle of idli batter until each impression is filled 3/4th.
    Steam it in idli steamer or pressure cooker(with out whistle) for 10-12 mins.Let it rest for another 5 mins.
    With a idli spoon cleanly remove the idlis.Dip the idli spoon in water in between which helps to remove the idlis easily from the plate.

 vegetable idli
Notes:
  • You can use the same batter to make vegetable dosa.Make the dosas bit thick like uthappam and roast until crisp on one side.
  • Adding cooking soda is a must otherwise the idlis come out hard.So in order to get soft and fluffy idlis we should add cooking soda to the batter.
  • You can use idli batter either prepared with Idli rice or Idli rava to prepare these idlis.But I prefer to use the batter made up of Idli rice.
vegetable idli

Wednesday, April 30, 2014

Brinjal Sambar Recipe | Vankaya(Kathirikai) Sambar | South Indian Sambar Recipe

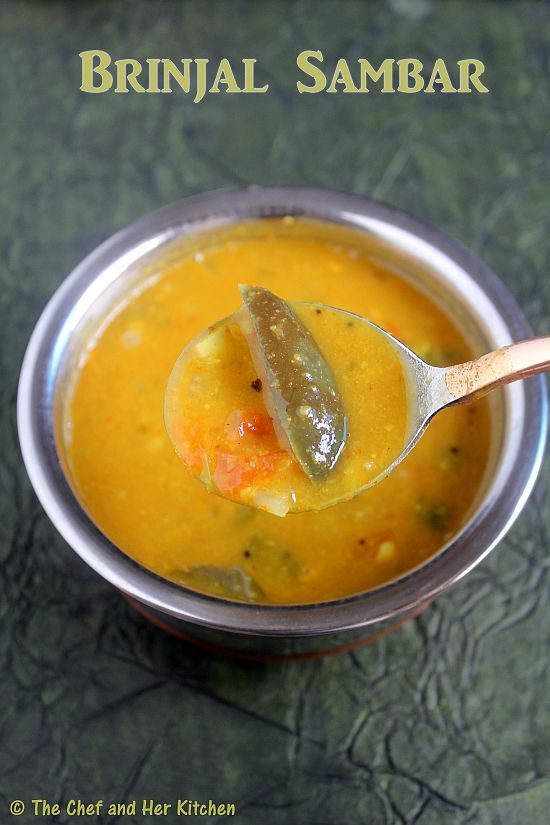
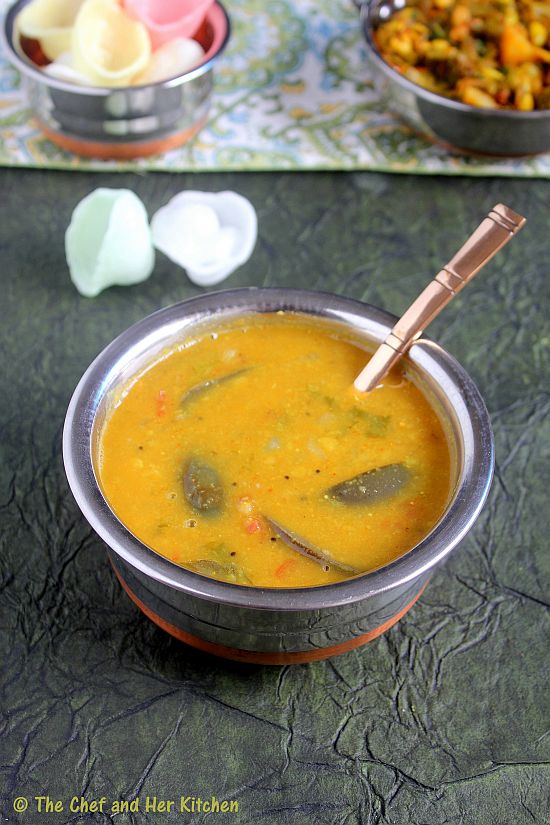
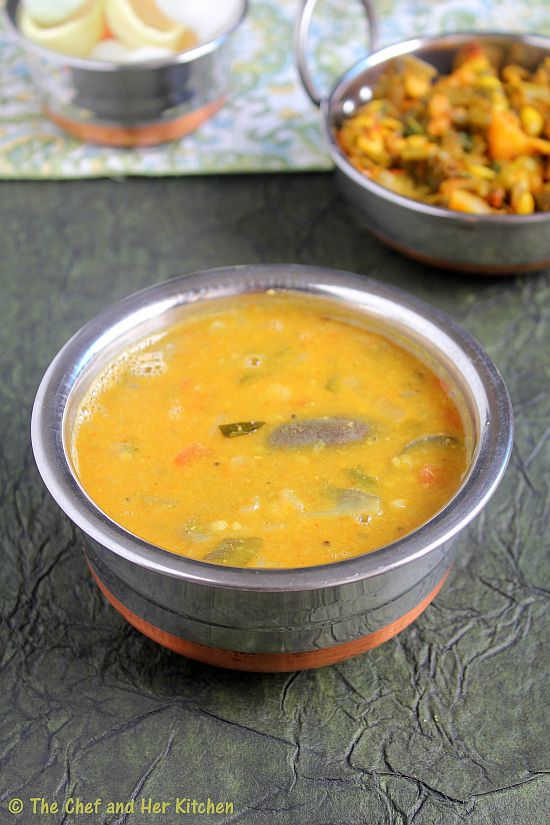
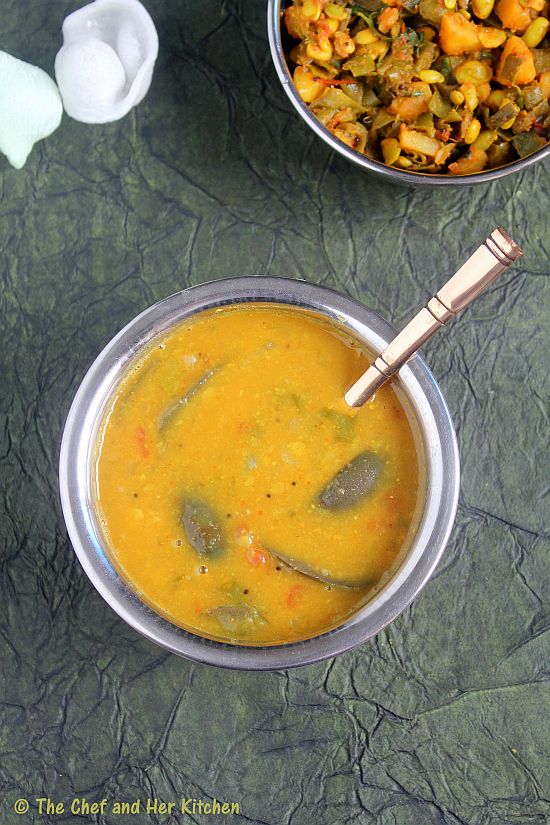
brinjal sambar
Sambar is the most popular south Indian accompaniment which pairs nicely with rice as well as the breakfast  idli/dosa varieties. The preparation process of Sambar slightly differ  for breakfast varieties and rice because of the combination of vegetables and also the sambar masala used in the recipe. A freshly ground Sambar masala is used in breakfast variety sambar where as we use Sambar powder with/without coconut in the sambar recipe which is paired with rice.
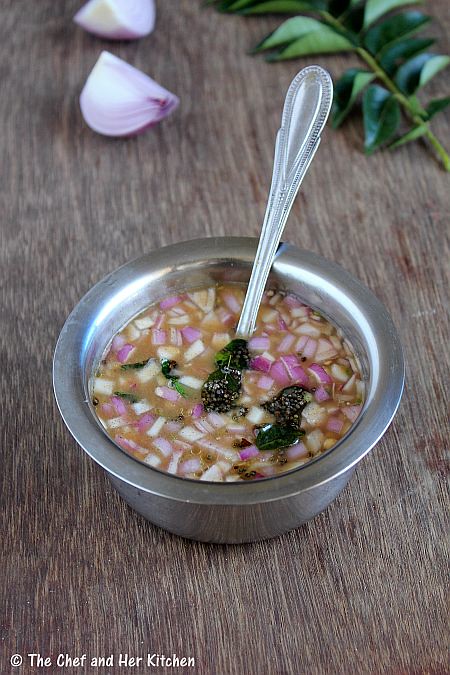
brinjal sambar
Few varieties of vegetables  go well with Tiffin Sambar and few varieties go well with sambar variety for rice. This Brinjal sambar pairs nicely with breakfast varieties or rice. I like to prepare this sambar slightly thick and also with less tamarind in the recipe which makes it taste delicious to pair with idli or dosa.You can adapt the same process of preparation for preparing sambar with other vegetables like drumstick, brinjal, yellow cucumber,potato and radish. I have used Andhra style Sambar powder in this recipe which makes it suitable for both rice and breakfast varieties. The preparation process for Karnataka style sambar is slightly different because of the addition of ground paste with freshly roasted spices and fresh coconut, which I would post some time later.
Check out other Sambar recipes in my blog here - Gummadikaya(Red Pumpkin) Sambar and Mullangi(Radish) Sambar-with freshly made masala.

kathirikai sambar

Brinjal Sambar Recipe:
Serves 3-4
Prep time:10 mins | Cooking time:30 mins | Total time: 40 mins
Cuisine: South Indian | Category: Side dish for Rice - Main Course
Ingredients:
1/2 cup Toor dal
5-6 small or 2 large Eggplants(Brinjals)
1 large Onion, diced or 7-8 Shallots
1 large Tomato, finely chopped
a small gooseberry size Tamarind
1/2 tsp grated Jaggery,optional
1/2 tsp Turmeric powder
1 tbsp. chopped Coriander leaves
2 tsp Oil
Salt to taste

to temper:
2 tsp Ghee/Oil
1/2 tsp Mustard seeds
1-2 Red chillies
a sprig of Curry leaves
a pinch of Asafoetida

Method:
  • Wash and soak toor dal for 10 minutes in 1.5 cups of water. Add turmeric powder and pressure cook for 3 whistles. Once the pressure drops slightly mash the dal with a wooden ladle.
  • Cut Brinjal into four quarters or if you are using long variety ones cut them into 2" long pieces and split into four pieces. Immerse them in salted water for 10 mins.
  • Soak tamarind in water for some time and extract pulp from it and keep it ready.
  • Heat oil in a big kadai/pan and add diced onions and fry until they turn translucent. Add brinjal pieces and fry for 4-5 mins and then add chopped tomatoes and fry until they become pulpy.
  • Add 1 cup water roughly and boil it for 2-3 mins. Now add tamarind pulp, salt, sambar powder( mix it in 2 tbsp. water before adding to avoid forming lumps), jaggery and mix nicely and boil it until the raw smell of the sambar powder is gone and the vegetables are cooked nicely.
  • Add cooked and slightly mashed dal and add some more water if required. Boil it for 3-4 mins until the sambar thickens. Taste the sambar once and adjust the seasoning if needed. Sambar thickens slightly when it sits, so adjust the consistency according to your requirement. Add coriander leaves at the end.
  • Heat ghee/oil in a small tempering pan and crackle mustard seeds and add red chillies, curry leaves and asafoetida and fry for half a minute and add the tempering to the sambar at the end and mix well.
Serve it hot with steamed Rice and fryums and a vegetable stir fry. You can even serve it with  Idli/ Dosa.
brinjal sambar
Notes:
  • One can follow the same recipe and prepare sambar with various vegetables like Drumstick, Radish,  Potatoes, Carrots, Sweet Pumpkin, Yellow Cucumber and Bottle gourd.
  • After you fry the vegetable pieces you can add tamarind pulp and pressure cook for 1 whistle if you want to make it quick.
  • Always add tempering at the end to retain the flavour of sambar and close it immediately.
  • I prefer to add ghee for tempering as it lends a nice flavour to sambar.
brinjal sambar

 
back to top