
 Vegetables


Well,I know many of you would be doing it regularly but I should admit that I do not prepare it regularly but I do it when needed. It is not that we do not eat paneer dishes often, I prepare paneer based dishes at least once a week - such is our love for paneer. The reason why I do not make at home regularly is that we get very good quality of Malai Paneer in Mumbai and apart from that, we do get flavoured Paneer like Jeera Paneer, Chili Paneer, Masala Paneer to name a few. So every time I do my grocery shopping I usually pick up a block and just prepare delicious paneer based recipes. Sometimes it happens that I would not have planned ahead and the situation arises to make fresh paneer at home and then I usually prepare at home.
'Paneer' is also known as 'Cottage Cheese' and is used in various curries, gravies, starters, sweets, snacks, pulaos etc.One should break the myth that preparing paneer is difficult or we cannot make soft paneer at home. It is very easy to prepare paneer at home with very few steps, just follow the instructions carefully and I am sure that you would love the freshness of home made Paneer. After all anything home made is always better.This is a very basic process I am mentioning here with more details keeping in mind the beginners in cooking. Also do not forget to check the notes for the tips and variations in making paneer.

If you are looking for some basics in cooking, even these posts might interest you:
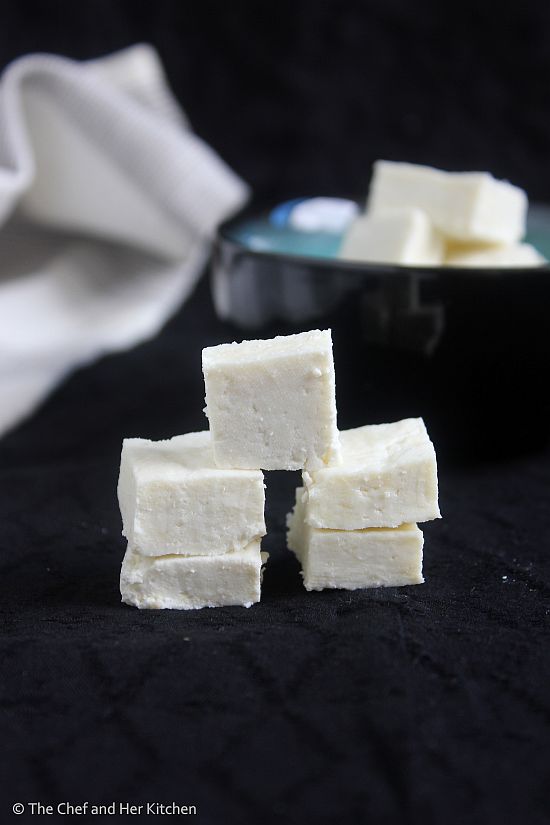
Home made Paneer (Cottage Cheese) Recipe:
Yields 200-250 gms Paneer approx.
Cooking time:10 mins | Standing time: 40-45 mins | Total time: 1 hr
Cuisine: Indian | Category: Kitchen Basics
Materials needed: sieve, cheese/muslin cloth, vessel, heavy weight
Ingredients:
1 litre Whole Milk
1/4 cup Curd(Yogurt) or 1-2 tbsp. Vinegar or juice of 1 Lemon
Method:
- Bring milk to a boil in a deep vessel. Mean while whisk the curd and keep it ready. If you are adding lemon juice extract the juice and keep it ready.
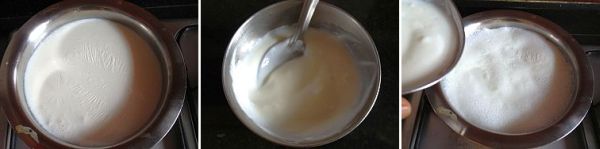
- Once the milk rises to the top lower the flame and add curd or lemon juice or vinegar and mix it immediately with a spoon. The milk would start curdling, if it does not curdle enough add some more curd or lemon juice to it and keep stirring so that the curdled milk would not coat the pan. Once the milk curdles completely, you would see a lump of crumbled paneer separating from the slightly yellowish- light greenish liquid. At this stage switch off the stove.

- Line a sieve with a muslin or cheese cloth and place a vessel underneath to collect the whey.
- Pour the curdled paneer on top of the cloth and let all the whey strain through.

- Bring the edges of the cloth together. At this stage you can hang it up to half an hour, I usually do not hang and I usually let it sit on the strainer for 10 mins roughly. Do not throw the whey, you can use it to knead the dough for rotis or use it to thinner your dals etc.
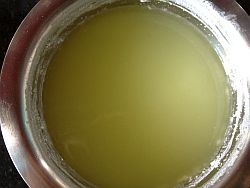
whey,separated from milk - Place the cloth with paneer upside down on plate (the extra cloth folded would be towards the plate so that you would get even surface on one side). See the pictures for better idea.Place a heavy weight on top of it. I used my marble roti maker and placed a steel vessel filled with water on top of it.
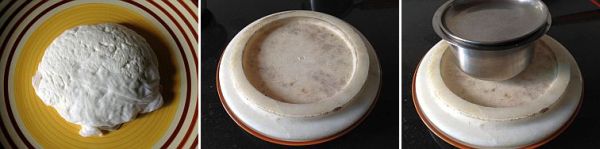
- Let it rest for 30-45 mins based on the time limit you have. I usually do not suggest you to keep more than this as it will make paneer bit hard. This much time is more than enough for paneer to hold in the shape of a block.

- Remove the paneer from the cloth and cut off the edges so that you would be remained with a square block. Cut them into shapes as required.
Use Paneer as required in curries, gravies, pulaos, snacks etc.
Notes:
- It is best to use the paneer fresh.If you want to store the paneer for 2-3 days, immerse the block in water and store it in refrigerator in an air tight container and change the water daily.
- Do not boil once you see the light greenish colored whey separated from paneer as it will make the paneer hard later once it is set.
- Do not throw the whey, as I mentioned you can use it to make atta or to thinner your dals or gravies. You can even use to curdle the milk, this is supposed to be a better way to curdle milk.
- The usage of whole milk makes the paneer soft, how ever you can use regular milk and still get decent paneer.
- Just in case if you find that your paneer is not very soft and it is bit hard , immerse it in warm water for half an hour. Paneer would definitely soften and is ready to use.
- You can pep up the paneer to spicy paneer or flavoured paneer by adding 2 tsp of cumin seeds while curdling the milk to make Jeera Paneer or you can add a mix of 2 tbsp. chopped coriander leaves along with 1 tsp of cumin seeds and 1/2 tsp of finely chopped green chillies to make Masala Paneer. You can even add 1/2 tsp of red chili flakes while curdling to make spicy chili paneer.

Now you have a block of freshly
home made Paneer ready with you , so you can also browse through few
paneer recipes here to use that beautiful block of paneer.

- Kadai Paneer - Restaurant style
- Paneer Butter Masala - Restaurant style!!


11 comments:
Super soft paneer! love it
Paneer looks so soft and fab ..nicely done with great details
Paneer look so delicious and soft that I feel like having them just as it is . Excellent pics as well.
Deepa
Have come out very well.. look so soft
Paneer looks super tempting and perfectly made.
That a informative post....Paneer looks so soft....Homemade is always wonderful...
lovely pics, i usually make my own paneer too. they are more soft and tasty
REALLY IT IS A SOFT AND DELICIOUS PANEER.IT IS BETTER TO PREPARE PANEER AT HOME RATHER TO PURCHASE OUTSIDE.IT IS WELL PRESENTED
Hi,
I prepared this its very good ,but when I put it in gravy it crumbled .plz tell me reason and where I went wrong.thank you.
@anonymous...the reason simply might b that you have not put enough weight on the strained paneer so that it can hold the shape of it...try keeping some heavy weight and leave it for some time. minimum of 40-45 mins, if its not hardened enough keep for some more time.
WoW, that was awesome and very well explained :)
I was preparing paneer, however, I used to wrap it tight and hang it over for over 4 to 5 hours (I was in an assumption that paneer will need at least that much time to get in shape for cutting later); your tutorial was very helpful.
Cheers from paneer fan from Bangalore, India.
Prabhath MP
Post a Comment
Thank you for visiting The Chef and Her Kitchen.
Do leave your comments and feedback,they are always welcome.Please do not leave any links.
Hugs,
Prathy