Showing posts with label Diwali Sweets. Show all posts

Wednesday, October 11, 2017

Atta Ladoo | Easy Diwali Sweets

atta ladoo
Atta ladoo recipe with step by step photos.Ladoos are popular sweets for any occasion and there are various ladoo varieties like rava ladoo, moong dal ladoo, minapa sunnunda, boondi ladoo, moti choor ladoo, atta ladoo, besan ladoo, dry fruit ladoo, gond ladoo to name a few.I find the ladoos made out of flour are easy to make compared to the ones like boondi ladoo or moti choor ladoo.I love rava ladoo,motichoor ladoo and moong dal ladoo the most among all the varieties.My mom always adds nicely fried nuts(in ghee)  to the ladoos which adds a nice bite and taste to the ladoo and hence I highly recommend to add the fried nuts for the ladoos though it is optional.You give a try once and let me know how you liked it.
atta ladoo
As Diwali is nearing by I have tried to post few easy and quick recipes for the festival as homemade sweets and savories are always the best compared to the store bought ones.These atta ladoos are quite healthy as it is made out of wheat flour and is an ideal snack for the kids and adults.Though it has good amount of ghee in the recipe it is still a healthy ladoo which one can eat without any guilt.
atta ladoo
Check out other Diwali sweets recipes on my blog:

Here is how to make atta ladoo recipe with step by step photos.

Atta Ladoo Recipe | Wheat flour Laddu:
yields:12 ladoos
Prep time: 10 mins | Cooking time: 20 mins | Total time: 30 mins
Cuisine: North Indian | Category: Sweets

Ingredients:
1 cup Wheat flour(Atta)
1 cup Sugar powder
1/3 cup Ghee(+2 tbsp ghee if needed)
8-10 Almonds,finely chopped
8-10 Cashew nuts,finely chopped
2-3 tbsp Raisins,optional
3 Cardamoms,seeds removed

Method:


  • Grind 1/2 cup + 2tbsp sugar along with cardamom seeds to a fine powder.
  • Dry roast wheat flour on low-medium flame for 8-10 mins until you get a nice aroma from it and the flour starts turning brown in color.Make sure you keep stirring it constantly and not let it burn.
  • Heat ghee in a small kadai and add chopped almonds and cashew nuts and fry them until the badam turns slightly brown.Add raisins to it and fry until they swell and remove them and keep aside.
  • Mix together sugar powder and roasted wheat flour and fried nuts and raisins without any lumps and it is mixed properly.Check for the sweetness now if you want more sweet add 1-2 tbsp extra sugar powder and mix well again.
  • Add hot melted ghee to the wheat flour and sugar mixture to it and mix it properly until the ghee is coated properly.If you try to make a laddu it should hold the shape, if it is not add 1-2 tbsp melted ghee and mix it again.
  • Let the mixture becomes luke warm and can be handled with hands.Make lemon sized round balls out of it and arrange them in a plate.
  • Once it is cooled completely store it in an air tight container.These can be stored for over a month.
Enjoy it as a dessert or snack.

Notes:
  • These laddus can be stored for over a month and hence store it in an air-tight container.
  • If you find it difficult to make laddus out of it and the mixture is dry,feel free to add 1-2 tbsp melted ghee to it and mix again and then start making laddus.
  • The addition of fried nuts in the ladoos make them taste extremely delicious,so I highly recommend to use them and not to skip them.
  • Always roast the wheat flour on low flame until it turns brown and starts getting a nice aroma,do not let it burn.
atta ladoo

Tuesday, September 19, 2017

Pasta Payasam | Macaroni Kheer Recipe | Kheer Varieties

pasta payasam
Pasta kheer recipe with step by step photos.Navaratri is around the corner and it is a norm to prepare a different sweet and sundal variety for naivedyam on those nine days.I have been planning to post the pasta kheer recipe from so long and finally I am able to post it for this navaratri.The preparation process of pasta payasam is very similar to any other payasam variety just that we need to boil the pasta and then add to the milk unlike other kheer varieties where vermicelli or sooji or rice is cooked in the milk.
pasta payasam
I usually get various pasta varieties which includes penne, shell, spiral, fettucine, macaroni, linguini, fusili, sphagetti etc but penne pasta is the favorite at my place as it absorbs the sauce well compared to the other ones.I have used macaroni for this payasam but one can either use shell or penne pasta varieties to prepare this kheer and I will not recommend other pasta varieties as they will not absorb the fluids well. The kheer absorbs the milk and thickens as it sit and hence while making the kheer add enough milk and adjust the sweetness as for your preference.
pasta payasam
pasta payasam
Check out other Kheer recipes in my blog here.
pasta payasam
Here is how to make pasta payasam recipe with step by step photos.
Pasta Payasam Recipe:
Serves 3-4
Prep time: 2 mins | Cooking time: 25 mins | Total time: 30 mins
Cuisine: Fusion | Category: Sweets/Desserts

Ingredients:
1 cup Macaroni or any other small Pasta variety
1/4 cup Sugar
1/2 cup Condensed milk
3/4 liter full cream Milk
10-12 Cashew nuts
2 tbsp Raisins
15-20 Saffron strands
2 tsp Ghee

Method:
  • Soak saffron in 2 tbsp warm milk for 10-15 mins.
  • Boil macaroni in a big pot of hot water,add little ghee and let it cook for 12-15 mins until done or follow the instructions given on the pack.
  • Boil milk and simmer it for 12-15 mins until it reduced to 3/4th of the quantity.
  • Add cooked pasta to the simmering milk and reduce the flame and cook for another 5-7 mins.
  • Add saffron soaked milk,sugar and condensed milk and mix gently till it dissolves and let it continue cooking over low flame.Always cook over low flame otherwise the milk might curdle.
  • Meanwhile heat ghee in a kadai and fry cashew nuts and fry them until golden in color and remove them and keep aside.
  • In the same kadai add raisins and fry them until they fluff up and remove and keep them aside too.
  • Add ghee roasted cashew nuts and raisins and cardamom powder to the kheer and mix and switch off the flame.
Serve it hot/warm/cold or at room temperature.

Notes:
  1. You can add 1/2 tsp Cardamom powder to the kheer while it is boiling.
  2. You can make any kheer varieties like sago,vermicelli,millets etc.Sago and vermicelli needs to be roasted in ghee before adding to the milk mixture.
  3. The kheer tends to thickens as it sits and hence make sure it has enough liquid when you finish making kheer.If it is thickened at the time of serving you can add boiled and cooled milk to the kheer.
pasta payasam

Thursday, March 9, 2017

Rasmalai Recipe | How to make Rasmalai recipe

rasmalai
Easy Rasmalai recipe with step by step photos.Rasmalai or Rossomalai is a popular Bengali sweet apart from Rasgulla. Rasmalai is a popular dessert which takes its place in the menu for Weddings or for special occasions. Rasmalai is a soft and spongy flattened cottage cheese dumpling served in thickened milk known as 'Ras'.Rasmalai is a mildly sweetened dessert compared to other sweets and hence one can easily have a couple of them at one go and still not feel heavy too.
rasmalai
When I had made Rasgullas last time I had saved just a few to make rasmalai as it was a long due for me to post these recipes in my blog.You can check out the detailed process and preparation of Rasgullas with various tips and tricks in my blog here.Once you have rasgullas(either homemade or store-bought) making rasmalai at home is a breeze, though it needs occasional stirring in between.
rossomalai
I have used condensed milk to sweeten the ras(milk) and also added a couple of tablespoons of sugar but one can add only sugar to the recipe.The preparation process of ras(thickened milk) is very similar to Basundi or Rabdi just that we do not need to boil it for that long to get a very thick rabri kind but a slightly thickened milk.For a quicker version, one can more quantity of condensed milk and evaporated milk and store bought rasgullas for a quicker rasmalai.Today I am posting the traditional method of preparing Rasmalai at home.As Holi is around the corner,why not prepare this delicious rasmalai and treat your loved ones with a homemade delectable sweet.
rasmalai
Check out other milk based similar sweets in my blog:
rasmalai
Check out how to prepare Rasmali recipe with step by step photos here:
Easy Rasmalai Recipe | Bengali Rossomalai:
Serves 4-5 | Author: Prathibha
Prep time: 10 mins | Cooking time: 30 mins | Total time: 40 mins
Cuisine: Bengali | Category: Sweets/Desserts

Ingredients:
12-15 Rasgullas,homemade or store bought(at room temperature)
1 liter full cream Milk
3-4 tbsp Condensed milk,optional
2 tbsp Sugar(increase it to 1/4 cup if not using condensed milk)
10-12 Almonds
12-15 Pistachios
12-15 strands of Saffron
1/2 tsp Cardamom powder
few saffron strands,to garnish

Method:
  • Soak almonds in water for 10 mins.Soak saffron strands in 2 tbsp warm milk for 10-15 mins.
  • Cut the soaked almonds and pistachios to small pieces.I used a nut grater to cut the dry fruits.
  • Press the rasgullas gently to remove extra syrup from them and keep them ready.If you are making fresh rasgullas for rasmalai,flatten them up while shaping. Click here to see the whole and detailed process of the preparation of rasgullas.
  • Boil milk in a thick kadai and once the milk comes to a boil reduce the flame and let it boil on low-medium flame.Keep collecting the cream formed on the milk and push it to the sides giving place to form more cream.Continue the process until the milk reduces to half.You need to keep stirring in between else the milk gets burnt at the bottom.This process might take roughly 20-25 mins,so be patient enough to check it at regular intervals.
  • Add saffron soaked milk to the reduced milk and then add condensed milk and sugar and mix it nicely.
  • Now add chopped dry fruits to it and continue simmering until it becomes slightly thick.Check the sweetness and add more sugar if needed at this stage.
  • Add the squeezed rasgullas to the thickened milk and boil it for 4-5 mins.
  • Cool it and refrigerate it.
Serve it chilled by garnishing with more saffron strands and nuts.

Notes:
  1. You can add rose water at the end for a flavorful one.
  2. Use good quality saffron to get a nice yellow hue for rasmalai, you can alternatively add some yellow color to the chenna while kneading for rasgulla.
  3. If you are making rasgulla at home, try to flatten few before they are put in the syrup and also cook rasgullas(for rasgulla) and flattened rasgullas(for rasmalai) separately so that they get cooked uniformly.
  4. If you are using ready rasgullas,let them come to room temperature and then press them gently to squeeze out the syrup and flatten it gently, else they will break if you do with the cold rasgullas.
  5. The addition of condensed milk is optional,but makes the milk more creamy.I added it as I had it at that moment,else use just the sugar.
  6. For a quicker version use full cream evaporated milk and condensed milk in the recipe and you do not need to boil it for longer.Also use store bought rasgullas for the recipe.
rasmalai
Technorati Tags:  , ,

Tuesday, December 6, 2016

Rasgulla Recipe | Spongy Rasgulla Recipe | Bengali style Roshogolla

rasgulla
Rasgulla is a popular bengali sweet and is pronounced as Roshogolla or Rosogulla by the Bengalis. Rasgulla is one of the most popular sweets in India and thanks to Haldirams for making it available in each and every corner of the country. These spongy rasgullas are favorite to many and I am one among them.I have mentioned many times before that I never liked sweets as a kid and the only one sweet which I used to eat was rasgulla and that too I used to squeeze out the syrup a bit and eat.Now, of course the taste buds have changed drastically and I need at least a bite of sweet or a chocolate piece to satisfy my sweet cravings after every meal. I still cannot eat sweets in more quantity at once but can easily eat one or two pieces with out complaining.
rasagulla
I usually do not try or post these sweets recipes unless for diwali but there is a reason why I am posting a sweet recipe(for me this is a very big sweet as it is bit tricky one too) now. Today is our 10th marriage anniversary which is a milestone not to be neglected and hence posting this sweet recipe to mark our celebrations.
rasgulla

rasgulla
Coming to today's post - rasgulla, I have been planning to post it from such a long time and finally it happened now!! I must say that the process of preparation of these rasgullas sound very simple, but it is very tricky and one can go wrong easily. I have a few failed attempts before and of course we learn from our failures too. I have gone through various blogs and cook books too to find out the mistakes and then tried them and finally got succeeded. I tried my level best to include most of the pointers which one needs to take care while preparing them in this post. Read the recipe carefully and also please go through the notes section where I have highlighted the important things to keep in mind while preparing the rasgullas at home. Though these rasgullas are easily available in the market, but one can try these homemade rasgullas for an experience too, also they taste good in their way too. You can prepare rasmalais with the homemade rasgullas too.Now let us see how to prepare soft and spongy rasgullas at home.
rasgulla
Check out other popular Indian sweets(desserts) recipes in my blog: 
rasgulla
Homemade Spongy Rasgulla Recipe:
makes 16-18 rasgullas | Author: Prathibha
Prep time: 15 mins | Cooking time: 30 mins | Total time: 45 mins
Cuisine: Bengali-Indian | Category: Sweets

Ingredients:
1 liter full cream Cow's Milk
1 tsp Sooji/Maida,optional
2-3 tbsp Lemon juice or Vinegar or 1/4 cup Yogurt
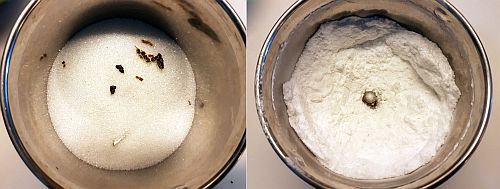
1 3/4 cups Sugar(2 cups if you want it very sweet)
4 cups Water
1/2 tsp Green Cardamom powder
Chopped Pistachios, to garnish
Saffron strands,for garnish

Method:
to prepare Chenna:
  • If you milk usually gives too much of malai(cream) on top when heated, it is better to boil the milk previously and remove the thick formed cream on top of it.Otherwise this yields very greasy rasgullas.
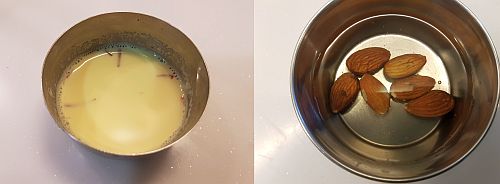
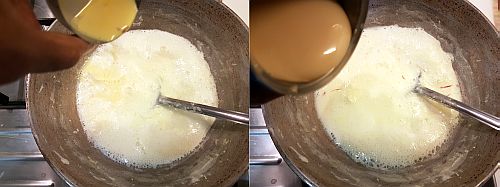
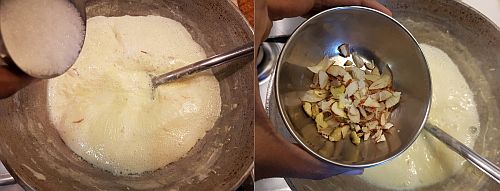
  • Boil milk in a big vessel over medium flame and keep stirring in between(otherwise the milk solids get stuck at the bottom of the vessel) until it comes to boil,now reduce the flame to LOW and add a tbsp of lemon juice and mix it nicely and check if the milk starts curdling, if not add more lemon juice until the milk starts curdling.You need to add the lemon juice until you see the slight greenish whey separates.Generally it takes 2-3 tbsp of lemon juice depending on the quality of milk.You can use vinegar instead of lemon juice in the recipe.Also, you can add yogurt in the recipe, you might need approximately 4 tbsp or more to curdle the milk.
  • Once the milk curdles SWITCH OFF the flame and remove the vessel off the stove. You can add few ice cubes to the curdled mixture to avoid further cooking(which yields hard chenna), but it is optional if you do the next step quickly.Also if you are using yogurt to curdle the milk you do not need to add ice cubes or wash the chenna(which we will be doing in the next step),you can proceed to strain the mixture.
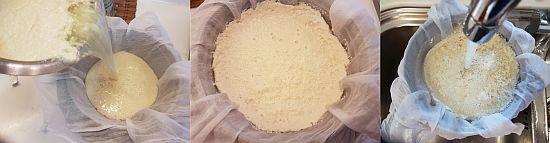
  • Meanwhile line a strainer with a cheese cloth or muslin cloth and pour the curdled mixture and strain the chenna through it. You can use the collected whey to add to your gravies or to prepare roti dough or to curdle milk again later. Wash the collected chenna(lined on the strainer in a muslin cloth) thoroughly a couple of times under the running water. This process helps in removing the lemony/sour taste from the chenna, you can skip washing chenna if you have used yogurt to curdle the milk.
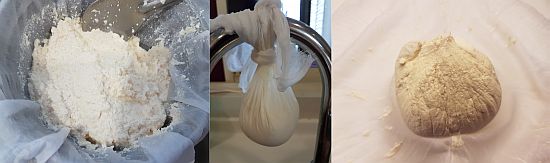
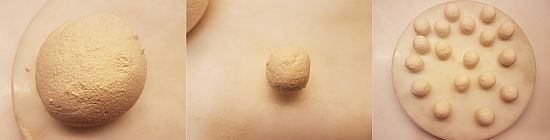
  • Gather the edges of the muslin cloth and gently squeeze all the excess water from the chenna and tie a knot and hang it on the tap for 20-30 mins. Make sure you drain most of the water from the chenna and also ensure that it is not very dry.You can see the texture of chenna in the picture for better understanding.
to prepare rasgulla balls:
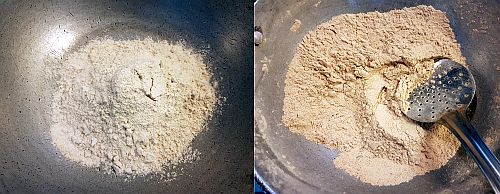
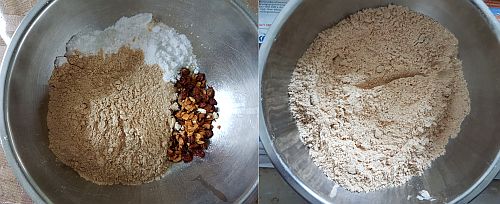
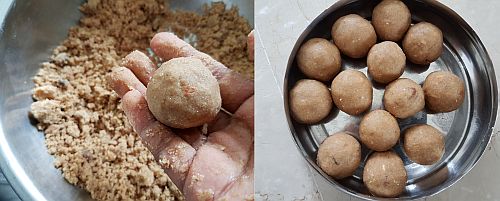
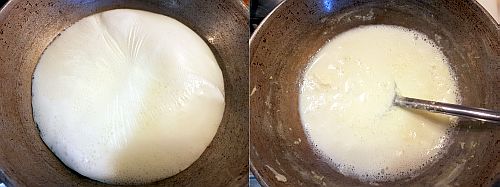
  • Add sooji/maida(if using) to the crumbled paneer(chenna) and with the heels of your palm mash and knead the chenna nicely for about 7-8 mins to make a soft pliable dough .
  • The chenna starts leaving the fat, means your palms will start becoming greasy which indicates you to stop kneading.
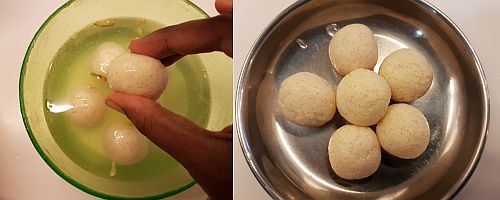
  • You can divide the chenna into 16-18 equal portions and roll them into equal sized balls.You should be able to roll them into balls with out cracks, which indicates that the texture is correct.Cover the prepared balls with a slightly moist muslin cloth.
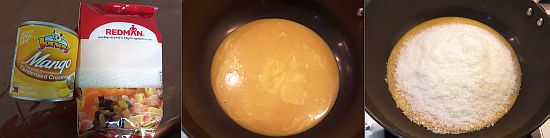
to prepare Sugar syrup and cook rasgullas:
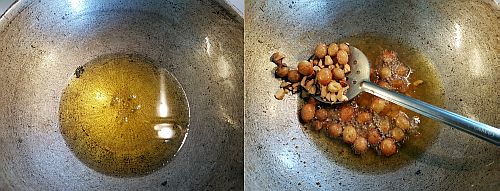
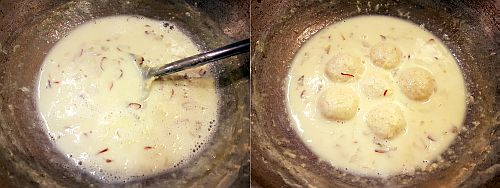
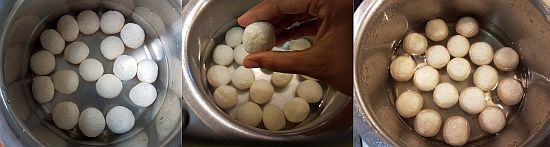
  • Add 4 cups of water and 1 3/4 cups of sugar to a large pot and let it come to a boil, add cardamom powder to it and once the sugar melts and comes to a rolling boil, gently slide each ball into the water, I added the prepared ones in two batches, do not over crowd them as they need space while boiling and they will become double in size and also to retain their round shape. Boil them for 12-15 mins over HIGH flame, you can uncover and check them in between if you want, which is actually the most fun part of the entire process to see them doubling!!
  • To check whether the rasgullas are done or not - drop a rasgulla in a glass of drinking water, if it sinks,it means DONE, else put it back and let them cook for another couple of minutes and repeat the test.
  • Once the rasgullas are cooked, transfer them one by one into another large bowl of plain drinking water.
  • Repeat the process of cooking another batch of rasgullas and follow the same procedure and test and also transfer them to the pot of cooked rasgullas(transferred to the drinking water pot).
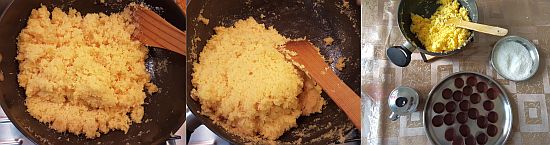
  • Let the sugar solution(in which we boiled rasgullas) cool down and come to room temperature. If you are using saffron strands or kewra water add them at this stage after the syrup comes to room temperature.Remove the rasgullas from the plain water and squeeze them gently and put them in the cooled sugar solution.
  • Chill them for 3-4 hours or over night.
  • You can add chopped pistachios for garnish while serving.
Serve them and enjoy homemade soft and spongy Rasgullas!!

Notes:
  1. Milk plays a major role in preparing rasgullas - use only full fat milk not the toned milk.But try to remove the malai(cream) layer formed on top of the milk else it will give greasy rasgullas.
  2. Once the milk is curdled, switch off the flame. Do not let it cook further to avoid hard chenna which in turns gives hard rasgullas. Also thoroughly wash the chenna to remove lemony taste.
  3. Ready paneer does not work for this recipe.
  4. Try to remove most of the moisture from the chenna. If there is too much moisture your rasgullas will break in the syrup and is it is very dry it will make rasgullas dry too.
  5. The addition of sooji or maida is optional which helps in binding.You can completely avoid it and still get nice and spongy rasgullas.
  6. Knead the chenna nicely until you get a smooth dough which takes easily 7-8 mins, if you roll a ball it should not break.
  7. Transfer the cooked rasgullas to the regular water, this ensures that the rasgullas will not cook further and become chewy by sitting in the hot sugar syrup.
  8. Use wide bottomed vessel to cook rasgullas and give them enough space to expand, it is better to do it in two batches for the mentioned quantity.Else they might become flat or loose shape if not enough space is given while boiling.
  9. You can even pressure cook the rasgullas for one whistle in the pressure cooker over medium flame.
  10. Chill them in the refrigerator for best taste as they soak up the sweet sugar syrup nicely. 
  11. I used 1 3/4 cups of sugar and they were of correct sweetness for us, but if you want them more sweet increase it to 2 cups. You can check the sweetness of your sugar syrup before you let it to cool down, if you want it more sweet or less sweet adjust by adding more sugar or water and boil it until it melts and then let it cool down.
  12. You can use the leftover sugar syrup to prepare shikanji or Sooji halwa or in any other sweets preparation.
roshogulla

Thursday, October 27, 2016

Coconut Ladoo with Condensed Milk | Desiccated Coconut Ladoo | Easy Ladoo Recipes

coconut ladoo
Diwali Sweet series is incomplete with out a ladoo recipe. I am yet to post several ladoo recipes in my blog and this quick Coconut ladoo using Condensed milk was long time due to post in my blog. As I mentioned in my previous post I have even taken these delicious Coconut ladoos along with Maida Burfi for my kiddo's school Diwali party.Needless to say both the sweets were a hit with the kiddos, the tutti frutti in the maida burfi and the soft and juicy mango flavored Coconut ladoos were the highlights of both the sweets.Yes, you read it right the Coconut ladoos were flavored with mango.It is not that I added any pulp or flavor to the ladoos, it is just that I could locate Mango flavored Condensed milk during one of my shopping visits and the very moment I knew what I wanted to do with it and had picked the desiccated coconut too to prepare these tiny beauties.
coconut ladoo using condensed milk

desiccated coconut ladoo
This coconut ladoo is the most easiest lado/sweet recipe that one can prepare for any festival or Diwali. It is simple and straight forward with just two ingredients - desiccated coconut and condensed milk .You just need to mix it and cook for sometime and then start rolling, thats it.How cool is it? If you are thinking about the taste let me tell you these were soft to bite with juicy interiors and just melts in mouth. I hope this description itself is enough for you to try them asap for this Dwali.
coconut ladoo using condensed milk

desiccated coconut condensed milk ladoo
Check out other Diwali sweets recipes on my blog:
condensed milk and coconut ladoo

condensed milk and coconut ladoo
Coconut Ladoo with Condensed Milk Recipe:
Yields: 45 Ladoos | Author: Prathibha
Prep time: 25 mins | Cooking time: 5 mins | Total time: 30 mins
Cuisine: Indian | Category: Sweets

Ingredients:
3 - 3 1/4 cups Desiccated Coconut
1 tin(392 gms) Condensed Milk(I used Mango flavored Condensed Milk)
1/2-3/4 cup Desiccated Coconut,for rolling

Method:
  • In a thick kadai empty the condensed milk tin and add initially 2.5 cups desiccated coconut and mix nicely.The coconut should be well mixed with the condensed milk and the mixture should not be very dry or very loose.It should be of thick consistency that one can make ladoo out of it, so add the remaining desiccated coconut until you get that consistency and also do check the sweetness of it and add the coconut accordingly.I used 3 cups in total.It all depends on the quality of coconut and how much it can seep in the condensed milk.
  • Now switch on the stove and heat the mixture until it is hot and reduce the flame and cook for 4-5 mins. This will make the coconut cooked in the condensed milk and gives a soft ladoo.
  • Now switch off the flame and let the mixture become warm.
  • Spread the remaining desiccated coconut in a plate.
  • With the clean and dry hands take a small portion of the mixture and make a ping pong sized ball out of it and roll it in the desiccated coconut and place it in a plate.Repeat it and prepare all the ladoos out of it.The fat from the mixture itself is enough to roll the ladoos, if it is sticky you can grease your hands with ghee and start rolling, it was not necessary for me.
  • Now carefully place the rolled ladoos in a small cup cake liners like how I did or arrange them in a box.
Store them in airtight containers or gift them in a gift box.They can be stored for 3-4 days under room temperature and upto a week when refrigerated.

Notes:
  1. There are no hard and fast rules regarding the amount of coconut as the sweetness preference by each individual is different.The only thing you need to keep in mind is the mixture should not be neither very dry nor very loose to get soft and juicy coconut ladoos.
  2. I have used Mango flavored Condensed milk for this recipe but one can easily use normal condensed milk.But we just loved the mango flavor that got infused in the ladoos.
  3. If you are using normal condensed milk you can flavor the ladoos with rose essence too.
  4. You can easily half the recipe.
  5. If you want to use frozen coconut in the recipe you can still use.You need to roast the coconut until the moisture evaporates and also taking care that the coconut does not change the color too.
coconut ladoo with condensed milk

 
back to top