Wednesday, February 20, 2013

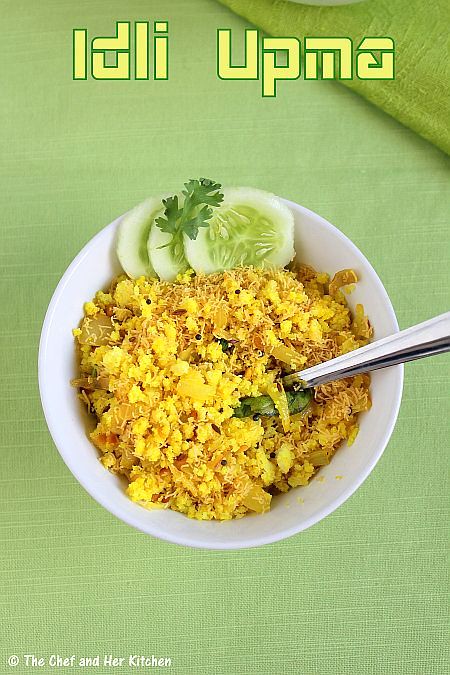
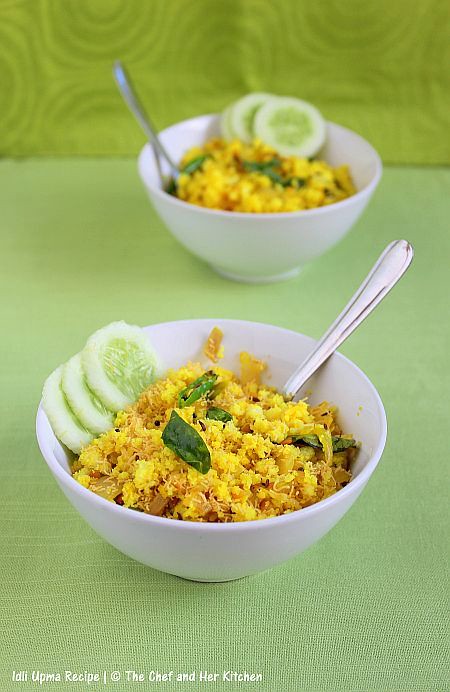
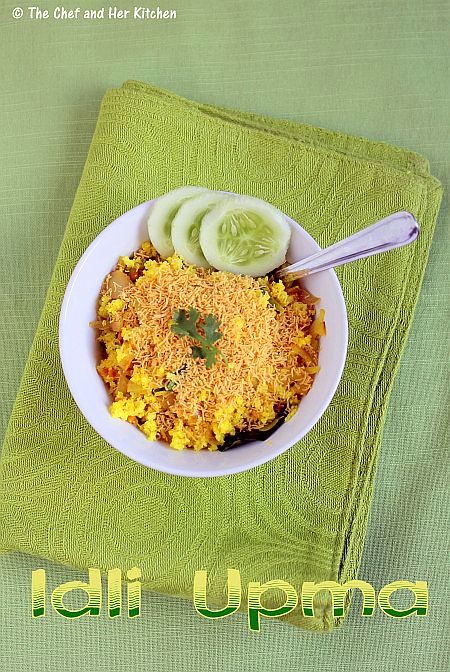
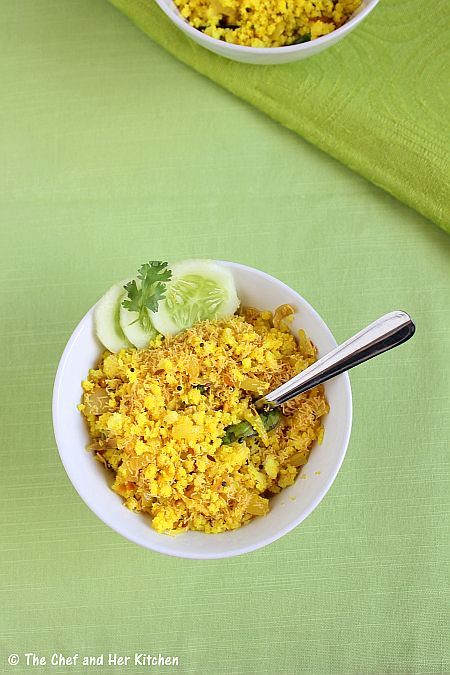
IDLI UPMA | Idli Upma Recipe with left over Idlis

 
Idli and Dosa are very common breakfast items in many south Indian house holds. Most of the times we prepare idli, we end up having some extra ones and one can be creative with what to do with these extra idlis. Some dishes one can prepare include Masala Idli fries, Seeyali,Masala Cocktail Idlis, Milagai Podi Idlis,Fried Idli,Chily Idli, Idli Manchurian and this simple Idli upma.
We usually know how many idlis to prepare for a breakfast so technically, chances of having left overs are less but in order to plan for an evening snack , i usually prepare a few extra ones. Infact I like these snacks more than the standard plain Idlis by itself. I think this idli upma is the easiest of all these snacks as it hardly takes any time to prepare.If you have'nt tried it before do give it a try - am sure you would want to make it again.
Idli Upma Recipe:
(serves 2)

Ingredients:
5-6 big sized Idlis,leftover/fresh
2 Onions,roughly chopped
1 tbsp Coriander leaves,chopped
4-5 Green Chillies,slit
1 tbsp Chana dal
1 tsp Urad dal
1/2 tsp Mustard seeds
1/4 tsp Turmeric powder
Salt to taste
2-3 tbsp Oil

Method:
  • Crumble the Idlis to get a coarse rava type of powder and keep them ready.
  • Heat oil in a kadai and crackle mustard seeds.
  • Add chana dal and urad dal and fry them.
  • Add slit green chillies and fry them well.
  • Add chopped onions and curry leaves and fry them until they turn pink.
  • Add turmeric powder,salt and crumbled Idlis and mix well.
  • Garnish with coriander.
Serve it hot as it is or with some sev on top.
Notes:
  1. You can add a bit of lemon juice at the end if you want.
  2. Green chillies can be replaced by garlic chili powder or curd chillies or red chillies in the recipe for a different flavor.
  3. You can even cut the idlis into fine pieces instead of crumbling them and follow the same recipe.
  4. You can sprinkle few spoons of water if you feel the idlis are dried when you crumble them.
  5. You can add 2-3 tbsp grated fresh coconut at the end.It adds nice taste too. 
 

Monday, February 18, 2013

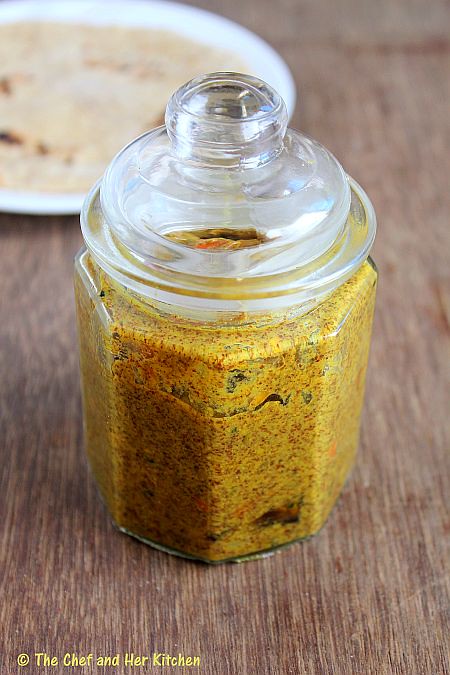
Mixed Vegetable Achar - North Indian Style | Mixed Vegetable Pickle

 
We spent a large part of the last month in preparing pickles as we always prefer home made pickles. The key source of the pickles in our house is my MIL who  usually makes several varieties of pickles during the mango season. Check them here. These last for a long time but she also makes another batch of pickles in the winter season which lasts for us until the next mango season. 
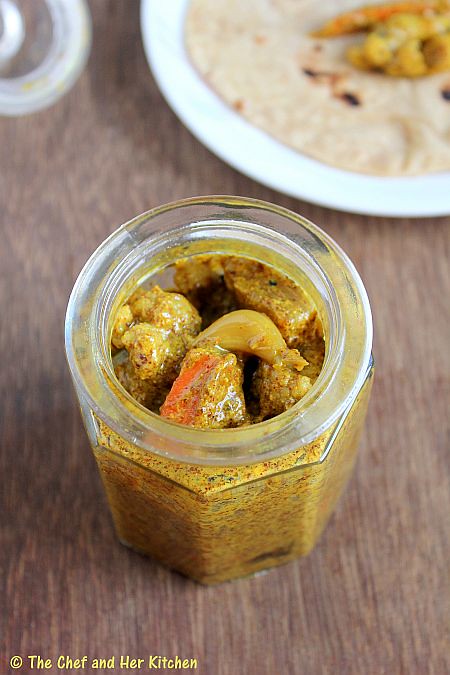
"Mixed Vegetable Achar", is a must in winter as we get really fresh and various varieties of vegetables in this season.I like the taste of Mixed Vegetables in this pickle, as they retain their crunch even after a few months of pickling. Apart from Mixed Vegetable Achar she also prepares other varieties like Gooseberry(Amla) pickle and Red chili pickle ,the recipes which I will post soon.
This North Indian style Mixed Vegetable Achar goes extremely well with parathas/rotis. I have shared this pickle with many of my friends & family and they absolutely loved it and requested me for the recipe.So here is my MIL's famous Mixed Vegetable Achar for all those who requested for it.
PS: I plan to post another spicy version of mixed vegetable pickle later.This version while a mild variation from the current one , does taste well too.
Mixed Vegetable Achar Recipe:
shelf life: upto 1 year

Ingredients:

3 tbsp Nigella Seeds(Kalonji)
1/4 cup Vinegar
1 liter Mustard Oil

Vegetables (16 cups of  cut vegetables):
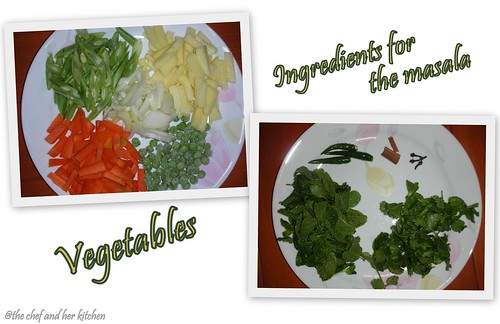
4-5 Carrots,peeled and cut into 1" thin long pieces
1 medium Cauliflower,separate and cut into small florets
3-4 Radish,peeled and cut into 1" thin long pieces
250 gms French Beans,remove the strings and cut into 1" thin long pieces
10-12 Lemons,cut into 8 pieces length wise
20-22 Gooseberry,cut into 6-8 pieces length wise(remove the seeds)
250 gms light colored Green chillies,cut into 2 pieces
2 whole Garlic pods,separate into pods and remove the skin
250 gms Ginger or Mango Ginger,peeled and cut into 1" thin strips

Powders:
4 cups Mustard powder,preferably Yellow mustard
3/4 cup Yellow Mustard tukda(you can avoid this if you do not get it)
3 1/2 cups Salt
1 tbsp Fenugreek powder
100 gms Amchur(Dried mango) powder
100 gms Fennel seeds(Saunf) powder,ground to a very coarse powder
2 tbsp Turmeric powder

Method:

Cleaning,Cutting and drying the Vegetables:
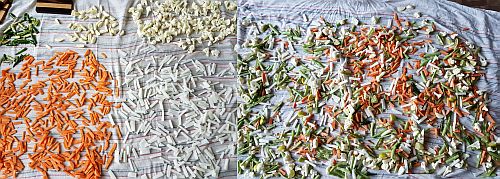
  • Wash and wipe all the vegetables with a dry cloth.Cut various vegetables as per the instructions I mentioned above.Take care that you cut all the vegetables into a similar length and sized pieces.
  • Spread them over a dry cloth in sun and let them dry completely.You should take care that the vegetables are dry with out any moisture content in it.If you have really good sun it should take half day otherwise you can keep it in shade up to a day.
for making pickle:
  • Keep ready the sterilized and sun dried jars ready before you start pickling.
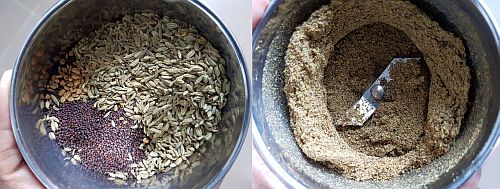
  • Grind fenugreek seeds to a fine powder.
  • Grind saunf in whipper mode until coarse powder.Do not run it for long time just run it for 2-3 times until you get coarse powder.
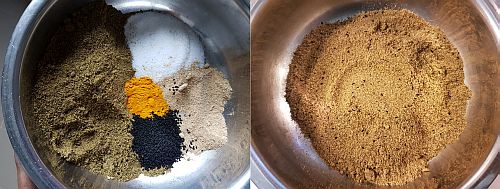
  • Now take a big bowl and mix the saunf and fenugreek powder, amchur powder, mustard powder,salt,kalonji seeds,mustard tukda and turmeric powder until everything is mixed well.
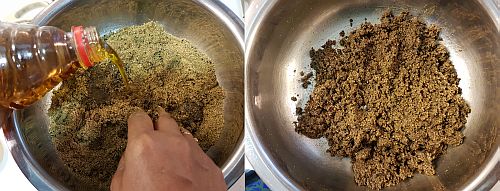
  • Now take another wide small bowl and take 1 cup of mixed powders and add sufficient mustard oil until the mixture is wet completely and mix with hands.
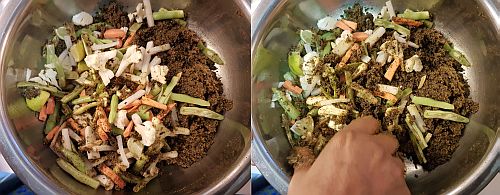
  • Take 2 cups of vegetable pieces at a time and apply the mixture all over the mixed vegetable pieces with your hands.Using your hands for this step is better than mixing it up with ladle.
  • Put the masala coated vegetable pieces in a big bowl and repeat the process of coating the vegetable pieces in small portions and put them in a big bowl.
  • Once all the vegetable pieces are mixed,add vinegar and remaining pickle masala and mix well again.
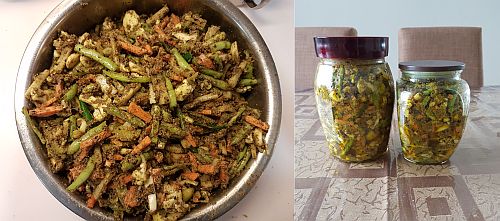
  • Carefully fill the sterilized jars with the vegetable pieces and pour the remaining oil over it.
  • Cover the jar with lid and keep it aside for 3 days.
  • On day-1 check it some oil might have started floating over the pickle.Do not panic if the oil does not float on day-1,if not on day-1 you will see oil floating on day-2.
  • Mix with a clean and dry ladle all over and repeat the same process on day-3.
  • Now taste the masala mixture in the pickle,it should be perfect and slightly salty as the pickle has to be yet marinated for atleast one week before its usage.But if you feel the salt is less add a tsp or 2tsps of salt to it and mix well.I don't think it would be necessary if you follow the measurements accurate.
  • On the day-3 if you see the oil is floating on the pickle up to an 1/2" height then it is perfect.Otherwise add extra mustard oil over the top until the oil floats on top.
  • Store it in air-tight tupper ware container or glass bottles.This way your pickle stores for long with freshness in it and even the vegetable pieces do not get soft.
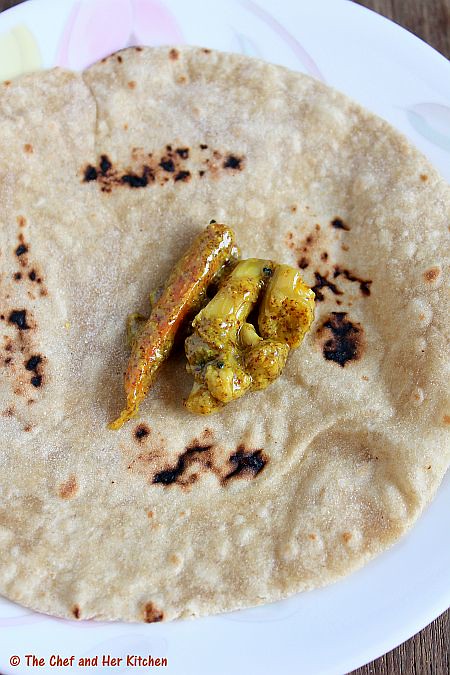
Serve it with piping hot Parathas/Theplas or it can be served with Rotis/Naans/Kulchas/Pulavs. 
Other Vegetable Options:
  • Shalgum(Turnip),Lotus Stem(Kamal Kakdi/Bhein),Raw Mangoes can also be added to the pickle according to the availability of them.
Variations:  
  • This pickle is not spicy but it is a real burst of flavors.If you want it spicy add 2 cups red chili powder while mixing the masala.But I strongly recommend not to use red chili powder for this pickle.
 Notes:
  • Always transfer a small portion of pickle into a small jar and use a clean and dry spoon.
  • Increase the amount of mustard oil as required in the recipe.The basic thumb rule is to make the oil float over the pickle after 3 days.So feel free to add extra mustard oil.
  • Do not replace or remove any of the ingredients in the recipe,all the ingredients are must to get a tasty Vegetable achaar in North Indian style.
  • This pickle stays good for an year.It might turn slightly sour after 5-6 months but it is good to eat with hot hot parathas and curd.
  • You can easily halve the recipe,the basic rule is to use 4 cups of vegetable pieces with 1cup salt and 1 cup mustard powder.
  • You can add a tsp of the pickle masala(in the pickle) while making methi theplas,it really adds a nice taste to the thepla. 

Check out other North Indian Pickle recipes in my blog.
  1. North Indian style Stuffed  Mirch ka Achar(Green Chili pickle) 
  2. North Indian style Aam ka Achar(Mango Pickle).


Friday, February 15, 2013

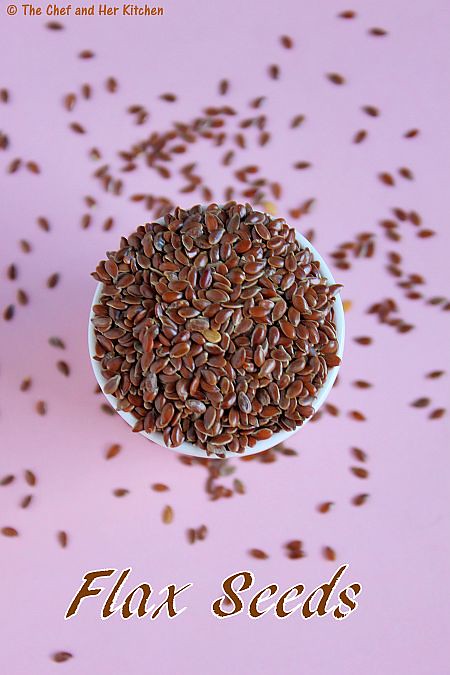
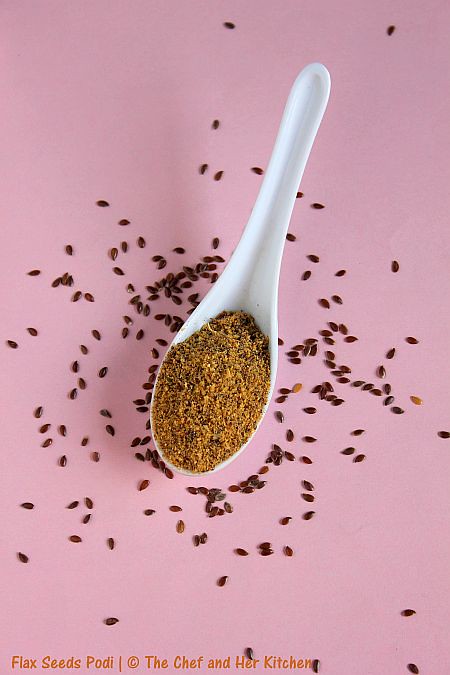
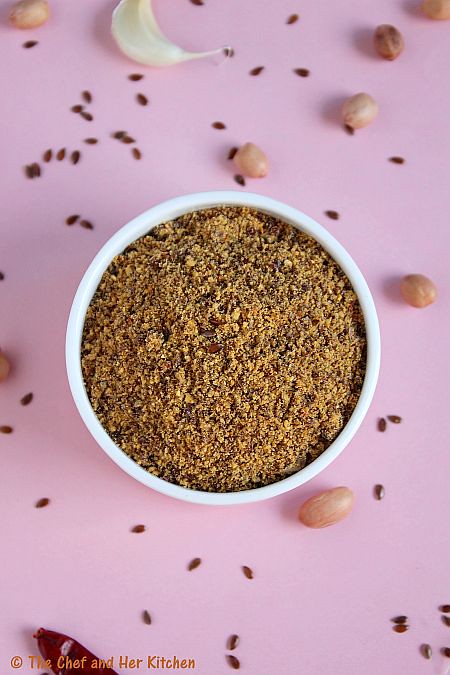
Flax Seeds Podi (Powder) | Alsi Pudi for Rice

I have been experimenting with new recipes only after I started my own blog. There were many ingredients for which I wasn't aware of the usage and flax seeds is one of them. Though I knew that Flax seeds are rich in Omega 3 Fatty acids, I wasn't sure of the ways to include them in my diet. Only after I started blogging, I tried using it in various recipes like Oats & Dry Fruits Laddu, Daily Oats Porridge, Granola Bars, Muesli , Flax Seeds Chutney Pudi for Idli/Dosa, Flax seeds Podi for Rice etc...the options are endless. I have even mixed powdered flax seeds in my chapati dough for a healthy and nutty roti.
I always stock a variety of powders/podis which can be mixed with rice and they come to the rescue when I am not in a mood to cook anything or at times it serves as an extra item in my daily meal.  Flax seeds powder is a favorite at my place as it has got that unique nutty texture.We usually prefer mixing it with hot steamed rice, extra virgin olive oil and  finely chopped onions.I must say that this combination is truly delicious. You can use ghee instead of olive oil to mix with rice.

On another note, I recently got to know about CupoNation,a website which offers amazing deals from various retailers such as Dominos, Ekstop, Jabong, Myntra, Pepperfry, Zovi etc.I even purchased a few cookbooks from Flipkart, some bakeware and my monthly groceries from Fkstop using their coupons. I must say I got very nice deals. If you are looking out for good discounts,Cuponation would serve as a one stop destination for you.
Flax Seeds Podi (Powder) for Rice:
Shelf life: upto a month
recipe adapted from: Veg Inspirations

Ingredients:
1/2 cup Flax seeds
1/3 cup Groundnuts
1/4 cup Sesame seeds
1/4 cup Fried(roasted) Gram(chutney dalia)
2 tbsp grated Dry Coconut
8-10 Red chillies
20-25 Curry leaves
3-4 Garlic pods,with skin
1/2 tsp Sugar(optional)
half a gooseberry sized Tamarind
Salt to taste

Method:
  • Dry roast groundnuts in the kadai/pan until they turn brown and the skin starts peeling off.Once they are cooled you can remove the skin or leave them as they are.Keep them aside.
  • Dry roast sesame seeds until they start popping and keep them aside.
  • Dry roast flax seeds until they get roasted and they try to pop up once they are roasted nicely.It gets a nice shine when they are roasted.Keep them aside.
  • Dry roast grated coconut slightly and keep it aside.
  • Dry roast red chillies until they turn crisp and keep them aside.
  • Spread the curry leaves on the microwave plate and microwave it for 2-3 mins depends on the microwave powder.They would turn crisp or alternatively you can dry roast them in the kadai/pan until they turn crisp,keep them aside
  • While the kadai is hot add tamarind at the end and just warm it a bit.
  • Once all the ingredients are cooled down to a room temperature,grind red chillies with salt to a powder.
  • Add the roasted flax seeds, groundnuts, sesame seeds, grated dry coconut, curry leaves, sugar, tamarind and grind to a slight coarse powder.Do not grind it to a fine powder,it tastes best if it is coarse.Taste the powder now and add more salt if required.
  • Add garlic pods at the end and run the mixer again for few seconds.
  • Store it in air tight container.
Serve it with hot steamed rice and a dollop of ghee with cut raw onions.You can even sprinkle on dosa or you can even mix with melted ghee or sesame oil and smear the idlis with it.
Notes:
  1. I like to eat it with hot rice mixed with extra virgin olive oil and finely chopped onions.Its your choice you can use even sesame oil or ghee to mix it with rice.
  2. You can increase or decrease the quantity of red chillies in the recipe according to your requirements. I like it medium spicy.
  3. The amount of grated dry coconut can be increased to 1/4 cup,also adjust the salt,red chillies and tamarind accordingly.

Wednesday, February 13, 2013

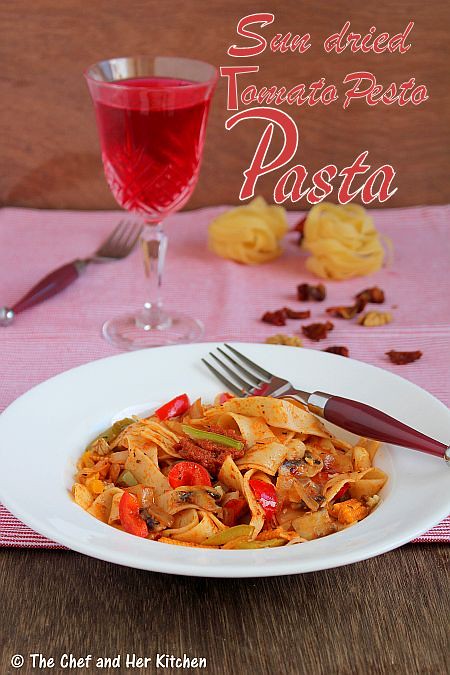
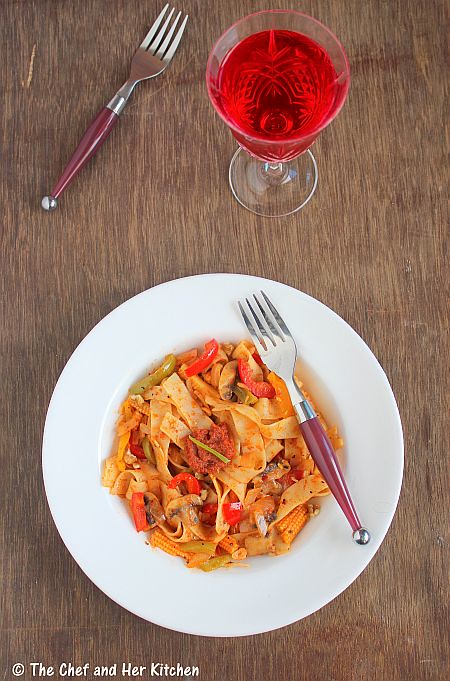
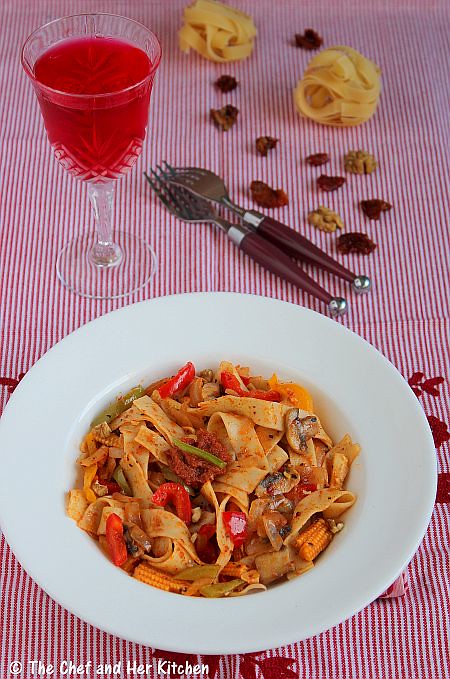
SUN DRIED TOMATO PESTO PASTA | EASY PASTA RECIPES

We usually prefer Pastas for our weekend dinners and both of us love the simpler versions of pastas or the pesto based ones more than the tomato or cheese loaded ones.Our most favorite pasta being the Basil pesto pasta and the next comes this Sundried Tomato Pesto Pasta.
The preparation process of the Pesto sauce is quite simple as we just need to grind the ingredients to a coarse paste.You can toss the cooked pasta in a good amount of Olive oil with the pesto sauce for a quick pasta,but I love to add some crunch to the pasta and hence I always saute few bell peppers,babycorns,broccoli etc as I like to bite into the crunchy vegetables in pasta.
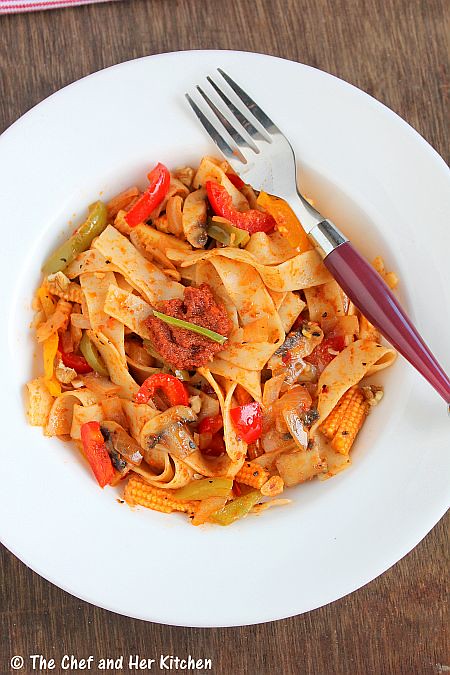
Sun dried Tomato Pesto Pasta Recipe:

Ingredients:

To prepare Sun dried Tomato pesto:
1 cup Sundried Tomatoes
1/2 cup loosely packed fresh Basil
1/4 cup Extra virgin olive oil(EVOO) + 3 tbsp oil from Sundried tomatoes
1/3 cup Pine nuts or Walnuts
1/4 cup grated Parmesan cheese(optional)
4-5 Garlic pods
1/2 tsp ground Pepper
1/2 tsp Red chili flakes
Salt to taste

To prepare Pasta:
10-12 blocks Fettucini pasta(or any other pasta-2 cups)
1/2 cup Sundried Tomato Pesto Sauce
1 Onion,sliced
3-4 Garlic pods,sliced
1 cup chopped Vegetables(Bellpeppers, Capsicum,Babycorn,Mushrooms)
1 tsp mixed herbs
1/2 tsp Chili flakes
1/2 tsp ground Pepper
1 tbsp grated Parmesan cheese(optional)
8-10 Basil leaves,torn
2 tbsp Extra virgin olive oil (EVOO)
Salt to taste

Method:

To prepare Sun dried tomato Pesto:
  • In a mixer add sun dried tomatoes, basil leaves,pine nuts/walnuts,garlic pods,pepper,add half the quantity of olive oil,parmesan cheese,red chili flakes,salt and ground to a medium coarse paste.Add the remaining olive oil in stages in between to ease the process of grinding.Do not add water to grind it,the EVOO is enough to grind into a slight coarse and uniform paste.
  • Now check for the taste and adjust the salt for the pesto.
To Cook Pasta:
  • Cook the pasts according to the instructions of your package or follow this procedure:
  • Bring water to boil in a big pot (filled to its half) and add salt,1 tsp olive oil and pasta and cook over medium flame for 10-12 mins until al dente(cooked and tender to teeth).
  • Drain and reserve 1/2 cup of water for later usage.you can even give a cold bath to the pasta by running it under fresh tap water which helps in keeping the pasta separate.
To prepare Sundried tomato Pesto Pasta:
  • Heat olive oil in a wide bottomed pan and fry sliced garlic until slight brown and crisp and add thinly sliced onions and fry until they are pink and soft.
  • Now add sliced vegetables and saute them for few minutes.
  • Add the sun dried tomato pesto sauce and mix well.Add 4-5 tbsp of reserved pasta liquid if required add more to get a medium sauce consistency.
  • Add cooked pasta and mix well until all the pasta is covered with the sauce and is warm.Now add red chili flakes,Italian herbs,basil leaves,salt and pepper and mix well.
  • Dish it out to the serving platter and sprinkle some cheese over it.Garnish with basil.
Serve it hot or warm with Raspberry Soda or drink of your choice.
 Notes:
  1. You can add more Parmesan cheese while preparing sauce in the above recipe to make pasta more cheesy.
  2. You can replace fettucini pasta with any of the pasta like penne,spiral,macaroni ,farfelle or any other pasta of your choice.
  3. You can add finely chopped carrot,blanched broccoli,thinly sliced mushrooms,blanched asparagus,zucchini to the pasta
  4. You can even fill the pasta in a baking dish and cover with grated Parmesan cheese(1/4-1/2 cup) and cover it with a foil and bake it in oven @ 160 degrees for 20 mins until the cheese melts.Serve it hot right from the oven.This would be a exclusive dish for parties especially or for special romantic dinners.
  5. For a Vegan version avoid parmesan cheese while making pesto,it tastes even delicious without cheese in it.

You can check out the other pesto versions of various Pasta varieties here - Basil Pesto Pasta and Spinach Pesto Pasta.

Monday, February 11, 2013

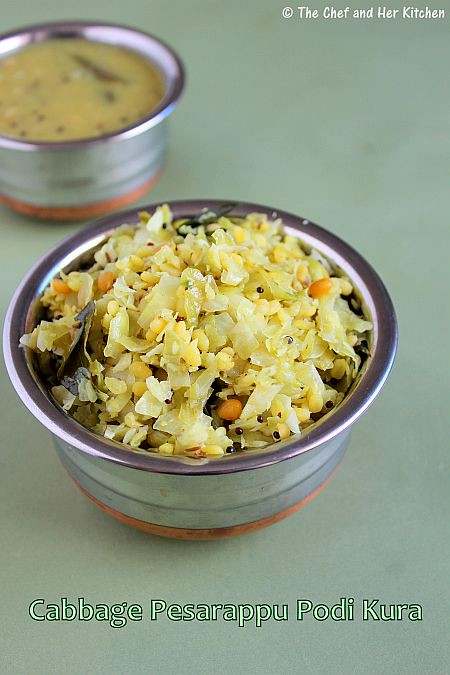
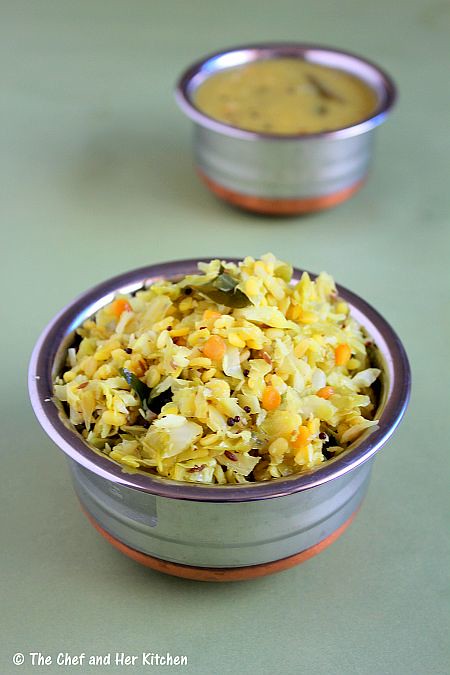
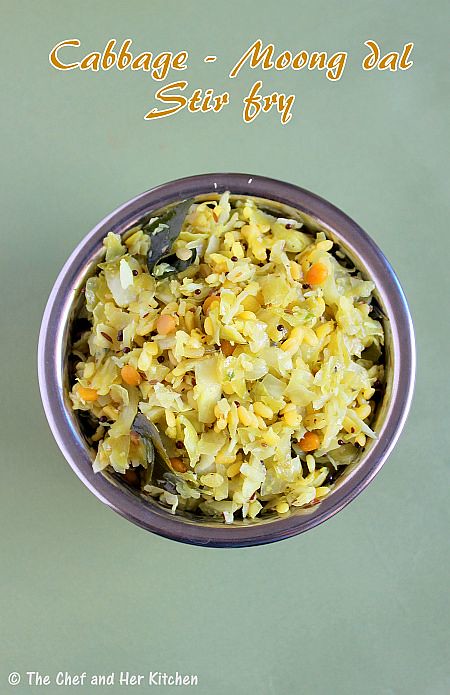
Cabbage Pesarapappu Podi Kura | Cabbage Moongdal Dry Curry

I prepare various dry curries to go with rice for our lunch and this Cabbage-Pesarapappu podi kura(dry curry) is one of my favorites which I prepare quite often.If you do not like cabbage do give this combination a try,the addition of moong dal and coconut makes this curry extremely delicious and pairs well with rice or roti.You can find a similar version of podi kura with amaranth leaves here, Thotakura Pesarapappu Podi kura which is again my personal favorite.
Cabbage Pesarapappu Podi Kura | Cabbage Moong dal Dry Curry:
(serves 2)

Ingredients:
1 small Cabbage,shredded or finely chopped
1/3 cup Moong dal(yellow lentils),soaked
1/3 cup grated fresh Coconut
5-6 Green Chillies
a pinch of Turmeric powder
1 tbsp Chana dal
1 tsp Urad dal
1/2 tsp Mustard seeds
a sprig of Curry leaves
Salt to taste
2 tbsp Oil

Method:
  • Soak moong dal overnight or for 1-2 hrs.
  • Heat oil in a kadai and crackle mustard seeds.
  • Add chana dal,urad dal and curry leaves and fry well.
  • Add curry soaked moong dal,shredded/finely chopped cabbage and turmeric powder and fry well for 2-3 minutes.
  • Cover it with a deep lid and pour water over it which enables steam cooking for the vegetable to get cooked.Keep it on low flame for 12-15 mins until the cabbage and moong dal is cooked.It would be a dry curry with slight moisture.Cook for another couple of minutes if needed.
  • Meanwhile grind grated coconut with salt and green chillies in a mixer to a coarse paste.
  • Once the cabbage moong dal is cooked add the ground coconut mixture and mix well and stir fry for 2 minutes.
Serve it hot with steamed rice/roti/chapati.

Variations:
  1. You can add grated carrots along with cabbage and follow the same recipe.
  2. You can substitute cabbage with grated carrots or grated beetroots in the recipe.The cooking time may vary accordingly.
  3. Moong dal can be substituted with Chana dal and follow the same recipe,even this tastes nice.
 

Sunday, February 10, 2013

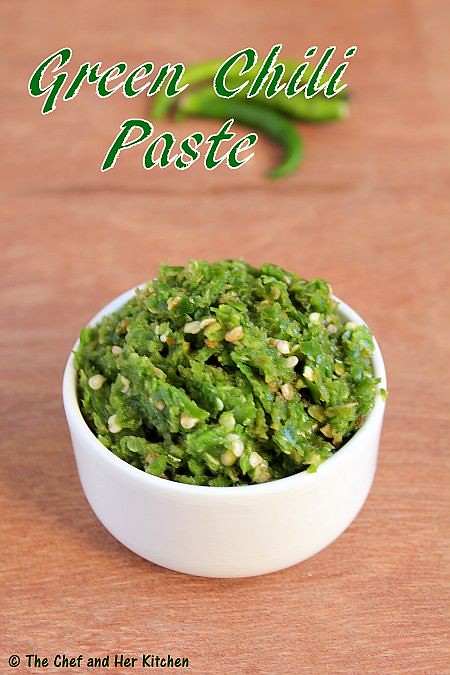
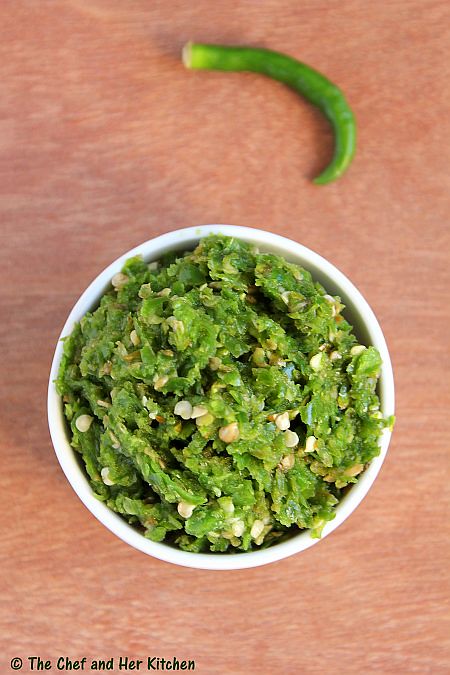
How to make Green Chilli Paste | Kitchen Basics

There are few items like Ginger-Garlic paste,Green chili paste,Green Chutney,Meetha Chutney which are home made and I always keep in my refrigerator as they are very handy while cooking.These are all the basic recipes and I am sure most of us would be preparing on regular basis.However I am posting these basic recipes which might help those who are new to cooking.We use this green chili paste in many of the breakfast and snack varieties like Gunta Ponganalu, Mosaru Kodubale, Kharada Onion Dosa, Onion Masala Idli, Rava Dosa, Akki rotti, Ragi Rotti, Punugulu, Sago bonda etc,it is very handy to use them instead of chopped green chillies in these recipes.

Green Chilli Paste:
Shelf life: upto a month when refrigerated

Ingredients:
100 gms Green chillies
Salt to taste( 3/4 to 1 tsp approx)

Method:

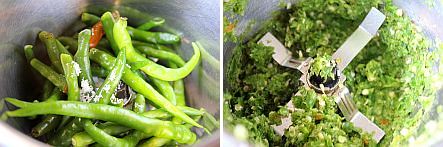
  • Wash and dry the green chillies on the kitchen napkin for 2-3 hrs until they are completely dry with out any water droplets.
  • Grind the green chillies with salt to a coarse paste.Do not grind it to fine paste,the paste should should be very coarse which will increase the shelf life of the paste.
  • Remove the paste and store it in an air tight container or glass bottle and keep it refrigerated.You can use this paste up to a month or more.
Notes:
  1. The green chillies should be completely dry with out any water droplets.
  2. Adding salt will increase the shelf life,so do not add less in it.
  3. Always use a clean spoon while taking out the paste from the container.
  4. You can use it for a month or more when refrigerated.
  5. You can use this in various recipes like Gunta Ponganalu, Mosaru Kodubale, Kharada Onion Dosa, Onion Masala Idli, Rava Dosa, Akki rotti, Ragi Rotti, Punugulu, Sago bonda etc where we add green chili paste instead of green chillies.It eases the work.

Friday, February 8, 2013

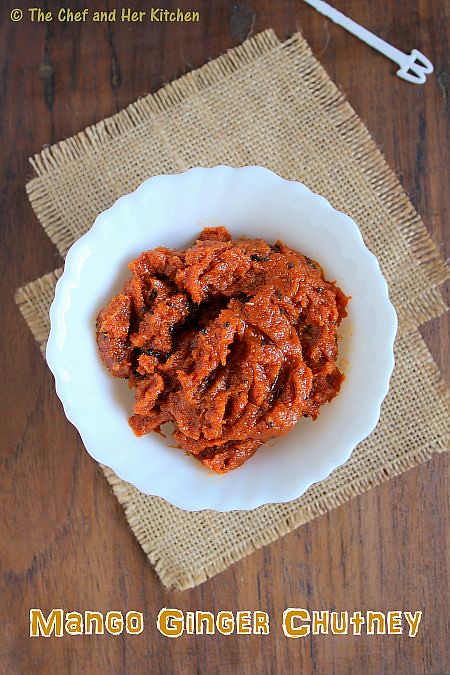
Mango Ginger Chutney | Mamidi Allam Pachadi | Maa Inji Thokku

When ever I see mango ginger(mamidi allam/maa inji) in the market I cannot resist myself without buying it.Both of us love the simple marinated version of pickle with it which goes very well with curd rice.This time I bought them in a larger quantity to make this chutney/thokku which can be preserved for longer and comes handy to serve with breakfast items like Idli/Dosa when we want.When needed we just need to mix water with the required amount of thokku to get the chutney consistency,it is ready to serve.

Mamidi Allam Niluva Pachadi | Ambe Haldi Chutney:

Ingredients:
250 gms Mango Ginger/Mamidi Allam
200-250 gms Tamarind
200-250 gms Jaggery,grated
3-4 tbsp Red chili powder
Salt to taste

to temper:
1/2 cup + 2 tbsp Oil
1 tsp Mustard seeds
a fat pinch of Asafoetida(hing)

Method:
  • Soak tamarind in little hot water until it softens.Let it cool completely.
  • Wash and scrape the skin of mango ginger and cut them into pieces roughly.
  • Grind mango ginger with tamarind,grated jaggery,red chili powder and salt to a fine paste.Do not add water while grinding,use little water in which the tamarind is soaked.
  • Check the taste now and adjust salt and chili powder if required.if you want it more tangy or more sweeter adjust the chutney as per your taste buds at this point.
  • Heat oil in a thick bottomed kadai and crackle mustard seeds and add asafoetida to it and add the ground mixture and fry it over low-medium flame until it leaves the oil in the edges.It takes 15-20 minutes approximately.The water content in the chutney/pickle should evaporate completely and the oil should float in the edges and top.This way the shelf life of the pickle would be longer.
  • Cool the pickle completely and store it in a glass bottle or air tight container.It stays up to an year if prepared carefully.
  • When required scoop out some portion and add a couple of tbsp of water to it and mix well.
Serve it with Idli/Dosa/Bajji/Punugulu/Bonda/Pesarattu/Gunta Ponganalu/Adai.You can even serve it with rice.

Notes:
  1. You can use regular ginger instead of mango ginger and follow the same recipe to make regular ginger pickle.It comes handy to serve with Idli,dosa and other breakfast varieties. 
  2. This pickle really tickles your taste buds as it is loaded with burst of flavors.
  3. Feel free to adjust the tangyness,sweetness,salt and spicyness according to your requirements after grinding the chutney.

Wednesday, February 6, 2013

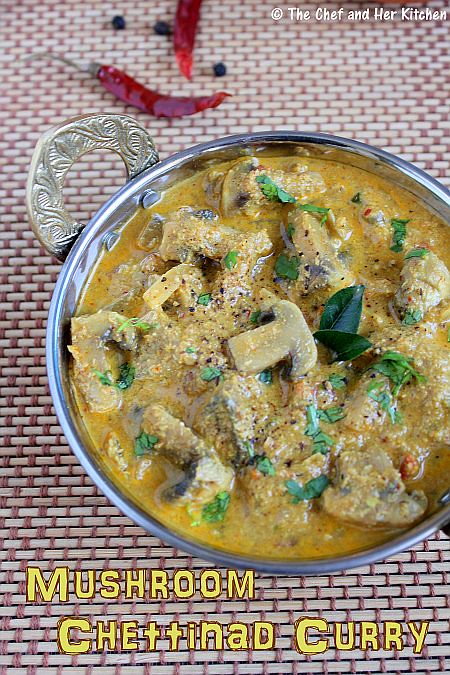
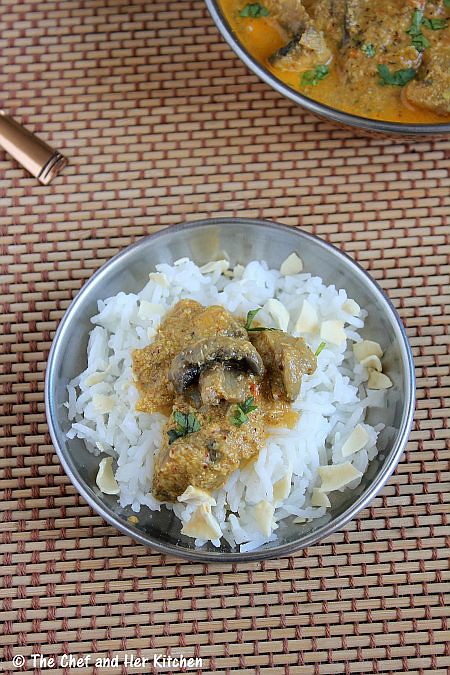
Mushroom Chettinad | Chettinad Mushroom Masala | Mushroom Recipes

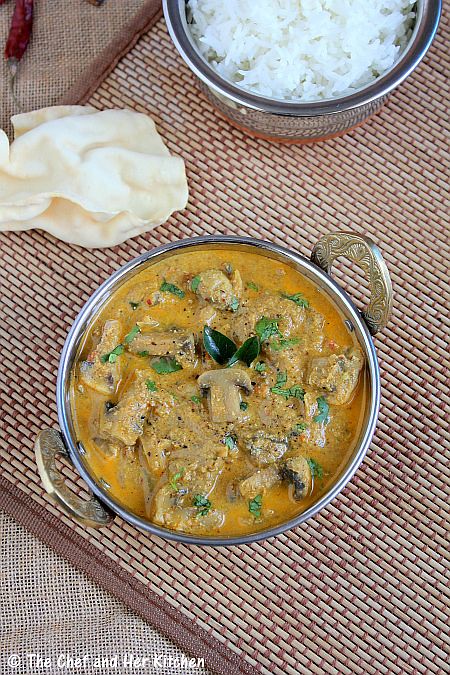
Though I prepare mushrooms often I never got to post any recipe with mushrooms in my blog.I started to use mushrooms lately in my cooking now it has turned to be one of our favorites for its soft and meaty texture.Mushrooms can be widely used in making pulaos, briyanis, curries, gravies, stir fries, stuffed mushrooms, pastas, cutlets etc. Today I am posting Chettinad Mushroom Masala which is really an aromatic and spicy gravy which complements really well with steamed rice or Kerala parottas.
I highly recommend this recipe to give a try and I am sure you will thank me for the recipe.The taste of those meaty and soft mushrooms in the spicy and rich chettinad masala gravy is truly delicious and lip smacking and when paired with kerala parottas,it is really a good combo.
 
Mushroom Chettinad Masala Gravy:
(Serves 2-3)
Recipe Source: Nita Mehta

Ingredients:
200 gms Button Mushrooms
6-8 Black pepper corns,crushed coarsely
1 Onion,finely chopped
3 Tomatoes,finely chopped
1" Ginger,chopped
6-8 Garlic pods
1 tbsp Poppy Seeds(Khus Khus)
2 tbsp Cashewnuts
3 tbsp Curry leaves
1/2 tsp Turmeric powder
1/2 tsp Red chili powder
juice of 1/2 Lemon
Salt to taste

to roast spices together:
1 tbsp Oil
1/2 tsp Cumin seeds
1/2 cup grated fresh Coconut
1 tsp Fennel seeds
1 tsp Coriander Seeds
3-4 Red chillies
2-3 Cloves
3 Green Cardamoms,remove the seeds
1" Cinnamon stick

Method:
  • Clean mushrooms nicely,I usually rub the mushrooms with maida to remove the excess dirt and wash them and pat dry them.Trim the stalks and cut the mushrooms into halves.
  • Soak Poppy seeds and cashew nuts in half cup of warm water for 15 mins.
  • Heat 1 tbsp Oil in a pan and roast all the spices together on low heat till fragrant for about 2-3 mins and remove them and cool the spices.
  • Grind the roasted spices along with ginger,garlic,soaked cashewnuts and poppy seeds to a very smooth paste.Add required amount of water while grinding.
  • Heat 3 tbsp of oil in a kadai and stir fry onions till they turn slight brown in color and add curry leaves to them.
  • Add the ground masala and saute for a minute.
  • Add chopped tomatoes,turmeric powder,salt and red chili powder.Cook fro 5-7 mins till the tomatoes get well blended and the oil separates from the gravy.
  • Add mushrooms and stir fry for 5 mins.
  • Add 1 cups of water and add chopped coriander and give the gravy a boil.
  • Simmer the gravy and cook on reduced heat for 5 mins till the gravy is thickened.
  • Sprinkle crushed black pepper corns and add lemon juice  to the gravy.
Serve it hot with steamed rice/Chapati/Kerala Parottas/Pulaos.
Notes:
  1. In order to clean mushrooms you can remove the thin layer over the mushrooms using a sharp knife or you can even rub the mushrooms with maida or rice flour to remove the excess dirt.Always wipe the mushrooms with a dry towel before it is added to the recipe,this way the mushrooms will not shrink much.
  2. This is a very aromatic and slightly spicy recipe.Adjust the red chillies and pepper accordingly.
 

Monday, February 4, 2013

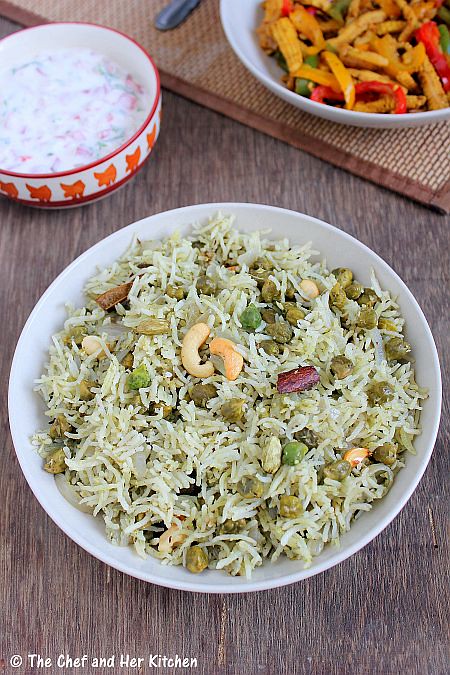
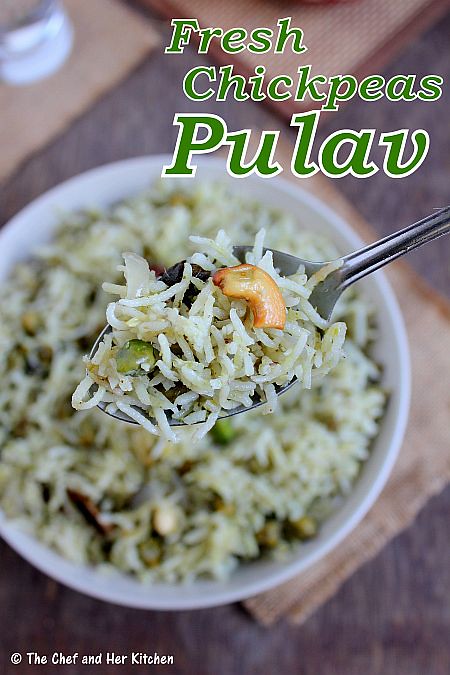
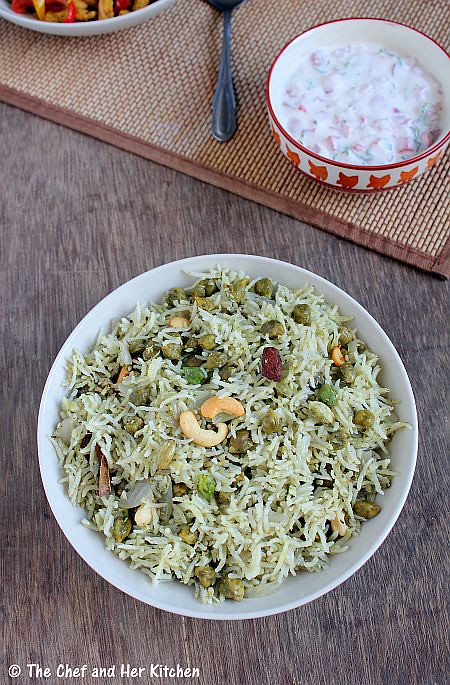
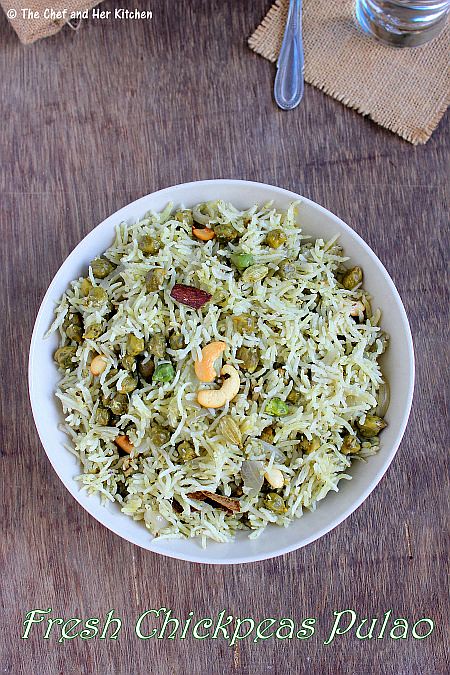
Fresh Chickpeas Pulao | Hare Chane ka Pulav

I have posted Fresh Chickpeas Paneer Gravy some time back and I used the remaining chickpeas to make this delicious pulao.Pulaos are the most easiest one pot meal which I prepare on those lazy afternoons when I run out of ideas.
I usually take a easy route to make simple pulaos but when I am in a good mood I love to grind fresh masala which makes the pulao really aromatic.The addition of fresh coconut and marati moggu in the masala mixture makes it taste unique,it gives the taste of a typical Bangalore Darshini kind of pulaos.If you can get hold of fresh chickpeas do give a try this pulao definitely,if you do not find them you can use mixed vegetables or soya chunks or fresh green peas to make this aromatic pulao.
Fresh Chickpeas Pulao Recipe:
(Serves 2)

Ingredients:
1 cup Basmati Rice
2 cups Water
1 cup Fresh Chickpeas
2 Onions,sliced
8-10 Cashewnuts
2 tbsp Oil
1 tbsp Ghee
1 Bayleaf
Salt to taste

to grind:
1/4 cup freshly grated Coconut
3-4 Green Chillies
3-4 Garlic pods
3/4" Ginger
1/2 cup Mint leaves
1/2 cup Coriander leaves
1" Cinnamon stick
2-3 Cloves 
1-2 Marathi Moggu(optional)

Method:
  • Make a coarse paste out of the ingredients mentioned under 'to grind' by adding little water.
  • Clean the rice and soak it in water for 10 mins.
  • In a pan/kadai heat oil and add bay leaf,cashewnuts and then add onions and fry it till it becomes soft and add all the fresh chickpeas and fry until its half cooked.
  • Add the ground masala and fry well until the raw smell disappears.
  • Add soaked and drained basmati rice and fry it for some time and add salt and fry it a bit and then add water.Now pour this mixture either into a rice cooker bowl and cook it until it is done.You can even pressure cook for 1 whistle and reduce the flame and cook it for 8-10 mins.
Serve hot with tomato onion raitha.

Notes:
  1. The addition of pudina and corriander leaves adds a nice flavor to the pulav.
  2. You can add mixed vegetables or fresh green peas instead of chickpeas in the recipe.
  3. You can reduce the water to 1 3/4 cups to get still granular rice.
  4. Marathi Moggu is a spice which looks similar to cloves and it adds a nice flavor to the pulao.If you do not get it you can avoid using it in the recipe.
Friday, February 1, 2013

Green Chutney for Chaats | Mint Coriander Chutney

Green Chutney and Meetha Chutney plays a major role in preparing any chaat varieties and any chaat is incomplete with out these chutneys. I always prepare these chutneys in large portions and store these chutneys in my refrigerator. If the green chutney is stored in refrigerator it looses its color quickly,hence I always store it in freezer. This way it retains it freshness as well as color for long.As I store it in the freezer,in order to avoid the ice formation in the chutney I usually do not add water while grinding the chutney which makes it easy to scrape when needed.

Green Chutney Recipe:

Ingredients:
1 big bunch(4 cups loosely packed) Mint leaves
1 medium bunch(3 cups loosely packed) Coriander leaves
8-10 Green chillies
1 1/2" Ginger,peel the skin
1 tsp Chaat masala
1 tsp Kala namak(black salt)
1/2 tsp Salt(to taste)
1 tbsp Sugar
juice of 1 big Lemon

Method:
  • Wash and drain the mint leaves,coriander leaves in a colander for 1 hour.You do not need to dry them completely but make sure you drain all the excess water.
  • Wash and wipe the green chillies and ginger and cut the ginger into pieces.
  • Grind mint leaves,coriander leaves with green chillies,cut ginger, chaat masala, salt, kala namak, sugar and lemon juice to a fine paste.
  • It is always advised to taste the chutney once and adjust the seasonings according to your taste buds. 
  • I usually do not add water while grinding the chutney,I try to grind the chutney by adding the lemon juice in intervals.
  • Store it in a container in fridge or freezer safe container in the freezer.If it is stored in refrigerator it stays good for upto a week -10 days.If stored in freezer,it can be stored for long upto a month or two.You need to scrape a small portion with a spoon when needed and keep the remaining portion back in the freezer.
Notes:
  1. As I prepare it in a larger portion and freeze it I usually do not add water while grinding the chutney,I try to grind the chutney by adding the lemon juice in intervals.
  2. If the chutney is stored in refrigerator it stays good for upto a week -10 days.If it is stored in freezer,it can be stored for long upto a month or two.You need to scrape a small portion when needed and keep the remaining portion back in the freezer.
  3. If you are going to use the Green chutney instantly you can add a small onion or 1/2 cup Besan sev while grinding.It tastes nice with samosas or any other snack items.
 
back to top