Wednesday, July 18, 2012

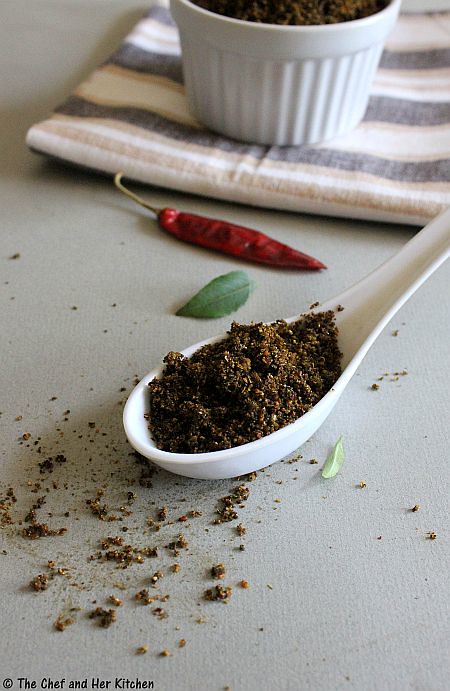
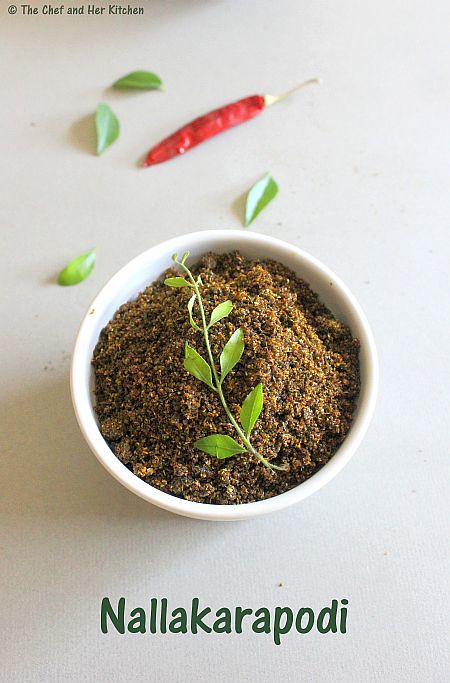
ANDHRA NALLA KARAM | NALLA KARAPODI

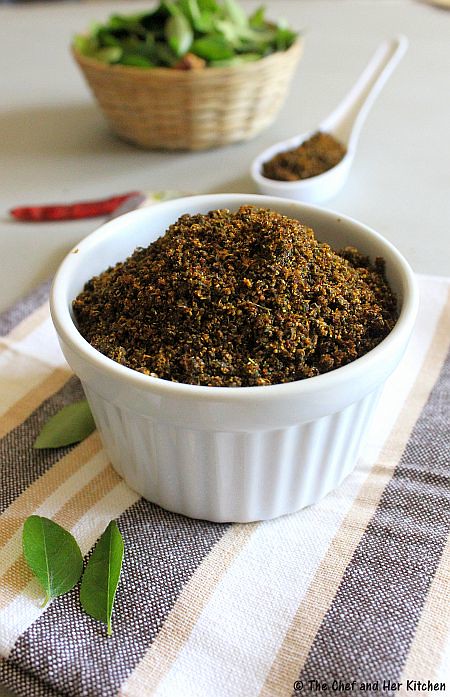
I had posted a version of Andhra Karapodi which is a good accompaniment for Idli/Dosa.Let me tell you why I am posting another version today.When ever I visit my MIL, I would get to taste the freshly made karapodi every time, as she makes a fresh batch for us to savor with Idli/Dosa. In our numerous visits, I noticed that each time the Karapodi used to be different in terms of, texture,taste and color but I never bothered to ask her, as she used to serve it every time mentioning it as Karapodi.This time when she visited us, I asked my MIL to prepare karapodi and she prepared it in the same way that I had posted earlier but this was not the one I wanted. She then told me that the reason why the karapodi's texture used to be different is that at times she used extra curry leaves to get that pitch dark color and also fried in ghee to get that granular texture..She then asked my FIL to bring more curry leaves and made the version which I wanted..so sweet of her!!!
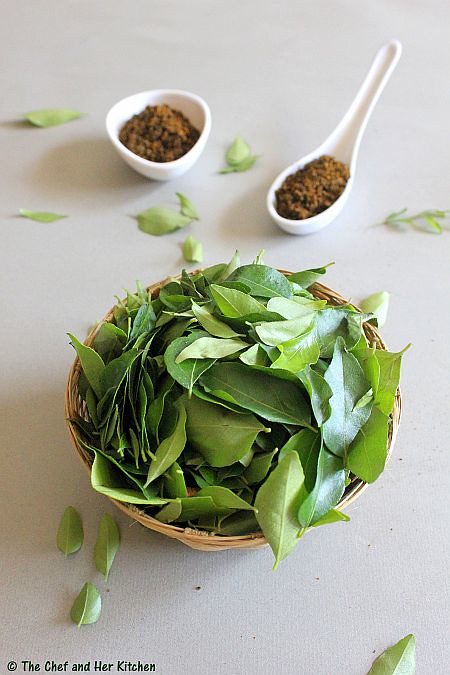
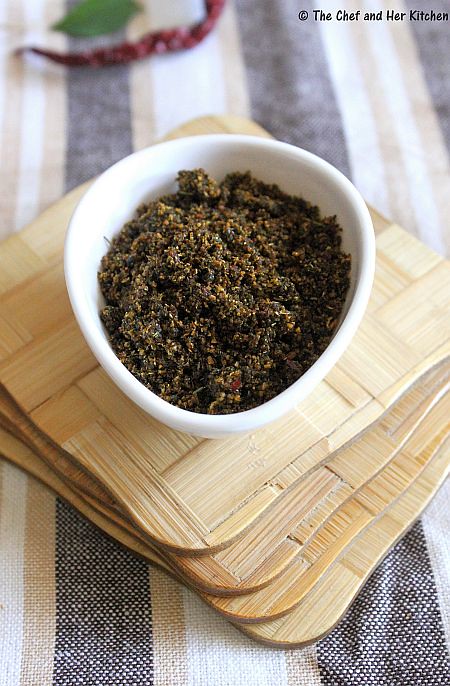
Ideally Karapodi and Nalla karam are the same as the ingredients that go in it are the same and please do not get confused them with Karivepaku podi. Though the amount of curry leaves used in this recipe are more,it is not the traditional way of preparing Karivepaku podi(curry leaves powder) as the procedure is different and also we do not use coriander seeds in traditional Karivepaku podi,I would post my curry leaves powder recipe soon in my space.Every house hold has their own variation of karapodi be changing the proportions of the ingredients. But for me, the word 'Nalla karam' in telugu, which can be literally translated as, 'Black spice powder' should look like one, hence I am posting another variation of Karapodi. The taste of this Nallakaram is much better than the Karapodi which I had posted earlier, in my view.The addition of ghee and extra curry leaves added a nice taste to the powder.
NALLA KARAM | NALLA KARAPODI | KARIVEPAKU KARAPODI:
(makes around approx 1 1/2 cups)
Shelf life : 2 months

Ingredients:
3-4 cups Curry leaves
1 levelled cup Coriander seeds
1/4 cup Urad dal
2 tbsp Chana dal
2 tbsp Cumin seeds
7-8 Red chillies
4-6 Byadige Red chillies
7-8 Garlic Pods
1 big amla sized Tamarind
Salt to taste(approx heaped 1 tbsp)
2 tbsp Oil
2 tbsp Ghee
Method:
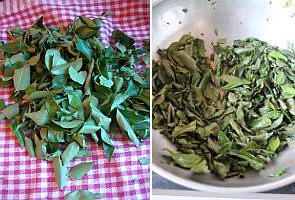
  • Clean and wash curry leaves and remove extra water and spread it on a dry cloth to let the leaves dry completely with out any water.Leave it for 2-3 hrs.If you are short of time spread the leaves on the microwave plate and microwave for 3-4 mins checking in between until the leaves turn dry.It turns out beautiful in microwave.
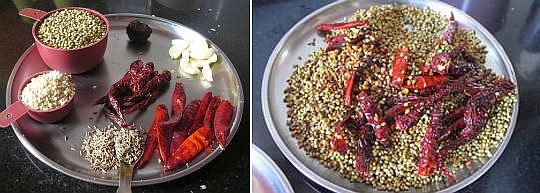
  • Heat 1/2 tsp oil in a thick bottomed kadai and fry chana dal until it is red in color and remove it and keep it aside.Do not burn them but fry upto the maximum red color you can get without burning,this is the key to get good black color for the powder.Follow the same for all the dals and spices.
  • Again heat 1/2 tsp oil and add urad dal and fry until it is red in color and remove it and keep it aside.
  • Again heat 1/2 tsp oil and add coriander seeds and fry until they turn slightly brown and remove it and keep it aside.
  • Heat 1/4 tsp oil and add cumin seeds and red chillies and fry until crisp and remove it and keep it aside.
  • Heat 1/4 tsp oil and add dried curry leaves and fry until they are crisp and remove it and keep it aside.Switch off the flame.
  • While the kadai(pan) is hot add tamarind and fry for half a minute and keep it aside.
  • Once everything comes to room temperature grind fried chana dal,urad dal,red chillies,cumin seeds and coriander seeds to a coarse powder.
  • Add fried curry leaves,salt and tamarind to it and grind again to a coarse powder.
  • Add whole garlic pods(with skin) and run it in whipper mode now or run it just for 30 secs in the regular mode.The powder should be coarse not very fine.
  • Heat ghee in the same pan and add the ground powder and fry for 1-2 mins until all the ghee is incorporated in to the powder.This gives a wonderful aroma and taste to Nalla karam podi.
  • Once it cools remove it and keep it in a air tight container.
  • This stays fresh for long,approx 2 months.
Serve this powder with Idli/Dosa/Uthappam/Paniyaram and also can be served with plain white rice.You can add ghee to the powder and mix if required while serving.
Notes:
  1. Make sure you fry all the ingredients well and let the curry leaves be completely dry.
  2. Always use a dry spoon when taking out the powder.
  3. Keep it in air tight container to seal the aroma of this podi.
  4. I gave the amount of salt approximately,please add the required amount using your judgement.


Monday, July 16, 2012

METHI PULAO RECIPE

Its been a while since I have posted a recipe on pulao for the simple reason that I either make it at odd times (well... I consider anything made for dinner also as an odd time as I find it difficult to take any good pics) or when I am short of time.I must say pulao is easy to prepare and is also a good dish in any party. The flavors of the whole masalas and herbs and the beautiful fragrance of basmati rice when cooked to the perfection when paired with a raita(seasoned yogurt) is truly a blissful meal.
While I have already posted various pulao recipes like Mint pulao, Palak Pulao, Vegetable pulav,Peas pulao to name a few, today's Methi pulao is one of the most favorite one at home.Unlike regular pulaos, I make Methi pulao with coconut milk, a hint of bitterness from those fresh greens and the slight sweetness of coconut milk adds a nice taste to the pulao.I can assure you that you will fall in love with this flavorful pulao, if you try this recipe.
METHI PULAO | FENUGREEK LEAVES PILAF Recipe:
(Serves 2)

Ingredients:
1 cup Basmati Rice
2 cups Methi leaves/Fenugreek leaves
1 Onion,sliced
1/3 cup Paneer,cubed
1/3 cup fresh/frozen Green Peas
1 tsp home made Sambar powder*
1/2 cup Coconut milk**
1 1/2 cups Water
Juice of 1/2 Lemon
1 Bay leaf
1" Cinnamon
3 Cloves
2 Marathi Moggu
2 tbsp Oil
1 tbsp Ghee
Salt to taste

to grind:
3/4" Ginger
4-5 Garlic pods
4-5 Green chillies
Method:
  • Wash and soak basmati rice in water for 10 mins.
  • Remove the fenugreek leaves from the stems carefully and wash them and add a pinch of salt and keep aside for 5 mins.Squeeze the water out of methi leaves.This will help to remove the bitterness slightly from fenugreek leaves,though it is optional to add salt.Do not chop the leaves for the pulav it will make the pulav bitter.
  • Heat oil and ghee together in a wide thick pan or pressure cooker.Add cinnamon,bayleaf,cloves and marathi moggu and fry until they pop up.
  • Grind ginger,garlic and green chili to a paste.
  • Add sliced onions and fry until they turn pink.Add ground ginger-garlic-green chilli paste and fry well until the raw smell goes away.
  • Add fenugreek leaves and fry for 2 mins.Add green peas and fry for 1-2 mins.
  • Add drained basmati rice and fry well for a couple of minutes.
  • Add paneer,sambar powder to rice and give a saute for a minute.
  • Add coconut milk(1/2 cup) and water(1 1/2 cups) and add enough salt and let it come to a boil and close the lid of the pan/cooker and cook over low flame for 10-12 mins in the pan.If you are using pressure cooker pressure cook for 1 whistle and simmer the flame and cook for another 7-8 mins.Switch off the flame.
  • After the pressure drops,add lemon juice and give a nice and gentle stir to the pulao.
Serve it hot with raitha and papad.

* You can use 1/2 tsp Biriyani Masala(ready made) instead of sambar powder in the recipe.Both have their own taste and I like both the ways.
**I used 2 tbsp coconut milk powder mixed in 2 cups of warm water to make instant coconut milk.You can adjust the amount of coconut milk to suit your taste buds.You can even avoid coconut milk in this recipe if you do not coconut flavored pulaos.
Notes:
  1. You can add mixed vegetables like carrots,potatoes,beans,capsicum in the recipe.Also you can add soaked chickpeas instead of veegatbles or peas in the recipe which makes it Methi Chana pulao which tastes nice too.
  2. If you are using frozen paneer,soak them in hot water for a while which makes paneer soft.
  3. You can add cashewnuts while frying onions which adds a nice taste to pulao.
  4. You can even avoid coconut milk in this recipe and replace with water(2 cups) if you do not coconut flavored pulaos.
  5. Marathi Moggu is not a very common spice available everywhere,if you do not get it leave the spice and proceed with the same recipe.
  6. For a Vegan version avoid ghee and paneer in the recipe.

Thursday, July 12, 2012

Spicy Phool Makhana | Roasted Fox nuts

Lotus seeds/makhana is a good source of calcium and you can also make various items like kheer,snack or curry with it.I though end up making this simple and tasty snack most of the times.
If you like to try them you can even check my phool makhana kheer recipe which I posted earlier.If you have never tasted this I strongly recommend you to try these lotus seeds,they are addictive and healthy.Try to replace your good old pop corn packets with this healthy guilt free makhana snack to munch, while watching your favorite movie/show.
Spicy Phool Makhana(Puffed Lotus Seeds) Recipe:

Ingredients:
1 1/2 cup Phool Makhana/Puffed Lotus Seeds
1/2 tsp Chaat Masala
1/4 tsp Pepper Powder
1/2 tsp Red chili powder
1/2 tsp Kala Namak/Black Salt
Salt to taste
2 tbsp Ghee/Olive oil
Method:
  • Heat 1 tbsp ghee/Olive oil in a kadai and add phool makhana to it and roast them until crisp over low flame.This takes 8-10mins.Pinch a nut and taste it whether it is crispy or not.Remove them and keep them aside.
  • Heat 1 tbsp ghee in the same pan over low-medium flame and add quickly red chili powder,pepper powder,chaat masala,Salt and kala namak and fry it for 10 seconds.Take care not to burn the spices.
  • Add roasted phool makhana to it and mix well until the phool makhana is coated well with all the spices.
  • Reduce the flame and fry for 2-3 mins.
  • Once they cool down store them in an air tight container.

Serve them as an evening snack with a cuppa or when ever you want to munch on in between meals.

Notes:

  1. You can store it up to a week.If the makhana becomes soft just pop them in a pan and roast them until crisp.
  2. You can experiment and adjust spices according to your taste buds.
  3. Ghee/olive oil can be replaced with regular oil.I recommend ghee for its taste.
  4. I think you can even use butter though I never tried but I am sure it will add nice flavor.
  5. Another interesting combination,I am thinking of replicating the caramel popcorn replacing the popcorn with phool makhana.Though I never tried it is just an idea,if you try please let me know how it turned out.
  6. For a Vegan version use olive oil instead of ghee.

Monday, July 9, 2012

MANGO FUDGE | MANGO BURFI

A few months back, while I was buying some savories and sweets to carry them to my brother's place, I tasted mango fudge for the first time in a Farsaan shop here in Mumbai and instantly fell in love with it.If you have ever visited Lonavala, you would have definitely tasted Chocolate fudge and also lots of other variations like Walnut fudge,Mango fudge etc.The fudge I tasted was similar to the one in Lonavala.
I have been thinking of making this at home for a while and when I saw this recipe on MyJhola, (check out the awesome video preparation in her blog) I liked it as the preparation was simple and does not include any ghee. In this mango season I tried making it and the fudge came out nice and tasty. The texture of the fudge that I made was somewhere between that of a burfi and a fudge and it managed to fulfill my craving for a fudge. My concept of fudge is something that is more like a smooth texture, gooey,formless and something that melts in the mouth. Intend to prepare a smoother version of this sometime soon- watch out this space.
MANGO FUDGE Recipe:
(makes 12 medium squares)
Recipe Source: My Jhola

Ingredients:
3 cups fresh Mango pulp(Alphonsos or Kesar variety)
4 cups grated Paneer(Cottage cheese)
3 cups Sugar
2 cups Milk powder
1 tsp Ghee,to grease the tray

to garnish:
few Saffron strands
2 tbsp Pistachios,slivered
Method:
  • In a thick kadai/pan add grated paneer,sugar and mango puree and mix well.Cook over low-medium flame until the mixture comes together and become thicker.
  • At this stage add milk powder and give a quick stir to avoid formation of lumps.Cook for 5 mins by stirring it continuously until it forms a thick fudge consistency.If you want fudge stop at this moment,if you like to cut it into burfi stir for another 5 mins.
  • Spread on a greased plate till you get a 3/4 - 1" thickness,so use the size of plate accordingly.
  • Sprinkle slivered pistachios and saffron strands over the spread mixture and press it slightly.
  • Set aside for 1 hr.If you want to cut into pieces allow it set for 2-3 hrs.You can even refrigerate for 1-2 hrs if you don't have much time.
You can cut it into squares or serve it as fudge.It can be stored for 2-3 days if refrigerated.
Notes:
  1. Use sweet and ripened Alphonsos(or kesar) variety for this recipe.
  2. Always grate the paneer for this recipe,do not crumble it.If any paneer pieces are left they would turn hard after it is cooked for long time,hence grate it or mash it completely.
  3. Use fresh paneer ,do not use frozen or packaged variety for this.
  4. You can even decorate with edible silver leaf.As I did not have it at that moment I could not use.
  5. If you don't get hold of fresh mango pulp,use canned one.
  6. Use unsweetened khoya( 2-3 cups) instead of paneer for a richer version.In that case you can avoid milk powder or add less quantity of milk powder(1/4 cup).

Friday, July 6, 2012

Brinjal fry | Vankaya Podi Kura

I have posted a Multi purpose Curry powder few days back, which we call 'Kurala podi' in Telugu.It is a very versatile powder and can be utilized in many ways. I am posting a simple recipe using that curry powder.If we have the curry powder handy,all we need to do is to either stuff the vegetables generously with this powder and shallow fry in oil or you can sprinkle the powder on the sauteed stir fry vegetables.
Eggplant Stir fry Recipe- using Curry powder:
(Serves 2)

Ingredients:
4-5 Eggplants/Brinjals
2-3 tbsp Curry powder/Kurala Podi
1/2 tsp Red chili powder
1/4 tsp Turmeric powder
1/2 tsp Mustard seeds
a sprig of Curry leaves
Salt to taste
2 tbsp Oil
Method:
  • Wash and cut brinjals into small cubes and soak in water for 10-15 mins.This will remove the bitterness from eggplants.
  • Heat oil in a kadai/pan and crackle mustard seeds and add curry leaves and fry for 10 seconds.
  • Squeeze the eggplant cubes and add to it and fry for a minute.
  • Add turmeric powder and cover it with lid and cook for 2-3mins over low-medium flame.
  • Remove the lid and increase the flame and stir fry for 5-6 mins until the brinjal pieces are cooked.
  • Add salt,red chili powder and kurala podi/curry powder and mix well and fry for 1-2 mins and switch off the stove.
Serve it with hot rice and sambar/rasam with fryums.

Notes:
  1. You can follow the same procedure for making vegetable stir fries like tindora and ladies finger curries using the same process.
  2. You can even stuff the mixture in brinjals/tindora/ladies fingers and shallow fry in oil.
  3. You can even use for vegetable curries like french beans,broad beans,cluster beans,yard long beans ,carrots,beetroot,cabbage and cauliflower.

Wednesday, July 4, 2012

CHEKKALU | PAPPU BILLALU | THATTAI | SAVORY RICE CRACKERS

We Indians always stock up lots of snacks which are generally deep fried and these snack varieties vary from region to region. The snacks in North India is mostly prepared with Besan,wheat flour and maida while in South most of the snacks (60-70%) are prepared with rice flour apart from besan and maida.
Apart from the famous Chakli,another rice flour based snack which is quite famous is 'Savory Rice cracker' which is known in south India with various names; ' Chekkalu or Pappu Billalu' in Andhra,'Nippat' in Karnataka and 'Thattai' in Tamilnadu.While the basic ingredients are same Chekkalu and Thattai tastes and looks almost similar where as Nippat/Nippattu(of Karnataka) differs in thickness,taste and texture.Check my earlier 'Nippat masala' post to see how the nippattu looks like-there I used baby nippats but in general it is of 2-3" diameter.Chekkalu are made basically very thin and crispy and they are very light and you can easily have 5-6 chekkalu at one go, while you cannot have more than 2 nippats at one go.
Though they are easily available in many shops in south,it is very rare to find good quality and tasty ones in the rest of India or even abroad. So the only option is to always source them from south or make them by yourselves. It though takes some time to gain expertise in preparing these fried snacks-while it is an easy snack to prepare but if the quality of rice flour is not good, you can easily mess it and end up with hard crackers. I have highlighted a few pointers to get good chekkalu and I hope it would be of help.Now back to the recipe.
Pappu Chekkalu | Pabbilla | Thattai Recipe:
(makes around 20-22 small size)

Ingredients:
1 cup fresh Rice flour
1/4 cup Chana dal(or moong dal or both)
2 tbsp Sesame seeds
3-4 Green chillies
3/4" Ginger
2 tbsp finely chopped Curry leaves
1/2 tsp Red chili powder
1 tbsp Butter,softened at room temperature
Salt to taste
Oil,to deep fry

Method:
  • Soak chana dal for 2-3hrs.Drain well.You can use moong dal or a mix of both for this,they add nice taste to chekkalu.
  • Grind green chillies and ginger to a coarse paste in mixer.

  • In a big bowl mix rice flour with salt.
  • Add ground ginger-green chili mixture,sesame seeds,torn curry leaves,soaked and drained chana dal,red chili powder and butter and mix well thoroughly.
  • Just sprinkle few drops of water (1/4 cup approx) and knead into a dough.Do not add more water,use little amount amount of water just to combine to a dough.Knead well.If you take a small ball and try to flatten on ur palm it should crack at the ends which indicates right consistency.

  • Take a plastic sheet and smear oil over it.You can even use milk covers.
  • Mean while heat oil in a kadai over medium heat to its smoking point.
  • Take a very tiny gooseberry sized ball and flatten it using your palms to a disc,2-3" in diameter on the greased sheet.Repeat the process and make 6-7 for a batch.Prick them using a fork which ensures that they don't puff up in oil.Remember we got thin crisp chekkalu,not the soft pooris.:)
  • Drop them carefully from sides of the kadai taking care that they don't get fold while dropping into oil and fry them and turn them to the other side and fry until golden brown in color.Always fry in medium hot oil otherwise low heat will result in very hard chekkalu and high heat will result in soft chekkalu.It is always better to taste in between to check whether you are getting the right crispiness or not.

  • Drain them on kitchen napkins to remove excess oil.When you fry them they would have light golden color which turns out deep dark brown in color after they become cool and they also become more crunchy afterwards.
  • Cool them and store them in air tight container.
Serve as a evening snack with a cup of tea.
Notes:
  1. Always use freshly ground rice flour(flour mill or home made) instead of the one available in grocery stores for good and crispy chekkalu.Rice flour quality is the key factor for the taste and texture.If the rice flour is very finely ground(like what we get in grocery stores) it will result in hard chekkalu,if it is mill ground with a slight coarse texture they yield good crackers.
  2. If you want to double the recipe,always add 1 tbsp butter per 1 cup of flour and adjust the other seasonings as required.The spice level is according to your wish and also add the chana dal in proportionately.
  3. If you are making in a larger portion,once all the ingredients are mixed well add water to only some portion and make the batch and then add water to the remaining batch.It is very important to do it in small batches else the dough becomes soggy and not gives crispy chekkalu.
  4. You can even add 1/4 cup ground fried gram powder to the dough which adds nice taste to chekkalu,it is optional though.
  5. You can add roasted,peeled and coarsely ground groundnuts(1/4 cup) to the dough,it gives very nice and distinct taste to it.

Monday, July 2, 2012

Mango Milkshake Recipe

I thoroughly enjoyed this summer season, eating plenty of mangoes.We get various varieties of mangoes here in Mumbai with my most favorite one's being Alphonsos and Kesar. The season for Alphonsos and kesar is almost over and we are left only with Dasheri and a few other varieties. While I had plans of posting several dessert recipes with ripened mangoes but could'nt post more than a few of them , more out of lethargy ..well some of the desserts were so good that they didnt last long enough for me to take pics :-). Still, I managed to post this recipe of a simple yet elegant mango milkshake which I made from the last batch of kesar mangoes.I like the deep orange color of these kesar and alphonso varieties which lends a nice color to the milkshake.
Mango Milkshake Recipe:
(Serves 2)

Ingredients:
1 ripen Mango(Alphonso/Kesar or similar variety)
2-3 tbsp Sugar *
2 cups cold Milk *
2 scoops of Vanilla ice cream or Mango ice cream(optional)
1 green Cardamom,seeded and crushed (optional)
LinkMethod:
  • Remove the skin and cut the mango into pieces.
  • In a mixer/blender add mango pieces, cardamom seeds,sugar and 1 cup of milk and blend into a smooth puree.Check the sweetness and if needed add extra sugar.
  • Add remaining 1 cup milk and vanilla/mango ice cream and run again to the desired consistency.Add more milk if you need a thin milkshake and also adjust the sugar accordingly.

Serve the chilled mango milk shake immediately.Notes:

  1. Sugar should be adjusted according to the sweetness of mango and to your desired sweetness.
  2. Milk also is to be adjusted according to your desired thickness.
  3. Addition of ice cream is entirely optional,it adds a nice creamy touch to milkshake.
  4. Cardamom enhances the flavor of mango milkshake,it is optional if you do not like any other flavor in mango milkshake.
  5. You can choose the mango varieties like alphonso,kesar,badam,raspuri which tastes best for this milkshake.
 
back to top