Thursday, January 7, 2010

Matar/Mutter Paneer

Hubby is a very big fan of paneer,so he insists me to prepare paneer dishes very frequently at home.Paneer in any form either in curries,rolls,gravies,pulao's,stir-fries,tikka's,soup's,salad's,sweets,paratha's or simple fried panner is very much loved by both of us and ofcourse who says NO to this yummy vegetarian delight.These days I have reduced using paneer at home because of its high calories,but including paneer in our diet regularly helps in attaining some essential proteins which vegetarians do not get in other food stuff.You can make this dish very creamy or low-cal curry according to your necessity.Matar paneer is a classic recipe and always turns out good even when no cream or nut paste is added to the gravy as the paneer itself gives nice taste to the curry.

Ingredients:

250 gms Homemade Paneer (or store bought),cut into 1" thickness pieces
3/4 cup fresh/frozen green peas,boiled
3 medium ripen tomatoes
2 medium onions,sliced
1" ginger,chopped
4-5 garlic pods,chopped
12-15 cashew nuts or 1/4 cup water melon seeds
1/4 cup fresh cream
1 tbsp tomato ketchup
a pinch of turmeric
1/2 tsp Garam masala
1 1/2 tsp kashmiri red chilli powder
1 tsp coriander powder
1/2 tsp jeera powder
1/2 tsp kasuri methi
1/2 tsp jeera
salt to taste
a pinch of sugar
2 tsp oil,oil for deep frying
1 tsp butter


Method:
  • Deep fry paneer pieces until light golden brown in color,drain them and immediately drop them in a bowl of water until its usage.This process will keep the paneer pieces soft.(Here,I did not deep fry the pieces,instead I fried them on both sides in a tawa applying a bit of oil on both sides and then soaked them in water)
  • Make a cross on tomatoes and blanch them in hot water for 3-4 mins.Remove the skin and chop them roughly.
  • Blanch the cashew nuts in the same hot water for a couple of minutes and remove them.
  • Heat 1 tsp oil in a pan and fry ginger and garlic pieces until slight brown,add sliced onions and fry until it is brown in color.Add a pinch of sugar while frying onion,it speeds up the caramelize process of onion.Let this mixture cool a bit.
  • Grind the onion mixture and chopped tomatoes into a very fine paste adding water if required.
  • Grind the cashews also to a very fine paste using the same water in which it is soaked.
  • Heat 1 tsp of oil in the same pan and crackle jeera and then add the pureed onion-tomato mixture into it and add coriander powder,jeera powder,turmeric,enough salt and let it come to a boil.
  • Add the finely ground cashew mixture and mix well,let it cook for a couple of minutes.Add more water to get the right consistency.
  • Now add paneer pieces,boiled green peas,tomato ketchup,red chili powder,garam masala and kasuri methi(slightly roast it on pan and crush it with your hand before adding) to it and mix well.
  • Stir in fresh cream and let it come to a boil on low heat and turn off the flame.( Here I did not add cream to the gravy)
  • Add butter to it and garnish with coriander.Adding butter atthe end will enhance the taste.
Serve it hot with Roti's/Paratha's/Naan/Kulcha/Jeera chawal/pulao.

Note:
  • I added watermelon seed paste instead of cashew paste as the fat content in water melon seeds is lesser than the cashew nuts.More over the taste provided by water melon paste to the gravy is better than the cashew nut paste,it gives a particular dhaba style gravy.
  • You can avoid cream in the above recipe and add little milk instead or completely avoid it for low-fat version.

Check out other Paneer recipes in my blog:

Monday, January 4, 2010

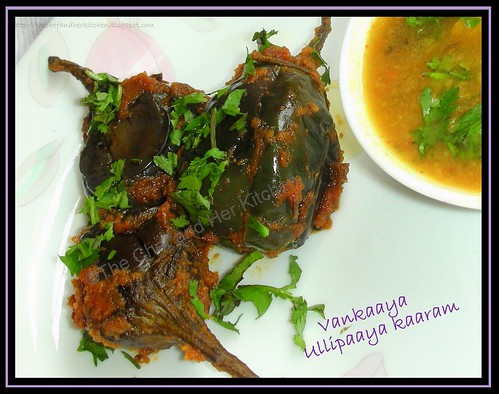
Vankaaya Ullipaya Kaaram / Stuffed Brinjal with Onion

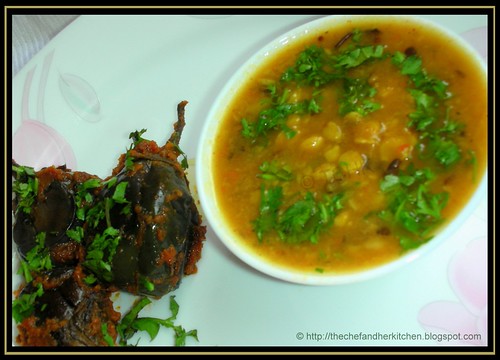
Stuffed brinjals are famous in Andhra Pradesh,we generally make different kind of stuffings for brinjal like ulli karam(Onion spice paste),kothimeera kaaram(coriander spice paste) and gutti vankaya(filled with spice powder mix).I learnt this stuffed brinjal from my MIL when she visited us last time.This is a very simple and tasty curry which can be prepared with easily available ingredients at home,and if you are a onion lover like me you are definitely going to love this.When I posted this recipe,many of you liked this stuffed brinjal more than the dal I posted(..ha..ha..) and have requested for the recipe,so here comes the recipe of this simple and yummy brinjal curry for you gals especially.

Ingredients:


6-8 small Brinjals

2 medium onions,roughly chopped
2 garlic pods(optional)
1 and 1/2 tsp red chilli powder(add according to your spice level)
1/2 tsp tamarind pulp
a pinch of turmeric
1/2 tsp mustard seeds
5-6 curry leaves
1 tsp chopped coriander
salt to taste

Method:
  • Wash and wipe brinjals and slit into 4 keeping the stem intact and immerse it in salted water.
  • Grind onion,red chilli powder,salt,tamarind pulp,turmeric and garlic pods to a coarse paste.
  • Heat 1tbsp oil in a kadai and add the ground paste and fry until the raw smell goes away(approximately 8-10 mins).Remove the paste and keep it aside.
  • In the same kadai heat 1 tbsp oil and drop the brinjals carefully in the oil and fry for 2 mins.Add little salt while cooking.
  • Cover it with a lid and pour some water into it and simmer the flame and let it cook for 8-10 mins until brinjals are tender and cooked.Switch off the flame and let them cool and stuff the brinjals with the fried onion mixture.
  • Heat a tsp of oil in the same kadai crackle mustard seeds and curry leaves and place the stuffed brinjals back in it and add remaining onion mixture to it and fry on medium high flame for 5-6 mins until it is evenly browned.
  • Garnish with coriander.
Serve it hot with hot rice and ghee or roti's.

Note:
1.You can follow the same process for making Tindora/Tendli ,Bitter gourd and Lady's finger.Cook the vegetables until they are tender based on the cooking time required for it and stuff it with the mixture.
2.The onion spice mixture can be used as a chutney for dosa,it tastes very nice when spread on the dosa.

Friday, January 1, 2010

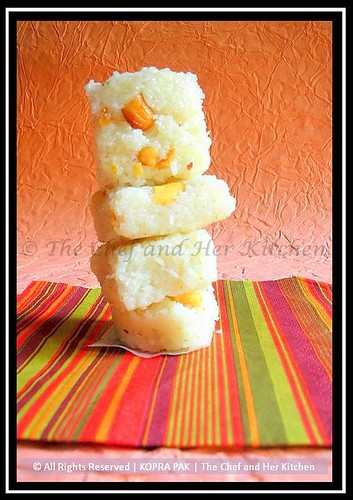
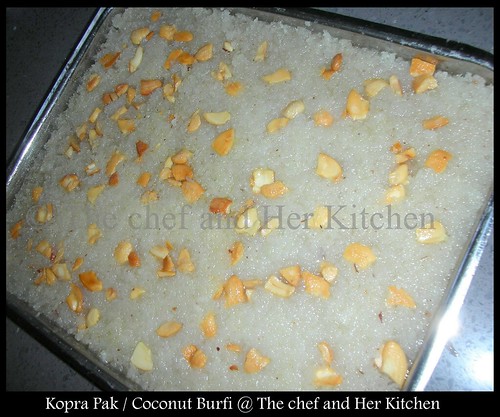
Kopra pak..Kobbari Mithai..Coconut Burfi...Happy New Year to all..!!


First of all lemme wish you all a HAPPY and PROSPEROUS NEW YEAR..!!!

Let us start the new year with a sweet post wishing this new year brings lots of happiness,health,wealth and fun in our lives.Kobbari Mithai is one of my favorite sweets as it is loaded with lot of nuts along freshly grated coconut and when mixed with sugar/jaggery makes an excellent combo.Even though the process is time consuming and bit difficult in scraping the coconut and making the syrup and stirring the mixture constantly,the end product is all worth the effort you put in it.These Burfi's are very soft to bite in and the crunchy nuts add the extra kick to this sweet.Let us get into the recipe soon before we get more tempted to take a bite..

Ingredients:

1 big coconut,grated fresh only white part(it yields 3 cups approx)
2 cups sugar
1/2 to 3/4 cup milk
20 cashew nuts,chopped
1/4 cup raisins(optional)
3 tbsp ghee for fudge
1 tbsp ghee for frying nuts
1 tsp ghee for greasing

Method:
  • Grate the coconut carefully,scrape only the white part leaving the brown edges behind in order to get an appealing snow white burfi.
  • Heat 1 tbsp ghee in a small pan and add chopped cashew nuts and fry until light brown in color.Remove them and add raisins and fry until it forms a bubble.Remove them and keep aside.(I did not use raisins here,just added only cashewnuts)
  • Grease a rectangular plate or square cake pan with ghee and keep it aside.
  • Mix milk and sugar in a thick wide bottomed vessel and place it on medium heat and let it come to boil.Let the sugar dissolves completed and blends well with milk and forms syrupy liquid(to reach one-string consistency).Using milk instead of water makes the burfi looks more white in color.The process of achieving string consistency syrup liquid is important in order to make a proper burfi.
  • Now add grated coconut and 3 tbsp ghee to it and stir well.Let it cook by stirring it constantly until the edges of the mixture in the vessel is bit dry and flaky.It approximately takes 10-12 minutes.
  • Now remove the mixture and spread it roughly on the greased plate/tin around 1/2" thickness.Sprinkle the fried cashews and raisins all over and gently press them all over with the ladle.
  • Level it using a flat ladle and let it cool and set for some time for about half an hour.
  • Run the knife to make markings in the burfi mixture.After some time carefully remove the burfi's.It approximately yields 24 square burfi's.
Store it in air-tight containers,stays good upto 5 days to 1 week.If you want longer shelf life keep them refrigerated.I am sure it will not last that longer,they are surely irresistible and would be over within 2 days.

Image source:google

Tuesday, December 29, 2009

Chilka Urad and Chana dal

Simple dal is a part of most comfortable meal in our daily life.I like experimenting dals in combination like toor with moong,moong with masoor,chana dal with whole moong dal,chana dal with chilka urad etc..This dal tastes definitely different in its texture also from regular dal and suites best as a side dish with roti's or pulao's.

Ingredients:


4 tbsp Chana dal
2 tbsp Chilka Urad dal(split black urad dal)
1 big tomato,finely chopped
1 medium onion,finely chopped
1/2" ginger ,finely grated
4-5 garlic pods,finely grated
1 tsp coriander powder
1/2 tsp jeera powder
1/2 tsp Garam masala
1 green chilli, slit
1/2 tsp jeera
a pinch of haldi/turmeric
a pinch of hing
1 tbsp chopped coriander
salt to taste
oil and ghee for tempering

Method:
  • Wash and soak chana and urad dal mixed for 10 mins.Add a pinch of turmeric to it.pressure cook dal for 2 whistles and reduce the flame and let it cook for 5-7 mins.
  • Heat oil and fry ginger and garlic and then add finely chopped onion and fry until it is brown in color.Add tomatoes and cook until it is mushy and add this to the dal mixture and let it come to a boil.Add salt and mix.
  • Add ghee in a tadka pan crackle jeera,slit green chilli,coriander powder,jeera powder,garam masala powder and hing.
  • Add the tadka to the dal and give a mix properly and add chopped coriander to it.
Serve it hot with hot rice/jeera rice/pulao or roti/paratha.

Thursday, December 24, 2009

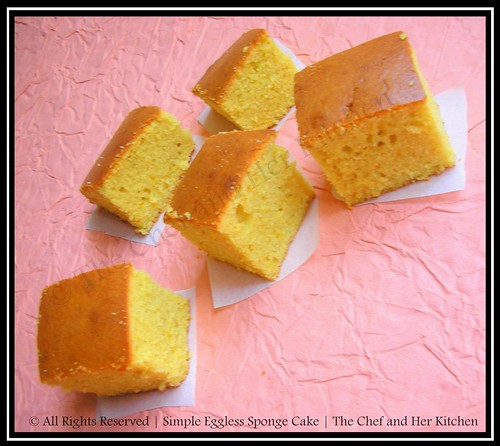
Simple Eggless Orange flavored Sponge Cake

The whole Blogosphere is full of Christmas celebrations showcasing different cookies,fruit cakes and special festive food in their beautiful blogs for this perfect occasion.Earlier,even I had some plans to bake a special fruit cake inspired by our enthu bloggers who started the preparations almost few weeks before for this christmas.Last week was completely hectic for me as my cousins visited us and we had a great time eating all possible food outside and have done tonnes of shopping with them.Due to the weather change I immediately caught cold and then cough and slight fever,I was down the complete last week with sore throat and spent the whole week swallowing N number of medicines and syrup's.So,I dropped my idea of baking cake which is loaded with loads of fat and calories.However I had a cake post pending in my draft from so many days seeking its attention,so thought of posting it for christmas even though it is not made for it.
And coming to the cake recipe,this is a eggless cake which I made for my mom (as she does not eat egg )during my last visit to Bangalore.When I saw this recipe here a couple of month's back
I loved the color and texture of the cake and I bookmarked it to prepare it for my mom especially.
I halved the recipe and almost followed the same method,just that I added apple cider vinegar and some extra sugar to the original recipe.The outcome was just fantastic,the cake was really moist,fluffy and loaded with orange flavor.This is definitely a fool proof eggless recipe which I treasure to treat the people who does not eat egg.No one can just say seeing the texture that it is eggless,please give a try to treat the pure vegetarians with this fool proof eggless sponge cake recipe.

Ingredients:

1 1/4 cup(190 gms) Refined flour/Maida

1/2 can(200 gms/ml) Condensed Milk
1/2 cup(125 gms) melted Butter,at room temperature
1/2 cup(125 ml) Orange Juice

3 tbsp powdered Sugar
1 tsp Vanilla Essence

1 tsp Apple cider Vinegar

1 tsp Baking Powder

1/2 tsp baking soda
1/2 tsp Orange Zest

Method:
  • Preheat the Oven @ 180 deg for 10 mins.
  • Line and grease a 8 inch square tin with butter and dust well with flour.
  • Sift the flour with baking powder and baking soda into a bowl and keep it aside.
  • In another bowl mix well with a hand whisker melted butter,condensed milk,orange juice,powdered sugar,vanilla essence and apple cider vinegar until everything is mixed well.
  • Make a well in the sifted flour mixture and pour the whisked wet ingredients mixture in the center and gently mix the mixture until you get a smooth and uniform mixture without lumps.
  • Add orange zest to it and mix well.
  • Pour the mixture into the greased square tin and tap it twice to remove the air bubbles formed if any.
  • Place this pan in the center of the oven and bake it for 35-40 mins until the crust is golden brown in color or if the tooth pick comes out clean when inserted into it.
  • After 5 mins remove it from the pan and let it cool on the wire rack.Cut into square wedges and serve.
  • Store it in the air tight container.
I wish all the bloggers and my readers MERRY CHRISTMAS and HAPPY NEW YEAR. Will catch you all in the new year.Till then enjoy your holidays and if possible will catch you with another post in this year.

Monday, December 21, 2009

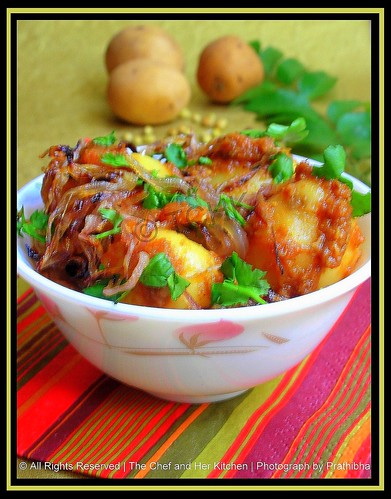
Baby Potatoes in Red Coriander Sauce

When I saw this recipe in Nag's blog almost 2 months back I liked the simplicity of ingredients used in making this curry , I tried it almost immediately but forgot posting it and was lying in my drafts from so long.The curry was so simple and flavorful which was made with minimun effort and ingredients available at home.However I modified the recipe a little bit to suit our taste buds,I added fried onions to the curry in order to balance the tangyness from the tamarind pulp and it turned out to be a perfect combination with roti's.

Ingredients:


12-15 baby potatoes
2 medium onions,finely sliced
1 1/2 tsp coriander seeds

1 1/2 tsp jeera seeds
4 garlic cloves
2 tbsp thick tamarind pulp
1 pureed tomato

A sprig of curry leaves
1/2 tsp sugar
2 tbsp oil

Salt to taste

Coriander leaves to garnish

Method:
  • Boil the potatoes in water or pressure cook for 2 whistles.Let them cool.Peel the skin.
  • Grind the coriander seeds with cumin seeds and garlic cloves to a coarse paste.
  • Heat 1 tbsp oil in a pan add ground paste,tamarind pulp and tomato puree,salt,sugar and curry leaves.Cook on low flame until oil separates.
  • Heat 1 tbsp oil in a pan and caramelize the sliced onions on medium flame until golden brown in color.Add a pinch of sugar to it while frying.
  • Add potatoes to the gravy and stir well and cook for 2 mins.Add fried onions to it and mix well.Reserve some fried onions for garnish.
  • Garnish with coriander leaves and some fried onions.
Serve it hot with roti's or pulao's.

Tuesday, December 15, 2009

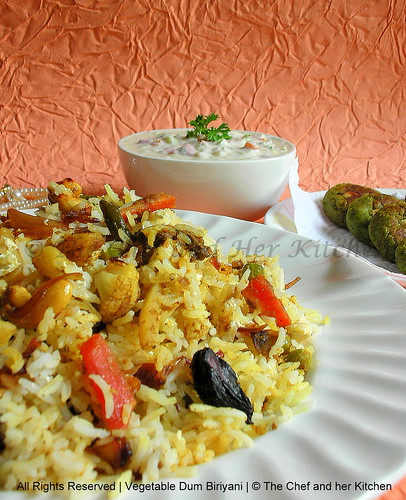
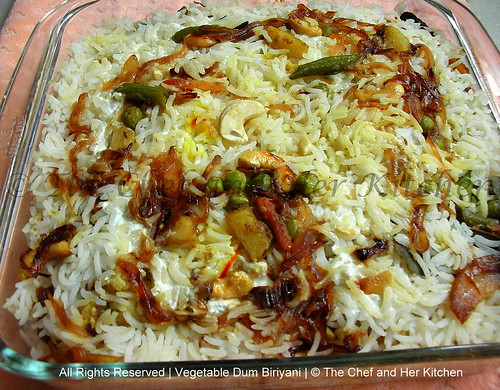
Vegetable Dum Biriyani... using ready made Biriyani paste

Vegetable Biriyani is a perfect feast for any occasion or a party.Even though it takes a lot of time to prepare this,the final dish is all worth the effort that you took in making it.Biriyani tastes the best when it is freshly made at home,but sometimes I try using ready made masala paste in order to ease the process in making it when I don't have much time to prepare fresh masala which involves lots of frying and grinding process.If you would have checked my earlier post I need not to mention that there was a reason behind making this yummy vegetable biriyani.Anyways if you have not seen my earlier post,I prepared this for my marriage anniversary last week and is the last dish from my anniversary menu.

Ingredients:

1 carrot,sliced into 1" pieces
1 potato,sliced into 1" pieces
10-12 french beans,chopped into 1" pieces
10-12 cauliflower florets
1/4 cup green peas,fresh/frozen
1 capsicum,sliced into 1"pieces
2 big onions,thinly sliced
1 tsp Ginger-Garlic paste
2 tbsp biriyani paste,I used MTR biriyani masala
8-10 cashewnuts
1/4 cup curd,beaten till smooth
few strands of saffron
1 tbsp milk to soak saffron
a pinch of sugar
salt to taste
2 tsp butter
2 tsp oil

To make rice:
1 1/2 cups Basmati rice
1 " cinnamon stick
3-4 cloves
1 Black cardamom
1 biriyani leaf
1/2 tsp royal cumin seeds(shajeera)
salt to taste
1 tsp Butter


Method:

Step 1
To make rice:
  • Wash and soak rice for 10-12 mins and drain the rice and keep it aside.
  • Heat 1 tsp butter in a deep pan and add cinnamon,shajeera,cloves,cardamom,biriyani leaf and fry for half a minute and add rice and fry for a minute.
  • Add 2 and 1/2 cups of water and enough salt to it and bring it to a boil and simmer it and close the lid and cook it until the rice is done.
  • After the rice is completely cooled make the rice fluffy with a fork and keep it aside.
Step 2 To caramelize Onions and cashews:
  • Heat 1 tsp butter in a pan add cashewnuts and fry until brown and keep it aside.Throw in the sliced onions and fry for some time.
  • Add a pinch of sugar to it and let it caramelize until brown.keep it aside.
Step 3 Saffron milk:

Heat the milk and dissolve the saffron in it and let it stand for 15 mins.

Step 4 To make the vegetable gravy :
  • Heat 1 tsp butter and 2 tsp oil and add ginger garlic paste and fry for half a minute.Add the chopped vegetables(other than capsicum) one by one and fry until crisp.
  • Add capsicum and fry for a minute and biriyani paste and fry for some time.Add some water(about 2 tbsp water) and salt required for the vegetables(remember you added enough salt even for rice) and keep it aside.
Step 5 To assemble the Biriyani:
  • Preheat the oven @ 160 deg for 10 mins.
  • Grease a flat oven proof glass bowl with butter and place a layer of half portion vegetables and then continue by a layer of half portion fluffed up rice.Pour half the caramelized onions, beaten curds over it and some saffron milk and repeat doing the same process for one more layer of vegetables,rice,fried onions,fried cashew nuts,curds and saffron milk.
  • Cover it with a aluminum foil and place it in oven and bake for 20-25 mins.
Slightly mix the biriyani and serve it hot with raitha and some gravy.


I am sending this entry for "EFM-Variety Rice Series" event hosted at Me and My Kitchen.

Thursday, December 10, 2009

Hara Bhara Kabab


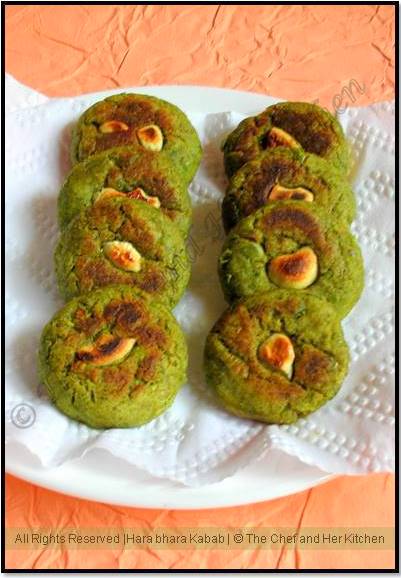
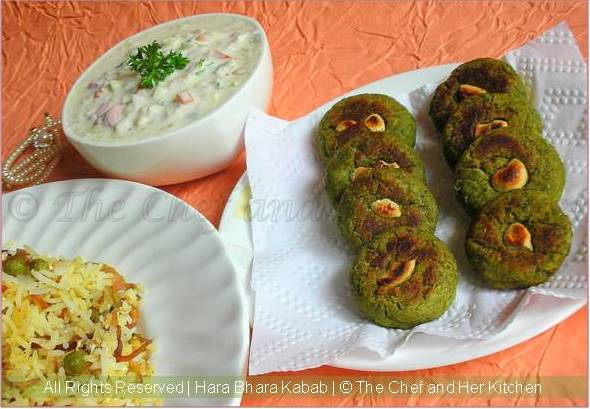
I love the green color of these kabab's and is one of our family's favourite starter and also is very ideal for a party snack.TH does not like me spending time in kitchen on a holiday and no need to say on a occasion,this time he gave a prior notice to me that I should not be cooking anything on our anniversary (excuses for tea..ofcourse!!!) and we planned our special day for a movie and few trips to the restaurants.But somehow I could not accept that I would not be preparing anything on the special occasion,so I thought of celebrating the day in advance with my home food.So I prepared veg dum biriyani and hara bhara kabab's in order to compensate the actual day celebrations at home.

Ingredients:

2 medium potatoes,boiled
1/2 cup green peas,boiled
1 cup fresh spinach,washed and pat dried
10-12 cashew nuts,halved
2-3 green chillies
1 1/2 " ginger,chopped
1/4 cup besan(chickpea flour)
1/2 tsp roasted cumin powder
1/2 tsp amchur powder
1 1/2 tsp chaat masala
2 tbsp finely chopped coriander
salt to taste

Method:
  • Dry roast besan until nice aroma comes from it.Turn off the stove and keep it aside.
  • Blanch spinach in hot water for 5 mins.Refresh in cold water,drain and squeeze water from it.Try to remove all the excess liquid from it.
  • Grind spinach with ginger,green chillies to a coarse paste(do not add water).Add boiled and drained green peas to it and grind in whipper mode until thick coarse paste.
  • Grate the boiled potato and add the ground mixture,roasted besan and all the masala's,salt and mix well.
  • Grease your hand and make small round tikki's and press a cashew gently into it.Follow the same procedure to do the remaining tikki's.Place them in refrigerator for sometime(for about 1 hr to set properly).
  • Shallow fry in oil on medium flame for 2-3mins until brown in color.(I placed them on a tava which is smeared with oil and fried on both sides on low flame with just 2 tsp oil).
  • Sprinkle some chaat masala all over before serving.
Serve hot with Green chutney/Tomato sauce/Dahi chutney.

These kabab's are going to participate in EC's -Tea Time Snacks Event.

Monday, December 7, 2009

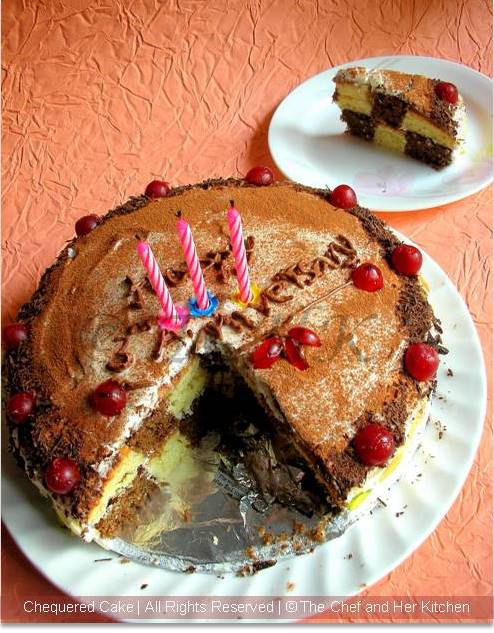
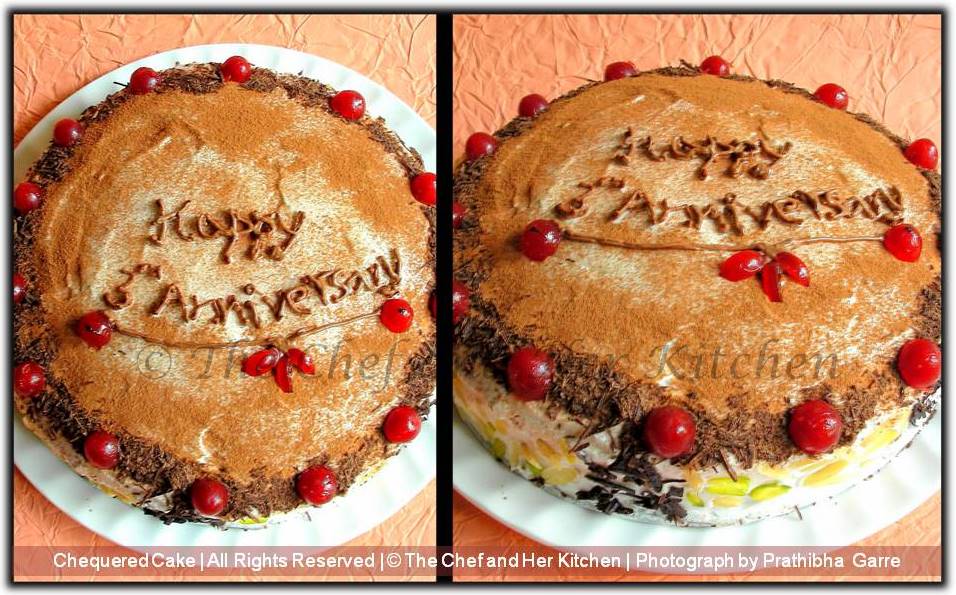
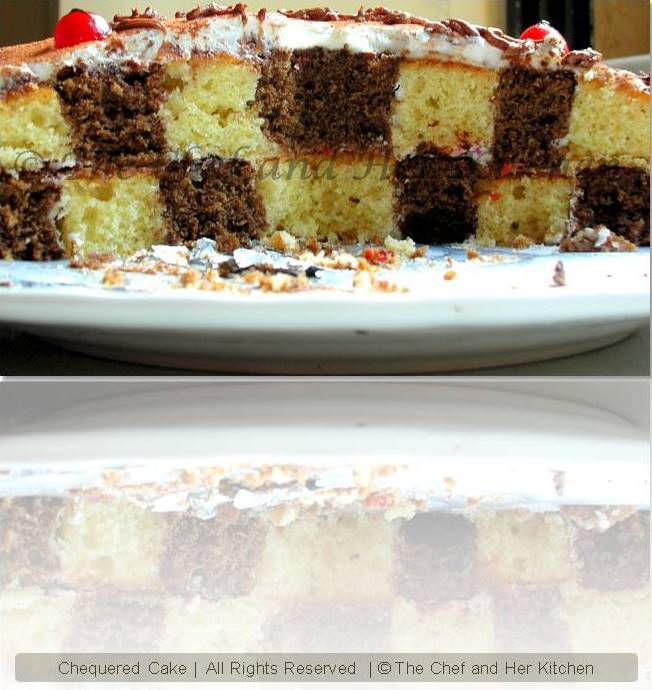
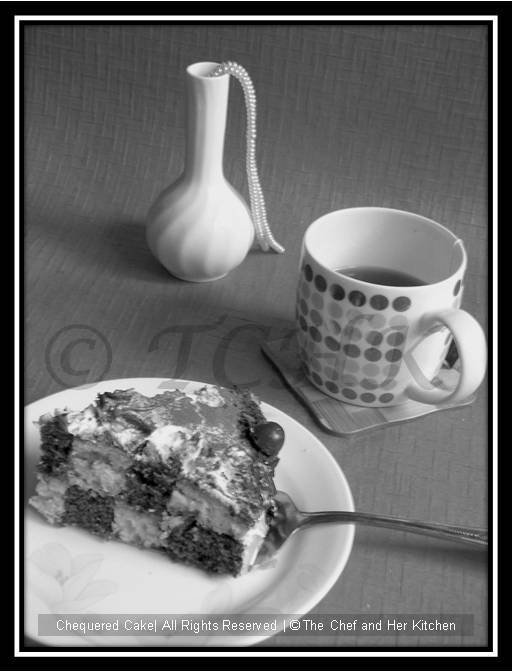
Chequered Cake.......Anniversary Special...!!!


When I saw sunita's Chequered cake I just fell in love with the technique which she mentioned for making the chequered cake without the use of any special pan meant for that purpose.I loved it so much that I have decided to make that for our third marriage anniversary(yesterday,6th dec).Check sunita's Eggless chequered cake version here for a detailed description.I personally thank sunita for posting the easy version of this chequered cake which I wanted to try from so long.
I wanted to make the classic yellow sponge and chocolate sponge cake to form the chequer pattern and I simply followed Nita mehta's recipe for making the cake.As I made it on a special occasion I made it rich by applying the cream all over the cake in order to make it bit special to suit the celebrations.
This time the marriage celebrations were more fun as we did a live telecast to our parents and in-laws over the internet while we were cutting the cake.Finally there was someone to clap and sing for us and took part of the celebrations along with us even though they were not around.
I was so tensed upto the time I cut the cake and when I saw the chequered pattern I was overwhelmed with joy and it was all worth the effort.The cake was very moist and light in taste and was a perfect cake for the special day.

Ingredients:

For yellow sponge :
3/4 cup Refined flour/Maida
2 Eggs,at room temperature
1/3 cup oil
1/2 cup powdered Sugar
1 tsp vanilla essence
1 tsp leveled baking powder

For chocolate sponge:
1/2 cup Refined flour/Maida
1/4 cup Cocoa powder
2 Eggs,at room temperature
1/3 cup oil
1/2 cup + 2tsp powdered Sugar
1 tsp vanilla essence
1 tsp leveled baking powder

For Cream:
2 cups thick cream(chill the cream tetra pack without shaking the pack,take only thick part and discard any water content)
1/2 cup powdered Sugar

For decoration:
100 gms Chocolate
1 Pack of cherries
8-10 Almonds
8-10 pistachios
1 tbsp cocoa powder

For the Sugar Syrup:
1/2 cup water
1/4 cup sugar
4 to 5 drops of lemon(optional)

Method:

Yellow Sponge:
  • Line a 9" round tin with a baking paper and grease it with oil and as well the sides of tin.
  • Sift flour and baking powder together.
  • Separate egg whites from the yolks.
  • Beat egg whites in clean dry bowl till fluffy.
  • Add Sugar gradually,beating till thick,fluffy and retains shape.
  • Beat in the yolks and essence till thick and fluffy again.
  • Add oil gradually,beating till thick again.
  • Fold in flour gently with a wooden or metal spoon,by sprinking evenly in 2-3 batches.
  • Pour mixture into tin and level the top.Tap the tin gently to get rid of any large air bubbles.
  • Bake in preheated oven at 180 deg for 20 mins.
  • Insert knife or skewer in the center of cake,if it comes out clean ,remove tin from oven.After 5 mins,remove cake from tin onto a wire rack and let it cool.Cool the pan completely before proceeding to make the chocolate sponge.
Chocolate Sponge:
Follow the same procedure as the yellow sponge cake just that add cocoa powder and sieve all the ingredients in the second step.

Sugar Syrup:
Boil water along with sugar until it forms a nice syrupy liquid,strain the water and let it cool.Add lemon juice to it and mix and keep it in fridge.

Cream to spread:
  • Beat the cream on medium speed till thick.
  • Only after it turns thick,then add powdered sugar and continue beating on high speed till you get the soft peaks.Chill it for some time.
  • Divide the mixture into 3 parts.Reserve one part for topping the cake.
  • Add very finely chopped cherries to the cream and gently fold in.
  • Take out 3-4 spoons of whipped cream from the third portion and mix with 1 tbsp cocoa powder and pour it into the cone made up of baking paper and let it stand in a glass and keep it in the refrigerator until its usage.

Assembling the cake:
  • Level the cake gently using a knife(to cut) to form a uniform surface.
  • Based on the size of your cake take 2-3 cutters which form similar symmetric hollow circles gives 1" width for each circle.As I did not have cookie cutters I used steel containers from my kitchen cupboard.
  • Gently press the cake with the cutters to get different symmetric circles and place them aside .
  • Place a chocolate sponge on the serving platter.Apply plain cream to the inner circles of the cake and apply cream again.Do the same with the remaining 1-2 circles to form first layer of the cake.Follow the same procedure to make the second layer and keep it aside.
  • Pour the lemon-sugar syrup mixture all over the cake to make it enough moist.
  • Apply a thin layer of cream(mixed with finely chopped candied cherries) and place the second layer of the cake.
  • Pour again the lemon-sugar syrup mixture all over the cake to make it enough moist.
  • Apply the plain cream all over the cake and make sure that it is uniformly applied all over and on the sides.
  • Stick the finely sliced almonds,pistachios and chocolate shavings on the sides of the cake according to your taste or like I have done for my cake.
  • Sieve gently the cocoa powder on top of the cake all over.(And slowly write the message using the cone).This step is completely of your choice and to your creativity.do it in the way you want.
Chill it in the refrigerator and slice it gently and serve chilled.


Note:
  • I used a ready mix whipped cream packet for making cream and it took hardly 3 mins for me to finish up the whipping process.
  • Slice the cake using sharp knife dipped in hot water to get clean cake wedges.


Enjoy the slice of cake with a cup of tea.

Friday, December 4, 2009

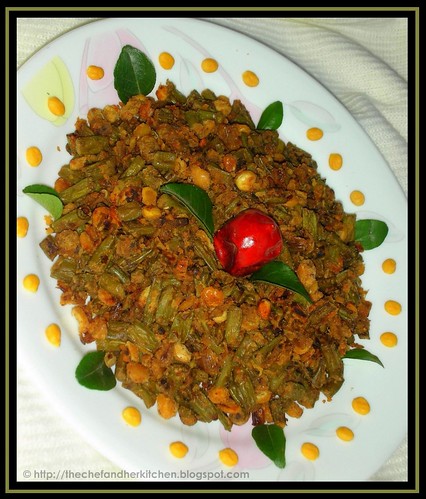
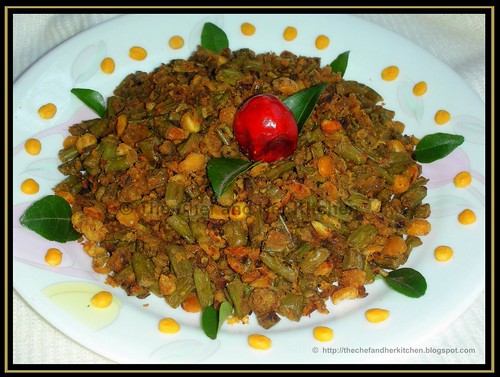
Yard long beans - Chana dal Stir fry

Yard long beans when combined with chana dal makes an excellent combination for rice as well as roti.Beans,dal and garlic chilli powder adds a unique taste to the curry which is very well balanced in flavor.

Ingredients:

1 Bunch of Yard long beans
1/2 cup chana dal

1 big Onion,finely chopped

1/4 tsp turmeric

1/2 tsp mustard seeds

A sprig of curry leaves

2 garlic cloves,chopped and crushed
Oil


To grind:

5-6 dry red chillies
2-3 tbsp grated dry coconut

4-5 garlic cloves

salt to taste


Method:
  • Wash and wipe the yard long beans and chop them into 1/2 inch pieces.
  • Pressure cook chana dal for 1 whistle or cook it on stove top until it is done.Take care that the dal will not become mushy.Drain it and keep aside
  • To make Garlic Chilli powder grind red chillies along with grated dry coconut and salt to a coarse powder.Add garlic cloves to it at the end and grind again.
  • Heat oil in a deep bottomed tawa and crackle mustard seeds.
  • Add crushed garlic,curry leaves and fry for a minute.Add finely chopped onions and fry until they are translucent.
  • Add the chopped beans and fry for 2-3 mins.Cover it with a deep bottom plate and fill it with water and let the beans cook on steam for 12-15 mins until the beans are tender.
  • Add chana dal to it and fry for 4-5 mins.
  • Add the ground spice powder to it and mix and let it cook for a couple of minutes.
  • Remove it from fire and serve hot.
Serve it hot with hot rice and fryums/papad or serve it with roti.

Note:
You can use cluster beans/gawarphali/goru chikkudu instead of yard long beans in this recipe and follow the same procedure.Just that you need to parboil o pressure cook cluster beans before proceding to make the curry instead of steam cooking it.

This is going to participate in
MLLA-18 hosted by Srivalli of Cooking 4 all seasons event started by Susan of The Well-Seasoned Cook.


back to top