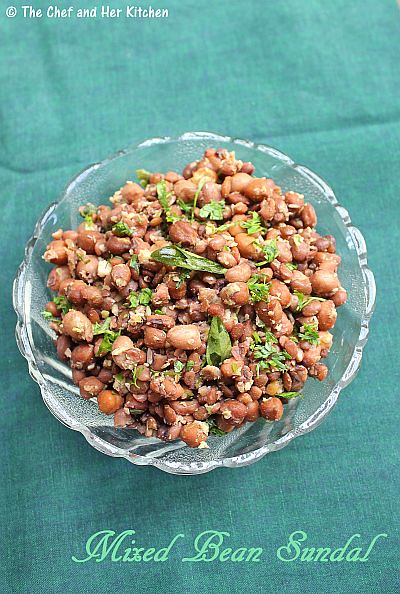
Showing posts with label Chickpeas | Kabuli Chana. Show all posts

Monday, March 16, 2015

Chole Biryani | Chickpeas Biryani | Chole Dum Biryani Recipe

chole biryani
Biryani or Pulav appears mostly on sundays for lunch at our place as hubby dear prefers a one pot meal for lunch .Both of us are big fans of a good dum style Biryani but the preparation process for dum Biryani is quite elaborate,hence I do it occasionally or when both of us crave for it.So most of the times I end up preparing a simple one pot kind of Biryani than the dum biryani as it is time consuming.
chickpeas biryani
There are various styles of cooking Biryani like Lucknowi Biryani, Awadhi Biryani ,Calcutta style Biryani, Hyderabdi Dum Biryani,Mughlai Biryani,Kashmiri Biryani etc.I myself have never experimented much on cooking various styles of Biryani.I think its high time for me to understand the differences in their preparation process and start cooking all these delicious Biryanis to treat my family.Today I am sharing Chole Biryani which is definitely a change from the regular Vegetable Biryani, the process of cooking the Chole Biryani I adapted is very similar to the Vegetable Biryani.I usually prepare fresh Biryani masala when I prepare Dum Biryani as the aroma of freshly prepared masala takes the biryani to another level.But if you are short of time you can use either store bought Biryani masala or the home made Garam masala instead.One can follow the same procedure to prepare mixed vegetable biryani by using all mixed vegetables instead of chickpeas in the recipe.
chickpeas biryani

chana biryani

If you are a Biryani lover,check out various Biryani Recipes in my blog:
Also,you can check out various Rice varieties and Pulav recipes in my blog here.
chana biryani

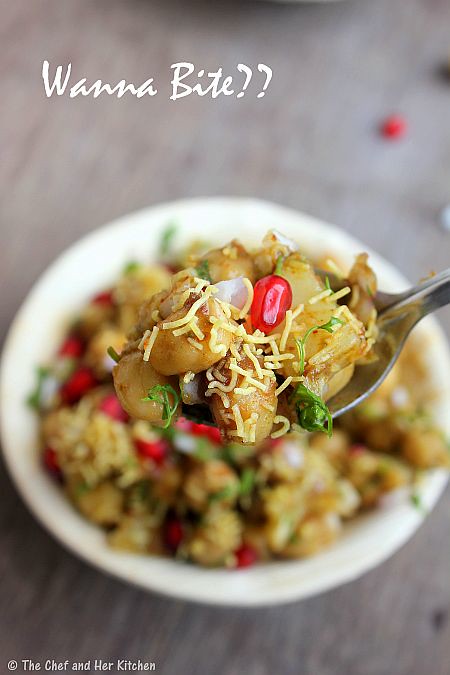
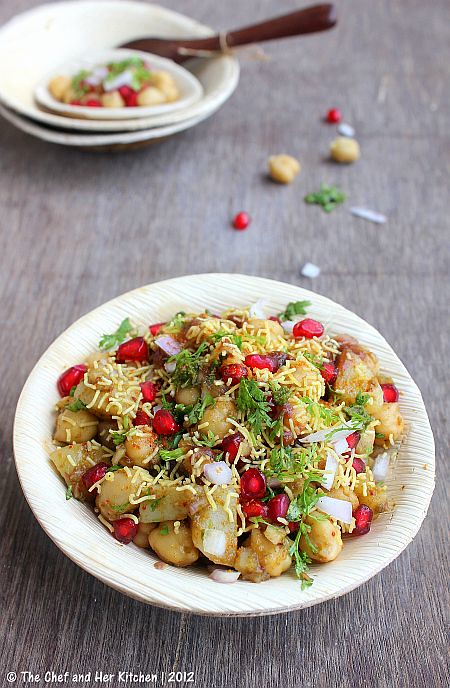
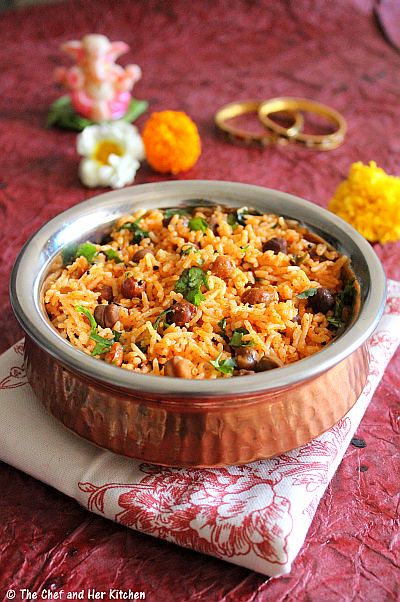
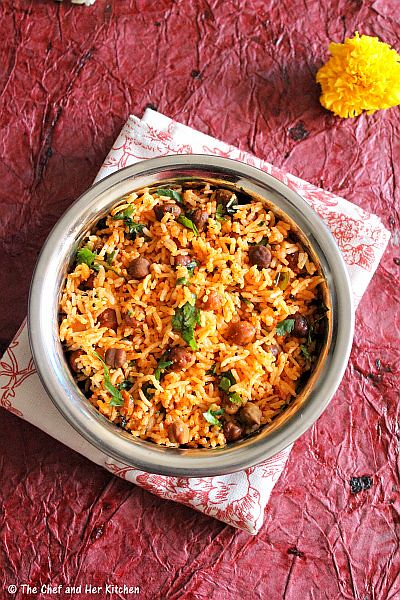
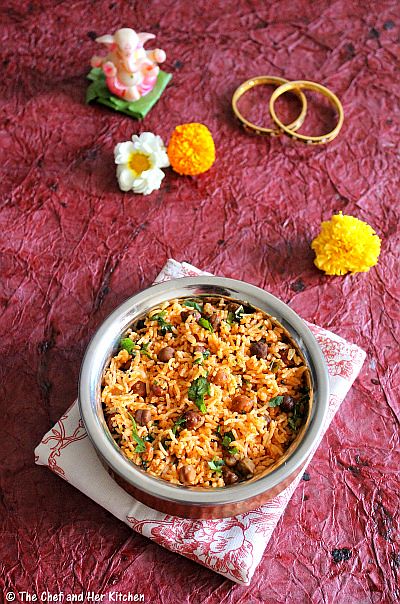
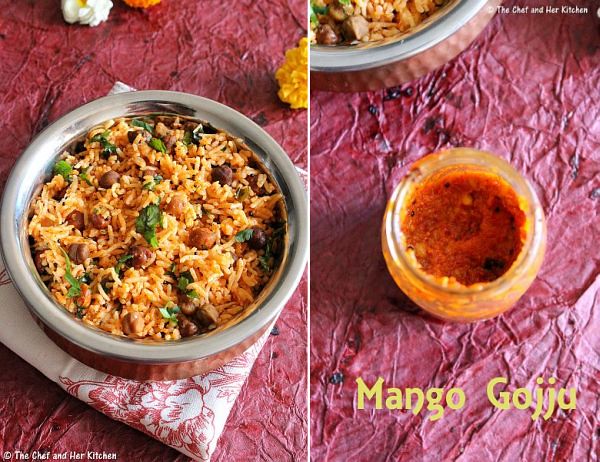
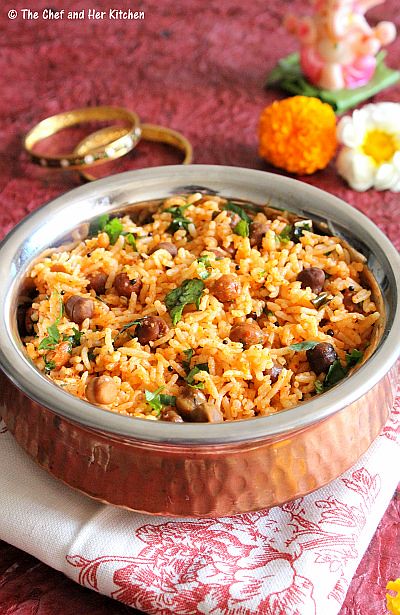
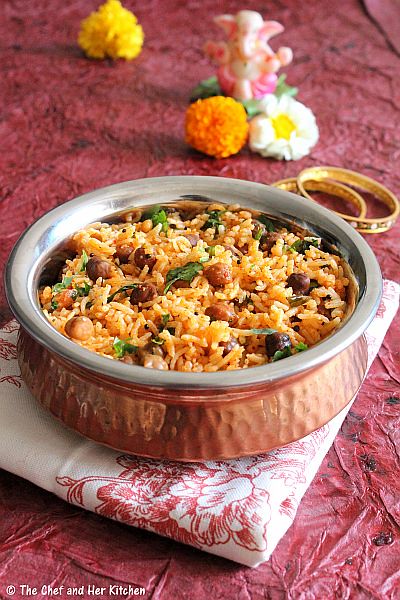
Chole Dum Biryani Recipe:
Serves 3-4
Prep time:30 mins | Cooking time: 1 hr | Total time: 1 hr 30 mins
Cuisine:North Indian | Category: Main Course-Biryani

Ingredients:
for Rice:
2 cups Basmati Rice
6-7 cups Water
1 Bay Leaf
1" Cinnamon
3-4 Cloves
2 tbsp Ghee
1 tsp Salt

for Chole gravy:
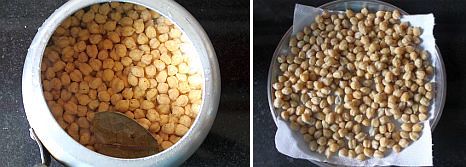
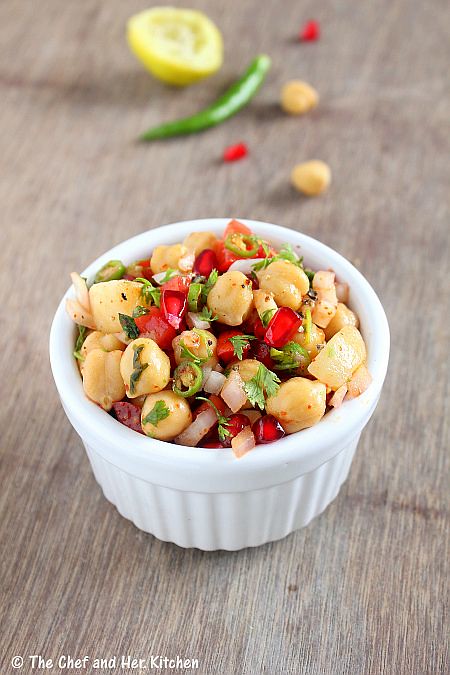
2 cups cooked white Chickpeas
2 medium Onions,chopped
3 Tomatoes,finely chopped
1 tsp ground Biryani Masala( or Garam masala)
2 tbsp chopped Coriander leaves
Salt to taste
3-4 tbsp oil

to roast and grind to a powder- Biryani Masala:
2" Cinnamon
4-5 Cloves
1 tsp Coriander seeds
1/2 tsp Cumin seeds
1 Cardamom
1 tsp grated Nutmeg

to grind to a paste:
5-6 Red Chillies
2 tsp Fennel seeds
6-8 Garlic cloves
1 1/2" Ginger

other Ingredients:
1/2 cup beaten Curd
1/4 cup chopped Coriander leaves
1/4 cup chopped Mint leaves
10-12 Cashew nuts
2 tbsp warm Milk
12-15 Saffron strands
2 large Onions,thinly sliced
Oil,to deep fry
2 tbsp Ghee

Method:
prior preparations:
  • for Saffron milk: In 2 tbsp warm milk add slightly mashed 12-15 saffron strands and set it aside for 10 mins.
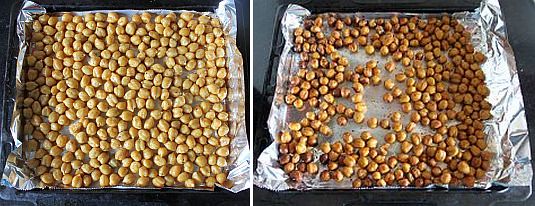
  • for Caramelized Onions: Deep fry finely sliced onions in oil until they turn crispy and slightly brownish in color. Drain them onto a paper towel.
  • to prepare spice powder: Dry roast all the ingredients mentioned under to roast and grind for biryani masala and grind to a fine powder.
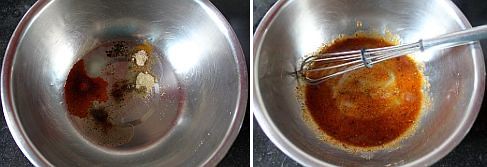
  • to prepare the spice paste: Soak red chillies and fennel seeds in hot water for  half an hour and grind them with ginger and garlic to a fine paste.
  • to fry Cashewnuts: Heat 2 tsp ghee in a pan and add whole cashew nuts and fry them until they turn light brown in color and remove them and keep aside.
to prepare rice:
  • Wash and soak basmati rice for 15 mins.
  • In a large pot bring water to a boil add bay leaf,cinnamon and cloves,ghee,salt and soaked rice and cook until the rice is 3/4th cooked. Drain all the water and run cold water through the rice to stop any further cooking.
to prepare Chole gravy:
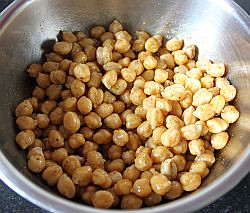
  • Heat oil in a pan and fry onions until they turn transparent. 
  • Add the ground chili-spice paste and fry until the raw smell is gone. 
  • Now add finely chopped tomato and fry until it is pulpy.
  • Add the cooked chickpeas,a tsp of freshly ground biryani masala and salt and 1/2 cup of water and let it simmer nicely for 8-10 mins until the chickpeas absorbs all the flavors and the mixture becomes slightly dry.
  • Lastly add coriander leaves and mix well.
Putting the chole biryani together:
  • Divide the cooked rice into 3 equal parts and the Chole gravy into 2 equal parts.
  • Take a heavy bottom pan (I used heavy steel here) and apply generous amount of oil/ghee at the bottom of the pan and start the layering process in the following way.
  1. a layer of thinly sliced onions(optional,I added it as I did not deep fry many onions for the other layers)
  2. Spread one layer of chole gravy on the onions(if using) or at the bottom.
  3. Spread one layer of Rice.
  4. Spread 1/2 cup beaten curd,one half of the caramelized onions,1/2 tsp of freshly ground Biryani Masala, half of Saffron Milk, 2 tbsp of Coriander leaves and 2 tbsp of Mint leaves.
  5. Spread one more layer of Rice.
  6. Spread the rest of the chole Gravy.
  7. Spread the last layer of Rice.
  8. Top it with the left over caramelized onions, fried cashewnuts, 1/2 tsp ground biryani masala, saffron Milk and the remaining coriander leaves and mint leaves.
  • Then add 2-3 tbsp milk and  2 tbsp of ghee from the top and cover the vessel with aluminium foil and cover it with lid and fold the foil carefully and try to seal the gap in between the vessel and the lid. Place this vessel/pot on a thick tawa and cook on medium flame for 15-20 mins or till it is completely cooked.You can alternatively bake this in oven at 170 deg C for 15-20 mins.
Serve it with Onion-tomato raita or Boondi raita with chips/papad/salad.
chole biryani
Notes:
  1. You can follow the same procedure to prepare mixed vegetable biryani by using all mixed vegetables, you can even deep fry the vegetables if you want it more rich.
  2. You can add potatoes to the chole gravy if you like it.
  3. Use good quality basmati rice for more finer rice.
  4. I used minimal spices while boiling the rice, you can use more spices like mace, peppercorns,star anise along with the spices I used.
  5. I highly recommend to use deep fried onions as it lends a nice taste to biryani. Here I used deep fried onions just for the top layer and hence I used sauteed onions as the first layer.
  6. You can use Garam masala instead of the freshly ground masala mentioned in the recipe.

Wednesday, November 6, 2013

Pindi Chole | Rawalpindi Chana Recipe

pindi chole
I prepare Chole or Rajma at-least once a week and if I run out of them, I end up with options like Lobia, black peas etc.TH prefers black chickpeas over the white one, as he likes the nutty taste of the black chickpeas; hence the black chickpeas get featured at our place more than the kabuli chana does.Though my ideal option for chickpeas would be the Punjabi Chole version,but it is quite boring to prepare the chole in the same way hence I always look out for various options.You can prepare chickpeas in various forms like Pindi Chole, Kadai Chole, Chana masala(with coconut), Kala chana masala, Punjabi Chole, Methi Chana, Chana Palak, Kadala curry etc. This post is on the preparation of Pindi Chole recipe. I will post the other varieties later.
pindi chana masala
Pindi Chole or Rawalpindi Chana emerged from the name of Rawalpindi, a place in Pakistan. Pindi Chole is prepared in a different way from the usual chole recipe. In Pindi chana there is no onion and tomato used and it is totally prepared with the spices and is made dry unlike the regular chole.The addition of freshly pound spices and dried anardana powder along with amchur adds a nice tang to the recipe.I have adapted the recipe from SK's site but I toned down the spices and masalas to suit our taste buds.Pindi chana is a great combination with parathas or pooris/bhaturas. Serve it along with onions,green chillies on the side and add lemon juice to the chole; this combination will elevate the taste to a different level.
pindi chana

Pindi Chole | Rawalpindi Chana Masala Recipe:
Serves 2-3
Prep time: 10 mins | Cooking time: 15 mins | Total time: 25 mins + 25 mins of chole cooking time
Cuisine: North Indian | Category: Side Dish - Main Course

Ingredients:
to cook chole:
1 cup white Chickpeas(Kabuli Chana)
1 Tea bag
1 Biryani leaf
1" Cinnamon + 2 Cloves

Spice mix:
1 tbsp Coriander powder
3/4 tsp Red chili powder
1 tsp Amchur(dried mango) powder

to roast and grind:
1 tbsp Cumin seeds
2 tsp Anardana(dried Pomegranate seeds)

other ingredients:
2-3 tbsp Oil
1-2 Green Chilies,roughly chopped
1 tbsp Coriander leaves,to garnish

to serve:
Onion,finely chopped
1 Green Chilli,finely chopped(optional)
Lemon wedges

Method:
  • Wash and soak chickpeas for 7-8 hrs or overnight. Drain the water and rinse it again and add fresh water (2-3 cups) and add biryani leaf, tea bag, cinnamon, cloves and salt and pressure cook for 1 whistle and simmer it for 20-25 mins.Once the pressure drops, fish out the spices and tea bag and drain and reserve the cooked water.
  • Dry roast cumin seeds until they are dark brown in color and remove it aside,do not burn them.In the same pan dry roast anardana and keep it aside.Once they come to room temperature grind to them a powder,slightly coarse is fine.
  • Meanwhile mix red chili powder, coriander powder and amchur powder and keep it ready.
  • Heat oil in a deep curved pan and add ginger-garlic paste and cut green chilies and fry for a minute until they loose their raw smell.
  • Reduce the flame and quickly add mixed masala of red chili powder,coriander powder and amchur powder and fry for half a minute.Be careful and make sure you do not burn the masala.
  • Add 1/4 cup of reserved cooked water to it and let it boil until the oil floats.Add the boiled and drained chickpeas and enough salt(remember we added salt while cooking chickpeas as well) to it and cook until the water evaporates.
  • Add garam masala, roasted cumin and anardana powder to it and mix well and cover it and cook for 3-4 mins.If you want you can add a tbsp of water and cook if the chole is very dry.
  • Garnish with coriander.
Serve it hot with Poori/Naan/Phulka/Bhatura with chopped onions,green chillies and lemon wedges. Mix the chopped onions and green chillies and add lemon juice to the pindi chana before eating.
pindi chole
Notes:
  1. You can prepare this with black chickpeas.I usually prefer black chickpeas over the white ones.
  2. If you like you can add a chopped tomato along with the garam masala and other spices at the end as the original recipe suggested.
  3. It tastes nice when it is made spicy but you can adjust the spices according to your wish.Instead of chopping the green chillies,you can add slit green chilies in the recipe.
  4. I used home made Garam masala and Ginger Garlic paste, if you are using store bought ones increase them to 1 tsp garam masala and 1.5 tbsp  ginger garlic paste in the recipe.
  5. If you want you can add 1 tsp Chole masala along with the other spices in the recipe. 
rawalpindi chana

Sunday, April 28, 2013

Spicy Oven Roasted Chickpeas Recipe | Low Calorie Snacks

Low Calorie Snacks
The morning time on a week day would be busy in packing breakfast, fruits and snack box for TH as  he leaves quite early in the morning. I usually pack the breakfast for him and most of the times it would be Muesli,Cereals,Sandwich,Burger and sometimes south Indian breakfast items.As he works for long hours, apart from the breakfast, I also pack fruits and a few snacks.Both of us usually prefer to take small meals through the day rather than having a three meal day.  
Low Calorie Snacks
I am always on the look out for healthy and low fat snacks.While I do prepare various instant varieties like salads,sundal etc, I always look for snacks which could be prepared ahead and stored for a few days.This oven roasted chickpeas is one such recipe, which I prepare very frequently as both of us love chickpeas in all forms. This is definitely a protein packed and low fat snack which is perfect to munch with your evening cuppa.I am posting the chatpata Indian style roasted chickpeas. The flavors are very versatile and one can be creative in the use of flavors.
Low Calorie Snacks
You can check out few low fat snack recipes in my blog.I would add few more snacks soon.

Spicy Oven Roasted Chickpeas Recipe:
shelf life: stays crisp for 2 days,but can be stored up to a week

Ingredients:
2 cups white Chickpeas / Kabuli Chana(or Kala chana)
1 Bay leaf
1/4 tsp strong home made Garam masala or 1/2 tsp ready made garam masala

to marinate:
1 tbsp Olive oil
1 tsp Red chili powder
1 tsp Chaat masala
1/4 tsp Turmeric powder
1/2 tsp Amchur powder
1/4 tsp Pepper powder
1 tsp Salt(or to taste)

Method:
  • Wash and soak chickpeas for 7-8 hours or overnight.Pressure cook chickpeas with a bay leaf and garam masala  for 2 whistles and reduce the flame and keep it for 5-6 mins.Switch it off. Once the pressure drops drain the chickpeas and spread them as a thin layer on a kitchen towel and let the moisture dries up.
  • In a bowl add olive oil, red chili powder, pepper powder, chaat masala, turmeric powder, amchur powder and salt and whisk well.
  • Add the drained and dried chickpeas to the mixture and mix it nicely and let it marinate for half an hour.
  • Line a baking tray with a silver foil and spread the marinated chickpeas in a single layer.
  • Bake it in the oven at 160 degrees for 30-35 mins until they turn crisp.Try to mix them in between once or twice.Keep an eye after half an hour,they might get burnt.Every oven differs in time and temperature,so judge them accordingly.When you touch them after they are done they would be slightly soft and they would become crisp once they are cooled down completely.
Store them in air tight container.They stay crisp for 2-3 days.
Notes:
  1. I make it in small quantities and finish them in 2-3 days.I think you can keep the roasted chickpeas up to a week.
  2. You can play with the flavors for chickpeas.You can experiment with garlic,pepper powder and salt or adjust the spices according to your wish.
  3. Every oven differs in time and temperature,so judge them accordingly.
  4. You can use kala chana(black chickpeas) instead of white chickpeas in the recipe. 
 

Wednesday, November 28, 2012

Chickpeas Salad | Chana Salad | Healthy Salad Recipes

I usually prefer salads for a light weekday dinner along with a small bowl of soup or toasted bread slices.I prefer these kind of protein rich beans salad as they are not only tasty they are even very filling too and hence can be eaten as a meal by itself.One can play with the ingredients that go in the salad and prepare it according to their wish.This is a very versatile salad and can be prepared with various beans.
Chickpeas Salad Recipe:
(Serves 2)

Ingredients:
1/2 cup Chickpeas/Kabuli Chana
1 medium Potato
1 small Onion,finely chopped
1 small Tomato,seeded and finely chopped
1/4 cup Pomegranate Kernels
2 tbsp finely chopped Coriander
2 tbsp Mint leaves,torn with hands
1 Green chilli,finely chopped

for dressing:
2 tbsp Extra virgin Olive oil
3/4 tsp Chaat masala
1/4 tsp Red chili powder
1/4 tsp black Pepper powder
1/4 tsp roasted Cumin powder(optional)
juice of 1/2 Lemon
Salt to taste
Method:
  • Soak chickpeas overnight for 8-9hrs and wash them and pressure cook with enough water for 3 whistles,reduce the flame and cook for another 5-8 mins.Chickpeas should cook thoroughly and soft but firm and also should not become mushy.Drain them and keep them aside to cool.
  • Pressure cook potato for 3 whistles along with chickpeas or separately.Let it cool completely and then peel the skin and chop into small cubes.
  • In a small make the dressing mix in olive oil,lemon juice,salt,chaat masala,red chili powder,black pepper powder,roasted cumin powder and give a nice stir using a small wire whisk until you get a uniform paste.
  • Take a big bowl and add boiled chickpeas,boiled and chopped potatoes,finely chopped onion,tomato,green chilli,coriander leaves,pomegranate kernels and give a nice stir.
  • Add the dressing and check the taste of it and add any seasoning like salt or spice to suit your taste buds.
  • Serve them into two individuals bowls.Garnish with chopped coriander.
Serve the Salad immediately. You can even refrigerate for sometime and eat,it tastes good too.
 Notes:
  • You can follow the same recipe replacing white chickpeas with Black Chickpeas or Rajma in the recipe and follow the same recipe.
  • If you do not have olive oil you can skip it and proceed with the same.
  • I love the bite of pomegranate kernels in the salad,you can even add roughly chopped walnuts or pecans or raisins in the recipe.
  • You can even add finely cubed cucumbers to the recipe along with onions and tomatoes.

Tuesday, October 16, 2012

Kala Chana Sundal | Black Chickpeas Sundal | Navarathri Recipes

Happy Navratri to all!!

Today is the first day of Navaratri and I offered kala chana sundal as prashad and I am here to share the same in my space.I love the way how my Tamilian friends pronounce it,they call it 'Konda Kadalai Chundal'.Check out the various Navarathri recipes here for various sundal, kheer, snack and rice varieties.
We always make a variety of sundal for any festival as it not only adds the number of items to the menu but also it is very easy to prepare and an absolutely guilt free snack to compensate the extra calories from the fried stuff and sweets made on festivals.Hubby is a big fan of sundal especially when made with kala chana.It is a perfect guilt free snack which can be served as a snack or as a side dish in lunch or breakfast.
Kala Chana Sundal | Konda Kadalai Sundal Recipe:
(Serves 3-4)

Ingredients:
1 cup Black Chickpeas/Kala Chana
2-3 tbsp grated fresh Coconut
3-4 Green chillies,sliced
1/2" Ginger,grated
juice of 1/2 lemon
Salt to taste

to temper:
1 tsp Urad dal
1-2 Red chillies,broken
1/2 tsp Mustard seeds
a sprig of Curry leaves
a pinch of Hing
1 tbsp Oil
Method:
  • Soak Kala Chana overnight or at least for 8-9 hrs and pressure cook for 3 whistles until soft,I generally pressure cook for 2 whistles and cook on low flame for 5-6 mins for making sundal.The Chana should be soft and firm to touch and should not be either hard or mushy. You can add salt while cooking chana or add it at the time of tempering.
  • Drain the chana and keep it aside,you can use this drained water to make healthy rasam.
  • Grind grated coconut,ginger and green chillies to a coarse paste in whipper mode.
  • Heat oil in a kadai and crackle mustard seeds and add urad dal and red chillies and let them turn slight brown.
  • Add hing,curry leaves and ground coconut-green chilli-ginger paste and fry it for a minute.
  • Add cooked and drained kala chana and required amount of salt and mix well and cook it on low flame for 2 mins.Do not fry them for long as it makes the sundal very dry.
  • Switch off the flame and add lemon juice and mix well.
Serve them hot,warm or cold as a snack or with lunch.
Variations:
  1. You can replace kala chana with white chickpeas,lobia,green gram,yellow peas or chana dal for variation or you can even use mix of these legumes to make variety sundal.
  2. You can even add coriander leaves in the end.

Friday, October 12, 2012

Mixed Bean Sundal | Navaratri Sundal Varieties

My mom makes either sundal or sambar using all the mixed beans on a regular basis.I like all varieties of sundal but mixed variety sundal is tastier when compared to a simple sundal.Even the water which is strained from sundal can be converted to delicious rasam with the addition of a ground coconut masala.This is rich protein packed and you can use any kind of beans in this to mask them if your family do not take it otherwise.Try this sundal for prashad on one of those days of Navratri.

Mixed Bean Sundal Recipe:
(Serves 2)

Ingredients:
1/3 cup Kala Channa/Black Chickpeas
1/3 cup Lobia/Black eyed Peas
a handful of Groundnuts
a handful of Horse gram
1/4 cup grated fresh Coconut
4-5 Green chillies,sliced
1 tsp chopped Coriander,to garnish
juice of 1/2 lemon
Salt to taste

to temper:
1 tbsp Chana dal
1 tsp Urad dal
1/2 tsp Mustard seeds
a sprig of Curry leaves
a pinch of Asafoetida
1 tbsp Oil
Method:
  • Soak all the beans(black chickpeas,black eyed beans,ground nuts,horse gram) overnight or at least for 8-9 hrs and pressure cook for 3 whistles until soft.The beans should be soft and firm to touch and should not be either hard or mushy. You can add salt while cooking them or add it at the time of tempering.
  • Drain the beans and keep it aside,you can use this drained water to make healthy rasam.
  • Grind grated coconut and green chillies to a coarse paste in whipper mode.
  • Heat oil in a kadai and crackle mustard seeds and add chana dal and urad dal and let them turn slight brown.
  • Add asafoetida,curry leaves and ground coconut-green chilli paste and fry it for a minute.
  • Add cooked and drained beans and required amount of salt and mix well and cook it on low flame for 2 mins.Make sure they stay moist and not let them dry out by over frying it.
  • Switch off the flame and add lemon juice and coriander leaves and mix well.
Serve them hot,warm or cold as a snack or with lunch.

Variations:
  1. You can even add a small piece of ginger while grinding coconut and green chillies,it adds nice flavor.
  2. You can add red chillies while tempering and reduce the green chillies in the recipe.

Friday, September 21, 2012

ALOO CHANA CHAAT | CHAAT RECIPES - A Guest Post for Cakes and More

When Suma of 'Cakes and More' asked me to do a guest post, I readily agreed. This is a special post for me, as it is my first guest post.I am sure most of you know her but still, I would like to say that if you have not seen her blog, please check it right away,you would be amazed with the collection of recipes, especially the bakes-cakes and breads which aptly suits her blog name.I always wonder, how one can be so passionate about baking even the regular breads on a daily basis. I admit that even though I love to bake breads, my laziness wins over me every time and hence my baking is limited to only once or twice in a week.I like her blog for one more reason-her detailed posts. You would get all your questions answered while you go through her recipes.
When I asked her preference for the guest post, she mentioned that a Rice or Snack variety would be nice. After running through a couple of ideas, I decided to firm up on Aloo chana chaat. Now hop on to her blog here, to see the complete recipe.
Before you leave I would like you to taste a spoonful of my Aloo Chana Chaat and while munching hop on to her blog to know how I made it.

I asked you to hop on to her blog,but I still could not control myself without posting one more pic.(excuse!!)

Friday, April 27, 2012

CHICKPEAS RASAM | SENAGALA KATTU

Whenever I make any chickpeas based dish, I would be left with lots of stock(called as kattu,the water in which chickpeas is cooked).I would try to use the stock mostly in the same dish but if it is a dry preparation like Hummus, Sundal, Pulav/Rice, Kadai Cholay where I don't need much of the reserved stock, I store it for later use.
Back home my mom makes a nice tasty sundal rasam where the cooked chickpeas(or any other legume) is ground along with coconut and few spices and made it into a rasam . Today's version is the easiest one and all you need to do is just add a tempering to the stock and bring it to a boil.I would say that preparing this rasam makes sense only if you have the excess stock , otherwise soaking and cooking chickpeas just for making it is not worth the effort. Let us see how the stock , which one would have usually thrown , can be transformed to a simple and tasty rasam.
Chickpeas Rasam | Senagala Kattu Recipe:
(Serves 2)

Ingredients:
2 cups Chickpeas Stock(called as kattu,water in which chickpeas is cooked)
1/3 cup cooked Chickpeas
a pinch of Turmeric powder
juice of 1/2 Lemon
Salt to taste

to temper:
1 tsp Ghee/Oil
1/2 tsp Mustard seeds
1/2 tsp Cumin seeds
3-4 Garlic pods,slightly crushed
2-3 Green chillies,slit
a sprig of Curry leaves
a pinch of Asafoetida

Method:
  • Boil the water in which chickpeas is cooked and add cooked chickpeas,turmeric powder and salt to it and let it come to a rolling boil.Slightly press the chickpeas with the back of the ladle.
  • Meanwhile heat ghee/oil in a small tadka pan and crackle mustard seeds and cumin seeds.
  • Add slightly crushed garlic pods and green chillies and fry well.
  • Add curry leaves and asafoetida and fry for 30 seconds and switch it off.
  • Add this tadka to the boiling rasam and boil for half a minute and switch off the stove.
  • After a couple of minutes add lemon juice to it and stir and close it with lid.
Serve it hot with steamed rice with some fryums or papad.
Notes:
  1. You can use canned chickpeas in the recipe,but wash it well before use.Ideally this recipe is to use the stock of cooked chickpeas.
  2. You can use black chickpeas or white chickpeas in the recipe.
  3. For a Vegan version use oil instead of ghee in the recipe.

Monday, April 23, 2012

RAW MANGO RICE | MAMIDIKAYI GOJJU ANNAM | MAMIDIKAYI PULIHORA

We make a lot of mixed rice varieties and pulavs regularly at home. During festivals preparing some form of rice without onions and garlic is a must. Many rice varieties such as Lemon rice, Coconut rice, Puliyogre, Raw mango rice, Vangibath, Mustard rice, Sesame rice etc fall in that category. I have already posted a Raw mango rice recipe which is prepared using grated mango where the preparation is similar to that of lemon rice.We also make another version of raw mango rice where raw mango is ground with coconut and few spices to a coarse paste and fried in oil to make yummy gojju, which is typically Karnataka style. I will probably post this recipe later.

For this post I have adapted this simple recipe from one of my favorite bloggers 'Pavithra of Dishes from my Kitchen'. Did I ever tell you that I love her blog very much? She is a wonderful blogger and a very good friend of mine. I love her diversity of cooking from traditional Indian one's to International cooking. Her presentation skills and food photography are excellent. Coming to today's recipe this raw mango rice that I have prepared tastes similar to the raw mango rice prepared in Karnataka style which I mentioned about earlier.

Raw Mango Rice | Mamidikayi Gojju Annam Recipe :
(Serves 2)
Source: Dishes from my Kitchen

Ingredients:
1 cup Sona masuri rice or Basmati rice
1/2 cup black Chickpeas/kala Chana,boiled until soft
2-3 tbsp chopped Coriander
Salt to taste

for Mango gojju:
2 raw sour Mangoes,peeled and diced
2 tsp Cumin seeds
6 byadige Red chillies(for bright red color)
8-10 regular Red chillies
1/2 tsp Asafoetida
1/4 tsp Turmeric powder
2-3 tbsp grated Jaggery
2 tbsp Chana dal
2 tsp split Urad dal
1/2 tsp Mustard seeds
a sprig of Curry leaves
Salt to taste
4 tbsp Sesame oil or regular oil
Method:
to make Gojju:
  • Warm the red chillies until they are crisp.Grind red chillies with cumin seeds,turmeric powder and asafoetida to a fine powder.
  • Add peeled and diced raw mango pieces to it and grind to a fine paste with little water(2-3tbsp).
  • Heat oil in a big kadai and crackle mustard seeds.Add chana dal,urad dal and fry well.
  • Add curry leaves to it and fry for 30 secs.Add ground paste to it and fry for a minute.
  • Cover it with a lid(just cover 3/4th portion of kadai) and let it cook over medium flame until the mixture is thick.
  • Add grated jaggery and mix well and cover it and cook again until it oozes out extra oil.Remove it from stove and let it cool.Store it in a clean bottle in refrigerator.You can make this mixture ahead and refrigerate upto 10 days and use when required.

to make Mango rice:
  • Soak black chickpeas over night and pressure cook with little salt for 3 whistles.Drain the extra water from it.
  • Clean and wash the rice and soak for 10-15 mins and pressure cook it with 1 cup rice:2 cups water ratio or prepare it in rice cooker as you prefer.
  • Once it is done spread it over a big plate and let it cool,take care that the rice granules should be separate.
  • Add 4-5 tbsp of prepared mango gojju and enough salt to it and mix well.
  • Taste the rice now and adjust the sourness and salt according to your taste buds.Add cooked and drained chickpeas and coriander to the rice and mix well.
  • Let it sit for 2-3 hrs before serving for the flavors to mix well.If the rice sits for little longer the flavors blend well.
Serve it at room temperature with some fryums.

Notes:
  1. Addition of black chickpeas is optional,but biting them in the rice gives a nice taste.
  2. Mango gojju can be stored in refrigerator upto 10 days and preparing the raw mango rice with the already prepared gojju is a breeze.
  3. Balance the sourness of mango with the jaggery,red chillies and salt which is a key process while making this kind of variety rice.

 
back to top