
 Vegetables


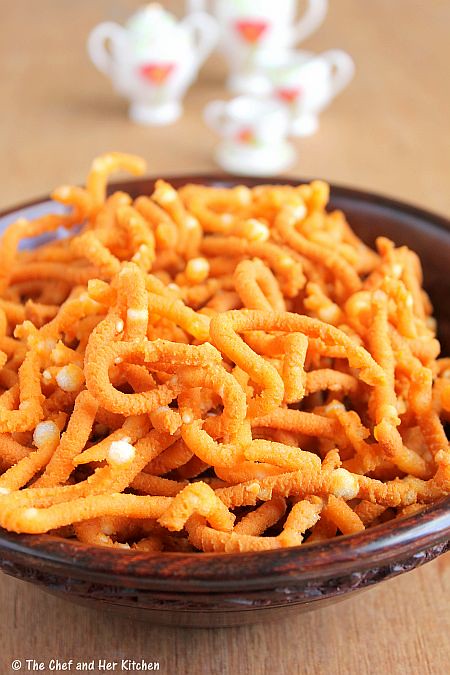
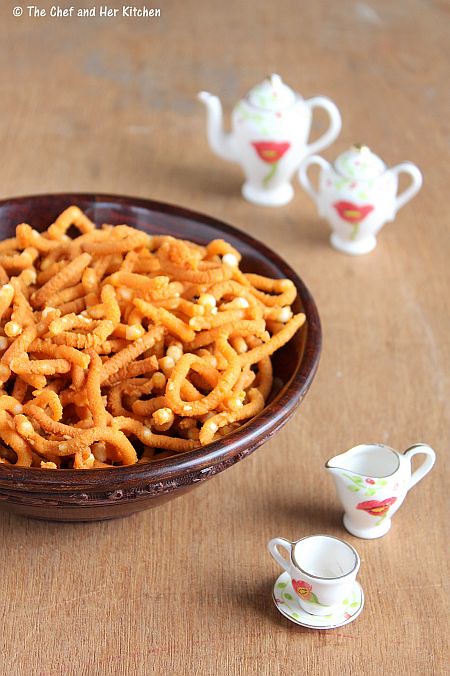
Sago murukku makes a perfect tea time snack as well it is good to munch anytime.If you have not tried this murukku before,I suggest you to try this once
and I am sure you will definitely like this the way we do.I bet you would finish the whole batch in a day or two and would definitely prepare again.
shelf life: 15-20 days
Ingredients:
1 cup fine Sago
4 cups Rice flour
1 cup sour thick Curds
thick Sour butter milk,to mix the dough
2-3 tbsp white Sesame seeds
2 tsp Chili powder
Salt to taste( approx 2 heaped tsp)
1 big ladle(1/4 cup) hot Oil
Oil,to deep fry

Method:
- Wash and soak sago in just enough sour thick curds to cover it for 3-4 hrs.

- Slightly press it with hands and crumble it nicely to break the sago.
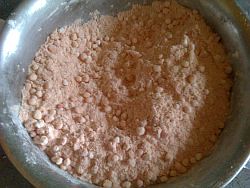
- Add rice flour,salt,chili powder and sesame seeds to it and mix it nicely.
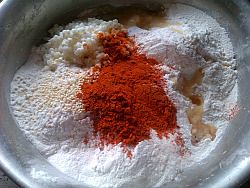
- Pour hot oil on top of the flour and carefully mix with the ladle,do not use your hands to mix.Leave it aside for 5 mins.
- Now mix the flour well with hands until the oil is incorporated in to the flour nicely.If you still find the mix very crumbly with sago pearls run the mix in the mixie for few seconds.
- Divide the flour equally into five parts.
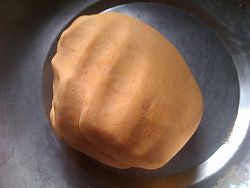
- Sprinkle the buttermilk to one portion and prepare a thick dough.
- Meanwhile heat oil in the kadai.
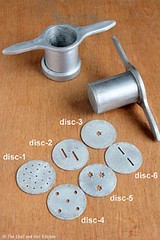
- Use a 5 eyed disc-thick round sev (disc-4 in the above pic) in the murukku maker and fill the dough in it.If your sago pearls are big and are obstructing in the murukku maker you can use star disc(disc no-5 in the above picture) to make the murukku
- Carefully press the dough in to the hot oil directly in a circular motion.Do this process carefully otherwise the oil might spill.The murukku will break into pieces in oil,it might not form a circular murukku in the oil.
- If your murukku looks smooth then it is the correct consistency it will give nice hollow and crisp but soft to bite kind of murukku.If the surface is very hard it will yield hard to munch kind of murukku.In that case slightly sprinkle some water to make the dough bit smooth and then proceed.

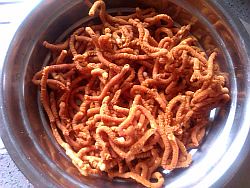
- Deep fry over the medium-high flame until the murukku turn golden brown in color and the bubbles subsides in the oil.
- Drain excess oil on to kitchen napkin.
- While it is frying add buttermilk to the 2nd portion and repeat the same process of preparing dough and frying and repeat until all the flour is over.It is always better to make dough in small portions than preparing the dough at once.

*Rice flour Preparation at home: Wash the rice nicely and spread on a
cloth and let it dry in shade completely.Grind it to a fine powder in a
mill or at your house in a mixie and sieve the floor.You can use it
immediately,if you want to store then spread the floor on the cloth for a
day in shade and store it in air tight container.This stays fresh for
2-3 months and can be used for many varieties.For modak/kudumulu
especially this kind of rice flour is used.

Notes:
- Choose small sized sago for this murukku,if the sago is big it might break into pieces when it is pressed it into oil.You can even use big star disc instead of round dics in the murukku maker if the sago is of big variety.
- Always mix the dough in small portions,this way it will not make the dough very soft and in turn reduces the oil consumption.
- If your murukku looks smooth then it is the correct consistency it will give nice hollow and crisp but soft to bite kind of murukku.If the surface is very hard it will yield hard to munch kind of murukku.In that case slightly sprinkle some water to make the dough bit smooth and then proceed.
- If the murukku turns very hard to bite,it means the amount of hot oil you added to the dough is not enough.Add 1-2 tbsp more and make the next batch.

- Avarekalu Mixture | Hyacinth Bean Snack - Bangalore special
- Butter Murukku | Benne Murukku
- Chakli | Murukku -easy version
- Karam Gavvalu - Andhra Special
- Kodubale | Kodbale
- Nippattu | Nippat Recipe
- Spicy Diamond Cuts
Check out other Diwali savouries in my blog here:
Also check out the wide collection of Diwali Sweets Recipes and Payasam/Kheer Varieties.


24 comments:
i love sago based savouries..looks yumm
New to me totally, colorful pictures and cute mini tea set.
wow very tempting murukku,i loved this murukku very much...
This is very new to me, nicely done. Beautiful clicks
Quiet new to me !! so crispy and yummy snack !!
that looks yummy and crunchy.. my son loves it. love the cute tea cups.
Delicious sago murukku. I love it.
Nice crispy murukku
Love the murukku & your bowl. Send it my way?
Looks yum ..long time I had this .....beautiful presentation ...I love the 2nd last pic
Very tempting clicks! This is new to me
great-secret-of-life.blogspot.com
New one...souds good with sago...
loved the color.. your version sounds a bit easy.. can't wait to try this .
These are new to me...never tried muruku this way.....looks crisp and yum...
very new to me Prathy... looks delicious...
Today's Recipe - Baked Idli without Idli Pan
VIRUNTHU UNNA VAANGA
Wow...that's an absolute delicious recipe.....
Had it long back, love this crunchy murukkus very much.
looks crispy and tempting :)
nice clicks.
Colorful murukkku. Looks very nice :)
Sago murukku is very new to me..Interesting & too tempting!!! Bookmarked :)
Prathima Rao
Prats Corner
Mmm yum !! Sago murukku looks crunchy and delicious !!
soo nice recipe and yummy and tea cups are soo cute
Tried this murukku today, came out very well.. thanks for the recipe :)
Thanks for the recipe. They turned out very tasty when I tried at home. Plz visit my blog on clay jewellery pcinspirations.wordpress.com
Post a Comment
Thank you for visiting The Chef and Her Kitchen.
Do leave your comments and feedback,they are always welcome.Please do not leave any links.
Hugs,
Prathy