Monday, May 21, 2012

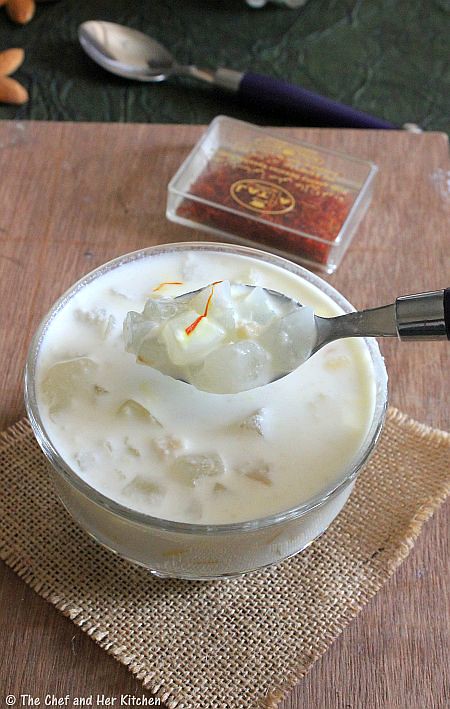
Thati Nungu Payasam | Easy Tadgola(Palm fruit) Dessert - EASY SUMMER DESSERT

As a kid, I always looked forward to the summer vacations, as that was the time to meet up my cousins and have lots of fun.Summer vacations are also associated with lots of memories for me.The usual number would be 25-30 of us who gathered at our granny's place in bangarpet and if the number exceeded 60 , we used to meet at my dad's ancestral house. It was a large gathering every summer an hence the fun element was even larger.While we kids are busy playing,watching movies and finishing our summer assignments, the adults(the ladies of the family) used to be busy in the kitchen cooking various varieties .In summers our place used to be flooded with bags of mangoes and buckets of tadgola fruits and one room would be dedicated for the mangoes to ripen.It is just impossible to resist the temptation, when some one passes that room given the sweet aroma of the ripening mangoes.It used to be fun to chose one's own fruit every day and we all cousins used to sit together and enjoy the king of fruits messing up our hands.
Apart from mangoes, Tadgola is another fruit which we enjoy in the summer.Tadgola or Toddy Palm fruit is called 'Nungulu' or 'Munjalu' in Telugu and it is a natural body coolant and is quite good for summers.While those skins are peeled, we kids used to pick the tender tadgola fruit and pop them into our mouth leaving the hard ones aside.If the tadgola fruit is very hard it gets used in this quick and easy dessert.As the mangoes are also available in this season, generally it is paired with tadgola so that it can be served to such a large group.

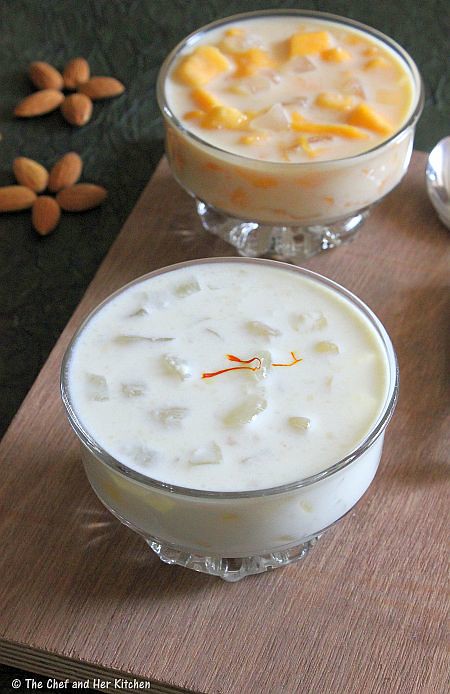
Thati Nungu Payasam | Palm Fruit Dessert:
(Serves 3-4)

Ingredients:
500 ml Whole Milk
7-8 Tadgolas(Nungulu)
10-12 Almonds,soaked for 1 hr
3-4 tbsp Sugar
few strands of saffron(for garnish)
Method:
  • Soak almonds in water for an hour or two and peel off the skin.Grind it to a paste using some milk.

  • Boil milk and simmer it for a while to become thick until the milk reduces to half the volume for approx 15 mins.
  • Add ground almond paste and sugar to it and stir continuously and boil on low flame for 2-3 mins.Check for the sweetness,if required add extra tbsp of sugar to it.Cool it until it comes to room temperature.
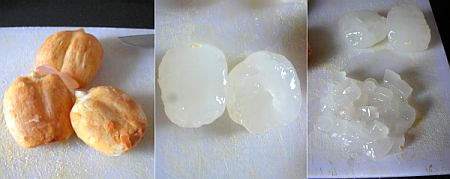
  • Peel off the skin of tadgolas and cut into small pieces and keep them aside.
  • Mix the chopped tadgolas with cooled milk mixture and refrigerate for 2-3 hrs before serving.
Garnish with saffron and serve it chilled.

Variations:
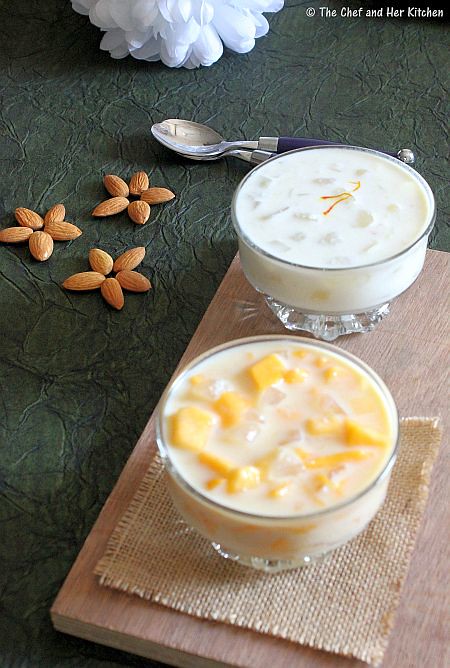
  1. You can play with the flavors and add cardamom powder to the milk mixture.
  2. You can make the dessert rich by adding condensed milk instead of sugar.
  3. Add a couple of tbsps of fresh cream just before serving to make the dessert rich.
  4. You can make Badam milk using MTR badam milk mixture and add chopped tadgola to it for a quick and east version.

Mango-Tadgola Dessert | Mamidipandu-Nungu Payasam:

Ingredients:
recipe ingredients same as above
1 ripen Mango,finely chopped

Method:
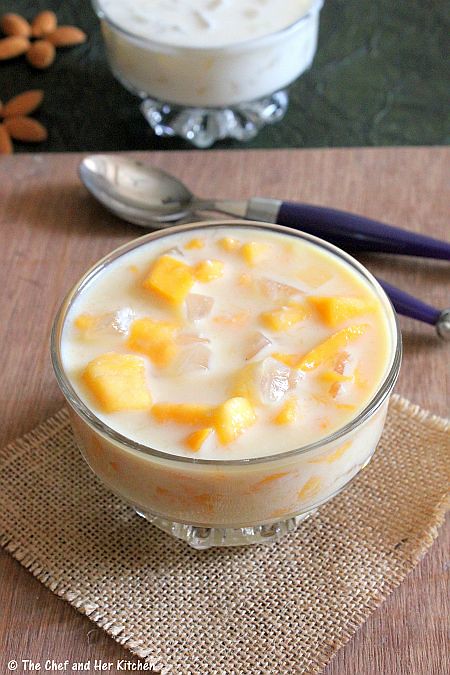
  • Just follow the above procedure for tadgola dessert and add finely chopped ripen mango(preferably alphonsos) to it along with tadgola fruit.Adjust the sweetness according to your taste buds.

Friday, May 18, 2012

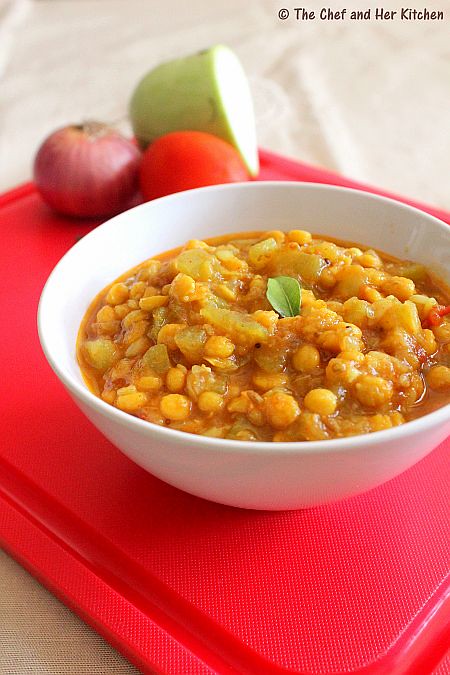
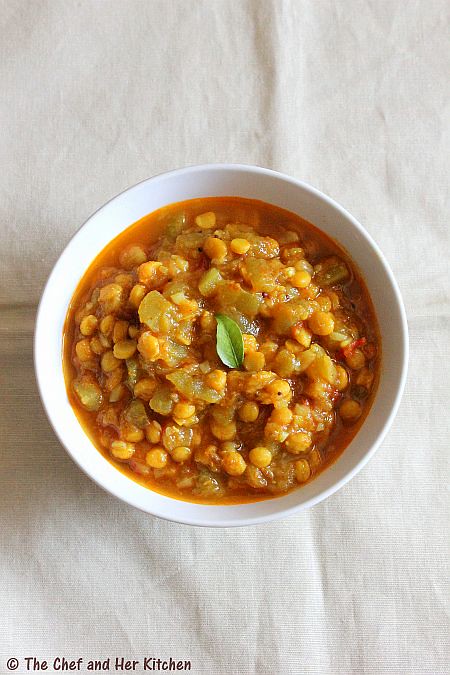
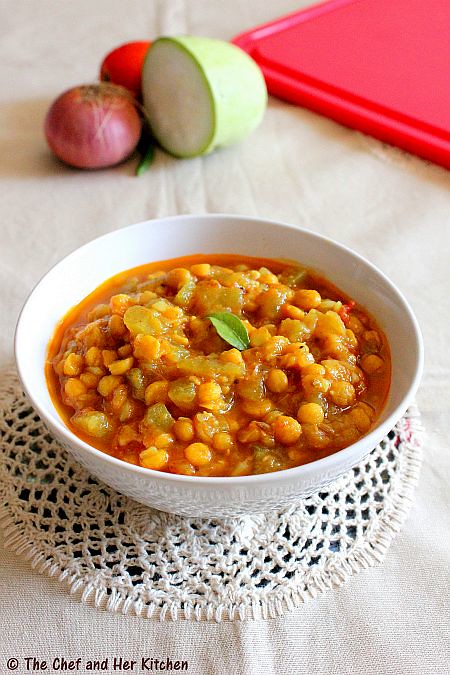
Lauki Chana Dal Recipe | Sorakaya Senagapappu Kura | Bottlegourd Chana Dal

I usually make either paratha or kofta or akki roti with bottle gourd as TH does not prefer bottle gourd in curries.As my in-laws are here now I had a chance to prepare this curry for lunch .I like the slight sweet taste of the vegetables like bottle gourd,ridge gourd after they get cooked and chana dal adds a nice bite when cooked.This is a simple recipe which goes well with rice and roti.
Lauki chana dal Recipe | Sorakaya Senagapappu Kura:
(Serves 4)

Ingredients:

1 medium Bottle gourd(roughly 2 1/2 cups chopped)
1/2 cup Chana dal
2 medium Onions,chopped
2 Tomatoes,finely chopped
2-3 Green chillies,slit
1 tsp Ginger-Garlic paste
3/4 tsp Red chili powder
1 tsp Coriander powder
1/2 tsp Turmeric powder
1/4 tsp Garam masala (optional)
a sprig of Curry leaves
1/2 tsp Mustard seeds
a pinch of Asafoetida
1 tbsp Oil
Salt to taste
Method:
  • Soak chana dal for 1 hr.Drain and keep aside.
  • Heat oil in a small pressure cooker or thick kadai and crackle mustard seeds.
  • Add hing,slit green chillies and curry leaves and fry for 30-40 secs.
  • Add chopped onions and fry until they are translucent.
  • Add chopped bottle gourd pieces and fry for 2-3 mins.Add chopped tomatoes and soaked chana dal and again saute for a minute.
  • Add coriander powder,red chili powder,garam masala,turmeric powder and salt fry for a minute.
  • Add 1 cup of water and pressure cook for 1-2 whistles.If you are using kadai cover it and cook for 8-10 mins until bottle gourd is cooked.Chana dal should be firm to touch but it should be cooked.
  • once the pressure is down(if using cooker) cook on high flame for a minute or two and switch off the flame.
Serve it hot with Rice/Roti.

Notes:
  • You can replace bottle gourd with ridge gourd or white pumpkin and follow the same recipe.

Wednesday, May 16, 2012

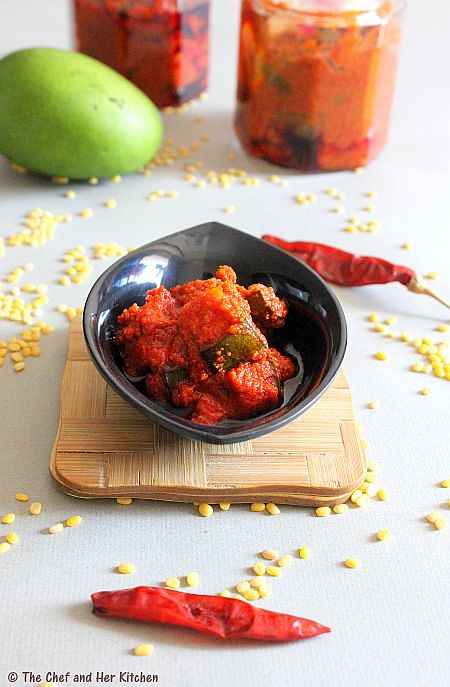
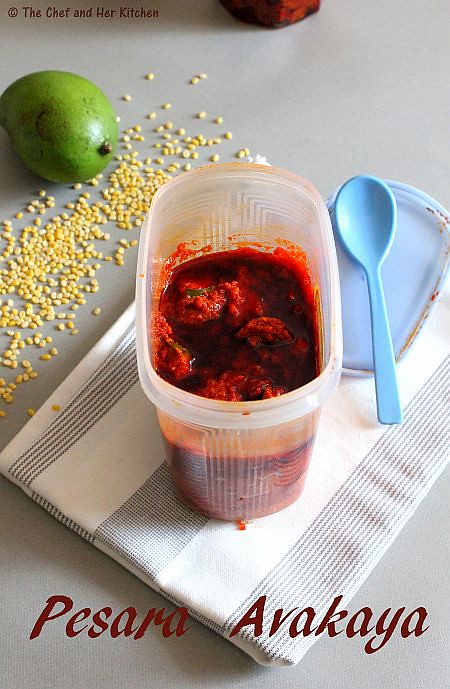
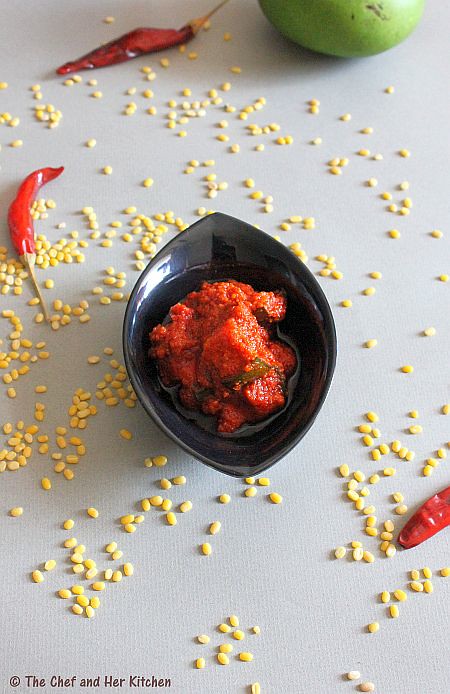
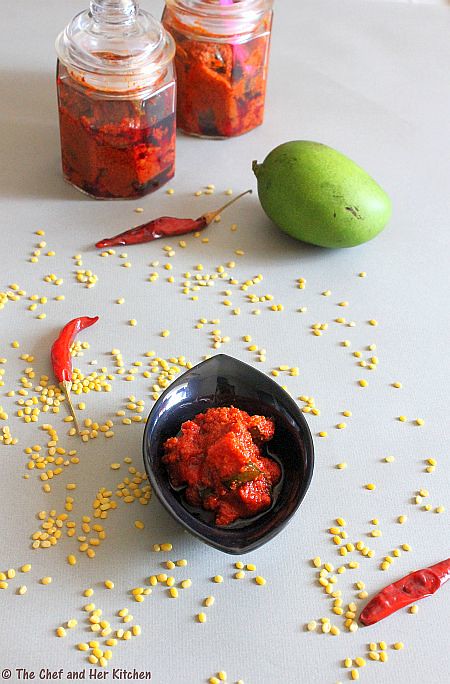
PESARA AVAKAYA | MOONG DAL AVAKAYA - ANDHRA MANGO PICKLE with MOONG DAL POWDER

Its SUMMER time and so is the season for mangoes. While lots of mangoes are consumed directly as any other fruit, raw mangoes are pickled and preserved for consumption through the year. I usually get my stock of pickles from my MIL and since this year they are visiting us in this season , the entire week was spent in preparing various pickles based on mangoes. Yes, your guess is correct - you will see lots of varieties of mango pickle varieties in my blog from now on.
While I am not an expert in making pickles , with some help from my MIL, I tried making some last year which is posted on my blog . See the following posts - North Indian style Aam ka Achar and also Mukkala Pacchadi(Tiny mango pieces pickle).
This year we prepared, various varieties of Andhra's special pickles such as Avakay,Allam Avakay, Mukkala Pacchadi, Maagaya, Pesara Avakay, Nuvvu Avakay, Bellam Avakay, Verusenaga Avakay and North Indian style Aam ka Achar.Pickle varieties like Avakay, Allam Avakay, North Indian Aam achar, Maagaya and Bellam Avakaya stays for the entire year and also needs at least a week to ten days to age. We hence prepare other varieties like Mukkala pacchadi, Pesara avakay, Nuvvu avakay to start the mango season, which can be consumeed in just 2 days post its preparation, however its shelf life is just 10-15 days, so we prepare them in small portions.

Coming to today's post -Pesara avakay is quite distinct in taste compared to the regular avakay with a dominant flavor of moong dal. In this avakay moong dal powder is used instead of mustard powder and hence a different taste.Pesara avakay when mixed with hot rice and ghee is just awesome.
PESARA AVAKAYA RECIPE:
(makes approx 3 cups)
Shelf life: 15-20 days

Ingredients:
2- 2 1/2 cups Mango pieces of 2 medium mangoes (pickle variety,see the notes)
1/2 cup Moong dal
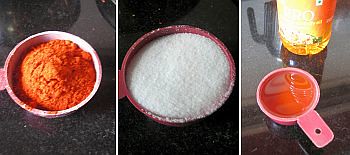
1/2 cup Red chili powder(see notes)
1/2 cup (minus 2 tbsp) Salt(use salt less than 1/2 cup)
1/2 cup Sesame oil

Method:

cleaning the mangoes:
  • Wash and wipe the mangoes with a dry cloth.You really need to have sharp thick knife to cut into 1" thick mango wedges with the inner shell in tact as shown in the pictures.Here in India the shop keepers does this job during the mango season.
  • If the inner shell is in tact this will increase the shelf life of pickle.Take a sharp knife and scrub the inner shell to remove a thin white layer over it.This is another important step you should keep in mind otherwise the pickle gets spoilt.
  • Now take a dry cloth and wipe the pieces from all the sides ensuring that they are cleaned and dried well.
  • Spread them over a dry cloth while you are preparing the spices for the pickle.

for making pickle:
  • Keep ready the sterilized and sun dried jars ready before you start pickling.

  • Dry roast moong dal until slight golden in color and cool it.Grind moong dal to a fine powder.
  • Now take a big bowl and mix the moong dal powder,red chili powder and salt until everything is mixed well.

  • Add the mango pieces to it and mix well and apply the mixture all over the mango pieces with your hands.Using your hands for this step is better than mixing it up with ladle.

  • Add 1/4 cup oil to the spice coated mango pieces and mix well.
  • Put the masala coated mango pieces and all the remaining masala in the sterilized jar add 1/4 cup oil over it and cover it with lid and keep it aside for 2-3 days.

  • On day-1 check it some oil might have started floating over the pickle.Now taste the masala mixture in the pickle,it should be perfect and slightly salty as the pickle has to be yet marinated for a day or two before its usage.But if you feel the salt is less add a tsp or 2tsps of salt to it and mix well.I don't think it would be necessary if you follow the measurements accurate.
  • Mix with a clean and dry ladle all over and repeat the same process on day-3.
  • On the day-3 if you see the oil is floating on the pickle up to an 1/2" height then it is perfect.Otherwise add extra sesame oil over the top until the oil floats on top.
  • Store it in a clean air-tight tupperware container or glass bottle.This way your pickle stores for long with freshness in it and even the mango pieces do not get soft.
Serve it with hot rice and ghee.
Notes:
  • Use pickle variety mangoes which are sour and also cut them in to the pieces with the inner shell in tact.
  • Use red chili powder which is specially used for pickles as this variety gives a nice and bright red color to the pickle and also it is not very spicy.
  • Always transfer a small portion of pickle into a small jar and use a clean and dry spoon.
  • Increase the amount of sesame oil as required in the recipe.The basic thumb rule is to make the oil float over the pickle after 3 days.So feel free to add extra sesame oil.
  • This pickle stays good up to 15-20 days.It stays good for a month if refrigerated.
  • You can easily double or triple the recipe,the basic rule is to use 4 cups of mango pieces with 1 leveled cup(1 cup-4 tbsp) salt,1 cup red chili powder and 1 cup moong dal powder.

Monday, May 14, 2012

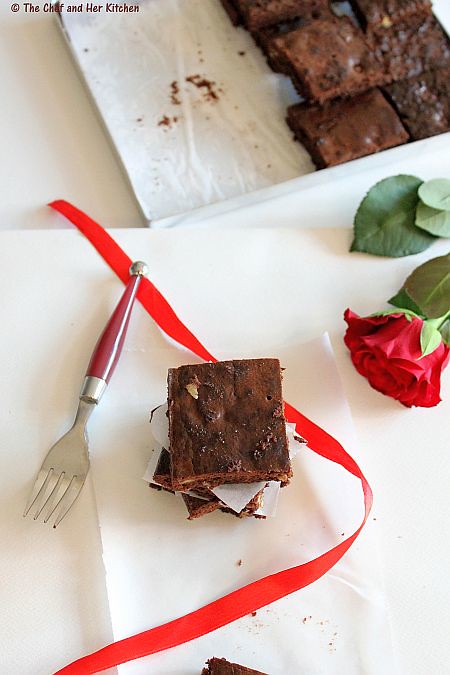
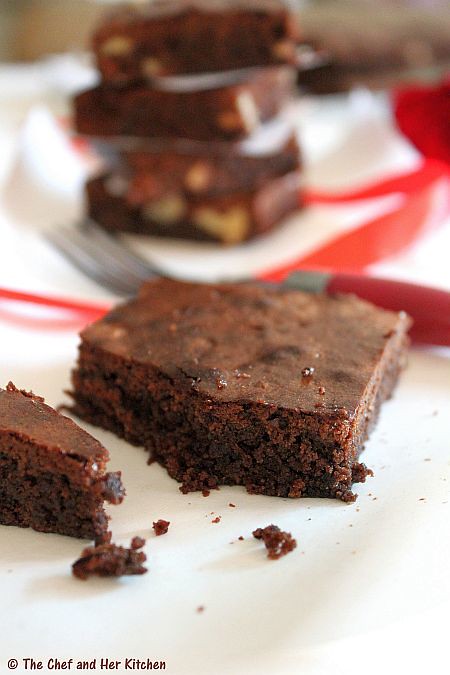
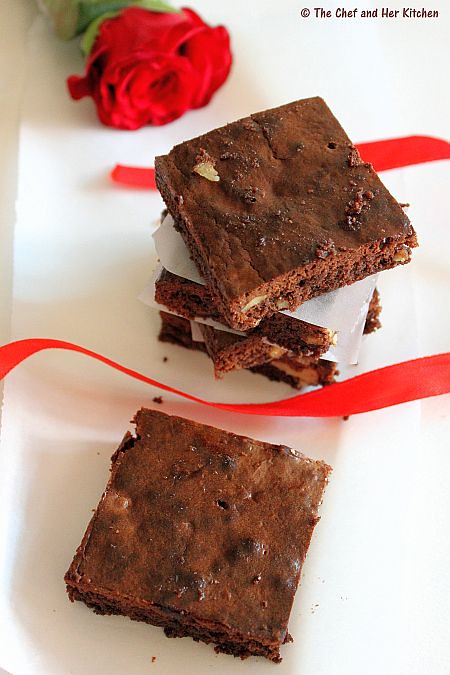
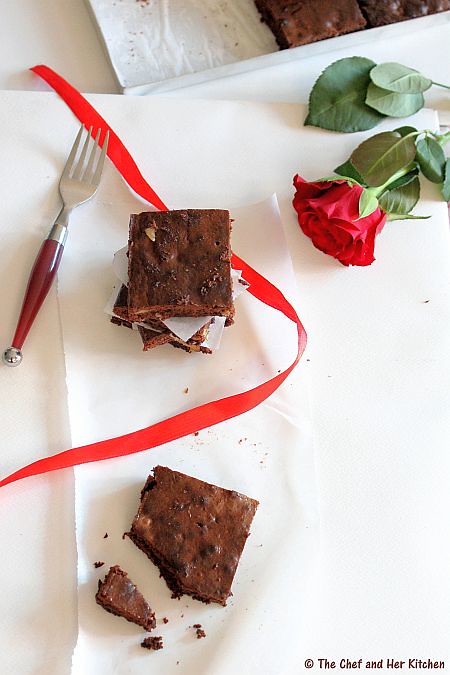
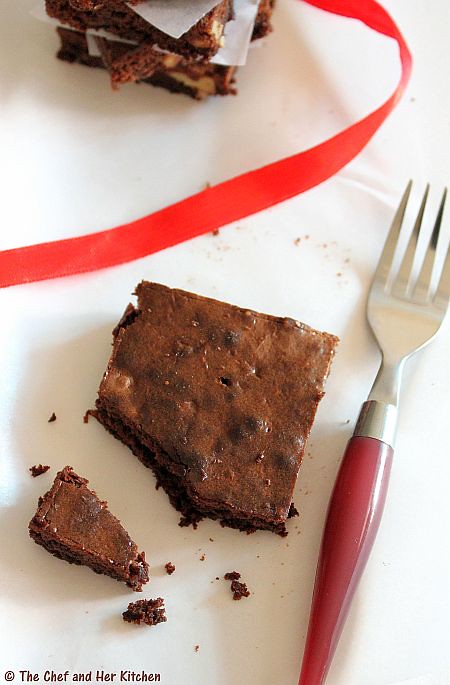
CHOCOLATE BROWNIES RECIPE ..for the Birthday Boy

I already have posted a Brownie recipe in my blog but today I am posting another brownie recipe with a variation.The earlier version I posted was with cocoa powder where as today's version is prepared with rich dark chocolate.We are never tired of brownies and always search for a new recipe as both of us like brownies very much.I have tried this recipe from Joy of Baking site and I must say that this is a perfect recipe for chocolate Brownies.
Hubby is a huge fan of Brownies and always prefer a brownie or a tea cake over the cream loaded cakes.Today is a special day as it is his birthday and also my in-laws visited us to celebrate the birthday .I already baked an 'Eggless Dates Cake' in the morning for a formal sweet to start this special day and a special Cheese cake is under preparation for the evening celebrations.I would like to wish him on this occasion with his favorite Brownie.
Chocolate Brownies Recipe:
(makes 16 Brownies)
Source: Joy of Baking

Ingredients:
5 ounces (150 grams) semisweet or bittersweet Chocolate,chopped
3/4 cup (95 grams) All-purpose flour
1/2 cup (1 stick) (113 grams) unsalted Butter, cut into pieces
2 tbsp (15 grams) Cocoa powder
1 cup (200 grams) granulated white Sugar
1 tsp pure Vanilla extract
3 large Eggs
1/4 tsp Salt
1/2 cup Walnuts,roughly chopped
3/4 cup (125 grams) Semi-sweet chocolate chips (optional)
Method:
  • Preheat oven to 350 deg F (180 deg C) and place the rack in the center of the oven.
  • Butter (or spray with a nonstick cooking spray) an 8 inch (20 cm) square pan, and line the bottom of the pan with parchment or wax paper.I used a thin 8*10 rectangular brownie pan as I wanted a thin brownies.
  • Melt the chocolate and butter by a double boiler method in a large stainless steel bowl placed over a saucepan of simmering water. Remove from heat and stir in the cocoa powder and sugar . Next, whisk in the vanilla extract and eggs, one at a time, beating well after each addition. Finally, stir in the flour, salt,walnuts and chocolate chips (if using).
  • Pour into the prepared pan upto 1/3 of its height.If you have some extra batter pour into another small pan.
  • Bake it for about 25-30 minutes, or until a toothpick inserted in the center comes out with a little batter and a few moist clumps clinging to it. Do not over bake. Remove from oven and let cool on a wire rack.Cut into 16 squares.
Serve at room temperature.You can refrigerate it for 3-4 days,just microwave for few seconds before serving.

Serving Suggestions:
  • Warm it up in Microwave and serve it hot with Vanilla Ice-cream and chocolate sauce over it.
Notes:
  1. You can freeze these brownies for a month,when ever you need you just need to pop them in microwave for few seconds and a fresh warm brownie is ready.
  2. Do not fill the cake tin more than 1/3rd as it will make your brownies very thick,pour the extra batter in another small pan and bake if you feel the batter is more.


Friday, May 11, 2012

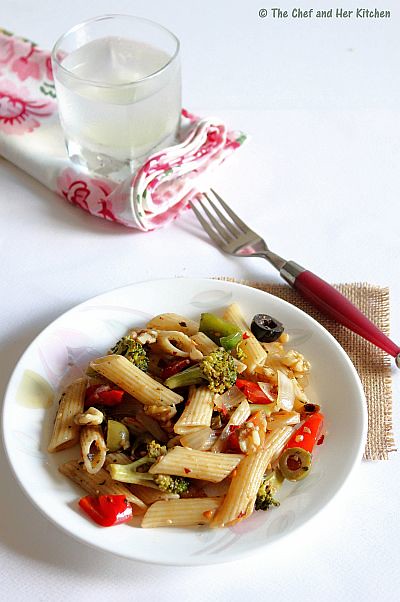
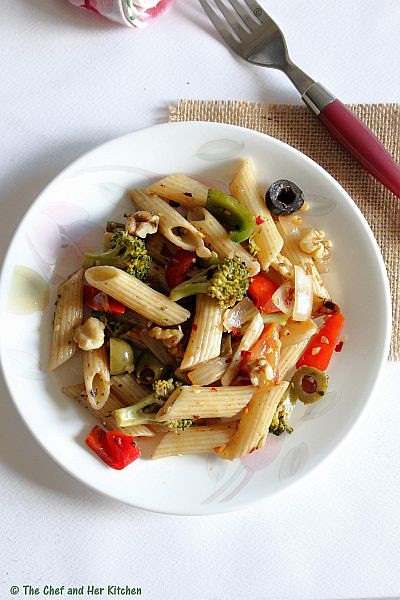
PASTA SALAD - PENNE & MIXED VEG COLD SALAD

Cold salads are very comforting for dinner especially in summer.I generally like to make them often as I can prepare it before and refrigerate it.All I need to do is, serve in a bowl for dinner and pair it with any aerated drink or any fruit shake.The recipe I am posting is very versatile and one can alter the vegetables according to their preferences.
Penne Pasta Salad:
(Serves 2)

Ingredients:
1 cup Penne Pasta( you can use Farfelle/Macaroni/Elbow pasta)
1 medium sized Red bell-pepper,seeded and cut into strips
1 medium sized Yellow bell-pepper,seeded and cut into strips
1 medium Green Capsicum,seeded and cut into strips
1 Onion,diced
1 Tomato,seeded and cut into strips
1 cup Broccoli florets
1/3 cup Walnuts,roughly chopped
2 tbsp chopped Coriander
5-6 Black pitted Olives,sliced
5-6 Green pitted Olives,sliced
3-4 pickled Gherkins,chopped
2 tsp chopped pickled Jalapenos

for dressing:
3-4 tbsp Extra virgin olive oil
1 tbsp Lemon juice
2 Garlic pods,grated
1/2 tsp Red chili flakes
1/2 tsp Pepper powder(adjust according to your spice level)
Salt to taste
Method:
  • Clean,wash and steam broccoli florets.You can stir fry them in a tsp of olive oil with a dash of salt and red chili flakes or just steam them until done.
  • Boil pasta in a big pot of water for 8-10 mins till al dente or follow the instructions given behind the pack.Drain and cool it.
  • In a big bowl mix all the chopped mix bell peppers, capsicum, onion, tomatoes, olives, gherkins, jalapenos,coriander and steamed broccoli florets.
  • In a small bowl whisk together olive oil with lemon juice,salt and pepper powder.Add red chili flakes and grated garlic and mix well.Add this dressing to the pasta salad and add the walnuts and toss it well.
  • Keep it refrigerated for 1 hr to blend the flavors well.
You can serve the salad slightly warm or at room temperature.I personally prefer cold pasta salad especially in these summers.
Notes:
  1. You can add vegetables of your choice.I mentioned my personal preference with this salad.You can even use vegetables like carrots,baby corn,baby spinach and sauteed mushrooms in the salad.
  2. I kept the dressing simple and I love this dressing for most of my salads and it works wonderful.
  3. You can replace pasta with cooked couscous,quinoa and follow the same procedure for various delicious salads.
  4. If you don't like the bell peppers raw you can quickly saute for a minute in a tsp of olive oil.But maintain its crisp for better taste.
  5. If you can refrigerate for long the flavors blend wonderful.

Wednesday, May 9, 2012

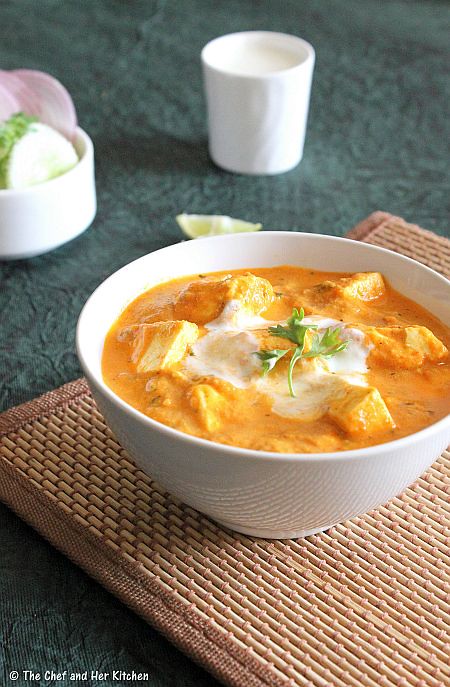
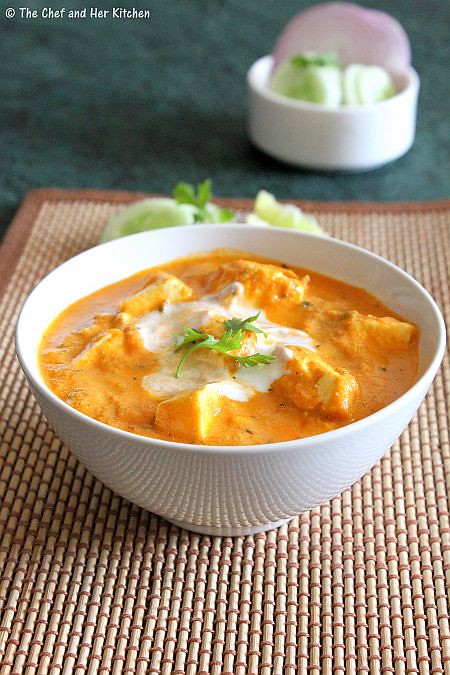
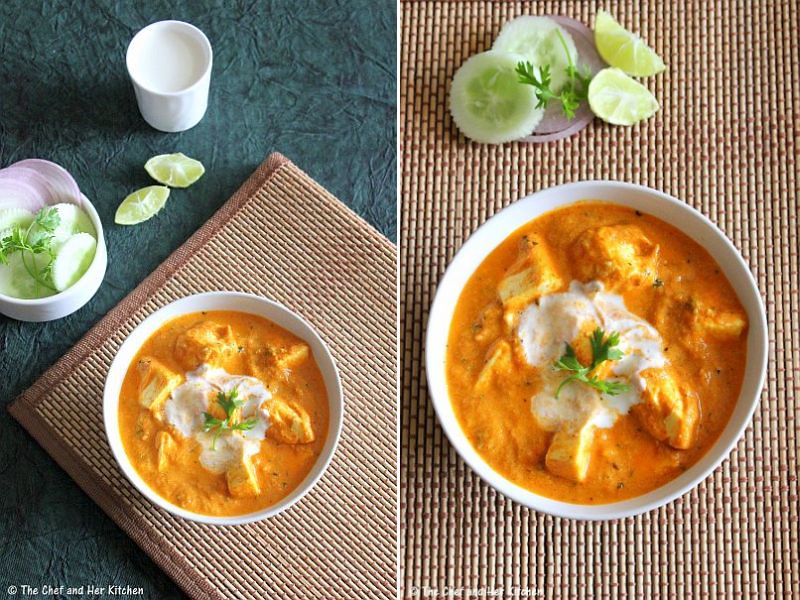
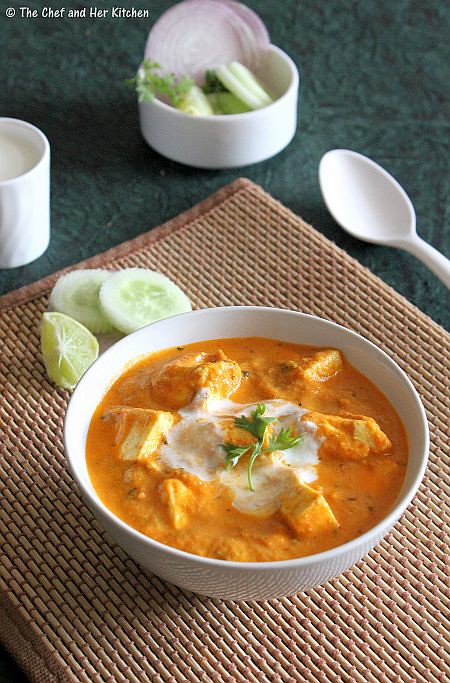
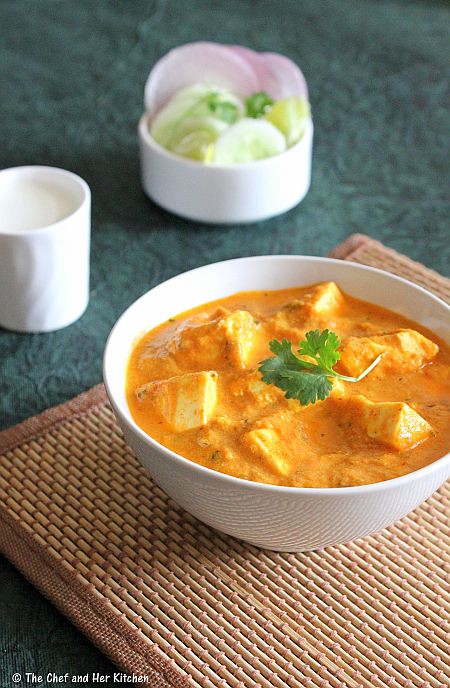
PANEER MAKHANI | PANEER MAKHANWALA | PANEER RECIPES

I have posted various paneer recipes like Palak Paneer, Matar Paneer, Paneer Bhurji, Paneer Tikka in the past, as Paneer appears quite often in my weekly menu and I usually make it a point to include one paneer item in my menu when we have guests over. Coming to today's recipe, Paneer Makhani is one of the famous gravies of North Indian cuisine. The soft paneer and creamy delicious gravy pairs well with any Indian flat breads such as Naan,Kulcha,Roti or even simple Pulavs.
I always have this confusion about the difference between 'Paneer Makhani' and 'Paneer Butter Masala' and while my google search suggests that they are the same but somehow I find it difficult to believe that. Though the basic ingredients that go in the recipe are the same,I believe that 'Paneer Makhani' is basically the preparation of paneer in basic makhani gravy which is quite rich with cream and cashews while 'Paneer Butter Masala' is prepared in an overdose of butter laden spicy tomato gravy. While this is my interpretation, I am keen to know if any of you know the difference.
Paneer Makhani | Paneer Makhanwala Recipe:
(Serves 2-3)

Ingredients:
250 gms Homemade Paneer (or store bought),cut into 1" cubes
3 medium ripen Tomatoes
2 medium Onions,sliced
1 tbsp Tomato ketchup
1" Ginger,chopped
4-5 Garlic pods,chopped
12-15 cashew nuts or 1/4 cup Water melon seeds
1/2 cup Milk
1/2 cup fresh Cream(optional)
1/2 tsp home made Garam masala
1 tsp Kashmiri Red chilli powder
1 tsp Coriander powder
1/2 tsp Cumin seeds powder
1/4 Turmeric powder
1/2 tsp Kasuri methi
1/2 tsp Cumin seeds
Salt to taste
1/4 tsp Sugar
2 tbsp Oil
1 tbsp Butter

Method:
  • Cut paneer into 1" cubes and immerse them in a bowl of warm water and cover it with lid until its usage.This process will keep the paneer pieces soft.You can even shallow fry them for a couple of minutes until they turn slight brown and then immerse in warm water.
  • Make a cross on tomatoes and blanch them in hot water for 3-4 mins.Remove the skin and chop them roughly.
  • Blanch the cashew nuts in the same hot water for a couple of minutes and remove them.Ignore this step if you are using water melon seeds.
  • Heat 1 tsp oil in a pan and fry ginger and garlic pieces until slight brown,add sliced onions and fry until it is brown in color.Add a pinch of sugar while frying onion,it speeds up the caramelize process of onion.Add the chopped tomatoes and fry for a couple of minutes.Add tomato ketchup,coriander powder,cumin seeds powder,turmeric powder and some salt and fry for a minute.Let this mixture cool a bit.
  • Grind the onion-tomato mixture to a very fine paste adding water if required.
  • Grind the cashews(or watermelon seeds) to a very fine paste using the same water in which it is soaked.
  • Heat oil and 1-2 tsp butter in a kadai/pan and crackle jeera and then add the pureed onion-tomato mixture into it and fry well until the masala leaves the oil in the edges.
  • Add the finely ground cashew mixture and mix well,let it cook for a couple of minutes.Add more water to get the right consistency.
  • Add red chili powder,garam masala and kasuri methi(slightly roast it on pan and crush it with your hands before adding) to it and mix well.
  • Meanwhile gently squeeze extra water from paneer pieces and keep them aside.
  • Now add paneer pieces to the gravy and simmer for 2-3 mins.Turn off the flame and let the gravy cool a bit.
  • Add milk to it and mix well and switch on the flame and stir in fresh cream and give a stir on low heat and boil for 2 mins.Add milk after the gravy is cooled a bit which avoids curdling the gravy.(Here I did not add cream to the gravy, I added only milk after I removed the gravy from heat)
  • Add 1 tsp butter to it and garnish with coriander.Adding butter at the end will enhance the taste.
Serve it hot with Roti's/Paratha's/Naan/Kulcha/Jeera chawal/pulao.
Notes:
  1. I added watermelon seed paste instead of cashew paste as the fat content in water melon seeds is comparatively lesser than the cashew nuts.More over the taste provided by water melon paste to the gravy is better than the cashew nut paste,it gives a particular dhaba style gravy.
  2. You can avoid cream in the above recipe and add little milk instead or completely avoid it for low-fat version.


In case you are interested check out  Paneer recipes both dry sabzi and gravy varieties in my blog :

Monday, May 7, 2012

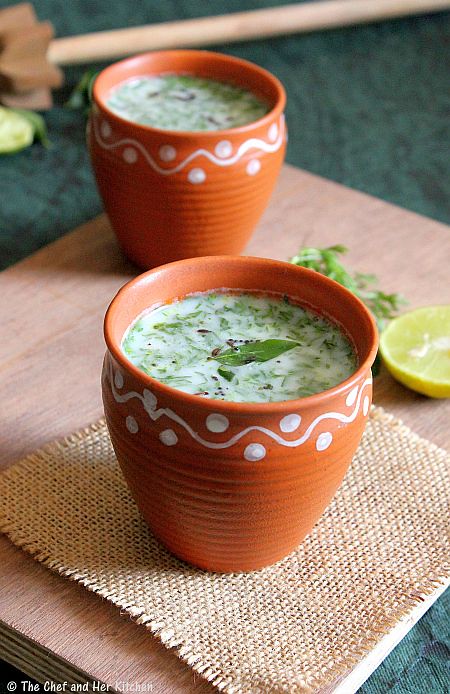
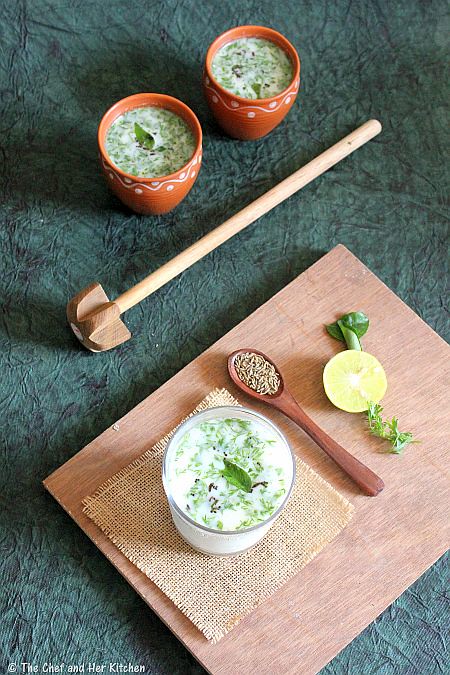
Neer Mor | Spiced Buttermilk | Chaas | Majjiga Recipe

Summer is at its peak and the best way to beat the heat is to rehydrate ourselves with fresh juices,milkshakes,smoothies, mocktails, lassi, buttermilk and tender coconut.On a daily basis I prefer having buttermilk, lassi, tender coconut or fresh juice in the summers while I reserve mocktails,milkshakes and smoothies for guests.It is more of a ritual for me to prepare a big pot of buttermilk in the mornings, all through the summer making it easy for me to grab a glass when ever I want.I am sure that preparing buttermilk is not a big task in any Indian household but still I thought I will record this in my blog in case anyone is not familiar with it.
The most common drinks prepared with curd are Lassi and Chaas(spiced buttermilk).Lassi is a lot creamier and sweeter version where as Chaas is very thin and salted and spicy version and we prefer Chaas over lassi any day.Now talking about the flavors one can be creative to make this simple and humble buttermilk with interesting flavors like mint,coriander,cumin powder,hing,cucumber to make it more refreshing.I have few pointers mentioned under notes for variations and I promise to post another interesting and unique version of butter milk soon.Till then I will leave you with this simple and refreshing drink.
Neer Mor | Spiced Buttermilk Recipe:
(Serves 2)

Ingredients:
3/4 cup fresh thick Curds
2-2 1/2 cups water
1 tbsp finely chopped Coriander leaves
few Lemon drops(1/4 tsp),optional
Salt to taste

to grind:
1/2" Ginger,chopped
1/2 Green chilli,chopped
3/4 tsp Cumin seeds,slightly roasted

to temper:
1/3 tsp Oil
1/2 tsp Mustard seeds
a pinch of Cumin seeds
3-4 Curry leaves,finely chopped or 5-6 small tender leaves
a fat pinch of Hing
Method:
  • Crush the ginger pieces with green chili and cumin seeds in a mortar pestle to a coarse paste.
  • Churn the curds using the traditional whisk(called as 'kavvam' in telugu) or if you are a lazy person like me you can grind curds with ginger,green chilli and cumin seeds in a mixer.This is faster process and easy to prepare on daily basis.
  • Dilute with water to get the desired consistency.Add enough salt and few lemon drops to it and mix well.
  • Meanwhile heat oil and crackle mustard seeds,cumin seeds and add curry leaves and hing and fry for 10-20 secs and switch off the flame.
  • Pour this tadka to the butter milk mixture and also add coriander leaves and mix well.
  • Keep it refrigerated for 1-2hrs for the flavors to blend better.
Serve it cold.

Serving suggestions:
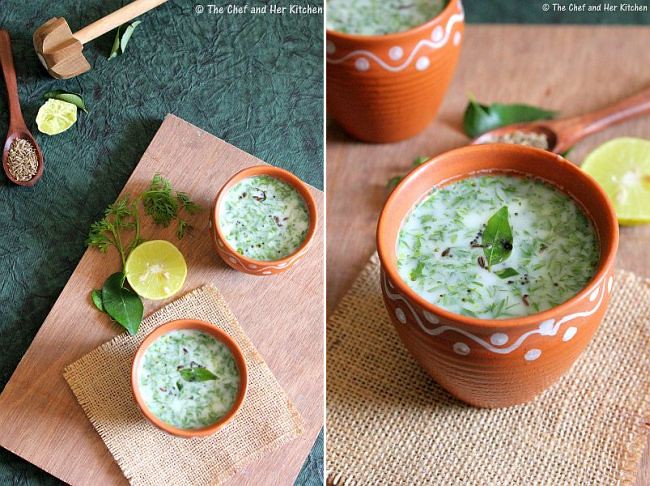
  1. Serve it in small earthern pots which adds nice taste to the buttermilk.
  2. If you don't like to have tid bits of tempering,you can strain the mixture and serve it.
  3. You can add finely chopped cucumber pieces or grated cucumber to the butter milk before serving.

Variations:
Minty flavored Buttermilk:
  • You can grind 2 tbsp chopped mint leaves with 1/2" ginger to a coarse paste and add to the churned buttermilk for a refreshing mint flavor and follow the same tempering process.Skip the garnish with coriander leaves.
Cucumber flavored Buttermilk:
  • Grind 1/2 cup grated cucumber with 1 tsp roasted cumin seeds and 2-3 tbsp chopped coriander
  • to a fine paste and add to the churned buttermilk for a refreshing cucumber flavored buttermilk and follow the same tempering process.

Friday, May 4, 2012

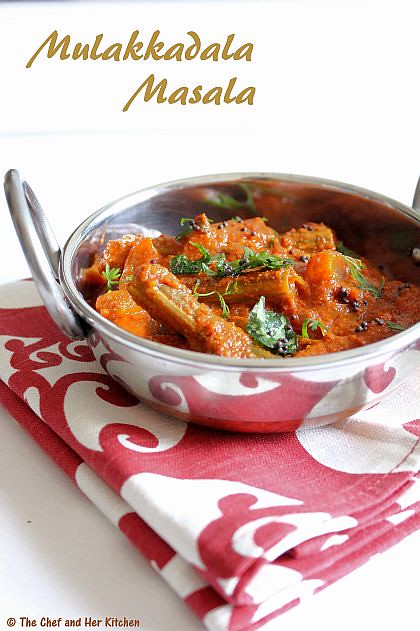
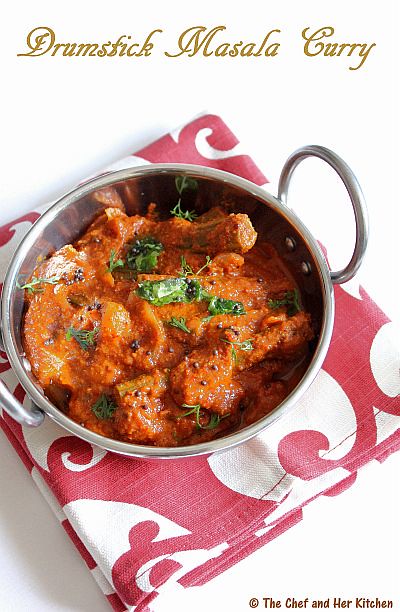
MULAKKADA MASALA | DRUMSTICK MASALA CURRY

This recipe is based on drumsticks - which I must admit I had never purchased until I shifted to Mumbai, thanks to my neighbors in the small town I spent my childhood days. While we didn't have much of a garden to talk about but our neighbors had planted various trees and plants including that of drumsticks. We used to source their home grown drumsticks at least twice a week and my mom used to make amazing stir fry,curry and podi with those drumstick greens. I must say the drumstick greens are very flavorful and tasty and you can even use them in making adai, rotti, dosa and paniyaram.While drumstick sambar was one of the usual fare and also our family's favorite, drumstick masala is another recipe which we were really fond of. Apart from these, I dont think my mom used to prepare any other variations. I however, experiment with a lot of varieties and use it in lots of gravies, sambar, rasam, raita, gojju to name a few.

Drumstick has a peculiar taste and flavor which I really like. Drumstick sambar is my most favorite one till date and I make it quite often.Drumstick masala is another one I like and for this one needs tender drumsticks. I didn't make this recipe for a long time, as I was not sure how my hubby would react to this dish.When I found some tender drumsticks, I picked them up to make this and surprisingly he loved it and asked me as to why I never prepared this before. In fact he even asked me for a second serving even though his favorite bitter gourd curry had also featured in the menu that day(I have already mentioned about his liking for bitter gourds in this post).I am sure I have convinced you enough, to try this recipe, this is truly a lip smacking gravy which goes very well with hot steamed rice and as well as rotis,but I prefer with rice usually.
Mulakkada Masala | Drumstick Masala Recipe:
(Serves 2)

Ingredients:
3 long Drumsticks(slightly thick and tender ones)
10-12 Shallots or 2 medium Onions,sliced
2 large Tomatoes
3-4 tbsp grated dry coconut
3-4 Garlic pods
2 tsp Coriander seeds
1 tsp Tamarind pulp
4-5 Red chillies
4 Byadige Red chillies(optional,gives a nice color)
1/2" Cinnamon
Salt to taste
2 tbsp Oil

to temper:
1/2 tsp Ghee/Oil
1/2 tsp Mustard seeds
a sprig of Curry leaves
Method:
  • Dry roast coriander seeds and red chillies separately and keep them aside.In the same pan warm cinnamon,grated dry coconut and keep aside.Let the mixture cool.
  • Grind all the roasted ingredients to a fine powder and add garlic and tomatoes to it and grind to a very fine paste.
  • Clean and cut drumsticks to 2" long pieces.
  • Heat 2 tbsp oil in a kadai and add cut drumstick pieces and fry them well for 3-4 mins.
  • Add shallots or sliced onions at this stage and fry them again for 2 mins.Reduce the flame and cover the kadai with a deep plate and pour some water over it and let the drumstick cook over a steam for 7-8 mins.
  • Add the ground paste to the cooked drumsticks and fry well for a couple of minutes and add tamarind pulp and enough water to get a gravy consistency,add enough salt and cover it and cook for 5-6 mins until the gravy is cooked and the oil starts floating over the gravy.
  • Meanwhile in a small tadka pan heat ghee/oil and crackle mustard seeds and add curry leaves and fry for 30 seconds and pour this tempering over the drumstick gravy.
Serve it hot with hot rice and ghee with some fry/fryums/papad.You can also serve it with rotis.
Notes:
  1. Always select nice and tender drumsticks for full flavor of the curry.
  2. Add red chillies according to your spice levels.If the gravy is very tangy add a bit of grated jaggery or sugar to it.
  3. For a Vegan version,use oil instead of ghee in the recipe.

Wednesday, May 2, 2012

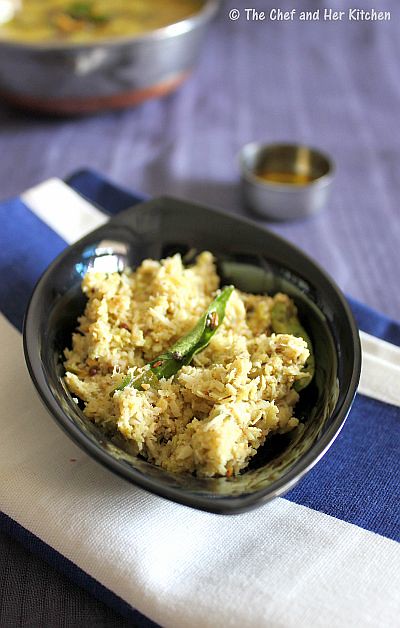
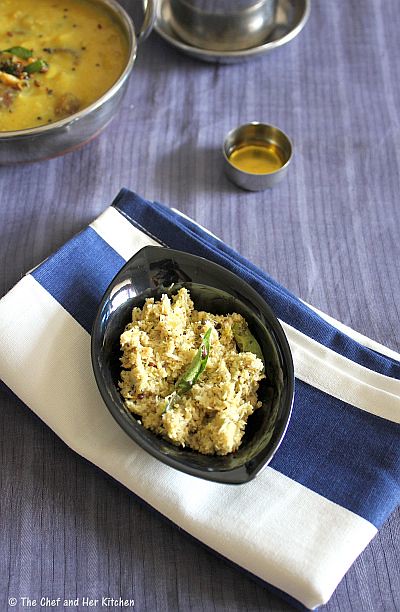
Raw Mango-Coconut Pacchadi | Pacchi Mamidikayi-Kobbari Pacchadi ( for Rice)

Andhra cuisine is famous for various kinds of Pacchadis which is an integral part of the lunch menu.'Roti pacchadi(in telugu)' -which translates to 'Ground chutney in traditional mortar and pestle' is mixed with rice where as 'Chutney' is just an accompaniment with breakfast and snack varieties like Idli,Dosa etc.While the chutney varieties(prepared for breakfast) are limited with main ingredients as coconut,tomato,onion with a combination of dals,spices and herbs;various varieties of pacchadis(for rice) can be prepared with vegetables like bottle gourd, coconut, ridge gourd, tindora, brinjal, snake gourd, various greens, tomato, ladies finger etc.Traditionally in Andhra pacchadi is prepared using a stone mortar and pestle which enhances the taste of pacchadi.Ideally the lunch is started with any podi and pacchadi variety mixed with a tsp of ghee and then it is followed by fry, curry, dal, sambar, rasam and curd in order to complete a meal.I am posting a simple and seasonal recipe with raw mango.The combination of raw mango and coconut gives an amazing taste to this pacchadi.
Mamidikayi-Kobbari Pacchadi | Raw Mango-Coconut Pacchadi Recipe:
(Serves 3-4)

Ingredients:
1 cup grated fresh coconut or 1 1/4 cup Coconut pieces
1/3 cup finely chopped raw Mango(use the sour variety)
2-3 Green chillies,slit
Salt to taste

to temper:
2 tsp Oil
1/2 tsp Mustard seeds
1 tsp Urad dal(split black gram)
a sprig of Curry leaves
a pinch of Asafoetida
Method:
  • Pulse chopped raw mango with green chillies and salt to a coarse mixture in whipper mode.
  • Add grated coconut and pulse it in whipper mode a couple of times to get a coarse mixture.Try not to add water,if needed add very few drops as the mixture should be very coarse.
  • Heat oil in a small pan and crackle mustard seeds and add urad dal adn fry until it is slight red in color.
  • Add curry leaves and asafoetida and fry for 30 seconds and add this tempering to the ground chutney and mix well.
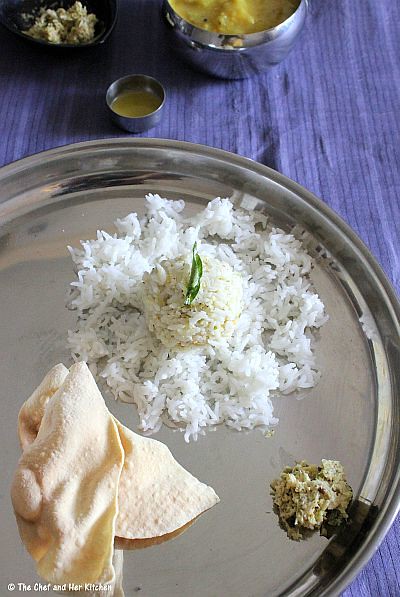
Serve it with hot steamed rice.Mix the pacchadi with hot rice and ghee.
Notes:
  1. Do not grind to a fine paste make the pacchadi coarse which is the key taste of pacchadi.
  2. Adjust the coconut and mango proportion based on the sourness of mango.Also increase green chillies if you like it more spicy.
  3. If you have the access to the traditional mortar and pestle,you can make the entire grinding process in it which adds a very nice taste to the pacchadi.
  4. You can serve this with Idli/dosa as well,in that case grind it to a paste rather than a coarse mixture

Variations:

  1. You can also add 1/2 tsp cumin seeds while grinding with green chillies in the first step.
  2. You can add 2 tbsp chopped coriander while grinding which gives a different flavor to this pacchadi.
  3. You can roast 1 tbsp urad dal in a tsp of oil until and red and grind it to a powder along with raw mango,green chillies and salt in the first step and follow the same process.In this method you can even replace green chillies with red chillies.

 
back to top