Monday, May 23, 2011

Mosaru Kodubale/Curd Kodbale(Curd-Rice Flour Rings)....FFF #4

This is the fourth successful consecutive week of my 'Family Food Friday' series and I am really happy with the response I got from my family members as well as our blogger friends.If you have missed any of the previous posts in this series check them here.Still there are few more interesting posts coming up in this section,so stay tuned!!!

Coming to today's post it is sent by my cousin's wife 'Savitha'.Though we met only a couple of times we are in touch regularly over the phone or mail.We had a blast last year during their visit to Mumbai,both of them enjoyed their visit and they just fell in love with the food and shopping in Mumbai. Savitha-Thanks a lot for sending my most favorite breakfast item for this series and you have done a wonderful job with the photography.
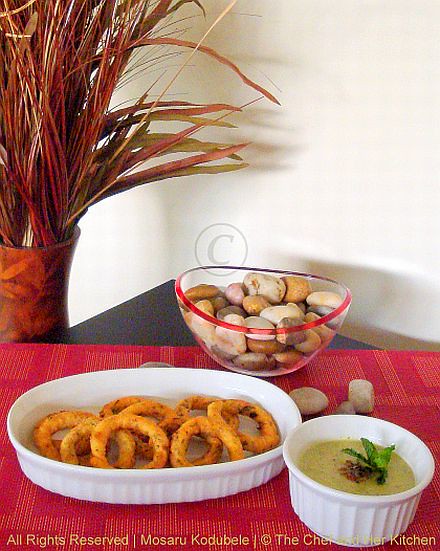
Coming to today's recipe,Mosaru kodubale is our community special and is one of the most favorite breakfast item by all age groups in our family.Me,my husband and my brother are big fans of these kodubale and we just finish a plate of them with in no time.These kodubale looks similar to the regular kodubale snack variety what we get in shops(in karnataka).One needs a bit of practice to make perfect kodubale as the process is bit elaborate for a beginner in kitchen.These are mainly done in Karnataka and I am sure all kannadigas would be aware of regular kodubale,but only few might be knowing about this variety of mosaru kodubale as it is done only in our community.
'Mosaru' in kannada means 'curd' and these kodubale are made with curd and hence they cannot be stored for long.They are generally made for breakfast or evening tiffin at our place and these are crispy outside and soft inside.These should be eaten hot and can be stored just for a day unlike those kodubale snack which stays for a couple of weeks,they taste best when hot.

These kodubale are nicely spiced and tastes slightly sour which tickle your taste buds in each and every bite of it.Many of my friends and family members are bowled by its taste for the first time itself when they tasted these awesome kodubale and mind you!!! These are just addictive!!.Do not blame me later if you have liked it so much and make it often to consume these yummy kodubale.If you ask me to rate this breakfast I would say that this is one of my top 3 list in breakfast,I just love it very much.

I remember when I served them to one of my friends for the first time,guess what theye thought seeing them?....they thought that these were 'Onion rings',but after tasting it they were just flattered with it and said they taste better than onion rings.I know,looks wise they are same but they are not comparable in taste with each other as according to me both of them belongs to different category and both tastes nice in its own way.
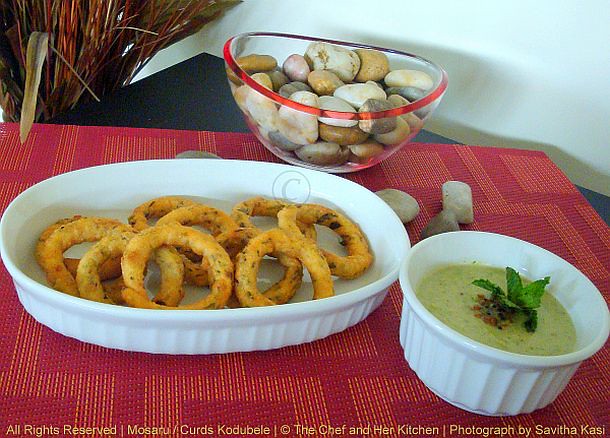
(Makes about 15 kodubale)
Ingredients:
1 cup slightly sour curds(slightly thin,not very thick)
1 cup Rice flour
1 tsp green chilli paste(coarsely grind–mirapa thokku)
1/4 cup grated fresh coconut
3/4th fistful moong dal
1/2 bunch finely chopped coriander(approx 1/2 cup)
a sprig of curry Leaves,finely chopped
Salt to taste
Oil,for deep frying

Method:
  • Add the curds(slightly watery), coconut, moong dal, coarsely ground green chilli paste and a little salt into a vessel. Mix these ingredients well and boil them in a vessel over a medium flame.
  • After it comes to a boil reduce the flame and add rice flour,finely chopped cilantro, curry leaves and mix it well with a ladle(chapati roller works best here).
  • Divide the mixture into two parts and knead the mixture into a smooth dough on a silicon baking mat or on a clean plastic sheet.Be careful the dough would be very hot,so wet your hands while doing this process.You can even place the dough in a clean plastic bag and knead well,this is very easy and risk free process.This should take at least 4-5 minutes.It is always better to do in small portions.
  • This will make it into a smooth thick dough(like how we knead chapati dough).
  • Now pinch in the dough and make into small equally sized balls and roll the balls into thin long (pipe like) of about an inch in diameter using hand. Press the ends of the dough to form a circle.
  • Deep fry them in oil over medium heat until it turns golden brown.
Serve it hot with green coconut chutney and enjoy!They taste best when they are hot but can be eaten at room temperature.

Note:
  1. Remember this is the breakfast/tiffin variety of kodubale and not the snack variety of kodubale.They should be eaten hot and cannot be stored.
  2. Double or triple the measurements to get the required number of kodubale taking care of salt portion.

I am sending these Mosaru kodubale to srivalli's 'Breakfast Mela' event.

Friday, May 13, 2011

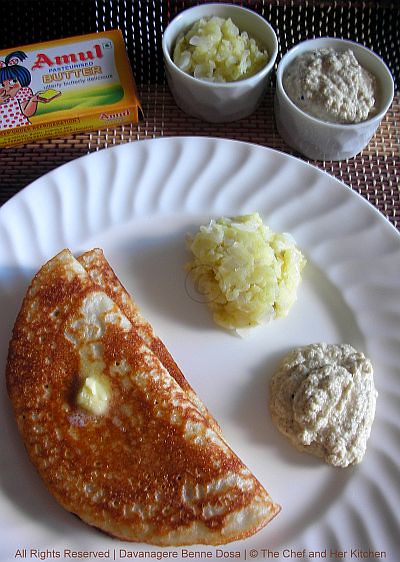
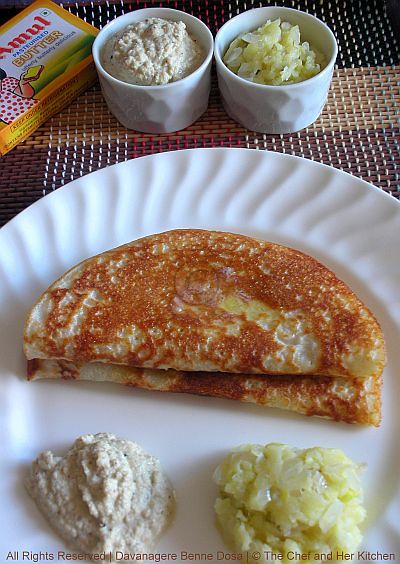
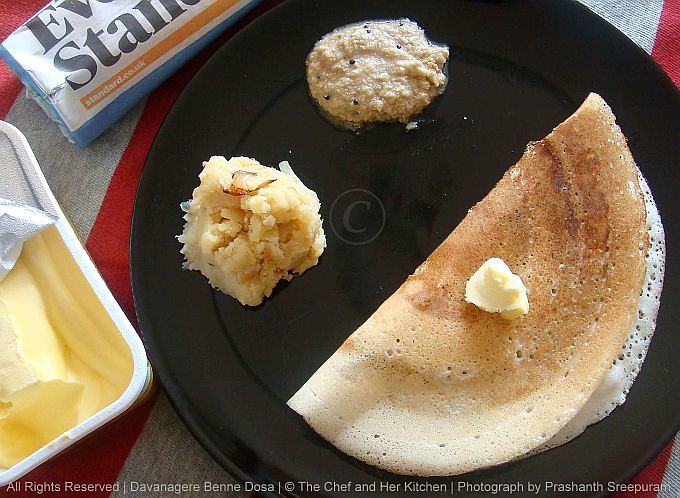
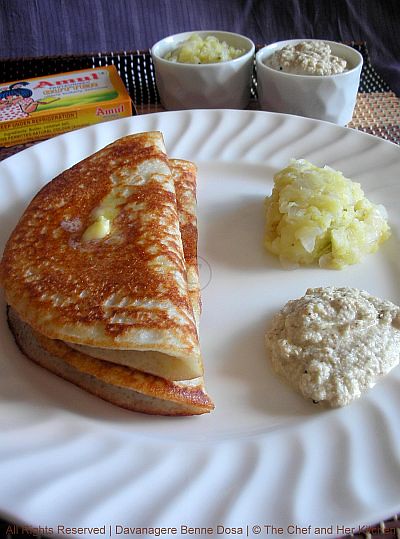
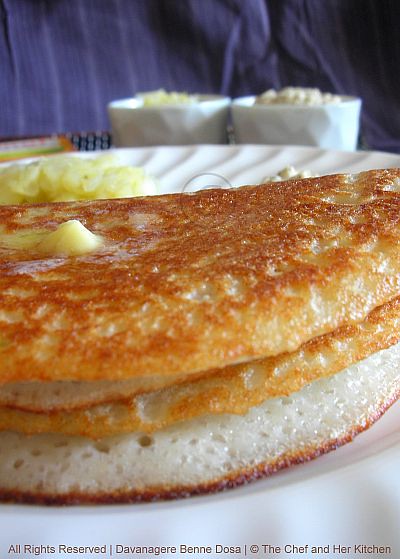
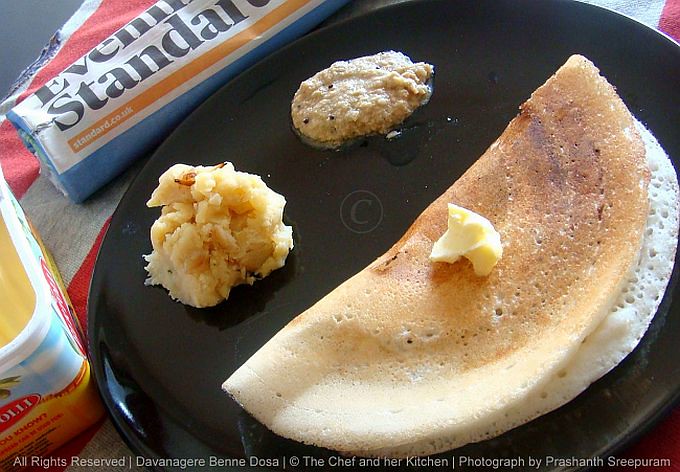
Davanagere Benne Dosa(DBD) from Karnataka!!!...Family Food Friday#3

In my last week's post I had asked you all to guess about my next post with the clues that I have given and many of you guessed that DBD would be a dosa.Though some of you were partially correct but the credit goes to two of our fellow bloggers who guessed it correctly; Vani being the first one to guess followed by Suma Gandlur.I intentionally did not publish their comments until today as I wanted to give others a chance to guess.Lubna pinged me in the morning and said that it flashed her mind last night suddenly what DBD stands for and yups she was also correct.I thank you all for responding to the guessing game I am overwhelmed with your response .

This post is very precious to me because it was sent to me by my sweet brother ''PRASHI''.I have already mentioned about his culinary skills in my earlier post here and if you have not checked it lemme tell you more about him again. He is a very good friend, advisor and a mentor to me from childhood.Though there are days we used to quarrel and not speak to each other for a few hours and with some fights lasting even a couple of days,ah! those days remain as sweet memories for me now.
Coming to his culinary skills, he started cooking only after he shifted to US on work and learnt everything on his own.At our house he boasts that he is a super chef . In-fact some of his dishes got appreciation even from his in-laws and the upma he prepares has a huge fan following in our family.One thing I hate about his cooking is the mess he creates while cooking and it takes more time for us to clean the kitchen than the time he takes for cooking.He behaves like a boss in kitchen and orders us to chop the vegetables and do all other things for him while he finishes off the main cooking part and takes the final credit of making that dish.Even while preparing this dish his job was to measure the ingredients and make the dosas, rest all things like cleaning,washing and grinding process was taken care by my S-I-L. You all know that I am a big fan of dosa and so is the case with my brother and niece.We three can 'Eat Dosa,Drink Dosa,Sleep Dosa' and can survive on dosa.My brother keeps experimenting in kitchen and that is how even this DBD was created. Once when my S-I-L was soaking the ingredients for Set dosa batter he interfered and wanted to give a try to recreate DBD and they were really happy and satisfied with the first attempt itself and from then they followed the same recipe for DBD.

During one of my usual chat with a friend,I was surprised to know that she had never tasted this famous dosa in Bangalore though she is from the same place.I always have a list of joints which I dont miss visiting when I go to Bangalore and this DBD is one of them.I absolutely love the breakfast delicacies in Bangalore and probably I can say that Bangalore breakfast Rocks!!!,it is just best in my opinion.If you are in Bengaluru or you visit Bangalore do try these famous breakfast joints in the city-have a look at this article which clearly mentions about the famous joints in the city and give a try -I am sure you will fall in love with the food.

Davanagere Benne Dosa in short form DBD is quite famous variety of dosa in Davanagere district located in the northern part of Karnataka. I have never tried the original dosa from Davanagere but I have tried it N number of times in Bangalore in a Davanagere Benne Dosa outlet which is famous in that area for its traditional taste of Davanagere food. Though there are many outlets of DBD in Bangalore, we love the taste of this famous DBD only in this particular outlet and we always stick to it. Along with DBD,there are many other famous items like kali dose,open masala dose, paddu, girmitt, mandakki masala,nargees which tastes superb.

DBD is quite different in taste when compared to any other dosa,though it is served with potato masala the combination is no where compared to the regular masala dosa.These dosas are not spread into large ones,they are of medium size,thick and crispy ones.The proportions used for the batter is quite different for this dosa which makes the dosa quite thick,soft and extremely crispy.The potato masala served with DBD is of pale yellow color unlike the deep yellow potato palya of masala dosa and is quite plain but very flavorful.The chutney is made extremely spicy to go well with the no spice potato masala and crispy buttery Davanagere Benne Dosa.

What makes DBD quite different from other dosas is the liberal usage of fresh and good quality white butter which makes the dosa extremely tasty and crispy.It is fun to see the way they place the blobs of butter here and there on dosa while they are frying it.In those DBD outlets they roast these dosas on thick iron tawas on the wood fire using a special variety of wood sticks which makes this DBD authentic in its taste.But at home as we do not make fresh butter it is easy to replace it with store bought one and anyways we cant think of making this on wood fired stove and so we should be happy with our regular stove.This is an attempt to recreate the famous Davanagere Benne Dosa and we claim that it might not be the most authentic one but we are happy with the taste which we were looking in DBD.

Davanagere Benne Dosa(DBD):

Ingredients:

To soak and grind:
4 cups Long grain rice/regular rice
2 cups Idli rice
1/2 cup poha/pressed rice
1/4 cup urad dal
1 cup murmur/puffed rice
1 tsp fenugreek Seeds
6 green chillies
Salt to taste

To add before making dosa:
1 tbsp maida
1 tsp sugar
A pinch of soda

loads of fresh white butter for roasting the dosas

Method :
  • Soak Long grain rice, idli rice, poha, urad dal, murmur, fenugreek seeds for 6 hours and grind it into uniform smooth mixture.
  • Now add chopped green chillies and salt and grind again.
  • Ferment it overnight or at least for 9-10 hrs.
  • Just before making the dosa add maida, sugar and soda and mix well.
  • Pour the batter on a hot tawa and quickly make a dosa of 6" diameter.
  • Pour ghee or melted butter over the edges and do not pour butter on the top of dosa initially.Close it with a lid and roast on medium flame,after a minute open the lid and add the blobs of butter and let it roast until you get to see the edges turning deep red in color.
  • If you add the butter initially it will make dosa soft and with white patches on it instead of beautiful brown crisp crust.This step is very important and crucial to get a thick brown crust.Increase the flame in the end and roast the dosa for few seconds.Reduce the flame,sprinkle some water and proceed making the remaining dosas.
  • Fold it into half and place a dollop of fresh white butter
Serve it hot right off from the pan onto a plate with aloo palya and white coconut chutney on the side which made specially for DBD.

Important Notes to make DBD:
  • Use a cast Iron tawa or heavy aluminium tawa instead of non-stick for better results.If you do not have them then go for the non-stick one.
  • Pour melted butter(ghee or oil can also be used here) over the edges and do not pour butter on the top of dosa initially.Close it with a lid and roast on medium flame,after a minute open the lid and add the blobs of butter and let it roast until you get to see the edges turning deep red in color.If you add the butter initially it will make dosa soft and with white patches on it instead of beautiful brown crisp crust.This step is very important and crucial to get a thick brown crust.Increase the flame in the end and roast the dosa for few seconds.
  • Reduce the flame,sprinkle some water and proceed making the remaining dosas.
  • Be generous in adding the butter to the dosas forgetting the calorie intake for a day and these are real benne dosas.Even we need a treat once in a while right??
Aloo Palya:

Ingredients :
2 medium potatoes (skin peeled)
4 green chillies
1 medium onion (chopped lengthwise)
Salt to taste
1 Tsp oil

Method :
  • Pressure cook potatoes with green chillies for 2 whistles.
  • Once the cooker is cooled, mash green chillies with aloo and mix well. And keep the mixture aside.
  • In a kadai heat oil and fry onions till translucent.
  • Add salt to taste and mix well.
  • Now add the mashed aloo mixture and mix it well.
Notes:
The addition of green chillies to the palya is optional,if you want it spicy then pressure cook the green chillies along with potatoes which helps the green chillies loose its color and not affecting the color of the potato palya.Do not add green chillies while frying onions otherwise the authentic look and color of the palya would be lost.

White Coconut chutney:

Ingredients :
1 cup freshly grated coconut
1/4 cup fried gram
1/4 tsp tamarind pulp (I used ready pulp)
6-8 green chillies
1/4 tsp sugar
Salt to taste

for tadka:
1 tsp ghee
1/2 tsp mustard

Method :
  • Grind fried gram into a course powder.
  • Add the rest of the ingredients and grind into a course mixture again.
  • Heat ghee in a small tadka pan and crackle mustard seeds in it and add this to the coconut chutney and mix well.
I have been in search of good DBD for a very long time and tried many recipes and kept happy myself with them though I was not very satisfied.So when the recipe is from a trusted source how can I stop myself from trying it.As soon as I got the recipe for the post I headed to my kitchen to soak the ingredients and here is the outcome from my kitchen.Just loved the taste of it and it was a perfect treat for my taste buds which salivating for a good Benne Dosa.

Note:
Photos embedded in the recipe part are from my brother,rest of them from yours truly,ME.I could not stop myself from posting those pics,the recipe deserved more pictures.


This breakfast is going to participate in srivalli's 'Breakfast Mela' event

Tuesday, May 10, 2011

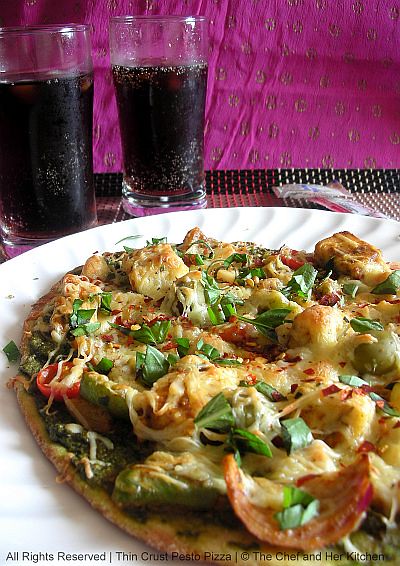
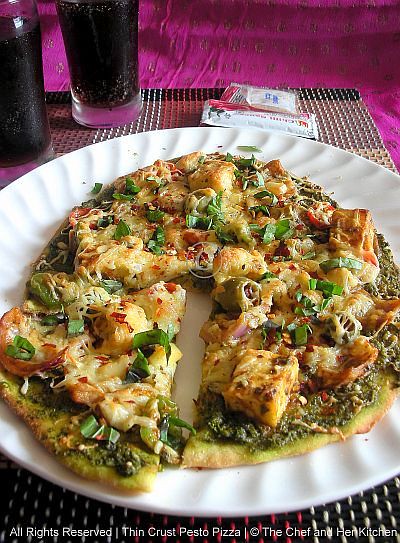
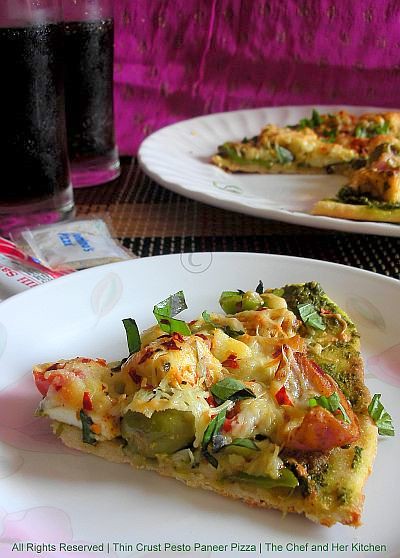
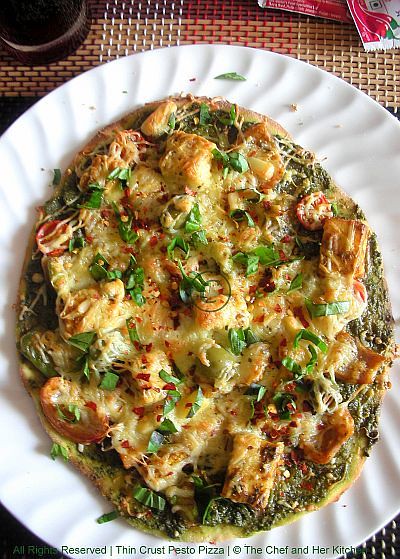
Thin Crust Pesto Pizza


Pizzas are quite popular among all the age groups because of its rich cheesy taste and of course how can someone say no to this cheesy treat until and unless they are diet conscious.Even in India in recent years it has become quite common in the menu for birthday parties, marriages, functions and it is also included in the road side food category as well, though the pizzas we get there are no where compared in taste to the ones we get in Domino's or pizza hut/corner or pizzeria etc.But I definitely enjoyed those road side/fast food joint pizzas during my school and college days when I really did not know much about the most authentic ones.When I got introduced to the real taste of pizzas I was hooked to the taste of it and I never looked back to eat those fast food joint pizzas.

Now with the introduction of various International Chains like California Pizza Kitchen,Indigo etc in India people are very much hooked to the International style and taste of Pizzas.We definitely love all these different varieties of pizzas either from Pizza hut/Domino's,etc or the ones from CPK/Indigo,etc.Even these big pizza joints have come up with lots of new flavors to satisfy our Indian taste buds with the special toppings of paneer along with the mexican style, salad style and the regular Italian style(and of course many more variations) with the option of our preferences for toppings and various types of cheese.Along with various choice of toppings,now even different variations of crusts are available like thin,thick,cheese burst,wheat according to our preference and thin crust is always we prefer among all.

I thoroughly enjoy all the toppings but hubby dear has a special liking for paneer and hence we always look for pizzas with paneer topping while ordering a pizza.I even mentioned about his love for pesto in many of my previous posts and you all must be knowing about it.So with all these personal preferences I can say a basic thin crust pizza with pesto sauce and paneer being one of the toppings would definitely be a perfect treat for my husband.I generally marinate the paneer in pesto sauce to enhance the flavor of it though it is optional,but it will definitely make those paneer pieces extra flavorful.If I make regular marinara sauce for pizza then I go for marinated tandoori paneer as a topping which really enhances the taste of pizza.

Ingredients:
for thin crust pizza base:
1 1/2 all purpose flour(I used 3/4 cup flour and 3/4 cup whole wheat flour)
1/2 cup(125ml) water
1 1/2 tsp instant active dried yeast
1 tsp sugar
1/2 tsp honey
1 tbsp Olive oil(EVOO)
salt to taste(approx 1 tsp)

for basil pesto sauce:(refer my earlier post or below)
100gms,roughly 2-3 cups loosely packed fresh basil
1/4 cup extra virgin olive oil(EVOO)
1/4 cup pine nuts or walnuts
3 tbsp grated Parmesan cheese
3-4 garlic pods
1/2 tsp roughly ground pepper
juice of 1/2 lemon
salt to taste

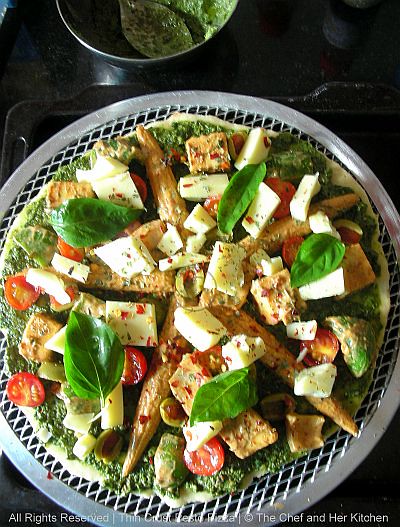
toppings I have used:
1/2 cup fresh paneer cubes (marinated in a tbsp of basil pesto sauce for 1hr)
3-4 baby corns,slit into lengthy
1 onion,cubed
1/4 cup mixed bell peppers,cubed
10-12 black olives,pickled
10-12 green olives,pickled
15-20 cherry tomatoes,halved
mozzarella cheese

other toppings suggestions:
zucchini
asparagus,tinned
mushrooms,sliced

to serve:
few basil leaves,sliced thin
dried oregano
red chili flakes
Tabasco sauce


Method:

for basil pesto:
  • In a mixer add washed and drained basil leaves,pine nuts/walnuts,garlic pods,pepper,add half the quantity of olive oil,lemon juice,Parmesan cheese,salt and ground to a medium coarse paste.Add the remaining olive oil in stages in between to ease the process of grinding.Do not add water to grind it,the EVOO and lemon juice them selves are enough to grind into a uniform paste.
  • Now check for the taste and adjust the salt for the pesto.
for pizza dough:
  • Take water in a microwave safe bowl and microwave for 30 seconds until luke warm.Stir in sugar,honey,EVOO(oil) and yeast until it is dissolved well properly and let it proof for 10 mins.Keep it in a warm place.
  • Sieve the flour(if using whole wheat flour sieve even that) along with salt and place this in a wide bowl.Make a well in between and pour in the yeast mixture and mix with a whisk or a spoon until you get a lump of dough.
  • Knead the dough until you get a smooth,elastic dough.It takes nearly 3-4 mins.
  • Place this in a bowl coated with oil and cover with cling wrap and place it in a warm place for 2 hrs.It would have doubled in size by then.
  • Punch in and knead again for a minute and take a big orange sized ball.You will generally get two medium size pizzas.
assembling and baking pizza:
  • Preheat the oven at 220 deg for 8-10 mins.
  • Pinch in a big orange size dough and make a nice ball out of it.
  • Sprinkle flour over the surface and roll the pizza into thin medium round size using a rolling pin.I generally keep the edges slightly thicker than in the center.You can even roll it into oval or square or rectangle and use the baking pan accordingly
  • Place this carefully on a baking mat/ pizza stone/ pizza mesh.
  • Prick it with a fork in a couple of places.At this stage you can bake it for a couple of minutes or you can avoid it and proceed further with layering the vegetables.I personally feel if we bake it before the center portion will not turn soggy and as it is thin crust this problem would not be there.
  • Spread the pesto sauce over it leaving a quarter inch from the corners.
  • If you want you can add a thin layer of grated mozzarella cheese,anyways it is absolutely optional to add at this stage.
  • Arrange the toppings how ever you want and add grated cheese over the top and bake in the preheated oven for 10-12 mins until the base is crisp and the cheese is melted and slightly browned.
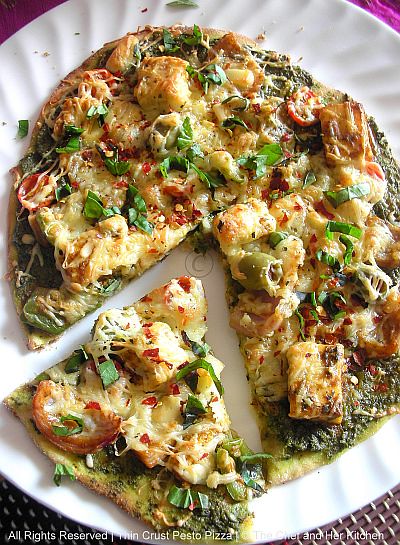
  • Remove it from the oven using a spatula preferably a metal one and slice it using a pizza cutter and serve it hot.
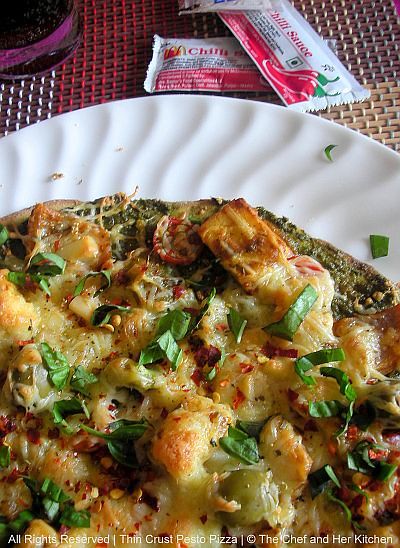
Garnish with your favorite seasonings like red chili flakes, oregano,thinly sliced basil and Tabasco sauce.Needless to say that serve these hot pizzas with ice cold aerated drinks like coke/Pepsi/lemonade/flavored soda as they go very well with each other.
I do not prefer serving pesto pizzas with tomato sauce and I always prefer Tabasco sauce with it,but if you are serving this for kids they might enjoy with tomato sauce.

Notes:
  • The toppings are left to your preference completely,you can add more or you can remove few in those mentioned toppings.Add according to your preference and taste.
  • If you have people in the house who are particular about few toppings,you can add the desired toppings on equal halves of the pizza and eat your respective portions.
  • As I did not have mozzarella at that time,I used another local pizza cheese variety for this.

Friday, May 6, 2011

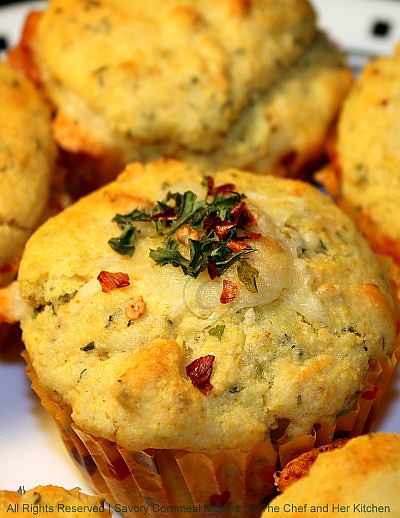
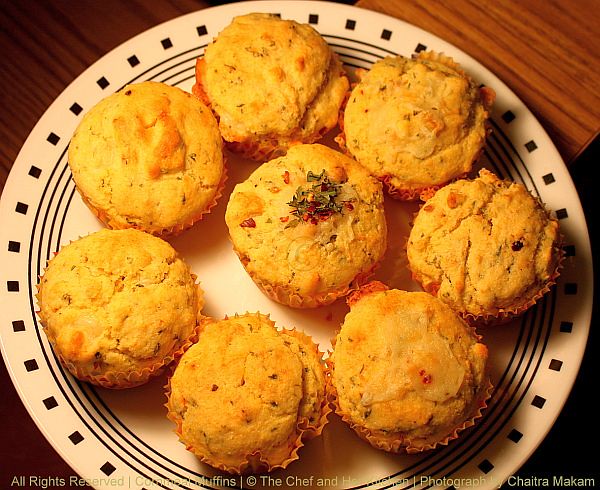
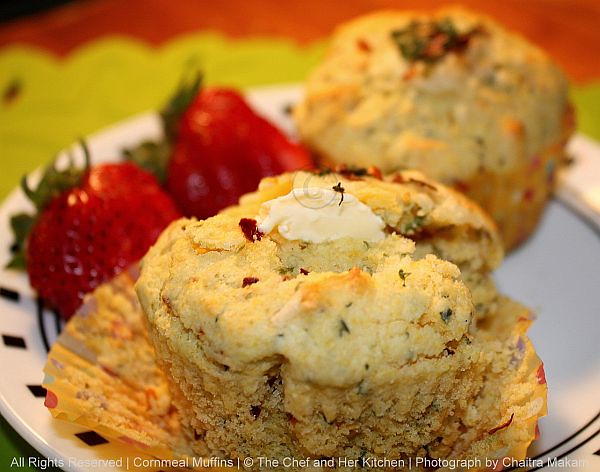
Savory Breakfast Cornmeal Muffins....Family Food-Friday#2

First let me thank you all for the tremendous response with all your encouraging words for my family members,this definitely boosts them up to send a couple of few more delicious entries.If you have missed out the action and the last week's recipe,check it out here,the first entry for this series from my S-I-L.

Coming to the second entry for my CWF series and this week's entry for 'Family Food -Friday' is Savory Cornmeal Muffins from my cousin,"Chaitra".And coming to the introduction part, Chaitra is my cousin with whom I am pretty close when compared to others as we both are of the same age group.We had a special bonding right from the childhood and we both have wonderful memories with our childhood adventures.Though we stayed in different cities we were in touch regularly and used to send each other letters(those were the days we did not have this e-mail system) and greetings regularly with out missing to wish any important occasion being it a birthday or new year or exams or in general.We always looked forward for our holidays and we planned the things well in advance.We used to go together everywhere and share everything with each other whether it could be a single kulfi or a single plate pani poori or a ride in the giant wheel or a dress or whatever.We used to make sure that we enjoy our holidays with all our cousins and used to get involved in several activities.Though she is a big foodie she never loved to cook and not even entered the kitchen before her marriage and now look at her,she cooks each and every meal interesting and also experiments with various cuisines.

Let us see what she says about this entry in her own words,'This is the basic recipe I got off the Albers cornmeal Box. I have made some changes to it to make them savory so that I can make them for breakfast. These are filling muffins apt for breakfast or even as a snack. You can use whole wheat flour to make them. These store well in an air tight box. If you have added cheese I would suggest you refrigerate them and microwave to warm them. Slather with butter and serve them.'


Ingredients:
1 cup white or yellow corn meal
1 cup all-purpose flour/whole wheat pastry flour
2 oz grated Cheddar cheese(I used pepper jack)
1 cup milk
1/3 cup vegetable oil
1 large egg,lightly beaten
1 tbsp granulated sugar
1 tbsp baking powder
1 tbsp red chili flakes
2 tbsp fresh/dried parsley
1 tsp salt,to taste

Method:
  • Preheat the oven to 400 deg F.Line the muffin tray with the liners and grease them with oil.
  • Combine all the dry ingredients cornmeal,all purpose flour,grated cheese,baking powder,salt,red chili flakes,sugar and fresh/dried parsley in a bowl.
  • Beat the egg lightly in another bowl and add oil and milk and whisk well.
  • Pour the whisked wet ingredients into the dry ingredients mixture and mix well.
  • Spoon batter into greased muffin molds,filling 2/3rds full.
  • Bake in preheated oven at 400 deg F for 15 mins or until the skewer comes out clean.
Serve them warm.

Note:
  1. If you want make this in a bread pan,pour the batter into a 8 inch greased square pan and bake at 400 deg F for 20-25 mins until the skewer comes out clean.
  2. You can double the recipe and make in 13x9 inch baking pan.Bake as above.
My Variations:

For a variation,you can add finely chopped colored bell peppers,paneer,onion,olives or sweet corn to the batter and mix well.Bake as above.

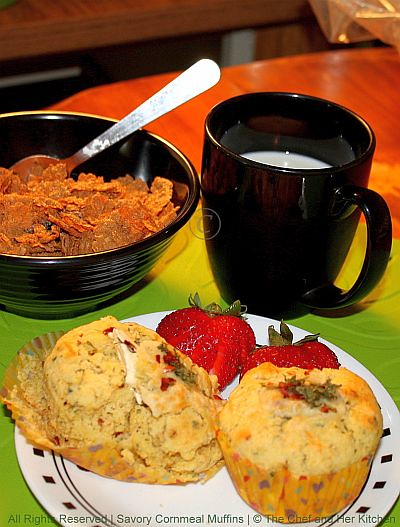
This is the breakfast platter for you from chaitra with savory cornmeal muffins,fresh strawberries and muesli with a cup of milk.This breakfast is going to participate in srivalli's 'Breakfast Mela' event

Now the time for a small guessing game regarding the next week's post.I am giving you two clues regarding it,let us see how many of you will get the answer correct and just have fun.
(Img Source:Google)

clue no:1 As you all know that my CWF-series for Family Food-Friday is Breakfast,so it is as simple as that it is a Breakfast item.
clue no: 2 I am giving the short form of the next entry as DBD.

Just leave a comment about your guess for my next breakfast entry in the Family Food-Friday series with those two clues and let us see how many can guess it correctly.

Tuesday, May 3, 2011

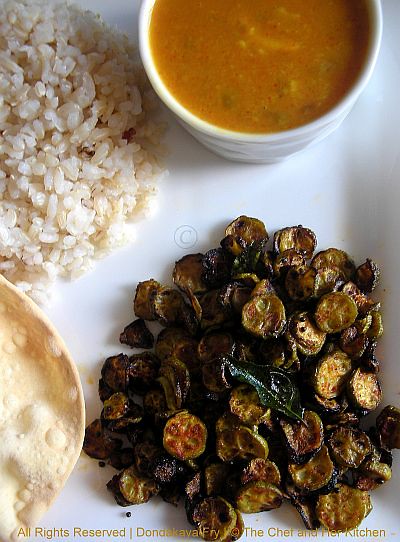
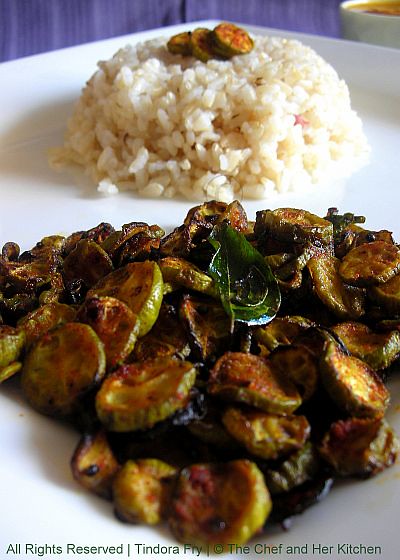
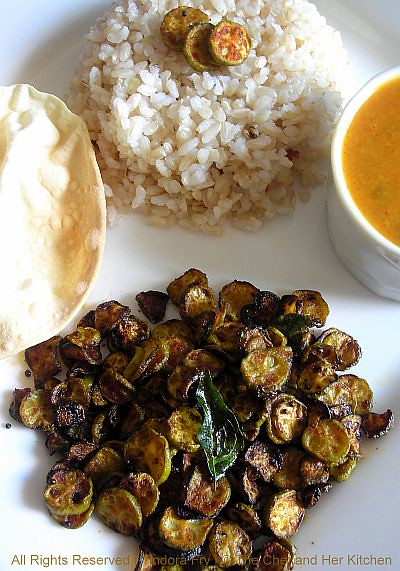
Tindora Fry/Dondakaya Fry

I don't think that I had to post this as this is a very simple and common south Indian stir fry.Then the next question would be as to why am I posting it then?The answer is simple,this recipe is completely meant for all the newbies or bachelors or for people who are not familiar with south Indian cuisine.
On any day if I am served with just a simple fry,rasam and papad for lunch I would be more than any happy person to enjoy my meal heartily.Especially after a long holiday after eating lot of junk food I would be dying to have simple south Indian meal like this.Not only that,this kind of decent meal with a stir-fry,rasam and rice can be made under 30 minutes which is just perfect on lazy weekends or when short of time.During my school and college days,most of my lunch boxes had few breakfast items or mixed rice and pulav varieties.So during the weekends or on holidays I used to insist my mom to make just stir-fry and rasam as I thoroughly enjoy it.She used to start her cooking only around 12.30 in the noon as 1 o' clock was my usual lunch time and she used to serve everything right off from the pan,piping hot rasam and crispy stir-fry with steaming rice which is a match made in heaven for me.Why am I boasting about a simple stir-fry and rasam so much??Well if you are a south Indian you will understand why am I saying so much about simple stir fry and rasam.

Ingredients:
250 gms Tindora/Tendli/Dondakaya
2 tsp red chili powder
1/2 tsp mustard seeds(optional)
2 tbsp oil
salt to taste
a sprig of curry leaves

Method:
  • Cut tindora into thin round discs or lengthy thin strips and keep them aside.
  • Heat oil in a thick bottomed kadai or non-stick pan and crackle mustard seeds and add curry leaves and let them get slightly crisp.
  • Add sliced tindora and keep it in low to medium flame.Keep stirring it once in a while to let it fry until crispy.It might take 25-30 mins depends on the flame and tawa you use.
  • Once it becomes crispy add required amount of salt and chili powder and mix well and fry for another couple of minutes.
  • Once the fry is done do not cover it as it will loose its crunch and becomes slightly soggy.So its better to do it fresh and serve immediately rather than making it a couple of hours earlier.
Serve it hot with piping hot white rice and rasam/sambar/dal and papad.I served it with brown rice,tangy raw mango dal and papad.

Notes:

Follow the same method to make any fry with the vegetables like ladies finger, brinjal, potato, raw banana, arbi(but you need to boil it before).You need to fry them according to the cooking time required to make it.

Variations:
  • I sometimes add garlic chilly powder instead of regular chilly powder which gives nice garlic flavor to the fry.You can even add slightly mashed whole garlic pods to the fry while you are frying it.
  • You can even add sambar powder or goda masala instead of red chilly powder for a different flavor to the fry.

Friday, April 29, 2011

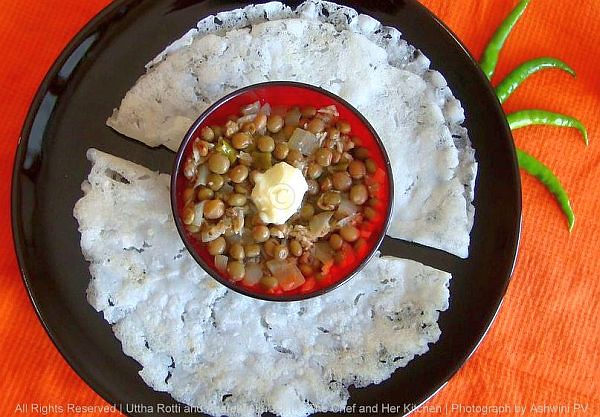
Uttha(Plain Rice flour)Rotti and Avarekaalu Benne Usli,Karnataka Special...'Family Food-Friday#1'

I am here to kick start my first event titled, 'Cooking with Family-Series' which I had highlighted in my last post. The theme that I have chosen for this event is, 'BREAKFAST'. I plan to post the recipes once a week on every Friday and hence named the theme as 'Family Food-Friday'. I have updated the details of this event in the side bar of my blog. Stay tuned to check out the next entry for this event.

Before going to the recipe, let me introduce you the author of this post. This entry is sent by my Sister-In-Law 'Ashwini ',who has a two year old, naughty daughter 'K' .My niece keeps her busy all the time with her non-stop enthusiasm.I think I would need another long post , if I were to tell you more about my little, enthusiastic and mischievous niece. As this post looks already looks lengthy so I am keeping it for another day. As me and my S-I-L both are of the same age group, we are more like friends and update each other on daily life and routine. She has kept her promise by sending her entry as soon as I told her about the event.The most surprising thing for me are the photos that they have clicked for this entry. Both my S-I-L and BRO have done a good job with the photos even though it is their first attempt at it.

Now coming to the recipe, Ashwini has sent me a breakfast item called 'Uttha Rotti' paired with the most famous karnataka dish, 'Avarekaalu Benne Usli'. Karnataka is a land of rottis and is famous for its various varieties like akki rotti, ragi rotti, jolada rotti etc .Uttha rotti means plain rotti and is made up of rice flour which is our community special.I have already posted a version of rice flour rotti called akki rotti which is roasted till its crisp and we also make another version where we cook the rice flour in steam and roll it to chapati and roast it soft.This version is a quite different from those two versions and it is a cross in between the two versions.The rice flour is cooked in steam and then it is patted with hands onto a tawa and roasted till soft and crisp.This rotti is even ideal to make on the fasting days as it does not have onion or garlic and can be paired with coconut chutney on those days.Ashwini also mentioned that though she was not a fan of this rotti she has learnt this rotti from her mom, only because my brother likes it very much...so sweet of her naaa!!!

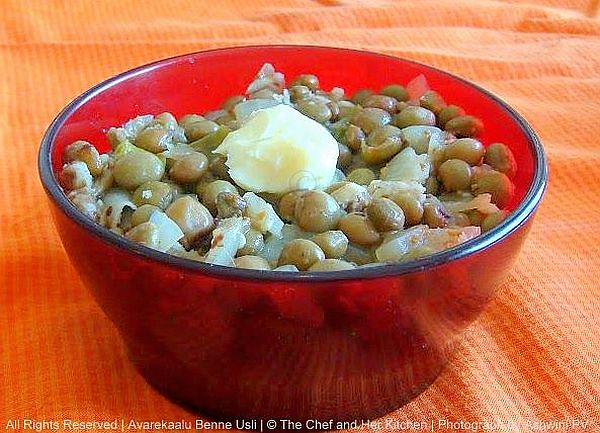
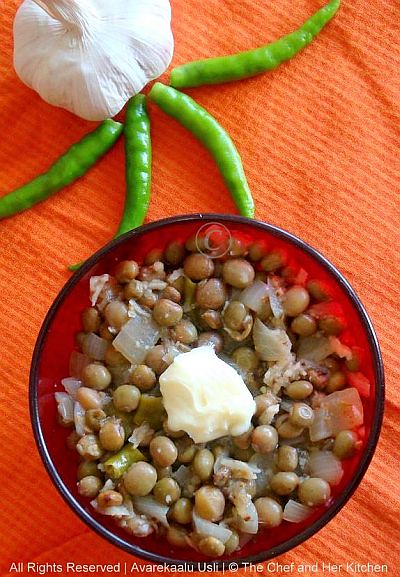
Avarekaalu is one of the seasonal beans which can be used in making various delicacies like halwa, payasam, dal, sambar,saaru, rice,usli, rotti, upma, chiwda etc etc and is loved very much by all our family members.We make a different version of Avarekaalu usli which I will post later and this is the version which is famous in North Karnataka and even in Tumkur.It is made with freshly made white butter which makes it taste extra special and that is why it is called Avarekaalu Benne Usli.This is not the season for fresh avarekaalu and as they stay in London she has used canned avarekaalu to make this and that is the reason a good green color is missing for usli.One should try this with fresh and tender avarekaalu to enjoy its flavor and taste to the fullest extent.And one more thing, many people assume that usli is similar to the sundal but it is not true.Though few of the ingredients are same in usli and sundal, usli is nowhere compared to sundal in its taste as the cooking process is completely different.Try this and you will agree with what I am saying. Now without wasting time let us take a look at the recipes.

Uttha(Plain) Rice flour Rotti:

Ingredients:
1 cup Rice flour(fresh one,do not use old stock)
2 cups Water
2 tbsp grated fresh coconut(I used frozen)
1 tbsp Oil
salt to taste
Oil,for frying rottis

Method:
  • Add oil and salt to the water and bring it to a boil over medium flame.
  • Reduce the flame to low now,slowly add the rice flour to the boiling water,do not mix or stir it.Cook for 4-5 minutes.
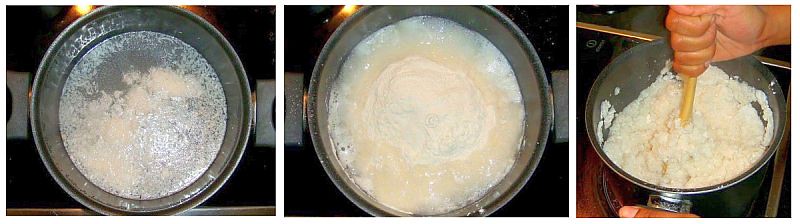
  • Stir vigorously now until you get a lump of mixture formed and all the ingredients are well mixed.You can use a long ladle or your roti belan for this process.
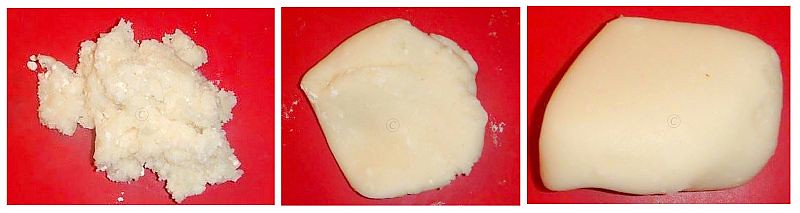
  • Divide the mixture into two parts and knead the mixture into a smooth dough on a silicon baking mat or on a clean plastic sheet.Be careful the dough would be very hot,so wet your hands while doing this process.You can even place the dough in a clean plastic bag and knead well,this is very easy and risk free process.This should take atleast 8-10 minutes.It is always better to do in small portions.
  • Smear the Rotti tawa(Non-stick/normal dosa pan) with little bit of oil all over the tawa and place a lemon sized rotti dough in the center and press it gently with hands and spread into a thin layer by rotating the pan by immersing the hand in a bowl in between which helps in patting the dough evenly and smoothly on the tawa.Make it as thin as possible.do not bother if small gaps are there,that makes the rotti even crispier.
  • Pour a spoon of oil over it and cover it with a lid and place it on fire on medium flame.Keep an eye on it to check in between whether it is done or not.Once you see the slight red patches started forming increase the flame and roast until you get the desired crispiness.Try to rotate the tawa in order to get an evenly roasted rotti.No need to turn it on the other side.
Serve it hot with Avarekaalu Usli / Sweet Pumpkin Gojju /Coconut chutney.Uttha rotti tastes best with any of these combinations.

Variations:
You can add either cumin seeds or chana dal into the boiling water while making the rotti dough,both gives its own flavor to the rotti.

Avarekaalu Benne Usli:(North Karnataka and Tumkur Style)

Ingredients:
1 1/2 cups tender Avarekaalu pods(hyacinth/flat beans/surti papdi)
2 medium onions,finely chopped
1/2 cup grated fresh coconut(I used frozen)
7-8 green chillies, finely sliced into rounds
2 tsp Ginger-Garlic paste,freshly ground

1 tbsp butter
2 tbsp oil
salt to taste

to grind into powder:
1 tsp cumin seeds(jeera)
1/2 tsp fenugreek seeds(methi)

Method:
  • Dry roast cumin seeds and fenugreek seeds separately in a tawa until you get the nice aroma of the seeds.Cool them and grind to a fine powder.
  • Heat oil in a pressure cooker,add avarekaalu and fry until the color changes and the raw smells goes away.
  • Add finely chopped onions to it and fry until they are translucent.
  • Add chopped green chillies and fry for a minute.
  • Add freshly ground ginger and garlic pastes and fry for a couple of minutes.
  • Add grated fresh coconut,salt and ground cumin-methi powder and fry again for a couple of minutes.
  • Add butter and 1/4 cup water and close the lid and pressure cook for 1 whistle.This should be dry with little gravy from the coconut mixture.
Serve it hot with Chapati/Roti/Uttha Rotti and fresh white butter.

Variations:
If fresh avarekaalu is not available,you can use fresh peas to make this.

Notes:
  • Usli tastes best with fresh and tender avarekaalu.So do not miss trying this in avarekallu season.I have used canned ones,so you miss that beautiful green color here.
  • Use fresh white butter in making this curry to get the authentic taste of Usli.Use 2 tbsp fresh butter if you are not calorie conscious,otherwise replace half the quantity with oil.
You can check the recipe for Green Peas Usli in my earlier post.This breakfast is going to participate in srivalli's 'Breakfast Mela' event

Monday, April 25, 2011

Mysore Masala Chapati and my first Event Announcement "Cooking With Family"

Mysore Masala Dosa is quite famous and known to every one,but have you ever heard of this not so famous Mysore Masala Chapati?
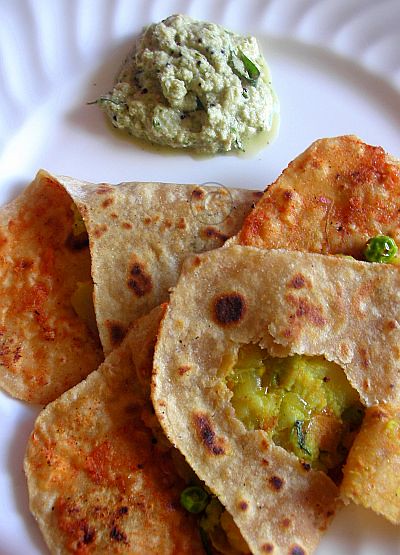
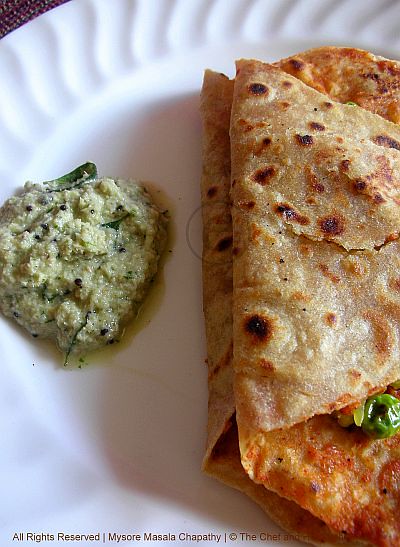
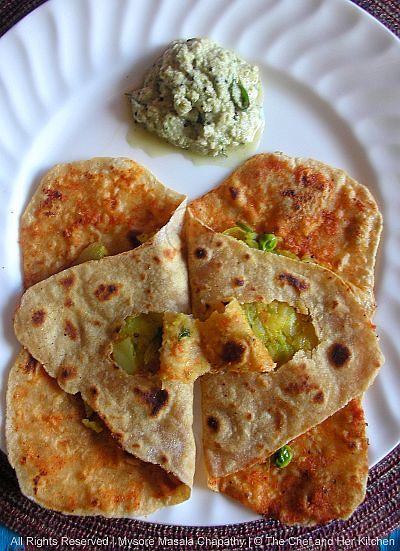
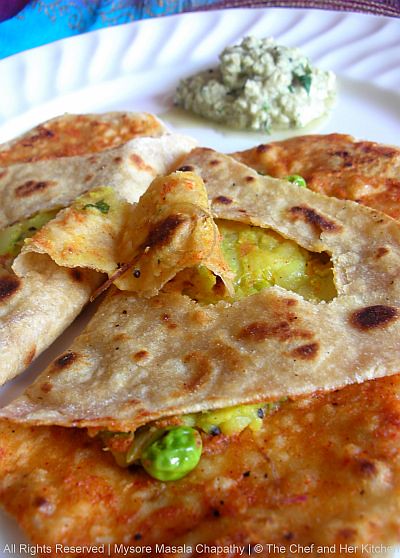
Well!!!..You will not get to see this in any hotel menu,but you can find it in our home where this is made to make the fussy eaters eat their food with lots of enthusiasm.I remember eating this for the first time at my aunts place during my child hood and then pestered my mom to make it for me and now it is been very regular in my menu.Mysore Masala Chapati(MMC) is nothing but a regular chapati made in the style of Mysore Masala Dosa(MMD) by smearing the red chutney and placing the potato palya in it and is eaten with coconut chutney.I am not a person who prefers eating chapati with dry alu palya/sabzi,so I make it in this form which I really relish each and every bite of it.Take my words and give a try,I am sure you will definitely love it and if you have fussy kids it is a great variation for them to try this.I am sure every one knows how to make chapati,red chutney and alu palya,but I prefer keeping everything at one place rather than redirecting my viewers with the links and hence,here is the recipe.This breakfast is going to participate in srivalli's 'Breakfast Mela' event

Ingredients:
for Chapati:
1 cup wheat flour
2 tsp ghee
2 tbsp curds
salt to taste
Oil & ghee for roasting

for Potato palya:
2 large potatoes,boiled

1/4 cup finely chopped carrot
3 tbsp fresh or frozen peas
1 medium Onion chopped

3-4 green chillies,slitted

1/4 tsp Turmeric powder
1 tbsp chana dal

1 tsp urad dal
1/2 tsp mustard seeds

2 tbsp chopped coriander

1 tsp lemon juice
8-10 chopped curry leaves
2 tbsp oil
salt to taste

f
or red Chutney:
1 big Onion chopped
8-10 garlic pods
1 tsp red chilli powder
1 tsp tamarind pulp
salt to taste


Method:
Step 1 : Potato Palya
  • Mash the peeled and boiled potatoes and keep it aside.
  • Heat oil in a pan,crackle mustard seeds and fry chana dal,urad dal till brown.
  • Add slitted green chillies,curry leaves and onions and fry until they turn pinkish in color.
  • Add fresh/frozen peas,finely chopped carrot and fry well.
  • Add turmeric,salt and mashed potato to it and give a nice stir and cook it for a couple of minutes.
  • Add coriander and lemon juice to it and mix properly and keep it aside to cool down.
Step 2 : Red(Onion-garlic) Chutney
  • Grind Onion,garlic,red chilli powder,tamarind pulp and salt into a very fine paste.You can reduce the number of garlic pods if you do not like the pungency of garlic or you even avoid onion and use all garlic pods if you like garlic to make this chutney.
Step 3 : Chapati Atta
  • Sieve wheat flour well and take it into a bowl .
  • Make a well in between and add curds,ghee,salt to it and rub in the mixture into the wheat flour gently using the fingers.
  • Add required amount of water to it and make into a smooth dough.You can even use milk instead of water for making softer chapatis.
  • Grease your palms and knead well into a smooth elastic dough.
  • Cover it with cloth or plate and leave it aside for half an hour.
Step 4: Making of Mysore Masala Chapati
  • Pinch into the chapati dough and take a big lemon sized ball and dust it with atta/flour and flatten it using a rolling pin into a 3" diameter circle.If you are making the chapatis round,flatten it further to a 6" diameter circle.
  • Now apply ghee/oil on the chapathi and fold into half and then apply the ghee/oil on the half and fold into a quarter.This process make the chapati flaky and soft.
  • Now roll it into a slightly thicker triangular chapati which should be thick like paratha.
  • Place the rolled triangular or circular chapati on a hot tawa.Keep the flame on medium-high at this stage.
  • When you see some blisters forming on it quickly turn it on to the other side.Apply oil all over it and quickly turn to the other side,you can see the chapati has nice brown spots over it.
  • Reduce the flame and apply red chutney over it and place potato palya in between and fold it into half.
  • Apply ghee on the outside of chapati and roast on both the sides of the folded chapati until crisp and evenly browned.
Serve it hot right off the flame and on to the plate with coconut chutney.

Notes:
  1. I have used roti dough to make this,so you really can not see the flakiness of chapathi.
  2. For a Vegan version avoid adding ghee and curds while making chapati dough.Instead use 2 tbsp oil in the dough.

On another note,I am here to announce my first ever event in my blog called "Cooking with Family Series" and I am sorry to say to my blogger friends that this event is limited only to my family members.But the happy part for my blogger friends is you will get to know lots of new amazing and wonderful recipes as I can assure you that all my family members(I mean all Ladies and few guys) have excellent cooking skills and always amaze me with their amazing cooking.I am planning to publish my event in a couple of series seeing the response from my family members for the first series.As Breakfast is my favorite meal of the day and also our community has lots of variety in breakfast,I am choosing my first series to start with Breakfast.So I can call my event as 'Cooking With Family-BREAKFAST SERIES'.This is the logo I have designed for this just for fun.

(Pic Courtesy : Google)

I have been planning to start some event in my blog from a long while,but the laziness in me some how stopped me from doing it.Last week suddenly this idea clicked in my mind to start an event with the cooking style of our family and even discussed it with my S-I-L immediately.She also suggested me to go ahead with my event and also promised me to send her entries soon.

To tell you ppl about my family,one common thing among all my family members is our love and passion for food.Any discussion in between two family members will always have a common discussion for food,either it to be a new eating joint they have visited or a new recipe they tried in their house.All my aunts and cousins are amazing cooks and always hunt for new variety of recipes and give their own twist to the traditional cooking.Even though we all are from the same family,still there is a lot of difference in our cooking from one family to another,this is my attempt to share our recipes with all.I have lots of childhood memories associated with food when we used to go for holidays to my grand parents place.Every meal of the day used to be so special and is loaded with all our favorites and I still remember how we cousins used to sit together and relish the food and those days cannot be recalled back.We,cousins,a gang of almost ten had lots of fun playing,eating,roaming out together and also some times fighting with each other(which does not last more than ten minutes of course) in our holidays and we always looked forward for our next holiday meet.One thing we used to definitely do in holidays is to explore eating joints in Bangalore and in our native and we really had a blast during our child hood and still if we meet now we always try going to those places which we used to go earlier and relish food to bring back those memories.I am sure every one would be having these kind of child hood memories.

Coming to the event,there are no hard rules for this event as the entries are from my family members and I take the whole responsibility of publishing them in my blog.Still I want to just brief my family members about the general rules for the event.
  1. Choose a different and unique kind of recipe which is your favorite and make sure that I have not blogged about it before as I do not want my viewers to get to see the same recipe featured again.As the theme I have chosen this time is BREAKFAST,please make some different breakfast item and send it to me.
  2. A neatly written precise recipe.
  3. A neat photograph of the dish.
  4. Your description regarding the recipe,how ever it is optional.
  5. Send the recipe and pictures of the recipe to my email ID.As you all know it,I am not mentioning it here.
  6. There is no dead line for the submission of recipe as I am planning to post it every fortnight or a month.So this is truly first come-first serve basis,but please send the entries soon.
Note: This event is only for my family members.

I am sure that my family members will not let me down and will also definitely amaze you people with their wonderful cooking skills and amazing recipes.So stay tuned to see this series in my blog very soon.

Thursday, April 21, 2011

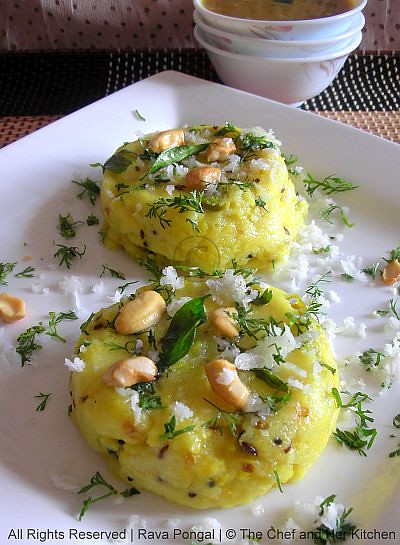
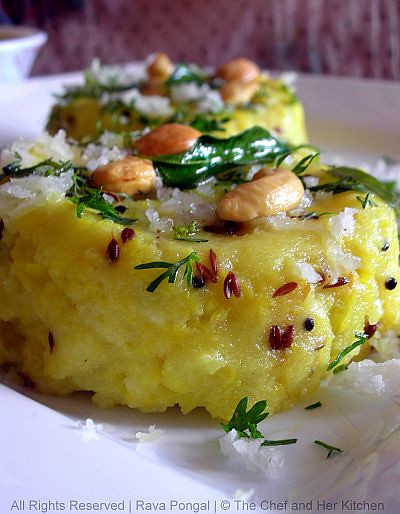
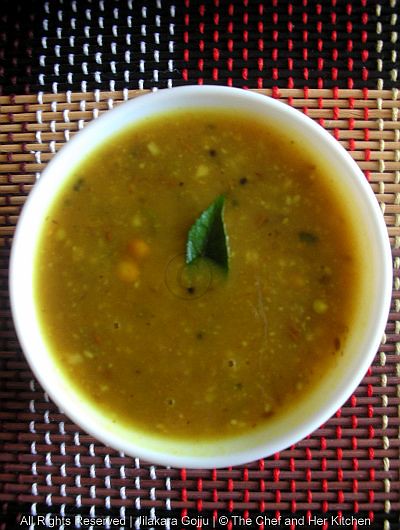
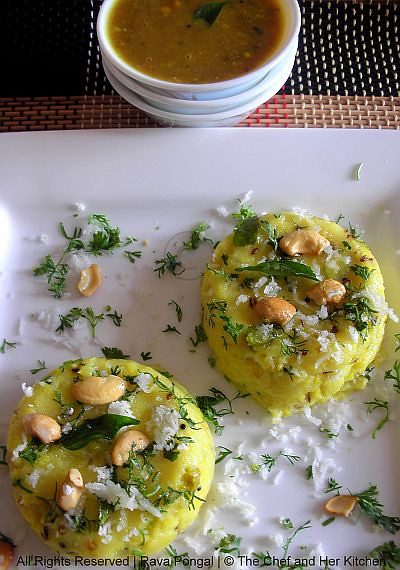
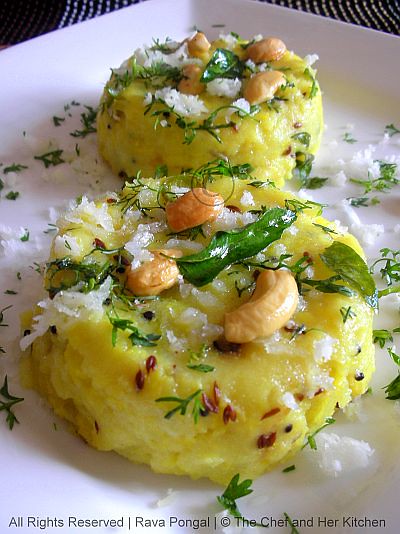
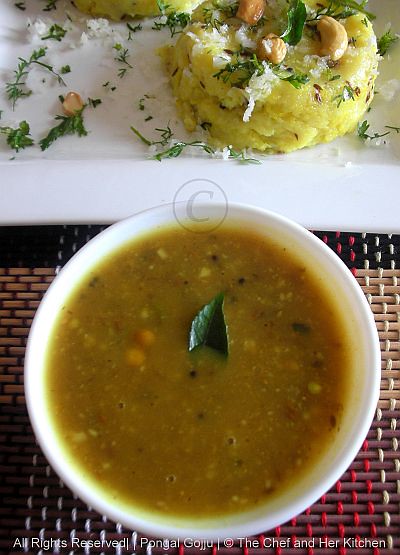
Rava pongal with Pongal Gojju

Rava Pongal:

Pongal is one of the most common variety of breakfast which you get to see in any south Indian hotel menu.The generous amounts of the usage of ghee in making pongal gives it a really melt in mouth texture and even makes it extra delicious.Pongal also takes part in the breakfast menu of many weddings in south India,it is generally paired with Idli,vada and dosa and the whole breakfast would be so satisfying for any one.The most common pongal you get in any hotel is ven pongal which is made with rice,the one which I am posting today is made up of rava which is quite easy to prepare when pressed for time.Pongal is generally paired up with sambar or chutney,but we do a different tangy gojju(a kind of tamarind stew) for it at home which goes really well with any kind of pongal.

Ingredients:
1 cup chiroti rava or regular Bombay rava/sooji
1/4 cup yellow moong dal
3 green chillies, finely chopped
1/2 " ginger, finely chopped
8-10 curry leaves
2 tbsp chopped coriander(for garnish)
3 tbsp grated fresh coconut + 1tbsp grated coconut(for garnish)
10-12 cashew nuts, broken
1 tsp cumin seeds
1/2 tsp pepper corns(roughly ground or whole)
1/2 tsp mustard seeds
1/4 tsp turmeric powder
a pinch of hing
4 tbsp ghee
1 tbsp oil

Method:
  • Heat a tsp of ghee in a kadai and roast rava in it until it is fragrant and light,remove it and let it cool.
  • Dry roast moong dal in another kadai and water to it and add a tsp of ghee,turmeric to it and let it come to a boil and lower the flame and cook until it is slightly mushy.Strain the dal and reserve the liquid.
  • Heat 2 tbsp ghee and 1 tbsp oil in a kadai and crackle mustard seeds and jeera.
  • Add finely chopped ginger and green chillies and fry a bit,then add hing,curry leaves and add water to it.Measure the water reserved from boiled moong dal and in addition to that add water which should come to the ratio of 2 1/2 cups water for 1 cup of rawa.
  • Let it come to a boil and add cooked moong dal,turmeric,salt and boil further for a minute.
  • Now add roasted rava to it slowly and mix it simultaneously to avoid the formation of lumps.
  • In a small tadka pan heat a tsp of ghee and add cashew nuts and fry until golden in color.
  • Add grated coconut,fried cashew nuts and a tbsp of ghee and mix well.
Garnish with coriander and grated coconut and serve it hot with pongal gojju/jilakara gojju or coconut chutney or sambar or coconut-onion raita.

Pongal Gojju :

As pongal is very mildly spiced,a nice tangy gojju pairs up very well with pongal.This gojju(stew) is basically made with tamarind pulp and is well balanced with jaggery and powdered masala which takes the gojju and pongal combo to another level.

Ingredients:
1 amla sized tamarind
2 tbsp roasted gram/chutney dal/fried gram
1 tbsp grated dry coconut/fresh coconut
1/2 tsp grated jaggery
2-3 green chillies,finely chopped
4-5 curry leaves,torn
1 tsp jeera
2 tsp chana dal
1 tsp urad dal
a fat pinch of turmeric
a pinch of hing
1/2 tsp mustard seeds
1 tsp oil
salt to taste

Method:
  • Dry roast jeera and grind it along with roasted gram,grated coconut,green chillies and salt to a coarse powder.
  • Soak tamarind in water and squeeze the pulp and keep it aside.
  • Heat oil in a small kadai and crackle mustard seeds and add chana dal and urad dal and fry well.
  • Add curry leaves and hing and fry for 1/2 minute.
  • Add tamarind pulp with 1/4 cup water approximately and let it come a boil.
  • Mix the ground powder with water and mix well and add this to the tamarind mixture and add grated jaggery,salt,turmeric powder and boil for a couple of minutes until it is thick.add water according to the requirement until you get a thick gravy consistency.
Serve it with pongal/rava pongal/oats pongal.

Note:
You can even add finely chopped onion while frying the tadka in gojju,it adds taste to gojju.


This breakfast combo ' Rava pongal with pongal gojju' is going to participate in srivalli's 'Breakfast Mela' event.
Monday, April 18, 2011

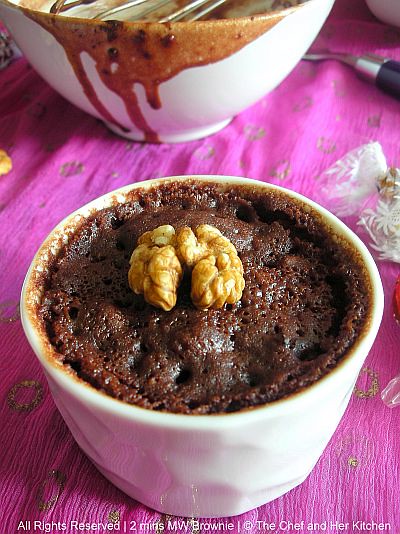
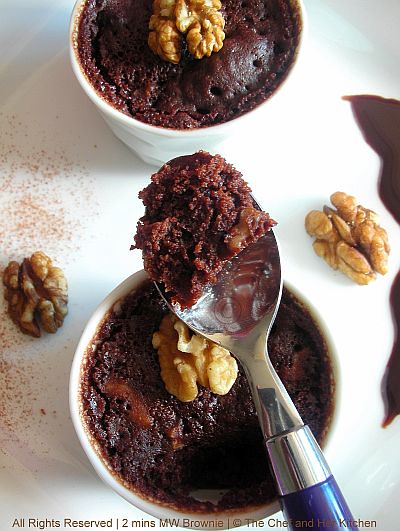
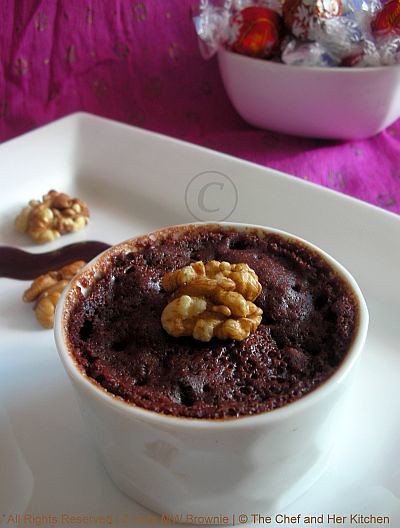
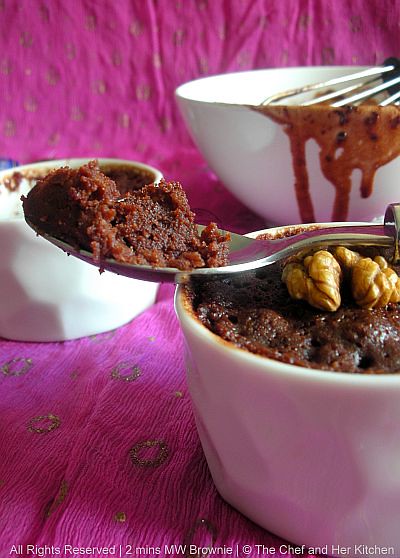
2 mins Eggless Instant MW Brownie/Cake...Quick Fix for Chocoholics!!

Frankly, I am not a chocoholic but I love to eat chocolates occasionally and enjoy small portions of chocolate based desserts thoroughly.I am sure most of us sometimes get sudden cravings for a dessert especially the chocolate based ones and that too at odd times during the day. Another reason behind these sudden cravings especially for me is blogging. When ever I see some cakes/brownies recipes from our fellow bloggers, I feel like making them immediately.

I have tried a couple of instant microwave versions but was not really impressed with them.Recently, when I was searching again for a different recipe I ended up seeing this recipe in Suma's space and really wanted to give a try immediately.The best part of the recipe is that it is instant and just needs a bowl and whisk so its not messy at all and everything can be finished in a matter of 5 mins. Call it by whatever name you want -cake or brownie- it's easy to prepare and is yummilicious enough to satisfy your craving for a chocolate dessert even in the middle of the night. Just give it a try am sure you will love this recipe. The entire preparation is done in a mug and hence you can call it a 'Mug cake' but today I poured into two ramekins to get two portions.
Ingredients:
(recipe source : Art of Dessert)

2 tbsp flour
2 tbsp cocoa powder
4 tbsp icing sugar(or powdered sugar)
2 tbsp melted butter
2 tbsp milk
2 tbsp dark chocolate pieces(or semi sweet chocolate chips)
2 tbsp chopped walnuts
1/4 tsp vanilla essence

Method:
  • Melt the butter in a microwave safe bowl and let it cool.Add milk and vanilla essence and whisk well.I used salted butter in it,so I did not add salt.If you are using unsalted butter add a pinch of salt to the batter.
  • In another bowl mix flour,icing sugar,cocoa powder until everything is mixed really well.
  • Now add this dry ingredients to the wet ingredients mixture in the microwave safe bowl and fold in the mixture properly.
  • Add dark chocolate pieces and walnuts to it and mix well.
  • Microwave it on HIGH for 1 minute and 30 seconds.Let it stand for a couple of minutes(approx 2mins).(I have poured this into two ramekins and microwaved for the same time)
Now remove it from microwave oven and just dig in when it is still warm or you can even serve it with vanilla ice cream and some chocolate sauce on it or even with freshly whipped cream.

Note:
  • Be precise to the measurements to get good results.
  • Check the brownie after 1 1/2 mins,if the surface is soft and dry to touch then it is done,no need to further microwave it.Do not microwave it for longer period,otherwise the brownie will become very hard.
  • I have poured the mixture into two ramekins,you can do it in a single micro safe mug or cup.
  • It is cooked in the microwave in microwave mode,not the convention mode.My microwave oven is of 1100 watts power.
  • Pour the batter upto half of the ramekin or mug height.
  • I used salted butter in it,so I did not add salt.If you are using unsalted butter add a pinch of salt to the batter.
When I started writing this post I knew that it was Suma's birthday today,so thought of wishing her through this post.But when I was about to publish this post I got to know that it is Rak's birthday tomorrow through sharmi's post,so I could not stop wishing her as well as she is a very good friend of mine too.So dear buddies Suma and Raji, I wish you " Many Many Happy Returns of the day" through this sweet post,I hope you gals like it.

Friday, April 15, 2011

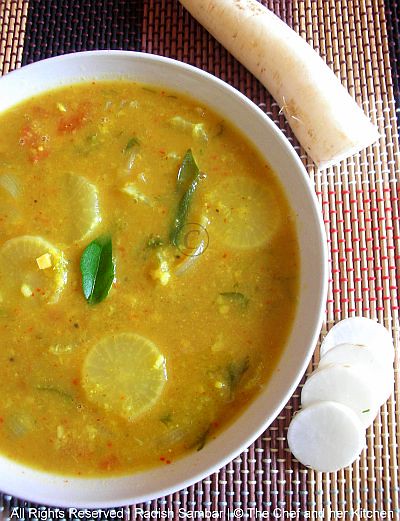
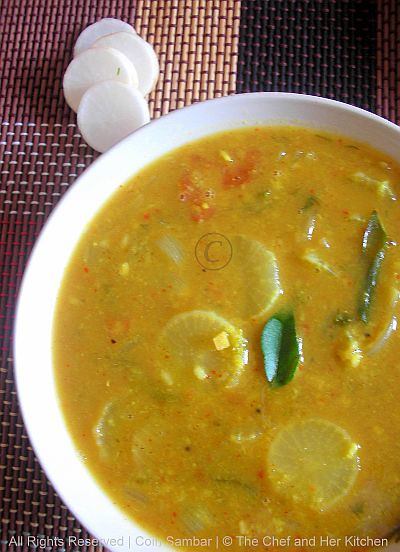
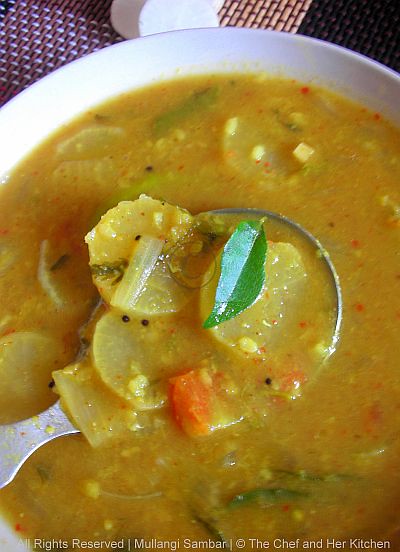
Coin Sambar / Radish(Mullangi) Sambar.....with freshly ground masala!!!

Sambar is one of most important accompaniments in south Indian meal and it at least appears twice in our lunch menu.Sambar is made in various ways in different regions of south India,for example in Andhra,coconut is not added to sambar while in karnataka coconut is a must while making sambar.How ever I like and enjoy both the variations and do it according to my wish at that point of cooking.I usually get a pack of sambar powder for the whole year from my mom and still some times I will be out of stock,then I make freshly ground instant sambar which I am posting here.Every family has their own recipe for sambar powder and the one I m using is partially adapted from both my mom and MIL's versions and I can claim that it is my own version which works for me when I run out of stock.
Sambar is made up of vegetables like potatoes, carrots, beans,cluster beans, drum stick, radish, brinjal, ladies finger, yellow cucumber, pumpkin, chayote squash, white pumpkin, bottle gourd and even greens.Every vegetable adds a different taste to sambar and among all the sambar varieties,I like drum stick , ladies finger and radish sambar as they impart very special flavor to sambar.We used to call radish sambar as 'Rupayila Sambar(which means rupee coin sambar)' as my mom used to cut radish into thin rounds which looks similar to rupee coin and hence the name.Here goes the recipe of radish sambar,this version is quite compatible you can make it as it is or you can even make it rich by adding coconut to the spice mixture,how ever both the versions taste good in its own ways.

Ingredients:
1 cup toor dal
1 big radish, peeled and cut into thin rounds
1 big onion, roughly diced or 10-12 small shallots
2 medium tomatoes, chopped
1 green chili,slit
5-6 curry leaves
1 tbsp chopped coriander
1 amla sized tamarind ball
1/2 tsp grated jaggery
1/2 tsp turmeric powder
1 tsp oil

to grind:
1 tbsp chana dal
2 tsp coriander seeds
1/2 tsp methi seeds
3-4 guntur red chillies
2-3 byadige red chillies( for color)
1/4 tsp mustard seeds(optional)
1/2 tsp jeera
4-5 pepper corns

for tadka:
1 tsp ghee/oil
1/2 tsp mustard seeds
a sprig of curry leaves
a fat pinch of hing

Method:
  • Wash toor dal and add a pinch of turmeric to it and pressure cook for 3 whistles.Slightly mash it after it cools down.
  • Soak tamarind in water and squeeze the pulp and dilute it with water.
  • Dry roast chana dal,coriander seeds,mustard,jeera,pepper corns,red chillies and methi seeds separately and grind it to a fine powder.
  • Heat a tsp of oil and add diced onions,green chili and fry a little bit and add chopped tomatoes and let it become slightly mushy.
  • Add radish rounds and fry a bit and add tamarind water and add more water, salt,turmeric powder, curry leaves, chopped coriander and boil until the radish is cooked well.
  • Add freshly ground sambar powder and jaggery to it and boil well and add cooked toor dal and simmer well for 3-4 mins.
  • Heat ghee in a small tadka pan and crackle mustard seeds,curry leaves and hing and fry little bit and add it to the boiling sambar and mix well.
Serve it hot with hot rice.

Notes:
  1. If you want to make this sambar for Idli/Dosa , add 1/2 cup toor dal: 1/2 cup moong dal and pressure cook and follow the same procedure.It tastes best with Idlis and dosas if moong dal is mixed with toor dal instead of toor dal alone.
  2. I sometimes add 1/2 cup grated coconut to the ground masala and add enough water and grind it to a fine paste.This gives completely a different flavor and taste to sambar.
  3. Addition of coriander leaves is optional,it tastes different with it and tastes good even with out it.
  4. You can replace radish with vegetables like potatoes, carrots, beans,cluster beans, drum stick, radish, brinjal, yellow cucumber, pumpkin, chayote squash, white pumpkin, bottle gourd and even greens.
  5. For a Vegan version avoid ghee and use oil in tempering.
 
back to top