Showing posts with label Hyacinth Beans | Avarekalu. Show all posts

Wednesday, May 22, 2013

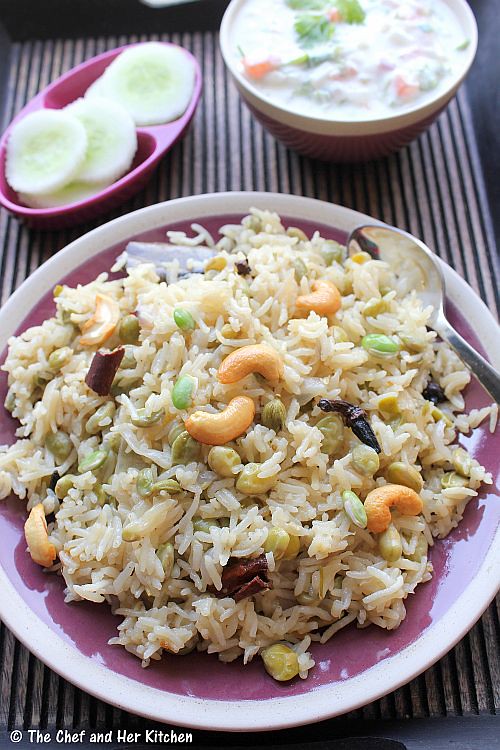
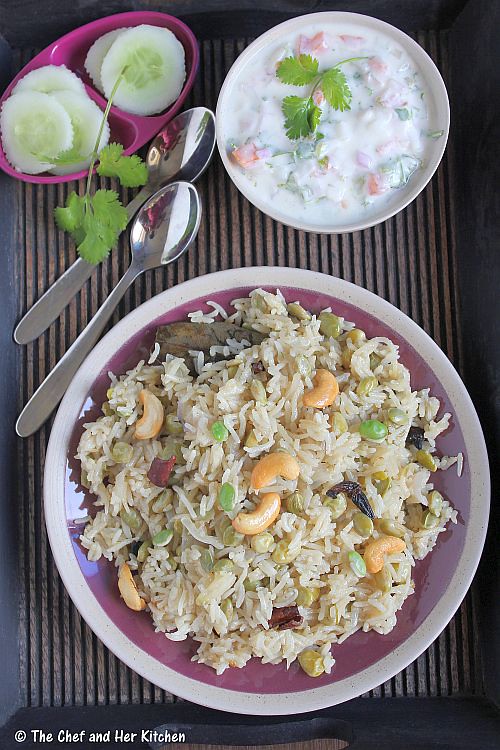
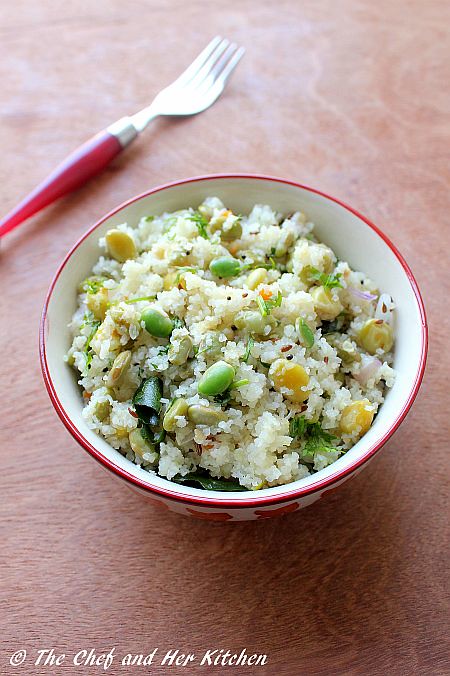
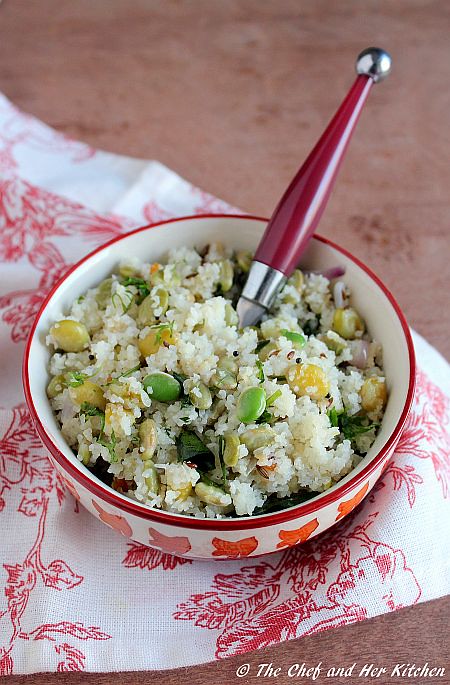
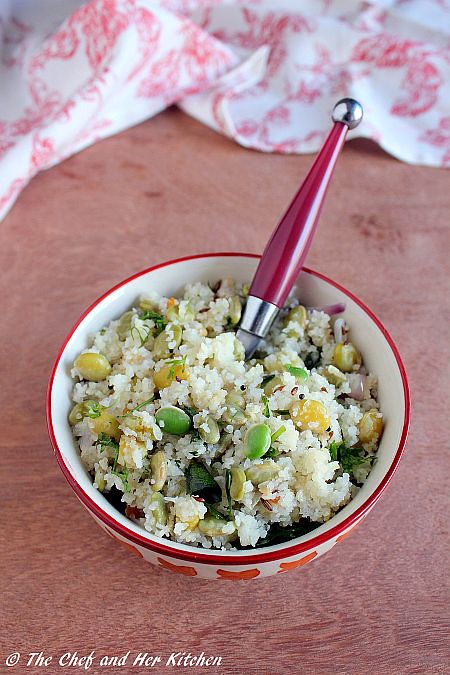
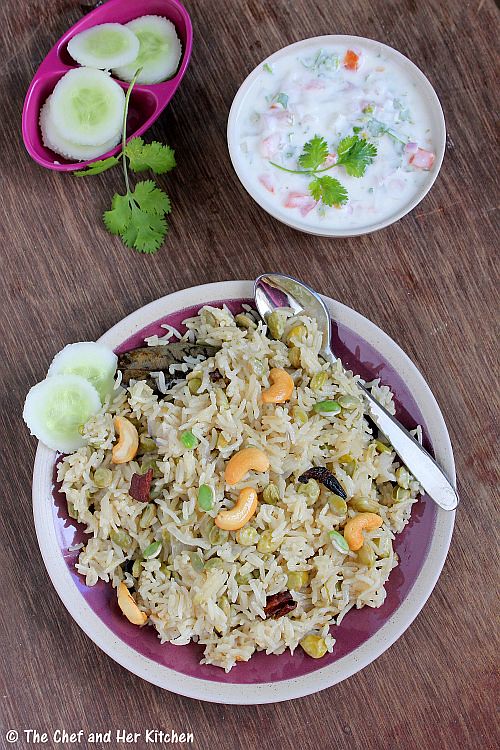
Avarekalu Pulao | Hyacinth Beans Pulav | Avarekalu Recipes

Pulao features at least once in a week at my place. My mom used to make this for breakfast and pack the same dish for lunch.Now many of you might be wondering - pulao for breakfast??. My kannadiga friends would however not find it unusual given that in Karnataka Bhat/Bath - a rice variety like Vangi bath, Batani bath, Bisi Bele Bath, Chitranna(Lemon rice), Tomato bath, Veg Pulao, Capsicum bath, Puliyogre etc are usually prepared for breakfast. These varieties are easily available for breakfast and lunch in Darshinis and other hotels in Bangalore.My mom used to make various bath varieties as it is a single pot meal which is quiet convenient to prepare for those busy morning hours and since we used to leave quite early in the day during our school and college days we also used to get the same, packed for our lunch.
At my MIL's place, the concept of eating rice variety for breakfast is something new and hence TH was never fond of it.After my marriage I rarely prepared these bath varieties for breakfast except on the festival days.Now all these kind of bath varieties and pulaos mostly appear on our weekend lunch as I do not like to slog in the kitchen on weekends and hence look for these kind of simple one pot meals which I can finish preparing in flat half an hour.
Today I am posting a simple Avarekalu Pulao which is again a delicacy from Bangalore.Though it is not a very traditional dish,it has been becoming popular these days in many wedding and function menus.If you are a avarekalu lover you should try this simple yet delicious pulao as avarekalu adds a nice flavor to it.

Also check out other Avarekalu recipes in my blog here.
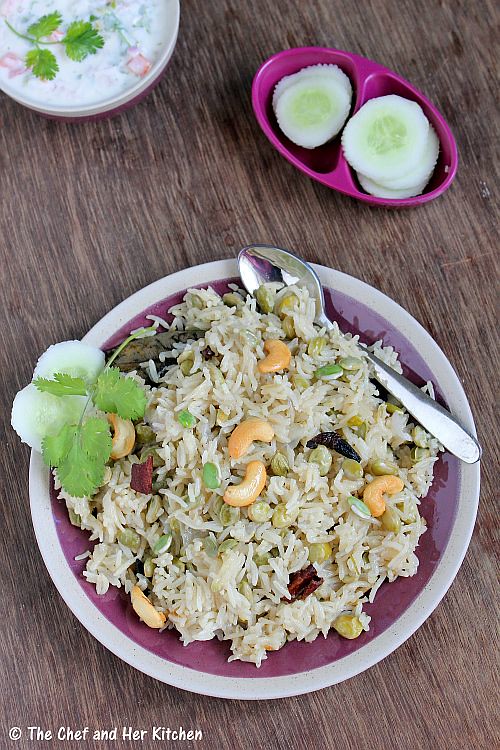
Avarekalu Pulav Recipe:
(Serves 2)

Ingredients:
1 cup Basmati Rice or Jeeraga Samba or regular Rice
1 3/4 cup water
1 cup tender Avarekalu(Hyacinth beans)
8-10 Cashew nuts,split into halves
1 big Onion,sliced
1 Bay leaf
1" Cinnamon
2 Cloves
2 Marathi Moggu
1 green Cardamom
Salt to taste
1 1/2 tbsp Ghee
1 1/2 tbsp Oil

to grind:
3/4" Ginger
4-5 Garlic pods
3-4 Green chillies
1/3 cup grated Fresh Coconut
1/4 cup Coriander leaves
1/2" Cinnamon
2 Marathi Moggu 
1-2 Cloves

Method:
  • Wash and soak basmati rice(or other rice what you are using) for 10 mins.
  • Grind all the ingredients under the section 'to grind' to a fine paste by adding little water.
  • Heat oil and ghee in a pressure cooker and add Biriyani leaf, cinnamon, cardamom, marathi moggu and cloves and fry them for a minute.
  • Add sliced onions and fry until they turn translucent and then add the tender avarekalu and fry them nicely for 2 mins.
  • Add ground masala and fry the mixture until the raw smell disappears.
  • Add washed basmati rice and fry the rice for 2 minutes.Stir it gently.
  • Add the water (1 3/4 cups) and also salt and let it come to a boil.If you are using sona masuri or equivalent increase the water quantity to 2 cups.
  • Pressure cook for 1 whistle and reduce the flame and cook for 8-10 mins.
  • Heat ghee or oil in a small kadai and add cashew nuts and fry them and garnish the pulao with the fried cashew nuts.
Serve the pulao hot with Onion-tomato raita or Boondi raita.

Notes:
  1. If you cannot find Marathi Moggu you can ignore using it but it lends a nice flavor to the pulao.
  2. Use fresh and tender Avarekalu for the pulao.If you do not get hold of fresh ones,you can use frozen ones as well.
  3. If using Basamati rice, for 1 cup rice you can use 1 3/4 -2 cups of water and if you are using any other rice use 2 - 2 1/4 cups of water for 1 cup of rice.
Check out various Bath and Rice varieties which are ideal for lunch box in my blog here:
 

Wednesday, March 13, 2013

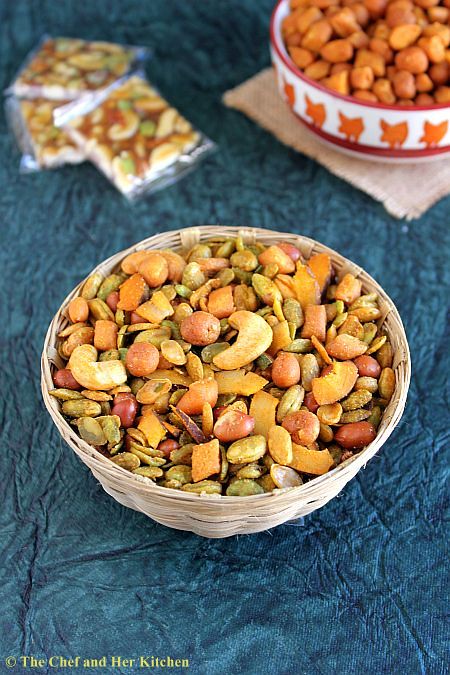
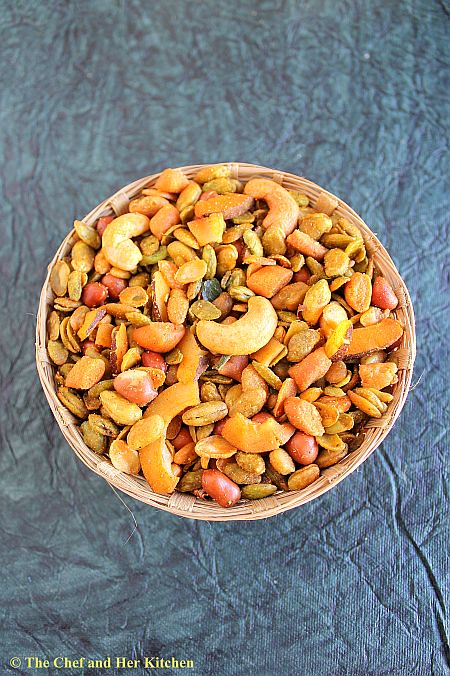
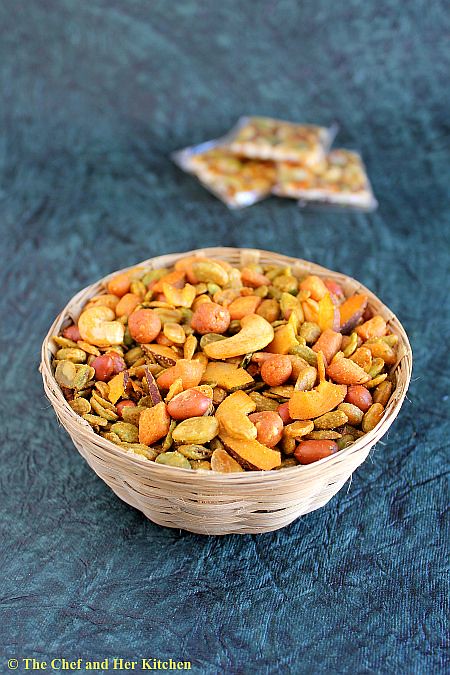
Avarekalu Mixture | Hyacinth Beans Snack

As mentioned in my previous post, this Avarekalu mixture has also been sent by my mom.As a tradition, every year my Grandmom used to give these avarekalu(deep fried hitikida avare) to all her daughters. The tradition continued even now and with out fail every year my uncle sends a huge packet of this mixture to my mom.Right from childhood, I never developed a taste for this mixture though I like a few other varieties with Avarekalu like Pithikipappu, Avarekalu Usli, Avarekaalu Uppittu, Avarekalu Kadubu, Rotti, Saaru and few other varieties
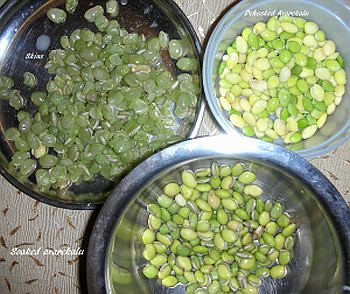
This Avarekalu mixture is a famous variety in Bangalore and in particular in our community.Back home,during the avarekalu season, we used to buy several kilos of it every week and my mom used to prepare various varieties with it.The process of shelling the flat beans,separating the tender ones from the hard ones,soaking the hard ones for a couple of hours and remove the skin to get the skinned avare(it is called 'hitikida avarekalu/hitikbele' in kannada) is all time consuming but my mom never complained about the process and at times even we helped her doing this process.Now a days we easily get the shelled beans as well as the skinned beans in the market, which makes life easier. Making the dishes with them is like a breeze now.But I think, my mom still enjoys her age old tradition of shelling and skinning them until and unless it is an immediate requirement she does not buy the ready stuff from the markets.
Coming back to the Avarekalu mixture,it is usually served in our place after lunch when the whole family sit and chit-chat.Though I am not a fan of this mixture, I used to pick the spicy rice flour balls (palakayalu) from the mixture as I just love to munch them as they are really spicy and very tasty.That is the reason my mom sent me an extra packet of those spicy rice flour balls.I think its time I head to the recipe,here you go!!
Avarekalu Mixture | Hyacinth Beans Snack Recipe:
shelf life: 2-3 weeks

Ingredients:
4 cups of hitikida Avarekalu/Hyacinth beans(Shelled,soaked and the skin peeled)
1 cup Spicy Diamonds/Palakayalu(Rice flour balls)
1/2 cup Groundnuts
1/2 cup Dry Coconut pieces,cut into thin slivers
1/2 cup Cashew nuts,slit into two
1/2 cup Curry leaves
1 tbsp Red chili powder
1 tbsp Cumin seeds
Salt to taste
Oil,for deep frying the hyacinth beans
1/4 cup Oil for tempering

Method:

Preparing the Hyacinth beans:
  • Soak shelled avarekalu in water for 4-5 hours or in luke warm water for 2 hrs.De husk outer skin and keep aside.This picture would give an idea how they are done.
to prepare Avarekalu mixture:
  • Spread the dehusked beans on a clean cloth for some time to dry up the moisture.
  • Heat enough oil in a deep kadai/pan to deep fry a handful of skinned avarekalu at a time.Once the oil is hot deep fry them on medium flame until they turn crisp.They would retain their slight green color and become crisp,do not fry them for long until they turn brown.Drain them and keep them aside.Remove all the oil from the pan and just keep 1/4 cup oil in the pan.
  • Add the cumin seeds and let them crackle.
  • Quickly add groundnuts and fry them on low-medium flame until they turn slightly red in color and the skin peels off slowly.
  • At this stage add cashew nuts and dry coconut pieces and fry them until they turn in golden brown in color.
  • Add curry leaves and fry them until they turn crisp.
  • Now switch off the flame and add salt and red chili powder to it and give a quick stir.
  • Quickly add deep fried Avarekalu and spicy Palakayalu(diamonds) to it and mix nicely until all are coated evenly with the spice mix.Check for the taste now and add if extra salt or red chili powder is needed.You need to adjust the spices while it is still hot and they blend nicely when it is hot.
  • Once the mixture comes to room temperature,store it in an air tight container.
Serve it as an evening snack with a cup of tea.In our house it is ideally served after a meal which the whole family sit and chit-chat.

Notes:
  1. You can even add mustard seeds while tempering or a mix of mustard and cumin seeds while tempering.
  2. Adjust the amount of red chili powder as per your liking.
  3. You can increase or reduce the amount of ingredients according to your wish and also adjust the seasoning accordingly.
  4. This can be stored even up to a month.
  5. Deep fried Hitikida Aavre(skinned hyacinth) can be stored up to 6 months in an air tight container and this mixture can be prepared using them when ever needed.

Monday, February 25, 2013

Avarekalu Akki Tari Uppittu | Rice Rava Upma with Flat Beans

During Avarekai season, my mom prepares various varieties ranging from simple snacks to sweets, and uses it in many breakfast and lunch varieties (Usli,saaru, curry, dal, rotti, upma etc.).Not everyone would like these beans for the first time. Its an acquired taste and it was the same with me. I never liked it as a child but now I like it and do not miss preparing a few favorite varieties with them during the season.
We do get good Avarekaalu even in Mumbai and during the season I buy them in large quantities and try to store them in a freezer for later use.I use them in various recipes if I want to add some extra flavor to it.These beans lends a different flavor and taste to the dish if added in moderate amounts.I usually add them in upma,rotti and sometime pair it up with brinjal or aloo. I am sharing a simple Upma recipe today using rice rava and these hyacinth beans.
Avarekalu Akki Tari Uppittu Recipe:
(Serves 2)

Ingredients:
1 cup Rice Rava
2 cups Water
1/3 cup tender Hyacinth beans(avarekalu)
1/4 cup grated Fresh Coconut
1 medium Onion,sliced(optional)
3-4 Green chillies,slit
4-5 Pepper corns,slightly crushed
8-10 Curry leaves
1 tsp Urad dal
1 tsp Chana dal
1/2 tsp Cumin seeds
1/2 tsp Mustard seeds
1 tbsp Oil
1 tbsp Ghee

Method:
  • Pressure cook the tender hyacinth beans for 2-3 whistles with salt until they are cooked.Drain them and keep them aside.
  • Dry roast rice rawa for 2-3 mins ,it does not need to change its color.
  • Heat oil and ghee in a kadai and crackle mustard seeds and cumin seeds.
  • Add chana dal,urad dal and fry until they turn bit red in color.
  • Add slit green chillies,curry leaves,crushed pepper corns and fry until the green chillies wilt.
  • If you are using onions,add sliced onions at this stage and fry them well.
  • Add cooked and drained hyacinth beans to it and fry well.
  • Add 2 cups of water and cover it with lid and let it come to a boil.
  • Add enough salt and roasted rice rava and stir it nicely and cover it and cook for 4-5 mins until the water is absorbed.
  • Add grated coconut at the end and give a nice stir.
Serve it hot with Lemon Pickle /Avakai /Mango Thokku /Podi and sliced cucumber/chips.

Notes:
  1. The addition of onion is entirely optional,I like to add onions in upma and hence I added.It is your personal choice.
  2. You can even skip the addition of chana dal and urad dal in the recipe and just give simple tempering of mustard and cumin seeds.
  3. Green chillies can be replaced by red chillies or you can use both the chillies in the recipe.It is your wish.
  4. You can add chopped dill leaves for additional flavor.If you are adding them you need to saute them in oil before you add water to it.
  5. The quantity of hyacinth beans can be increased even to 3/4th cup- 1 cup which depends on your choice.
  6. You can follow the same recipe and replace rice rava with normal sooji or bansi rava and make regular upma.You can increase the water quantity to 2 1/2 cups if you want a soft upma.
Also check out other Avarekalu recipes in my blog here.

Friday, June 17, 2011

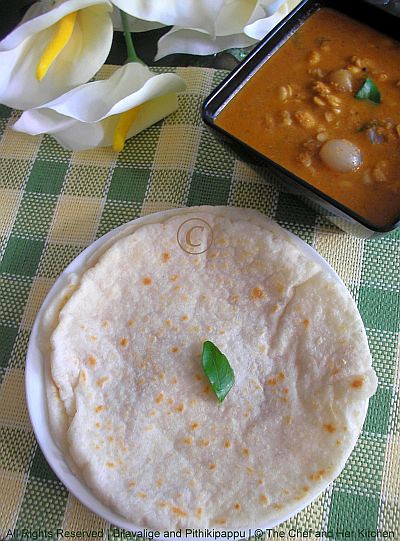
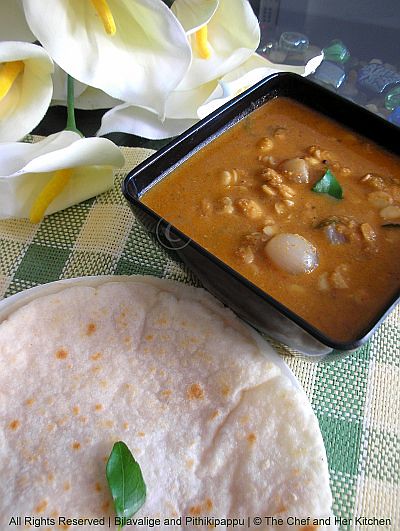
Bilavalige(Rice Flour Chapati) and Pithikipappu(Mochai Beans Dal)......FFF#8

I am sure that all of you would know that today's post would be related to my Family Food Series. This is the 8th week of this series and If you have missed any of the previous one's check them here.

This week's post is very special for me as this is from my mom.How can I not have any entry from my mom, especially when this is a family series?I was actually wondering how to get an entry from my mom for this series and when I was clearing off the photos in my folder I realized that I already had an entry from her. She had prepared this dish for me when she visited us last year and I had happily clicked the photos then.It is more than a year since then and although I have been waiting to post this for a while somehow I never posted it- could be because I wasnt with the pictures. I am glad that I didnt post them until now as this is the perfect time given the current theme.
Coming to the introduction-I don't think that one needs to introduce their mother as everyone knows that MOMs are the best. Like everyone, even I am attached emotionally to my mom and I don't want to make this post an emotional one so let us just get to the recipe.

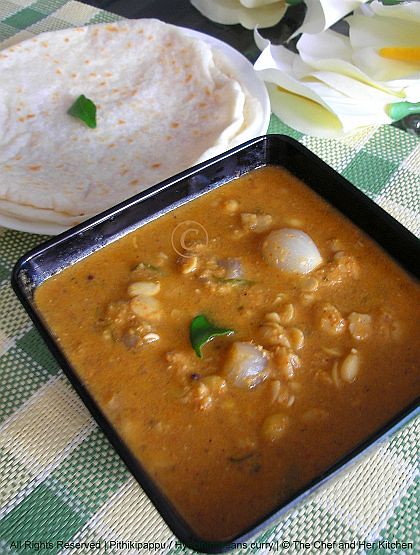
Coming to today's recipes Bilavalige and Pithikipappu is the most famous breakfast combination of our community and is considered as a very special breakfast and is must to be made for important guests.This is quite a laborious breakfast and one needs to expertize in making perfect bilavalige,after all the most laborious recipes would be the best tasting ones right??Bilavalige is nothing but rice flour chapati and is similar to akki rotti in karnataka but the process for making bilavalige is little different compared to akki rotti.Bilavaliges are rice flour chapatis which are white in color and extremely soft and they taste best when you eat them hot.
Avarekalu is very famous in Bangalore and as it is seasonal we make sure that we utilize them to the maximum extent in the season.We make various varieties with it like pithikipappu,usli, kheer,halwa,rotti,upma,rasam etc.Try this truly delicious combination in the avarekalu season.

Bilavalige(Rice flour Chapati/Akki Rotti):

Ingredients:
1 cup Rice flour
2 cups water
1 tsp oil
salt to taste
rice flour,for rolling chapatis

Method:
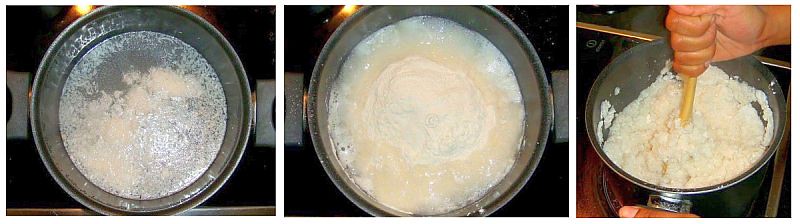
  • Bring water to boil in a deep thick bottomed vessel and add salt and oil to it.
  • Once the water comes to boil,mix a tsp of rice flour with 2-3 tsp water and add this to the mixture.This helps in not forming the lumps in the dough.
  • Pour the rice flour into the water but do not mix it at all,leave the rice flour in water.
  • Reduce the flame and let it cook for 15 mins.
  • Now take a thick wooden stick(chapati rolling pin also works well here) and mix the rice flour into the water vigorously in one direction only.It will form a lump now and switch off the flame.
  • Wait until the mixture becomes warm.It should not become cold,the whole process is to be done when it is hot.So take care not to burn your hand in this process.
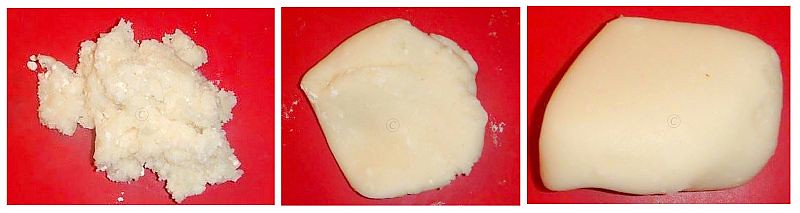
  • Wash and dry a polythene cover and place the mixture in it and knead it into a smooth dough.Place the mixture in a vessel and cover it with lid,take care not to cool the mixture.You can even knead the dough on baking sheet.
  • Pinch in the dough and take orange sized ball and again knead it on the chapati stand.Rolling a rice chapati needs a lot of practice as the rice flour chapati keeps breaking while rolling.I am explaining two different ways to roll it,follow them which ever way you feel comfortable.
  • Method-I for an experienced person:Sprinkle liberally rice flour over the chapati stand and on the kneaded round dough and roll it into a 6" dia circle using rolling pin like how we do rotis.While rolling keep pressing the edges to get a uniform round chapati and also use rice flour liberally while rolling.
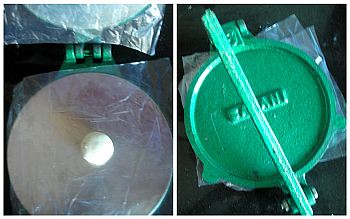
  • Method-II for a beginner:The easiest way to proceed for a beginner would be using a poori press.Clean,wash and wipe a polythene cover and cut into 5" dia rounds and grease the sheets on one side and place them on the sides of the press facing the oiled edges towards the center.Place the kneaded round dough and press it in the poori presser,you would get approximately 3" diameter round chapati.Now sprinkle rice flour over the chapati stand and on the kneaded round dough and roll it into a 6" dia circle using rolling pin like how we do rotis.
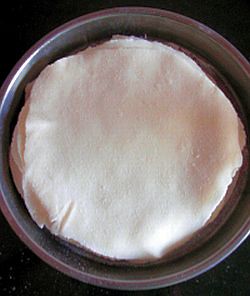
  • Follow the same process of pinching the warm dough and kneaded the ball and rolling using two options.Pile up all the rice flour chapatis in a deep plate and keep it covered until you roast them.You can roll these rice flour chapatis much ahead before making them.You can even refrigerate it and fry them on next day.
  • Heat the tawa and place the rice flour chapati on a hot tawa and roast it for a minute or so and turn it on to the other side and apply oil and once it is fried on the other side and apply oil and fry until you get to see small brown spots over it.These chapatis would be very soft and white in color with some brown spots.Do not over fry them,they will turn hard.
Serve them hot with Pithikipappu or coconut chutney or Bagara Baingan or Mixed vegetable Kurma.The ideal combination we prefer with this chapati is Pithikipappu.

Note:

  • I have included few pictorials of my old posts for better understanding the process of making bilavalige.
  • If the rolled rotis are refrigerated for half an hour before roasting them, they roast better.
  • While refrigerating cover the rotis with a kitchen towel or place them in paper bag.
Pithikipappu(mochai beans curry/Fresh field beans Sambar/Hitikibele dal):

Ingredients:
2 cups avarekalu(mochai/hyacinth beans)
12-15 small onions,peeled
3 tbsp tamarind pulp
1 tbsp grated jaggery
1 tsp mustard seeds
a sprig of curry leaves
4 tbsp ghee/oil
salt to taste

for masala paste:
1 big onion(roasted over the flame)
1/4 cup grated coconut
2 tbsp grated dry coconut
4-5 garlic pods
1" ginger,chopped
2 tsp khus khus
8 red chillies
3-4 byadige red chillies(for color)
2 tsp coriander seeds
3/4 tsp cumin seeds
1/4 tsp black pepper corns
1/2" cinnamon
3-4 laung
1 tsp oil

Method:Boldfor masala paste:
  • Heat oil in a pan and add cinnamon,laung and fry and then add red chillies,coriander seeds,cumin and pepper and fry well.
  • Add ginger and garlic and saute for a minute.Add khus khus,grated coconut and switch off the flame and just warm the fresh coconut and dry coconut and let it cool a bit.
  • Roast one big onion with skin over the flame directly until the skin turns dark brown in color.Use tongs or fork for this process.Remove the skin and grind it along with the roasted masalas to a fine paste adding little water.
for making pithikipappu:
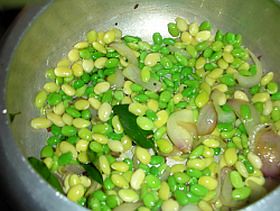
  • Soak mochai beans(avarekalu) in water for 4-5 hours or in luke warm water for 2 hrs.De husk outer skin and keep aside.
  • Heat oil/ghee in a pressure pan or cooker and crackle mustard seeds and add curry leaves and peeled small onions and fry until the onions change their shade.
  • Add the dehusked beans and fry well until they turn light in color.
  • Add ground masala and fry until good aroma comes and add approximately 1/2 cup water and pressure cook for 1 whistle.
  • Allow the pressure to drop,remove lid and add salt,jaggery,tamarind pulp and add more water if required and boil for few minutes.The consistency should be similar to flowing dal.
Serve it hot with rice flour chapati/rice/wheat flour chapati/poori.The ideal combination with this dal is rice flour chapati.

Notes:
If you do not get fresh avarekalu,you can even follow the same process with fresh peas for a variation.Even this tastes nice.

Friday, April 29, 2011

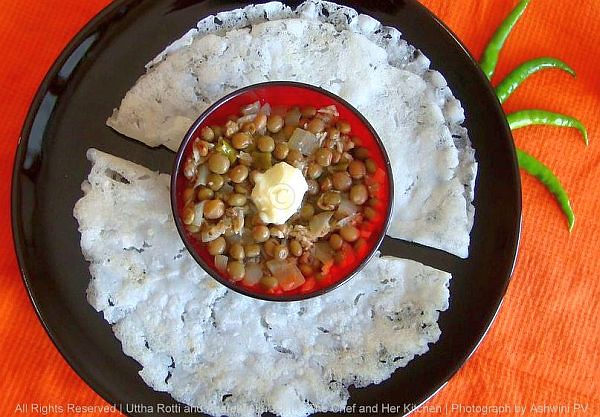
Uttha(Plain Rice flour)Rotti and Avarekaalu Benne Usli,Karnataka Special...'Family Food-Friday#1'

I am here to kick start my first event titled, 'Cooking with Family-Series' which I had highlighted in my last post. The theme that I have chosen for this event is, 'BREAKFAST'. I plan to post the recipes once a week on every Friday and hence named the theme as 'Family Food-Friday'. I have updated the details of this event in the side bar of my blog. Stay tuned to check out the next entry for this event.

Before going to the recipe, let me introduce you the author of this post. This entry is sent by my Sister-In-Law 'Ashwini ',who has a two year old, naughty daughter 'K' .My niece keeps her busy all the time with her non-stop enthusiasm.I think I would need another long post , if I were to tell you more about my little, enthusiastic and mischievous niece. As this post looks already looks lengthy so I am keeping it for another day. As me and my S-I-L both are of the same age group, we are more like friends and update each other on daily life and routine. She has kept her promise by sending her entry as soon as I told her about the event.The most surprising thing for me are the photos that they have clicked for this entry. Both my S-I-L and BRO have done a good job with the photos even though it is their first attempt at it.

Now coming to the recipe, Ashwini has sent me a breakfast item called 'Uttha Rotti' paired with the most famous karnataka dish, 'Avarekaalu Benne Usli'. Karnataka is a land of rottis and is famous for its various varieties like akki rotti, ragi rotti, jolada rotti etc .Uttha rotti means plain rotti and is made up of rice flour which is our community special.I have already posted a version of rice flour rotti called akki rotti which is roasted till its crisp and we also make another version where we cook the rice flour in steam and roll it to chapati and roast it soft.This version is a quite different from those two versions and it is a cross in between the two versions.The rice flour is cooked in steam and then it is patted with hands onto a tawa and roasted till soft and crisp.This rotti is even ideal to make on the fasting days as it does not have onion or garlic and can be paired with coconut chutney on those days.Ashwini also mentioned that though she was not a fan of this rotti she has learnt this rotti from her mom, only because my brother likes it very much...so sweet of her naaa!!!

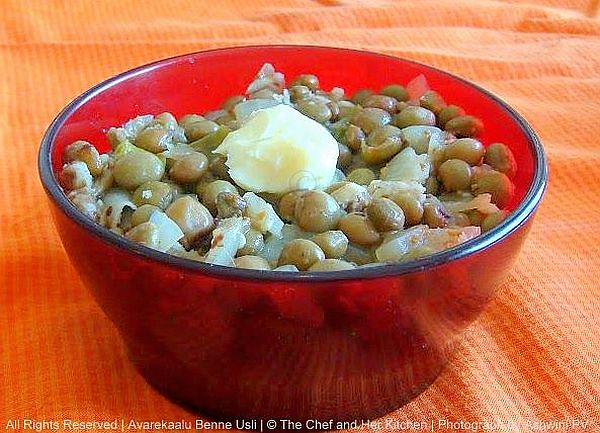
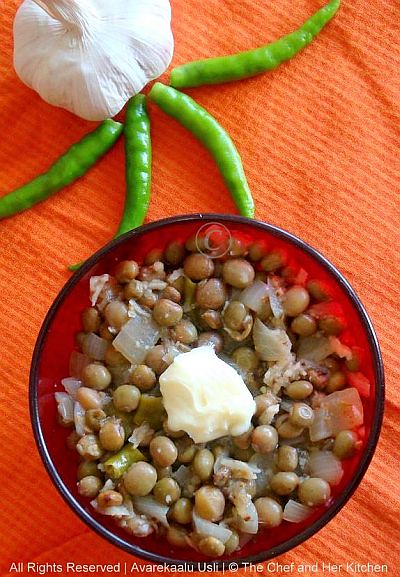
Avarekaalu is one of the seasonal beans which can be used in making various delicacies like halwa, payasam, dal, sambar,saaru, rice,usli, rotti, upma, chiwda etc etc and is loved very much by all our family members.We make a different version of Avarekaalu usli which I will post later and this is the version which is famous in North Karnataka and even in Tumkur.It is made with freshly made white butter which makes it taste extra special and that is why it is called Avarekaalu Benne Usli.This is not the season for fresh avarekaalu and as they stay in London she has used canned avarekaalu to make this and that is the reason a good green color is missing for usli.One should try this with fresh and tender avarekaalu to enjoy its flavor and taste to the fullest extent.And one more thing, many people assume that usli is similar to the sundal but it is not true.Though few of the ingredients are same in usli and sundal, usli is nowhere compared to sundal in its taste as the cooking process is completely different.Try this and you will agree with what I am saying. Now without wasting time let us take a look at the recipes.

Uttha(Plain) Rice flour Rotti:

Ingredients:
1 cup Rice flour(fresh one,do not use old stock)
2 cups Water
2 tbsp grated fresh coconut(I used frozen)
1 tbsp Oil
salt to taste
Oil,for frying rottis

Method:
  • Add oil and salt to the water and bring it to a boil over medium flame.
  • Reduce the flame to low now,slowly add the rice flour to the boiling water,do not mix or stir it.Cook for 4-5 minutes.
  • Stir vigorously now until you get a lump of mixture formed and all the ingredients are well mixed.You can use a long ladle or your roti belan for this process.
  • Divide the mixture into two parts and knead the mixture into a smooth dough on a silicon baking mat or on a clean plastic sheet.Be careful the dough would be very hot,so wet your hands while doing this process.You can even place the dough in a clean plastic bag and knead well,this is very easy and risk free process.This should take atleast 8-10 minutes.It is always better to do in small portions.
  • Smear the Rotti tawa(Non-stick/normal dosa pan) with little bit of oil all over the tawa and place a lemon sized rotti dough in the center and press it gently with hands and spread into a thin layer by rotating the pan by immersing the hand in a bowl in between which helps in patting the dough evenly and smoothly on the tawa.Make it as thin as possible.do not bother if small gaps are there,that makes the rotti even crispier.
  • Pour a spoon of oil over it and cover it with a lid and place it on fire on medium flame.Keep an eye on it to check in between whether it is done or not.Once you see the slight red patches started forming increase the flame and roast until you get the desired crispiness.Try to rotate the tawa in order to get an evenly roasted rotti.No need to turn it on the other side.
Serve it hot with Avarekaalu Usli / Sweet Pumpkin Gojju /Coconut chutney.Uttha rotti tastes best with any of these combinations.

Variations:
You can add either cumin seeds or chana dal into the boiling water while making the rotti dough,both gives its own flavor to the rotti.

Avarekaalu Benne Usli:(North Karnataka and Tumkur Style)

Ingredients:
1 1/2 cups tender Avarekaalu pods(hyacinth/flat beans/surti papdi)
2 medium onions,finely chopped
1/2 cup grated fresh coconut(I used frozen)
7-8 green chillies, finely sliced into rounds
2 tsp Ginger-Garlic paste,freshly ground

1 tbsp butter
2 tbsp oil
salt to taste

to grind into powder:
1 tsp cumin seeds(jeera)
1/2 tsp fenugreek seeds(methi)

Method:
  • Dry roast cumin seeds and fenugreek seeds separately in a tawa until you get the nice aroma of the seeds.Cool them and grind to a fine powder.
  • Heat oil in a pressure cooker,add avarekaalu and fry until the color changes and the raw smells goes away.
  • Add finely chopped onions to it and fry until they are translucent.
  • Add chopped green chillies and fry for a minute.
  • Add freshly ground ginger and garlic pastes and fry for a couple of minutes.
  • Add grated fresh coconut,salt and ground cumin-methi powder and fry again for a couple of minutes.
  • Add butter and 1/4 cup water and close the lid and pressure cook for 1 whistle.This should be dry with little gravy from the coconut mixture.
Serve it hot with Chapati/Roti/Uttha Rotti and fresh white butter.

Variations:
If fresh avarekaalu is not available,you can use fresh peas to make this.

Notes:
  • Usli tastes best with fresh and tender avarekaalu.So do not miss trying this in avarekallu season.I have used canned ones,so you miss that beautiful green color here.
  • Use fresh white butter in making this curry to get the authentic taste of Usli.Use 2 tbsp fresh butter if you are not calorie conscious,otherwise replace half the quantity with oil.
You can check the recipe for Green Peas Usli in my earlier post.This breakfast is going to participate in srivalli's 'Breakfast Mela' event
 
back to top