Showing posts with label International Recipes. Show all posts

Monday, July 24, 2017

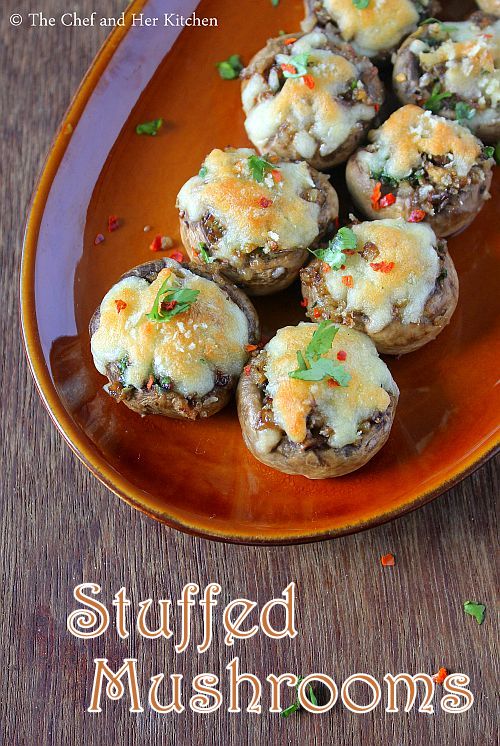
Stuffed Mushrooms Recipe | Vegetarian Stuffed Mushrooms

stuffed mushrooms
Stuffed Mushrooms with a vegetarian filling recipe with step by step photos. Mushrooms are very versatile and can be used in various ways to create delicious starters, snacks,pulav, biryani,gravies,stir-fry,curry etc. Among all the mushrooms recipes this stuffed mushroom recipe is my most favorite, it is not only easy to prepare but also tastes delicious.If the preparation work of mushrooms is done, it takes hardly any time to cook them and stuff them and bake.It is an ideal recipe for starters in the parties, one can prepare the filling ahead and stuff the mushrooms and keep them ready and bake in the oven at the last minute.These stuffed mushrooms taste best when served hot and consumed immediately, otherwise they become soggy.
stuffed mushrooms
Stuffed Vegetables make any meal interesting and I always love stuffed colored bell peppers, stuffed jalapeno poppers, Indian style stuffed peppers,Stuffed Brinjals ,stuffed mushrooms which can jazz up any meal.
You can check few stuffed vegetables recipes in my blog - 
stuffed mushrooms
You can check other mushroom recipes in my blog- Mushroom BiryaniMatar Mushroom MasalaMushroom Chettinadu,Palak Mushroom.
stuffed mushrooms
Here is how to make stuffed mushrooms recipe with step by step photos.
Stuffed Mushrooms Recipe with Veg filling:
Serves 3-4 | Author: Prathibha
Prep time: 15 mins | Cooking time: 10 mins | Total time: 25 mins + 20 mins baking time
Cuisine: International | Category: Starters/Sancks

Ingredients:
15-20 white button Mushrooms
1/4 cup grated Mozarella/Cheddar/Processed cheese
1/4 cup Bread crumbs
1 small Onion,finely chopped
2-3 Garlic cloves,finely chopped
2-3 tbsp chopped Coriander leaves
2 tsp Mixed herbs
3/4 tsp Pepper powder
2-3 tbsp Olive oil
Salt, to taste

Method:
  • Gently rub and wash the mushrooms.I usually rub them with rice flour gently and wash them under running water.Carefully remove the stalks and trim off the tip portion of the stalk and cut the stalk into fine pieces and keep aside.
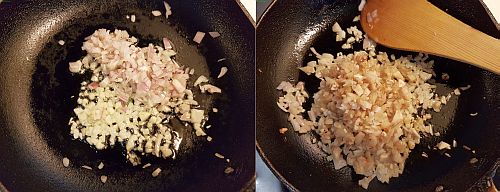
  • Heat 1 tbsp Olive oil in a pan and add finely chopped garlic and fry until it turns slight brown in color and then add finely chopped onion and fry until the onion turns light brown in color.
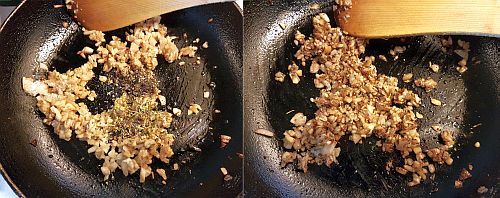
  • Add the chopped mushroom stalks and saute them, they initially release water and let them cook more until the water is absorbed completely.
  • Add the mixed herbs, pepper powder, salt and cook for another 2 mins.
  • Let the mixture cool a bit.
  • Meanwhile preheat the oven at 180 deg C/375  deg F for 10 mins.
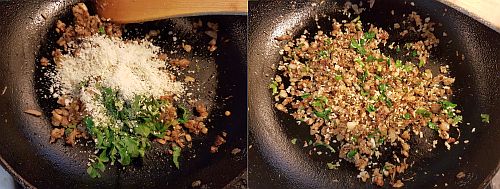
  • Now add the bread crumbs and chopped coriander leaves to the cooked mushroom stalk mixture and mix it well.
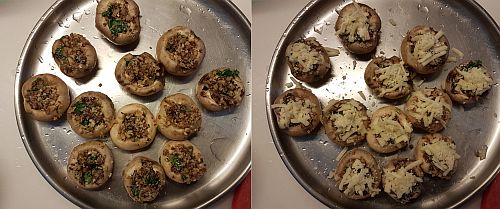
  • Stuff the mushrooms with 2-3 tsp filling and sprinkle some grated cheese(of your choice) and little bit of bread crumbs and keep them ready.
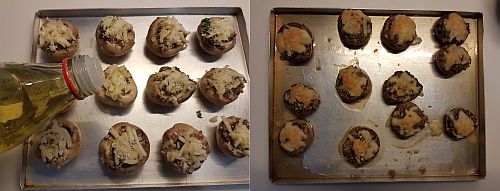
  • Arrange the stuffed mushrooms on a greased tray and dot them with olive oil and bake them in the oven at 170 deg C for 20-25 mins until they are done, they release water and starts to slightly drying up.When start drying up you can remove them from the oven.
Serve them immediately by adding freshly chopped coriander leaves.

Notes:
  1. They taste best when served immediately and consumed hot, else they turn soggy and will not taste good.
  2. Once the mushroom started releasing water in the oven means it is done but I usually keep it for little longer until it starts slightly drying up otherwise I find them bit raw.So it is your wish,you can remove them when you see the water starts forming under the mushrooms while baking.
  3. The bread crumbs add a nice crispy texture on top so do not skip in the filling as well as add a little while topping them with cheese.
  4. For a vegan version avoid cheese on top.
stuffed mushrooms

Wednesday, April 19, 2017

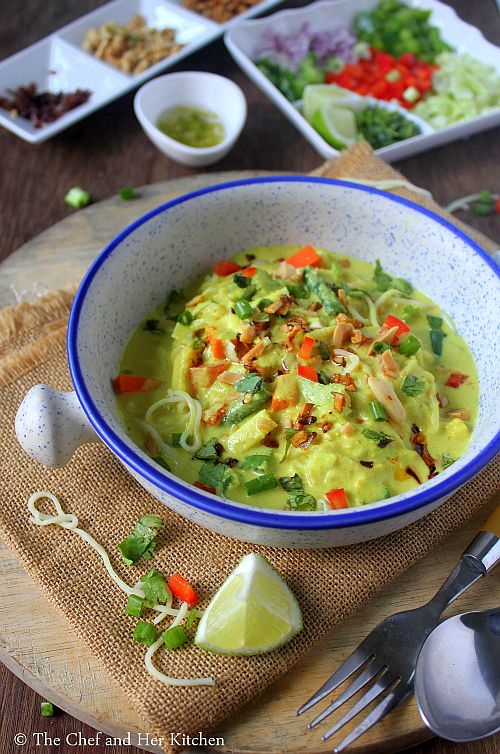
Vegetarian Burmese Khow Suey Recipe | Veg Khowsuey

vegetarian khowsuey
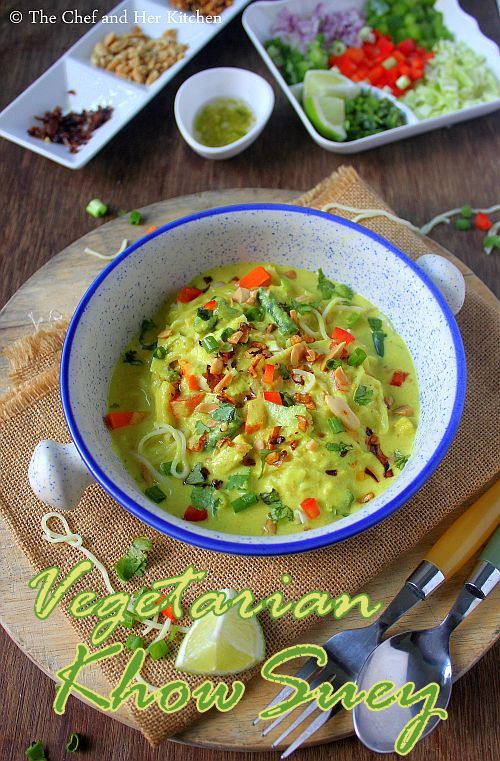
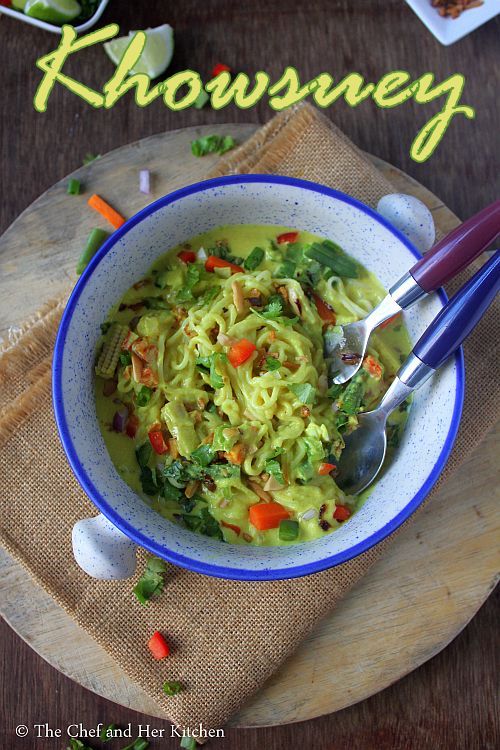
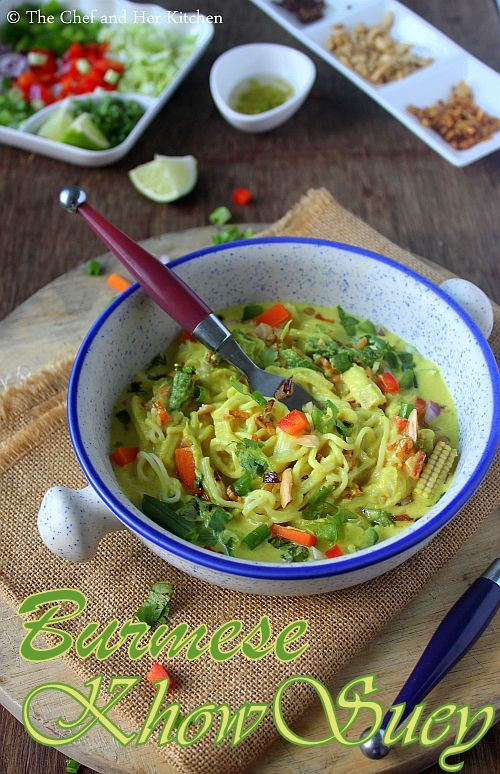
Vegetarian Burmese Khowsuey Recipe with step by step photos.Sometimes we fall in love with few dishes at the very first bite and this Burmese Khow suey was one such dish for me which bowled me for the very first time I had tried in a restaurant back in Mumbai long time ago.When ever I visit that restaurant it had become a norm to order this dish for me with out any fail.Mildly spiced gravy poured over a bed of noodles and is topped with various condiments which adds a nice texture in each and every bite.The crunchy bits of fried garlic, onion and crushed roasted peanuts need a special mention as I just love them in my toppings and I always add them generously to jazz up my khowsuey bowl.
burmese khow suey
burmese khow suey
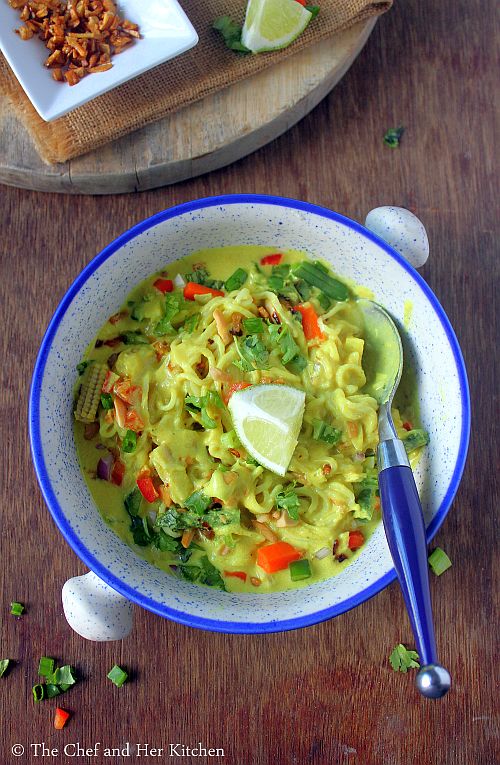
I wanted to recreate this restaurant magic at home so that I can pep up my weekend meals a bit and got referred to this recipe  while I was searching for the recipe and I modified the recipe a bit to suit my convenience and I must admit that it turned out really delicious. This has become quite regular at home as the idea of making your own khow suey bowls from an elaborate spread of condiments and toppings is much appreciated by everyone at home and also it is fun to create your own khowsuey bowls according to your taste buds.
burmese khow suey
burmese khow suey
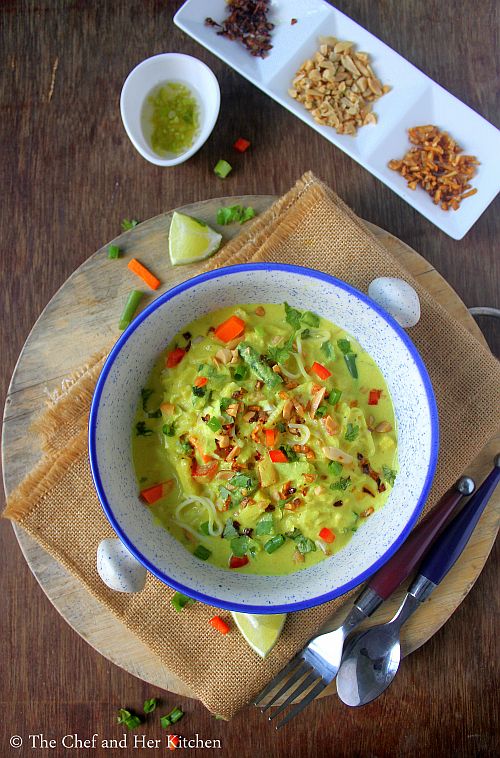
Before I jump into the recipe I am warning you - do not get worried seeing the number of ingredients and the long procedure I had mentioned, it is actually quite simple to make. It is easier to make than the regular Chinese Veg Hakka Noodles with manchurian or your usual roti-sabzi-dal fare. Just that you need to chop a lot of vegetables and deep fry a few things for toppings which you can do prior hand. This is one such dish which can wow your guests for sure if you serve at your parties.So, what else you are waiting for? try this recipe at home to impress your family or friends and enjoy the whole hearty meal at home.
burmese veg khow suey
Check out other noodle based recipes in my blog - Chinese Veg Hakka Noodles and Schezwan Vegetable Noodles.
burmese khow suey
Here is how to make Vegetarian Burmese khowsuey recipe with step by step photos:
Vegetarian Burmese Khow Suey Recipe:

Serves 3-4 | Author: Prathibha
Prep time: 20 mins | Cooking time: 30 mins | Total time: 45 mins
Cuisine: Burmese-International | Category: Main Course

Ingredients:
1 packet (200 gms) Noodles
1 cup Coconut Milk,I used ready made
1 cup Vegetable stock or 1 Veg stock cube
2 tbsp Chickpea flour/Besan
1 tsp Pepper powder
Salt, to taste
1 tbsp Oil

for paste:
1 large Onion,chopped
5-6 Garlic cloves
1" Ginger,chopped
1 tsp Coriander seeds
2" Lemon Grass stalk,chopped( I used 1.5 tbsp Green Thai Curry paste)
1/2 tsp Turmeric powder

Vegetables:
5-6 Babycorns,cut into batons
1 large Carrot,peeled and cut into batons
7-8 french Beans,cut into 1/2" long pieces
1/2 cup finely chopped Cabbage
1/4 cup finely chopped Green Capsicum
1/4 cup finely chopped Red Bellpepper
1/4 cup finely chopped Onion
other options- Cauliflower,broccoli,peas,corn

for toppings:
1/2 cup deep fried noodles(I did not add)
1/4 cup browned Onions
2-3 tbsp deep fried finely chopped Garlic
1/3 cup roasted salted peanuts,slightly crushed
2-3 tbsp chopped Spring Onions
2-3 tbsp chopped Coriander
4-6 Lemon wedges
2-3 Green chilies,finely chopped and soaked in 2 tbsp vinegar for a day
1 tsp Red chili flakes
Tofu(pan roasted) or Boiled Egg wedges,optional

Method:
pre preparations:
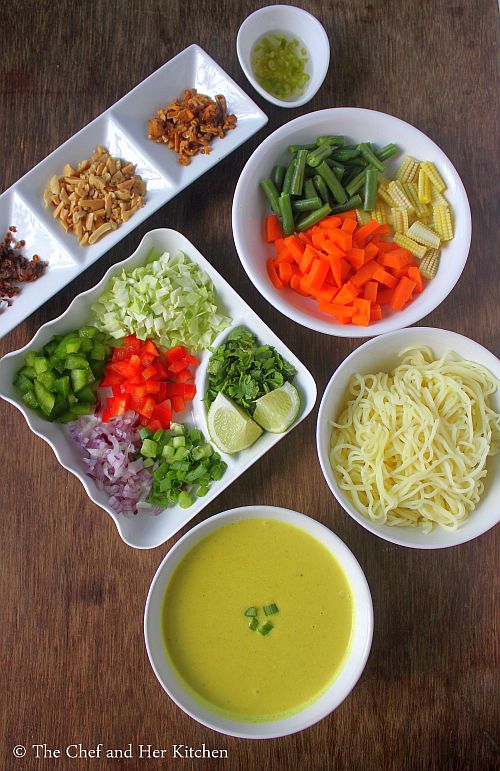
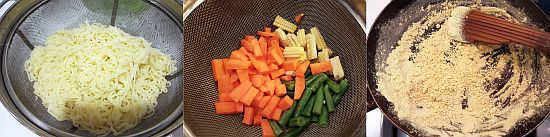
  • Boil Noodles as per the instructions on the pack and keep it ready.
  • Dry roast chickpea flour until it becomes aromatic and keep it ready.
  • Blanch the vegetables - babycorn,carrot,beans in hot water individually until they are slightly soft but still maintain their crunch.If you are using other vegetables like cauliflower, broccoli,corn or peas blanch them accordingly too.
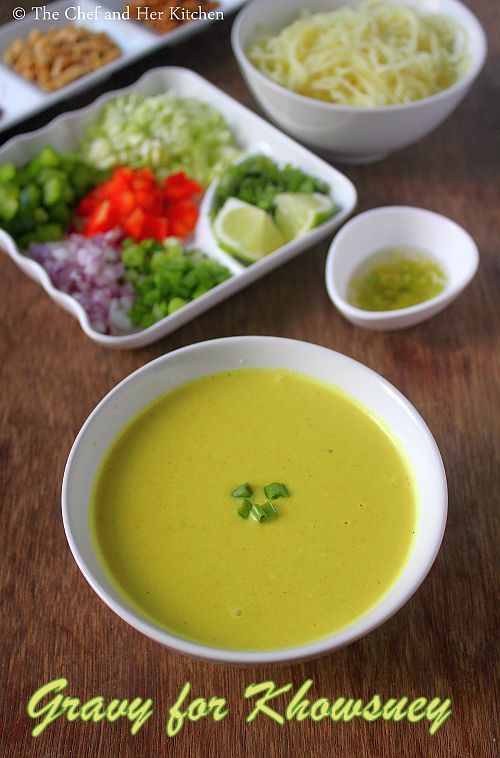
for Gravy:
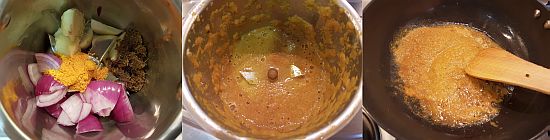
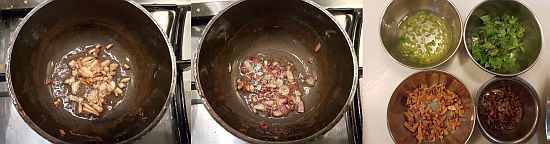
  • Grind the ingredients mentioned under the section- for paste - onion, ginger,coriander seeds, garlic , turmeric powder and lemon grass stalk( I used green thai curry paste as I did not have lemon grass in hand) to a fine paste.
  • In a big pot/kadai heat oil and then add ground paste and fry until the mixture leaves the oil at the edges.Add roasted chickpea flour and fry nicely until it is mixed.
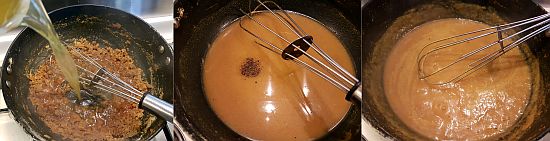
  • Now reduce the flame and add the stock slowly and keep mixing it with the whisk nicely to avoid the lump formation.
  • If you want to add vegetables to the gravy,  you can add them at this stage and let them cook in the gravy,but I like to keep it separate to maintain their crunch.
  • Add salt and pepper powder to it and let the mixture come to a boil and then add coconut milk and mix it nicely and let it come to boil.Add more water if needed to get the consistency of a gravy which is neither thin nor very thick.Cover and keep it aside.
for toppings:
  • Deep fry finely chopped garlic and onion separately until they turn brown and crisp.
  • Finely chop green chilies and soak in vinegar, it is better to let it soak for long as it makes the green chili bits spicy and tangy.
to assemble:
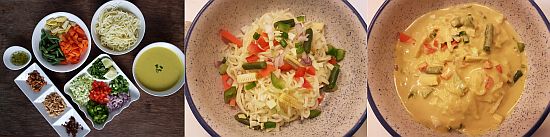
  • Keep the gravy hot.
  • Keep all the toppings,noodles and gravy ready.
  • for each portion of khowsuey - Place a portion of boiled noodles in a serving deep bowl and add few blanched vegetables(babycorn,carrot and beans) and also add finely chopped raw vegetables (cabbage,green and red capsicum,onion) and pour 2-3 ladles of hot gravy all over the noodles and vegetables.Now garnish with a generous amounts of deep fried garlic-onion bites, crushed roasted peanuts, spring onions, chili flakes, green chilies(soaked in vinegar), coriander, deep fried noodles(if using) and squeeze lemon all over it.You can add pan fried tofu cubes or boiled egg wedges on top while serving if you want.
  • Repeat for all the portions.Add the noodles,gravy,vegetables,toppings quantities as per your wish.
Serve it hot.Enjoy!!

Notes:
  1. You can add vegetables while preparing the gravy but I prefer to keep it separate and serve them so that it maintains its crunch and we can add them as per our wish.
  2. Be generous with toppings- fried garlic, fried onions, crushed peanuts. They add nice taste to khowsuey.
  3. You can even add glass noodles or rice noodles or a combination of noodles,but I use regular noodles.
  4. It is fun to serve everything at the dinner table so that one can create their own khowsuey bowls as per their taste.Hence keep everything ready and heat the gravy just before serving.
  5. I did not have lemon grass in hand and hence I added Thai green curry paste which had good amount of lemon grass in it and it was quite good.
burmese veg khow suey

Monday, January 2, 2017

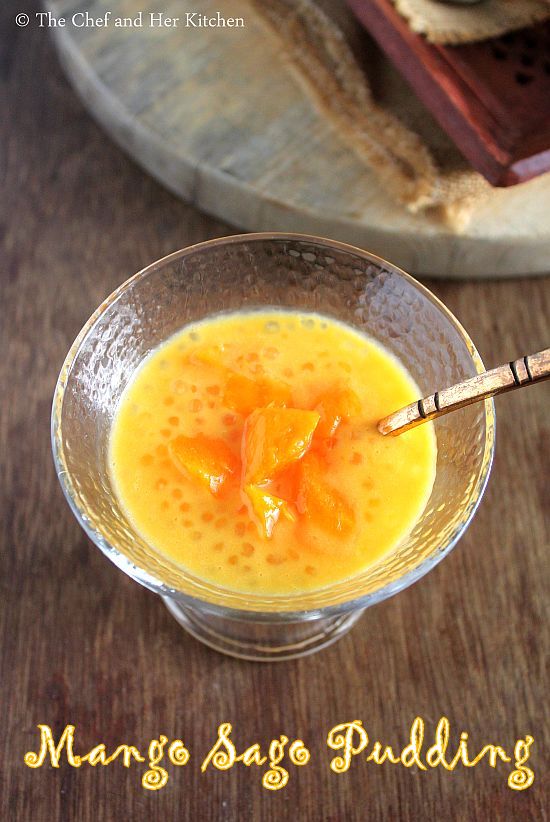
Mango Sago Pudding | Easy Mango Dessert Recipes

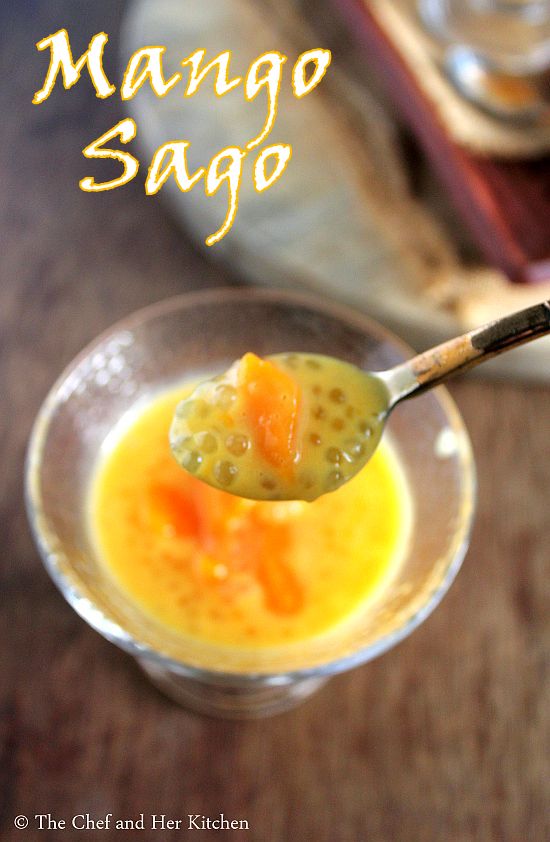
mango sago
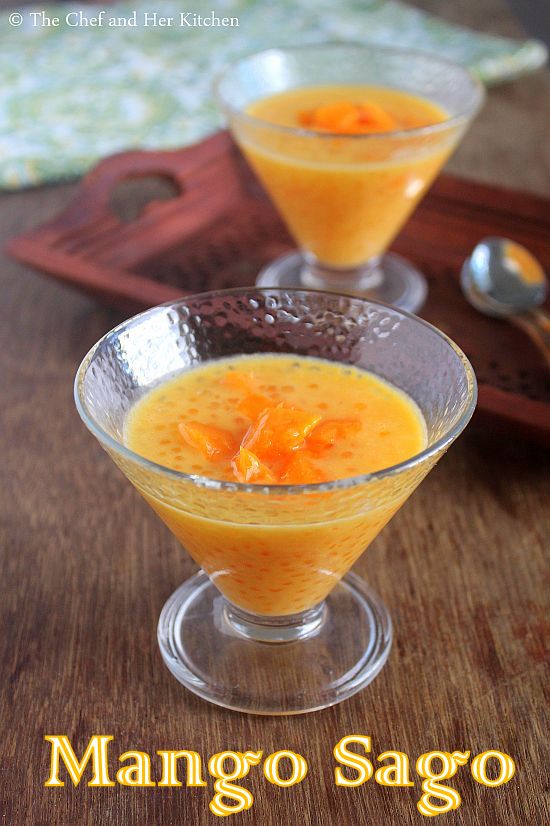
I have been planning to post this popular Singapore dessert from ages but coincidentally I am able to post it only after shifting to Singapore. It is a popular dessert in Singapore and is available in most of the food joints and food courts here.Though the mango season is over, we still get mangoes here and whenever I spot them I buy them for little 'V'. I make milkshakes and smoothies for him and keep those mangoes only for him as he is really fond of mangoes. I have made this Mango Sago recently for his evening snack instead of his usual Mango Milkshake ritual and the kiddo had it happily and said- "mamma, it is yummy!! ", what else I can ask for from a two year old kiddo. It is fairly simple to make and also very filling at the same time.
mango sago
mango sago pudding
Mango,as the fruit by itself is a great dessert and one can prepare various desserts with it.The flavor of mangoes is great especially in the desserts, sweets, ice creams, kulfis and puddings. I have posted many mango desserts recipes already in my blog in case if you are interested to check them.Sago is also used in sweets preparation like Sago Kheer, Sago Halwa etc.
mango sago pudding
Coming to the recipe part, it is extremely simple to prepare and is a mix of Sago Kheer and creamy Mango Milkshake. In short,cooked sago pearls are mixed with the thick creamy mango milkshake just that you need to follow few steps to make it fool proof. In the traditional method, evaporated milk is used but I have substituted with full cream milk and condensed milk for my convenience.There are no hard and fast rules with the quantities in the recipe, one can add them as per their taste buds.Now, off to the recipe.
mango sago pudding
Check out various mango desserts recipes in my blog:
mango sago pudding
Mango Sago Pudding Recipe:
Serves 3-4 | Author: Prathibha
Prep time: 10 mins | Cooking time: 10 mins | Total time: 20 mins
Cuisine: International | Category: Desserts

Ingredients:
1 large ripen Mango
1/4 cup Sago pearls, medium size
1/2 cup Condensed milk or 3/4 cup Evaporated milk
1-2 tbsp Sugar,if needed (more if using evaporated milk)
1 cup full cream Milk

Method:
  • Wash and soak sago pearls for an hour and wash it again to remove the extra starch in it.Cook it for 5-7 mins until they turn transparent and gets cooked, if you want you can bite one and test whether it is done or not.Drain the cooked sago pearls and wash again under the running water, this removes additional starch, I skipped this step.
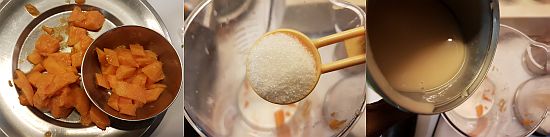
  • Wash,peel and chop mango into small pieces.Reserve 1/4 cup pieces for garnish and usage later.
  • Meanwhile boil full cream milk until it is reduced to half and cool the milk.
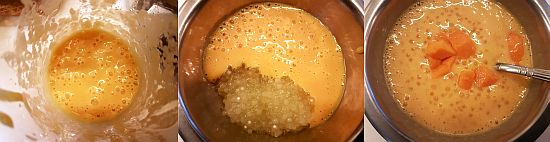
  • Grind the cooled milk, mango pieces, condensed milk(or evaporated milk) and sugar as per your requirement to a smooth puree in a blender. The addition of sugar is based on the sweetness of mango and usage of condensed milk or evaporated milk,you can increase or decrease or avoid it completely as per your wish.
  • Now mix the pureed mango mixture with the cooked and washed sago pearls to an uniform mixture.The consistency should be slightly thick,not very thin.
  • Add reserved mango pieces(reserve 5-6 pieces) and mix nicely and pour into individual bowls and garnish with few mango pieces and chill it for 2-3 hrs.
Serve it cold and Enjoy!!!

Notes:
  1. It is ideal to wash the sago pearls, before soaking, after soaking and after cooking, this is to remove the excess starch content in them.You can follow the process you usually use to cook them, it is completely fine.
  2. Use nicely ripen mangoes for this dessert for dark yellow color and also for good flavor. If you are in India you can use Alphonsos or Kesar mango varieties for this dessert.
  3. The traditional recipe uses evaporated milk and sugar in the recipe but I find it convenient to use condensed milk in the recipe, it gives creamy rich taste to the dessert. If you are calorie conscious you can even avoid it but it will not turn creamy like how it is supposed to be.
  4. If you don't have mangoes you can always use canned mango pulp to make this dessert.
  5. Pomelo sacs can be also added to this dessert for a variation to make Mango Sago Pomelo Pudding.
mango sago

Monday, November 21, 2016

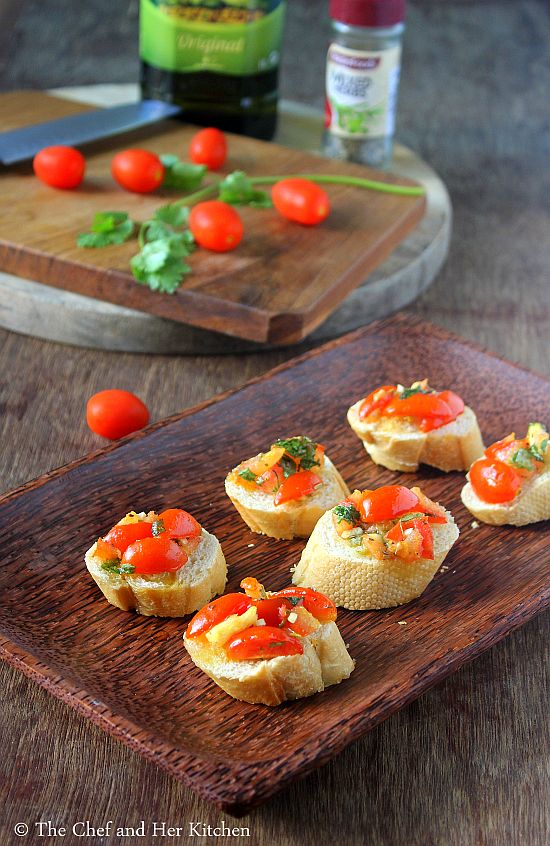
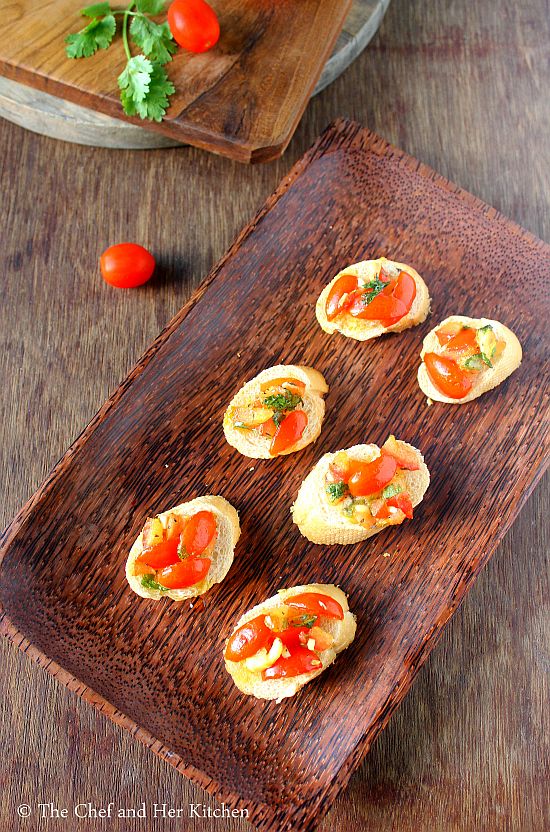
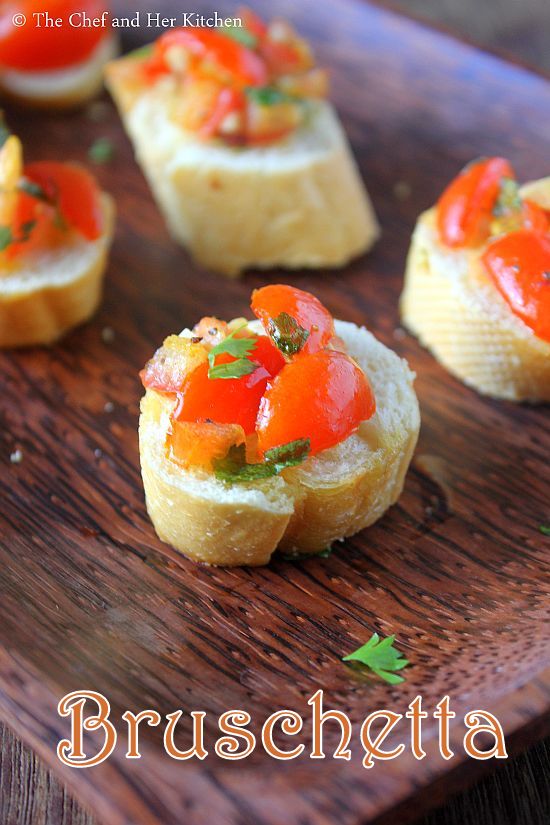
Tomato Bruschetta Recipe | Easy Bruschetta Recipes

tomato bruschetta
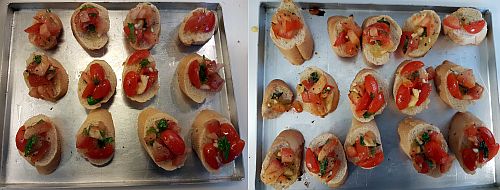
'Bruschetta' should be actually pronounced as 'Bru-sket-ta'  but I often hear it being pronounced as 'bru-shet-ta'.It is a classic Italian appetiser which is very simple and quick to prepare that can jazz up your parties for sure.The addition of fresh basil leaves, garlic and EVOO  to the tomatoes takes it to the new level.
tomato bruschetta

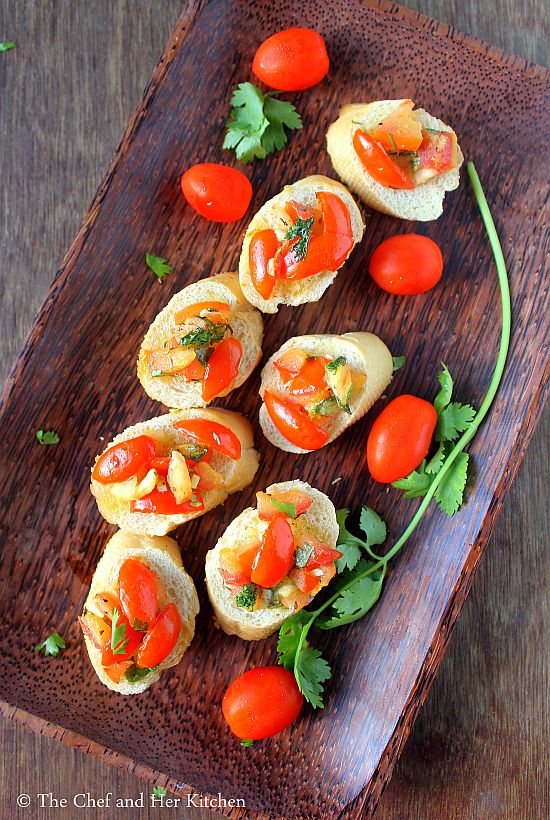
tomato bruschetta
Whenever the theme is Italian cooking I always would choose either garlic bread,Garlic Bread Exotica or this tomato bruschetta as a starter as these are very quick to prepare and can be served to a large crowd with ease. You can even have this tomato bruschetta with a Soup for a light and comforting dinner too or serve it as an evening snack in your tea parties, it fits the bill anywhere!!
tomato bruschetta

tomato bruschetta
Check out other Italian recipes in my blog here:
bruschetta
Tomato Bruschetta Recipe:
Serves: 3-4 | Author: Prathibha
Prep time: 10 mins | Baking time: 10 mins | Total time: 20 mins
Cuisine: Italian | Category: Appetizers/Snacks

Ingredients:
1 French loaf/Baguette
2 medium Red Tomatoes,finely chopped
12-15 Cherry Tomatoes, sliced into 4 pieces
8-10 Basil leaves, torn roughly(I used dried herbs and Coriander leaves isntead)
2-3 tbsp Extra Virgin Olive Oil(EVOO)
2 pods Garlic,grated
1 tsp Lemon juice or Balsamic Vinegar
1/2 tsp Black Pepper powder
Salt, to taste
Extra Virgin Oil, to drizzle

Method:
  • Make a cross mark on the tomatoes and blanch them in hot water and remove the skin and chop them into pieces. You can skip this step and just remove the seeds and chop the tomatoes into small pieces. Cut the cherry tomatoes into 4 pieces lengthwise and keep them aside.
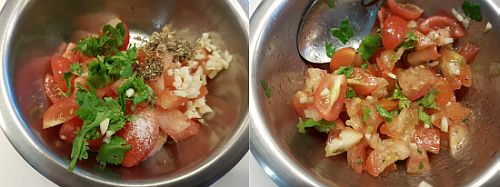
  • In a bowl mix chopped tomatoes, cherry tomatoes,torn basil leaves, grated garlic, black pepper powder, salt and add lemon juice(or Balsamic Vinegar) and Extra Virgin Olive oil and mix nicely and leave the mixture for an hour.
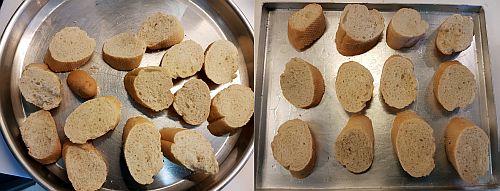
  • Cut the french loaf diagonally  to get pieces of 3/4"thickness.
  • Place a big tbsp of tomato mixture on top of each piece and bake it in preheated oven for 7-8 mins until the tomatoes wilt slightly.Alternatively you can bake the slices(drizzled with EVOO) first in oven or roast them on tawa applying butter or EVOO and then rub one side of the toasted bread with a garlic pod and place the tomato mixture on it.
Drizzle more extra virgin olive oil on top and Serve.

Notes:
  1. Ideally it is suggested to roast them in preheated oven until they are slightly crisp and one side of the roasted baguette slice is rubbed with a garlic pod to infuse more flavor into the slice.Then place the tomato filling on top and drizzle more EVOO on top.
  2. I did not have basil at that moment and hence I had used dried Italian herbs and coriander leaves in place of basil.But I highly recommend to use fresh Italian basil for the recipe.
  3. The addition of cherry tomatoes is optional,but it adds a nice look for the bruschetta. You can even add colored cherry tomatoes and skip the big tomatoes completely.
  4. Balsamic vinegar adds a nice taste to it, if you have it add it otherwise replace it with lemon juice or vinegar or you can avoid it if you do not like it more tang.
  5. You can even add few bites of buffalo mozarella cheese or feta cheese or paneer in the tomato  filling.
tomato bruschetta

Technorati Tags:

Wednesday, November 16, 2016

Eggless Wholewheat Banana Pancakes | Eggless Pancakes Recipes

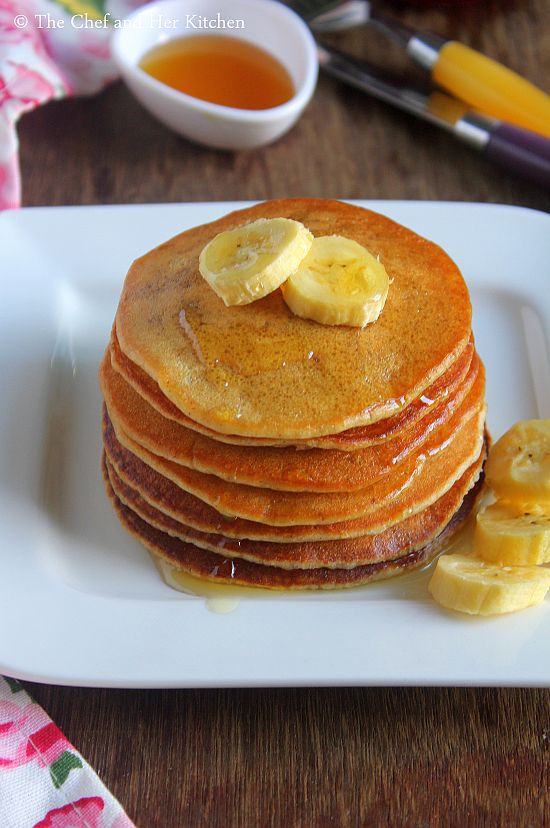
eggless wholewheat banana pancakes
Pancakes are quick to make as they do not need any fermentation and also they can be prepared instantly. Pancakes are usually make with egg but it can be prepared without eggs easily. One can serve the pancakes with toppings of their choice. My favorite toppings are warm maple syrup, whipped cream,vanilla sauce and berries and sometimes I like to eat them with Nutella or Chocolate sauce. They are so versatile that once you get the basic recipe correct you can play with the flavors and create your own style of pancakes. One can add various fruits like bananas, apples,berries etc to the pancake batter and prepare different fruit version of the pancakes.
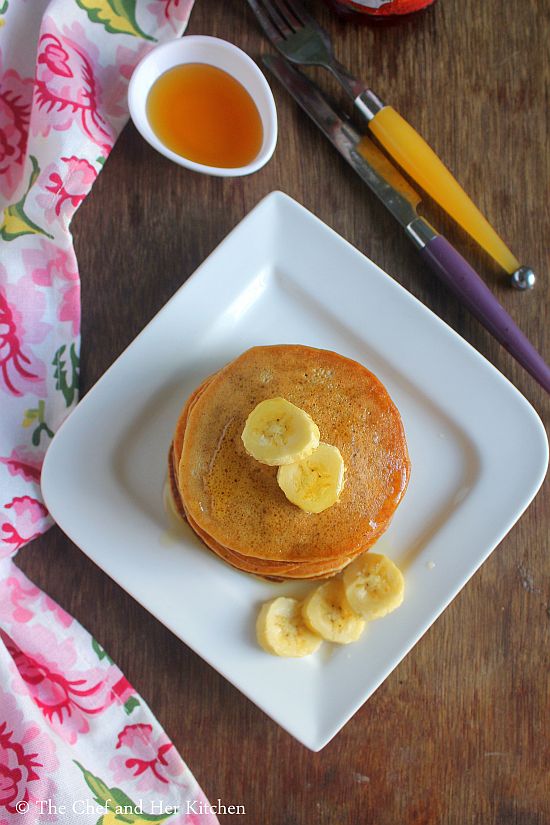
eggless wholewheat banana pancakes
For Vegetarians it is usually a challenge in other countries to find good veg fare , hence I always end up having heavy breakfast in the breakfast Buffet. I do not mind eggs in my bakes,pancakes or waffles but somehow I do not like the omelettes or french toasts and I am not a bread person too.Hence I always end up picking up a bowl of cereal or porridge, pancakes or waffles(I do not mind Eggs in them) with various toppings and fruits with juice and coffee which actually keeps me full for longer hours.
eggless banana pancakes
Coming to today's post, I often make these Eggless Wholewheat Banana Pancakes and for me these taste exactly like the Banana Appam as the ingredients are almost same. In this pancake recipe, wheat flour works well and is almost a guilt free recipe especially when you make it for kids.Try them for your kids for evening snack or breakfast, they will love it for sure.
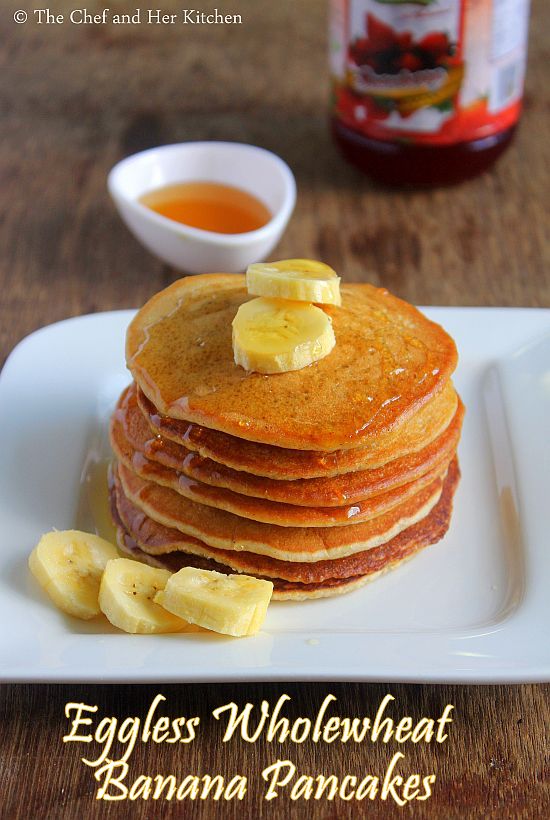
eggless wholewheat banana pancakes
If you want more banana based recipes, check out here:
eggless wholewheat banana pancakes

eggless wholewheat banana pancakes
Eggless Wholewheat Banana Pancakes Recipe:
Serves 2 | Author: Prathibha
Prep time: 5 mins | Cooking time: 15 mins | Total time: 20 mins
Cuisine: International | Category: Breakfast

Ingredients:
1 cup(120 gms) Wholewheat flour(or All purpose flour)
2 medium ripened Bananas, mashed
1-1.25 cups Milk( 1 cup = 240 ml)
1.5 tbsp fine Sugar( or Jaggery powder)
1 tbsp Oil (or melted Butter)
2 tsp Baking powder
1/4 tsp Cinnamon powder
1/4 tsp Salt
Oil/Butter ,to fry

Method:
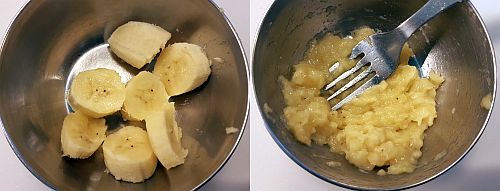
  • Mash the bananas and keep it aside.
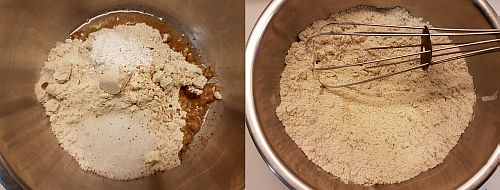
  • In a wide bowl add wheat flour, sugar,salt, baking powder, cinnamon powder, oil(or melted butter) and mix it nicely using a whisk.
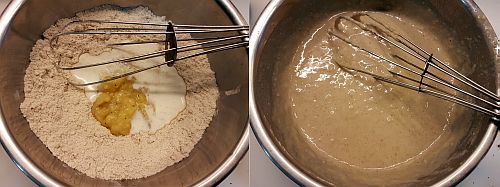
  • Make a well in the center of the wheat flour mixture add 1 cup of milk and mashed banana and mix it until it is mixed.Add more milk if necessary until you get a thick consistency of the batter which can be pourable.Do not over mix the batter,else the pancakes will not be fluffy. Leave this batter aside for 10-15 mins.
  • Heat the dosa pan until it is hot and add few drops of oil and spread it nicely using a kitchen tissue.Make sure that the pan is hot(but not over heated).
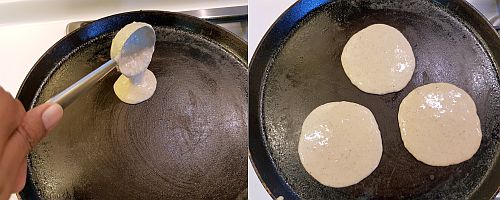
  • Mix the batter once and take a medium sized ladle and pour a ladle full of batter and allow it spread on its own(Do not spread). You can prepare 3-4 pancakes at a time depending on the size of your pan.Pour oil from the edges.
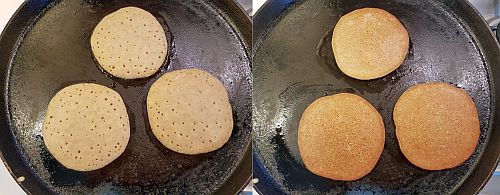
  • Once you see the formation of bubbles/holes on the pancakes and also the edges turn slight brown turn them gently to the other side and let them cook again for a minute and remove them and stack them on a plate.
  • Sprinkle few drops of water on the pan and wipe it with the tissue and proceed again to make the pancakes. This ensures that the pan does not become over heated,else you will not see evenly browned pancakes, it will result in white patches on the pancake.
Serve the pancakes with a generous drizzle of Maple Syrup or Honey, Butter(or Whipped Cream)or with a Sauce of your choice like Strawberry Coulis, Mixed Berry Coulis,Butterscotch Sauce,Chocolate Sauce, Nutella or Vanilla Sauce.You can serve with sliced bananas or fruits/berries of your choice.
Enjoy the soft and fluffy Pancakes !!

Notes:
  1. You can use All purpose flour instead of wheat flour in the recipe or 50:50 ratio of both. If you use all purpose flour 1 cup of milk would be enough, if you use wheat flour increase the milk until you get the required consistency.
  2. Cinnamon powder can be replaced with Vanilla essence or Cardamom powder for Banana pancakes.
  3. For a VEGAN version use non dairy milk or water and use oil instead of butter in the recipe.
  4. Sugar can be replaced with Cane sugar or Jaggery powder for healthy version.
  5. It is important to maintain the temperature of the pan , it should be not very hot and should be only on medium heat to get evenly browned pancakes. If the pan is very hot the shapes of the pancakes will be distorted and also they turn in dark color.
  6. The consistency of the batter should be thick but should be pourable. DO NOT SPREAD the pancakes on the pan, you need to pour the batter and leave it spread by itself.
  7. Always use same amount of batter to get same sized pancakes.
  8. Do not over mix the batter,else the pancakes will become tough.
  9. You can avoid Bananas in the recipe and make plain eggless pancakes. You can add berries of your choice to your pancakes or you can even add grated apples instead of mashed bananas in the recipe.
  10. You can add chocolate chips to the batter if you like.
eggless wholewheat banana pancakes
 
back to top