Showing posts with label Sankranti Recipes. Show all posts

Friday, January 13, 2017

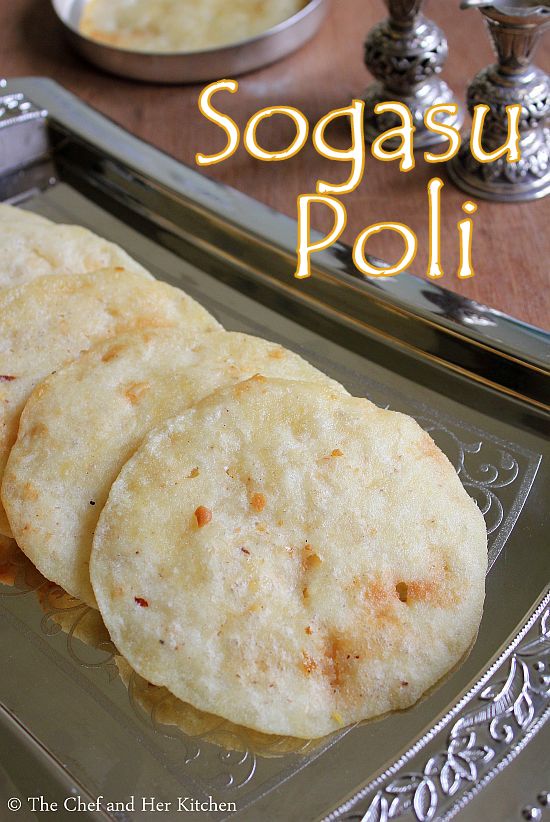
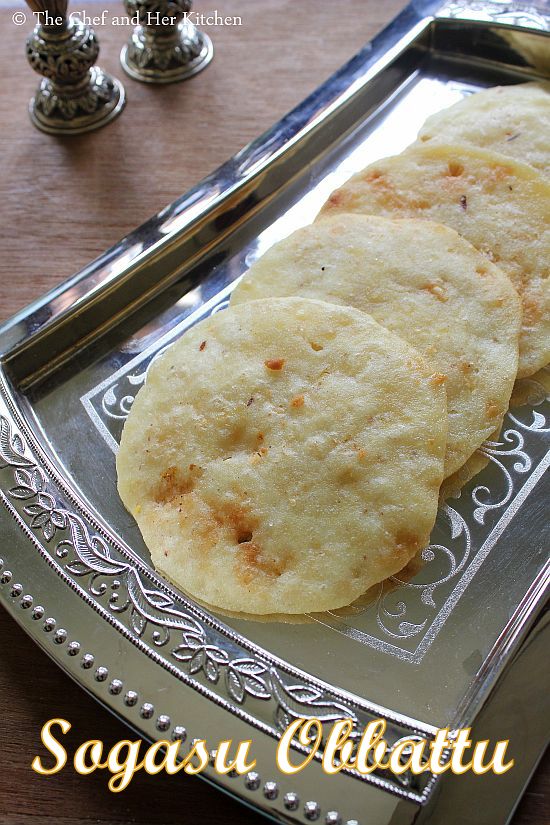
Sogasu Poli | Sogasu Obbattu | Holige Recipes

sogasu poli
At my mom's place,any major festival is incomplete without a holige and hence we prepare various holige varieties at home.While the most popular one are  Hoornada holige(Pappu Obattu) and Coconut Holige,my mom prepares various other holige varieties like Til Poli(Nuvvula Obbattu), Shenga Holige(Groundnut holige), Dates Holige etc. While these holiges are fried on the tawa there are few holiges which are deep fried like Paala Obattu(Haalu Holige), Sajjige Obattu(Sajjappa),Garugu Obattu, Sogasu Obbattu and every holige tastes best on its own and has its own importance for the festivals.
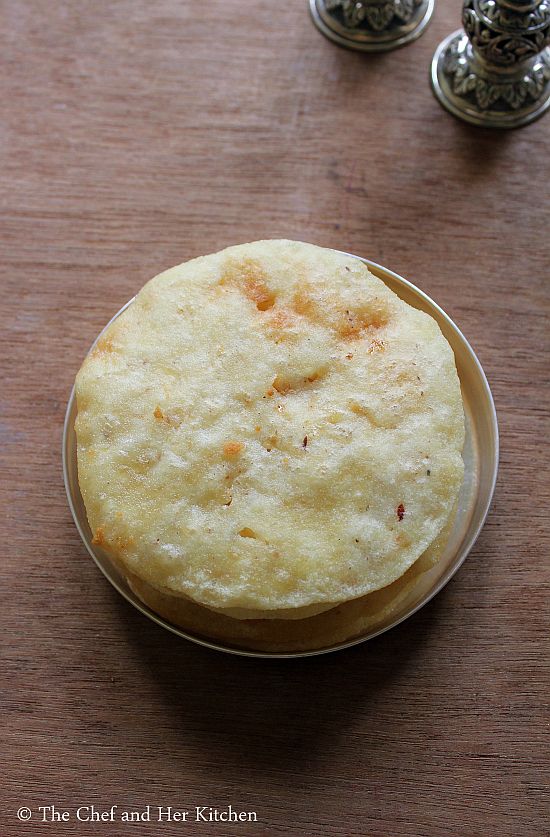
sogasu poli
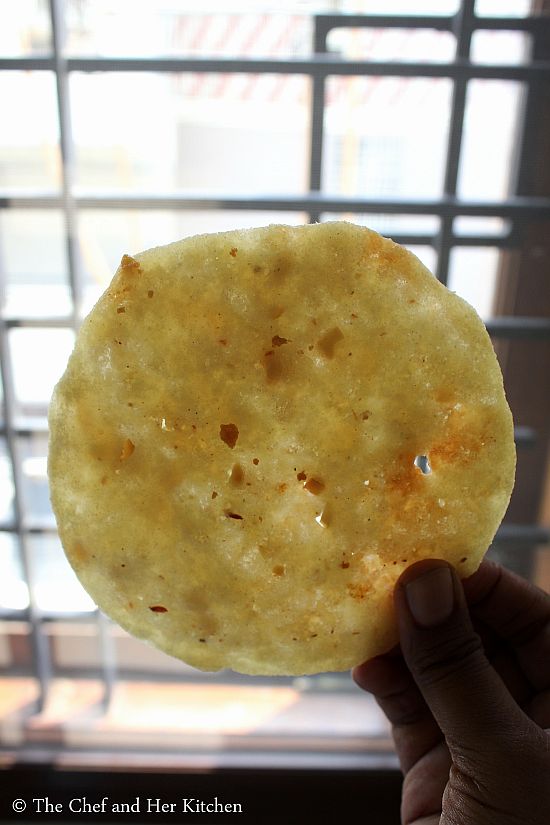
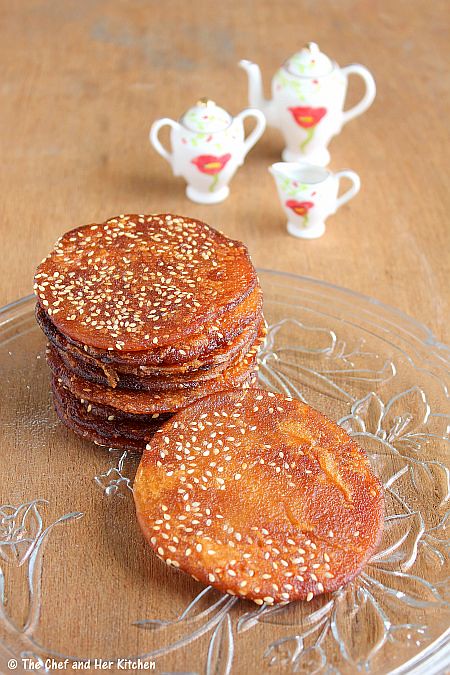
Today I am posting Sogasu Poli recipe which is very similar to Garugu Obattu and Sajjappa.They all look similar and all are deep fried but the filling,taste and texture of each holige is different from each other. Sogasu Poli and Sajjappa uses rawa filling which is made differently for each holige and where as Garugu Obattu uses rice flour filling.I know that it is very confusing if you are hearing all these names for the first time but once you go through all the recipes you can easily differentiate them.The best part about these holiges is that they can be stored easily up to a week, if they last that long!! These can be made ahead and serve as prashad for Navaratri Golu prasadam too, also tastes best when eaten hot as they are super crisp.This is apparently one of my favorite holiges and would gulp a couple of them at one go.As it is Sankranti tommorow, try this different traditional holige recipe to impress your family.
Check out other Holige recipes in my blog:
sogasu poli
Sogasu Poli | Sogasu Obbattu :
Shelf life: 2 days | Yields: 10-12 polis
Prep time:20 mins | Cooking time:40 mins | Total time:60 mins
Cuisine: South Indian | Category: Sweets

Ingredients:
for Stuffing: 1 cup fine Chiroti(Holige) Rava
1 cup fresh grated Coconut
1 cup Sugar,preferably slghtly fine
1/4 cup finely chopped Cashewnuts
1 tsp Ghee

for kanaka(outer cover):
1 cup Chiroti/Holige rawa(baarik rava)
a fat pinch of Salt
1/2 cup Oil(to soak the kanaka)
Oil for deep frying

Method:

for filling:
  • Mix chiroti rava, fresh grated coconut, chopped cashewnuts and sugar in a large bowl nicely until everything is nicely mixed and keep it aside for 2-3 hours.
  • Now the mixture would have become wet and soft.Mix it nicely again.
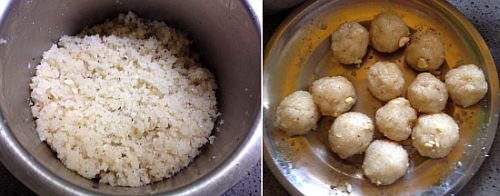
  • Grease your palms with ghee and make big lemon size balls out of the filling and keep them aside.
 for Kanaka:
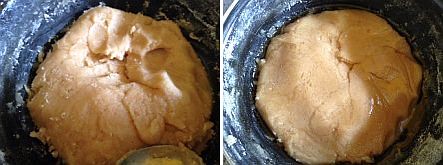
  • Mix chiroti rawa with a pinch of salt to it and add water to it and knead in to a very smooth dough.The consistency of the dough should be very loose than the regular roti dough.
  • Now using your fist hit the dough for few mins to get the softer dough.

      
  • Now place this dough in a deep vessel and pour oil over it until the dough is completely soaked in oil.Let the dough rest for a minimum of 1 hr and up to 2 hrs.Drain the excess oil and use it for other purpose.
  • See the pics to get to know the consistency of the kanaka.
for making Sogasu Poli:
  • Cut the holige paper into a round and place it on the rolling stone which we use to roll rotis.Grease holige paper or banana leaf or a plastic cover with oil.
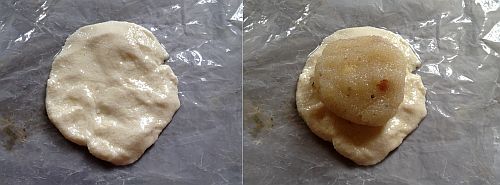
  • Pinch a small amla sized dough and flatten it a bit using your hands as shown in the pics and place one round of filling and seal it properly from all the edges like how we do for parathas.
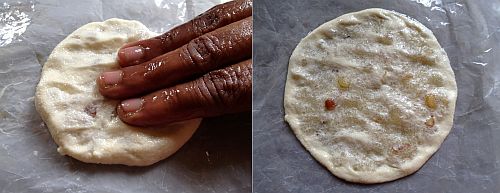
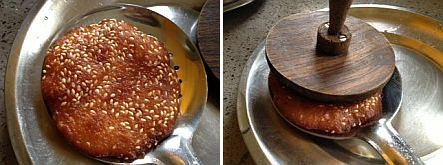
  • Now flatten it slowly with hands to get 3" diameter circle to the size of big pooris.It should not be very thick like paratha nor thin like rotis.See the pictures for clear idea.
  • Meanwhile heat oil for deep frying in a kadai and gently slide the patted holige from the sides into the oil taking care that oil would not splutter.
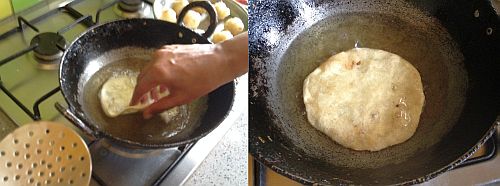
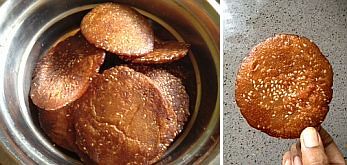
  • Deep fry them until they are slightly brown on both side.
  • Drain them on kitchen towels to remove the extra oil.
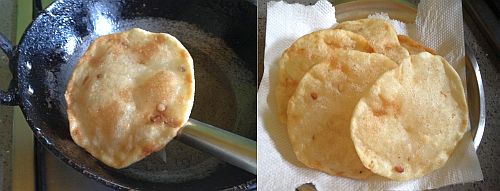
  • Repeat the process for making holiges,smear the holige paper liberally with oil and follow the same procedure.
Serve them hot/warm or at room temperature.You can store them at room temperature for upto a week.
Notes:
  1. Always make kanaka before proceeding to make filling which helps in saving time.
  2. As these can be stored for a week you can make them ahead if you want.But the fresh ones are more crispier and tastier.
  3. The addition of nuts is entirely optional but it adds a nice taste to every bite of holige.
  4. If you are a health freak instead of deep frying you can even fry it on tawa like how we do for parathas,they taste still good but the deep fried ones taste anytime better.
sogasu obbattu

Thursday, November 8, 2012

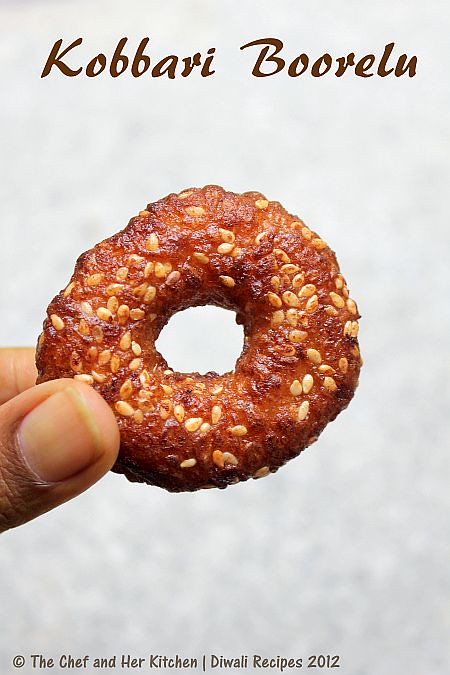
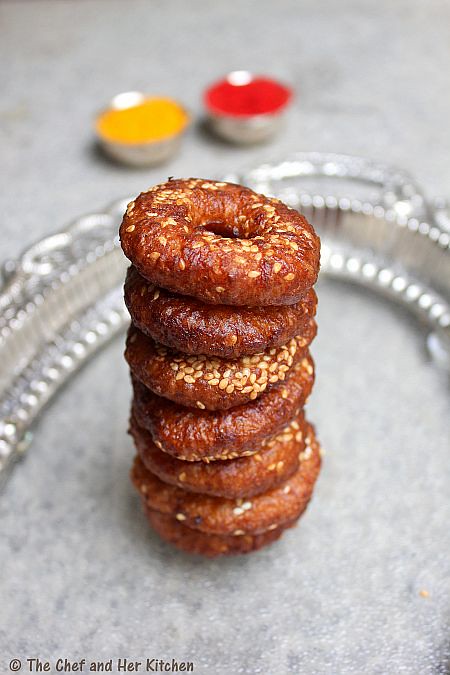
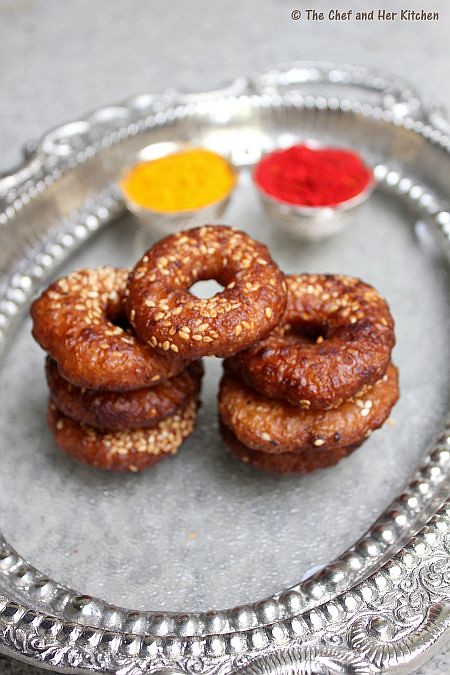
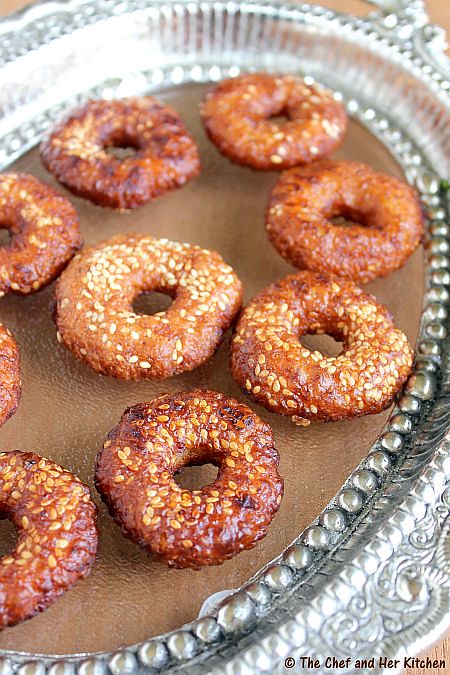
Kobbari Boorelu | Kobbari Vadalu | Deepavali Recipes

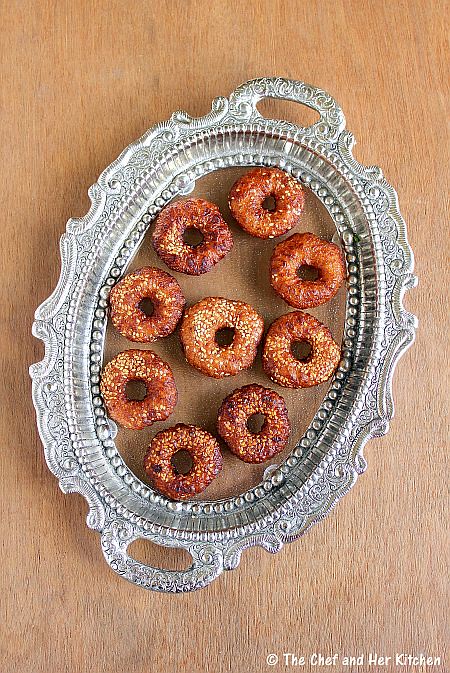
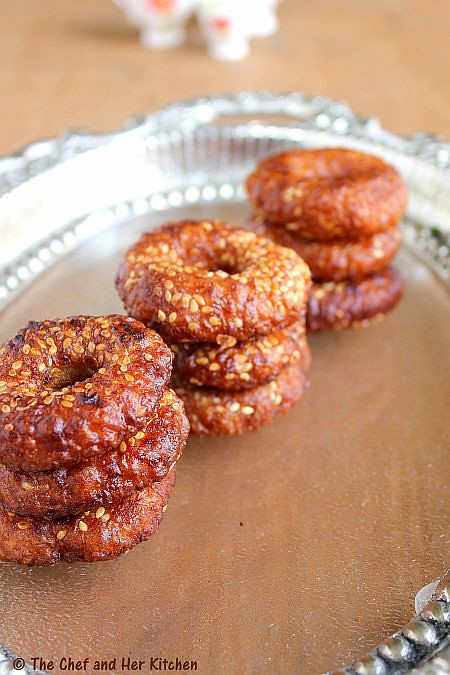
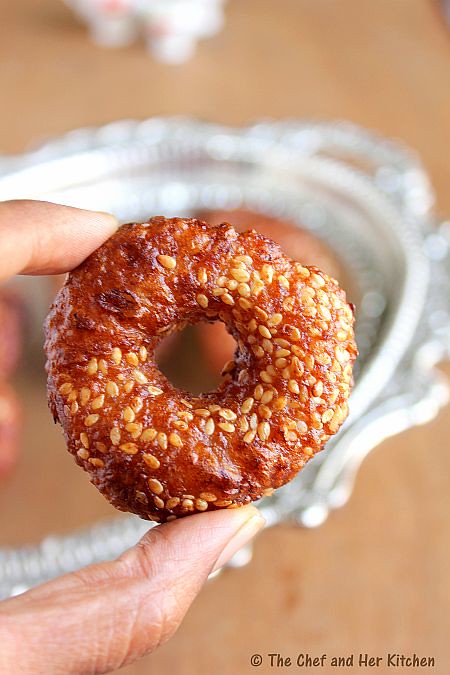
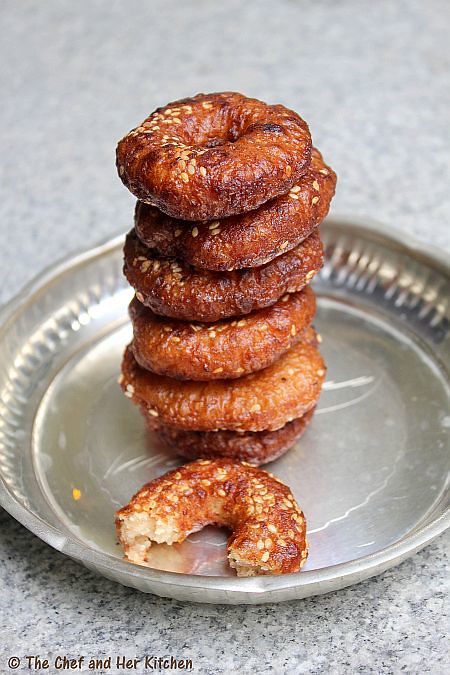
I am sure many of you might not be familiar with this sweet called 'Kobbari boorelu'  or 'Kobbari Vadalu' which are prepared only in Andhra and few places of Karnataka.Also do not get confused with the name boorelu and do not assume the dal based boorelu,these are different.When ever my mom prepares Ariselu(or Adhirasam) she also prepares Kobbari boorelu along with them.As she does not eat jaggery(yes you read it correct,she does not eat jaggery at all and that's my mom..;) ) she always makes one variety among those to make with sugar and as she loves Kobbari boorelu she always ends up making kobbari boorelu with sugar and Ariselu with jaggery.However we get to eat both the varieties. When you see them looks wise they are very much similar to ariselu(or adhirasam) and in fact even the preparation process is similar but the difference comes in the addition of fresh coconut in this recipe.Coconut not only makes the boorelu soft it also gives a nice bite when you eat them and I must say they are very very tasty.
 
Let me point out all the differences between those two varieties to avoid the confusion.The main difference between the both ariselu(Adhirasam) and boorelu is the addition of coconut which definitely changes the taste and texture of them.The dough consistency for both of them is different which gives a drastic change in texture.Kobbari boorelu are very soft when compared to ariselu.Also the shape of boorelu would be like medu wada and the ariselu would be flat discs.Boorelu are not pressed like ariselu after they are fried and hence boorelu are soft,slighly spongy.Some prepare boorelu like flat discs like ariselu but we always prepare in the shape of vada and hence we usually call it kobbari vadalu but in Andhra it is called Boorelu.I have included few more differences in their preparation methods so please have a look at my notes.
When I posted Ariselu last week many mentioned that the addition of sesame seeds over the top is new to them.Yes it is true and the reason why we add them over the top is it not gives a nice look to ariselu but also adds to the taste with the extra bite of sesame seeds and so is the case with kobbari boorelu too.
Kobbari Burelu(Boorelu) | Kobbari Vadalu Recipe:
Shelf life:up to 2 weeks

Ingredients:
2 1/2 cups(1/2 kg) Rice
1 3/4 cups grated fresh Coconut
2 cups(approx 400 gms) grated Jaggery
1/2 tsp Cardamom powder
1/3 cup white Sesame seeds
2 tbsp Ghee
Oil,for deep frying


Method:

to make rice flour: 

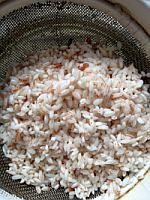
  • Soak rice in water overnight.My mom uses a slight red colored variety of rice for this,she says it tastes the best but you can use regular white rice variety too. 
  • option-1:Drain the water through a colander.Dry under the shade by spreading on a clean dry cloth.Once it is three-fourth dried(it should not dry completely),you need to send it to mill to get it powdered.Sieve it well
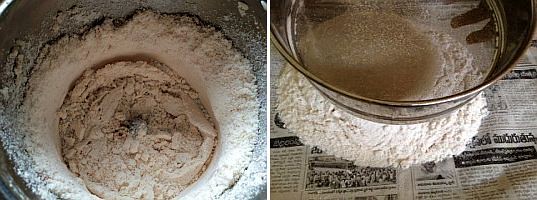
  • option-2:Drain the water through a colander and leave it for 10-15 minutes.Grind half the portion to a powder in the mixie and do the same with the remaining half.Sieve it well.
  • option-3:Drain the water through a colander.Immediately pound it using the typical stone grinder using the pestle,this is the most traditional method.Sieve it well.
  • I followed the option-2  as it is very convenient to make the quantity for a small family.
to make Boorelu:
  • Grate jaggery and keep it aside.
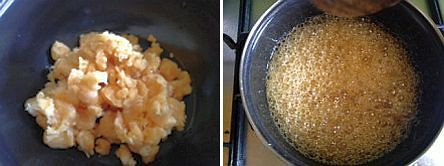
  • Take a heavy bottomed thick kadai and add grated jaggery and 1/4 cup of water and let it melt completely.Strain through a fine strainer to remove the mud and dirt from it.
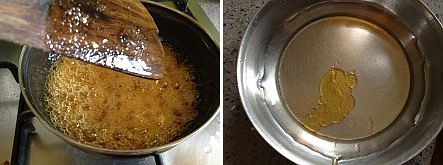
  • Now pour it back to the cleaned kadai and boil the jaggery syrup until it reaches the SOFT BALL consistency.In order to test the consistency of soft ball - put little syrup in cold water,when you roll it with fingers you should be able to make a ball out of the syrup.This means a correct soft ball consistency which is very important to get in this recipe.
  • Once you get the soft ball consistency add grated coconut,cardamom powder to it and mix well.Remove it from flame and keep it in a sturdy surface.
  • Sprinkle rice flour(prepared above) quickly little by little and keep stirring so that it does not form lumps. Keep adding the flour until the syrup holds.You need to stop adding the flour once all the syrup is absorbed and the dough should be very soft and slightly loose.Because of the addition of coconut this will be a soft dough not like the dough we get for ariselu.So keep it in mind and do not add more rice flour which will make the boorelu hard.
  • Pour the ghee on top of it and keep it covered and keep aside.
  • Let the mixture sit for a while for an hour or you can even make them immediately.
  • When you are about to prepare the boorelu,check the consitency(if you keep the dough aside for long) if you think it has become slightly hard,add a couple of tbsps of milk to the mixture and can be mixed to get a soft dough.
  • Meanwhile heat oil in a kadai to deep fry them.
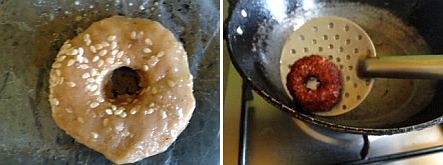
  • Take a small gooseberry sized ball and pat it on a greased plastic sheet or banana leaf to a 1.5 inch diameter round discs and then make a hole in between like how we do for medu wada.
  • Sprinkle some sesame seeds in top of them and gently press them.
  • Deep fry them over MEDIUM-HIGH flame until they turn brown in color.They turn to dark color very quickly and hence do not need to be fried for long,so you should remove them when they start turning color.Few sesame seeds float up in the oil but it is fine,you can remove them with the slotted spoon later.
  • Remove it with a slotted spoon and drain them in a colander,this will remove the extra oil from them.
  • Repeat the same process with all the dough and drain them.
  • Let them come to room temperature.
Store them in a dry container.They can be stored up to 2 weeks.


Notes:
  1. You can even make the same with sugar by replacing the jaggery with equal quantities of sugar in the recipe.Follow the same recipe.
  2. These would be softer than ariselu because of the addition of coconut.
  3. Do not fry them for long,these are supposed to be soft.Also fry them over Medium-High flame.
  4. Few shape the boorelu like ariselu,like 3 inch discs.You can even do that way and please remember we do not need to press them after they are deep fried like how we do it for ariselu.
  5. The consistency of jaggery syrup to reach the soft ball is very important in this recipe.If you mess up with it- you will even mess up your end product.
  6. Sesame seeds can be added into the dough but we always add over them.
  7. My mom uses a slight red colored variety of rice for this,she says it tastes the best but you can use regular white rice variety too.
 

Wednesday, October 31, 2012

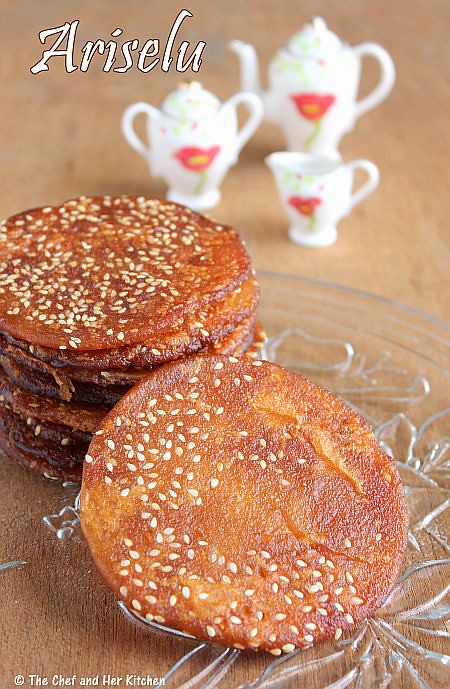
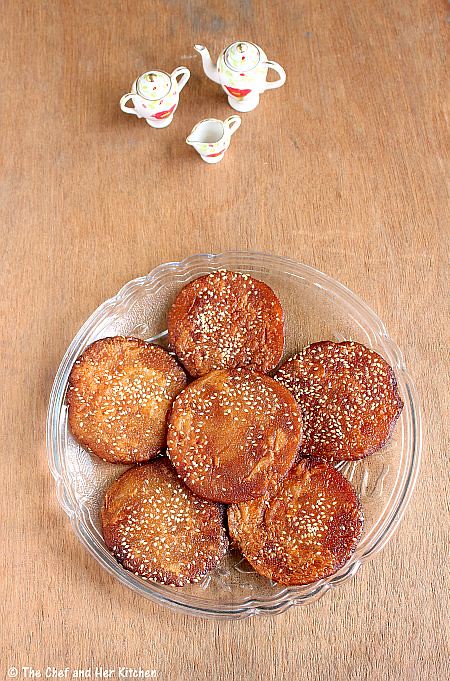
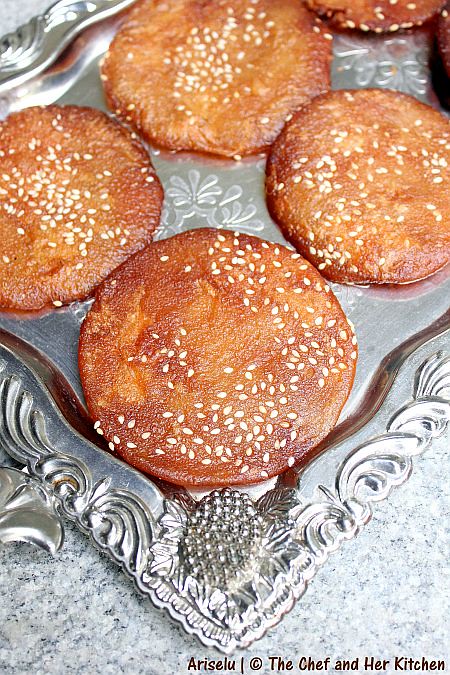
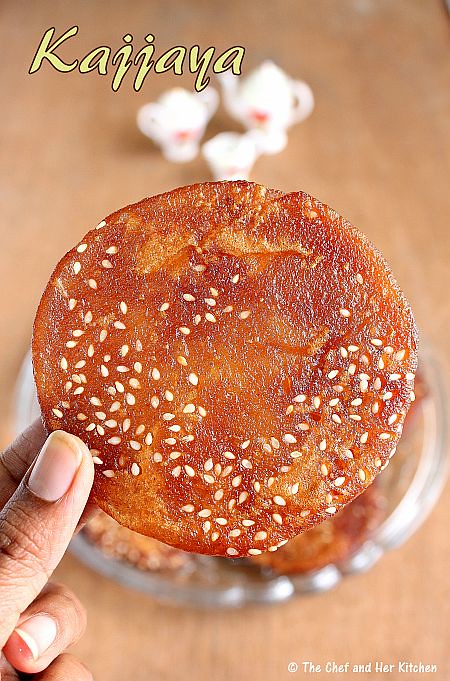
Ariselu | Adhirasam | Kajjaya | Athirasa Recipe - Diwali Sweets Recipes 2012

This is the 400th post in my blog and to mark the milestone, I am posting a sweet recipe.

'Ariselu', is a very traditional and common sweet in South India and is known by various names like 'Ariselu' in Andhra, 'Kajjaya' in Kannada and 'Adhirasam' in Tamil.If it is deep fried in ghee it is called 'Nethi Ariselu'.This sweet is distributed in many auspicious functions and even during weddings.This is again one of my favorite sweets, which I never miss to get back whenever I visit Bangalore.As I  mentioned in my earlier Manugupoolu post, we prepared this sweet along with the other goodies during my last visit.I just enjoyed this time while making all those sweets and savories as it really refreshed those child hood memories.
Mom used to make this a lot when we were kids and my task used to be to deep fry them.I would say this is not a very easy recipe to attempt if you are new to cooking,but you can definitely give it a try .I have tried to mention all the pointers in notes so that you don't miss the minute details and I also added step wise photos for easy understanding.Also we need a freshly hand pounded wet rice flour to make Ariselu,an ordinary rice flour does not help. Traditionally the rice is to be hand pounded to make them but I have mentioned a few easy options to make the rice flour at home. Please read the notes and recipe carefully for more detailed information before you proceed to prepare this.
Ariselu | Kajjaya | Adhirasam Recipe:
Shelf life:upto 15 days

Ingredients:
2 1/2 cups(1/2 kg) Rice
1 1/2 cup(300 gms) grated Jagegry
1/2 tsp Cardamom powder
1/3 cup white Sesame seeds
2 tbsp Ghee
Oil,for deep frying
Method:

to make rice flour for Ariselu: 

  • Soak rice in water for 2 hours.My mom uses a slight red colored variety of rice for this,she says it tastes the best but you can use regular white rice variety too. 
  • option-1:Drain the water through a colander.Dry under the shade by spreading on a clean dry cloth.Once it is three-fourth dried(it should not dry completely),you need to send it to mill to get it powdered.Sieve it well
  • option-2:Drain the water through a colander and leave it for 10-15 minutes.Grind half the portion to a powder in the mixie and do the same with the remaining half.Sieve it well.
  • option-3:Drain the water through a colander.Immediately pound it using the typical stone grinder using the pestle,this is the most traditional method.Sieve it well.
  • I followed the option-2  as it is very convenient to make the quantity for a small family.
to make Ariselu:
  • Grate jaggery and keep it aside.
  • Take a heavy bottomed thick kadai and add grated jaggery and 1/4 cup of water and let it melt completely.Strain through a fine strainer to remove the mud and dirt from it.
  • Now pour it back to the cleaned kadai and boil the jaggery syrup until it reaches the SOFT BALL consistency.In order to test the consistency of soft ball - put little syrup in cold water,when you roll it with fingers you should be able to make a ball out of the syrup.This means a correct soft ball consistency which is very important to get in this recipe.
  • Once you get the soft ball consistency remove the kadai and keep it on a firm surface.
  • Add cardamom powder to it and mix well.
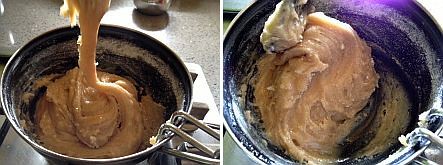
  • Sprinkle rice flour(prepared above) quickly little by little and stir so that it does not form lumps. Keep adding the flour until the syrup holds.You need to stop adding the flour once all the syrup is absorbed and forms like Soft Chapati dough consistency.It should not become harder than that.
  • Now take another vessel and slightly grease it and transfer the mixture to it and pat it nicely with the greased hands all over and pour the remaining ghee on top of it.
  • Let the mixture sit for a while,you can keep it for 2 hrs or even up to a day before preparing ariselu.
  • When you prepare ariselu,check the consitency if you think it has become very hard.You can add a couple of tbsp of milk to the mixture and can be kneaded to a soft dough.When you make balls you should not see cracks in the edges and it shoudl be soft which means a correct dough consistency.
  • Meanwhile heat oil in a kadai to deep fry the ariselu.
  • Take a small lemon sized ball and pat it on a greased plastic sheet or banana leaf to a 3" diameter round discs.
  • Sprinkle little sesame seeds on top of it and press well.You can even sprinkle sesame seeds on both the sides or you can even add in the dough itself.
  • Deep fry the ariselu one by one over low-medium flame until they turn brown in color.They will slightly puff up like puri.Few sesame seeds float up in the oil but it is fine,you can remove them with the slotted spoon later.
  • Remove it with a slotted spoon and place it on a thick flat colander.Place the colander on a clean and dry vessel.Now press using a flat wooden press over the aiselu,this will remove the extra oil from it and make them look flat and even.
  • Repeat the same process with all the dough and press them nicely to remove the extra oil. 
  • Arrange on a flat plate side by side.This will make sure that they wont stick to each other.
  • Once they come to room temperature store them in a container.My mom used to place few sticks at the bottom of the container and arrange the ariselu on top of it.This will make sure that all the extra oil would drain to the bottom.
 Notes:
  1. Ariselu would be crisp immediately after frying.They turn softer by next day.We actually love the crispier ones and will finish half of them on the same day.
  2. Ariselu would be slightly oily when compared to any other sweets.If you drain them on the kitchen napkin to remove excess oil they turn out dry and does not taste that good.
  3. The consistency of jaggery syrup to reach the soft ball is very important in this recipe.If you mess up with it- you will even mess up your end product-ariselu.If the syrup is taken before the soft ball consistency.ariselu will break while frying them and if the syrup reaches more than the soft ball consistency,ariselu will become hard.So be careful while doing it.
  4. The taste of Ariselu also depends on the quality of jaggery.The dark colored jaggery and even the soft ones gives the best results.
  5. You can keep the ariselu dough for upto a week or for months when refrigerated and make ariselu fresh when ever you want.Make sure you soaked it nicely with ghee on top of it. 
  6. Sesame seeds can be added into the dough but we always add over that which gives a nice look to ariselu.
  7. My mom uses a slight red colored variety of rice for this,she says it tastes the best but you can use regular white rice variety too.
  8. You can even deep fry them in ghee which is a special recipe in Andhra called Nethi Ariselu.

Wednesday, September 19, 2012

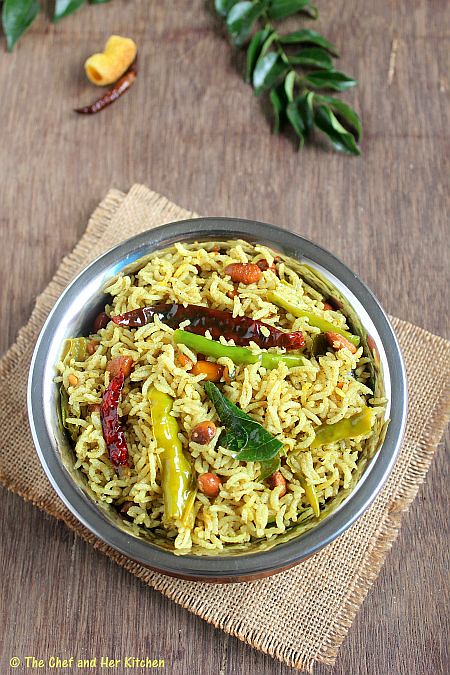
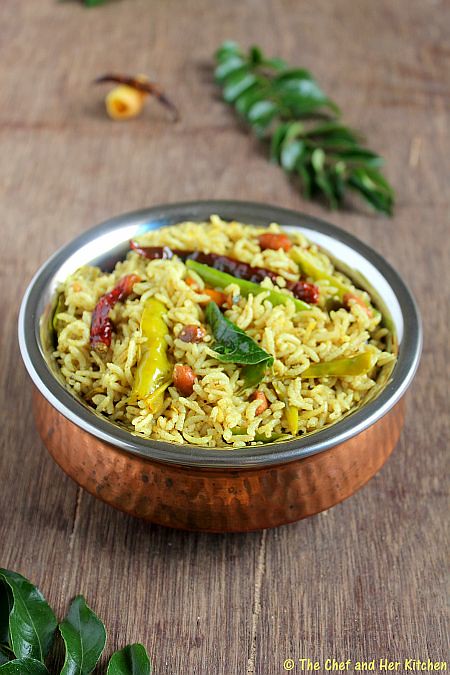
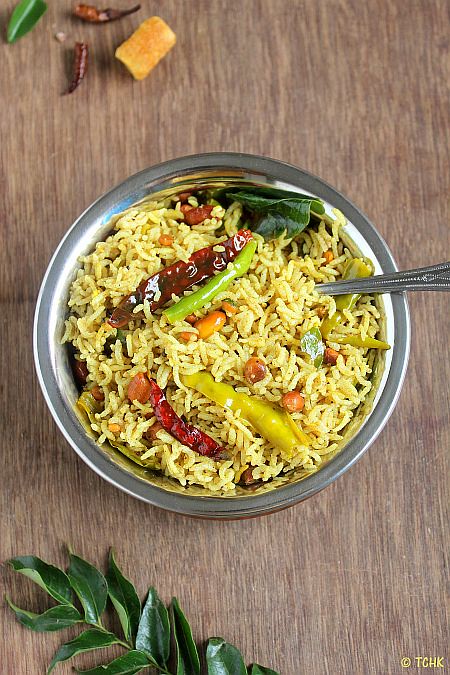
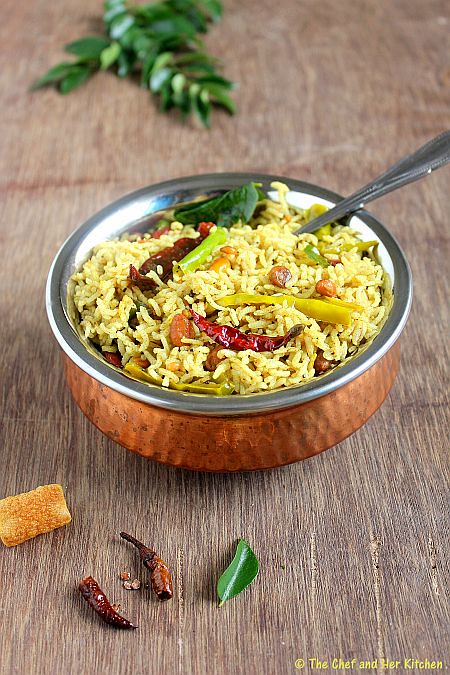
Pulihora | Andhra Style Chintapandu Pulihora

Happy Ganesh Chaturthi to all!!I hope every one is busy with the festival celebrations.

A festival is not complete without a variety rice,sweet,kheer and sundal varieties.Pulihora and lemon rice are the most common among the rice varieties.Though the process for lemon rice is similarly followed by all,pulihora recipe changes from home to home.My mom used to make a special Pulihora Gojju and when she wants to make pulihora all she needs to do is to mix the rice wid the pulihora gojju and lately she started making podi which is convenient to use.I have posted a version of Puliyogre in my blog earlier and today I am posting the Andhra version of pulihora.
In Andhra the pulihora is made in a very simple way,they do not add any powders to the gojju.All it has is tamarind pulp,jaggery(which is optional) and green chillies along with the basic tempering ingredients.They use light colored chillies for this and is cooked in the tamarind mixture while making the base for the rice,that adds a kind of tangy touch to the chili and gives a nice bite while eating the rice.It is a simple recipe which DH likes very much and hence I do make it quite often.
Andhra Style Chintapandu Pulihora Recipe:
(serves 2)

Ingredients:
1 cup Sona masura rice(or equivalent)
1 big lemon size Tamarind
3-4 tbsp Groundnuts
2 tsp grated Jaggery(optional)
1/2 tsp Mustard seeds
2 tbsp Chana dal
1 tbsp Urad dal
3-4 dry Red chillies
5-6 light colored(less spice) Green chillies,slit
1 tsp Turmeric powder
a pinch of Asafoetida
a sprig of Curry leaves
2-3 tbsp Oil
Salt to taste
Method:
  • Wash the rice and add 2 cups of water and soak it for 15-20 mins.Pressure cook the rice or cook it in electric rice cooker or how ever you usually do.
  • Once the rice is done,cool it completely by spreading it over wide plate smear with 1 tsp of oil and 1/2 tsp turmeric powder.
  • Soak tamarind in 1/4 cup of water for 10-15 mins or microwave the tamarind mixture for 1 min.Microwave method is quite quick when u have lack of time.After it is cooled down remove the pulp and add grated jaggery and mix well until it is melted completely.
  • In a kadai heat oil and crackle the mustard seeds,add groundnuts and fry until they turn slight red.Add chana dal,urad dal,red chillies,green chillies and fry for a couple of minutes until done.
  • Add curry leaves,asafoetida and turmeric powder and fry for a minute and then add tamarind pulp mixture and mix until the mixture thickens completely for at least 5-6 mins.Add enough salt to it and mix.
  • Now remove it from the stove and let it cool a bit and reserve some mixture and pour the remaining mixture over the cooled rice and mix properly until everything is well blended.Now check the taste of it and add more tamarind mixture or salt according to your taste.It should taste sour when you taste it as the sourness will reduce and blend well along with the time it sits.
  • Let it sit for 2-3 hrs before serving.
Serve it at room temperature.
Notes:
  1. Use rice varieties like sona masuri,ponni,jeeraga samba for these kind of rice varieties,I do not suggest basmati rice.
  2. Always make it bit tangy so that it will taste nice once it settles down.
  3. This rice is ideal to pack for travel as it does not get spoilt,you can keep it for long upto a day.

Friday, April 20, 2012

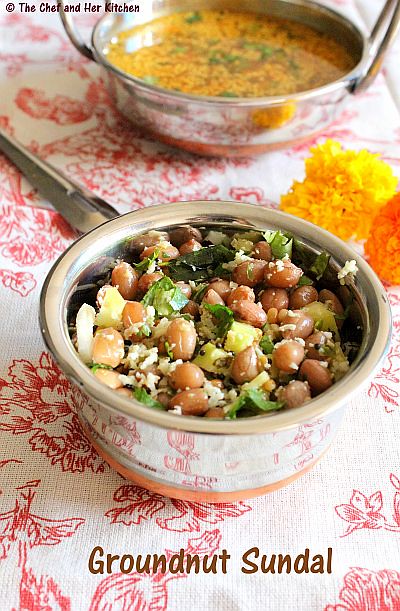
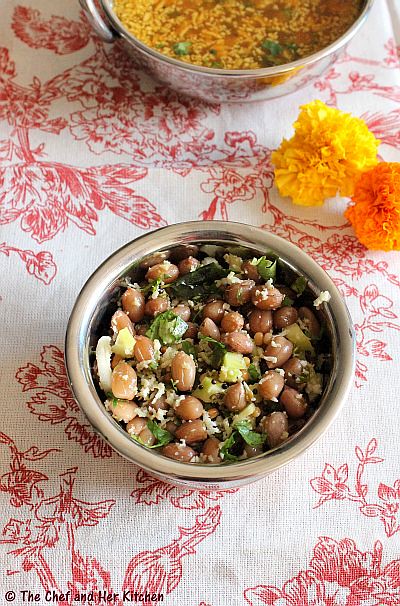
Groundnut Sundal | Peanut Sundal..with a touch of Raw Mango

I love sundal and I always include a variety of sundal in festival thali.It is a low fat spicy snack which complements the meal as well as it can be served as an evening snack.Hot steamed salted fresh groundnuts are one of my favorite snacks and this sundal makes a nice substitute even if we don't get fresh groundnuts.This is a easy peasy recipe which is prepared in a similar way like any other sundal.I added finely chopped raw mangoes to give a touch of beach style sundal which is a popular snack among most beaches of South India.

Groundnut Sundal | Peanut Sundal Recipe:
(Serves 2)

Ingredients:
1 cup Peanuts/Groundnuts
3 tbsp finely chopped raw Mango
2-3 tbsp grated fresh Coconut
1/2 tsp Green chilli paste
a sprig of Curry leaves
1 tsp Urad dal
1/2 tsp Mustard seeds
a pinch of Asafoetida
1-2 tsp Oil
Salt to taste
Method:
  • Soak groundnuts in water for 1-2hrs and pressure cook them with salt for 2 whistles until they are soft.Drain them and keep aside
  • Heat oil in a kadai and crackle mustard seeds and add urad dal and fry until they turn brown.
  • Add curry leaves,green chilli paste and hing and fry for few seconds.
  • Add drained groundnuts,salt and fry for a minute.
  • Add grated coconut and finely chopped raw mango it to and mix well.Remove it from stove.
Serve it with a meal or as an evening snack.

Notes:
  1. Addition of raw mango is optional,it adds a nice tangy touch to sundal.You can even grate the mango in the recipe.
  2. You can even make this fresh groundnuts which tastes even better and soft.
 
back to top