Showing posts with label Winter Recipes. Show all posts

Monday, December 28, 2015

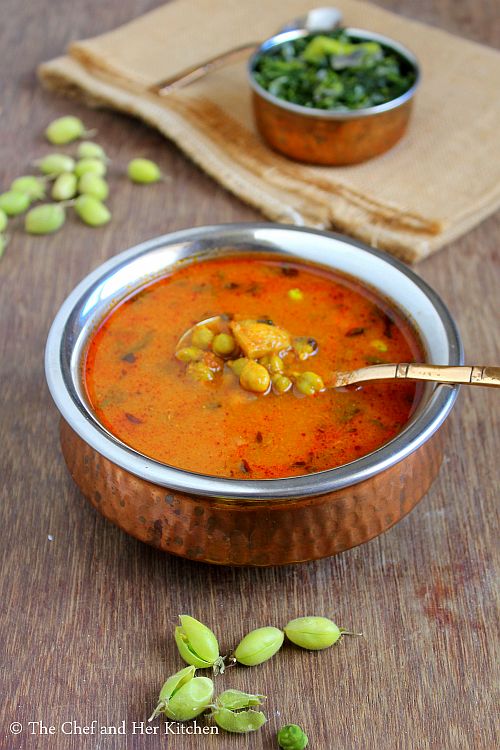
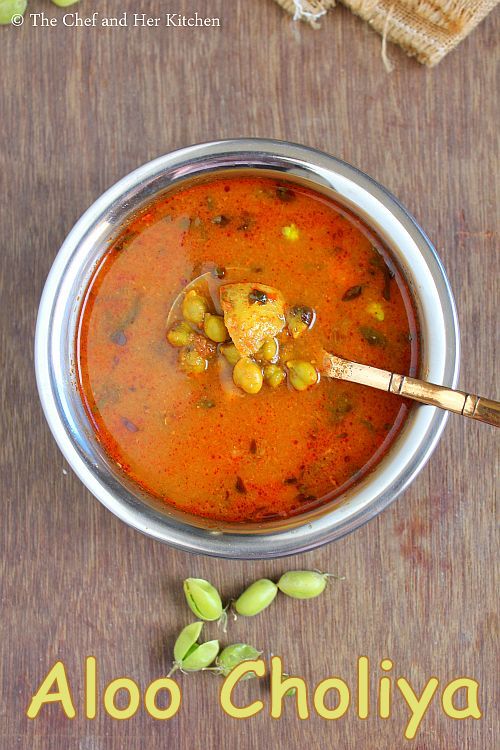
Aloo Choliya Recipe | Aloo Hara Chana | Hara Chana Recipes

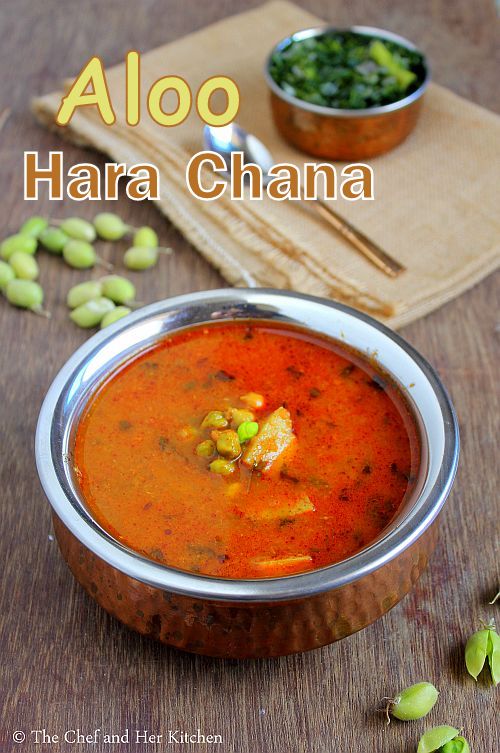
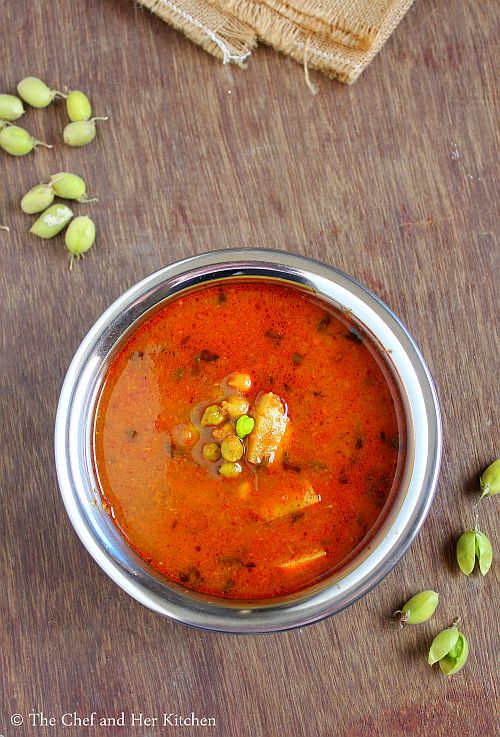
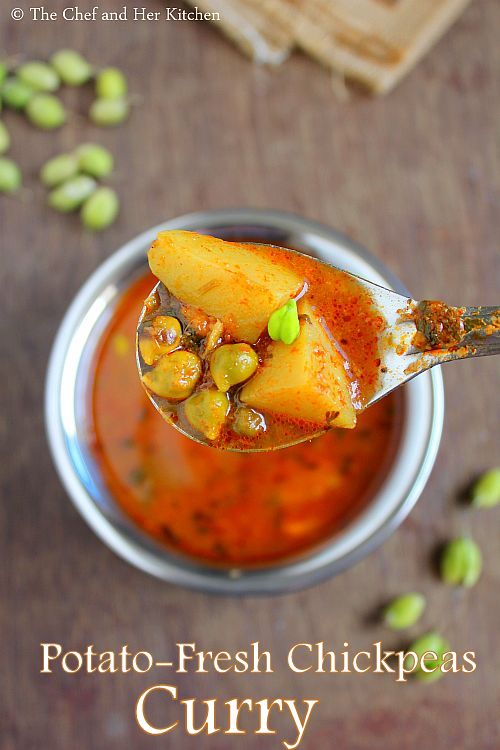
aloo hara chana
Winters are here and the markets are full of fresh winter vegetables.Fresh Chickpeas is known as Choliya which is also called as hara chana in hindi and is available abundantly during winters.Though its time consuming to clean and shell the fresh Chickpeas but its really worth for the taste and freshness of these winter vegetables. My mom used to roast these fresh chickpeas in pods with salt until they turn slight black and the skin wilts.It used to be fun to shell out the chickpeas from the hot pods and eat them warm with a gossip session with the family members.
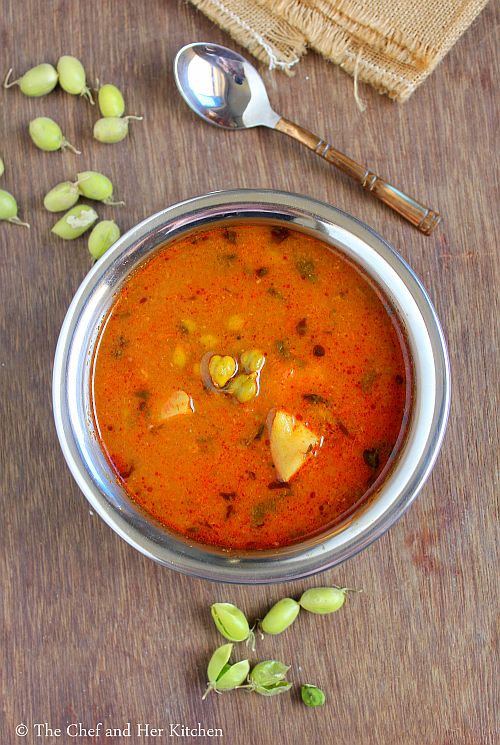
aloo hara chana
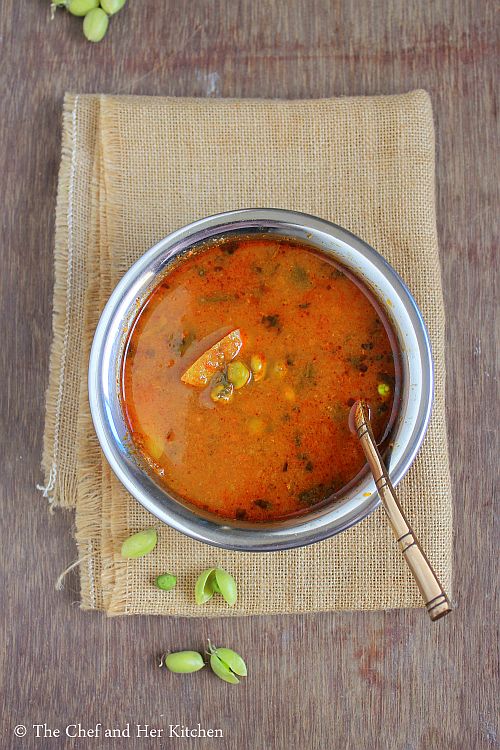
Aloo Choliya is popular in North India and is a must prepare winter delicacy. It can be paired with steamed or hot phulkas, but one needs to adjust the consistency of gravy. I usually prefer a thinner version when it is to be served with rice and a slightly thick and creamy version when served with rotis.The preparation process of Aloo Choliya is very similar to Aloo matar and is a very simple recipe which can be directly prepared in cooker.
aloo choliya
I have posted few recipes with Choliya earlier - Choliya Paneer Curry and Choliya Pulao if you are looking out for few more interesting recipes with Choliya. You can even prepare a simple Choliya salad with tomato-onion which tastes delicious in its own way. Utilize this winter season and prepare various varieties with these fresh ingredients.
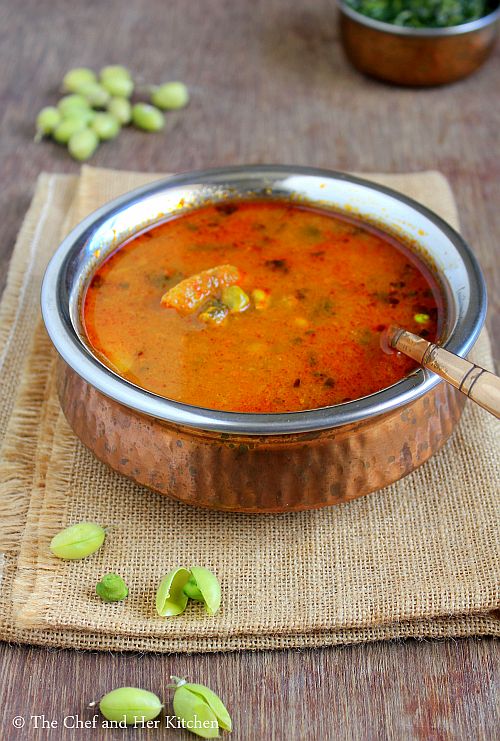
aloo choliya

potato fresh chickpeas curry

Check out various Winter recipes in my blog:
potato fresh chickpeas curry

Aloo Choliya | Potato-Fresh Chickpeas Curry Recipe:
Serves 2-3 | Author- Prathibha Garre
Prep time: 10 mins | Cooking time: 20 mins | Total time: 30 mins
Cuisine: North Indian | Category: Gravy/Sidedish

Ingredients:
2 Potatoes,diced into cubes
1 cup fresh Chickpeas/Choliya
1 Onion,sliced
2 Tomatoes,chopped
1/2" Ginger
4-5 Garlic cloves
1 tsp Red chilli powder
1/2 tsp Coriander powder
1/4 tsp Cumin powder
1/2 tsp Garam masala
1/2 tsp Amchur powder
1/2 tsp Turmeric powder
2 tbsp chopped Coriander leaves
1/2 tsp Cumin seeds
Salt,to taste
2 tbsp Oil

Method:
  • Grind onions ,chopped tomatoes, garlic and ginger to a smooth puree.
  • Heat oil in a pressure cooker and crackle cumin seeds.Add the ground Onion-tomato paste and fry until the masala leaves the oil over the edges.
  • Add coriander powder, cumin powder, red chili powder, turmeric powder and fry a couple of minutes.
  • Add fresh chickpeas and potato cubes and fry for 2-3 mins in the masala.
  • Add salt, amchur powder,garam masala and few coriander leaves to it and fry for a minute.
  • Add 1 cup water to it and pressure cook it for 2 whistles and reduce the flame and cook it for 8-10 mins.
  • Once the pressure is down adjust the consistency of gravy- thin or thick.
  • Garnish it with chopped coriander leaves.
Serve the curry hot with Steamed Rice or any Indian flat bread - Roti/Naan/Phulka/Chapathi.
aloo choliya
Notes:
  • If you want to serve it with rice- slightly prepare a thin gravy and if you want to serve with roti make it bit thick,in that case reduce the water in it.
  • You can replace fresh green chickpeas with fresh peas in the recipe and follow the same process for a tasty fresh aloo matar gravy.
  • One can even replace the potatoes with paneer in the recipe and make Choliya Paneer gravy.Both tastes nice in the recipe.
aloo choliya

Monday, January 7, 2013

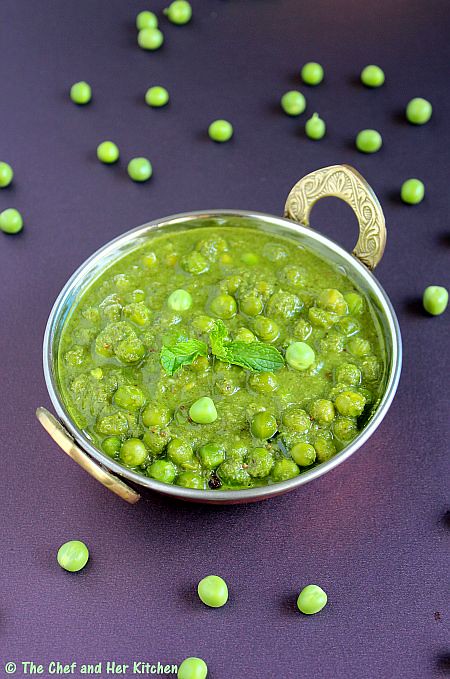
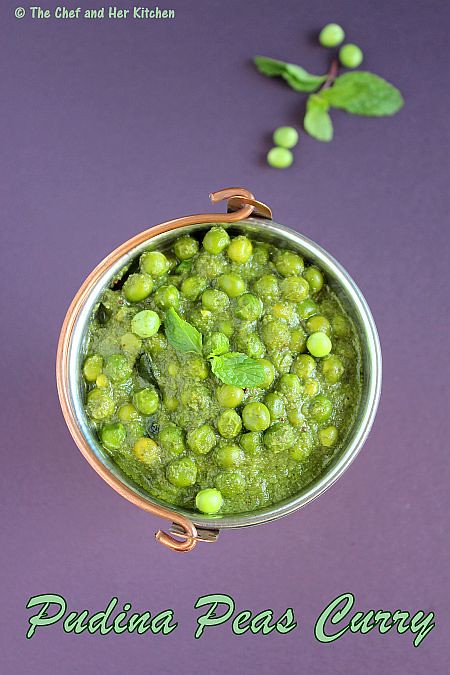
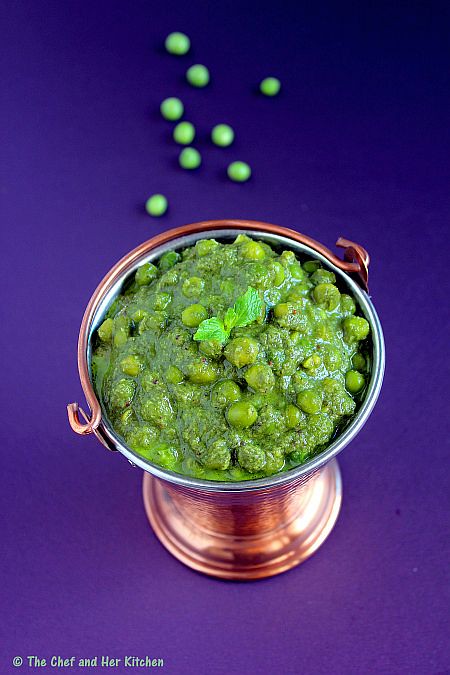
Pudina Peas Curry | Fresh Peas Masala Gravy

Fresh Peas are abundantly available in the markets these days and I am preparing lots of recipes using fresh peas like dry curries,tikkis,as a stuffing in parathas and various gravies.
I have tasted this Pudina Peas Gravy for the first time at my aunt's place long back during one of my visits to Bangalore and it was definitely a winner recipe for me.I still remember the taste of the curry which was really refreshing and a very delicious gravy.This is a typical south Indian gravy which is really delicious and is well balanced with the sweet fresh peas spiced up in the aromatic mint gravy.It is also a perfect recipe to make on any day as the recipe does not call for any onions and garlic.There are no masalas added in the recipe too,But I do add a few cloves and cinnamon in the tempering which is optional.In Kannada this Pudina Peas gravy  is called 'Hasi Batani Kaalu Gojju' where 'Hasi Batani Kaalu' stands for 'Fresh Peas' and 'Gojju' is typically a South Indian style 'Gravy'.
If you get hold of fresh peas,I would strongly recommend you to try this at least once as this is one of my favorite gravies and also use only fresh green peas for this,do not use frozen or dried variety for this.I would suggest you to try this Pudina Peas gravy with triangular folded chapatis like the south Indian way (where oil is applied in the inner layers and folded and rolled to a triangular chapati) instead of rotis as they pair up extremely well with the chapatis.
Pudina Peas Curry | Hasi Batani Kaalu Curry Recipe:
(Serves 2)

Ingredients:
2 cups fresh shelled Green Peas
1 cup loosely packed fresh Mint leaves
1/2 cup loosely packed  fresh Coriander leaves
1/4 cup grated fresh Coconut
7-8 Green chillies(adjust the quantity)
1 tbsp Fried gram
juice of 1/2 Lemon
1/2" Cinnamon(optional)
2-3 Cloves(optional)
a sprig of Curry leaves
1/2 tsp Mustard seeds
2 tbsp Oil
Salt to taste

Method:
  • Microwave the fresh green peas for 3-4 mins with a pinch of sugar.This will make sure the peas retain their green color through out the cooking process.Drain and keep them aside.
  • Heat a tsp of oil in a pan and add green chillies and saute until you see some blisters forming on them.
  • Grind mint leaves with coriander leaves,grated coconut,fried gram and fried green chillies to a smooth paste.Open the jar and keep otherwise you will loose the green color if it is closed for long.
  • Heat the remaining oil in the kadai and crackle mustard seeds and add cinnamon and cloves and let them splutter.
  • Add curry leaves and boiled and drained fresh green peas and fry for 2-3 minutes.
  • Add ground mint masala and fry the masala for 5-6 mins until the oil leaves the edges and the raw smell disappears.
  • Add 1 cup of water and salt to it and mix well and let it simmer for another 5 mins.You can cover it with lid slightly so that the gravy does not splutter outside.Do not cover the kadai/pan completely with the lid otherwise you will loose the lovely green color of the gravy.
  • Switch off the flame and add lemon juice to it and mix well.
Serve it hot with triangular Chapati/Parotta/Rotis or even Jeera rice.
 Notes:
  1. The addition of cinnamon and cloves is optional,in general we do not add it but its your wish to add it or not.
  2. You can add a small piece of ginger while grinding the mint paste.

Monday, October 8, 2012

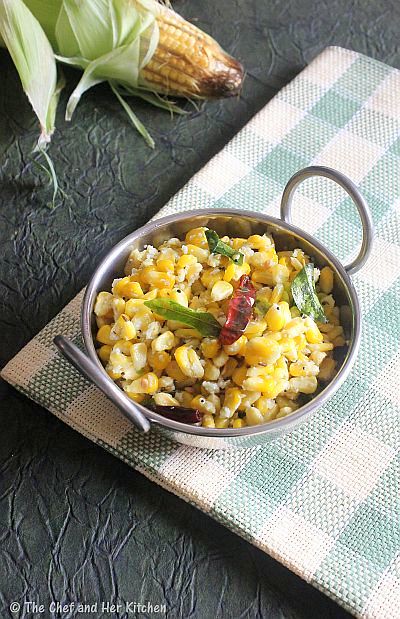
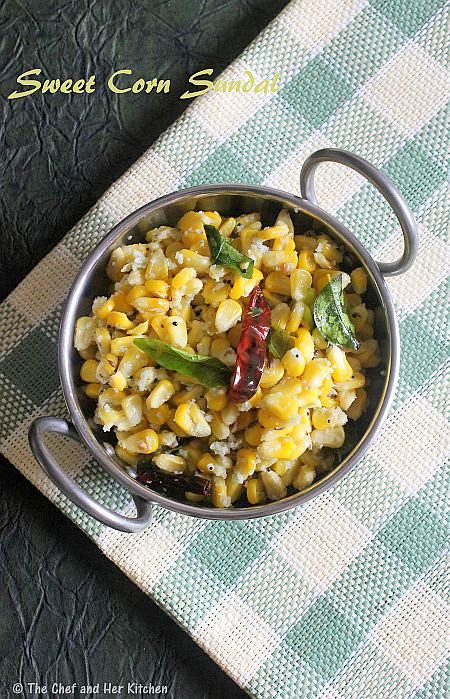
Sweet Corn Sundal | Sweet Corn Stir fry | Navratri Recipes

Navratri is going to start in few days and I am sure many of you would be busy with the arrangements for the festival.Though I do not keep Golu at home I love to visit my friend's places to see the Golu as part of the festival celebrations.Various varieties of sundal,mixed rice varieties and kheer varieties are prepared as prashad everyday for Mataji on those nine days.I would be posting a few recipes that are commonly made in this festival. Hoping that it should be useful for all of you.
 
Sweet Corn Sundal Recipe:
(Serves 3-4)

Ingredients:
1 cup Sweet corn
2-3 tbsp grated fresh Coconut
4-5 Green chillies,sliced
1 tsp chopped Coriander,to garnish
juice of 1/2 lemon
Salt to taste

to temper:
1 tsp Chana dal
1 tsp Urad dal
1/2 tsp Mustard seeds
a sprig of Curry leaves
2-3 Red chillies
a pinch of Asafoetida
1 tbsp Oil
Method:
  • Remove the kernels of corn from the cob and pressure cook them with salt for 2 whistles.Drain off the excess water.
  • Grind grated coconut and green chillies to a coarse paste in whipper mode.
  • Heat oil in a kadai and crackle mustard seeds and add chana dal and urad dal and let them turn slight brown.
  • Add red chillies,asafoetida,curry leaves and ground coconut-green chilli paste and fry it for a minute.
  • Add cooked sweet corn and required amount of salt(remember,we already added some salt while cooking sweet corn) and mix well and cook it on low flame for 2 mins.
  • Switch off the flame and add lemon juice and coriander leaves and mix well.
Serve them hot,warm or cold as a snack or with lunch.It should be consumed immediately as it will leave water if kept for long.

Variations:
  1. You can replace sweet corn with soaked black/white chickpeas,lobia,green gram,yellow peas or chana dal for variation or you can even use mix of these legumes to make variety sundal.
  2. You can even add a small piece of ginger while grinding coconut and green chillies,it adds nice flavor.
  3. If you are not preparing this for festival,you can add finely chopped onion in the tempering.
  

Friday, August 31, 2012

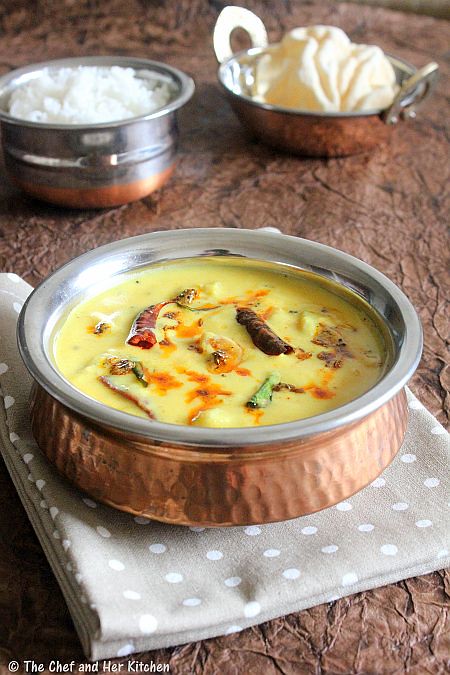
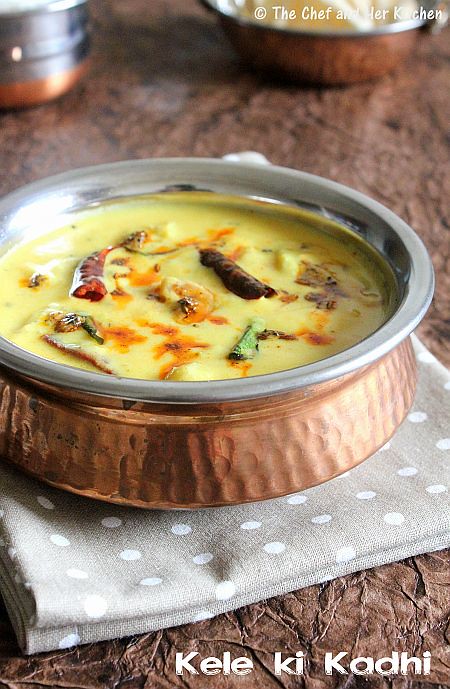
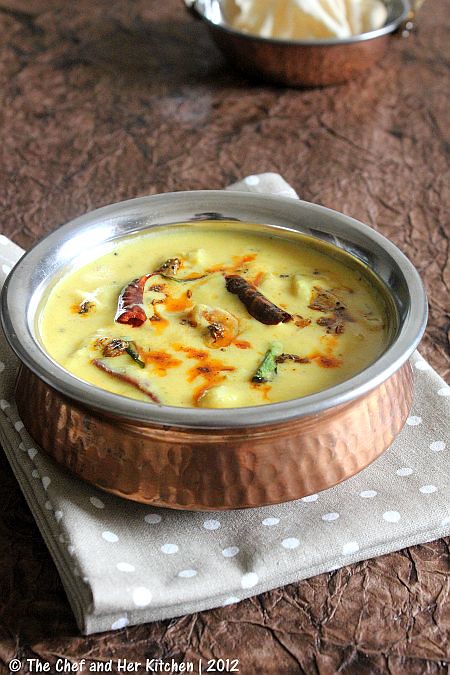
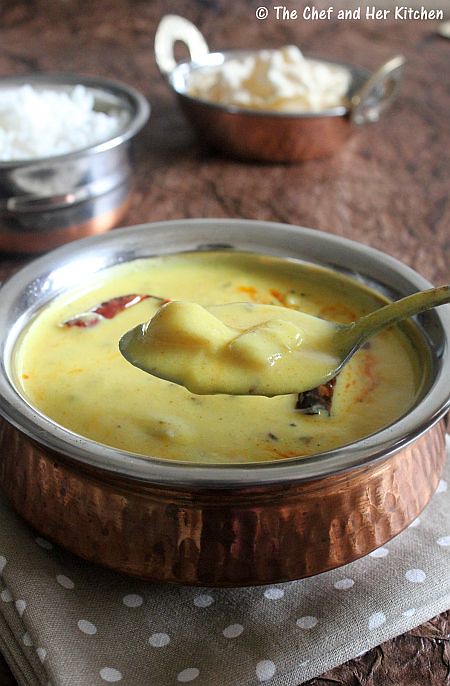
Kadhi with Raw Banana | Kele ki Kadhi

Kadhi is basically a gravy made up of buttermilk and chickpea flour and is prepared in various ways across regions.The famous Punjabi version 'Kadhi Pakora' is a thick version and the pakoras(onion or methi fritters) are dunked in the thick kadhi.The Gujaratis make their kadhi very thin and also mildly sweet.While I like both the versions I make them according to my preferences.I make kadhi quite often and it appears at least once a week in my menu,it pairs well with rice/roti/khichidi.I rarely make Pakora waale kadhi because of the deep frying involved and it is boring to eat the plain kadhi sometimes.Hence I try to do variations with some roasted vegetables like Ladies finger or raw banana,sauteed spinach,curd chillies,gatte(chickpea flour dumplings),sun dried urad dal fritters etc.I also play with various seasonings of kadhi which makes it taste different each time.I have mentioned a few variations in the notes,please go through if you want to give a try.
Kadhi with Raw Banana | Kele Ki Kadhi Recipe | Chickpea flour Yogurt Gravy:
(Serves 2)

Ingredients:
2 Raw bananas
1 1/2 tbsp Chickpea flour/Besan
1 cup sour Curd
1 tsp Ginger,grated
2 tbsp chopped Coriander leaves
2 Red chillies,roughly torn
1/2 tsp Red chili powder
1/4 tsp Turmeric powder
7-8 Fenugreek seeds
1/2 tsp Cumin seeds
a pinch of Asafoetida
1 tbsp Ghee
2 tbsp Oil

for tempering:
1 tsp Ghee
1/2 tsp Mustard seeds
a sprig of Curry leaves
2 Red chillies,roughly torn
a pinch of Asafoetida
Method:
  • Steam raw banana for 7-8 mins or pressure cook for 1-2 whistles,it should be firm to touch.Once it is cooled down,remove the skin and cut into 1/2 inch half moon pieces.
  • Heat oil in a thick kadai and add raw banana pieces and fry them on high flame for 2-3 mins with out mixing it.
  • Reduce the flame and turn the pieces and fry on low-medium flame until they are crisp.Remove them and keep aside.
  • Whisk chickpea flour,turmeric powder with sour curd and mix well.Add 1 1/2 cups water and mix well with out any lumps and keep it aside.
  • Heat ghee in the same pan and crackle cumin seeds.Add fenugreek seeds ,broken red chillies, asafoetida,red chili powder and fry for few seconds.
  • Add whisked chickpea flour-curd mixture and mix well and cover it and cook on low flame for 12-15 mins.Cook well until you see the mixture bubbling and form a nice thick kadhi.Check the consistency,I prefer a slightly runny kadhi instead of very thick or very thin.
  • Add grated ginger,salt,coriander leaves to kadhi and cook for 2-3 mins.
  • Add fried raw banana pieces and mix well and cook for a minute and remove from flame.
  • In a separate small pan heat ghee and crackle mustard seeds followed by broken red chillies,curry leaves,asafoetida and fry for few seconds and pour this tadka over kadhi.
Serve it hot with rice/khichdi/roti/paratha.
Notes:
  1. You can follow the same procedure for kadhi and instead you can add sauteed spinach for Palak Kadhi or deep fried okra pieces for Okra Kadhi or Onion pakora or methi pakora for Kadhi Pakora for a variation.
  2. You can add few pinches of saunf or ajwain in tempering before starting making kadhi.It gives a nice flavor to kadhi.
  3. Whole masalas like 2-3 cloves,1" cinnamon can be added to the tempering before making kadhi.This makes the kadhi more aromatic and I prefer to add them when I am making it for any occasion as I avoid whole spices in my cooking on daily basis.


Friday, May 4, 2012

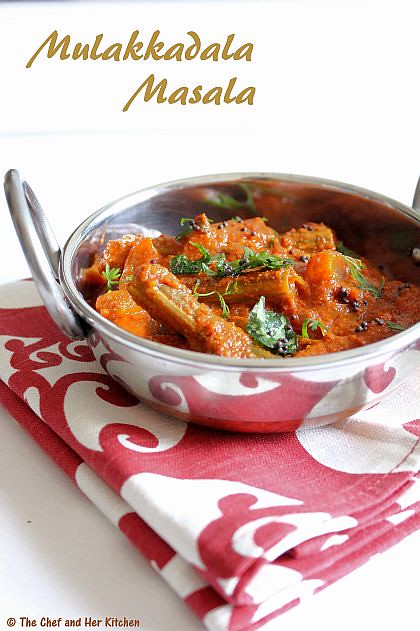
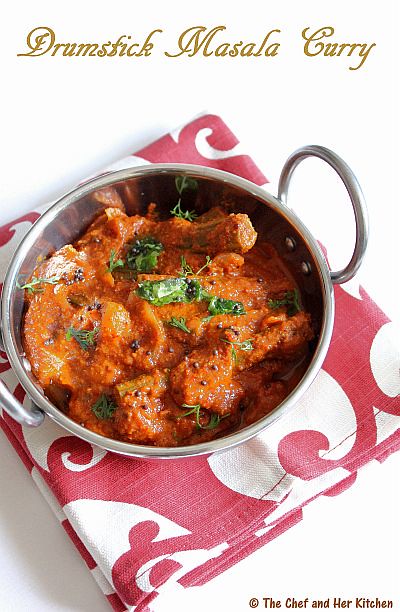
MULAKKADA MASALA | DRUMSTICK MASALA CURRY

This recipe is based on drumsticks - which I must admit I had never purchased until I shifted to Mumbai, thanks to my neighbors in the small town I spent my childhood days. While we didn't have much of a garden to talk about but our neighbors had planted various trees and plants including that of drumsticks. We used to source their home grown drumsticks at least twice a week and my mom used to make amazing stir fry,curry and podi with those drumstick greens. I must say the drumstick greens are very flavorful and tasty and you can even use them in making adai, rotti, dosa and paniyaram.While drumstick sambar was one of the usual fare and also our family's favorite, drumstick masala is another recipe which we were really fond of. Apart from these, I dont think my mom used to prepare any other variations. I however, experiment with a lot of varieties and use it in lots of gravies, sambar, rasam, raita, gojju to name a few.

Drumstick has a peculiar taste and flavor which I really like. Drumstick sambar is my most favorite one till date and I make it quite often.Drumstick masala is another one I like and for this one needs tender drumsticks. I didn't make this recipe for a long time, as I was not sure how my hubby would react to this dish.When I found some tender drumsticks, I picked them up to make this and surprisingly he loved it and asked me as to why I never prepared this before. In fact he even asked me for a second serving even though his favorite bitter gourd curry had also featured in the menu that day(I have already mentioned about his liking for bitter gourds in this post).I am sure I have convinced you enough, to try this recipe, this is truly a lip smacking gravy which goes very well with hot steamed rice and as well as rotis,but I prefer with rice usually.
Mulakkada Masala | Drumstick Masala Recipe:
(Serves 2)

Ingredients:
3 long Drumsticks(slightly thick and tender ones)
10-12 Shallots or 2 medium Onions,sliced
2 large Tomatoes
3-4 tbsp grated dry coconut
3-4 Garlic pods
2 tsp Coriander seeds
1 tsp Tamarind pulp
4-5 Red chillies
4 Byadige Red chillies(optional,gives a nice color)
1/2" Cinnamon
Salt to taste
2 tbsp Oil

to temper:
1/2 tsp Ghee/Oil
1/2 tsp Mustard seeds
a sprig of Curry leaves
Method:
  • Dry roast coriander seeds and red chillies separately and keep them aside.In the same pan warm cinnamon,grated dry coconut and keep aside.Let the mixture cool.
  • Grind all the roasted ingredients to a fine powder and add garlic and tomatoes to it and grind to a very fine paste.
  • Clean and cut drumsticks to 2" long pieces.
  • Heat 2 tbsp oil in a kadai and add cut drumstick pieces and fry them well for 3-4 mins.
  • Add shallots or sliced onions at this stage and fry them again for 2 mins.Reduce the flame and cover the kadai with a deep plate and pour some water over it and let the drumstick cook over a steam for 7-8 mins.
  • Add the ground paste to the cooked drumsticks and fry well for a couple of minutes and add tamarind pulp and enough water to get a gravy consistency,add enough salt and cover it and cook for 5-6 mins until the gravy is cooked and the oil starts floating over the gravy.
  • Meanwhile in a small tadka pan heat ghee/oil and crackle mustard seeds and add curry leaves and fry for 30 seconds and pour this tempering over the drumstick gravy.
Serve it hot with hot rice and ghee with some fry/fryums/papad.You can also serve it with rotis.
Notes:
  1. Always select nice and tender drumsticks for full flavor of the curry.
  2. Add red chillies according to your spice levels.If the gravy is very tangy add a bit of grated jaggery or sugar to it.
  3. For a Vegan version,use oil instead of ghee in the recipe.
Monday, April 30, 2012

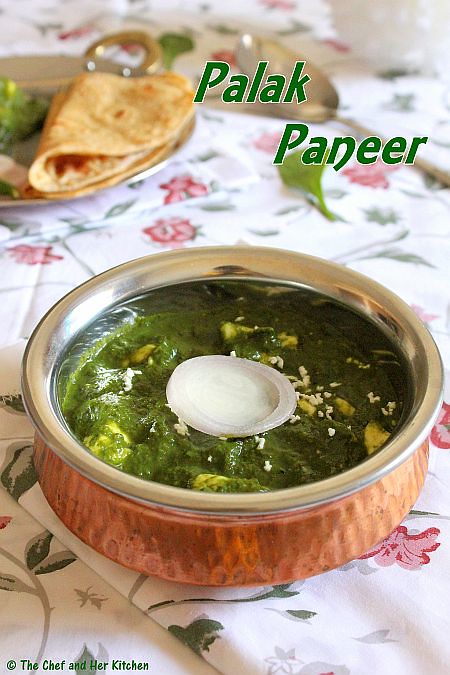
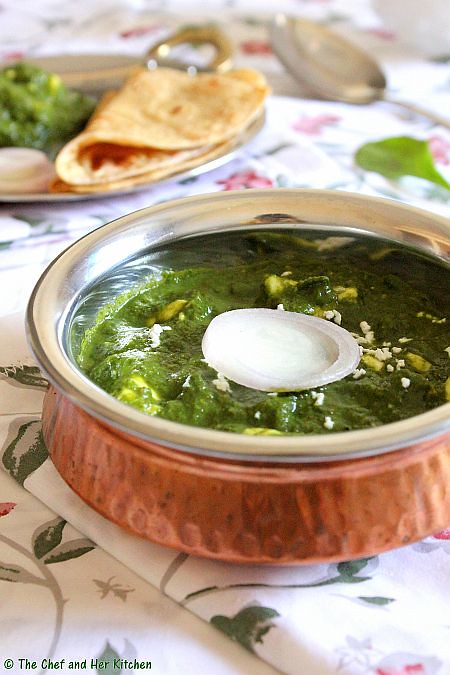
PALAK PANEER | COTTAGE CHEESE in SPINACH GRAVY

Paneer(cottage cheese) based dishes, as a thumb rule, appear at least once a week in our menu as TH is very fond of it, a liking which even I share. In my childhood days , paneer dishes were a must order dish, whenever we visited any north Indian joint. After coming to Mumbai, my craze for paneer has increased as the paneer available here is extremely soft and tasty. Its called malai paneer and is widely available here.I use it for sandwiches, chinese, pulavs, grilled paneer, stuffing for flat breads and breads, curries, gravies and love it in any form.
'Palak Paneer' - Cottage Cheese in Spinach gravy, is a classic combination is a very popular North Indian gravy which goes well with Indian flat breads like Naan, Kulcha, Roti etc.While there are many variations to this recipe with methi greens and saag, I am posting the most common Palak Paneer recipe. Check out the other versions I posted earlier Rajma Palak, Aloo Palak, Grilled Corn Palak Paneer which are slightly different or can be prepared in a similar procedure.I have mentioned a few tips and tricks to keep the paneer soft and also to retain the bright green color of the greens, so please follow the notes carefully for an amazing Palak Paneer gravy.
Palak Paneer | Cottage Cheese in Spinach Gravy Recipe:
(serves 2)

Ingredients:
250 gms Homemade Paneer (or store bought)
1 big bunch fresh Spinach(Palak)
1/4 cup fresh Cream or 1/2 cup whole Milk
2 medium Onions,roughly chopped
4-5 Green chillies
2 tsp Ginger-Garlic paste
2 tsp Coriander powder
1 tsp Cumin powder
1/2 tsp Garam masala
1/2 tsp Amchur powder
3/4 tsp Kasuri methi
a pinch of Sugar
1/2 lemon,cut into wedges
1/2 tsp Cumin seeds
Salt to taste
2 tsp Butter
1 tbsp Oil
Method:
  • Clean and wash spinach and chop it roughly.
  • Heat 1tsp oil in a big pan and add green chillies and fry them until you see brown patches forming on them and remove them aside.
  • In the same pan add chopped spinach and saute until the leaves wilt,add a pinch of sugar while cooking spinach which helps in retaining color.This process takes 4-5 mins.Cool the spinach.
  • Meanwhile grind the onions to a fine paste.
  • Cut paneer into big cubes or slabs according to your wish,immerse this in warm-medium hot water until its usage.
  • Heat 2 tsp oil in a big kadai and crackle cumin seeds.Add ginger-garlic paste and ground onion paste and fry well until the mixture is light brown in color and the rawness of onions disappears.
  • Add coriander powder,cumin powder,garam masala and kasuri methi(slightly rub it in between your fingers while adding)to it and fry for a couple of minutes.
  • Mean while grind the spinach with fries green chillies to a fine puree.If you are doing it ahead remember to open the mixer after it is ground or transfer the mixture into a bowl.Don't keep the ground mixture covered for a long time as it will loose its beautiful color.
  • Add the spinach puree to the fried masala and add enough salt,amchur powder to it and cook it open over medium flame for 3-4 mins.
  • Drain the paneer out of hot water and gently squeeze to remove extra water and add it to the spinach gravy and cook for another 2-3 mins until the gravy coats paneer cubes and also helps the paneer absorb the flavors.
  • Add butter to it and a give a nice mix.
  • Add cream and give a gentle mix and switch off the flame.If you are using milk add the milk after you switch off the flame.
  • You can squeeze lemon now or serve the lemon wedges with curry so that you can squeeze it over curry while eating like how it is served in restaurants.I prefer the second way for palak paneer especially.But do remember lemon is essential to give the sourness to palak paneer as I did not use tomatoes in the gravy and also I used just 1/2tsp of amchur powder.
  • Garnish with some grated paneer and a blob of butter.
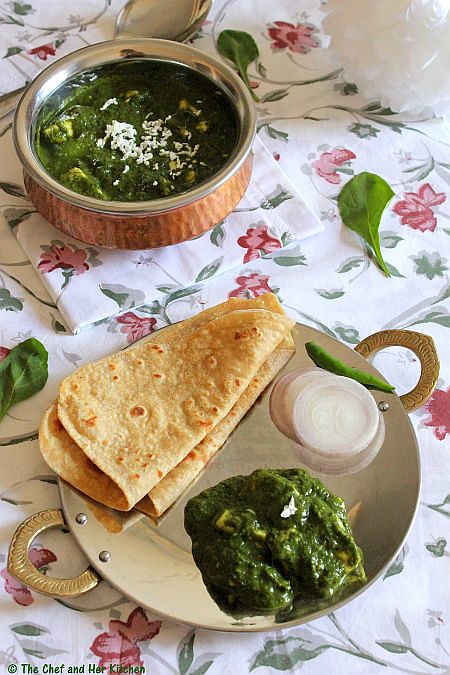
Serve the gravy hot with any kind of Indian breads like Roti/Naan/Chapati/Paratha/Kulcha or Pulav.Also serve sliced onions and lemon wedges along with it.
Notes:
  1. Its a basic thumb rule to remember,do not cover while cooking any greens as they loose the beautiful green color.If you want to make it ahead and keep the gravy ready you cover it with a lid only after it comes to a room temperature.You can use perforated plate while cooling.
  2. I mentioned many times before that I do not combine palak and tomato as I believe that combination would lead to stone formation(though I am not sure).Hence addition of amchur powder and lemon juice is essential to give the sour factor to the gravy.If you want you can add tomato puree while sauteing and cut the amchur powder.
  3. If you are using frozen or packaged paneer always immerse the paneer in hot water which makes it super soft and moist.
  4. If you want you can shallow fry the paneer in oil and immerse in hot water,as I always use fresh malai paneer which is amazingly soft I do not feel like frying it.

Variations:
  1. Spinach gravy is as versatile as the most common tomato gravy.I already have blogged various versions with spinach gravy like Rajma Palak, Aloo Palak, Grilled Corn Palak Paneer which are slightly different or can be followed in the same way.
  2. You can follow the same process and add boiled chana(white chickpeas) instead of paneer and avoid cream in it which makes tasty Chana palak.

Check out other Paneer recipes in my blog:

Monday, April 16, 2012

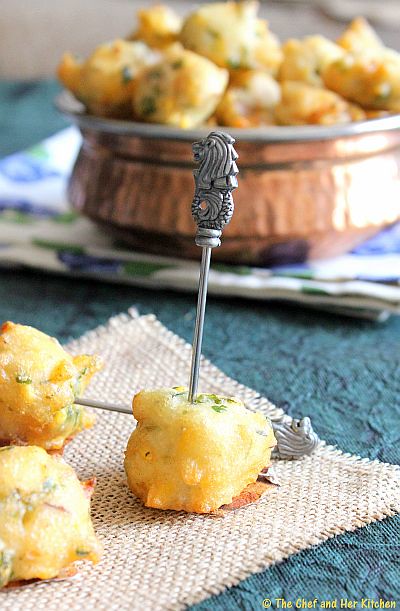
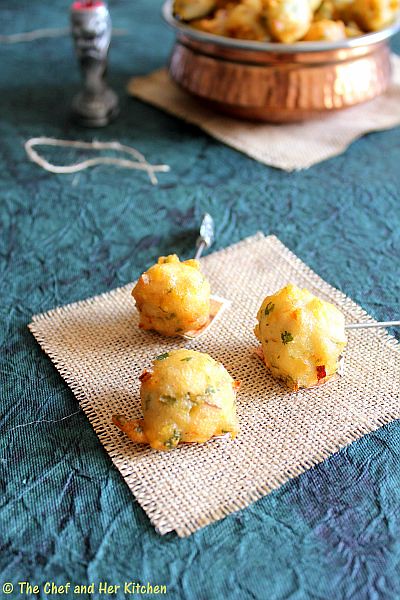
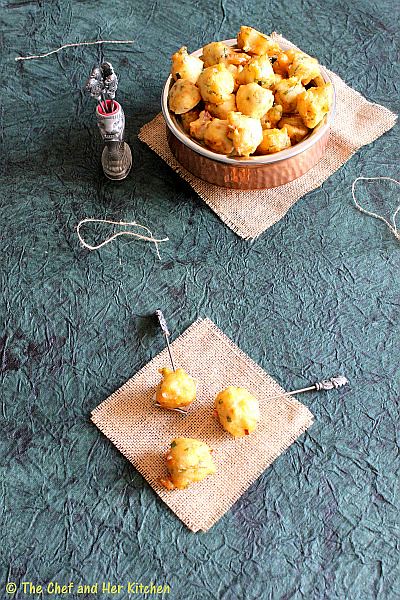
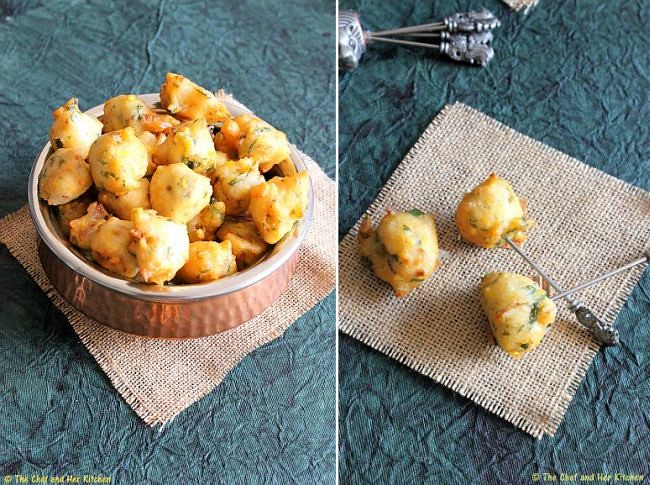
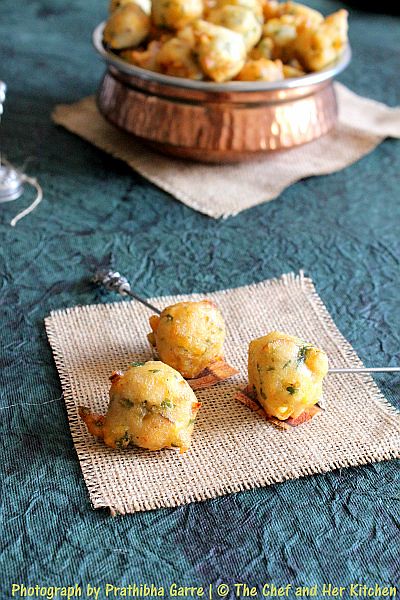
Punugulu | Bondas with Dosa batter | Dosa batter Fritters

I prefer bonda (rice based fritters) over pakoras (chickpea flour based) but I don't make both on a regular basis. My mom used to prepare several varieties of bonda and as such pakoras used to find less favor as my dad wasn't fond of the (chickpea) flour that is used in preparing them . Mirch(chilli) fritters was though an exception. We also used to like the sour taste of bondas. Its the complete opposite at my in-laws place as they are more fond of chickpea flour based fritters , which they prepare at least twice a week - its actually quite common in North India because of the colder weather during winters. Hot chick pea fritters and tea especially during rains is just awesome , as per my hubby. I usually don't prefer eating deep fried items that frequently , so this concept of having fritters that often was initially difficult for me to comprehend.On another note , my hubby just reminded me that my MIL can turn any vegetable to a fritter. Enough of pakoras for today , I guess - let me keep it for some other post.
Coming back to today's post,we generally prepare these bondas with left over dosa batter which turns sour after 2-3 days,bondas usually taste better with a sour batter. If the bondas are prepared with freshly made batter (with no fermentation) they are called 'Punugulu', a famous road side snack in Vijayawada and few Coastal districts of Andhra.You don't need to add anything while making them apart from salt for taste.
This version which I am posting today is ideally prepared during festivals to go along with afternoon meal. As we do not use onions during festivals, we generally replace with soaked moong dal and tiny coconut pieces which adds a nice taste to these bondas.There are no hard rules in preparing these bondas,the addition of quantities of ingredients is purely left to suit your taste buds.I have also mentioned various variations in the recipe,please feel free to follow them and enjoy these hot bondas as an evening snack with tea or in a festival lunch as I usually do.
Punugulu | Bonda with Dosa batter:
(Serves 2-3)

Ingredients:
2 cups left over dosa batter(fresh or fermented)
3-4 tbsp Rice flour
2-3 tbsp Moong dal,soaked for an hour
3-4 tbsp tiny pieces of fresh Coconut or 1 medium Onion,finely chopped
1-2 tsp Green chili paste(to suit your taste)
2 tsp finely chopped Curry leaves
1/4 cup finely chopped Coriander
a fat pinch of cooking Soda
Salt to taste
Method:
  • Let the dosa batter comes to a room temperature.
  • Add rice flour to it and mix well and leave it aside for 5 mins.Feel free to add an extra tbsp of rice flour or sooji(rawa) to the batter to make it slightly thick.The consistency should be thicker as Idli batter and have dropping consistency.
  • Add soaked and drained moong dal,tiny pieces of fresh coconut(or finely chopped onion),green chili paste,chopped curry leaves,chopped coriander and required salt and mix well.
  • Add a fat pinch of soda to a tsp of water and mix well and mix in the batter until well mixed.
  • Mean while heat oil in a thick kadai over medium flame.
  • Drop a spoonful of batter using a spoon or hand.We your finger in between for easy dropping of batter.
  • Drop 6-8 at a time and fry them over medium flame for 2 mins and turn them over and fry them until they turn golden brown and crisp.
Serve them hot with coconut chutney or tomato sauce/chutney or as they are.
Notes:
  1. You can prepare these bondas with fresh dosa batter(before or after immediate fermentation) pr 2-3 day old batter which turned sour.All these variations taste nice and also have different taste.I personally like the one when prepared with sour batter.
  2. You can add a couple of tbsp of rawa to the batter which gives a crisp bondas.In that case leave the batter aside for an hr and proceed with the same above mentioned process.
  3. You can even prepare these bondas with the batter which is prepared for sukkinunde/boorelu/poornalu.
Variations:
  1. As I prepared these bondas during festival I added soaked moong dal and coconut pieces.If you are preparing them on any regular day add finely chopped onions to it which gives a nice crunch in between.
  2. You can even add soaked and drained sago(1/4 cup) to the batter instead of soaked moong dal and you can add either coconut pieces or chopped onions to it along with sago as both goes well.

Monday, April 2, 2012

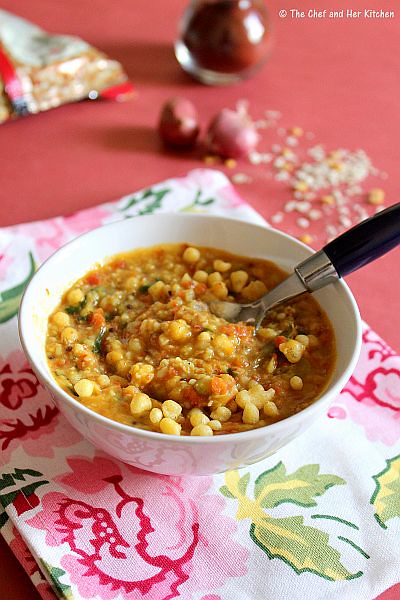
OATS BISI BELE BATH | SAVORY OATS PORRIDGE | INDIAN OATS RECIPES

Oats is a healthy and versatile breakfast option as it can be used in various preparations and can also be used easily in several south Indian dishes. My blog already has various posts that highlights various savory options with oats like Savory Oats porridge(with curds), Oats kharabath,Oats pongal . Oats can also be used to prepare instant idly,dosa,paniyaram varieties which I intend to post later.This post is based on an interesting method of using Oats in a very well known south Indian dish called Bisi bele bath, which I aptly call as the Oats Bise bele bath. Remember to serve it hot , otherwise Oats tends to get a bit sticky when it becomes cold. I am sure you will enjoy this healthy preparation.

Oats Bisi Bele Bath Recipe:
(serves 2)

Ingredients:
1 cup quick cooking Oats
1/4 cup Toor dal
1 cup of finely chopped Vegetables(1 small Carrot,5-6 french Beans,1 small Capsicum)
1/4 frozen green Peas
1 Tomato,finely chopped
1 medium Onion,finely chopped
2 tsp Bisi Bele Bath masala(home made or ready MTR masala)
2 tsp Tamarind pulp
1/2 tsp grated Jaggery
1/2 tsp Red chili powder
a pinch of Turmeric powder
1/2 tsp Mustard seeds
a sprig of Curry leaves
a pinch of Hing
Salt to taste
1 tsp Oil
1 tsp Ghee(while serving)

Method:
  • Pressure cook toor dal and finely chopped vegetables(carrot,french beans,capsicum) and peas in separate containers in the cooker for 3 whistles.
  • Meanwhile dry roast oats and keep it aside.This is very important to dry roast oats when you make porridge which helps in making slightly non-sticky porridge,otherwise oats tend to get sticky faster.
  • In a big kadai heat oil and crackle mustard seeds and add curry leaves and fry well.
  • Add hing and finely chopped onions and fry until translucent.Add finely tomatoes and fry until they are mushy.
  • Add water(3 cups) to it and let it come to a boil and add oats and give a quick stir.Add cooked toor dal and vegetables to it and mix well and mash it slightly using the back of the spoon which helps in amalgamating with each other to give a thick porridge consistency.
  • Add salt,bisi bele bath masala,red chili powder,turmeric powder and tamarind pulp and boil it fro 3-4 mins.Adjust the consistency of bisi bele bath by adding more water if required.
Serve it piping hot with a dollop of ghee and khara boondi/chips or cool raitha.
Notes:
  1. I kept the vegetables simple,you can even add potatoes,fresh double bean pods to it.
  2. You can even give a tadka of fried cashew nuts or fried ground nuts.I did not add as I wanted to make it more healthier.
  3. Eat this immediately and do not keep it for long as it turns slightly sticky.
  4. You can replace Bisi bele bath masala powder with Sambar powder,but you will find a difference in taste.
  5. For a Vegan version avoid ghee in the recipe.
Monday, March 5, 2012

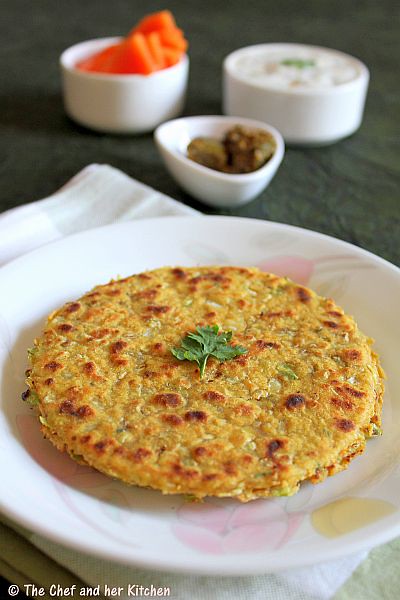
Easy Cabbage Paratha | Cabbage Chapati

My usual weekday dinners would be either roti-sabzi-dal or paratha-pickle-raita-salad combos. While I plan the menu ahead most of the time there are few instances that I would be lazy enough to either plan or do the preparations ahead.Then comes these kind of easy peasy parathas like cabbage paratha,bottle gourd paratha,methi paratha and onion paratha based on the availability of vegetables in my refrigerator.
If your kids are fussy about these vegetables,this is the best way to make them eat those healthy vegetables.These piping hot parathas when paired with an achaar and dahi makes a wholesome meal.
This is a very simple recipe as it does not involve any stuffing business;grated veggies are added inside the dough which makes our job easier.My mom used to make a similar version of cabbage chapati and onion chapatis for breakfast while I tweeked it a bit to give a typical North Indian touch to them.My mom always add sesame seeds to onion chapatis saying that they give a nice taste to it and it is true,even I like the taste of sesame seeds while eating the paratha.There are no hard and fast rules about the ingredients in this paratha,you can actually play with the ingredients and make it according to your family preferences.I have mentioned a few variations to the recipe to give you few such ideas.
Cabbage Chapati | Cabbage Paratha Recipe:
(makes 10-12 parathas)

Ingredients:
2 cups Wheat flour
1/4 cup Besan(Chickpea flour)
3/4 cup finely chopped or shredded Cabbage
1/4 cup finely chopped Onions
1/4 cup finely chopped Coriander
4-5 Green chillies,finely chopped
1/2 tsp Ginger-Garlic paste or 1/2 tsp grated Ginger
2 tbsp Sesame seeds
1 tsp Coriander-Cumin powder
1/2 tsp Amchur powder
1/4 tsp Garam masala (optional,I did not add)
2 tbsp Curd
2 tsp Oil
Salt to taste
Oil for frying parathas

Method:
  • Finely chop or grate the cabbage and drop it in a bowl.
  • Add finely chopped onion,chopped green chillies and coriander, all the masala powders, salt and sesame seeds to the chopped/grated cabbage and mix well.
  • Add chickpea flour and wheat flour and now mix again.
  • Add curds,oil and add little water to the dough and knead into a smooth and pliable dough.Take care that the dough should not be very sticky,it should be bit stiff while kneading so that it would become little soft when we start rolling.Leave it aside for 10-15 mins.Do not leave the dough for longer time as the cabbage leaves water.
  • Take a big lemon sized ball and roll into a thin paratha(as thick as chapati or slightly thicker than chapati) and fry it on tawa on both sides applying either oil or ghee over it and roast until you see the brown specs on both sides.
Serve them hot with North Indian style Aam ka Achaar or Stuffed Chili pickle and masala raitha.
I made alu-spinach raita with lots of walnuts to go with the parathas.The combination was truly divine and yumm.
Notes:
  1. Always make dough just 10-15 mins before making parathas,otherwise it would be difficult to roll the parathas.As cabbage leaves water the dough would become sticky which is difficult while rolling them .
  2. Addition of chickpea flour is optional but I like to use it in theplas and these kind of parathas which are not stuffed.
  3. If you feel that cabbage smell is dominating in your parathas you can even saute them in a tsp of oil for a couple of minutes before making the dough.
  4. If you are making this for kids,try to replace chopped green chillies with 1 tsp of red chili powder in the recipe.You can even avoid garam masala.
  5. They stay soft and good up to 3-4hrs and so it is ideal for lunch boxes.
  6. These parathas will not give clean edges and hence I used a round cutter to give a clean shape to cabbage parathas,but it is optional to follow this method.
  7. For a Vegan version avoid curd in the recipe.
Variations:
  1. You can add grated carrots or chopped methi along with cabbage to the same recipe.
  2. You can easily replace cabbage with grated bottle gourd or grated radish and follow the same recipe to make Bottle gourd parathas and Radish paratha.
  3. If you do not like cabbage ,replace cabbage with onions in the above recipe and make Onion chapatis.

I just love to eat a meal like this..in short it is a simple and wholesome meal for me..How about you ??

 
back to top