Showing posts with label Kerala. Show all posts

Wednesday, November 22, 2017

Appam Recipe without Yeast | Kerala Appam Recipe

appam without yeast
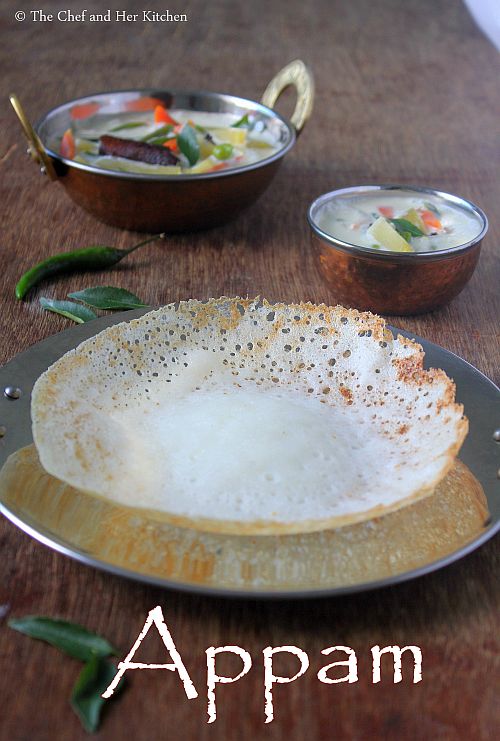
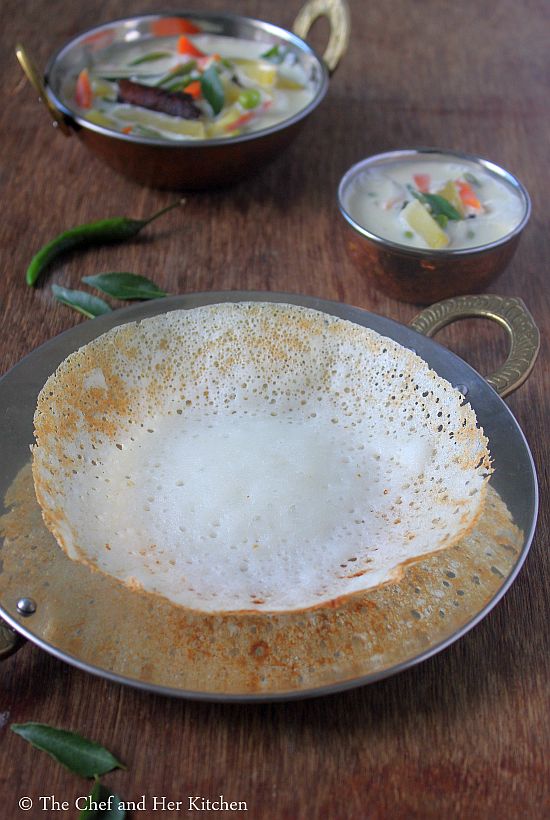
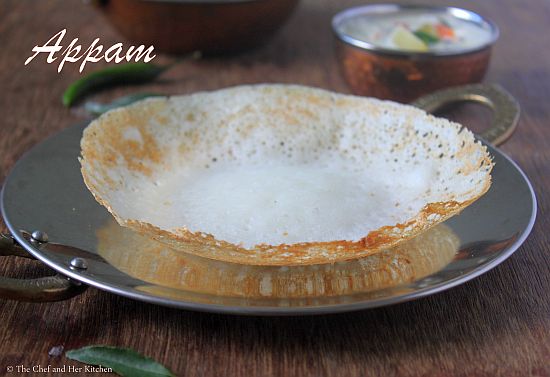
Appam Recipe without yeast with step by step photos.Appam with vegetable stew is a classic combo for breakfast from the state of Kerala.My mom has been making this Appam(without yeast) from our childhood but she had always paired it with Onion chutney.Her recipe is bit different from the traditional appam recipe which includes yeast, she makes a kanji(porridge) out of the rice batter and mix it with more ground rice batter and is fermented for long,they yield soft at the center and crispy and lacy at the ends kind of appams. But we used to call this dosa as Aapan dosa instead of appam and I am not sure why it was called so.Typical Kerala style appam has coconut and yeast in the recipe but if you do not like to use yeast in the appam recipe you can follow this recipe which yields similar results.
appam without yeast
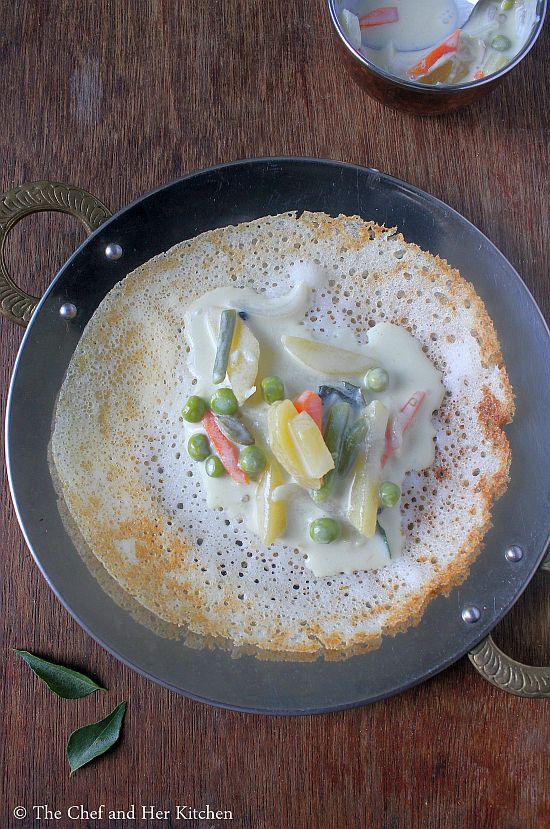
Appams can be served with coconut milk and sugar or sweetened coconut milk or flavorful vegetable stew or a simple coconut chutney.Appams are usually fluffy and can absorb the flavors very nicely and hence I always love to eat them with vegetable stew.
Appam Recipe without yeast:

Yields 12-15 appams | Author: Prathibha
Prep time: 30 mins | Cooking time: 15 mins | Total time: 45 mins + fermentation time
Cuisine: Kerala | Category: Breakfast

Ingredients:
3 cups Raw Rice,soaked in water for 5-6 hrs
1 cup Raw Rice, soaked in water for 5-6 hrs
1/2 cup thin yogurt
1 tbsp Sugar
Salt,to taste
1/8 tsp Cooking soda,optional

Method:
  • Soak 3 cups of rice and 1 cup of rice separately for 5-6 hrs.
  • Wash and grind 1 cup of rice with enough water to get a coarse rawa consistency like batter.Grind the remaining 3 cups of rice with enough water to a smooth batter and keep it aside.
  • In a big pot add 4 cups of water,salt and sugar and let it come to a boil and then add the coarsely ground batter to it and keep stirring continuously till it thickens and become a kanji(porridge) and let it cool completely.
  • Once the cooked batter is completely cooled mix in the yogurt and ground rice batter(made out of 3 cups rice) and mix it nicely with out any lumps and let it ferment for 15-16 hours.
  • The batter should be little loose than the regular dosa batter,so adjust the consistency accordingly. Add cooking soda(if using ,see notes) to a tbsp of water and mix it in the batter nicely.
  • Heat the non stick appam chetti/kadai and pour a big ladle of batter in the center and swirl it in a circular motion so that it forms an aapam which is thin around the corner and thick in the center.
  • Pour the oil around the edges and close it with a lid and let it cook until the edges turn crispy and is soft and fluffy in the center.Loosen the corners gently with the help of spatula and slide the appam into a plate and repeat to make more appams.
Serve it with sweetened coconut milk or Vegetable Stew or any spicy curry.

Notes:
  1. The addition of soda is optional,if the batter is fermented nicely you do not need to add soda to appam.Try making one appam without soda and if it is not fluffy you can add soda to the batter and make which definitely gives soft and fluffy appams.
  2. My mom never added grated fresh coconut while grinding for appam dosa,but you can add 1/3-1/2 cup of grated coconut while grinding the rice(3 cups rice) batter.
  3. The most important step in the recipe is making the kanji and mixing in the batter and hence follow the instructions carefully.
  4. You can make the dosa like regular dosas or thick dosa like poha dosa with the same batter.

Monday, November 13, 2017

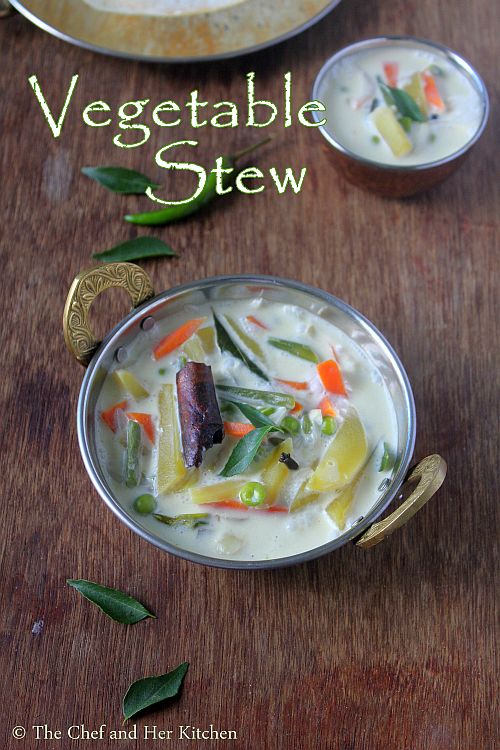
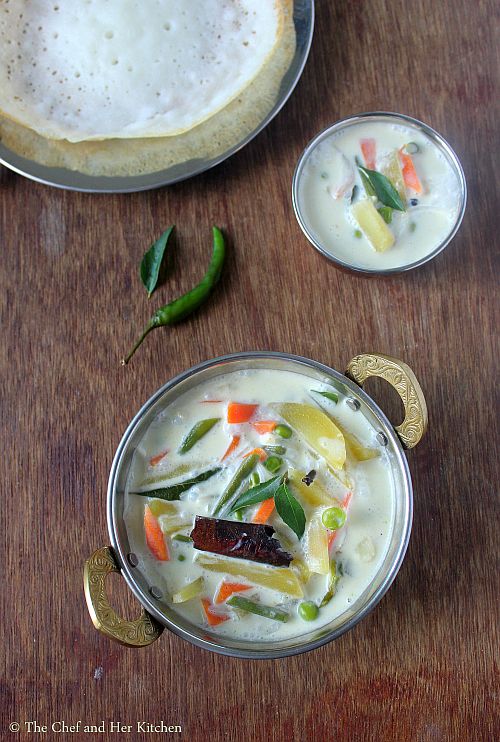
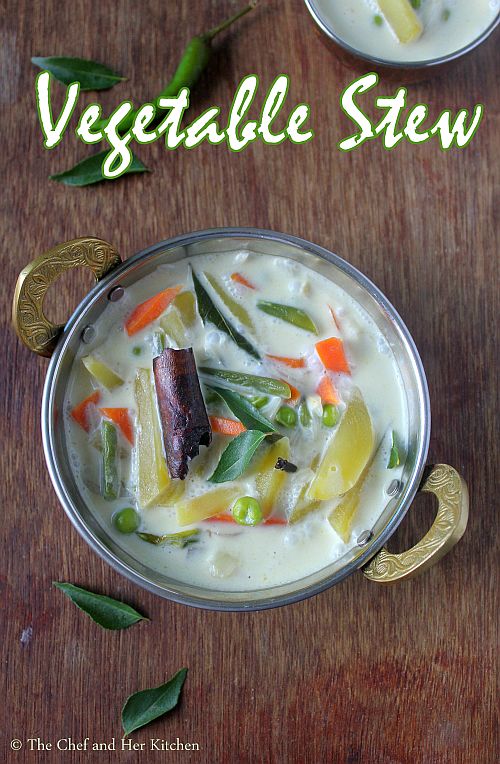
Vegetable Stew Recipe | Kerala Veg Stew for Appam

vegetable stew
Kerala style Vegetable stew recipe with step by step photos. Appam with Vegetable stew is a famous Kerala breakfast combo variety which is loved by all.Appams are different from the regular dosa as these are lacy thin at the corners and fluffy in the center and are made in a Appam Chatti(kadai) instead of the tawa and hence the appams turn in the shape of kadai.Appam is served with a white coconut milk based curry with vegetables in it.The stew has mild spice levels and also has slight sweetness from the coconut milk but it is very flavorful and tastes delicious with the fluffy appams.The appams are so porous that they absorb the flavor from the stew beautifully and makes it taste more delicious.
Stew is made up of various vegetables and is cooked in a coconut milk with minimal spices but the process to prepare the stew is quite important otherwise you will not get the stew in white color. Freshly pressed coconut milk is the best choice for the stew but if you are lazy like me you can even use tinned coconut milk.I have used coconut oil in the recipe for the authentic kerala taste but if you do not like you can even use the regular oil in the recipe. Try this delicious kerala delicacy-stew with appam if you have not tried it before.
kerala veg stew
Check out other breakfast combos here in my blog:
Here is how to make kerala style vegetable stew with step by step photos:
Vegetable Stew Recipe:
Serves 2 | Author: Prathibha
Prep time: 15 mins | Cooking time: 30 mins | Total time: 45 mins
Cuisine: Kerala | Category: Side dish

Ingredients:
1 small Carrot,peeled and cut into 1" long thin sticks
1 small Potato,peeled and cut into 1" long thin sticks
10-12 french Beans,trimmed and cut into 1" pieces
1/4 cup Green peas
1 small Onion,thinly sliced
2-3 Garlic cloves, cut into long strips
1/2" Ginger,peeled and cut into thin strips
2-3 Green chilies,slit
1 pack(200ml) Coconut milk or 1 Coconut,grated
8-10 Curry leaves
Salt,to taste

to temper:
1.5 tbsp Coconut oil
4-5 Cloves
1" Cinnamon
4 green Cardamoms
8-10 Black peppercorns

Method:
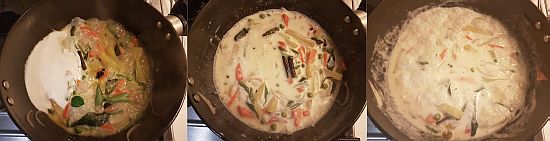
  • If you are using freshly grated coconut to extract coconut milk add 1/2 cup warm water to the grated coconut and grind it nicely and strain it to get the thick coconut milk and add 3/4-1 cup warm water to the coconut residue and grind again to get a thin consistency coconut milk.If you are using ready coconut milk empty the contents of the carton to a bowl and add a cup of water to the empty carton and shake it nicely to get thin coconut milk.
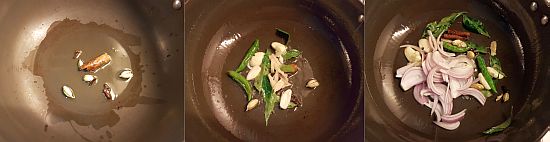
  • In a kadai/pan heat coconut oil and add cloves,cinnamon,peppercorns and green cardamoms and fry for 10-15 seconds.I forgot to add the peppercorns in the tempering and hence did separately and added later to the curry.
  • Add cut ginger,garlic and slit green chilies and fry until the green chilies slightly wilt.Add 5-6 curry leaves and fry for few seconds.
  • Add thinly sliced onions and fry until they become translucent,do not let them turn brown.
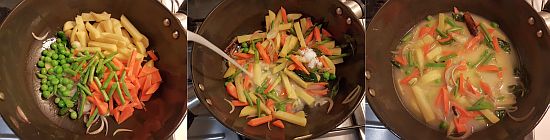
  • Now add all the vegetables(you can add them raw or steamed) and add salt and thin coconut milk and cook until the vegetables are done.
  • Now reduce the flame(or remove the pan from the flame) and add thick coconut milk and 3-4 curry leaves and boil it on low-medium flame.
  • Adjust the consistency of gravy and seasoning by adding enough water and salt.The consistency should neither be thin or thick.
Serve it with Appam/Dosa.

Notes:
  1. You can even add cauliflower along with the other vegetables.
  2. Do not brown the onions,spices and vegetables otherwise it will change the color of the stew.
  3. Freshly pressed coconut milk tastes best for the recipe but one can use ready one if pressed for time.
  4. Coconut oil adds a nice flavor to the stew but if you do not like it you can use regular oil and make it.

Wednesday, August 30, 2017

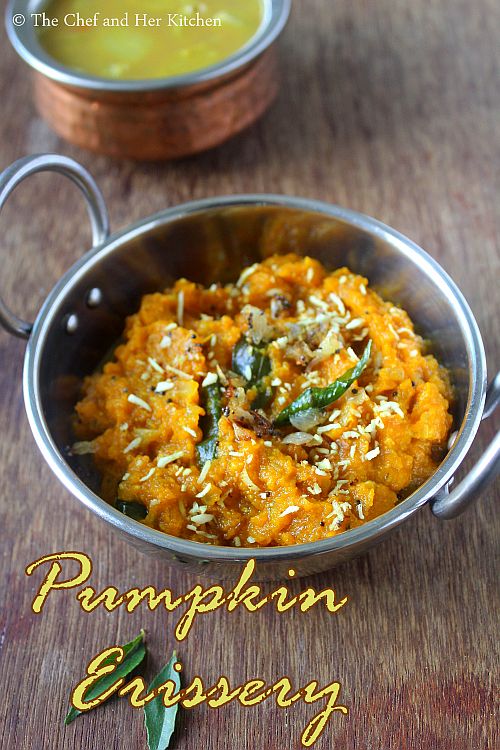
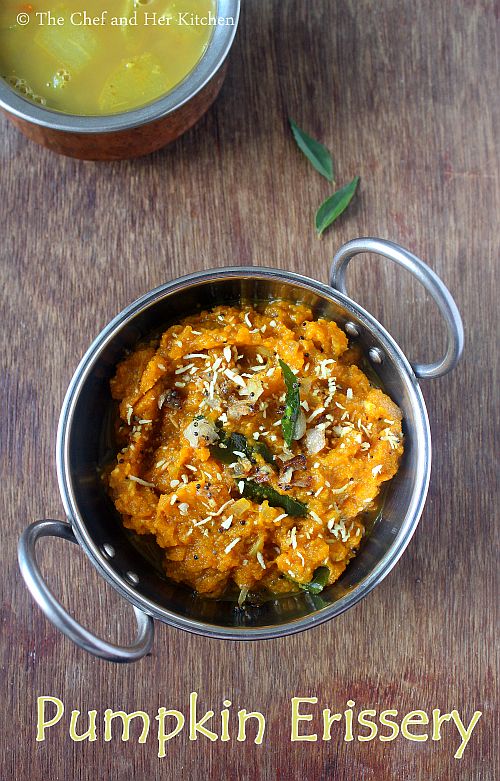
Pumpkin Erissery | Mathanga Erissery | Onam Sadya Recipes

pumpkin errisery
Pumpkin Erissery recipe with step by step photos.Pumpkin is one of  those favorite vegetables for the little one and hence I get pumpkin at least once a week.It is boring to eat the same preparation again and again and hence tried this pumpkin curry-kerala style for the first time.I had got a brief about this recipe from a Kerala friend and also checked the recipe in Mallika Badrinath's cook book and also referred maria's menu.Though the versions are slightly different from each other but the basic ingredients remain the same.My friend's version and Mallika badrinath cookbook version use red chilies for spicyness and do not add shallots in the recipe and the version I am posting is slightly different with the addition of green chilies and shallots but the remaining ingredients being the same.I have also mentioned few more options in the notes where pumpkin can be replaced with other vegetables.Few use red cowpeas along with pumpkin in this yeriseri recipe.
Pumpkin erissery also known as Mathanga errisery is one of the items that is served for Onam sadya.As Onam is around the corner I thought of posting a sadya recipe which will be apt for the festival.I am a novice to Kerala cuisine and have just a basic knowledge of the cuisine because of my blogging journey.I would like to explore more about this cuisine and will post more recipes in future.I have posted another famous kerala dish Avial which is a medley of vegetables in a coconut base,if you are interested check it out.
Check out other Pumpkin recipes in my blog:
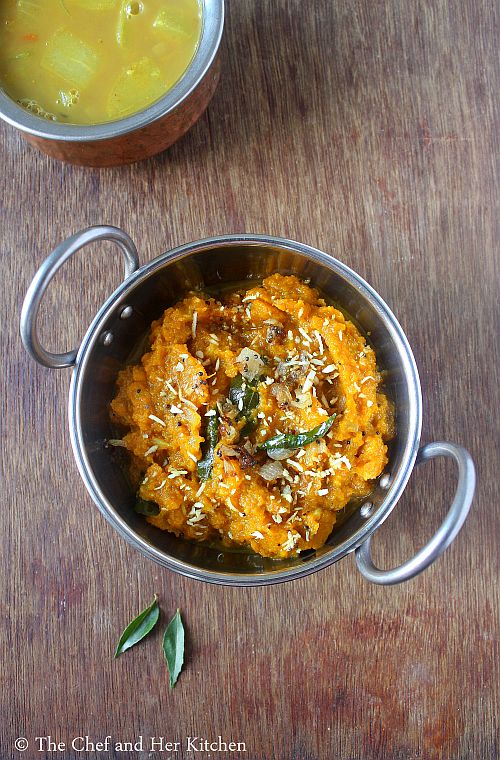
mathanga errisery
Here is how to make pumpkin errisery recipe with step by step photos:
Pumpkin(Mathanga) Erissery Recipe:

Serves 2
Prep time: 10 mins | Cooking time: 20 mins | Total time: 30 mins
Cuisine: Kerala | Category: Side dish/Curry

Ingredients:
2-3 cups Yellow Pumpkin
1/2 tsp Turmeric powder
1/2 cup grated Coconut
2-3 Green chilies
1/2 tsp Cumin seeds
Salt,to taste

to temper:
2 tsp Coconut oil/regular oil
1/2 tsp Mustard seeds
1 tsp Urad dal
4-5 Shallots,sliced
2-3 Red chilies
a sprig of Curry leaves

3 tbsp grated fresh Coconut

Method:

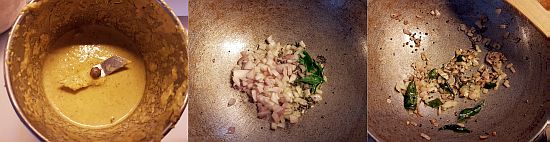
  • Wash and remove the skin and seeds of pumpkin and cut into small cubes and add enough water to it and cook for 8-10 mins.You can even pressure cook it for one whistle.Once it is cooked drain the extra water and slightly mash half of the cooked pumpkin pieces.
  • Dry roast or roast the grated fresh coconut in little coconut oil until it turns crispy and keep it aside.
  • Grind the grated coconut with green chilies,turmeric powder,cumin seeds and salt to a fine paste by adding enough water.
  • Meanwhile in another pan heat coconut oil and crackle mustard seeds and add urad dal and fry until it turns red and then add sliced shallots and fry until they become slight pinkish and then add red chilies and curry leaves and let them wilt.
  • Add the ground coconut mixture to the cooked pumpkin pieces and mix it nicely and let it cook.
  • Pour this tempering over the cooked pumpkin erissery.

While serving add the fried coconut over the curry and serve it hot.

Notes:

  1. You can add even red cow peas in the curry and cook it along with coconut and follow the same recipe.
  2. Green chilies can be replaced with red chilies.
  3. Raw banana,yam or Raw papaya can be used instead of pumpkin to prepare erissery.
  4. Coconut oil gives a nice flavor to the curry and hence do not skip it.If you do not like you can use regular vegetable oil.
  5. The addition of shallots is optional and is used in some parts of Kerala.
pumpkin errisery

Tuesday, August 6, 2013

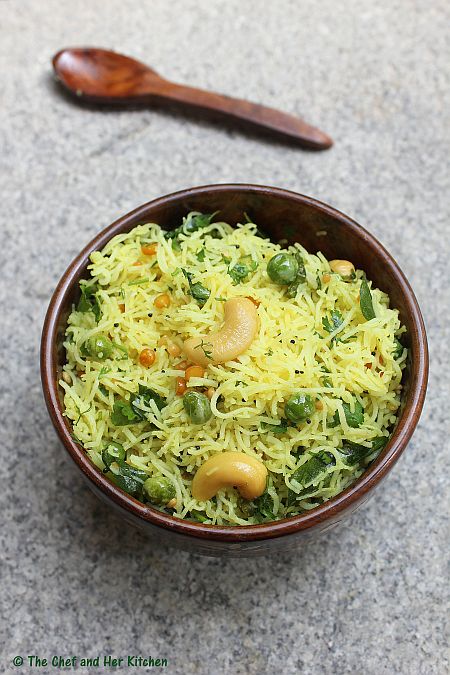
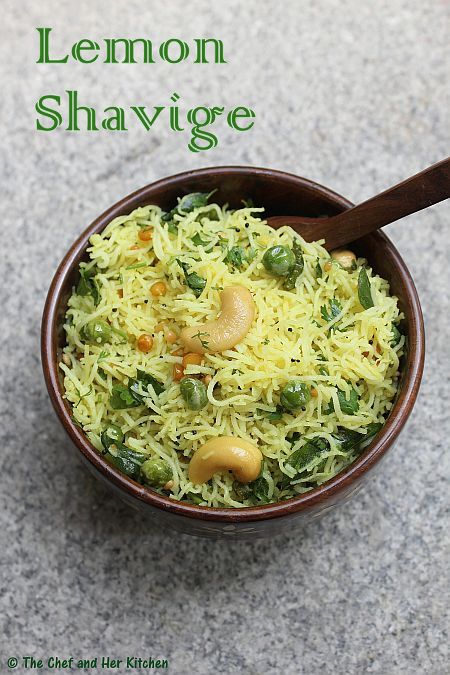
Lemon Shavige | Lemon Sevai(Idiyappam) Recipe

lemon idiyappam
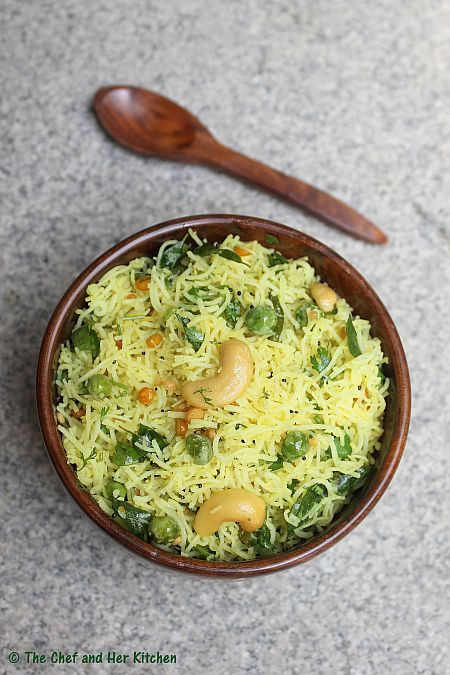
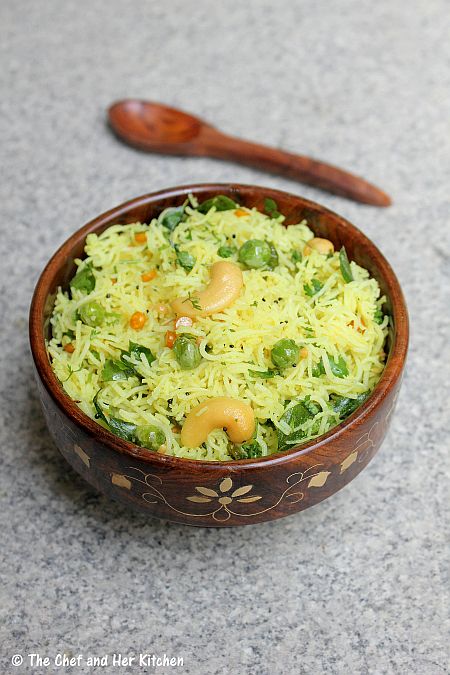
I have already highlighted about my love for Ottu Shavige in my previous posts and hence don't want to repeat it again. Lemon Shavige is also known as Lemon Sevai or Shavige Oggarane.It is a ritual to prepare Lemon Shavige whenever we prepare Ottu Shavige at home.Though we prepare other spicy variations with shavige like Tamarind Shavige or Coconut Shavige,this Lemon Shavige is the one thats mostly preferred by everyone.
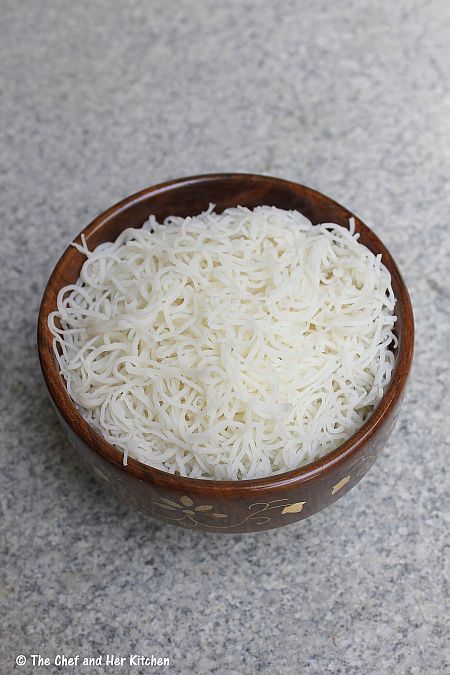
Check out the detailed process of preparation of Ottu Shavige(freshly pressed Rice noodles) here.
ottu shavige
During special occasions, Lemon Shavige along with the Ottu Shavige and its sweet variants feature in our menu.You can serve Lemon Shavige with Kaayi chutney(Coconut chutney) or eat it without any accompaniment.
Nowadays we get instant rice noodle pack very easily in the markets but somehow I don't like its taste and it's nowhere compared to the freshly pressed shavige. Using instant noodles would amount to compromising on the taste, in our view so my vote always go for fresh shavige.I have prepared this dish using freshly pressed Ottu Shavige but you can use the instant rice noodles pack and follow the same recipe.
If you are interested to learn about more Shavige(Sevai) recipes, check out how to prepare Ottu Shavige(Plain sevai/Rice noodles), Coconut Sevai and Tamarind Sevai.
lemon shavige

Lemon Shavige | Lemon Idiyappam Recipe:
Serves 2-3
Prep time:5 mins | Cooking time:20 mins | Total time:25 mins + to prepare shavige
Cuisine: Karnataka-South Indian | Category: Breakfast

Ingredients:
5-6 cups prepare Otthu Shavige or 200 gms Instant Rice vermicelli pack
1/2 cup fresh/frozen Green Peas
12-15 Cashew nuts,slit
8-10 Green chillies,slit
juice of 1 big Lemon
3-4 tbsp chopped fresh Coriander leaves
1/4 tsp Turmeric powder
a sprig of Curry leaves
1 tbsp Chana dal
2 tsp Urad dal
1/2 tsp Mustard seeds
3 tbsp Oil
Salt to taste

Method:
  • If you are using instant rice vermicelli,prepare the rice vermicelli as per the instructions given on the pack.Cool it completely.
  • Blanch the green peas in hot water for few mins and drain them.
  • Heat oil in a big kadai and crackle mustard seeds.
  • Add chana dal,urad dal,cashew nuts and fry until they turn slight golden in color.
  • Add green peas and green chillies and fry for 3-4 minutes until the green chillies wilt and green peas gets fried nicely.
  • Add curry leaves and fry and then add turmeric powder and enough salt and switch off the flame.Leave it for 5 mins.
  • Add prepared rice vermicelli to the tempering mixture and add lemon juice and chopped coriander and mix it nicely until everything is incorporated well.Taste it and adjust the seasoning according to your wish.
Serve it warm with coconut chutney,potato chips or sliced cucumber.

lemon shavige
Notes:
  1. I like to prepare this spicy and tangy and hence I add more green chillies and lemon to it,you adjust it according to your taste buds.
  2. Cashew nuts add better taste to it,so do not skip it.Alternatively you can use ground nuts instead of cashews in the recipe.
  3. If you are using instant rice vermicelli,boil a big pot of water with a tsp of oil and salt and then add instant rice vermicelli noodles and cook it for 8-10 mins approximately(see your pack for clear instructions) and strain it and give it a cold water bath and drain off the excess water.Spread it on a wide plate until it becomes cold and follow the recipe.
lemon sevai

Thursday, July 11, 2013

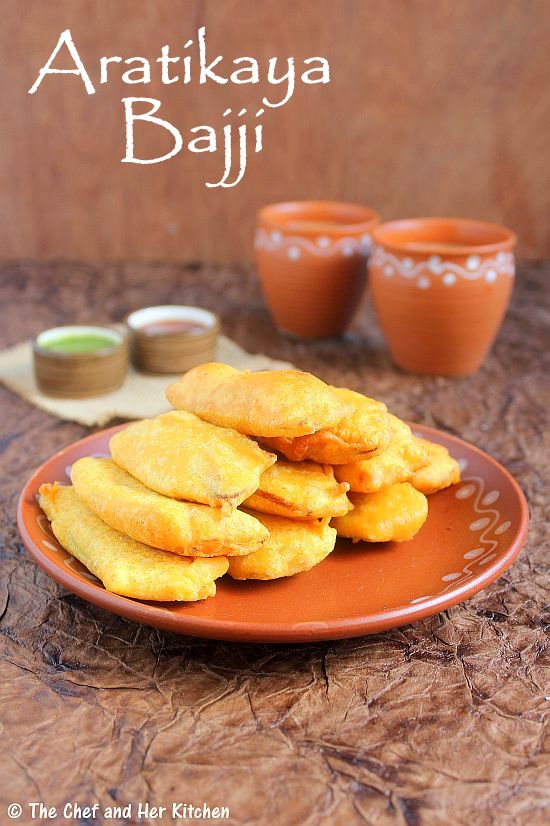
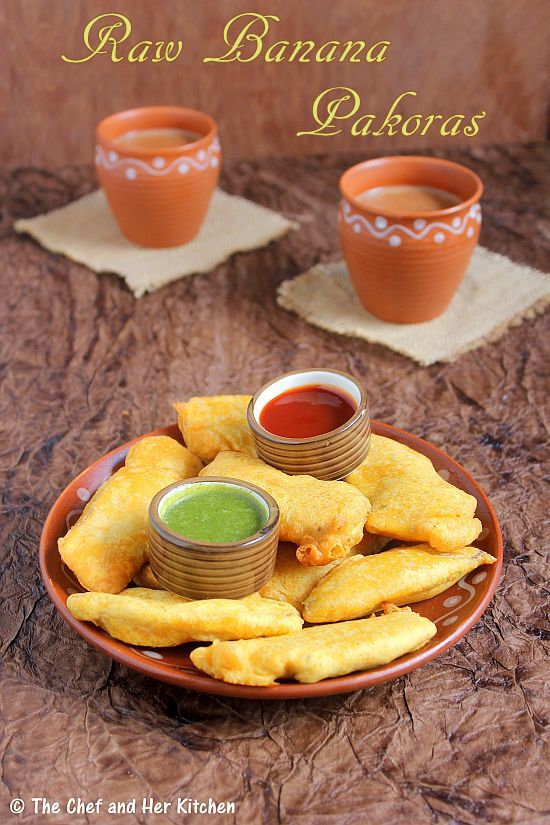
Aratikaya Bajji | Raw Banana Pakoras

aratikaya bajji
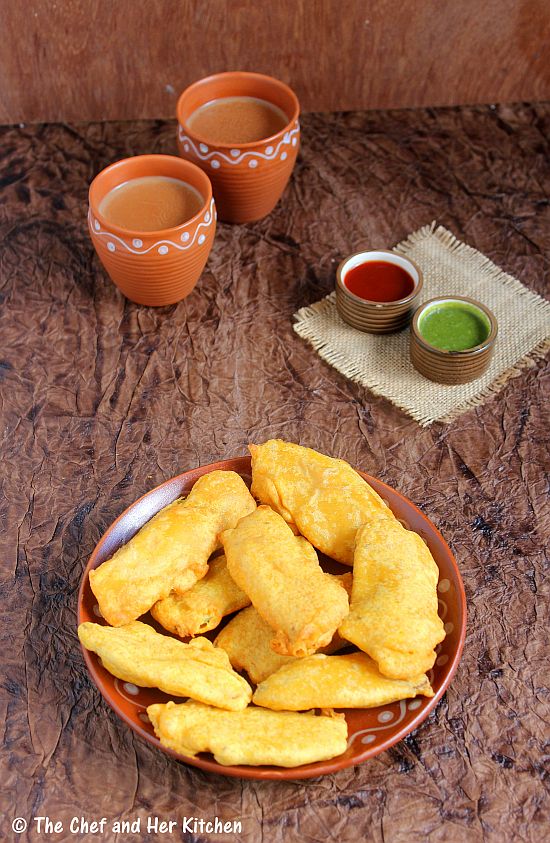
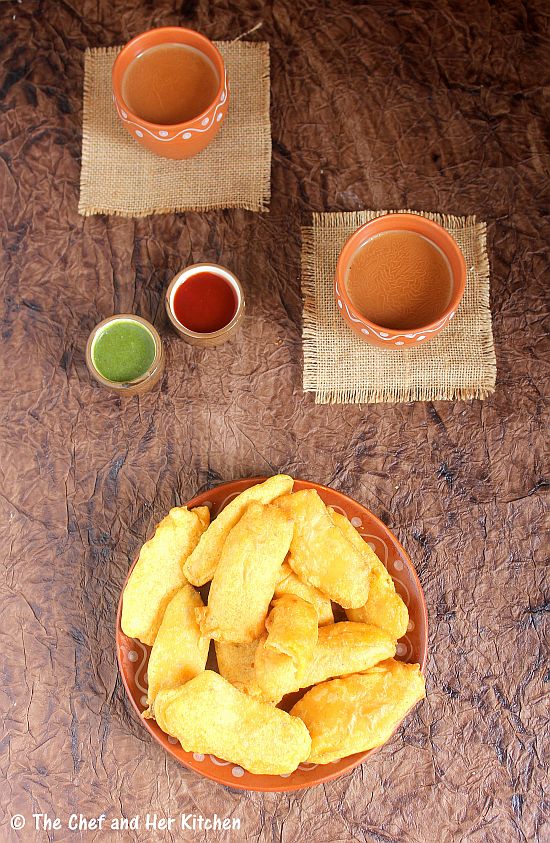
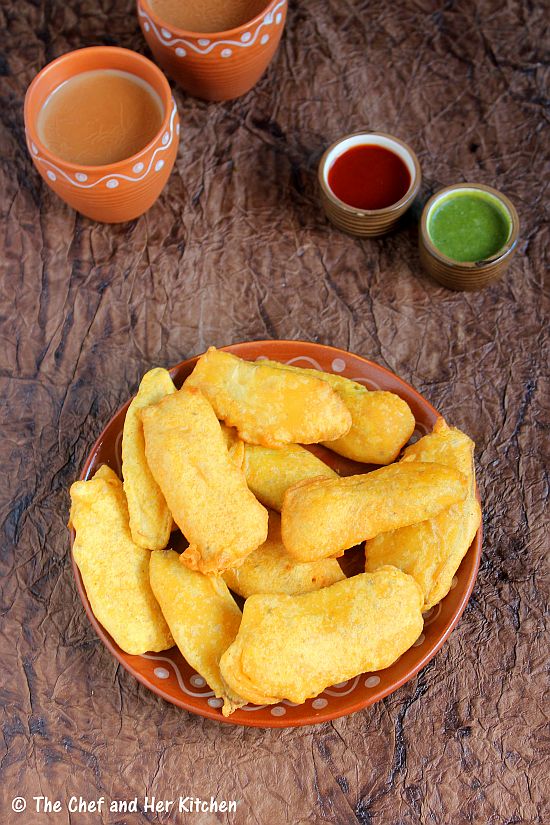
Monsoons are tempting me to make fried pakoras (fritters) often these days. Well , am not sure if I should be blaming the weather or the temptation to make something interesting that I could post. This is more so becoming an excuse for me to indulge in such fatty deep fried goodies that I usually avoid preparing more than once in an month. TH is the one who initiates me to make some of his favorite deep fried goodies at times. These dishes include Puri, Batura or various kinds of fritters (Pakora).I must say that TH was elated at being served deep fried goodies on two consecutive weekends and that too without pushing me to prepare it.
balekai bajji
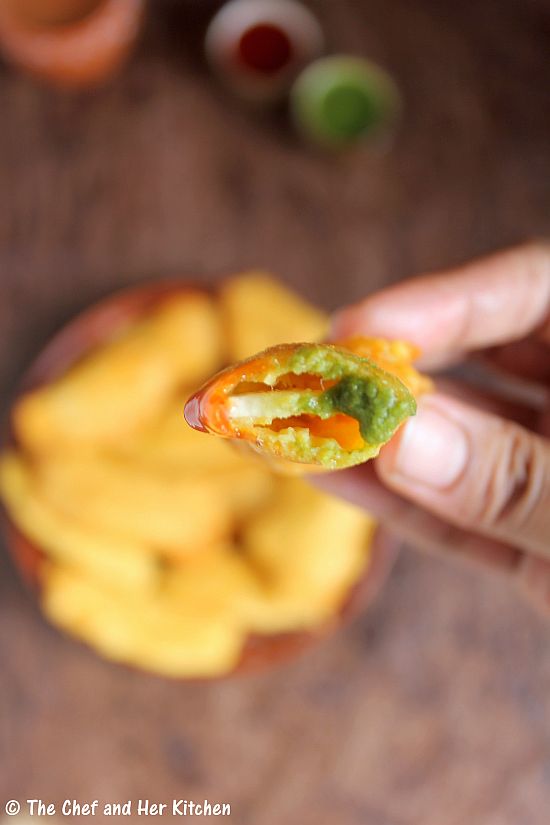
In South India, there is a slight difference between Bajjis and Pakoras.If the vegetables are dipped in batter and deep fried then it is known as Bajjis and if its prepared with the mixture of cut vegetables like onions or cabbage and mixed with besan (chick pea flour) mixture and deep fried then it is called as Pakoras.In North India, any vegetable mixed with Besan mixture and deep fried in any form is called Pakora.One can prepare various Bajji varieties by using any vegetable but the most common one's are Onion Bajji, Potato Bajji, Capsicum Bajji, Mirch Bajji and Raw Banana Bajji.In South India, in few stalls they even cut these Bajjis in the centre and stuff it with a mixture of onions,coriander,salt and lemon juice. Try it once, you will like it a lot..
raw plantain pakora
In the monsoon season, apart from Pakoras even hot bondas and Vadas are equally relished. In fact at my mom's place, we prefer bonda and vada over Pakoras and Bajjis and of course there are few exceptions like Mirch Bajji.My mom mostly prepares bondas with either rice flour or sago or the left over dosa batter.
plantain fritters
While Pakoras, Bajjis, Bondas and Vadas are not healthy options as they are deep fried, I don't mind consuming them once in a while.In case you are a health freak and want to avoid these deep fried goodies and opt for something light and healthy, I would suggest that you check out a few Cutlet and Tikki recipes in my blog - Vegetable Chops , Zucchini Patties, Maggi Noodle Cutlet , Sago(Sabudana)Tikki, Broccoli Cutlets and Hara Bhara Kebabs.
raw banana pakoras

Aratikaya(Kela)Bajji | Raw Plantain Pakoras Recipe:
Serves 2-3
Prep time:10 mins | Cooking time:20 mins | Total time:30 mins
Cuisine: Indian | Category: Snacks

Ingredients:
2-3 Raw Bananas(Raw Plantains)
Oil,to deep fry

for Batter:
1 cup Besan/Chickpea flour
1/4 cup Rice flour
1 tsp Red chilli powder
a pinch of Turmeric powder
1/4 tsp Garam masala (optional)
1/2 tsp Carom seeds
a pinch of Cooking soda
2 tsp hot Oil
Salt to taste

Method:
  • Peel the skin of plantains and slice lengthwise into thin pieces or you can use a slicer to do this work.I have an adjustable slicer and hence I can make slightly thick pieces.Drop them in water until its usage so that they would not loose their color.Do not slice them very thin like we do for chips,slice them of medium thickness so that they will hold the batter when we dip in the pakora batter.
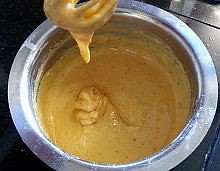
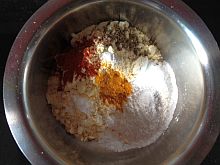
  • Mix all the items(mentioned under 'for Batter') well and make it into a smooth paste by adding enough water.Add the water slowly and use a wire whisk and whisk to the consistency of thick idly batter consistency and make sure you don't add too much water at once.The more you beat the mixture the better and fluffy the pakoras would be.You should ideally beat the batter for 3-4 mins.
pakora batter
  • Mean while heat oil for deep frying.
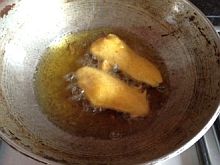
  • Hold the edges of plantain slices and dip each of them in batter and individually and drop them slowly into hot oil and deep fry them till it becomes golden brown in color on medium flame.
  • Drain them on to a kitchen towel to remove excess oil.
Serve them hot with Imli Chutney/Green Chutney/Tomato Sauce.
You can even top them with a mixture of finely chopped onions,coriander leaves,salt and lemon juice like they serve in Bajji stalls in South India.

raw banana pakora
Notes:
  1. You can use the same process for making pakoras like Cauliflower, Baby corns, Broccoli and Poblano peppers(remove the seeds) by blanching them in hot water initially and follow the same process.
  2. You can use the same batter as base for all pakora varieties like Potato(cut into thin slices), Brinjal(cut into thin slices), Onion(thin round slices as well as lengthwise) and Capsicum rings.
  3. The addition of garam masala is completely optional,as plantain is a bland vegetable I added it to spice up the batter.
  4. The addition of rice flour makes the pakoras crisp.
  5. I like to add hot oil to the batter mixture as it will make the pakoras crisp and also makes them consume less oil.Make sure you beat the batter which will makes the pakoras more fluffy.
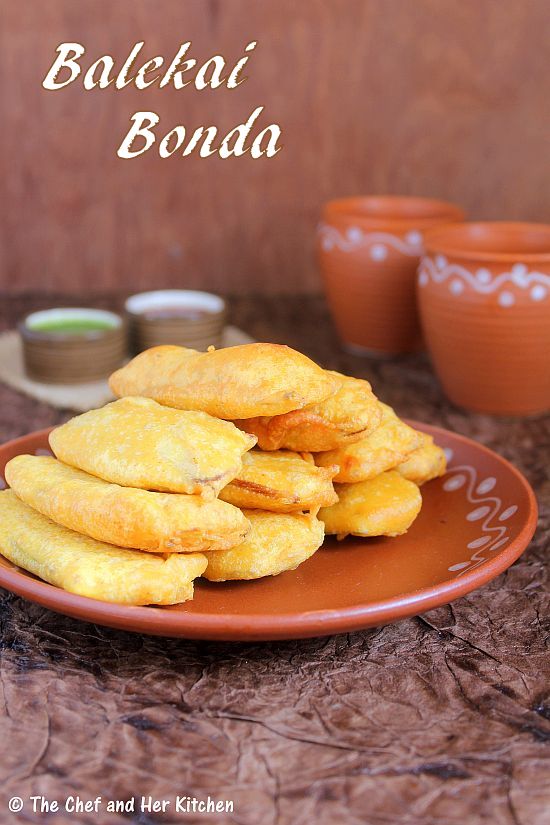
balekai bonda

Monday, December 10, 2012

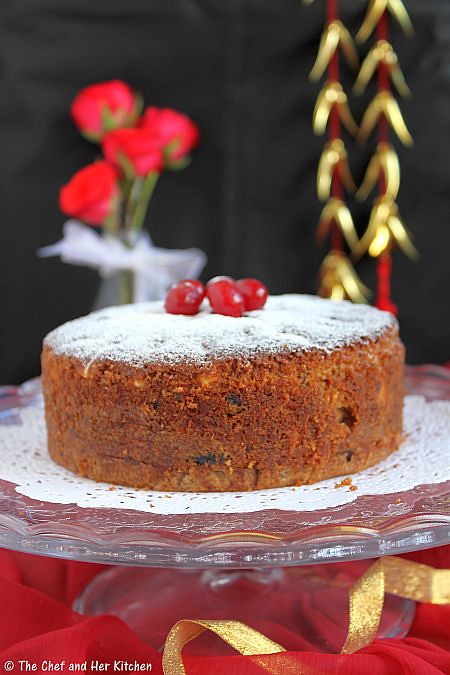
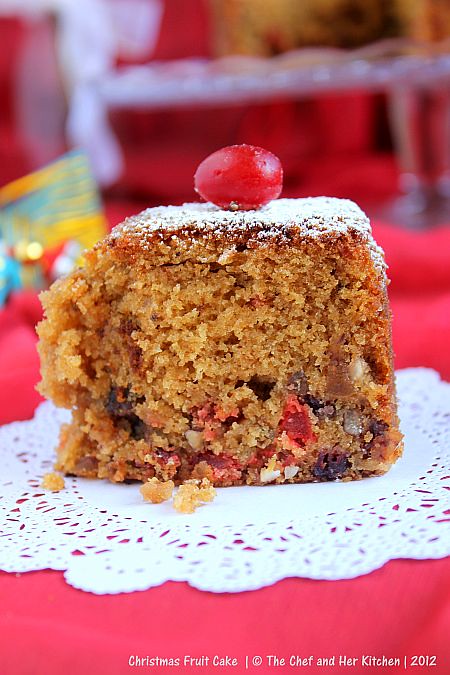
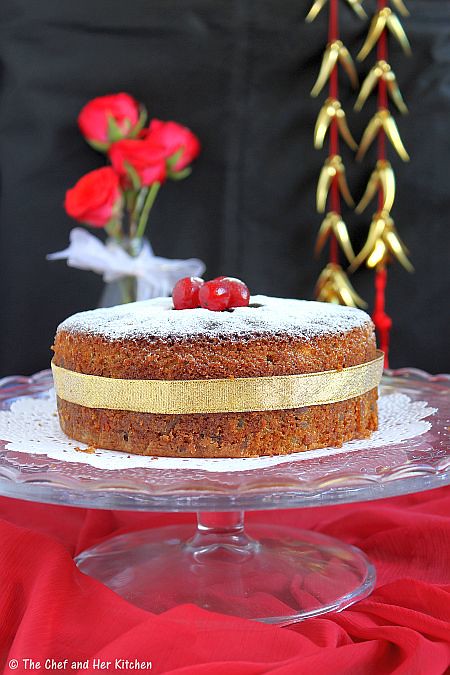
Christmas Fruit Cake | Kerala Plum Cake | Christmas Cake Recipes

Today is my niece K's birthday and she has turned four today.I would like to wish her a very Happy Birthday through this virtual celebration post.
My dear lovely princess K,  'May your birthday be filled with sunshine and smiles, laughter, love, and cheer'. - with love,Atta.
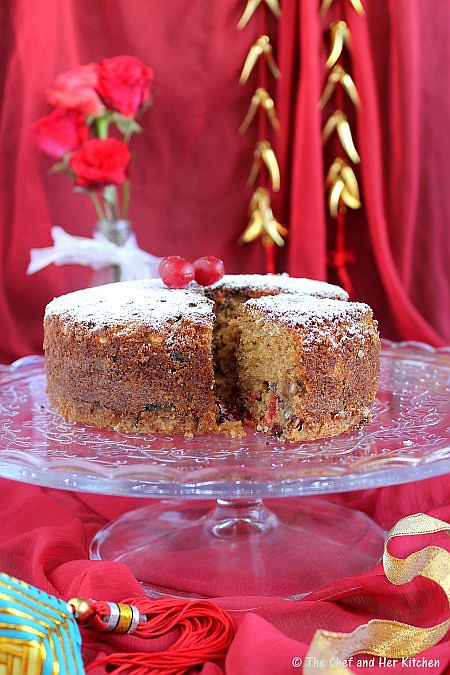
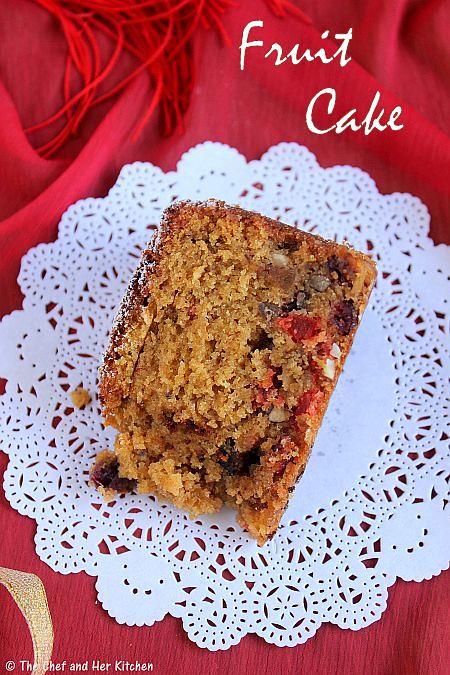
Christmas is nearing and I am sure many of you would have already soaked your dry fruits for the Christmas cake.As I do not use alcohol in my cooking, I am posting my non-alcoholic version of Christmas fruit cake which is ideal for those who are planning to make it at the last moment.I soaked the dry fruits and nuts in orange juice instead of alcohol(rum) which imparts a nice flavor-may not be similar to that of the alcohol version but it tastes still delicious.
Plum cake/Fruit cake is one of my favorite cakes apart from the classic butter sponge as I prefer the cakes with out frosting.When I googled the fruit cake recipe I got so many recipes but most versions used alcohol which I did not want. I got impressed with this recipe and I have adapted the process and also my basic Vanilla cake recipe and changed it according to my taste.The cake was very moist with the right amount of sweetness and slightly crumbly just like how the Fruit cake is supposed to be.Few of my dry fruits got settled down,next time I should mix the batter bit careful.But this recipe is definitely a keeper for a non -alcoholic version of Fruit cake.
The recipe list goes long and also the method looks quite elaborate but believe me it is a very easy recipe if you follow the instructions clearly and plan it bit ahead.Also the shelf life of the cake is more and you can easily store it more than a week when refrigerated.Do not miss preparing this cake during Christmas,it will definitely make your Christmas more merrier.
KERALA PLUM CAKE | CHRISTMAS FRUIT CAKE RECIPE:
makes a 6" Cake
recipe source: adapted from here

Ingredients:
100 gms(1 leveled cup) All purpose flour
100 gms(1 stick or 1/2 cup) unsalted Butter*,at room temperature
60 gms(1/4 heaped cup) Dark brown Sugar
2 large Eggs
1 tsp Baking powder
1/4 tsp Baking Soda
1 tsp fresh Orange Zest
1/2 tsp fresh yellow lemon Zest
1 tbsp candied Peel(optional)
1 tbsp candied Ginger(optional)
3/4 tsp All spice powder( 1/4" Cinnamon + 3 Cloves + a fat pinch of Nutmeg powder)
1 tsp dried Ginger powder
a pinch(1/4 tsp) of Salt

to prepare ahead(atleast a day before):
3/4 cup fresh/canned Orange juice
1/4 cup Tutti Fruti
1 cup dried Fruits(1//4 cup dried Cranberries, 2 tbsp Raisins,2 tbsp Black currants,2 tbsp chopped dry Dates, 2 tbsp chopped dried Figs, 2 tbsp chopped dried Apricots,2 tbsp chopped Glaced Cherries)
1/2 cup chopped Nuts(8-10 Cashews,8-10 Almonds,8-10 Walnuts,8-10 Pecans,2 tbsp Pistachios)

to prepare caramel:
50 gms(1/4 cup) Dark brown Sugar
1 tbsp Water
1/4 cup warm Water
1 tsp Vanilla essence

to decorate:
2 tbsp Icing sugar
25 blanched and skinned Almonds

Method:
to prepare ahead(atleast 1 day ahead) - soaking up dry fruits:
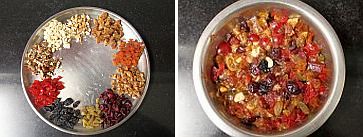
  • Cut all the dry fruits like apricots,figs,dates and cherries into fine pieces and also the nuts like cashewnuts,almonds,walnuts and pecans into fine pieces and keep it ready.
  • Soak all the chopped dry fruits and nuts with tutti fruti and cranberries,raisins and black currants in orange juice.Let the dry fruits soak in the orange juice at least for a day or at least for a minimun of 6-7hrs.Keep mixing the chopped fruits and nuts in between so that they would soak up all the juices.
to prepare Caramel:
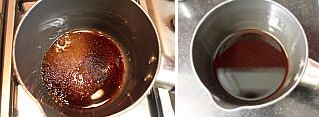
  • In a deep pan add 50gms(1/4 cup) dark brown sugar and 1 tbsp of water and stir it continuously until the sugar caramelizes and melts and starts bubbling and changes it color to the deeper dark shade.It takes roughly 4-5 minutes.Meanwhile warm 1/4 cup of water either in microwave or on stove top.Switch off the flame and add 1/4 cup warm water to it and leave it aside to cool completely.Add vanilla essence to it and mix.
to prepare Cake:
  • Prepare a 6" round tin by layering it with butter paper at the bottom and grease it with butter.Sprinkle a tsp of all purpose flour and dust it to reach all the edges and sides of the pan.Shake off the extra flour from the tin. 
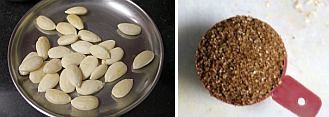
  • Blanch the almonds and peel off the skin and keep them ready.
  • Sieve the all purpose flour with baking powder,baking soda,dry ginger powder and all spice powder.Sieve it 4-5 times until all the flour is uniformly mixed.
  • Beat butter with a electric whisk and add dark brown sugar(or powdered form of sugar) and beat well again for 5-6 mins until you get a smooth and fluffy mixture.
  • Add one egg at a time to the mixture and beat again until everything is well incorporated.Add the other egg and follow the same process.
  • Add cooled caramel mixture and beat again to get a smooth uniform mixture.
  • Add orange zest and lemon zest and mix well with a rubber spatula.
  • Meanwhile preheat the oven at 160 degrees for 10-12 mins.
  • Add 1/3 rd quantity of  the flour mixture and beat it with electric whisk or fold it using a rubber spatula and repeat the same process for the remaining portion of flour.
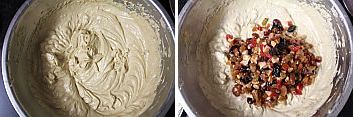
  • Drain the soaked dry fruits and add them to the batter and gently mix with a spatula.I has some 2-3 tbsp of soaked orange juice left which I added to the batter.It is your wish to add it or not to the batter.
  • Scoop out the mixture to the prepared tin until 2/3rds full .Here if you want you can decorate the cake with blanched and skinned almonds in a required manner.Cover it with aluminum foil.Covering it with Aluminum foil ensures that the top portion will not get burnt.It is an optional step to cover the tin with foil.
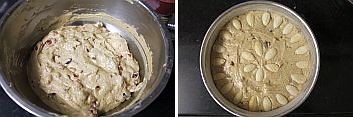
  • Bake it in preheated oven at 160 deg(320 F) for  40-50 minutes.Mine got done in 45 minutes.Keep an eye after 30 minutes.When you insert a long tooth pick it in the center,it should come clean which means the cake is perfectly done.
  • Cool the cake in the tin for 10  minutes.Run a sharp knife along the edges and invert it on to the wire rack and peel off the butter paper and let it cool completely for an hour.
  • Cool it completely overnight for at least 5-6 hours before cutting the cake.
Store it in an air tight container.It stores well for 3 days under room temperature and more than a week when refrigerated.
You can dust it with icing sugar if you want before serving.

*I used Amul salted butter in the recipe.So I avoided salt in the recipe.If you use unsalted butter add salt otherwise it is not necessary.
Notes:
  1. You can add dry fruits of your choice to the cake.
  2. You can add 1-2 tsp rum to the batter or you can even soak the fruits in rum 1-2 months before.This depends on your personal choice to use alcohol or not.Mine was a non-alcoholic version and hence I did not add it in the cake.
  3. You can soak the dry fruits for long in the orange juice say for a couple of weeks,it says that you get a better flavor but I soaked it just for a day and it was still tasting nice. 
  4. Few of my dry fruits settled in the bottom.Hence I suggest you to drain the dry fruits completely and wipe off extra moisture in a kitchen towel and sprinkle some flour and mix.Then add them to the cake batter and mix well,I think this would help in not settling the dry fruits down.
  5. Use dark brown sugar for the cake which gives the brownish color to the cake. 
  6. As I did not have candied peels and candied ginger in hand I did not use it in the recipe.If you have them do definitely use them they will definitely enhance the flavor of the cake.
  7. You can even pour the batter into a loaf pan and bake it like a load which is quite convenient to cut into slices.

Wednesday, August 29, 2012

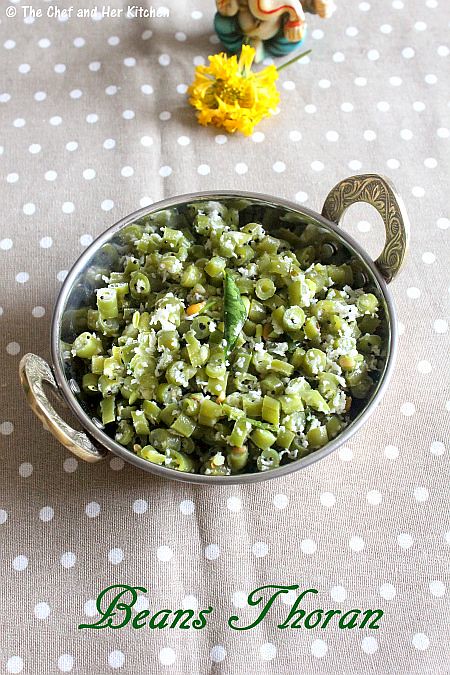
Beans Stir fry | Beans Poriyal | Beans Kobbari Kura - ONAM Sadya Recipes

I wish all my readers and friends 'HAPPY ONAM'.I hope all my mallu readers and friends would be busy today with the ONAM celebrations.
During festivals we do not use certain vegetables such as, onion and garlic which narrows down the options.In general, we make the main course simple and light on the festival day as we would be gorging on extra portion of traditional sweets and savories on that day. Our ideal festival menu would be a rice bath variety,1-2 varieties of palya,sundal,kosambari(salad), plain dal, rasam, payasam,plain rice,traditional sweet like holige,boorelu etc which depends on the festival) and some snacks/savories(like bonda,bajji) varieties.
As we do not use onion during festivals,we make most of the dishes with coconut based masala.Today's recipe is one such example.It is quite simple to make and it takes hardly 15 mins to prepare if we have chopped beans at hand.These kind of stir fries doesn't need any spices and green chillies pound with coconut adds a nice taste to the curry.
Beans Palya | Beans Thoran Recipe:
(Serves 3-4)

Ingredients:
250gms French beans,finely chopped
1/3 cup grated fresh Coconut
3-4 Green chillies
2 whole Red chillies
1 tbsp Chana dal
1 tsp Urad dal
1/2 tsp Cumin seeds
1/2 tsp Mustard seeds
8-10 Curry leaves
juice of 1/2 lemon(optional)
a pinch of Asafoetida
salt to taste
2 tsp Oil
Method:
  • Steam chopped beans with few pinches of salt either in pressure cooker(without whistle) or steamer for 8-10 mins.You can even microwave them on HIGH for 4-5 mins.Strain them and keep aside.
  • Heat a spoon of oil in a pan/kadai and crackle mustard seeds and cumin seeds.
  • Add asafoetida,chana dal,urad dal,red chillies and curry leaves and fry for a minute.
  • Grind grated coconut with green chillies and salt to a coarse masala.It should not become a paste,it should be like just roughly coarse ground masala.
  • Add cooked and strained beans and stir fry for 2 mins.
  • Now add ground coconut-green chili masala and fry for another minute or two.
  • Switch off the flame and add lemon juice and give a stir.
Serve it with rice,dal/rasam/sambar and papad.
Variations:
  1. You can follow the same process for vegetables like carrots,beans-carrot,raw banana,cluster beans,yard long beans,cauliflower etc.
  2. You can skip the steaming part and can make with the vegetables like ladies finger,cabbage etc.You need to saute them well for 7-8 mins before adding ground coconut masala.

  3. You can add red chili powder instead of green chillies,it would slightly change in color.
  4. You can add 1 tbsp kurala podi along with the ground coconut masala to the stir fry,in that case reduce the amount of green chillies to 2 in the recipe.This gives a nice taste to curry.
  5. If you want you can add finely chopped onion to the pan and saute well and then proceed with adding beans and ground masala.

 
back to top