Showing posts with label Low Calorie Recipes. Show all posts

Tuesday, September 5, 2017

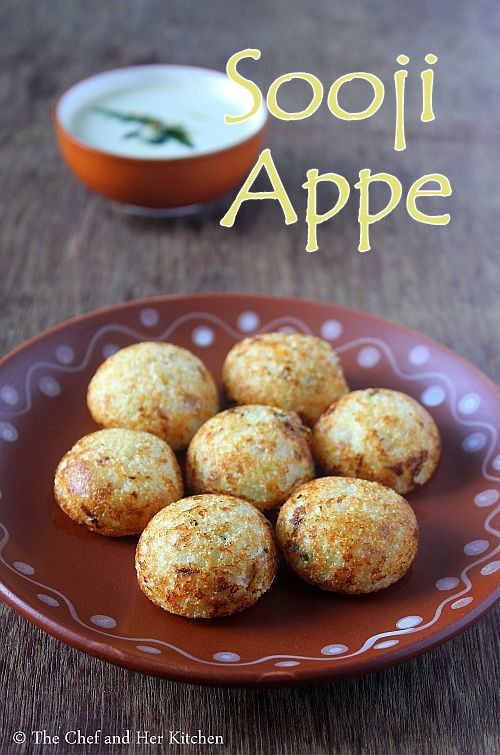
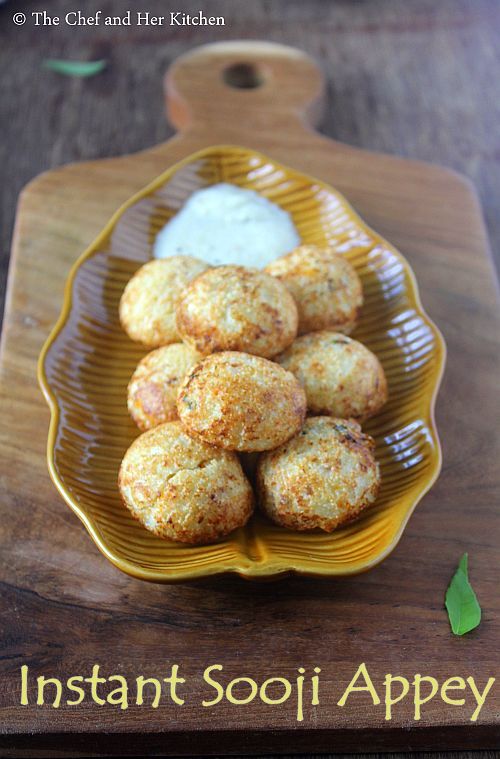
Instant Sooji Appe | Instant Rava Paniyaram Recipe | Rava Appe

sooji appe
Instant sooji appe recipe with step by step photos.It is always a difficult task for me to plan the breakfast as I decide what to prepare the stuff instantly most of the times rather than planning it in advance and only on weekends I plan my breakfast menu the previous night.My weekend breakfasts are elaborate where as on weekdays it would be a quick fix or easy breakfast options.Appey or Paddu or Paniyaram or Gunta Ponganalu or Gunta Punugulu is one of the favorite breakfasts for me.We usually make Gunta ponganalu with left over Idli/dosa batter or avalakki paddu or instant oats paniyaram or this instant sooji appey.
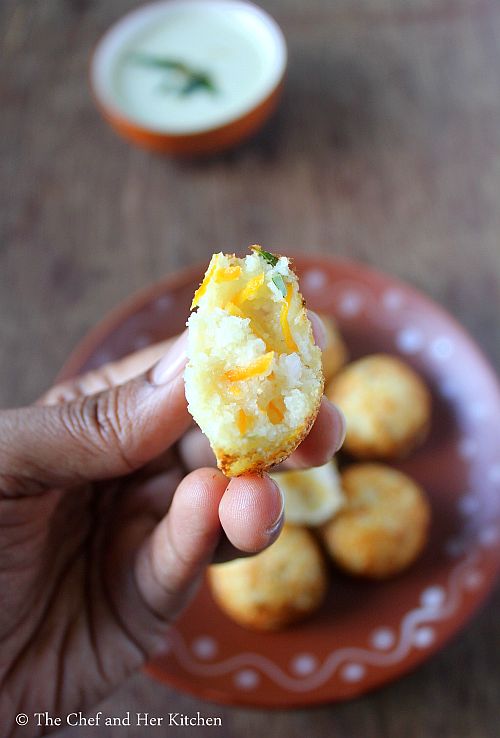
sooji appe
rava paniyaram
Sooji appey does not need any fermentation and can be prepared instantly with the easily available ingredients at home.This recipe is very similar to my oats paniyaram recipe just that I do not add oats to it.
Check out other appey recipes -  Gunta ponganalu with left over Idli/dosa batter, avalakki paddu ,instant oats paniyaram.
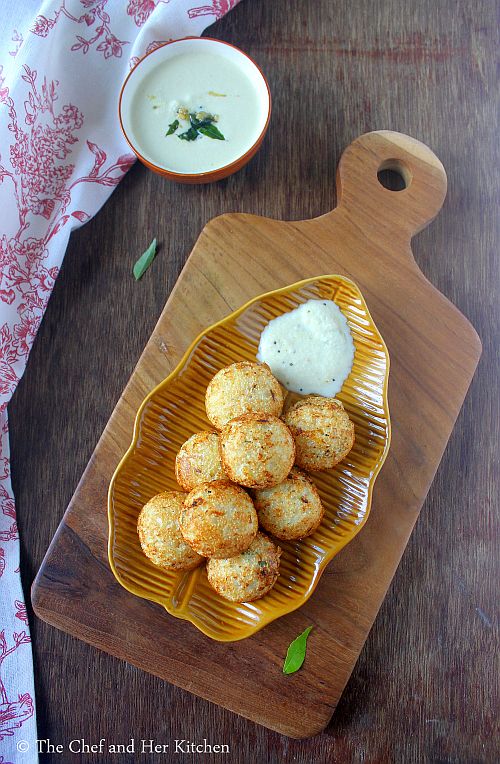
sooji appey
Here is how to make instant rava paniyaram with step by step photos:
Instant Rava Paniyaram | Sooji Appe | Rava Appey Recipe:

Serves 2
Prep time: 10 mins | Cooking time: 20 mins | Total time: 30 mins+ standing time
Cuisine: South Indian | Category: Breakfast/Tiffin

Ingredients:
1 cup Sooji/Rava
1/2 cup sour Curd
1 big Onion,finely chopped
1 Carrot,grated
1/4 cup grated fresh Coconut
3 tbsp chopped Coriander
2-3 tbsp chopped Curry leaves
1/2 tsp Cumin seeds
1 tsp Eno/Fruit salt
1/4 tsp Cooking Soda
Salt to taste

Method:
  • Dry roast sooji lightly and do not roast much.
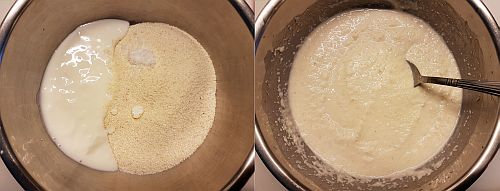
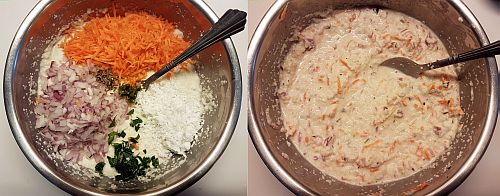
  • Beat curd well and add it to a big bowl add sooji and mix well.Add enough water to it to get the consistency of dosa batter.
  • Add salt and cooking soda to the mixed batter and leave it aside for 1 hr.You should leave it at least for 20 mins aside.
  • Add finely chopped onions, grated carrot,grated coconut,coriander, curry leaves along with green chilli paste,cumin seeds and mix well.
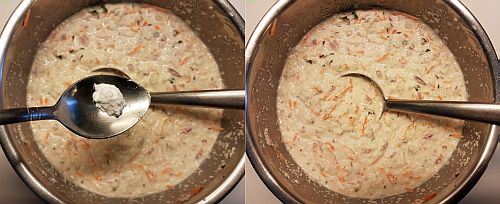
  • Check the consistency of batter,it might become thick as the sooji absorbs water when it is soaked.Add extra required water to it to get the dosa batter consistency.
  • Just before making paniyaram add eno to the batter and mix well.
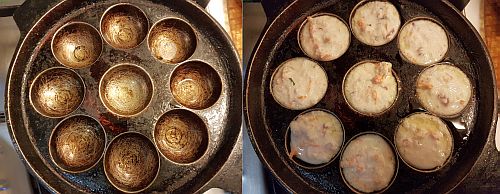
  • Heat the paniyaram/gunta panganalu pan/Aebliskever pan and add 1/2 tsp of oil in each impression.When it is piping hot keep the flame on LOW and pour the batter using a table spoon until it covers 3/4 th and pour some more oil over it and cover it with a lid.Let it roast on low-medium flame until golden brown in color.
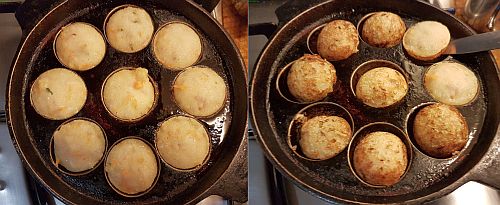
  • When you see the edges turning golden in color use a sharp knife and run it around the edges of  each paniyaram and turn them to the other side and roast until golden brown on both the sides.

Notes:
  1. You can add blanched corn to the batter and make paniyaram.
  2. Make sure that you use sour curd to make this.
  3. You can refrigerate the batter and use it on next day as well.Add eno to the batter before using it.
  4. If you do not have eno you can use only cooking soda in the recipe.
instant sooji appey

Monday, May 29, 2017

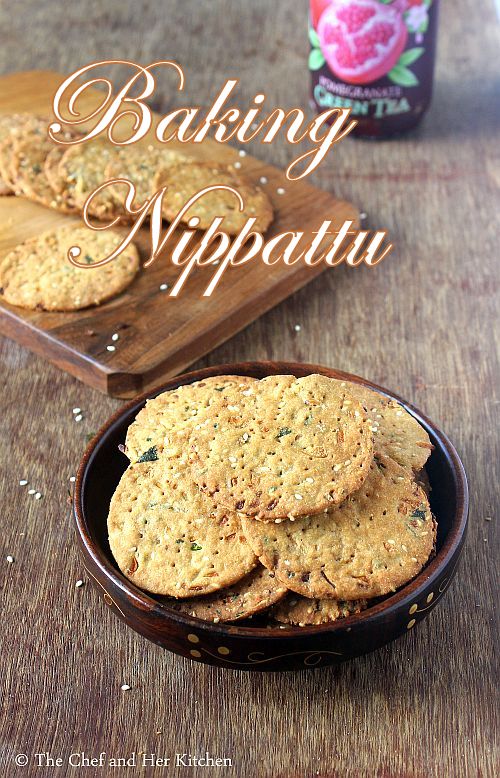
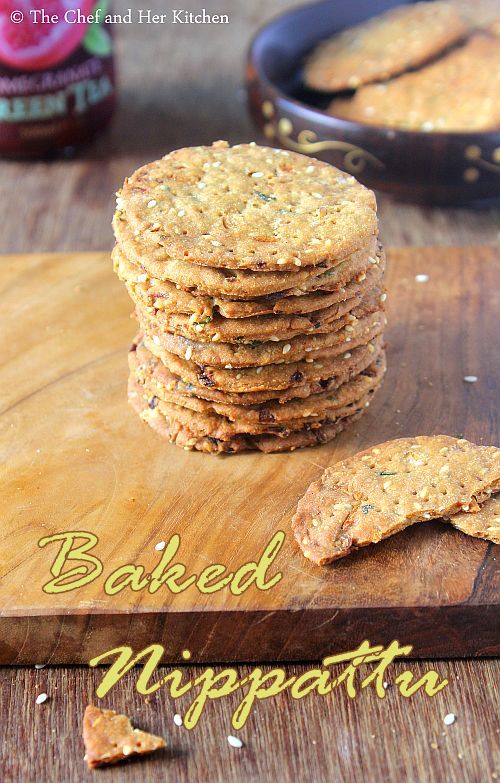
Baked Nippattu Recipe | Iyengar Bakery style Baking Nippattu

baking nippattu
Baked Nippattu recipe with step by step photos. If you have ever visited an Iyengar bakery in Bangalore you would have been familiar with these snacks - Benne Biscuit, Khara Biscuit,Kobbari Biscuit, Palya buns, Baked Nippattu,Honey cake,Plain cake,veg puffs,Khara buns, rusk,Vegetable toast, Khara bread etc to name a few and these are all my favorite goodies among all the available items in the bakery.When ever I visit Bengaluru it is must for me to eat these goodies and carry back few with me while coming back to my place.I usually get Khara buns, plain cake, Khara bread, rusk, mixed bicuits and baked nippattu along with me.Though the shelf life of Khara buns and Khara bread is less we enjoy it as our breakfast and dinner for two days and finish them off while the rest can be stored for a couple of weeks.
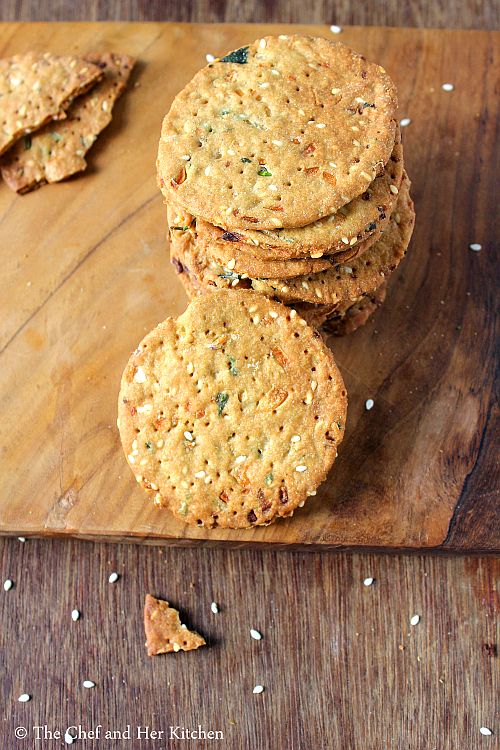
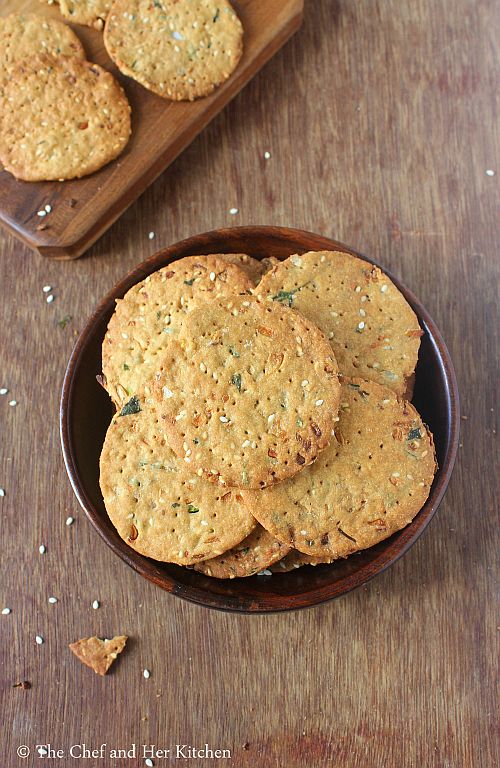
baked nippattu
Baked Nippattu is a baked version of the nippattu but the main ingredients used in the regular nippattu and baked nippattu are completely different.While the regular nippattu is made out of rice flour, baked nippattu is prepared using all purpose flour.Both the versions taste good on their own and I absolutely love both the versions. You can check out how to prepare traditional nippattu recipe here and today I am posting the Iyengar bakery style baked nippattu,which is also known as Baking nippattu.
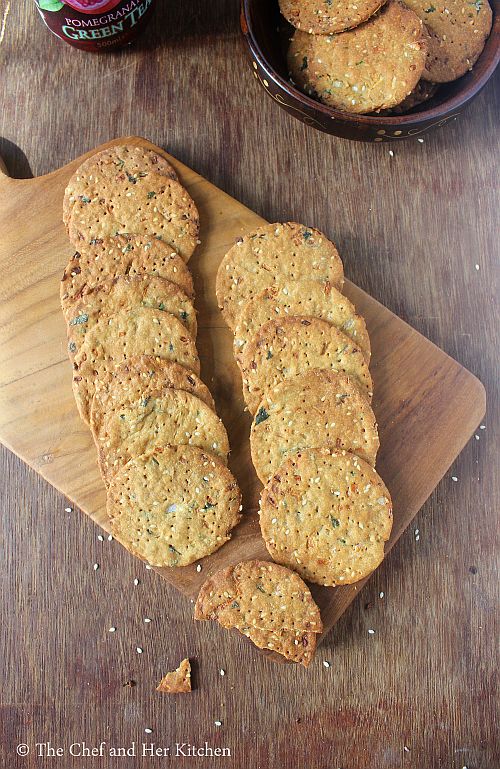
baked nippattu
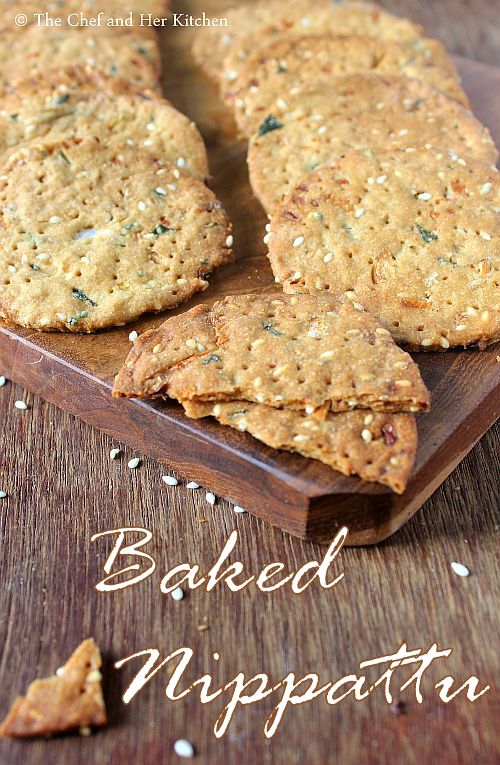
The recipe which I am posting today is adapted from Red chilies and it has been tried several times and I have replaced the flour with the wheat flour and have achieved good results.Though it tastes best with the regular flour the ones prepared with the wheat flour are no less in taste compared to the regular flour ones. The key taste factor in these baked nippattus is the onions which are baked to crisp and that gives a sweet hint of taste in every bite.Also, the more thin you roll the more it tastes better.Do try out this simple and delicious baking nippattu recipe and enjoy these homemade goodies with a cup of tea.
baked nippattu
Check out the other Iyengar bakery style snacks recipes in my blog: Khara Bread, Khara Buns, Coconut Biscuit, Vegetable toast.
baked nippattu
Here is how to prepare iyengar bakery style baked nippattu recipe with step by step photos.
Iyengar Bakery style Baked Nippattu Recipe:
Yields 25 crackers
Prep time: 30 mins | Baking time:20 mins | Total time: 50 mins+ resting time
Cuisine: Karnataka | Category: Snacks

Ingredients:
1 cup All purpose flour/Wheat flour
1/2 tsp Baking soda
1.5 tbsp Sesame seeds
1.5 tsp Sugar
3/4 tsp Salt
1 big Onion,finely chopped
2 Green chilies, finely chopped
2-3 tbsp finely chopped Coriander leaves
2 tbsp Butter,melted
3 tbsp Oil
2-3 tbsp Warm water

Method:
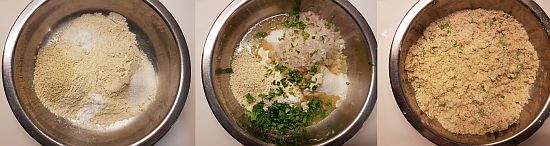
  • In a bowl add flour(or wheat flour) ,baking soda, sesame seeds,sugar and salt and mix nicely.
     
  • Add finely chopped onions, coriander leaves, green chilies, oil, melted butter to the flour mix and mix it nicely.
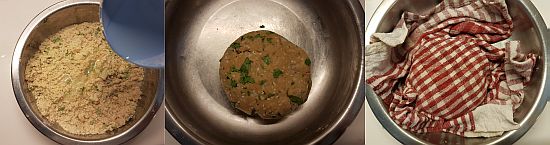
  • Now sprinkle warm water little by little and make it to a tight dough and knead it for a couple of minutes and cover it with a damp cloth and keep it aside for half an hour.
     
  • Preheat the oven at 180 deg C/350 deg F for 10-12 mins.
  • Knead the dough again for a minute and divide the dough into big lemon size balls.
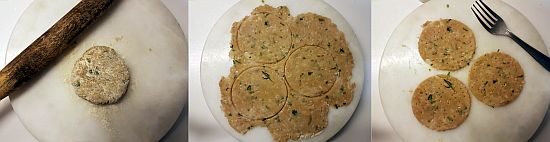
  • Take one ball and dip it in dry flour and roll like a thin chapati. If this does not work place the ball in between two plastic sheets and press it to a thin roti using a puri presser.
  • Use a 2.5" round cutter and cut the rolled roti into circular discs as shown in the picture.
  • Prick them with a fork at a couple of places to avoid them getting puffed up while baking.
     
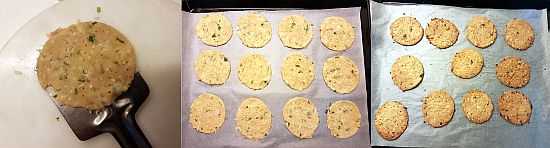
  • I used a flat spatula and lifted it carefully and place it on the parchment paper placed over a baking tray.
  • Now gather the scraps from the cut out circular discs and reroll to make the thin chapati and follow the same process with the left over dough too.Place the circular discs giving some space in between on the parchment paper.
     
  • Bake it in a preheated oven t 170 deg F for 15-18 mins until they are crisp. Keep an eye after 12 mins, do not bake it until dark brown as they get burnt and will not taste nice. 
  • I baked them in two batches and I got around 25 crackers.
  • Remove the tray and let the crackers down a bit on the parchment paper and then remove them and place on the wire rack and let them cool completely.
Store them in an air tight container and enjoy it with a cup of tea/coffee.

Notes:
  1. I have used both all purpose flour and wheat flour in the recipe and succeeded with the results.Hence I use wheat flour in the recipe instead of all purpose flour but I suggest to try with all purpose flour if you are attempting for the first time.
  2. Needless to say that Maida based ones taste better but the wheat flour one was equally good, you can take my words and try it.It was easier to roll the wheat flour one than the maida ones.
  3. I like the thin baked nippattus and hence I rolled the dough to a thin roti, if you like it thick you can keep it slightly thick. But the thinner ones turn out crispy and stay crisp even after a week when stored properly.
  4. Add little water and make it to a tight dough else you cannot roll it thin.
  5. Please do not compromise on the fat quantity used in the recipe, else it does not turn out nice.
  6. Cut the onions very finely else it will be difficult in rolling the dough.
  7. Do not forget to prick them nicely before baking.
baked nippattu

Monday, March 13, 2017

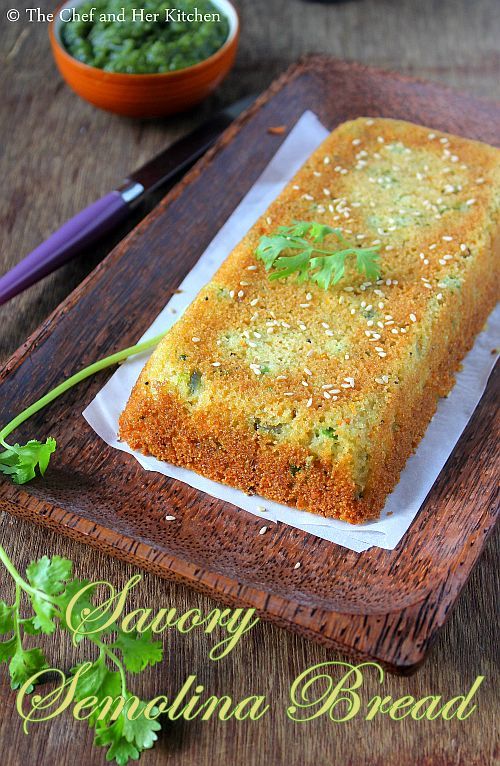
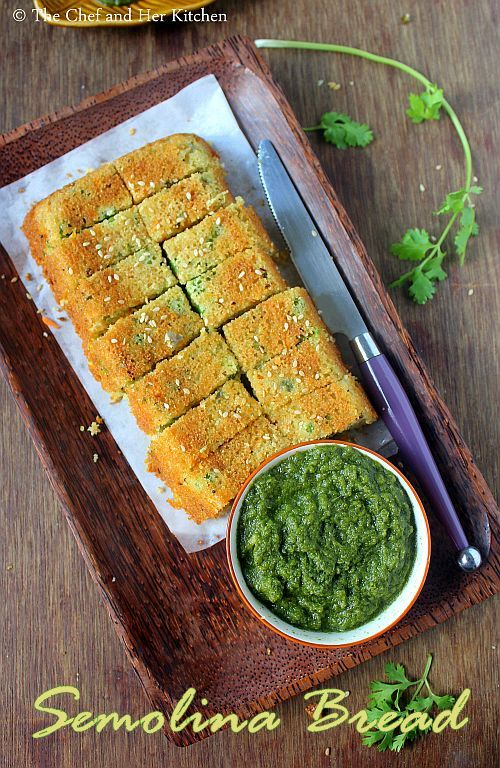
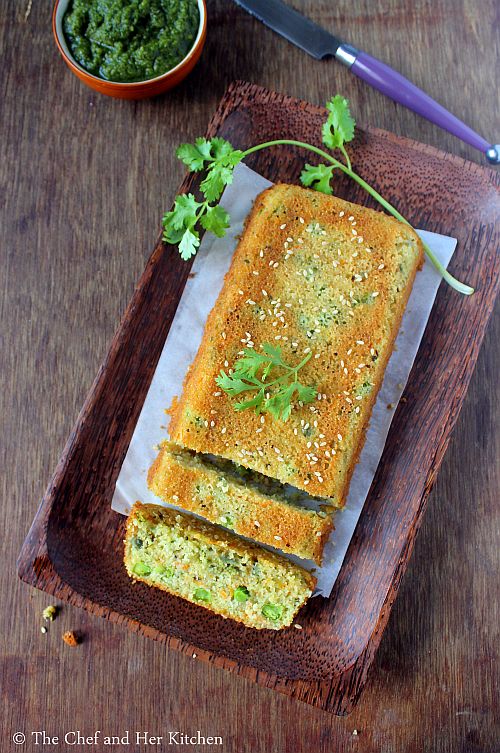
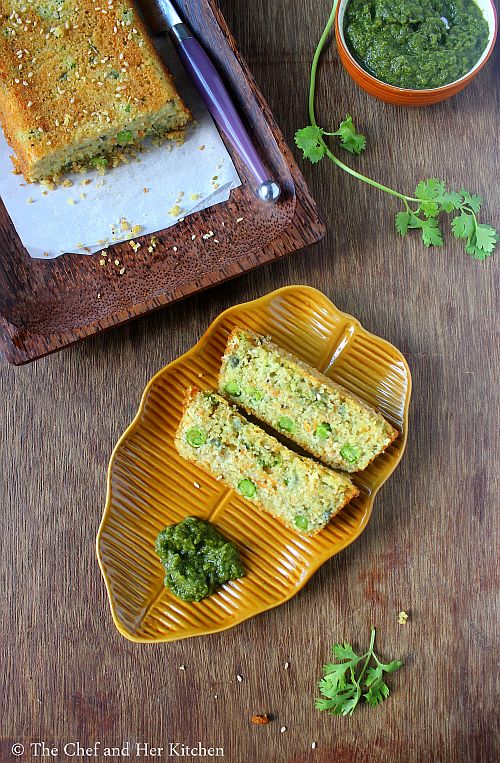
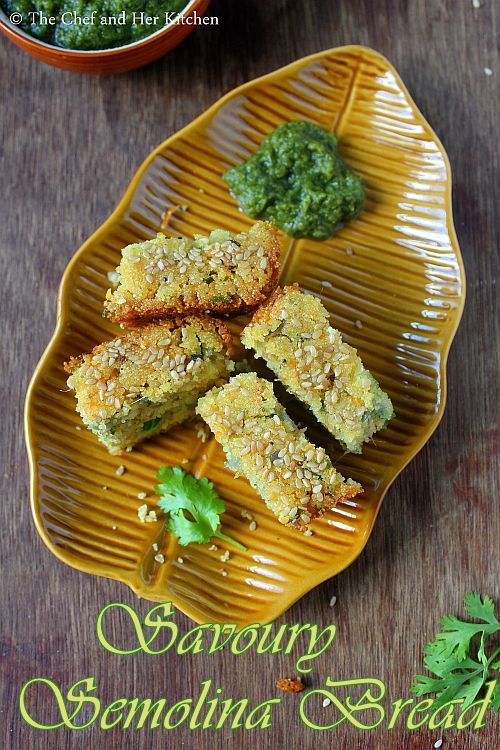
Savory Semolina Cake Recipe | Savoury Semolina Bread

savory semolina cake
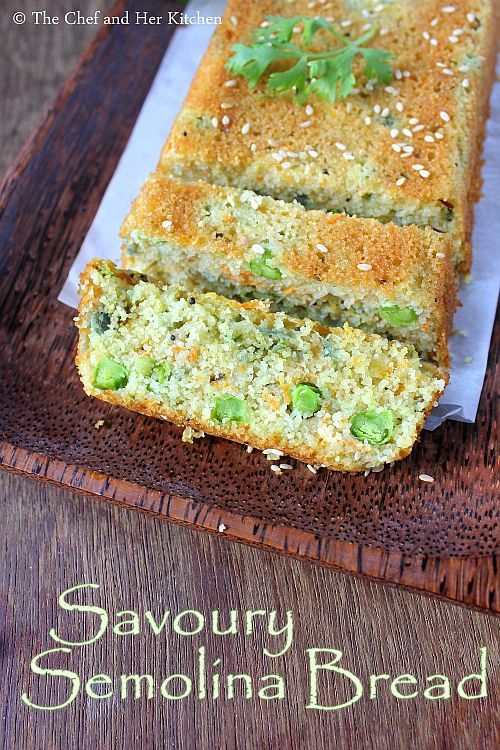
There were days where I was glued to tv to watch few of my favorite shows of Nigella Lawson, Anjum Anand and Master Chef Australia.I had watched most of the episodes of various series of  Nigella Lawsons and jotted down all the recipes and few of Anjum Anand's recipes.Among all the recipes of Anjum Anand this Savory Semolina Cake caught my attention then because it is a very quick snack to prepare and it is very similar to Rava Idli but in a baked form, I liked that idea.Also, I feel this simple snack looks very exotic when it is served on your dining table and is perfect for simple tea time or high tea snack. You can even bake them in individual muffin cups to serve for your tea parties.I had prepared this snack many number of times from the time I stumbled upon this recipe in her show.
semolina bread
savory semolina cake
The recipe needs very basic ingredients from your pantry and the preparation process is quite simple and the only time taking part is during baking. Try this simple savory cake recipe in case if you have not tried it still, I am sure you will like it.It can be served with Green Chutney as an evening snack or for breakfast.
savoury semolina cake
Check out other savory snacks using bread in my blog:
savoury semolina bread
Savory Semolina Cake | Savoury Semlina Bread Recipe:
Serves 3-4 | Source: Anjum Anand-Author
Prep time: 15 mins | Baking time: 30-35 mins | Total time: 45 mins
Cuisine: Modern Gujarati | Category: Snacks/Breakfast

Ingredients:
1 cup Rawa/Sooji
1 cup sour Curd
1/2 cup Water
1/3 cup grated Carrot
1/3 cup fresh/frozen Green Peas
1 small Onion, finely chopped
1/4 cup chopped Coriander leaves
3/4" Ginger, grated
2 Green chilies, crushed to paste
2 tsp Sesame seeds
1/2 tsp Turmeric powder
3/4 tsp Baking soda
1/2 tsp Mustard seeds
3/4 tsp Cumin seeds
2-3 tbsp Oil
Salt,to taste

Method:
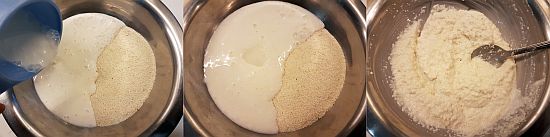
  • Mix sooji with curd and water and leave it for 5 mins for the sooji to absorb the water.
  • Preheat the oven at 180 deg C/350 deg F for 10 mins.
  • Line the loaf pan with a parchment and grease the edges with oil and keep it ready.
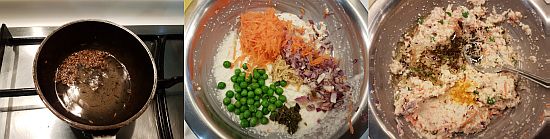
  • Add all the vegetables- grated carrots, green peas, chopped onions and coriander leaves, chili paste, grated ginger, turmeric powder and salt and mix nicely.
  • In a small tempering pan heat oil and crackle mustard seeds and cumin seeds and add this to the sooji mixture. The mixture should be of medium consistency like rava idli batter, if not add a couple of tablespoons of water to achieve that consistency.
  • Add baking soda and mix well and leave it for 3-5 mins.
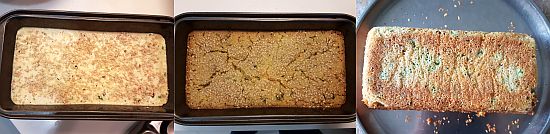
  • Pour the batter into the prepared tin and sprinkle sesame seeds on top of it and bake it for 35-40 mins until the tooth pick comes out clean.
  • Let it cool a bit in the pan and gently tap into an inverted plate and let it come to room temperature or until it is just warm.
Cut into slices and serve it warm with Green Chutney.

Notes:
  1. You can add vegetables of your choice - chopped french beans, corn and chopped palak to the batter.You can even use frozen vegetables for this.
  2. You can even add red chili powder to the batter but I did not add it.
  3. The batter can be prepared ahead and just before baking add the baking soda and bake it in oven.
  4. You can even use 1/2 tsp baking powder and 1/2 tsp baking soda for the recipe. 

Friday, October 7, 2016

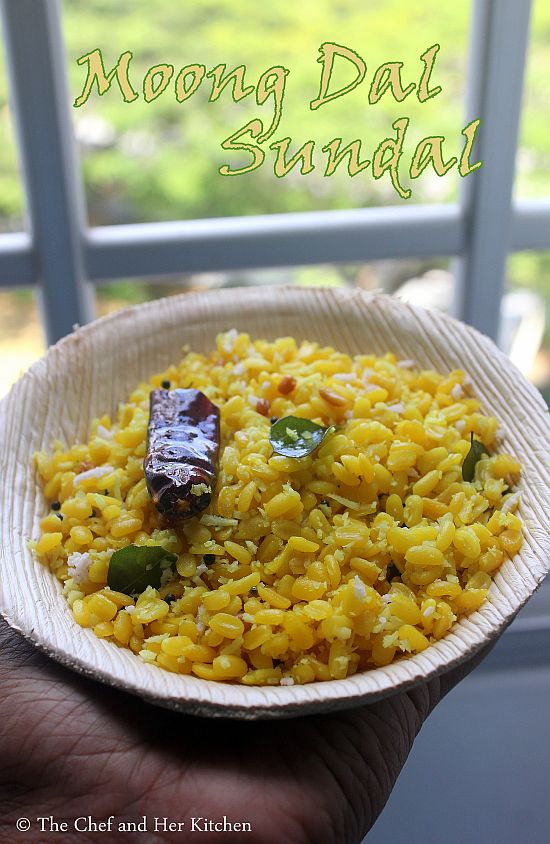
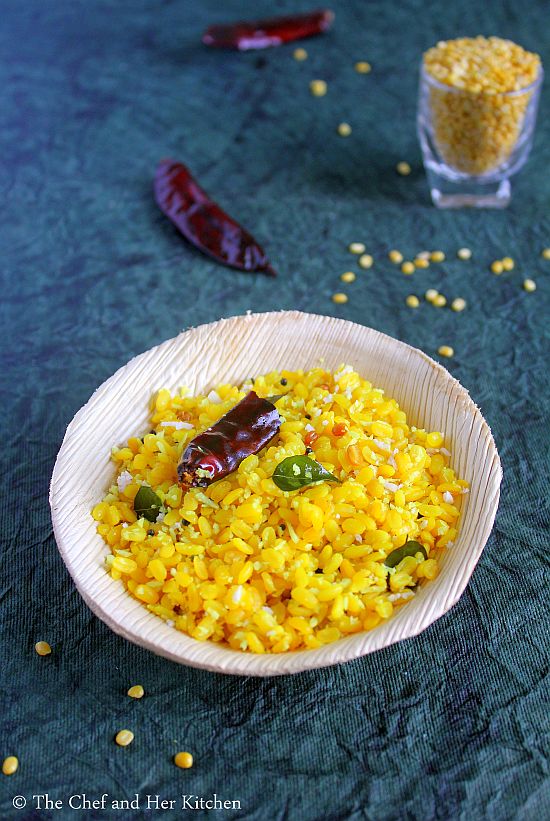
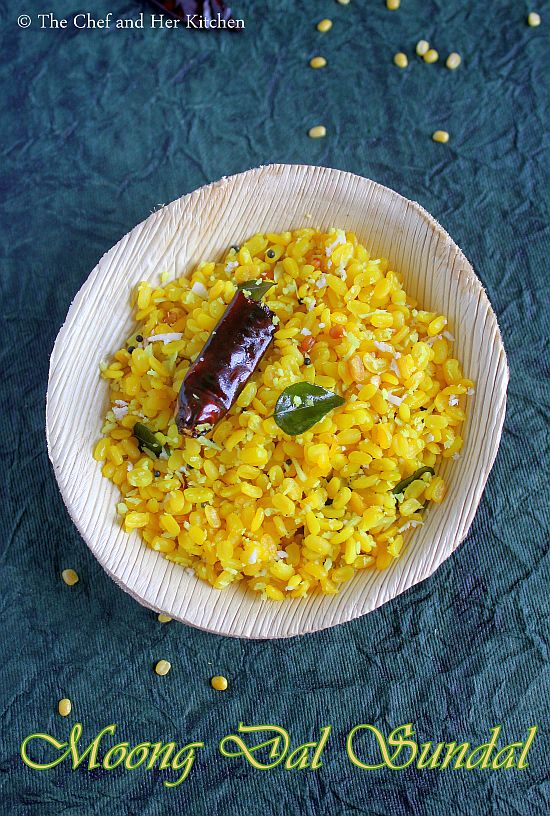
Moong dal Sundal Recipe | Pasi Paruppu Sundal | Easy Sundal Recipes

moong dal sundal
Navaratri has started and all are busy with the festival preparations. Sundal(Guggillu) is the most commonly prepared prashad for navaratri golu as it is very easy to prepare in large quantities. I had posted various sundal recipes in my blog and this year I had thought of preparing the sundal varieties which still could not make entry to my blog so that I can post them too here.Also,sundals are a very good low cal snacks option too for your evening snack.
The preparation process of most of the sundal varieties is very similar.While few varieties taste best when made simple with seasoning and coconut and few taste with an addition of ginger in the coconut paste and few varieties are made with sundal masala. Today's recipe - Moong dal Sundal falls in first category - it tastes best when made simple with seasoning and coconut. I would say that this is the most easiest sundal and takes very less time to prepare as moong dal cooks really fast.
Check out other sundal recipes in my blog:
For a complete list of Navaratri recipes, Check Here.
pasi paruppu sundal
Moong dal Sundal Recipe:
Serves 3-4 | Author: Prathibha
Prep time: 5 mins | Cooking time: 10 mins | Total time: 15 mins
Cuisine: South Indian | Category: Snacks

Ingredients:
1/2 cup Moong dal
3-4 tbsp grated fresh Coconut
a pinch of Turmeric
Salt to taste

to temper:
1 tsp Urad dal
1/2 tsp Mustard seeds
a sprig of Curry leaves
2-3 Red chillies, broken
a pinch of Asafoetida
1 tbsp Oil

Method:
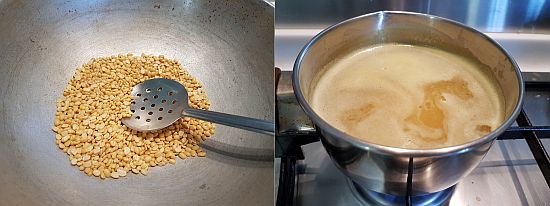
  • One can follow any of these methods to prepare moong dal.You can dry roast it a bit until it is warm and cook or you can soak in water for sometime and then cook.Both ways it work fine,do it as per your convenience.
  • Boil water in a vessel with some salt,turmeric powder and 1/2 tsp oil and once it comes to a boil add moong dal(roasted or soaked) and cook it for 4-5 mins.Keep stirring it in between so that they don't stick to the bottom of the vessel. Try to cook moong dal until it is just cooked  which means soft to bite but it should still hold its shape and not become mushy.Drain the moong dal into the colander.
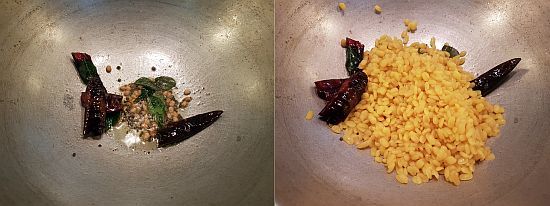
  • In a kadai heat oil and crackle mustard seeds and add urad dal, red chillies and curry leaves and fry until the dal turn slightly brown.
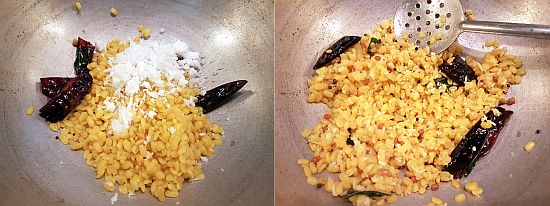
  • Add asafoetida and then add drained cooked moong dal and give a gentle stir and cook for 1 min.
  • Add salt and grated coconut and mix it gently and switch off the flame.Cover it with a lid and leave it undisturbed for 5 mins. This will help moong dal to fluff up nicely.
Serve it in bowls- warm or at room temperature.

Notes:
  1. One can follow any of these methods to prepare moong dal.You can dry roast it a bit until it is warm and cook or you can soak in water for an hour and then cook.Both ways it work fine,do it as per your convenience.
  2. As the dal gets cooked fast,make sure you do not over cook the moong dal. Even if it is bit under cooked it is fine, the steaming process at the end will let it cook completely.
  3. You can follow the same process of chana dal sundal by replacing moong dal with chana dal.
pesarapappu sundal

Wednesday, March 2, 2016

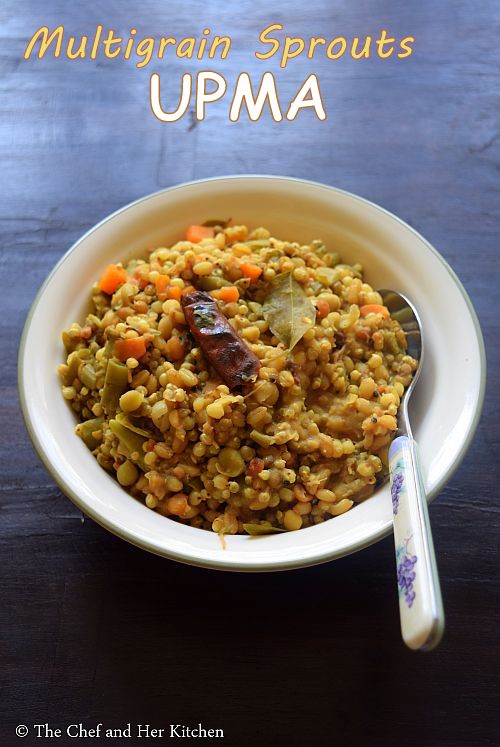
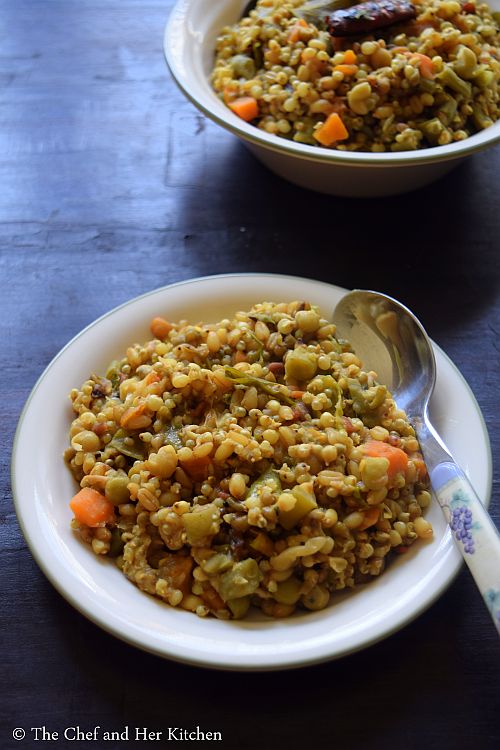
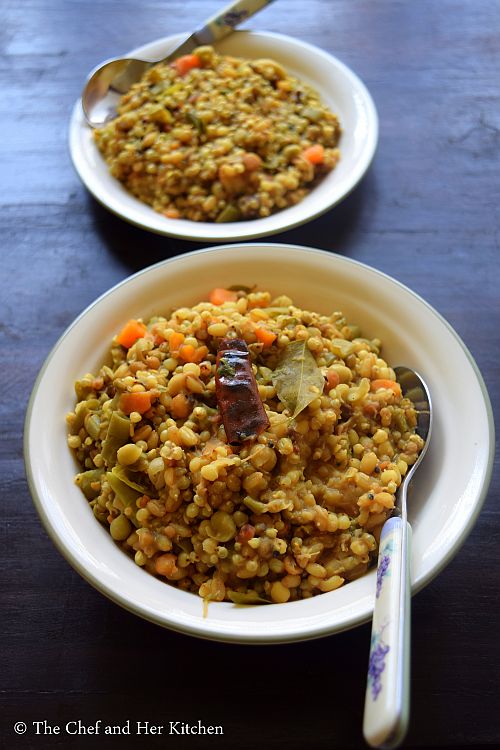
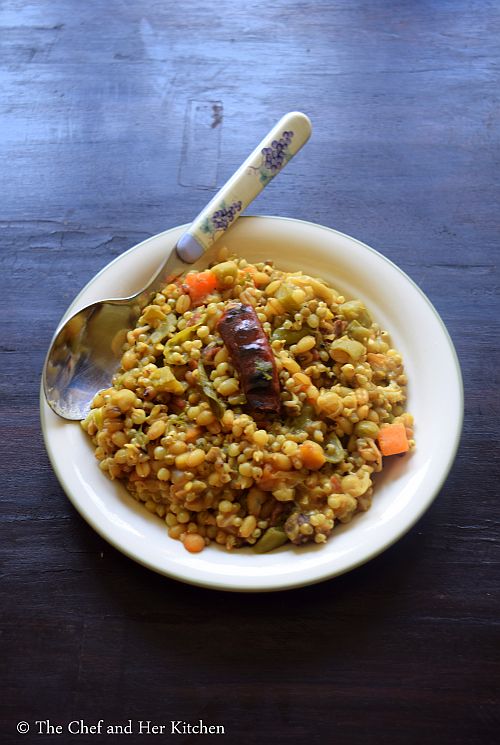
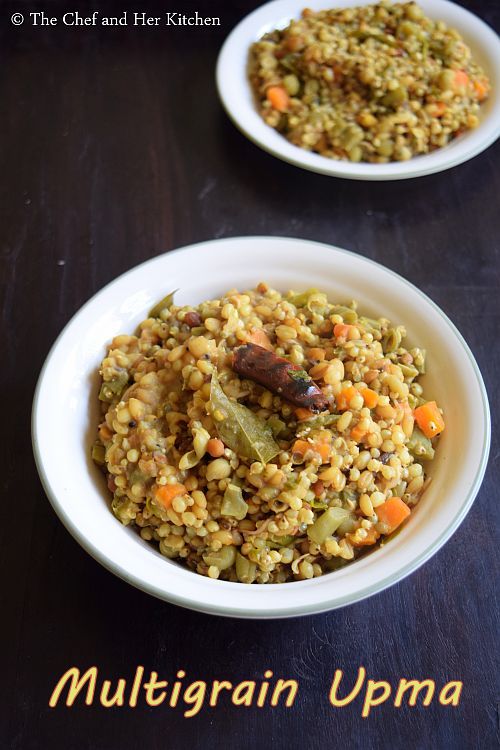
Multigrain Upma | Multigrain Sprouts Upma Recipe | Multigrain Recipes

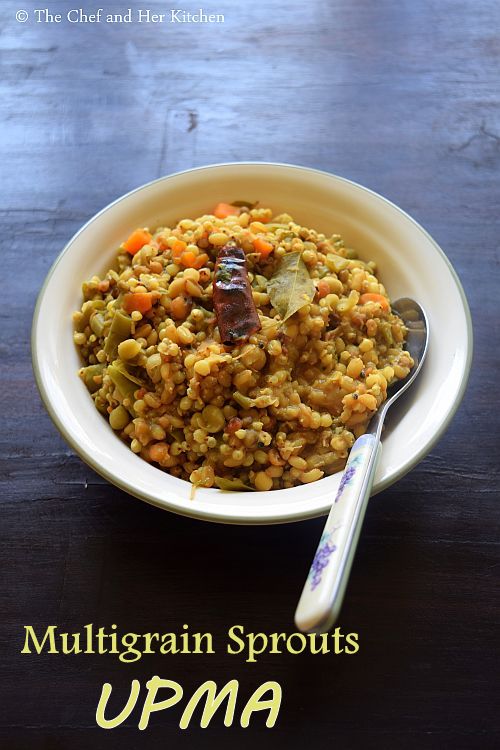
multigrain sprouts upma
I use various millet grains extensively in the form of flours to prepare various kinds of bhakris like Jowar, Bajra, Nachni and also I prefer to use multigrain atta for regular cooking.But my mom uses the whole grains in her cooking these days because of the health benefits of the usage of these grains in our regular diet. My mom tried this Multigrain Sprouts Upma recipe from a cookery show and she liked it instantly and hence,she had included in her breakfast menu and prepares quite often.She had been telling me to try this recipe for a very long time but some how I did not try it and instead asked her to prepare for me when I visit her.
multigrain sprouts upma
So this time when I visited her, even before I reminded her she got the sprouts ready to prepare this upma for me. I was actually bowled over with the taste of this upma as I did not expect it that it turns out so tasty. The bite of the whole multigrains and the sweetness from the mushy peas,whole moong and vegetables,the whole mixture is balanced with spicyness and sourness..I must say it was really a delicious upma over all. My mom actually calls it as Multigrain Khichdi but I am calling it as Upma as the texture is more like upma than the khichdi.I recommend to follow the usage of grains as mentioned for a delicious upma.The addition of green peas and moong is a must in the recipe.
multigrain sprouts upma
The only time consuming part is to get the grains sprouted, it usually takes 2 days for the grains to sprout up, but the rest of the preparation process is very simple.I have posted a Wheat-Jowar sprouts Salad recipe long back which again was my mom's recipe and I recommend you to try it if you are looking for healthy salad recipes.She had also prepared one more recipe with the multigrain which I would post sometime soon.
multigrain upma

Meanwhile check out few healthy sprouts recipes in my blog here:
Also Check out Multigrain Crackers recipe.

multigrain upma

Multigrain Sprouts Upma Recipe:

Serves 2-3
Prep time:10 mins | Cooking time: 30 mins | Total time: 40 mins+ 2 days for sprouting
Cuisine: South Indian | Category: Breakfast/Dinner

Ingredients
1/3 cup whole Wheat grains
1/3 cup Sorghum(Jowar) grains
1/3 cup Pearl Millet(Bajra) grains
1/3 cup whole Moong
1/4 cup Green peas,dried
1 large Onion, sliced
12-15 Garlic cloves
1 large Carrot, diced into small cubes
12-15 French beans, cut into small pieces
1 Potato, diced into small cubes(optional)
4-5 Green chillies, slit
1 Red chilli, broken
1/2 tsp Turmeric powder
a sprig of Curry leaves
2 tbsp Coriander leaves,chopped
juice of 1 lemon
1 tbsp Chana dal
2 tsp Urad dal
1/2 tsp Mustard seeds
2 tbsp Oil
Salt to taste

Method:
to prepare sprouts:
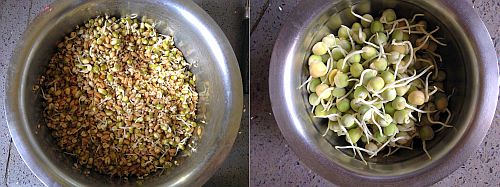
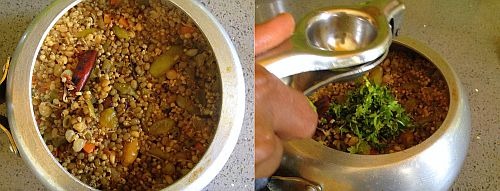
  • Soak the grains - (wheat,jowar and bajra) together for 8-10 hrs,drain the water,cover and keep in a dark place for a day or two until the sprouts are formed. Keep an eye after one day and refrigerate it when you get desired length of the sprouts.
  • Soak the pulses - whole moong and green peas separately for 8-10 hrs,drain the water,cover and keep them in a dark place for a day or two until the sprouts are formed. Keep an eye after one day and refrigerate it when you get desired length of the sprouts.
to prepare Upma:
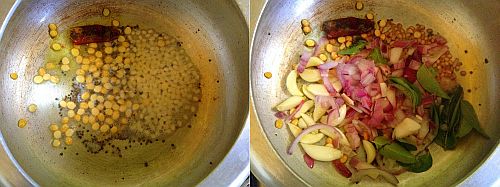
  • Heat oil in a pressure cooker and crackle mustard seeds.Add urad dal ,chana dal and red chilliesvand fry until they turn slight red in color.
  • Add sliced onions,garlic cloves ,green chillies and curry leaves and fry until the onions turn translucent.
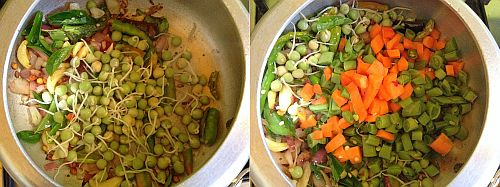
  • Now add the chopped vegetables- carrots,beans and potato and green peas fry for 2 mins.
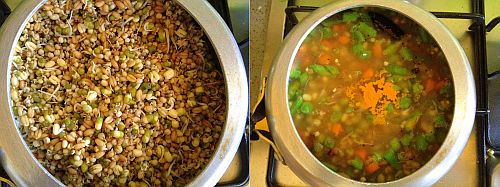
  • Add all the sprouts - wheat,jowar, bajra,whole moong and fry for 4-5 mins.
  • Add enough salt, turmeric powder and 2 cups water and pressure cook for 6-7 whistles and simmer it for 7-8 mins and switch off the flame.
  • Once the pressure drops add chopped coriander leaves and lemon juice and mix well.
Serve it hot.

Notes:
  1. I recommend to follow the usage of grains as mentioned for a delicious upma.The addition of green peas and moong is a must in the recipe.
  2. The amount of water mentioned in the recipe is enough to boil the sprouts.If you add more water it will turn to a khichdi.
  3. Once the sprouts with required length are formed, refrigerate them and do wash them before usage.
multigrain upma

Monday, February 8, 2016

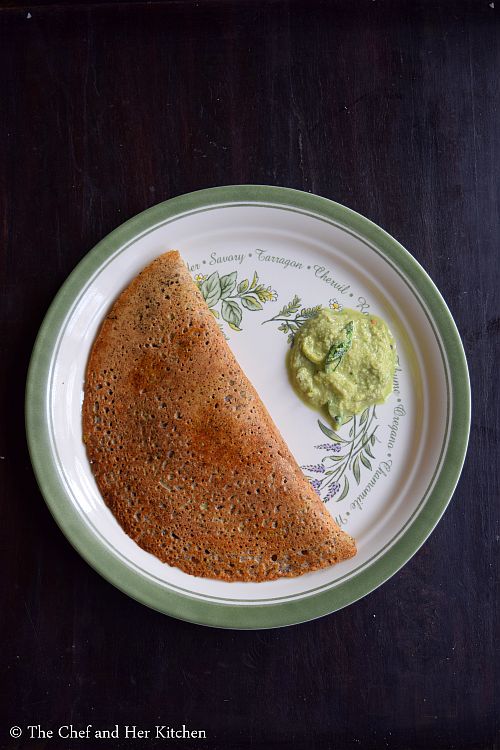
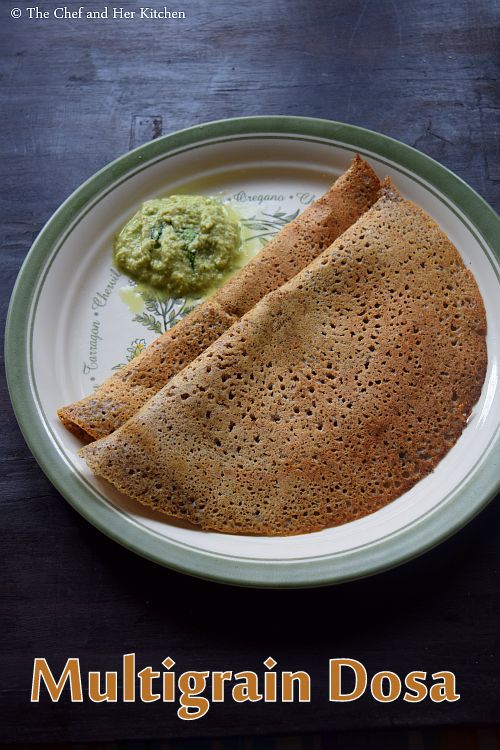
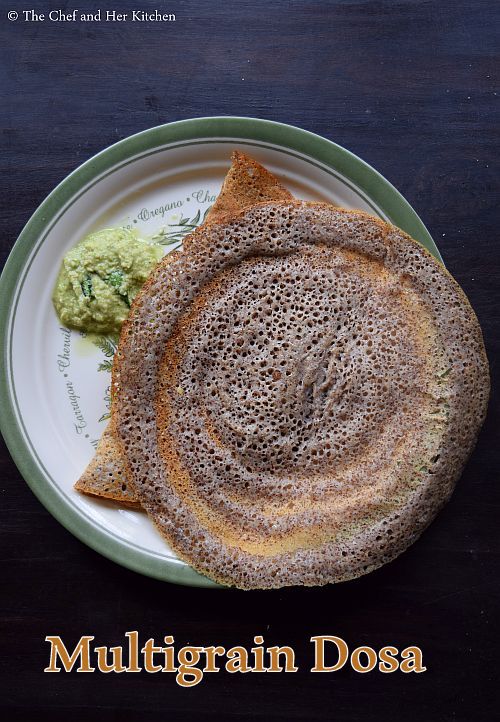
Multigrain Dosa Recipe | Multigrain Sprouts Dosa | Multigrain Recipes

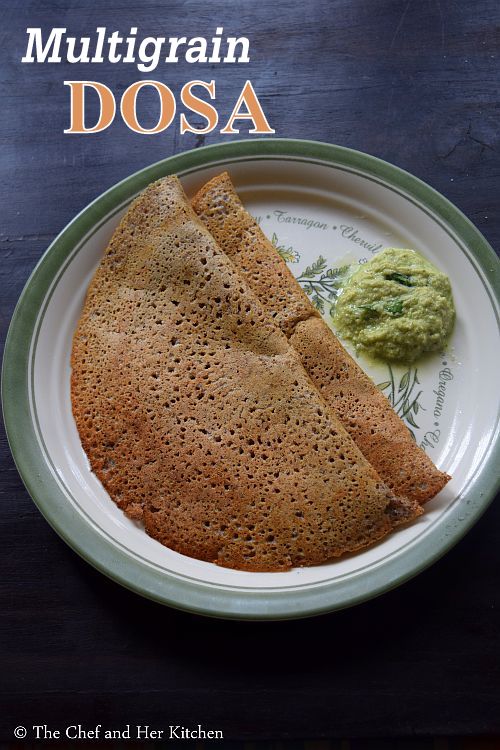
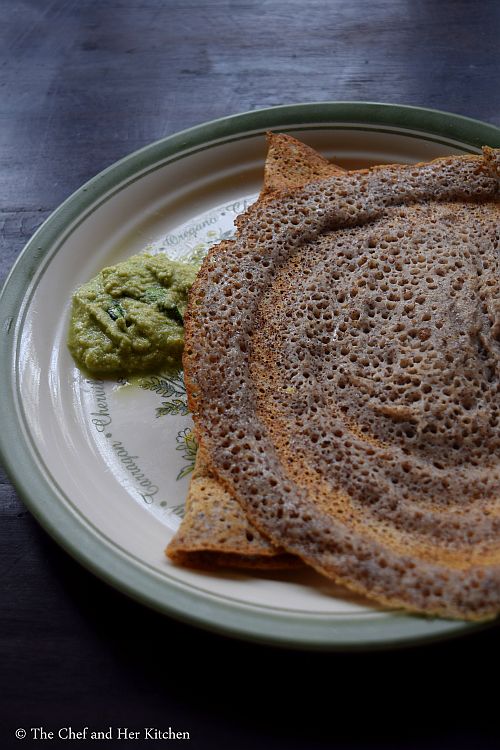
multigrain sprouts dosa
Millets have become a trend and the usage of millets in our daily cooking has been increased in the recent years.Now one can easily get ready made snacks, instant millet dosa flour, idli flour, dosa atta made out of millet flours in the shops.Even I use millets extensively in cooking and we usually consume more of millet bhakris instead of rotis for our dinner.I use millet flours rather than the whole millets, but my mom uses whole millets and includes them in her regular diet in various forms like salads, breakfast dishes like upma, dosa,idli and also in porridges. Check out another multigrain recipe - Multigrain Crackers in my blog.
multigrain dosa
Needless to say that this again is my mom's recipe where she used sprouted whole grains which adds more nutrition to the dosa.I am sure many of my readers know about my love for dosa, I have posted various varieties of dosa in my blog. If we prepare something which is our favorite as well as healthy then that dish is definitely a winner and this dosa recipe is definitely a winner for me.One can prepare this dosa using single millet like jowar, ragi or bajra but the usage of various millets in one recipe is good for me.This needs prior preparation as the grains need to be sprouted but the rest of the process- grinding,fermenting and preparing dosa is same as any other dosa.
multigrain sprouts dosa
Check out various healthy Dosa recipes in my blog:
For a complete range of Dosas, CLICK HERE.
multigrain dosa

Multigrain Dosa Recipe:
makes 15-16 dosas
Prep time: 30-40 mins | Cooking time: 5 mins/dosa |  Total time: 45 mins + soaking/sprouting time
Cuisine: South Indian | Category: Breakfast

Ingredients:
1 cup Sorghum(Jowar) grains
1 cup Pearl Millet(Bajra) grains
1 cup Finger Millet(Ragi/Nachni) grains
1 cup Whole white Urad
1 tsp Fenugreek(Methi) seeds
Salt to taste

Water,to grind
Oil, to roast dosas

Method:

to prepare Dosa batter:
  • Soak the grains - (ragi,jowar and bajra) together for 8-10 hrs,drain the water,cover and keep in a dark place for a day or two until the sprouts are formed. Keep an eye after one day and let it sprout until you get desired length of the sprouts.
  • Soak whole white urad and fenugreek seeds for 4-5 hrs.
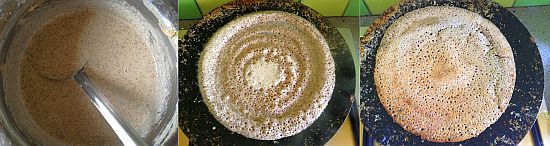
  • Wash the grain and dals properly and grind everything together to a smooth paste using enough water in the wet grinder for better results.The batter should neither be very thick like idli batter nor very thin.
  • Add enough salt to the ground batter just before removing the batter from grinder.Remove the batter into a larger container which gives enough room for the batter to rise.
  • Ferment the batter for 12-15 hrs at room temperature or keep it in oven in winters with light on for speeding up the process of fermentation.The fermented batter would be frothy and almost double in volume.
for making Dosa:
  • I am sure everyone knows how to make simple plain dosa,still I explain the process of making it for people who are not familiar with it.
  • If the dosa batter is taken out from refrigerator,take out the portion how much you need and let it come to the room temperature.
  • Mix the fermented dosa batter well.Check the consistency of dosa batter,it should be of pourable consistency,if needed add little water and mix well.
  • Pour a big ladle of batter onto a medium hot pan and spread it in the circular motion towards the outer edge to form a uniform round shaped dosa.Do not make this dosa either very thin nor very thick,if it is very thin your dosa will get hard once it is cold and if it is very thick it would become very chewy.
  • Pour 1 tbsp oil approx over it and cover it with a lid.
  • Let it roast on medium-high flame for 1-2 mins,remove the lid and increase the flame and roast for another 1 minute.Turn the dosa to the other side and fry for a minute and serve directly.
  • Reduce the flame for one minute and then start preparing the next dosa.Do not pour the batter on high flame,the batter will stick to the tawa.If you feel the tawa is over heated sprinkle some water over it before making next dosa.
Serve dosa with chutney of your choice like Coconut chutney / Peanut Chutney / Tomato-Onion Chutney and Sambar.

Notes:
  1. Do not close the box with air tight lid while fermenting.Cover with a loose plate and once the dosa batter is fermented cover the box with air tight lid which helps in keeping the batter fresh for long.
  2. Always scoop out the required amount of batter from the box and keep the remaining batter refrigerated,do not mix the batter vigorously while removing it from the box.
  3. You can use soaked grains instead of sprouted grains but the sprouted grains makes these dosas more healthy.
  4. Smear the pan with a half sliced onion every time you make dosa which gives a nice flavor to dosa.
multigrain dosa
 
back to top