Monday, February 27, 2017

Jini Dosa Recipe | Mumbai Street Style Jini Dosa Recipe

mumbai street style jini dosa
It's been a long time I have posted any dosa recipe in my blog. If you are a regular reader of my blog you would know about my love for dosas and many of my blogger friends used to call me a Dosa queen for the varieties of dosa I have posted in my blog.I love Dosa and especially the Mysore Masala Dosa is one among the top 5 breakfast dishes for me.
mumbai street style jini dosa
When it comes to fusion food I would say that Mumbai tops the list in that category as we get various varieties of snacks,chaats and the regular food in various variations and dosa is one example among them. I love the various varieties of dosas we get in mumbai though I am still very loyal to the authentic Dosas we get in Bangalore and in my opinion nothing can beat the taste of  Masala Dosa from Bangalore.
Talking about the Mumbai street style dosas, there are various varieties, the list of the dosas would go upto 100+ varieties like Schezwan Dosa, Noodle Dosa, Spring Dosa,Chinese Dosa, Jini Dosa, Mumbai style Mysore MasalaPav Bhaji Dosa, Cheese Dosa, Chili Mili Dosa to name a few.  I love the way they play with the ingredients by mashing them on the dosa and the way it is served really impressed me - it is really fun to watch the way they use the masher to mix the ingredients.My favourite Dosa varieties among the lot are Jini Dosa, Pav Bhaji DosaSchezwan Dosa and Mumbai style Mysore Masala and I have posted all my favorite recipes in my blog before.
mumbai street style jini dosa
Dosa lovers,check out various Dosa variations in my blog here -
If you are interested in other dosa recipes,check out more varieties here.
jini dosa recipe
Jini Dosa Recipe | Mumbai Street style Jini Dosa:
Serves 2 | Author: Prathibha
Prep time: 30 mins | Cooking time: 20 mins | Total time: 40 mins
Cuisine: South Indian | Category: Breakfast/Snacks

Ingredients:
2 cups Dosa Batter
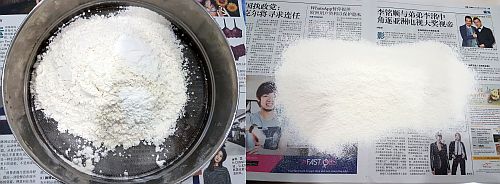
1.5 tbsp Besan(Chickpea flour),optional
3/4 cup Potato masala,optional
1 cup grated Processed Cheese,Amul or equivalent
7-8 Paneer cubes,grated
1/2 tsp Garam masala
1.5 tsp Red chili powder
2-3 tbsp Tomato -Chili Sauce
Salt, to taste
1/3 cup Butter

Vegetables:
1/2 cup shredded Cabbage
1/2 cup Onions,finely chopped
1/2 cup Tomatoes, finely chopped
1/4 cup Spring onions,finely chopped
1/2 cup grated Carrots
1/2 cup grated Beetroot
1/2 cup Capsicum,finely chopped

for Tomato-Garlic Chutney:
2 large Tomatoes
5-6 big Garlic pods
2-3 Red chilies
Salt, to taste

Method:
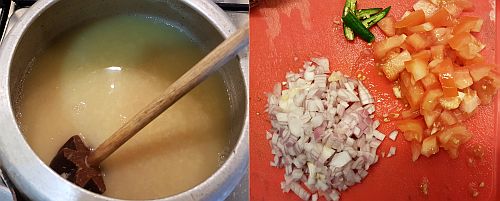
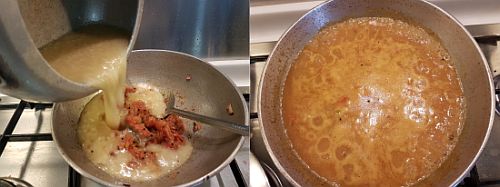
  • Grind tomatoes,garlic pods, red chilies and salt to a smooth chutney and keep it ready.
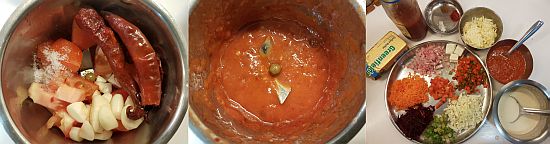
  • Chop and grate the vegetables as mentioned above and keep them ready.
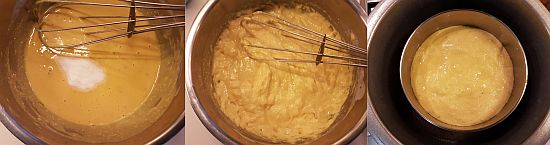
  • Add besan to the dosa batter and add a tbsp of water and mix it nicely until you see no lumps of  besan in the batter.
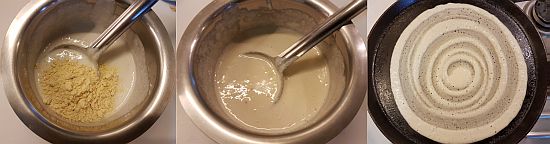
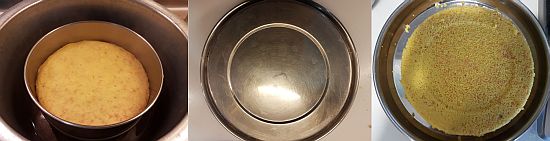
  • Heat the tawa and pour a big ladle of dosa batter and spread in a circular motion like how we do our usual dosa.It should be of 10-12" diameter.Keep the flame on Low-Medium.
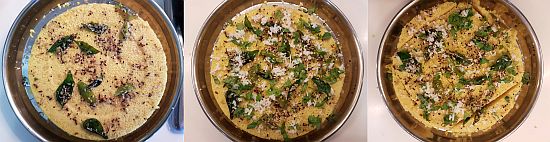
  • Now quickly add a tbsp of each chopped/grated vegetable -chopped onions,spring onions, capsicum, tomatoes, cabbage and grated carrots,beetroot in the center of the dosa.
  • Add quickly a tbsp of Potato masala(if adding), 1 tbsp of grated paneer, 2 tsp of Tomato-Garlic chutney, 1 tsp of Tomato-Chili sauce, 1/4 tsp Red chili powder, a pinch of Garam masala, Salt, 1-2 tbsp butter and 1 tbsp of  grated Cheese and quickly start mixing and mashing with a potato masher until it is nicely mashed. 
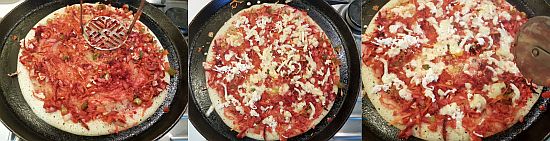
  • Spread the masala evenly over the dosa using a spatula and then add generous amount of grated cheese on the entire dosa.Always keep a watch on the flame and make sure that you are not burning the dosa at any stage.
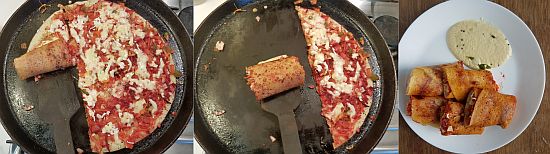
  • You can cut the dosa on the pan into four-five vertical stripes using a pizza cutter or sharp wooden/metal spatula as shown in the picture and roll each portion and put it on the serving plate. (OR)  you can roll the dosa first and cut into 4 pieces on the tawa or by transfering it on to the chopping board.
  • Sprinkle some water on the tawa and wipe it using a kitchen napkin and start repeating the process.
Serve the Jini dosa hot with Coconut Chutney and Sambar.Check out other side dishes for Idli/Dosa here

Notes:
  1. If you find it difficult to mash the masala on the dosa you can do it in a pan and add the masala to the dosa and spread it.For that hear butter and oil in a pan and add all the chopped and grated vegetables and fry them for 2-3 minutes and mash it slightly and then add red chili powder, garam masala,salt, tomato-garlic chutney, tomato-chili sauce to it and mix nicely. Keep the mixture ready.Now you can add 3-4 tbsp of cooked vegetable mixture, 1 tbsp of  potato masala, 1 tbsp of grated paneer , butter and cheese on the dosa and mix it nicely and spread on dosa, it is quick and easy to follow this process when making in large quantities.
  2. The addition of  besan to the dosa batter  is entirely optional but it gives a nice golden color to the dosa,hence I add it.
  3. I did not add potato masala to my recipe but still it tasted great.
  4. You can even add a tbsp of coconut chutney on the dosa along with the other ingredients and masala but I do not prefer to add.
  5. The amount of cheese and butter is entirely upto you. You can add less or more according to your taste buds.
  6. For Jain version, avoid potato curry in the recipe and add more paneer in the recipe and also replace onions with more amount of cabbage.Also, us tomato sauce(no onion-no garlic) instead of tomato-garlic chutney in the recipe.
  7. Do not skip adding tomato-garlic chutney in the recipe, it adds a nice flavor and taste to the dosa.
jini dosa

Friday, February 24, 2017

Bharwa Karela(with Besan) | Stuffed Bittergourd recipe | Punjabi style Bharwan Karela

bharwa karela
I have mentioned many times earlier in my posts that bitter gourd is a favorite vegetable to TH and it finds its place in our menu almost every week.He likes it in any form like fry, curry or stuffed version but I prefer mostly the stuffed version. I have already posted a south Indian version of stuffed bittergourd which tastes absolutely delicious with rice and also another stuffed bittergourd with onion masala(Kakarakaya Ullipaya Karam) and today I am posting a Punjabi style of Bharwa Karela with Besan. One can prepare the filling even with boiled and mashed aloo which also tastes good,I will post it some time later.These stuffed Bittergourds can be stored in refrigerator for upto 2 days.Also you can store the masala and use the same to stuff the big bajji mirch to prepare bharwa mirch the other day.
punjabi style bharwan karela
I somehow like the stuffed vegetable recipes and Bharwa mirch, Bharwa Bhindi, Bharwa Baingan, Bharwa Tendli and Bharwa Karela - all these dishes appear quite regularly at my place.Do not got by looks of this dish, take my words and try it and you agree that this is the best way to eat bitter gourd which is not even bitter.
stuffed bittergourd

bharwan kareley
Check out other stuffed vegetable recipes in my blog:
stuffed bittergourd
Bharwa Karela | Stuffed Bitter gourd Recipe:
Serves 3-4 | Author: Prathibha
Prep time: 15 mins | Cooking time: 30 mins | Total time: 45 mins
Cuisine: North Indian | Category: Side dish - Curry

Ingredients:
8-10 Small Bittergourds
1 cup Chickpea flour/Besan
1 Onion,finely chopped
2 tbsp chopped Coriander leaves
1 tbsp Coriander powder
2 tsp Red chili powder
2 tsp Amchur powder
1/2 tsp Turmeric powder
1/4 tsp Garam masala
Salt to taste
1 tsp Cumin seeds
3-4 tbsp Oil

Method:
  • Wash and peel the bitter gourds and make a slit vertically on one side keeping the edges intact and scoop out the flesh and seeds and give a nice massage with salt internally and externally and place them in a box and sprinkle a bit of wheat flour and leave it in refrigerator overnight or for at least 2-3 hours.
  • In a pan dry roast besan until it becomes aromatic and keep it aside.
  • In a kadai heat 1.5 tbsp of oil and crackle cumin seeds and add ginger garlic paste and fry for half a minute.
  • Add finely chopped onions and fry until they turn translucent.Add all the dry spices - red chili powder, coriander powder, garam masala, turmeric powder, amchur powder and salt and fry for another minute.
  • Add roasted besan to it and mix it nicely and let the mixture cool down a bit.
  • Add coriander leaves and mix well.
  • Drain the excess water from the bitter gourds and stuff them with the besan mixture nicely and tie each karela tightly with a thread so that the mixture gets sealed nicely.
  • Heat 2-3 tbsp of oil in a wide pan and place the stuffed karelas and fry them on low-medium flame until they turn brown on all the sides by turning them in between.
  • While serving remove the tied threads from the karelas.
Serve them hot with rice/roti/paratha.

Notes:
  1. As we remove the skin of the bitter gourd and massage it with salt and marinate it for long, the bitterness would almost go.But if you like you can keep the skin of the bitter gourd and also marinate for less time or avoid marinating it..
  2. You can vary the quantity of spices as per your taste.
  3. You can use the same masala to stuff the big bajji mirchi to prepare bharwa mirch.
stuffed bittergourd

Tuesday, February 21, 2017

Onion Tomato Gotsu with Moong dal | Tomato(Thakkali) Goshtu Recipe

onion tomato gotsu
Idli and Dosa is an everyday fare in most of the south Indian households.Though the most common side dishes that are often prepared for Idli and Dosa are Sambar and various chutney varieties like Coconut ChutneyTomato ChutneyPeanut Chutney etc but I often get confused to think of a side dish to pair with them other than the usual chutney-sambar options.
thakkali koshtu
I had tasted this Thakkali Gotsu for the first time at my aunt's place a few years ago,she had prepared this Tomato Gostu and poured it on the mini idlis and sprinkled a generous drizzle of ghee.She had served it as a starter as small individual portions,which I think was a good idea as this can be done in a jiffy and makes a great appetizer. Though the taste was very familiar to me as it is a simple moong dal but done in a slight different manner where the tomatoes play a major role in lending the flavor but I did not know the name of it then.I got to know the name only through the blogging world that it is called Tomato Koshtu or Thakkali Goshtu or Onion Tomato Gotsu. I quite liked the taste of the Gotsu and it should be made bit watery which helps those spongy Idlis to soak up the gravy nicely,I like it best with Idlis but one can serve it with even dosas.It is quicker to prepare when compared to the usual sambar and you can easily prepare it for larger crowd.
tomato goshtu
Check out other side dishes for Idli and Dosa:
onion tomato goshtu with moong dal
Onion Tomato Gotsu with Moong Dal | Tomato Koshtu Recipe:
Serves 2-3 | Author: Prathibha
Prep time: 5 mins | Cooking time: 25 mins | Total time: 30 mins
Cuisine: Tamilnadu | Category: Accompaniments/Side dish for Idli,Dosa

Ingredients:
2 large or 3 medium Tomatoes, chopped
1 medium Onion, finely chopped
1/3 cup Yellow Moong dal
2-3 Green chilies, slit
5-6 Curry leaves
1 tbsp chopped Coriander leaves, to garnish
3/4 tsp Red chili powder
1/2 tsp Turmeric powder
1/2 tsp Mustard seeds
Salt, to taste
1-2 tbsp Oil

Method:
  • Wash and pressure cook yellow moong dal for 3-4 whistles and mash it nicely.Cut the onions, tomatoes and green chilies and keep it ready.
  • In a kadai/pan heat oil and crackle mustard seeds.Add curry leaves and green chilies and fry until the chilies wilt.
  • Now add finely chopped onions and fry nicely until they turn translucent.Add chopped tomatoes and cook until they become mushy.
  • Add red chili powder, turmeric powder and salt and fry nicely for another 2-3 mins.
  • Now add cooked and mashed moong dal and add enough water to get your required consistency and let it come to a boil and cook for another 3-4 mins.
  • Garnish with coriander leaves.
Serve it hot with Idli/Dosa.

Notes:
  1. Use the regular naati tomatoes for best taste, not the hybrid ones.
  2. The consistency of this gotsu should be thin and hence add adequate water to it and get to the desired consistency.
  3. You can add a bit of sambar powder in the recipe,if you want. I like it simple like the way I mentioned.
tomato gotsu

Thursday, February 16, 2017

Dates Milkshake Recipe | Easy Milkshake Recipes for Kids

dates milkshake
Milkshakes have become more of a routine for me after my kiddo as it is a quick,healthy and filling snack option.Also, my kiddo is not fond of drinking milk and I find that the milkshake is a great way to include milk in his diet and keeps him full until his dinner. I usually prepare fruit milkshakes like Mango MilkshakeStrawberry MilkshakeAvocado MilkshakeBanana MilkshakeChikoo Milkshake and also Oreo Cookies Milkshake and Dates Milkshake quite often. I try to replace sugar with mostly dates in few shakes like Banana MilkshakeChikoo Milkshake but in the rest I use the regular sugar.Also, I use full cream milk for him and also add cream at times which is collected from the boiled milk to make it rich which acts as a perfect energy booster for him.
dates milkshake
I usually make a big batch of mixed dry fruit powder made out of roasted Almonds, Walnuts and Cashew nuts and I add it to all the milkshakes, kheers and halwas which I prepare for my kiddo. If you do not have dry fruit powder, you can skip it totally or you can even add a couple of almonds and cashew nuts while soaking the dates. I like to add dry fruits to the milkshakes and halwas as it adds nice taste, texture and also all the goodness from the nuts enhances it to the new level.As I prepare these milkshakes mostly for my kiddo, I avoid ice cream in them but one can add it as it adds the creaminess to the milkshake.Also as we are using more dates in the milkshake it does not need extra sweetener but one can add it according to their taste buds.
dates milkshake
Dates Milkshake Recipe:
Serves 2 | Author: Prathibha
Prep time: 3 mins | Cooking time: 2 mins | Total time: 5 mins
Cuisine: International | Category: Beverages

Ingredients:
500 ml full cream Milk, boiled and cooled
12-15 good quality soft pitted Dates
1-2 tbsp Sugar,optional
2 tbsp mixed Dry fruit powder
2 scoops of Vanilla Ice Cream, to serve(Optional)
Date Syrup, to drizzle(optional)

Method:

  • Warm 1/2 cup of milk and soak the soft pitted dates in milk for half an hour.
  • Blend the dates with the remaining milk along with dry fruit powder and a scoop of vanilla ice cream (if using) nicley using a hand blender or you can even do it in mixie.You can taste it and add sugar if required and blend it again.
Serve it with vanilla ice cream on top and drizzle with date syrup.

Notes:
  1. In case you do not have dry fruit powder you can skip it or you can soak few almonds and cashew nuts along with dates in the milk.
  2. The addition of ice cream is optional but gives a creamy texture to it. I do not use it for my kid and hence I did nod add it.
dates milkshake

Monday, February 13, 2017

Khaman Dhokla Recipe | Instant Dhokla | Besan Dhokla Recipe

dhokla
Dhokla is a popular Gujarati snack and is also called as Khaman Dhokla which is pretty well known all over India and is widely available every where.Dhoklas are nothing but fluffy savory steamed chickpea flour cakes which are eaten with green chutney and meeta chutney. Usually the dhoklas that are available in the market are extremely soft and fluffy,almost like a sponge but the homemade ones are slightly dense compared to the market ones but it is no less in taste otherwise.Dhoklas are almost oil free low calorie and also protein rich snack.
besan dhokla
Dhoklas can be prepared easily at home with the ingredients easily available in the pantry and I highly recommend to use eno instead of cooking soda to get fluffy dhoklas.Also the key secret for fluffy dhoklas is one has to put the prepared tin(with batter) quickly in the steamer as soon as the eno is mixed in the batter, the more you delay the more you loose the fluffiness of dhoklas.
khaman dhokla
There are various versions of Dhoklas like Moong dal Dhokla, Palak Dhokla, Khatta Dhokla, Rava Dhokla, Corn Dhokla, Sandwich Dhokla.You can check out Moong Dal Corn Dhokla which I have posted earlier where I have used moong dal and corn instead of besan.
besan dhokla
Check out few low fat Snacks recipes for Kids Tiffin box:
dhokla
Khaman Dhokla | Instant Dhokla Recipe:
Serves 3-4 | Author: Prathibha
Prep time: 10 mins | Cooking time: 20 mins | Total time: 30 mins
Cuisine: Gujarati | Category: Snacks/Breakfast

Ingredients:
1 cup Chickpea flour(Besan)
1 tsp Rava(Sooji)
1 cup thick Buttermilk or Water
1 tbsp Sugar
1 tsp grated ginger
1/2 tsp Green chili paste
1/4 tsp Citric acid or 1 tsp Lemon juice
Salt,to taste
1 tsp Oil
1 sachet Eno

for tadka:
1 tbsp Oil
1 tsp Mustard seeeds
a sprig of Curry leaves
2-3 Green chilies,slit
1 tbsp white Sesame seeds
1.5 tsp Sugar
Salt,to taste
1/2 cup water
1/2 tsp Lemon juice

to garnish:
2 tbsp chopped Coriander leaves
2-3 tbsp grated fresh Coconut

Method:
  • In a bowl mix chickpea flour,salt,sugar and add buttermilk(or water) and mix it nicely using a whisk without any lumps.
  • Now add rava,grated ginger, green chili paste, lemon juice, oil and mix it nicely again.
  • Keep the steamer ready and grease a flat bottomed round vessel(with edges) with oil and keep it ready. Switch on the steamer or cooker(without whistle) with water of 1 inch level and let it get hot.
  • Now add eno to the chickpea mixture and whisk it nicely, you will see a nicely foamed up batter now. QUICKLY pour it into the prepared vessel and put it in steamer/cooker and let it steam for 15 mins on HIGH flame.You can even steam this mixture in a greased microwave safe bowl in the microwave for 8-10 mins depending on the powder of the microwave.
  • Check the doneness of dhokla by inserting a tooth pick in the dhokla , if it comes clean then it is ready else cook for bit long.Switch it off and let it cool.
  • Now gently run a knife around the edges of dhokla and turn it on to a plate(with edges).Gently tap on the vessel so that the steamed dhokla cake can slip out of the vessel easily.
  • Meanwhile prepare the tempering.Heat oil in a small tadka pan and crackle mustard seeds and then add green chilies,curry leaves and sesame seeds and fry until the chilies wilt and then add water.
  • Add salt and sugar to the water and once it comes to a boil add lemon juice and remove it from flame.
  • Now pour the tempering along with water all over the dhokla uniformly using a spoon.
  • Add grated coconut and coriander leaves generously and cut it into 1.5 inch squares like shown in the picture by cutting the edges.
  • Let them sit for half an hour for the pieces to absorb the water and become fluffy.
Serve them with Green chutney and Meeta Chutney.

Notes:
  1. Besan itself gives a lovely yellow color to the dhokla and hence it is not necessary to add the turmeric powder to it.Sometimes the turmeric powder and eno reacts together and gives few red spots in the dhokla, so better to avoid it.
  2. If you are using butter milk you can reduce the lemon juice added to the mixture.
  3. Instead of eno use 1/4 tsp good quality cooking soda to it and prepare.
  4. You can even microwave the mixture in microwave which is a quick process.
  5. I add a pinch of hing to any of the besan based dishes to avoid gas and hence I add it in the batter.
khaman dhokla

Wednesday, February 8, 2017

Eggless Banana Bread Recipe | Eggless Banana Walnut Bread

eggless banana bread
Whenever I buy bananas I always end up having few bananas which are over ripen by the time we consume and I never feel bad as I always look up for it so that I can prepare various varieties like Pancakes, Banana Bread ,banana buns, muffins with them. I always had great results using bananas to create nice eggless whole wheat banana pancakes, eggless whole wheat banana muffins which are absolutely delicious and a bit guilt free.
eggless banana bread
I had already posted a Banana Bread recipe with Eggs and also Choco Banana Bread but somehow never posted the eggless version of Banana Bread, better late than never I am posting today a quick and easy eggless banana bread recipe.This recipe yielded a nice moist and beautiful loaf of banana bread which holds it shape nicely when sliced.The addition of brown sugar added a nice color to the bread and as I used dark brown sugar the color was but dark than the usual banana bread.
eggless banana bread
I always add walnuts to my banana bread or banana muffins as the combination of banana and walnuts is something I really love as they add a nice bite to the bread,hence do not skip them unless you do not like those nuts. I had made this bread for a small tea party at my place and needless to say that it was a hit.I love to eat banana bread just like that but one can toast it a bit and apply peanut butter or nutella or butter and have it like regular bread for breakfast.
eggless banana bread
Check out other eggless bakes recipes in my blog:
eggless banana bread
Eggless Banana Walnut Bread Recipe:
Yields: 1 loaf | Source: here
Prep time: 10 mins | Baking time: 40-45 mins | Total time: 1 hr
Cuisine: International | Category: Baking

Ingredients:
1.5 cups All purpose flour
4 large ripen Bananas
1/2 cup unsalted Butter,melted
1/2 cup Walnuts, roughly chopped
3/4 cup Brown sugar(you can make it to 1 cup if you like it sweet)
1/2 cup Milk or Buttermilk
1 tsp Baking Soda
1 tsp Vanilla Essence
a pinch of Salt

Method:
  • Preheat the oven to 350 def F or 180 deg C for 10-12 mins.
  • Line a 9"*5" pan with a parchment paper and grease the sides of the pan with butter and keep it ready.
  • Sieve flour with baking soda and salt nicely a couple of times and keep it ready.
  • Melt the butter and let it cool.
  • Peel,chop and mash the ripen bananas with the brown sugar until it is smooth.
  • Add melted butter,vanilla essence and milk(or buttermilk) and mix it nicely with a whisk until it is uniformly combined.
  • Now add flour mixture and gently fold until just combined and you see no streaks of flour remaining in the batter.
  • Sprinkle a tsp of flour on the chopped walnuts and toss them a bit so that the flour covers all the walnut pieces.
  • Add chopped walnuts to the prepared batter and mix it gently and pour it into the prepared pan and tap it gently to remove the air bubbles. I have sprinkled few sunflower seeds on top , but you can sprinkle even chopped walnuts on top as well.
  • Place the pan in the preheated oven and bake at 180 deg C(350 deg F) for 40-45 mins until done.
  • Check it for doneness by inserting a toothpick, if it comes out clean it is done else bake it for bit long until it pass the toothpick test.
  • Remove the pan from the oven and let the pan cool a bit and then run a knife at the edges and invert the pan and gently tap the pan to remove the banana bread from the pan and let it cool on the wire rack completely.
Slice and serve it as breakfast or a snack or dessert. You can keep it for 2 days under room temperature and upto 3-4 days when refrigerated.

Notes:
  1. The color of banana bread depends on the quality of brown sugar used in the recipe.I use dark brown sugar and hence the banana bread was very dark in color.
  2. You can increase the sugar upto 1 cup if you like it bit sweet.
  3. One can toast the banana bread a bit with butter and can apply peanut butter or nutella or just serve as it is, it tastes yumm.
  4. I have replaced melted butter with oil and still got good results.
  5. Use large ripen bananas for the recipe for the best taste.
eggless banana bread
Technorati Tags:  ,
 
back to top