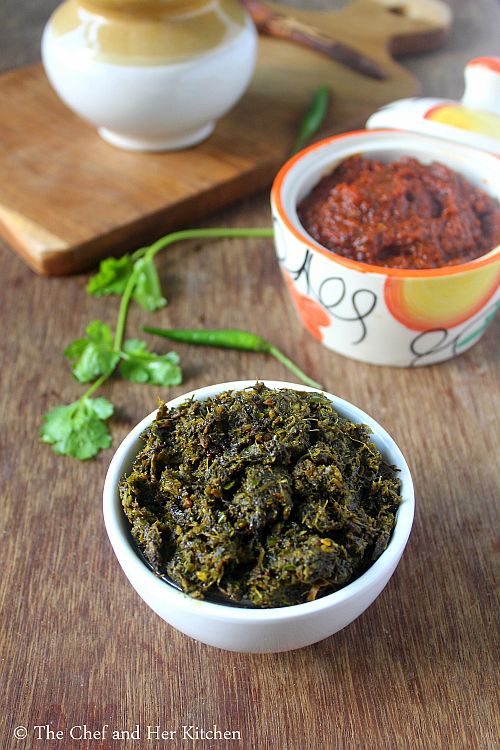
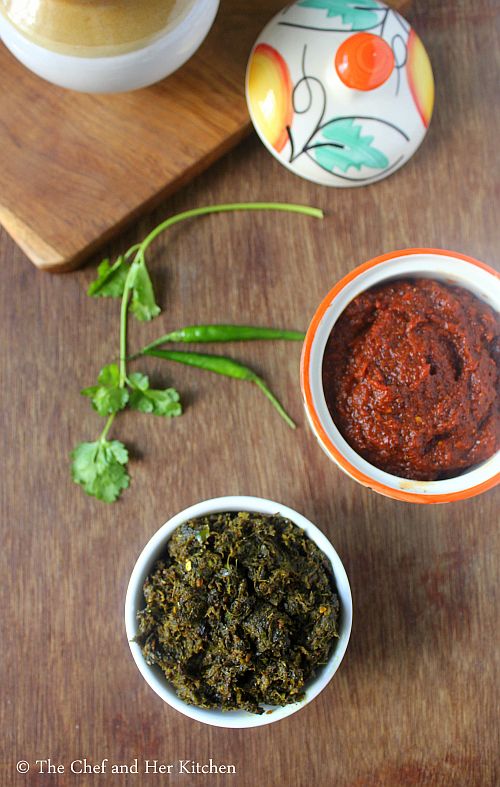
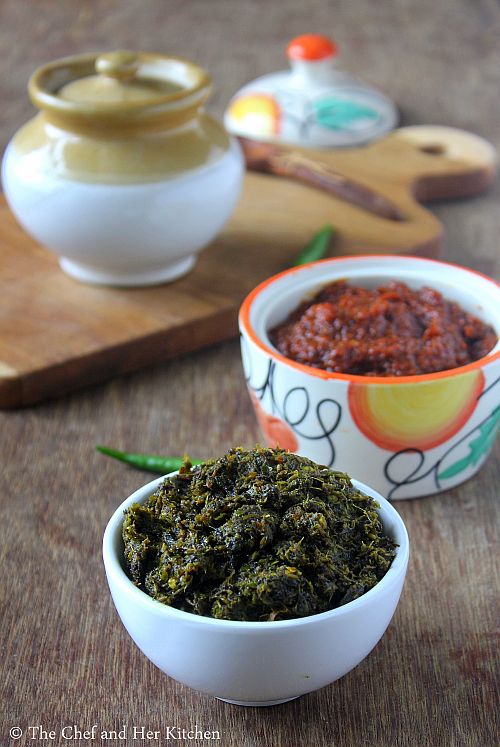
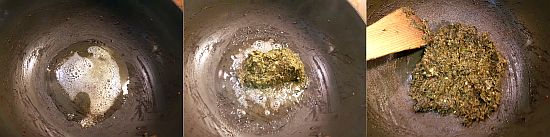
Showing posts with label South Indian. Show all posts

Monday, February 19, 2018

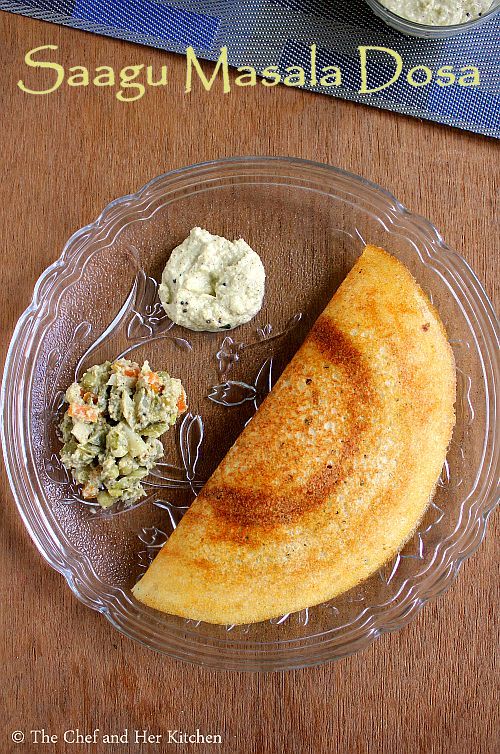
Sagu Masala Dosa Recipe

sagu masala dosa
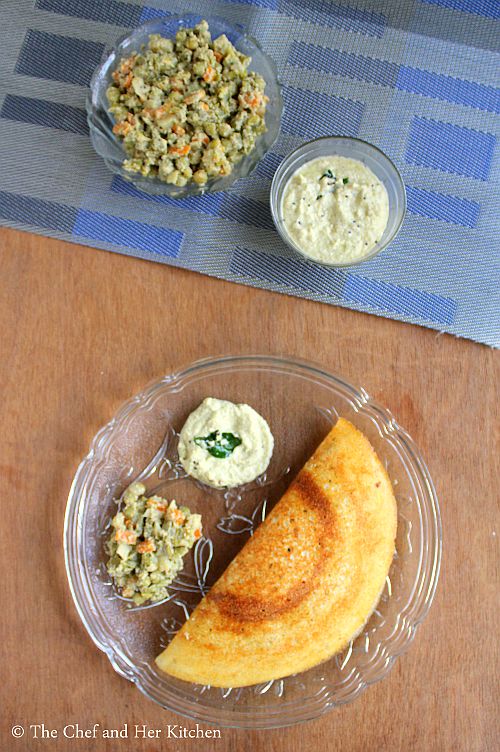
Sagu Masala dosa recipe with step by step photos.Sagu is a typical karnataka style mixed vegetable curry made out of coconut paste with few spices which makes it unique in taste.Usually Sagu is eaten with set dosa or poori and you can even pair it with simple pulav or can be eaten with chapati/roti too.
sagu masala dosa
I love to eat masala dosa any day and I try to cover many of my favorite dosa joints during my trip to Bangalore.You get the best masala dosa in Bangalore and I have mentioned in many of my earlier posts how the masala dosa available in bangalore is different from the other parts of the country.There is another version of masala dosa called Sagu masala dosa which is available only in few hotels.If I see Sagu masala dosa in the menu that would be my obvious choice than the masala dosa as I love the sagu masala dosa very much.A generous serving of thick sagu is smeared inside the dosa instead of the regular potato masala which makes it quite unique in taste.
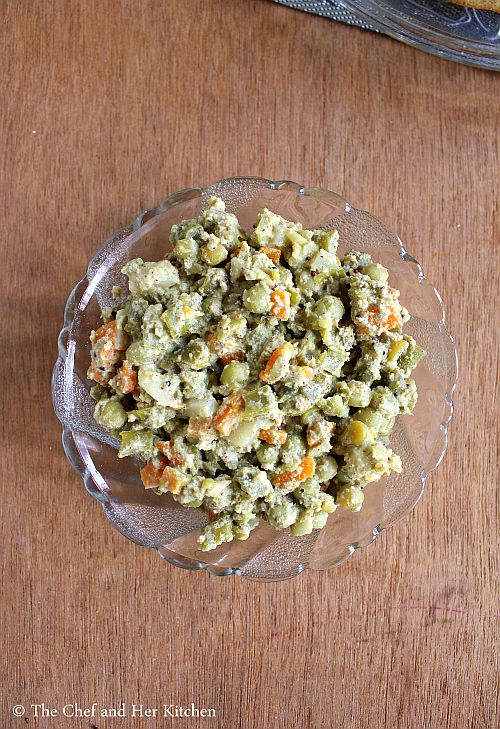
vegetable sagu
We are lucky to have MTR in Singapore to satisfy a good masala dosa craving for a Bangalorean.Most of my trips to MTR would be having this sagu masala dosa as a constant order apart from Set dosa,Bisebele bath etc.I have not clicked step wise pics for this post but will update the space when I do next.
Check out other stuffed dosa varieties in my blog:
sagu masala dosa
Here is how to make sagu masala dosa with step by step photos:
Sagu Masala Dosa Recipe:
Serves 3-4 | Author: Prathibha
Prep time: 20 mins | Cooking time: 20 mins | Total time: 40 mins + fermentation time
Cuisine: Karnataka | Category: Breakfast

Ingredients:
for Dosa batter:
2 cups Raw Rice
1 cup Idli Rice/Par boiled Rice
3/4 cup Poha/flattened Rice
3-4 tbsp Urad dal
1 tsp Methi(Fenugreek) seeds
Salt,to taste
1/8 tsp Cooking soda

for Vegetable Sagu:
2 cups of finely diced Mixed Vegetables(Carrot,Potato,Beans,Green Peas,Cauliflower)
1 Onion,roughly chopped
1/2 tsp Mustard seeds
2 tbsp Oil/Ghee
Salt to taste


ingredients to grind for Sagu:
1" Cinnamon stick
4-5 Cloves
1-2 Marathi Moggu
1/2 cup fresh grated Coconut
1 tbsp Khus khus
1 tbsp Fried gram
5-6 Green chillies
a handful of chopped Coriander leaves,optional
1 tsp Oil

Method:
to prepare dosa batter:
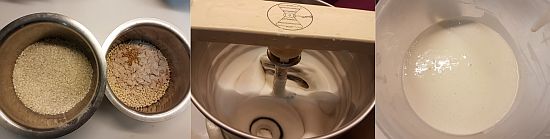
  • Soak both the rice together with methi seeds for 5-6 hours and soak urad dal with poha in another vessel for 3-4 hours.
  • Wash the rice and urad dal+poha separately.
  • Grind urad dal with poha to a smooth batter in the wet grinder and add rice to it and grind until smooth by adding enough water.
  • Remove the batter to a vessel and add enough salt and little rinsed water(from the grinder bowl) and mix it nicely with the hand and cover it and let it ferment for 9-10 hours.
to prepare Vegetable Sagu:
  • Heat a tsp of oil in a kadai/pan and add green chillies and fry them, but be careful as the whole green chillies might burst.You can make a small slit if you want to avoid bursting.Add cinnamon,marathi moggu and cloves to it and fry for sometime.
  • Grind the fried ingredients with grated fresh coconut,khus khus, fried gram, coriander leaves and make it into a smooth puree.
  • In a cooker,heat oil crackle mustard seeds and fry chopped onions until pink.Now add vegetables and fry until they are slightly crisp.
  • Add the ground masala and fry until the mixture leaves the oil and then add enough salt and 1/3 cup of water and pressure cook for 1-2 whistles(do not over cook).Once the pressure is released add lemon juice to it and give a good stir.
to prepare Sagu Dosa:
  • Take required amount of fermented batter in a bowl and add little water to get the pouring consistency and add cooking soda and mix it nicely.
  • Heat a thick dosa tawa and sprinkle some water to make sure that the tawa is hot.
  • Pour a big ladle of batter onto a medium hot pan and spread it in the circular motion towards the outer edge to form a uniform round shaped dosa.Do not make this dosa either very thin nor very thick.
  • Pour 1 tbsp oil/ghee approx over it and around the edges and cover it with a lid.
  • Let it roast on medium-high flame for 1-2 mins,remove the lid and spread 3-4 tbsp of vegetable sagu on the dosa and increase the flame and roast for another 1 minute.Fold it and serve.You can even spread coconut chutney on the dosa and place the sagu one side and then fold it.
  • Reduce the flame for one minute and hten start preparing the next dosa.Do not pour the batter on high flame,the batter will stick to the tawa.If you feel the tawa is over heated sprinkle some water over it before making next dosa.
Serve the sagu dosa hot with coconut chutney and sagu on the side.

Notes:
  1. As the quantity of urad dal is less this batter needs more fermentation time.If your dosa is porous you can avoid adding cooking soda else you can add little bit and then make dosas.
  2. Sagu needs to be thick as we are placing it inside the dosa and hence if you feel the sagu is slightly thin,put it on high flame until the water evaporates a bit and become a thick gravy.
  3. You can prepare masala dosa using the same batter, it comes out super crispy outside and spongy inside.
              sagu masala dosa

Tuesday, January 30, 2018

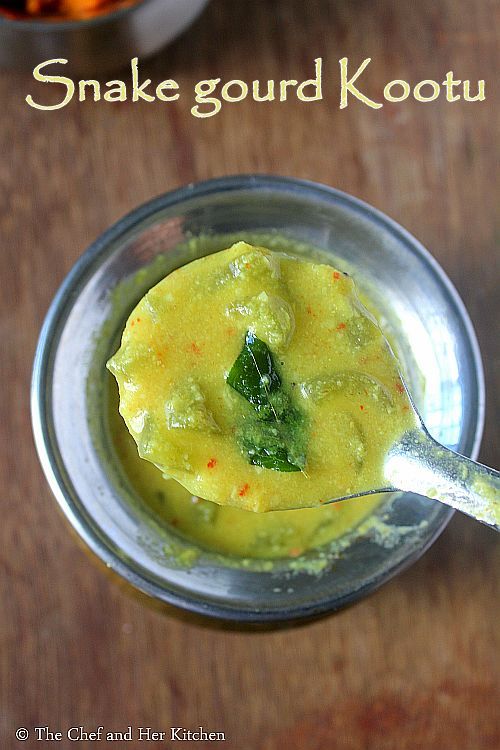
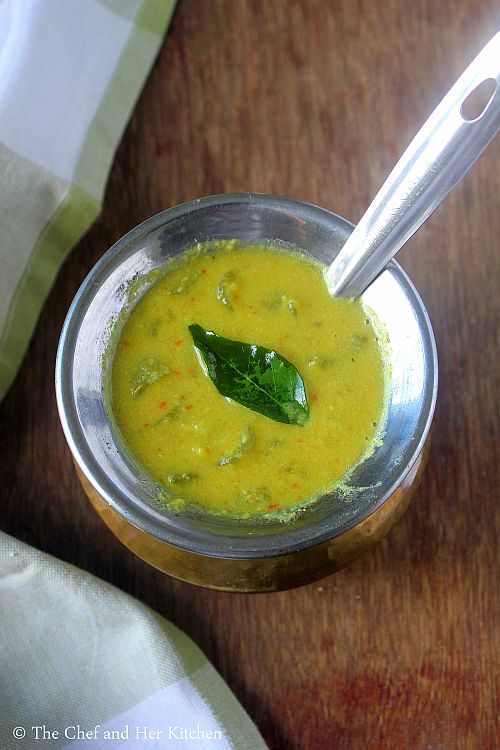
Snake gourd Kootu Recipe | Pudalangai Kootu

snake gourd kootu
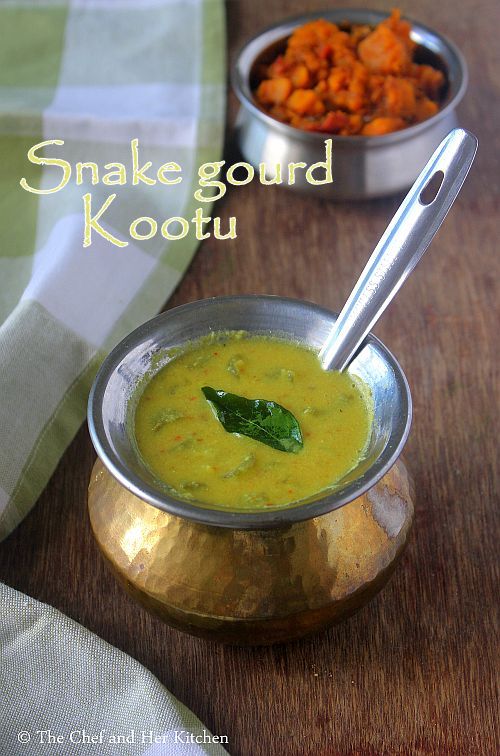
Snake gourd Kootu recipe with step by step photos.I rarely bring snake gourd home not that we don't like it but somehow it does not get its priority in my grocery list.My mom prepares various recipes with snake gourd like simple stir fry, dal, Pindi miriyam and even payasam.Last time when I got this vegetable I prepared this kootu and it was quite nice and paired nicely with rice.It is a very simple dal preparation with the addition of coconut which gives quite a unique taste to this kootu.I had posted Potlakaya(Snake gourd) Kobbari Koora in my blog long time back,check out the recipe here .
snake gourd kootu
Here is how to make snake gourd kootu with step by step photos:
Snake gourd Kootu Recipe | Pudalangai Kootu:

Serves 2-3 | Author: Prathibha
Prep time: 10 mins | Cooking time: 30 mins | Total time: 40 mins
Cuisine: South Indian | Category: Lentils/Maincourse

Ingredients:
1 long Snake gourd
1/3 cup Toor dal
2 tbsp Chana dal,optional
1/3 tsp Turmeric powder
Salt to taste

to grind:
1/4 cup grated/frozen Coconut
1 tsp Cumin seeds
3-4 Red chilies

to temper:
1 tsp Oil/ghee
1/2 tsp Mustard seeds
1 tsp Urad dal
a sprig of Curry leaves
2 Red chilies,broken
1/4 tsp Asafoetida

Method:
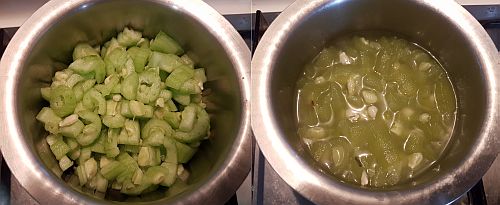
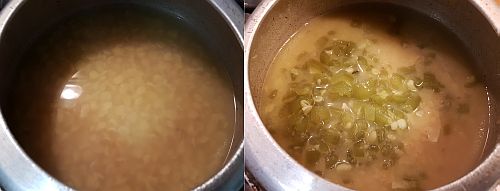
  • Peel the snake gourd and cut into half and scoop out the seeds and cut it into thin slices or small cubes and add enough water to it and boil until done.You can even pressure cook it for 2-3 whistles.
  • Grind coconut with red chilies and cumin seeds to a fine paste adding water.                      
               
  • Wash and soak toor dal and chana dal for 10 mins and pressure cook adding enough water with turmeric powder and salt.
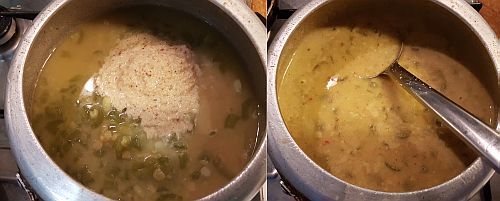
  • Mash the dal slightly and add cooked snake gourd pieces and ground coconut paste and let it come to a boil.Adjust the salt and the consistency of the gravy, it needs to be thick like dal.
  • In a small tempering pan heat oil or ghee and crackle mustard seeds and add urad dal and fry until it turns red in color and then add red chilies,curry leaves and asafoetida and fry until the curry leaves wilt and add the tempering to the boiling lentil-vegetable mixture and mix it and close it.
Serve it hot with hot steamed rice and other accompaniments.

Notes:
  1. You can use moong dal instead of toor dal.I add chana dal as it gives a nice bite to the kootu.
  2. Cabbage or ridge gourd or Spinach can be substituted with snake gourd to make cabbage kootu or ridge gourd kootu or Keerai kootu respectively.
snake gourd kootu


Monday, January 22, 2018

Ragi Idli Dosa Recipe using Ragi flour | Ragi Idli | Ragi Dosa | Ragi Idli Dosa batter

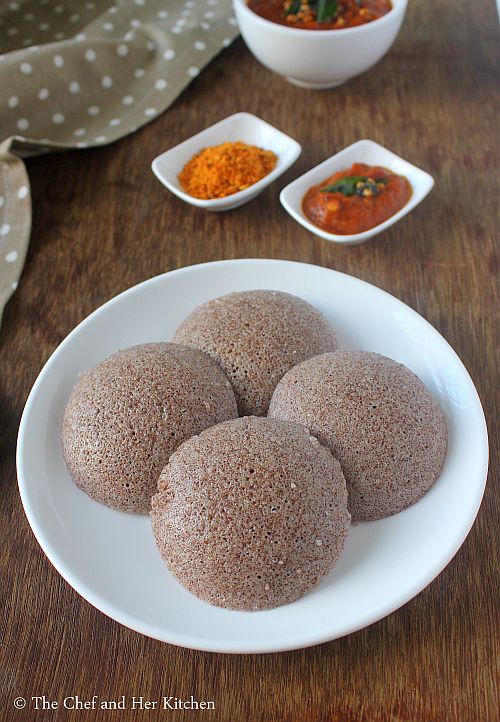
ragi idli dosa
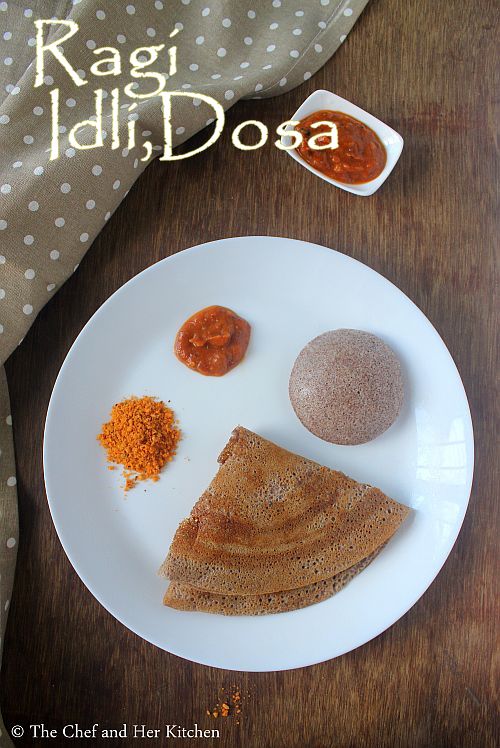
Ragi Idli Dosa recipe with step by step photos.Millets have become extremely popular these days and I have started including them on regular basis.Most of the days I am taking Millet rice instead of rice and I do not miss rice any more as the cooked millet is a good substitute for rice and pairs nicely with south indian curries,dals and sambar varieties.Finger millet is known for its high calcium and dietery fiber content and is known for its various health benefits.Ragi millet adds a very earthy taste to the dish and hence I try to include the ragi flour often in my menu in the form of Ragi SangatiRagi Rotti,Thalipeeth, Ragi Idli,Ragi dosa,Ragi Rava Upma,Ragi Cookies etc.
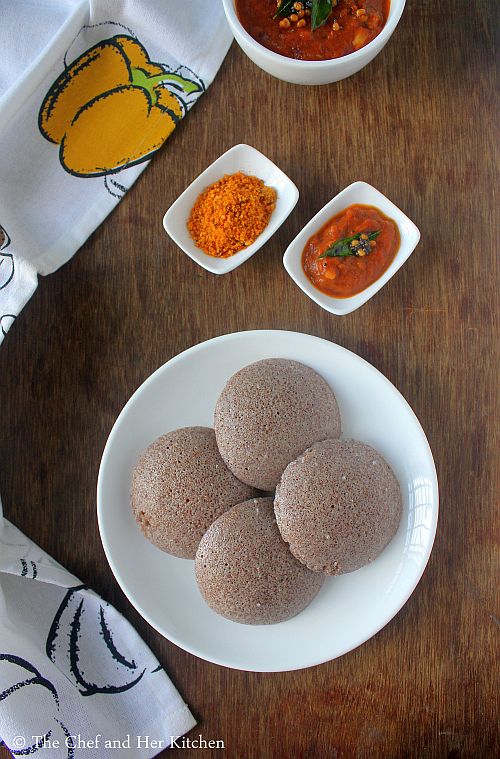
ragi idli using ragi flour
I prepare Ragi Idli using even Ragi Rava but today I am posting the recipe of idli dosa batter using ragi flour which can be used to make both idli and dosa.I usually prefer to make a spicy chutney to go along with ragi idli and dosa to balance the distinct flavor of ragi.However I like the ragi idli using ragi rava instead of ragi flour because of the usage of the rawa that gives the idli a better texture and softness,I will post that version sometime soon,but dosas come out nicely with this recipe and is a good way to feed those who are finicky to include this wonderful finger millet in their diet.If you want to use the whole finger millets instead of flour you can check out my ultimate multigrain dosa recipe where I have used the whole millets instead of the flours.
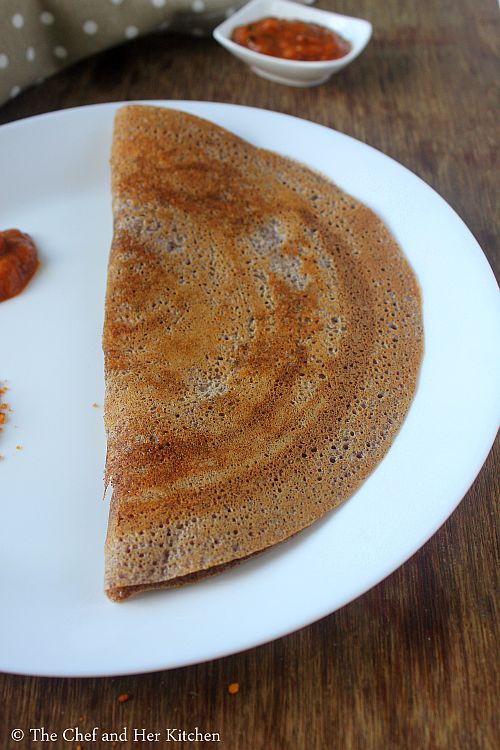
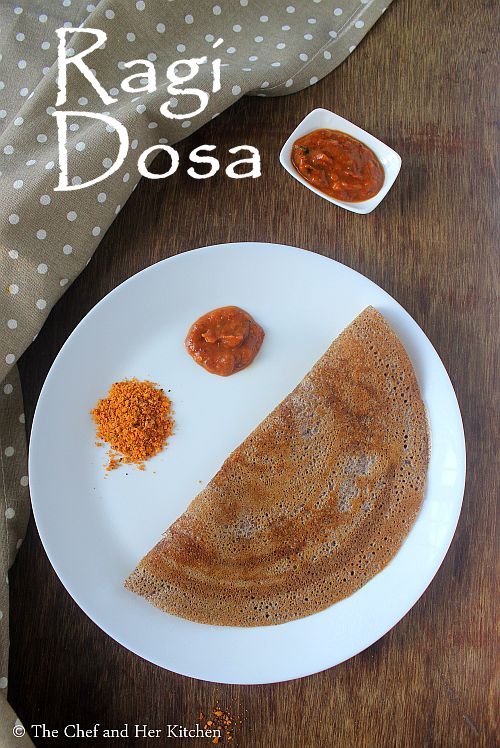
ragi dosa recipe using ragi flour

Check out other healthy dosa recipes in my blog:
ragi dosa recipe using ragi flour
ragi idli recipe
Here is how to make ragi idli dosa recipe with step by step photos:
Ragi Idli | Ragi Dosa | Ragi Idli Dosa Recipe:

Yields 28-32 Idlis/20-22 Dosas | Author: Prathibha
Prep time: 30 mins | Cooking time: 20 mins | Total time: 50 mins +  fermentation time
Cuisine: South Indian | Category: Breakfast

Ingredients:
1.5 cups Ragi flour(finger millet flour)
1.5 cups Idli Rice
3/4 cup whole white Urad
1/3 cup Poha(flattened rice)
1 tsp Methi seeds
Salt,to taste

Water,to grind
Oil,to grease

Method:
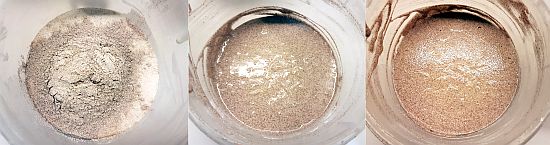
  • Soak the idli rice for 6-8 hrs.Soak whole white urad,poha  and fenugreek seeds for 4-5 hrs.
  • Wash the rice and dal properly and grind everything together with poha and fenugreek seeds to a smooth paste using enough water in the wet grinder for better results.
  • Add ragi flour to the ground batter and mix with hands thoroughly so that no lumps will be left.
  • The batter should neither be very thick like idli batter nor very thin.
  • Add enough salt to the ground batter just before removing the batter from grinder.Remove the batter into a larger container which gives enough room for the batter to rise.
  • Ferment the batter for 8-10 hrs at room temperature or keep it in oven in winters with light on for speeding up the process of fermentation.The fermented batter would be frothy and almost double in volume.
for making Idli:
  • Take out the required portion of batter(do not mix the whole batter while scooping out) and refrigerate the rest of batter.
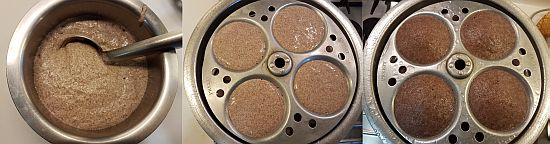
  • Grease the idli plates with oil and pour a ladle of idli batter until each impression is filled 3/4th.You can even line it with a wet muslin cloth and pour the batter on top of it.
  • Steam it in idli steamer or pressure cooker(with out whistle) for 10-12 mins.Let it rest for another 5 mins.
  • With a idli spoon cleanly remove the idlis.Dip the idli spoon in water in between which helps to remove the idlis easily from the plate.If you have used muslin cloth just invert them into the hot box.
  • Keep them in hot box or serve directly on to a plate.Always serve idlis hot.
for making Dosa:
  • I am sure everyone knows how to make simple plain dosa,still I explain the process of making it for people who are not familiar with it.
  • If the dosa batter is taken out from refrigerator,take out the portion how much you need and let it come to the room temperature.
  • Mix the fermented dosa batter well.Check the consistency of dosa batter,it should be of pourable consistency,if needed add little water and mix well.
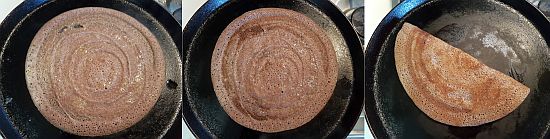
  • Pour a big ladle of batter onto a medium hot pan and spread it in the circular motion towards the outer edge to form a uniform round shaped dosa.Do not make this dosa either very thin nor very thick,if it is very thin your dosa will get hard once it is cold and if it is very thick it would become very chewy.
  • Pour 1 tbsp oil approx over it and cover it with a lid.
  • Let it roast on medium-high flame for 1-2 mins,remove the lid and increase the flame and roast for another 1 minute.Turn the dosa to the other side and fry for a minute and serve directly.
  • Reduce the flame for one minute and then start preparing the next dosa.Do not pour the batter on high flame,the batter will stick to the tawa.If you feel the tawa is over heated sprinkle some water over it before making next dosa.
Serve dosa with spicy chutney of your choice like Coconut chutney / Peanut Chutney / Tomato-Onion Chutney and Sambar.

Notes:
  1. Do not close the box with air tight lid while fermenting.Cover with a loose plate and once the  batter is fermented cover the box with air tight lid which helps in keeping the batter fresh for long.
  2. Always scoop out the required amount of batter from the box and keep the remaining batter refrigerated,do not mix the batter vigorously while removing it from the box.
  3. If the Idlis or dosas turn hard add a pinch of cooking soda and mix nicely and make Idlis n dosas,they will turn out nice and soft.
  4. Smear the pan with a half sliced onion every time you make dosa which gives a nice flavor to dosa.
ragi idli recipe

Wednesday, January 3, 2018

Raw Mango Rasam | Maavinkay Saaru

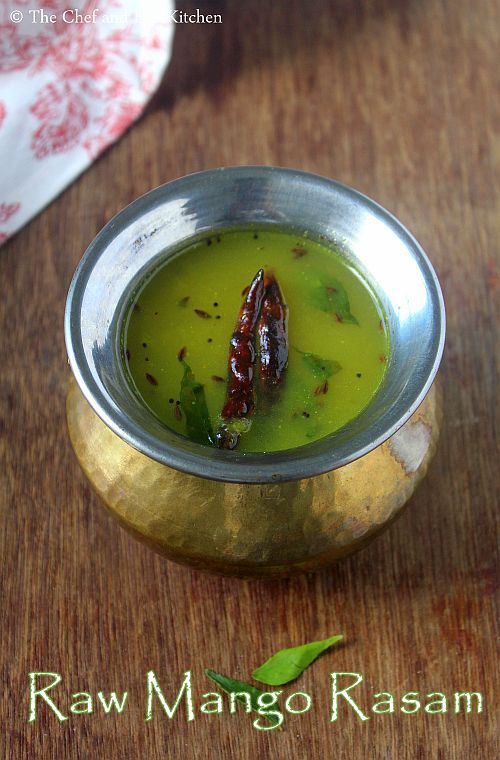
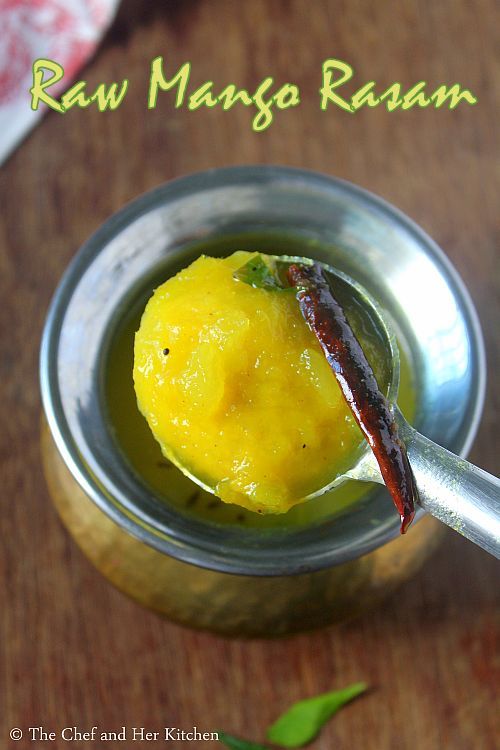
raw mango rasam
Raw mango rasam with step by step photos.A typical south Indian meal always comprises of a rasam variety and it is my comfort food too. I am always happy to eat a simple meal of rice with a vegetable fry and rasam and would not complain about the other missing varietes as in a typical south Indian thali.My most favorite rasam varieties are Karnataka style Bele Saaru, Holige Saaru and Tomato Rasam but there are few other varieties like mint rasam,pacchi pulusu, pepper rasam, mango rasam, tomato dal rasam which I thoroughly enjoy too.
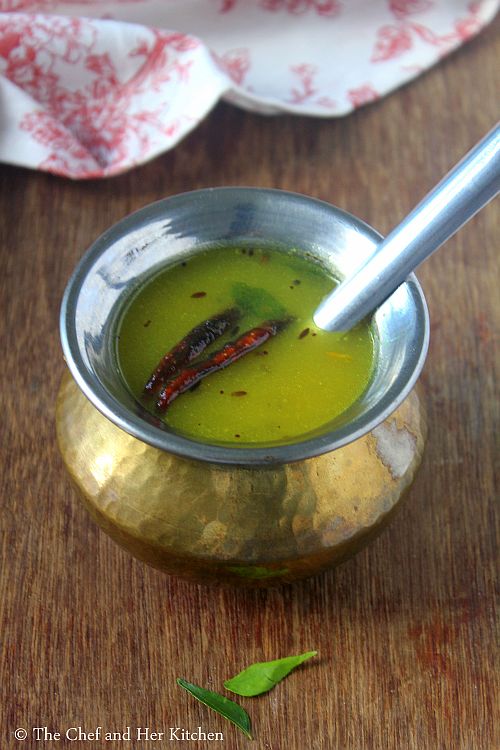
raw mango rasam
Preparing a good rasam is again an art, not everyone can prepare a well balanced rasam which makes a lip smacking meal when mixed with hot rice and paired with fryums.I do not like very thin rasam which is flavorless, the rasam should be of right consistency and even though it is thin it should not lack the flavors and should be perfectly balanced in taste.My FIL is a big fan of my rasam varieties, he always get excited the moment he sees a rasam on our lunch table.A simple rasam rice is always a comfort meal for south Indians like how a dal chawal is a comfort food for north Indians.
Check out other rasam varieties in my blog - 
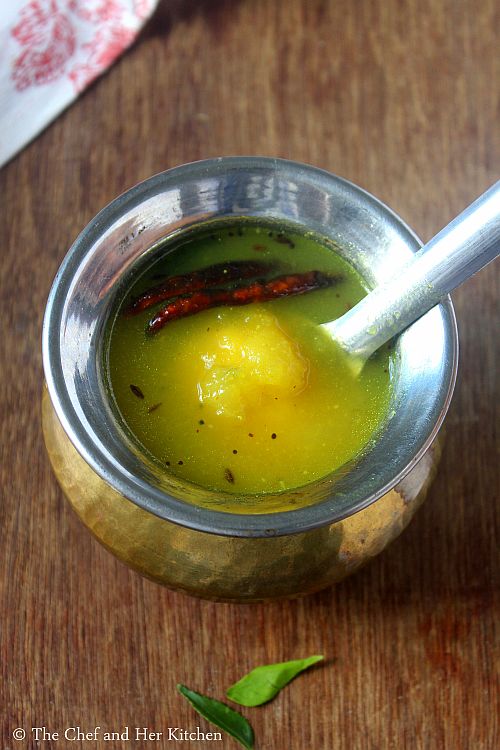
raw mango rasam
Here is how to make raw mango rasam recipe with step by step photos.
Raw Mango Rasam Recipe:

Serves 2 | Author: Prathibha
Prep time: 5 mins | Cooking time: 25 mins | Total time: 30 mins
Cuisine: South Indian | Category: Main Course - Side dish

Ingredients:
1 raw Mango
2 Green chilies
1/2 tsp Turmeric powder
2 tsp Jaggery
Salt,to taste

to temper:
2 tsp Oil/Ghee
1/2 tsp Mustard seeds
2-3 Red chilies,broken
8-10 Curry leaves
1/4 tsp Asafoetida

Method:
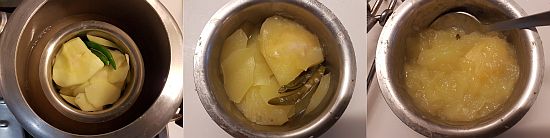
  • Wash and peel the skin of raw mango and cut into slices and reserve the mango seed.In a bowl add cut mango slices,mango seed and green chilies and close it with lid(no need to add water) and pressure cook for 3 whistles.
  • Once it cools down mash it nicely with the back of a spoon or puree it in the mixer.Reserve the mango seed aside.
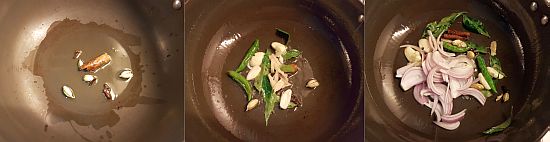
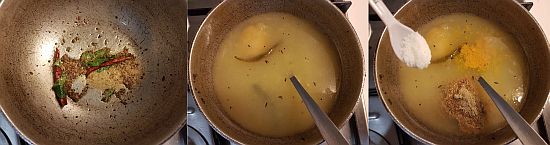
  • In a small pan heat oil/ghee and crackle mustard seeds,add broken red chilies, curry leaves and asafoetida and fry until the red chilies turn slight brown in color.
  • Add mashed mango puree along with the cooked mango seed and 1.25-1.5 cups of water and add turmeric powder, rasam powder,salt and jaggery and bring the rasam to a boil.Check the seasoning and adjust it.Boil it well.
Serve it hot with hot steamed rice,fry and papads.

Notes:
  1. You can add 1/3 cup of cooked and mashed toor dal or moong dal to the rasam while boiling for a different taste.
  2. You can serve it as a soup or hot beverage.
raw mango rasam

Wednesday, November 22, 2017

Appam Recipe without Yeast | Kerala Appam Recipe

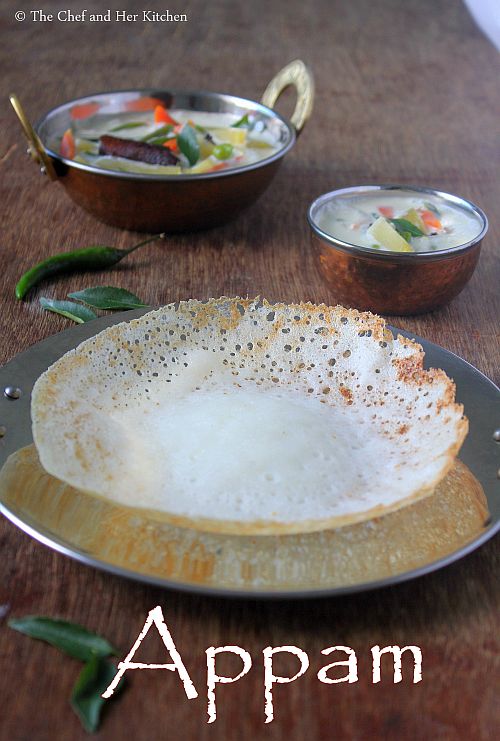
appam without yeast
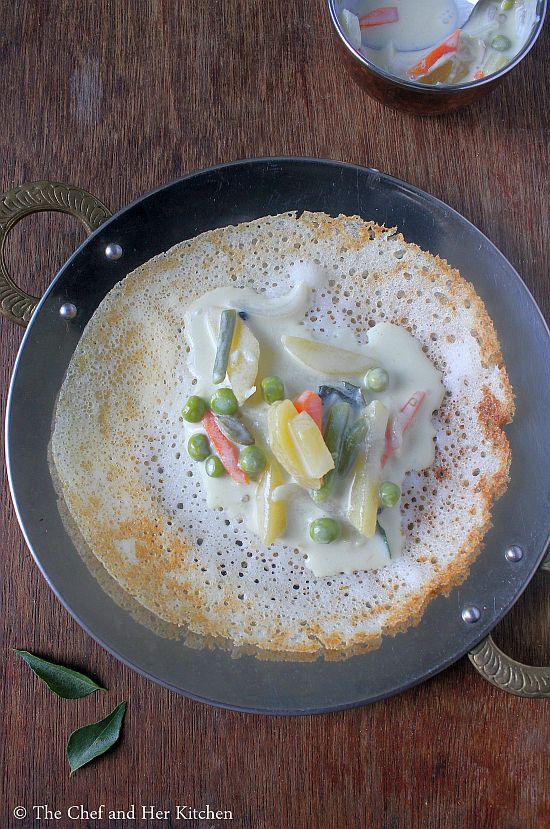
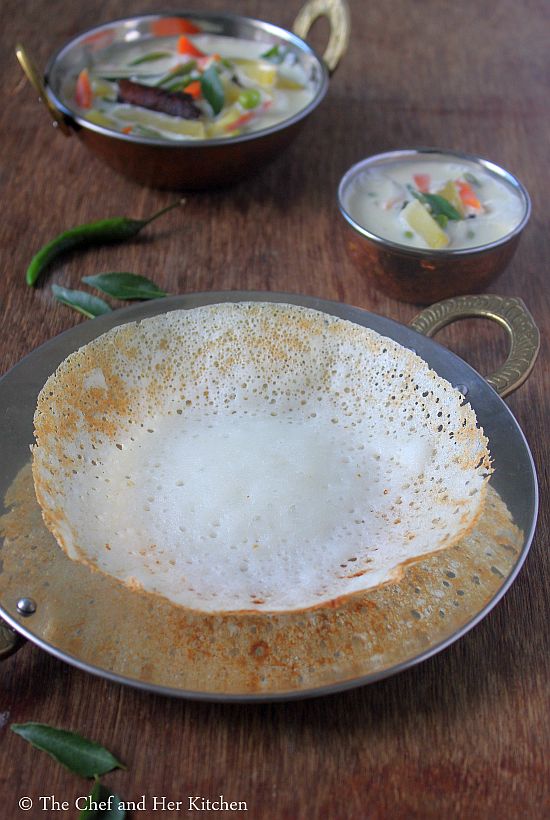
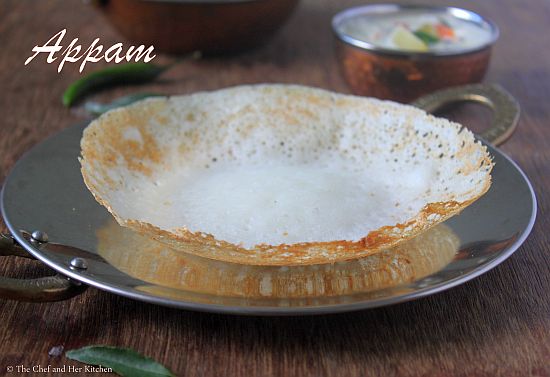
Appam Recipe without yeast with step by step photos.Appam with vegetable stew is a classic combo for breakfast from the state of Kerala.My mom has been making this Appam(without yeast) from our childhood but she had always paired it with Onion chutney.Her recipe is bit different from the traditional appam recipe which includes yeast, she makes a kanji(porridge) out of the rice batter and mix it with more ground rice batter and is fermented for long,they yield soft at the center and crispy and lacy at the ends kind of appams. But we used to call this dosa as Aapan dosa instead of appam and I am not sure why it was called so.Typical Kerala style appam has coconut and yeast in the recipe but if you do not like to use yeast in the appam recipe you can follow this recipe which yields similar results.
appam without yeast
Appams can be served with coconut milk and sugar or sweetened coconut milk or flavorful vegetable stew or a simple coconut chutney.Appams are usually fluffy and can absorb the flavors very nicely and hence I always love to eat them with vegetable stew.
Appam Recipe without yeast:

Yields 12-15 appams | Author: Prathibha
Prep time: 30 mins | Cooking time: 15 mins | Total time: 45 mins + fermentation time
Cuisine: Kerala | Category: Breakfast

Ingredients:
3 cups Raw Rice,soaked in water for 5-6 hrs
1 cup Raw Rice, soaked in water for 5-6 hrs
1/2 cup thin yogurt
1 tbsp Sugar
Salt,to taste
1/8 tsp Cooking soda,optional

Method:
  • Soak 3 cups of rice and 1 cup of rice separately for 5-6 hrs.
  • Wash and grind 1 cup of rice with enough water to get a coarse rawa consistency like batter.Grind the remaining 3 cups of rice with enough water to a smooth batter and keep it aside.
  • In a big pot add 4 cups of water,salt and sugar and let it come to a boil and then add the coarsely ground batter to it and keep stirring continuously till it thickens and become a kanji(porridge) and let it cool completely.
  • Once the cooked batter is completely cooled mix in the yogurt and ground rice batter(made out of 3 cups rice) and mix it nicely with out any lumps and let it ferment for 15-16 hours.
  • The batter should be little loose than the regular dosa batter,so adjust the consistency accordingly. Add cooking soda(if using ,see notes) to a tbsp of water and mix it in the batter nicely.
  • Heat the non stick appam chetti/kadai and pour a big ladle of batter in the center and swirl it in a circular motion so that it forms an aapam which is thin around the corner and thick in the center.
  • Pour the oil around the edges and close it with a lid and let it cook until the edges turn crispy and is soft and fluffy in the center.Loosen the corners gently with the help of spatula and slide the appam into a plate and repeat to make more appams.
Serve it with sweetened coconut milk or Vegetable Stew or any spicy curry.

Notes:
  1. The addition of soda is optional,if the batter is fermented nicely you do not need to add soda to appam.Try making one appam without soda and if it is not fluffy you can add soda to the batter and make which definitely gives soft and fluffy appams.
  2. My mom never added grated fresh coconut while grinding for appam dosa,but you can add 1/3-1/2 cup of grated coconut while grinding the rice(3 cups rice) batter.
  3. The most important step in the recipe is making the kanji and mixing in the batter and hence follow the instructions carefully.
  4. You can make the dosa like regular dosas or thick dosa like poha dosa with the same batter.

Monday, November 13, 2017

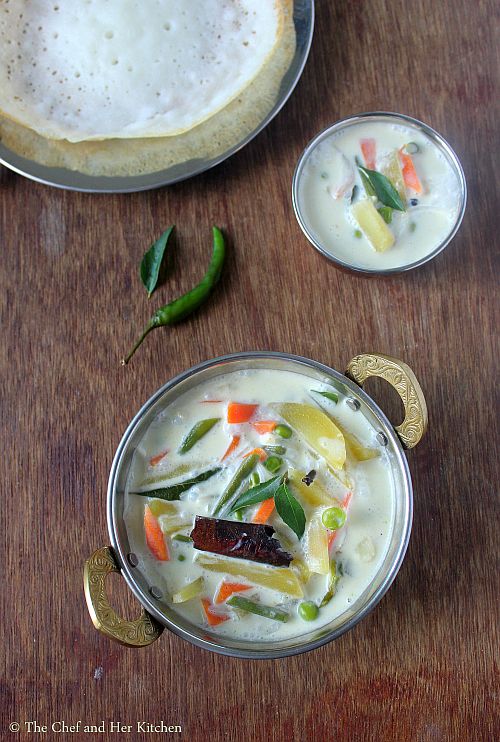
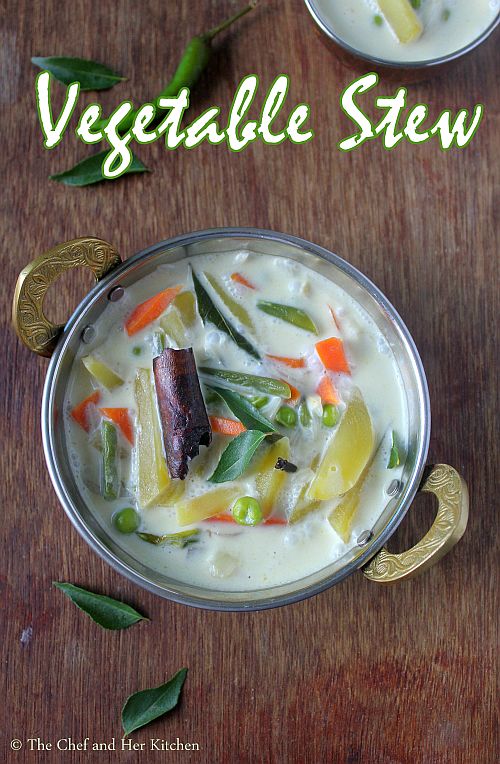
Vegetable Stew Recipe | Kerala Veg Stew for Appam

vegetable stew
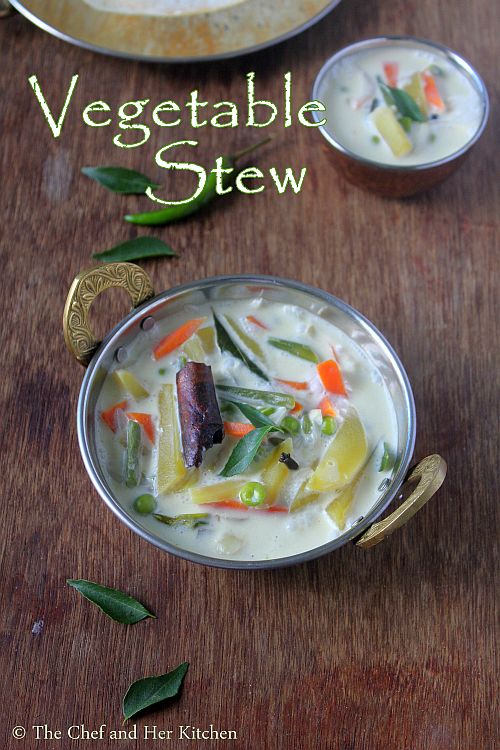
Kerala style Vegetable stew recipe with step by step photos. Appam with Vegetable stew is a famous Kerala breakfast combo variety which is loved by all.Appams are different from the regular dosa as these are lacy thin at the corners and fluffy in the center and are made in a Appam Chatti(kadai) instead of the tawa and hence the appams turn in the shape of kadai.Appam is served with a white coconut milk based curry with vegetables in it.The stew has mild spice levels and also has slight sweetness from the coconut milk but it is very flavorful and tastes delicious with the fluffy appams.The appams are so porous that they absorb the flavor from the stew beautifully and makes it taste more delicious.
Stew is made up of various vegetables and is cooked in a coconut milk with minimal spices but the process to prepare the stew is quite important otherwise you will not get the stew in white color. Freshly pressed coconut milk is the best choice for the stew but if you are lazy like me you can even use tinned coconut milk.I have used coconut oil in the recipe for the authentic kerala taste but if you do not like you can even use the regular oil in the recipe. Try this delicious kerala delicacy-stew with appam if you have not tried it before.
kerala veg stew
Check out other breakfast combos here in my blog:
Here is how to make kerala style vegetable stew with step by step photos:
Vegetable Stew Recipe:
Serves 2 | Author: Prathibha
Prep time: 15 mins | Cooking time: 30 mins | Total time: 45 mins
Cuisine: Kerala | Category: Side dish

Ingredients:
1 small Carrot,peeled and cut into 1" long thin sticks
1 small Potato,peeled and cut into 1" long thin sticks
10-12 french Beans,trimmed and cut into 1" pieces
1/4 cup Green peas
1 small Onion,thinly sliced
2-3 Garlic cloves, cut into long strips
1/2" Ginger,peeled and cut into thin strips
2-3 Green chilies,slit
1 pack(200ml) Coconut milk or 1 Coconut,grated
8-10 Curry leaves
Salt,to taste

to temper:
1.5 tbsp Coconut oil
4-5 Cloves
1" Cinnamon
4 green Cardamoms
8-10 Black peppercorns

Method:
  • If you are using freshly grated coconut to extract coconut milk add 1/2 cup warm water to the grated coconut and grind it nicely and strain it to get the thick coconut milk and add 3/4-1 cup warm water to the coconut residue and grind again to get a thin consistency coconut milk.If you are using ready coconut milk empty the contents of the carton to a bowl and add a cup of water to the empty carton and shake it nicely to get thin coconut milk.
  • In a kadai/pan heat coconut oil and add cloves,cinnamon,peppercorns and green cardamoms and fry for 10-15 seconds.I forgot to add the peppercorns in the tempering and hence did separately and added later to the curry.
  • Add cut ginger,garlic and slit green chilies and fry until the green chilies slightly wilt.Add 5-6 curry leaves and fry for few seconds.
  • Add thinly sliced onions and fry until they become translucent,do not let them turn brown.
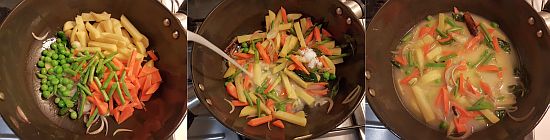
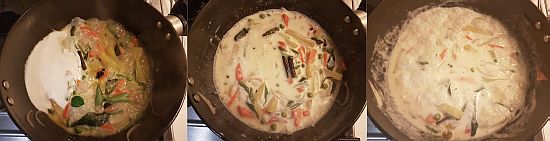
  • Now add all the vegetables(you can add them raw or steamed) and add salt and thin coconut milk and cook until the vegetables are done.
  • Now reduce the flame(or remove the pan from the flame) and add thick coconut milk and 3-4 curry leaves and boil it on low-medium flame.
  • Adjust the consistency of gravy and seasoning by adding enough water and salt.The consistency should neither be thin or thick.
Serve it with Appam/Dosa.

Notes:
  1. You can even add cauliflower along with the other vegetables.
  2. Do not brown the onions,spices and vegetables otherwise it will change the color of the stew.
  3. Freshly pressed coconut milk tastes best for the recipe but one can use ready one if pressed for time.
  4. Coconut oil adds a nice flavor to the stew but if you do not like it you can use regular oil and make it.

Monday, November 6, 2017

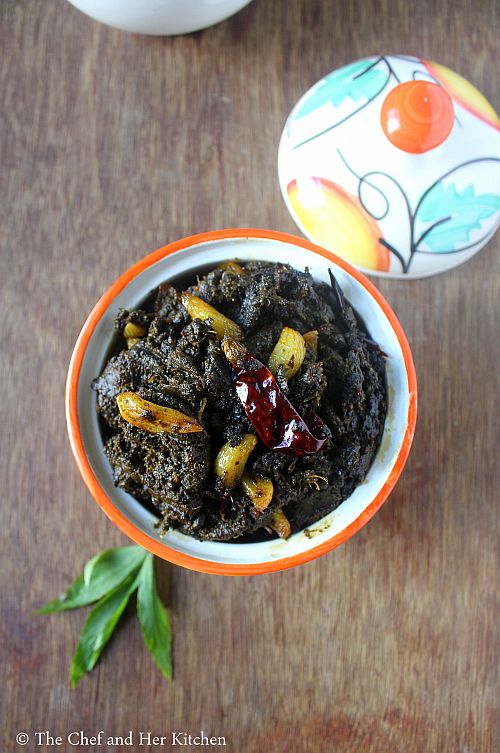
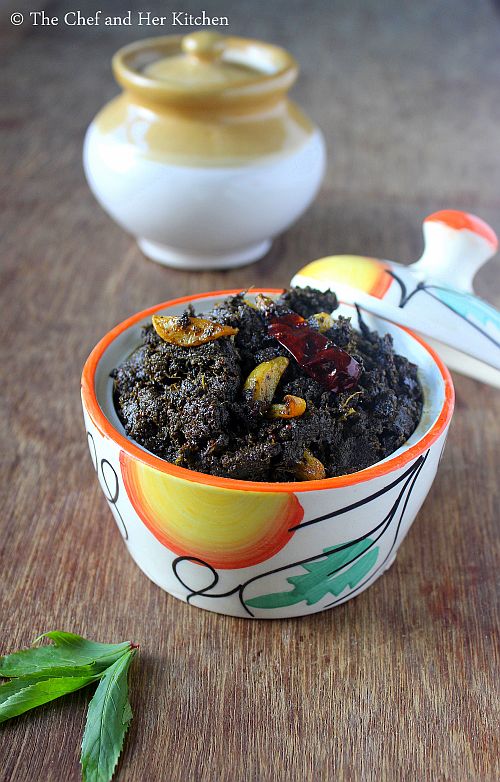
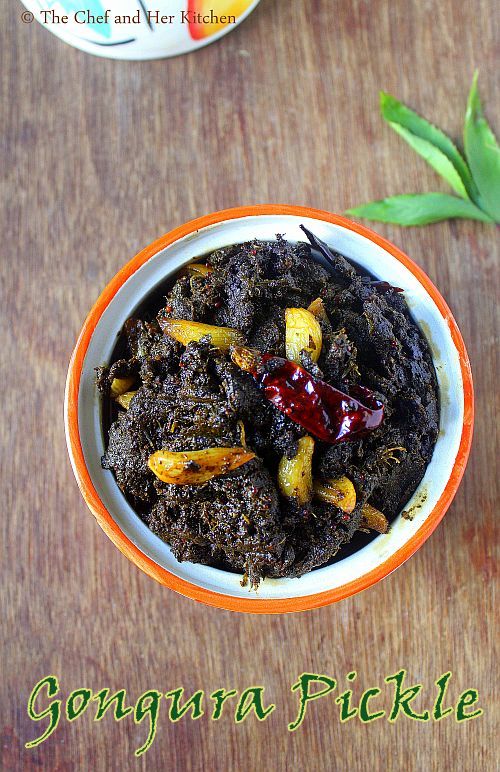
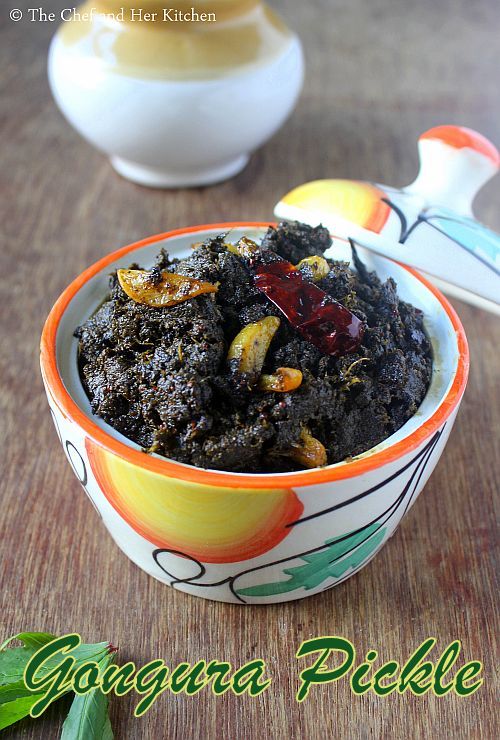
Gongura Pickle Recipe | Andhra Niluva Gongura Pacchadi

gongura pickle
Gongura pickle recipe with step by step photos.Gongura pickle does not need any introduction as it is one of the most popular pickles from the state of Andhra and any Andhra meal is incomplete without gongura pickle being served in it.Gongura pickle is sour and spicy and is made out of red sorrel leaves,it can be stored for a couple of months if made carefully. I also have posted a version of Gongura Pacchadi with Green Chilies and Gongura Pacchadi recipe using Red chllies which have less shelf life and should be consumed in a day or two.Gongura pickle is usually mixed with hot steamed rice,ghee and is eaten with raw onions on the side, the onions elevate the taste of the gongura pickle and hence do not miss to serve it with onions.
gongura pickle
I do not miss to get these wonderful greens when ever I go to little India and in fact it has become a norm to keep a bottle of Gongura pickle or Pulihora Gongura pickle handy in my refrigerator these days.It is much better to eat the homemade pickles rather than the preservative loaded ready made pickles.I also prepare another version of gongura pickle - Pulihora Gongura pickle which is prepared in a different way with the addition of tamarind and few other spices and even this Pulihora Gongura pickle can be stored for a couple of months.Both the pickles taste absolutely delicious in its own way, try these pickles at home and enjoy the delicious home made andhra famous gongura pickle.
Apart from the pickles we make various other pacchadi,dal,curry and rice varieties with these greens and these greens give a peculiar taste and sourness to the recipe which makes it even more tastier.Check out all Gongura recipes in my blog here:
niluva gongura pacchadi
Here is how to make gongura pickle recipe with step by step photos.
Gongura Pickle | Niluva Gongura Pacchadi Recipe:
Shelf life:1 month | Author: Prathibha
Prep time: 15 mins | Cooking time: 30 mins | Total time: 45 mins
Cuisine: Andhra | Category: Pickles/Accompaniments

Ingredients:
1 big bunch or 8-10 cups tightly packed Gongura(Red sorrel) leaves
1 tbsp Mustard seeds
1.5 tsp Fenugreek seeds
6-8 Red chilies
Salt to taste
1.5 tbsp Sesame oil

to temper:
4 tbsp Sesame oil
1 tsp Mustard seeds
5-6 Red chilies,whole or broken
15-16 Garlic cloves,peeled roughly
1/4 tsp Asafoetida

Method:
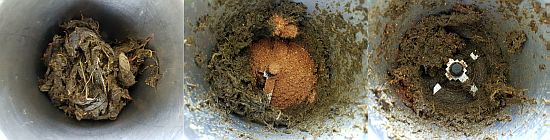
  • Dry roast mustard seeds,fenugreek seeds and red chilies until they are nicely roasted.Cool them and grind them along with salt to a fine powder.
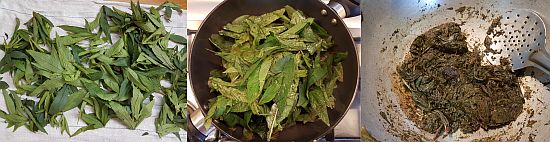
  • Remove the gongura leaves from the stems and wash them thoroughly and drain the water thoroughly. Spread a big kitchen towel and spread the leaves on the towel and let them dry in shade for 3-4 hours.They do not need to get wilt just that the water has to be completely absorbed by the towel.
  • In another pan heat oil and add gongura leaves(dried for a while) and saute them until they become soft and pulpy.Do not add water to the leaves at any point of time.Continue frying for 7-8 mins until the water evaporates from the leaves mixture.
  • Cool the gongura leaves and grind it to a paste along with the ground spice powder.
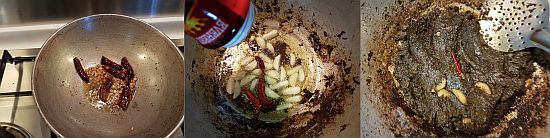
  • In the same/another pan heat 4 tbsp of sesame oil and crackle mustard seeds and then add garlic cloves and red chilies and fry them until they turn slight brown in color and add asafoetida and then add the ground gongura mixture and fry it nicely for 8-10 mins until the mixture starts leaving the oil along the edges.Sometimes the oil gets seeped inside the pickle but it will start leaving after a couple of hours when stored in the bottle,so do not worry.
  • Cool it thoroughly and store it in an air tight glass bottle in the refrigerator.It stays good for a month or two in refrigerator when handled carefully.
Serve it with hot steamed rice with ghee and raw onions on the side.
Notes:
  1. You can add 1.5 tbsp of Coriander seeds while roasting the mustard and fenugreek seeds.The addition of coriander seeds is optional.I add sometimes and skip it sometimes and however the taste does not alter much.
  2. If you are using tella gongurs(not the typical red gongura leaves) you need to add a small gooseberry sized tamarind while frying the gongura leaves for the sourness.
  3. The amount of red chilies can be altered according to your spice level.
  4. Do not skip garlic in the recipe as it adds a nice taste and also always serve the gongura pickle with raw onions on the side.
  5. Sesame oil is recommended for the recipe, if you do not have you can use regular oil.
  6. Always use a clean and dry spoon when you take out the pickle and close the lid tightly and store it in refrigerator for increased shelf life.
  7. You can take the required portion of the pickle and mix in the chopped onions and serve it with hot steamed rice and ghee.
gongura pickle


Thursday, July 13, 2017

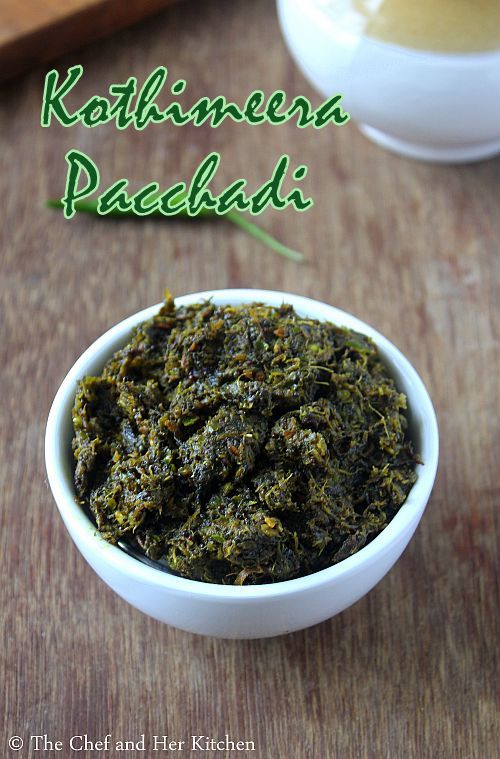
Kothimeera Pacchadi | Coriander Chutney for Idli,Dosa

kothimeera pacchadi
Kothimeera pacchadi recipe with step by step photos.Idli and Dosa appears quite frequently for breakfast in any south Indian home. It is always challenging to think of a different side dish for Idli and Dosa apart from the usual fare like Coconut Chutney and sambar. Though I make various chutnies like Tomato ChutneyTomato-Onion ChutneyCarrot ChutneyCapsicum ChutneyPeanut Chutney, Fried gram chutney but the moment I hear about any new chutney recipe I would like to try it immediately as we south Indians are never tired of the various chutney varieties.
kothimeera pacchadi
During my last visit to my mil's place I had noticed a couple of vaious chutney variety jars sitting in the fridge and everyday she used to serve with different combinations of chutnies and powders with Idli and Dosa.These chutnies do not have large shelf life like couple of months but they are good to store for a couple of weeks or until a month. Niluva tomato pacchadi and this Kothimeera pacchadi were few among those pacchadi varieties which she keeps preparing often.Though I do not prepare Idli and dosa on daily basis but we love to indulge them over weekends atleast twice or thrice a month.Hence I never needed to make storable chutnies at my place but when my inlaws visited us last month Idli and Dosa featured quite often for our breakfast.Hence I had prepared few chutney varieties like niluva tomato pacchadi, mamidi allam pacchadi, allam pacchadi and this kothimeera pacchadi and these chutnies stayed quite well for a month. Though we prepare the regular chutnies, it is always nice to have an array of chutnies and powders to be served along with Idli and Dosa,it definitely jazz up your breakfast a bit.
kothimeera pacchai for idli,dosa
Check out other chutney and powder varieties for Idli and Dosa:
coriander chutney for idli,dosa
Here is how to prepare Kothimira pacchadi recipe with step by step photos.
Kothimeera Pacchadi | Coriander Chutney Recipe for Idli,Dosa:

Serves 3-4 | Author: Prathibha
Prep time: 5 mins | Cooking time: 20 mins | Total time: 25 mins
Cuisine: Andhra | Category: Accompaniments,Side dish for Idli/Dosa

Ingredients:
1 big bunch Coriander leaves(roughly 3-4 cups)
8-10 Green chilies
1 big lemon sized Tamarind
1/2 tsp Turmeric powder
1 tsp Cumin seeds
Salt,to taste
1 tbsp Oil

to temper:
1/2 tsp Mustard seeds
2 tsp Oil

Method:
  • Wash and drain the water from the coriander leaves and green chilies and chop them roughly.
  • Heat oil in a kadai and crackle cumin seeds and then add green chilies and fry until they wilt a bit.
  • Add chopped coriander leaves,turmeric powder,tamarind and salt and fry until they become wilted and become a lump,this might take 12-15 mins.Cool it.
  • Grind the coriander leaves mixture to a coarse paste in the mixer.If needed add a couple of tablespoons of water while grinding it.
  • Heat oil in the same pan and crackle mustard seeds and then add ground paste and fry for another 3-4 mins until there is no moisture left in the chutney.Let it cool.
  • Store it in an airtight glass container in the refrigerator.It stays nicely up to 3-4 weeks.
Take out required portion as required into the cup and add little water and dilute it and serve it as a side dish with Idli/Dosa/Uthappam.

Notes:
  1. If you want to prepare the coriander chutney for rice, you can add a tbsp of urad dal and chana dal each before frying the green chilies and coriander leaves and proceed the same way.This chutney cannot be stored more than 2-3 days.
  2. This chutney is extremely spicy and tastes best when served with other mild chutnies like coconut chutney, tamarind chutney.
  3. You can reduce the number of green chilies in the recipe if you cannot bear much spice in the recipe.
  4. If you want you can add bit of jaggery or sugar in the recipe to cut down the spice.
kothimeera pacchai for idli,dosa
Technorati Tags:
 
back to top