Showing posts with label Bachelor Recipes. Show all posts

Monday, December 22, 2014

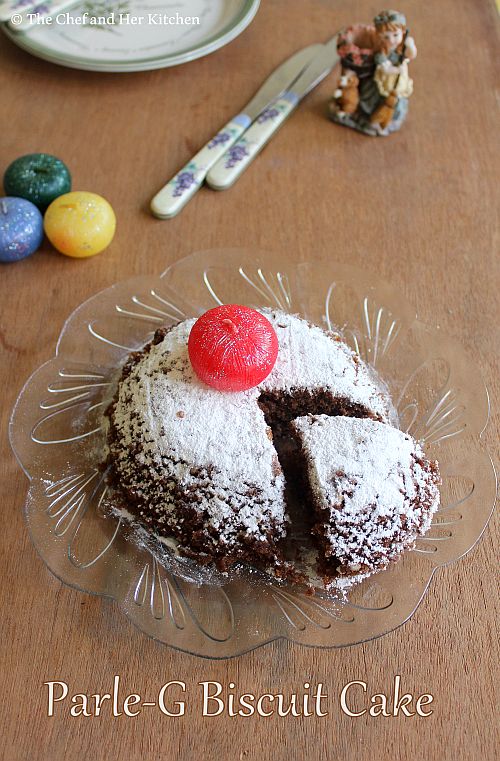
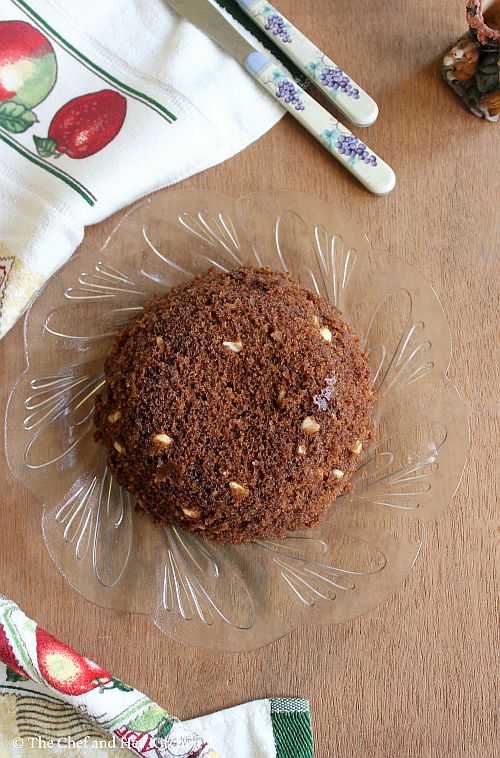
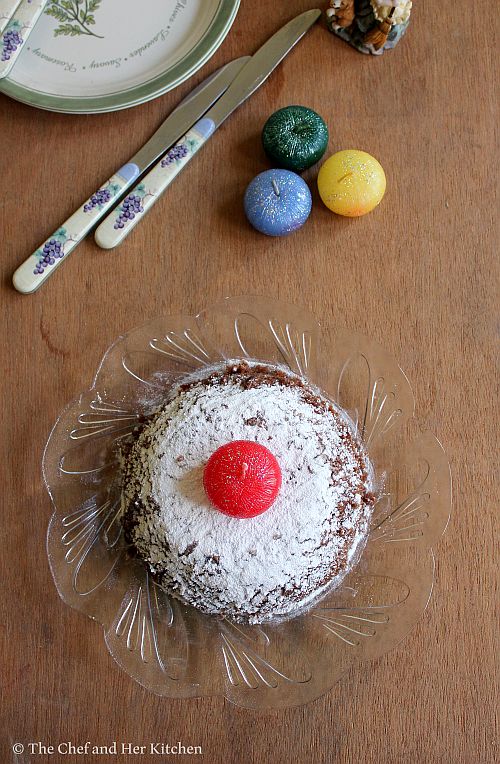
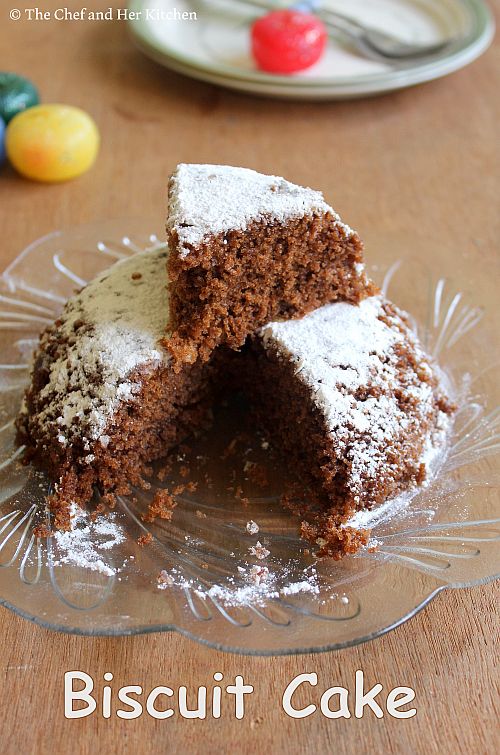
Parle G Biscuit Cake in Microwave | Microwave Biscuit Cake

parleg biscuit cake
Few years ago,one of my aunt shared this recipe which she took it from a tupperware booklet.I was new to baking then and tried it immediately because of the simplicity of the recipe and I was really amazed by the texture of the cake .I had shared this recipe to my mom,mil and friends and everyone appreciated this cake as it is quite simple to prepare with very few ingredients available at pantry.This cake has been quite regular at my mom's place for her get togethers and kitty parties as this cake does not need oven and also the fact that it is eggless.All you need is a pack of parle-G biscuits ,a sachet of fruit salt and few basic ingredients from your pantry and you can prepare this cake in no time. I am sure many of you tried the instant version of biscuit cake in microwave.If you have not tried yet, I recommend you to try this simple biscuit recipe.It is the most easiest way to please your kids who demands for cakes with short notice.
biscuit cake

Check out other cake recipes for Christmas:

microwave biscuit cake

Parle G Biscuit Cake Recipe :
makes an 8" cake | Author : Prathibha
Prep time: 5 mins | Cooking time: 4-5 mins | Total time: under 10 mins
Cuisine: Indian  | Category: Cakes/Bakes

Ingredients:
150 gms Parle G Biscuit packet
3 tbsp Cocoa powder
1/2 cup Sugar
1 1/2 cups Milk,approx
1 Eno fruit salt sachet, plain
2-3 tbsp chopped Dry fruits(almonds,cashew nuts etc)
Butter/Oil , to grease the pan
Cocoa powder or Icing sugar, for dusting

Method:
  • Chop dry fruits into small pieces and keep them aside.
  • Take a deep microwave bowl and grease it with butter or oil nicely and keep it ready.
  • Break biscuits into fine pieces and add cocoa powder, sugar to it and run it in the mixer to a fine powder.
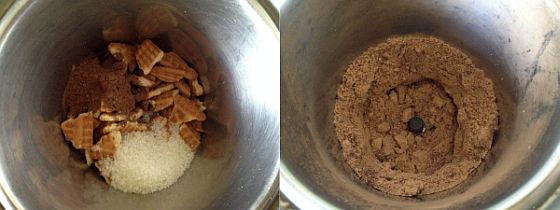
  • Take milk in a bowl and add the ground powder to it and mix well.The mixture should be smooth,neither very thin nor very thick.
  • Add sliced almonds and cashewnuts to it and mix well.                                 
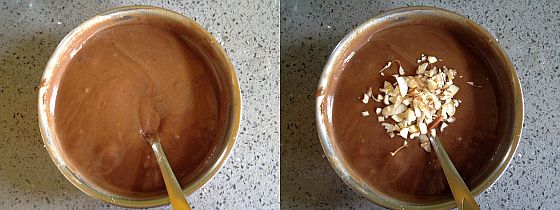
  • Add eno to it and give a quick stir, you will see a foamy batter ready.
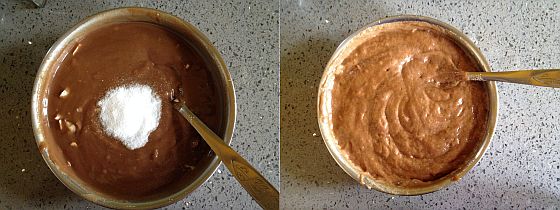
  • Pour this batter into the greased bowl and level it off evenly.Sprinkle few more sliced almonds on top.Microwave it on HIGH for 4-5 mins.Check it after 4 mins, as the power differs for each microwave it is always better to check it in between.Insert a tooth pick and see if it comes out clean it is ready if it is slightly battery then again microwave it for a minute or more.Repeat the tooth pick test if needed.
  • Leave it undisturbed for 5 mins.Run a knife around the corner of the cake and unmould it on to a plate.Let the cake cool completely.
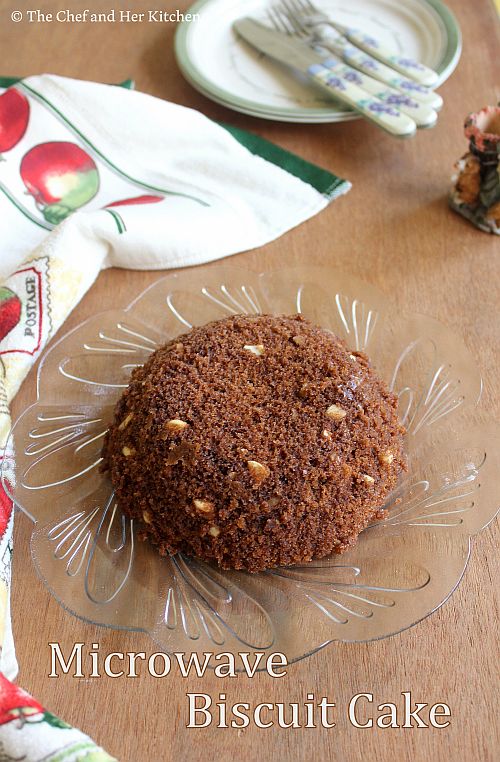
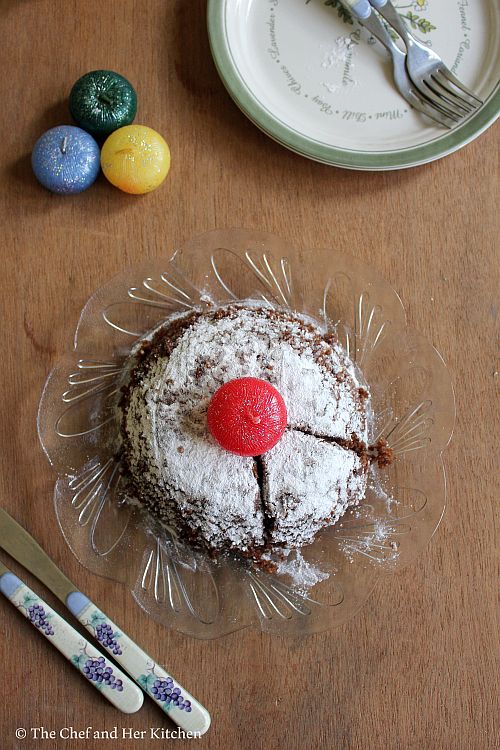
Serve the cake as it is  or you can even dust it with cocoa powder or Icing sugar or pour chocolate ganache on top of it.Decorate it as per your wish with color sprinkles,gems etc.

microwave biscuit cake

Notes:
  1. You can use combination of biscuits like Parle G and Hide and seek biscuits or use just plain Parle G biscuits.
  2. You can reduce the sugar to 1/3 cup if you like it mildly sweet.
  3. As the Microwave power differs for each microwave it is always better to check the cake in between.Insert a tooth pick and see if it comes out clean it is ready, if it is slightly battery then again microwave it for a minute or more.
  4. Checck out the chocolate ganache recipe if you want to cover the cake with it.You can even use ready whipped cream or chocolate icing or simply dust it with icing sugar or cocoa powder like how I did.
  5. You can easily keep this cake for 2-3 days at room temperature.
biscuit cake

biscuit cake

Wednesday, July 2, 2014

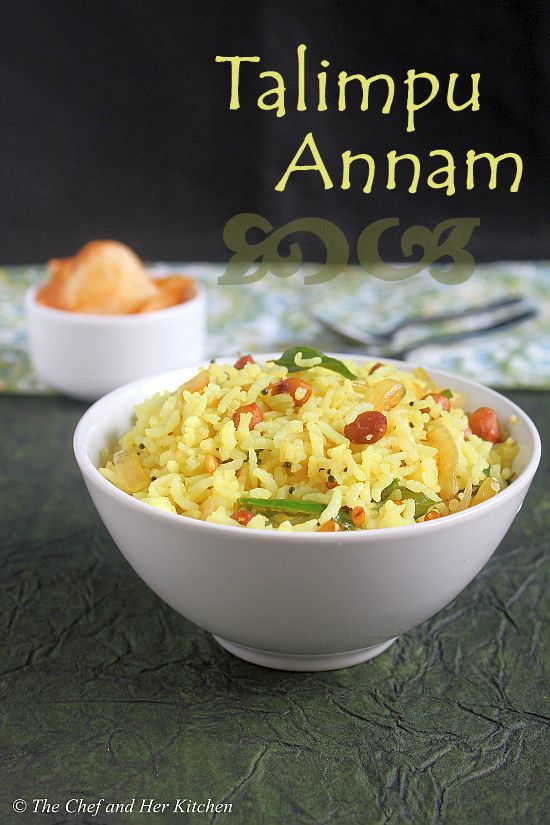
Talimpu Annam | Tempered Rice | Phodnicha Bhaat

talimpu annam
It is rare to have left over rice at my place and whenever it does, it is usually when guests come over and I end up making more rice than required. I am sure many of us do not prefer to reheat left over rice, instead we can convert it into a simple Rice variety which is more interesting to eat. Left over rice works like a charm to prepare Chinese Veg Fried Rice, Garlic Rice and this Simple Tempered Rice.But there are no hard and fast rules that one should prepare this rice from left over rice, you can even prepare it with freshly cooked rice,but make sure you have cooled down the rice before preparing this, otherwise it will become mushy.
talimpu annam
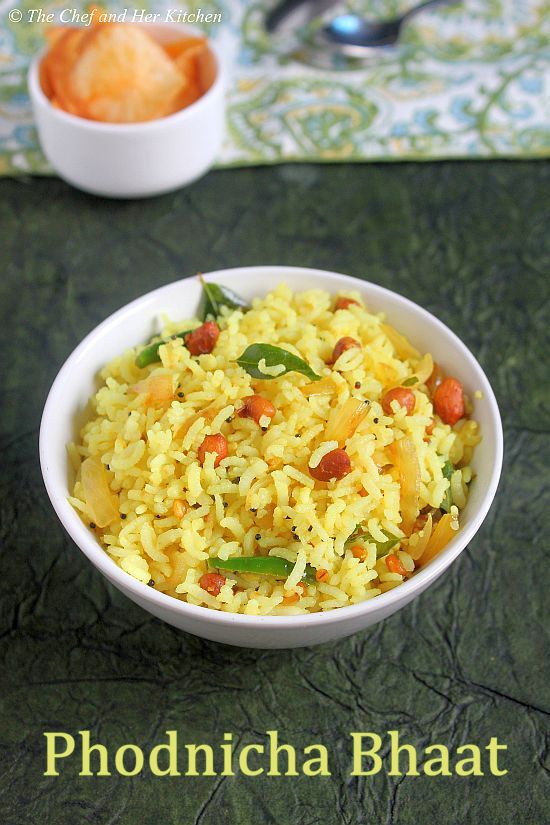
In South, we prepare this tempered rice in a way similar to lemon rice but we use onions in the recipe which adds a nice taste to the rice.Tempered Rice can be called as 'Talimpu Annam' in Telugu and 'Chitranna' in Kannada,you can even call it simple Fried Rice.In Maharasthra,they prepare a similar version called Phodnicha Bhaat with few minor variations in tempering. One can improvise the recipe with the addition of vegetables to the recipe but I love it when it is made very simple with lot of onions. The crunch of onions and the tangyness because of the addition of lemon juice makes this rice extremely tasty.If you have left over rice,do give this simple rice recipe a try,I am sure you will love it.
phodnicha bhaat

Talimpu Annam | Phodnicha Bhaat Recipe:
Serves 2
Prep time:5 mins | Cooking time:10 mins | Total time:15 mins
Category:Indian | Cuisine:Rice - Main course/Breakfast

Ingredients:
3 cups Cooked Rice(left over rice)
2 medium Onions,finely chopped
1 big Lemon
3-4 Green chillies,slit
2 tbsp chopped Coriander
a sprig of Curry leaves
2-3 tbsp Groundnuts
1/4 tsp Turmeric powder
1 tbsp Chana dal (optional)
1 tsp Urad dal (optional)
1/2 tsp Mustard seeds
Salt to taste
2-3 tbsp Oil

Method:
  • Use left over rice for the recipe.In case if you are cooking the rice fresh,pressure cook rice(1 cup rice: 2 1/4 cups water) or how you cook your regular rice until it is soft and fluffy.The rice should be comparatively softer to eat and it should not be like how we do for pulav/biriyani. Cool the rice completely.
  • Squeeze the lemon and separate the seeds and keep it aside.
  • Heat oil in a kadai and crackle mustard seeds and add ground nuts and fry over medium flame until they are golden brown.
  • Add chana dal, urad dal and green chilies and fry until they turn golden brown and green chillies wilt.
  • Add curry leaves and onions and fry until the onions turn pink in color.
  • Add turmeric powder and add the rice(left over or cooled rice) and salt and mix nicely and fry for 1-2 mins until the rice becomes hot.Switch off the flame.
  • Add squeezed lemon with out seeds and coriander to it and mix well.
Serve it hot with chips or fryums.

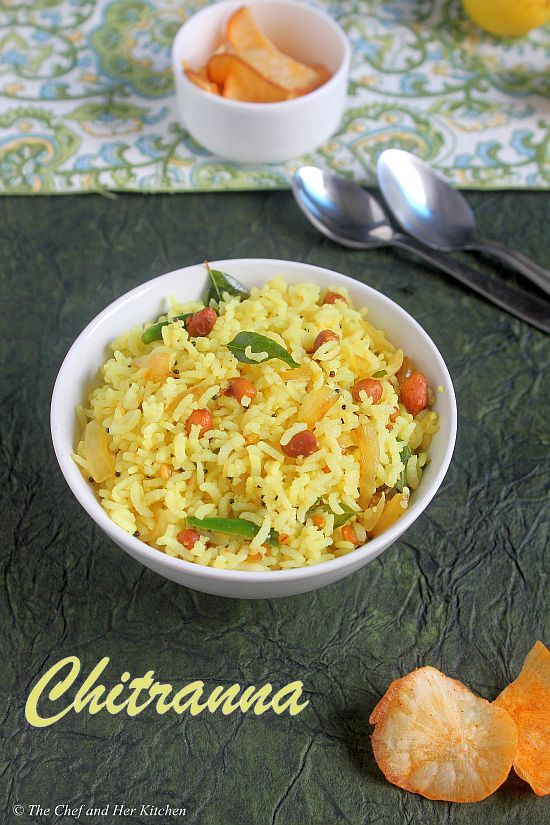
tempered rice
Notes:
  1. In South India, we add urad dal and chana dal in the tempering. In Maharasthra, they do not add urad dal and chana dal for Phodnicha Bhaat and if you like you can add 1/4 tsp Cumin seeds and a pinch of asafoetida in the tempering.
  2. If you like garlic you can roughly chopped garlic in the tempering or 1 tsp Ginger-Garlic paste for a variation.
  3. You can avoid ground nuts in the recipe and green peas can be used instead. 
chitranna

Tuesday, January 7, 2014

Batata Poha | Kanda Batata Poha Recipe | Poha Recipes

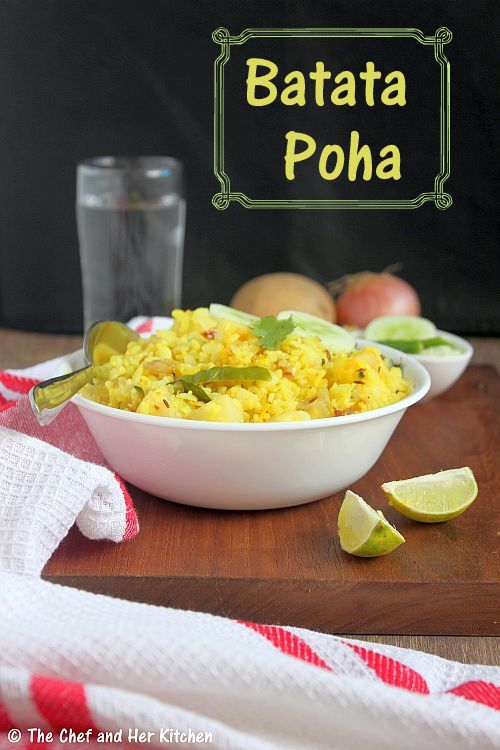
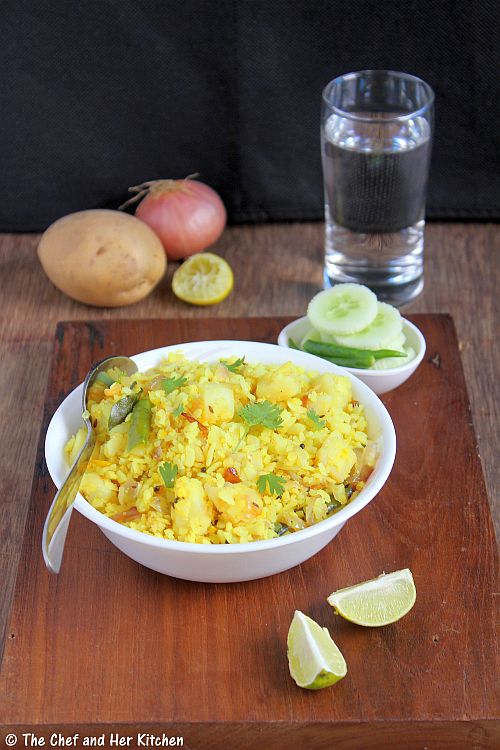
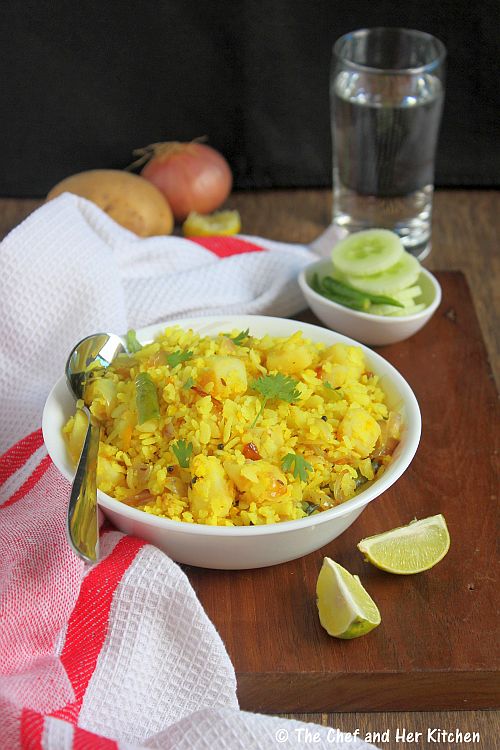
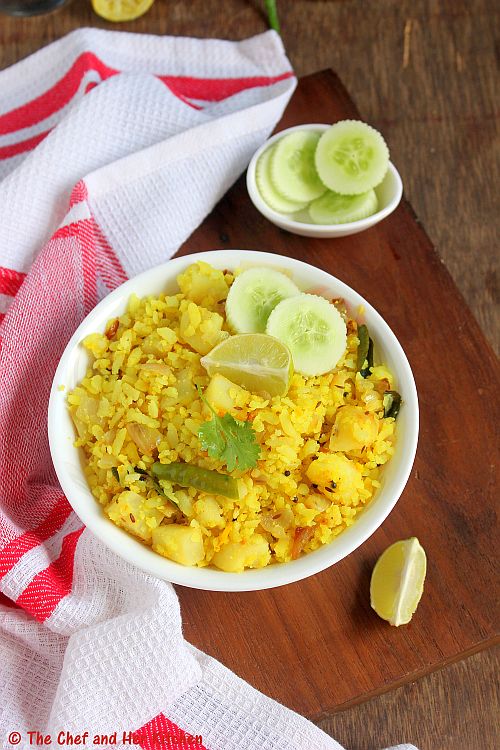
potato poha
'Batata Poha' or 'Potato Poha' is a typical Mahasthrian breakfast variety which is very popular along with 'Kanda Poha',which means 'Onion Poha'.'Batata' in Marathi means 'Potato' where as 'Kanda' means 'Onion', which I got to know only after coming to Mumbai. Maharasthrians have profound love for Potatoes,which is used as the main ingredients for many recipes like Batata vada, Sabudana Khichdi, Batata poha and also as a base for many cutlets and fillings. If you are preparing this for festivals like Janmashtami, you can avoid onion in the recipe.
potato poha
Poha is a very common breakfast at my place, we prepare various varieties of Poha in our house like Lemon Poha,Coconut Poha,Tamarind Poha,Coriander Poha.'Kanda Poha' is very similar to the south Indian variety of 'Lemon Poha' with minor variations in the tempering part. I got introduced to 'Batata Poha' only after coming to Mumbai and has become our favorite on weekends. As it has both potatoes(batata) and onions(kanda) it is called 'Kanda Batata Poha'.I usually prefer to prepare poha when I want to prepare something quick or have not planned my breakfast ahead. Yes, I plan my breakfast ahead as it is the most important meal of the day.You can check lots of options for Breakfast varieties in my blog here.
Check out various Poha varieties in my blog here.
aloo poha

Batata Poha | Aloo(Potato) Poha Recipe:
Serves 2
Prep time:10 mins+soaking time | Cooking time:15 mins | Total time: 25 mins
Cuisine: Indian | Category : Breakfast/Snacks
Ingredients:
2 cups Poha(flattened Rice/atukulu)
2 Potatoes,diced or sliced thin
1 large Onion,thinly sliced
2-3 tbsp Peanuts,roasted and skinned
5-6 Green Chillies,slit
1 tsp Cumin seeds
1/2 tsp Mustard seeds
1/4 tsp Turmeric powder
8-10 Curry leaves
2 tbsp chopped Coriander
juice of 1 small Lemon
1 tsp Sugar(optional,see notes)
2 tbsp oil
Salt to taste

Method:
  • Wash and soak poha in enough water(just add up to the level of poha) for 8-10 mins.As I have a slight medium thick variety it did not take much time.If you are using thick variety soak it with little more water and also for long time,say 15-20 mins.

  • Pressure cook potatoes and peel the skin and dice it into pieces.If you want you can avoid this step and add thinly sliced potatoes in the tempering directly,but it takes bit longer to cook.You can prepare either ways.
  • Heat oil and crackle mustard seeds and cumin seeds.
  • Add cut green chillies,curry leaves and fry for a minute,add sliced onions and fry until they are crisp and pink.
  • Add boiled and diced potatoes and fry well.If you are using raw potatoes,add finely chopped potatoes along with onions and cover it cook until they are done,it takes bit longer time.
  • Add turmeric powder,salt and poha and give a good stir until everything is mixed properly.
  • Add roasted and skinned groundnuts,lemon juice,chopped coriander and sugar(if using) just before removing from stove and mix well.
Serve it hot with chips/sev/chiwda/sliced cucumber and lemon wedges.
batata poha
Notes:
  1. If thick variety of poha is used you need to soak in more water for 20 mins and drain off excess water before using in the recipe.
  2. You can add potatoes either directly in the tempering and cook along with onions,it is a bit longer process or you can use boiled and chopped potatoes in tempering which is a quick process.If you are using them in tempering,chop them fine as they will cook faster.I like the bite of soft potato cubes in poha,hence I boil it ahead and use it.If you want crunchy potatoes you can fry them until crisp separately and add to poha at the end.
  3. If you want you can even add green peas along with potatoes in the recipe.I suggest if you add peas avoid peanuts in the recipe,use either one of them.
  4. You can avoid potatoes and prepare poha just with onions,which is called Kanda Poha(Onion Poha).
  5. You can even avoid onions in the recipe and make only with potatoes.
  6. The addition of sugar is entirely optional,it adds a typical Maharasthrian touch to poha.
batata poha

Saturday, July 20, 2013

Cabbage Carrot Stir fry | Easy Side dishes for Rice

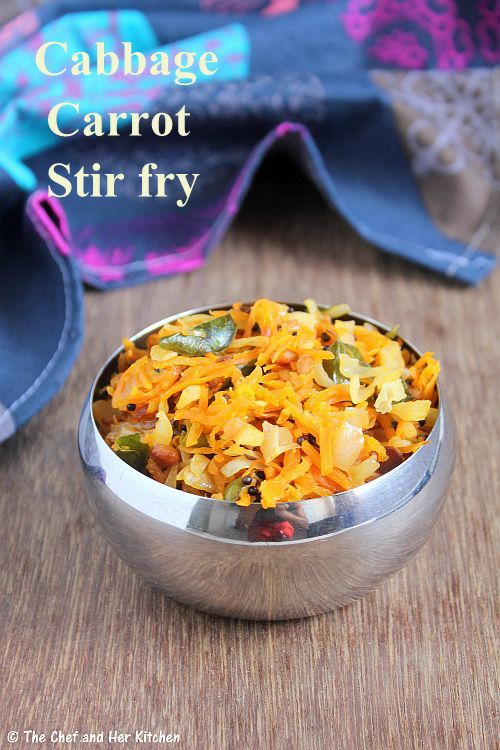
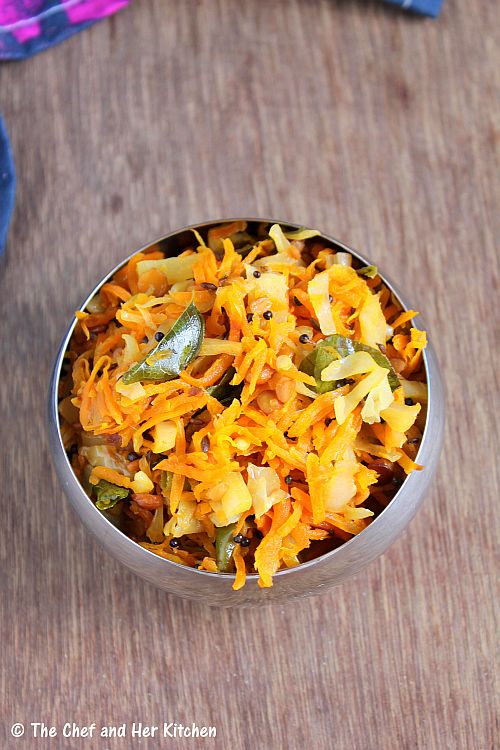
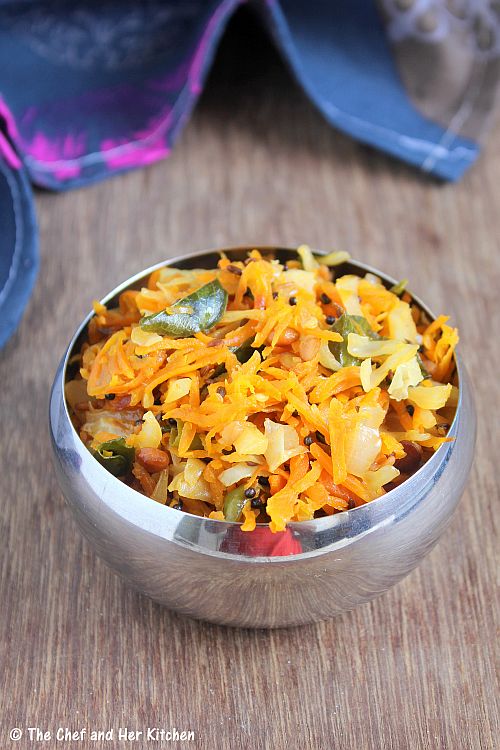
cabbage carrot stir fry
I prefer to use Cabbage mostly in stir fries than the curries as TH is not fond of soft cooked cabbage.Cabbage Paratha is again a favorite with the crunchiness of fresh cabbage bites in it.Cabbage can be paired with many vegetables like carrots,peas,potatoes,sprouts and also with various dals like moong dal,chana dal,chickpeas. I absolutely love all the combinations and also try new combinations sometimes.
You can check out various Cabbage recipes here.

cabbage carrot stir fry

 Cabbage Carrot Stir fry Recipe:
 Serves 2-3
 Prep time:10 mins | Cook time:15 mins | Total time:25 mins
 Cuisine: South Indian | Category: Side dish for Roti|Rice
  
 Ingredients:
 1 small Cabbage,shredded thinly
 1 large Carrot,grated
 5-6 Green chillies,slit
 2 tsp Chana dal
 1 tsp Urad dal
 1 tsp Mustard seeds
 a pinch of Turmeric powder
 a pinch of Asafoetida
 5-6 Curry leaves
 1 tbsp Oil
 Salt to taste

Method:
  • Heat oil in a pan and crackle mustard seeds and add asafoetida.
  • Add chana dal,urad dal and fry them until they turn golden in color.
  • Add curry leaves,green chillies and fry them until they wilt.
  • Now add shredded cabbage and fry well for 3-4 mins.
  • Add grated carrots and,turmeric powder and fry for a couple of minutes.
  • Cover it and cook for 5-6 mins.
  • Add salt at the end and mix well.
 Serve it hot with Rice/Rotis.
  
 Notes:
  1. You can add roasted peanuts(slightly crushed) at the end for extra crunch.
  2. Green peas or sprouts can also be added to the curry.
  3. You can replace green chillies with red chili powder in the recipe.
  4. If you wish you can add grated coconut at the end.
You can check few stir fry varieties with cabbage here:
cabbage carrot stir fry

Monday, July 8, 2013

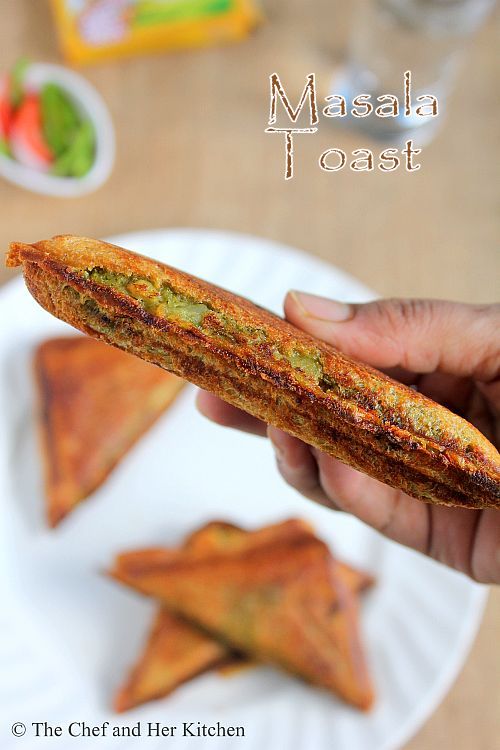
Bombay Masala Toast Sandwich | Potato stuffed Sandwich Recipe

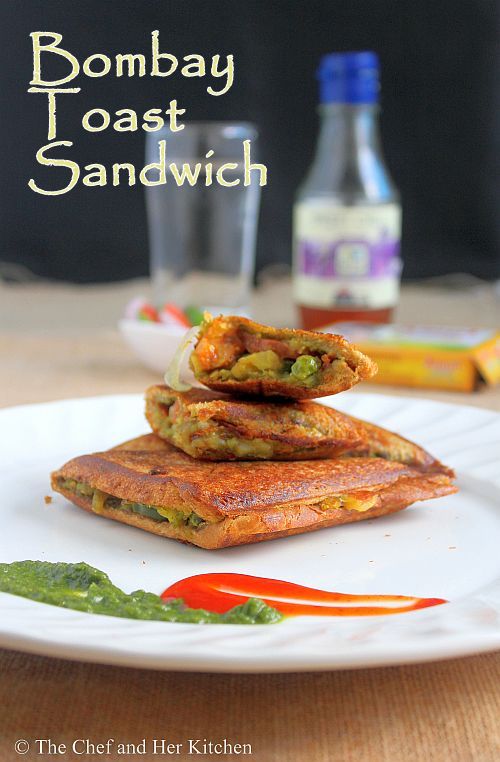
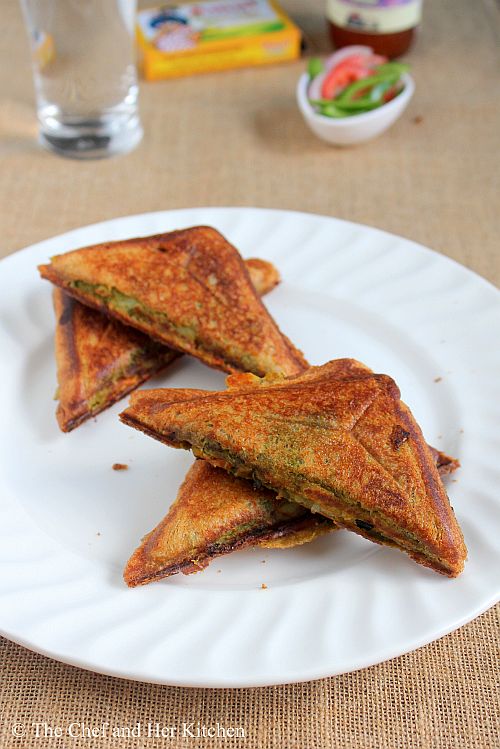
bombay toast sandwich 
Mumbai street food has its own variety ranging from the humble vada pav to  pakoras, sandwiches, pani puri, bhel puri and various other chaats,variety dosas, Indo-Chinese items. Few varieties really stand out and one such is this famous Bombay Toast Sandwich also called as Masala Toast Sandwich widely known as Aloo Toast ot Potato Sandwich in rest of the country.
bombay toast sandwich
You would find sandwich stalls in each and every corner of the city where the hawkers would be busy preparing the fresh sandwiches through out the day.These sandwiches can be eaten as a snack or a meal by itself.I usually rely on these sandwiches if I go out for shopping.As the vegetables are freshly cut and everything is laid in front of you, one doesn't need to bother much about hygiene.The addition of liberal amount of amul butter makes these sandwiches taste even more delicious.If you have not tried this sandwich earlier,I would strongly recommend to try this sandwich recipe.It is really delicious and makes a perfect Breakfast or Snack.
potato stuffed sandwich
I have posted Bombay style Veg toast sandwich earlier which tastes equally good.That version  though is prepared mostly with vegetables where as today's version has the aloo masala along with the vegetables which makes a wholesome breakfast.
potato stuffed sandwich

Bombay Toast Sandwich | Mumbai Masala Toast | Potato Toast Recipe:
serves 2
Prep time:10 mins | Cooking time: 5 mins | Total time:15 mins
Cuisine:Indian | Category:Breakfast|Snacks

Ingredients:
8 Whole wheat Bread slices or regular sandwich bread
1 cup Potato curry(recipe follows)
1 Capsicum,de seeded and thinly sliced rounds
1 Onion,thinly sliced rounds
1 Tomato,thinly sliced rounds
1/4 cup Green Chutney
1 tsp Chaat masala or Sandwich masala
Salt to taste
Amul Butter
Sev,to top

for Potato stuffing:
2 large Potatoes,boiled
1/3 cup boiled fresh/frozen Green Peas
1 medium Onion ,finely chopped
2-3 Green chillies,chopped fine
1 tsp Green chili-Ginger paste
1 tsp Chat masala
1/4 tsp Turmeric powder
1/2 tsp Cumin seeds
1/2 tsp Mustard seeds
2 tbsp Coriander leaves,finely chopped
8-10 Curry leaves,finely chopped
salt to taste
2 tsp Oil

Method:
to prepare potato stuffing:
  • Mash the peeled and boiled potatoes and keep it aside.
  • Heat oil in a pan,crackle mustard seeds and cumin seed.
  • Add chopped green chillies,curry leaves and onions and fry until they turn pinkish in color.
  • Add green chilli-ginger paste,boiled fresh/frozen peas and fry well.
  • Add turmeric,salt and mashed potato to it and give a nice stir and cook it for a couple of minutes.Add a couple of tbsp of water to it and cook to get semi soft consistency curry.
  • Add chat masala and coriander to it and mix properly and keep it aside to cool down.
to prepare sandwich:
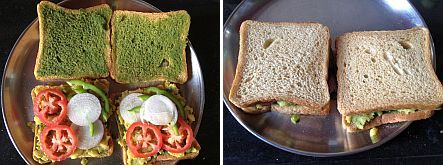
  • Apply butter on one side of bread slices.
  • Apply green chutney on the same side of all the bread slices to which we applied butter.
  • Apply a thick layer of potato stuffing uniformly using a butter knife,level the stuffing over the bread.
  • Arrange the thinly sliced vegetables(tomato,onion,capsicum) on the stuffing and sprinkle salt and chaat masala (or sandwich masala) over it.
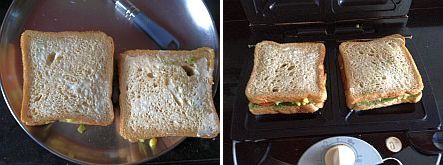
  • Apply butter on the outer slice facing upwards and place it on the hot grill(upside down so that the buttered bread slice would be towards the grill).Now apply butter on the top slice and close the grill and let it grill until the bread becomes crisp and golden brown in color.
  • Remove the sandwich on to a plate and apply some butter(optional) on top of it.
  • Cut it into half in Triangle shaped Toast or else it can be cut into 4 pieces.
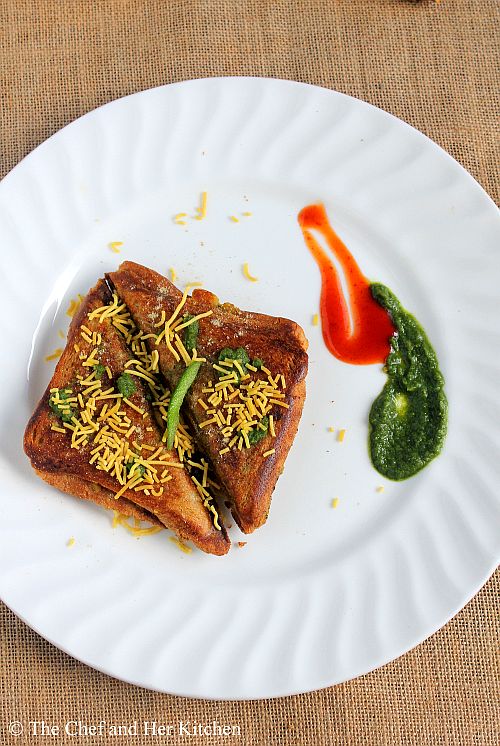
  • For a typical Bombay style Chat sandwich,spread some green chutney over the buttered toast sandwich and sprinkle some chaat masala and add sev generously over it and serve immediately.
Serve the toast hot with the Tomato ketchup and Green Chutney.

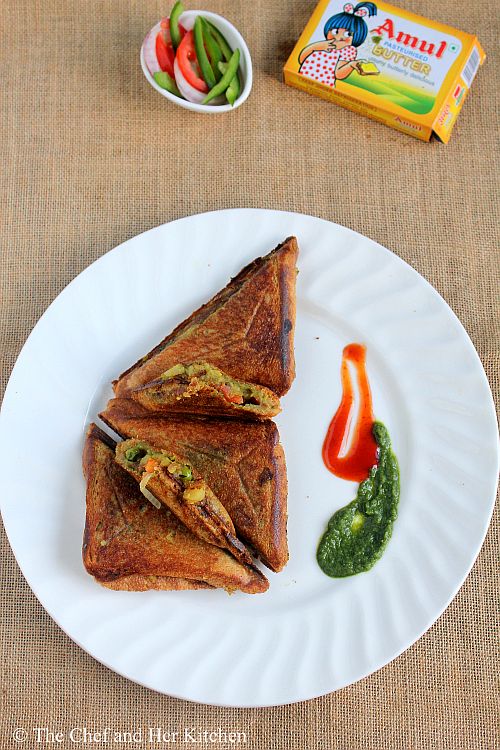
mumbai masala toast sandwich
Notes:
  1. We get good variety of ready made sandwich masala  in Mumbai.If you do not have use chaat masala instead.
  2. You can avoid vegetables and just use potato stuffing for the sandwich.
  3. You can avoid potato stuffing and use all vegetables like sliced cucumbers, tomato, capsicum, onions, boiled sliced potatoes, beetroots to make vegetable sandwich.
  4. I prefer to use Amul salted butter for this sandwich,try to use it if you do not get it use any other butter.
  5. If you do not have griller roast the sandwich on tawa ,slightly press the sandwich while roasting so that the masala sticks to the sandwich.
  6. For Cheese masala toast add grated cheese generously over the vegetable mixture and grill it.
bombay toast sandwich
Check out the crispy bread outside and soft and melting filling inside.If you add cheese it would be a double treat to the taste buds.
potato toast sandwich

Friday, June 14, 2013

Totapuri Mango Chutney | Easy Chutney Recipes

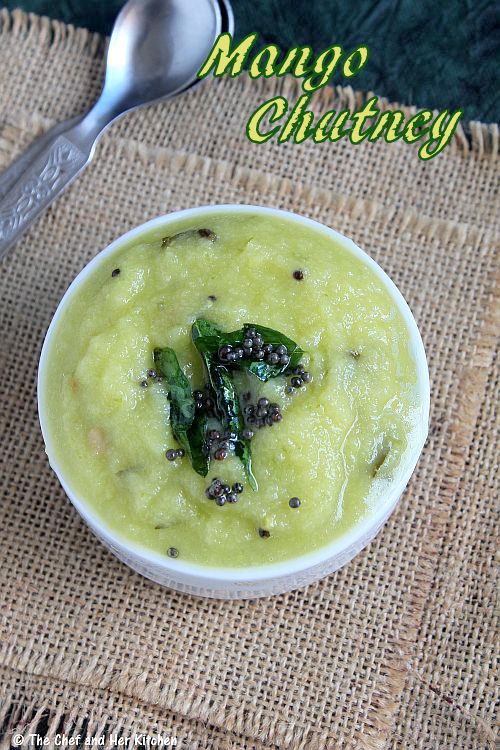
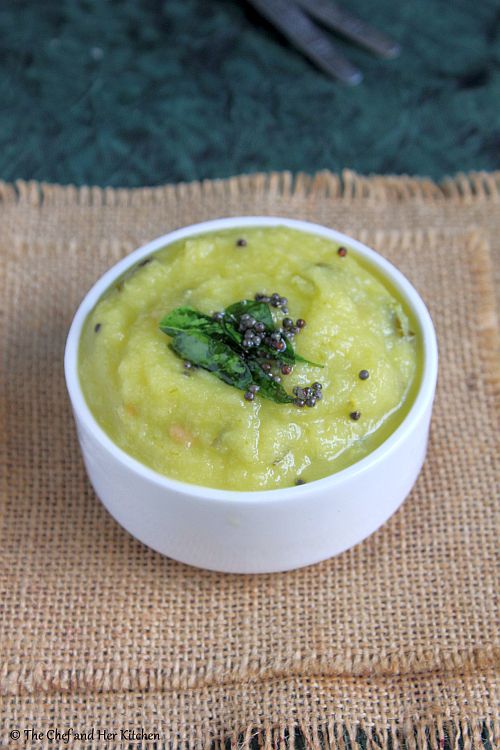
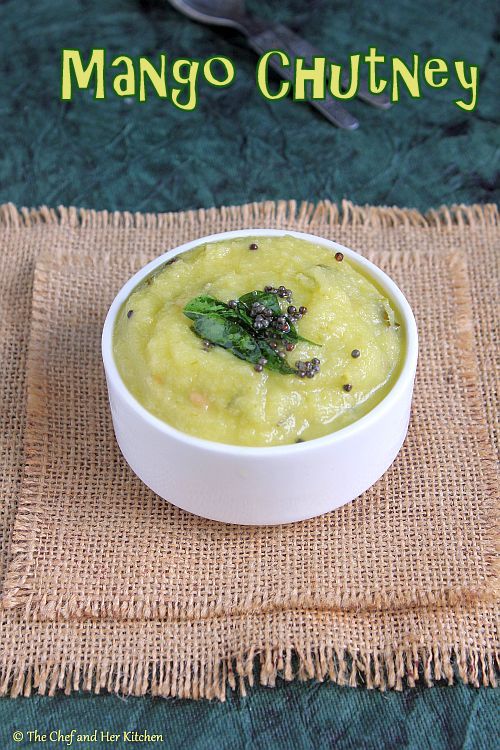
mango chutney
Totapuri mango is one variety which can be eaten raw as it is slight sweet and sour in taste.It is usually sold in front of parks,schools etc where the vendors would drizzle a liberal amount of masala(salt,chili powder with a hint of sugar) on the mango pieces and I must say that the combination is a bliss!!I am sure many of you would agree.
In Bangalore, we get really good ones which tastes better than the ones we get in Mumbai.But when ever I find them in market I usually buy them to relish them raw with salt and chili powder or prepare this mango chutney or instant pickle.You can even use totapuri mangoes in salads,bhel puri etc.
Coming to today's post,this is a very simple and quick chutney made up of totapuri mangoes.Please make a note that you cannot substitute Totapuri mango with any other variety in this recipe.You can prepare this chutney in two ways - you can grind it in whipper mode to retain tiny bits of mango pieces or you can grind it into a smooth paste.It tastes good either ways.I like to prepare coarse chutney with mango pieces which is best suitable with Curd rice and I make it smooth if I want to use it as a dip or serve with any breakfast variety.This chutney is not suitable to mix with rice,if you want to prepare mango pacchadi for rice,check out my Mango-Coconut Pacchadi recipe which tastes best with rice.

Check out few recipes using totapuri mangoes in my blog.
mango chutney

Totapuri Mango Chutney Recipe:
shelf life: 3-4 days
Preparation time: 10 mins | Cooking time: nil | Total time: 10 mins
Recipe Cuisine: Indian | Recipe Category: Chutney|Pacchadi

 
Ingredients:
1 Totapuri raw Mango
4-5 Green chillies
1 tsp Sugar
Salt to taste

to temper:
1 tsp Oil
1/2 tsp Mustard seeds
5-6 Curry leaves
a pinch of Asafoetida(strong rock variety)

Method:
  • Wash and peel the skin of mango and chop it into small pieces roughly.
  • Grind the mango pieces with green chillies,salt and sugar in the mixer to a coarse paste.Check the taste and adjust seasoning if required.Here you can grind it in two ways- you can grind it in whipper mode to retain tiny bits of mango pieces or you can grind it into a smooth paste with the addition of little water if needed.It tastes good either ways.
  • Heat oil in a small tempering pan and crackle mustard seeds and add curry leaves and asafoetida and switch off the flame.Add this tempering to the mango chutney.
Serve it as an accompaniment with khakras/rice/roti/ Curd rice/dosa/paniyaram etc.

Notes:
  1. Use only totapuri mango variety for this,other varieties would not suit for this chutney.
  2. This chutney is a nice blend of flavors,hence taste the chutney once when you grind and adjust the salt,sugar and spicyness of chutney.
  3. You can prepare the chutney in two ways- you can grind it in whipper mode to retain tiny bits of mango pieces or you can grind it into a smooth paste with the addition of little water if needed.It tastes good either ways.I like to prepare coarse chutney with mango pieces which is best suitable with curd rice and I make it smooth if I want to use it as a dip or serve with any breakfast variety.
  4. This chutney is not suitable to mix with rice,if you want to prepare mango pacchadi for rice,check out my Mango-Coconut Pacchadi recipe which tastes best with rice.
  5. You can store it in an air tight container for 3-4 days in refrigerator.
mango chutney

Saturday, June 8, 2013

Mango Juice | Easy Summer Drinks Recipes

mango juice
I had plans to post Mango recipes this year, but I could not do so because of my laziness.Somehow I managed to prepare a few mango recipes last week and I would post them in the coming weeks.So stay tuned for various Mango Special recipes in my blog and prepare them before the mangoes fade away from the markets.
Mango Juice is an easy recipe which I thoroughly enjoy during the mango season.Given a chance if I am asked to prepare a beverage with mango,I would prepare either Mango Milkshake or Mango Lassi as both of them are my absolute favorites.I usually stock the mango fruit pulp in my freezer all the time and if you have the mango pulp at hand you can prepare this juice in no time. 

Check out few ripen Mango recipes in my blog.For complete list of Mango recipes click here.
mango juice

Mango Juice Recipe:
(serves 2)

Ingredients:
1 ripen Alphonso Mango(any variety would do)
2-3 tbsp Sugar
1/4 tsp Cardamom powder(optional)
Ice cubes,to serve

Method:
  • Wash and peel the skin of mangoes and cut into pieces.
  • In a blender add chopped mangoes,sugar and cardamom powder and blend to a fine puree.
  • Add chilled water(approx 1 cup) and blend again to a smooth consistency.Now check the sweetness and add more sugar or water if needed.You can make it thin or thick according to your preference,I prefer to make it slightly thick.
Serve it in a glass with ice cubes on top.

Notes:
  • I like the flavor of cardamom in the drink,you can skip it if you want.
  • Always add chilled water so that you can serve the drink immediately or you can refrigerate the jucie for few hours before serving.
  • Use sweetened mango varieties like alphonso,kesar,badam etc and fibrous variety is not suitable for juice.If you use fibrous variety strain the juice before serving.
  • I usually dip the mangoes in water for few hours.It is believed that this process reduces the heat impact of mangoes on our body.
  • You can add juice of 1 small lemon and few mint leaves while blending to make mango lemonade.This would be a refreshing change to your usual drink.
  • The amount of sugar depends on the sweetness of mangoes,hence add it accordingly by tasting the juice in between while blending it.
mango juice

Friday, December 21, 2012

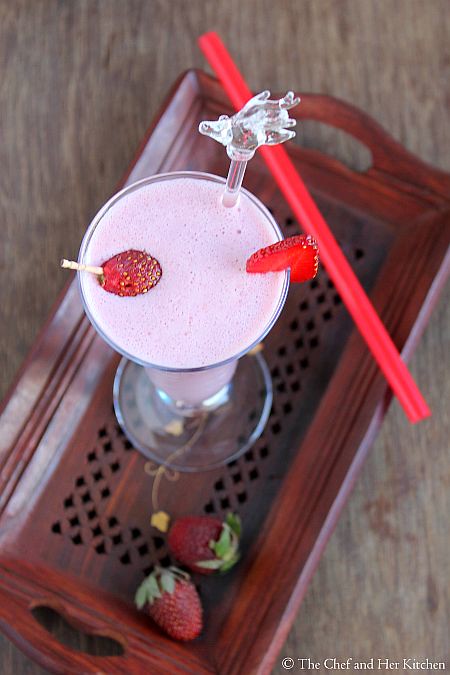
Strawberry Milkshake Recipe | Milkshake Recipes

 
Strawberries are in season and I just love those berries,in fact all berries.When ever I get a pack of them I finish it off eating them as they are before I even think of using them in any recipe.I had saved a box of strawberries this time to use them particularly in recipes and here goes my Strawberry milkshake recipe.
This recipe is no different from any other milk shake recipe and is a very basic one but this is a favorite among every one.One can make it rich by adding ice cream to it.I do not add ice cream to my milkshake on regular basis but I do add when I am in a good mood and not bother about the calories.
Strawberry Milkshake Recipe:
(Serves 2)

Ingredients:
8-10 Strawberries
2-3 tbsp Sugar *
2 cups cold Milk *
2 scoops of Vanilla ice cream or Strawberry Ice cream (optional)
few(2-3) Ice Cubes(optional)

Method:
  • Wash the strawberries and remove the green leaves and chop them roughly into pieces.
  • In a mixer/blender add strawberries,ice cubes,sugar and 1 cup of milk and blend into a smooth puree.Check the sweetness and if needed add extra sugar.
  • Add remaining milk and vanilla/strawberry ice cream and run again to the desired consistency.Add more milk if you need a thin milkshake and also adjust the sugar accordingly.
  • Strain the milkshake in a strainer to separate the seeds.
Serve the chilled strawberry milk shake immediately.
Notes:
  1. Sugar should be adjusted according to the sweetness of strawberries and to your desired sweetness.
  2. Milk also is to be adjusted according to your desired thickness.
  3. Addition of ice cream is entirely optional,it adds a nice creamy touch to milkshake.
  4. You can even add milk powder to thicken the milkshake.

Check out my other Strawberry recipes here.

Friday, October 26, 2012

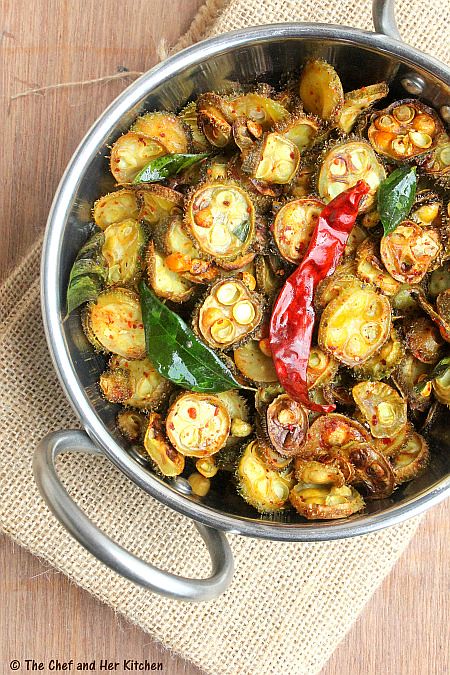
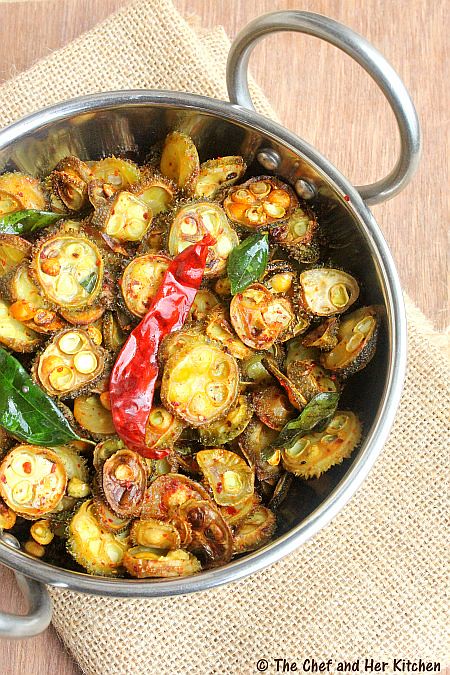
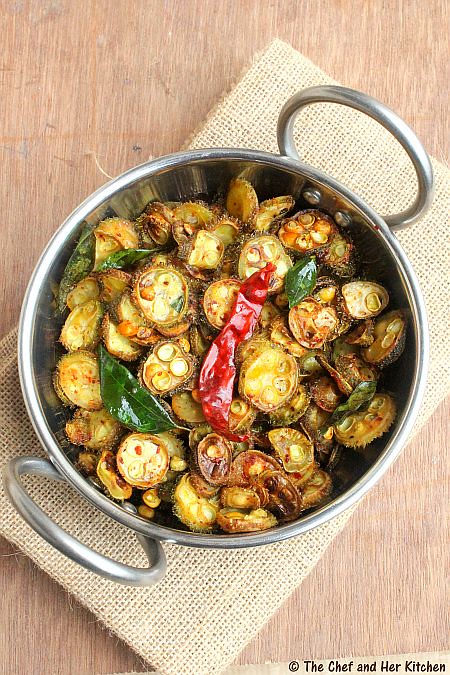
Kantola Fry | Akakarakaya Vepudu | Indian Teaselgourd Fry

Kantola(Akakarakaya in Telugu) is a seasonal vegetable and also is rarely available in the markets. When ever we find them in the market, it is a must buy for us , as we all love this vegetable.They look like tiny bitter gourds but are not as bitter as them.If you are not someone who likes bitter gourd this mildly bitter kantola would definitely impress you in the first taste.Though we make sabzi (curry) with kantola, my first preference would be a fry as everybody in the family loves it to the core.It is a great accompaniment with sambar/dal/rasam rice.So the next time you come across this vegetable do definitely get it to try this simple but amazing fry.
Kantola Fry | Akakarakaya Vepudu Recipe:
(Serves 2-3)

Ingredients:
250 gms Kantola(Akakarakaya)
10-12 Curry leaves
2 Red chillies
3/4 tsp Red chili powder
Salt to taste
2-3 tbsp Oil

Method:
  • Wash and cut the edges of Kantola and slice them into thin roundels.
  • I will mention two methods (low fat oven method and traditional method)to make this simple and crispy fry.Adapt the version which suits you.
Oven roasted low fat method:
  • Cut an aluminium foil to the size of the oven baking tray.Grease it slightly.
  • Add 1 tsp of Oil to the kantola pieces and spread them on the foil of oven baking tray.
  • Bake them in the preheated oven for 15-20 mins @ 160 degrees.Keep an eye after 12 minutes taking care not to burn them.We need half roasted kantola pieces not the fully fried ones,so if you see slight brown color in the edges remove it from the oven.
  • Heat 1 tbsp oil in a thick kadai and add red chillies and curry leaves and fry them for 20-30 seconds.
  • Add half roasted kantola slices and fry them over medium flame for another 5-6 mins until they turn crisp.
  • Add red chili powder and salt and fry for a minute and remove them from the stove.Do not cover the vessel wit lid which makes the fry soggy.

Traditional method:
  • Heat 2-3 tbsp oil in a thick kadai/pan and add red chillies and curry leaves and fry them for 20-30 seconds.
  • Add kantola slices and fry them over medium-high flame for another 2-3 mins until the oil coats all the pieces and they start changing the color.
  • Now reduce the flame and fry over low flame for 12-15 mins until they turn crispy.
  • Add red chili powder and salt and fry for a minute and remove them from the stove.Do not cover the vessel wit lid which makes the fry soggy.
Serve them hot with rice,dal/rasam/sambar with papad.
 Notes:
  1. I prefer the oven roasted method as it will give you perfect crisp and low fat fry and also does not require much attention like the traditional roasting method which needs to be constantly stirred.
  2. You can follow the same process for the fries like Tindora, Ladies finger, Brinjal, Bittergourd.They all work beautifully in the oven.
  3. Always make the fry just before you serve the food,it tastes nice and crisp.If you need to make it before all you need to do is make the fry and cool it completely and then cover it with lid.During serving fry them again for 3-4 mins in the kadai to regain the crispness back.
  4. Though Kantola belongs to the bittergourd family it is very mildly bitter and hence it does not require any prior marination in salt/turmeric powder to remove the bitterness.
  5. You can add 1-2 crushed garlic pods along with red chillies while frying.This will give nice garlicky flavor to the fry.

 
back to top