Tuesday, December 30, 2014

Udupi Sambar | Mixed Vegetable Sambar | Karnataka style Sambar Recipe

udupi sambar
Udupi is known for the origin of the famous 'Masala Dosa' and also for various tiffin varieties.Udupi sambar is very aromatic because of the usage of freshly ground spices and also the addition of coconut,jaggery and red chillies makes it mildly sweet,sour and spicy in taste.It can be served with most of the breakfast varieties like idli,dosa,vada and even plain steamed rice,it tastes nice. You can prepare this sambar with just one vegetable or various combination of vegetables with or without onions.The addition of onions is optional but I love the addition of onions to sambar and in fact the addition of shallots adds to a better taste.
udupi sambar

Check out other sambar recipes in my blog:
udupi sambar

Udupi Sambar Recipe -Mixed Vegetable Sambar - Karnataka style:
Serves 2-3 | Author: Prathibha
Prep time:10 mins | Cooking time:30 mins | Total time: 40 mins
Cuisine: South Indian | Category: Side dish for Rice - Main Course

Ingredients:
1/2 cup Toor dal
2 cups diced Mixed Vegetables(Carrot,Potatoes,Beans,Drumstick,Brinjal)
1 Onion, diced or 12-15 Shallots,optional
1 large Tomato, chopped
a small gooseberry size Tamarind
1/4 tsp Turmeric powder
1-2 tsp grated Jaggery,optional
2 tsp Oil
Salt to taste

to roast and grind:
2 tsp Coriander seeds
2 tsp Urad dal
1 tsp Chana dal
1/4 tsp Peppercorns
1/2 tsp Cumin seeds
7-8 Fenugreek seeds
2 Red chillies,spicy variety
2 Byadige Red chillies
1/3 cup grated coconut

to temper:
2 tsp Ghee/Oil
1/2 tsp Mustard seeds
1-2 Red chillies
a sprig of Curry leaves
a pinch of Asafoetida

Method:
  • Chop the vegetables  into 1" cubes and keep them ready.
  • Wash and soak toor dal for 10 minutes in 1.5 cups of water. Add turmeric powder to it. In a separate container add chopped vegetables and tomato and pressure cook dal and vegetables separately for 3 whistles, Once the pressure drops slightly mash the dal with a wooden ladle.
  • Soak tamarind in water for some time and extract pulp from it and keep it ready.
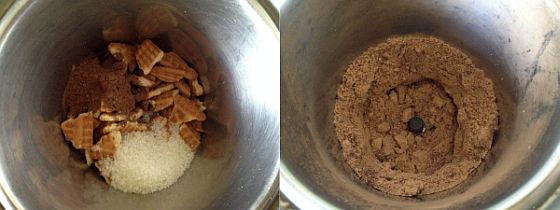
  • Dry roast coriander seeds, cumin seeds, urad dal, chana dal,fenugreek seeds red chillies and pepper corns and grind them to powder first and then add freshly grated coconut and grind to a fine paste by adding some water.You can even saute the fresh grated coconut at the end for half a minute along with the spices,this way the sambar does not spoil quickly even in summers.
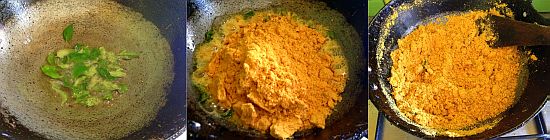
  • Heat oil in a big kadai/pan and add diced onions and fry until they turn translucent. Add boiled vegetable pieces and cooked dal to it.
  • Add ground mixture , tamarind pulp, salt, jaggery and mix nicely and boil it until the raw smell of the ground paste is gone.Also add enough water to get the required consistency while boiling.
  • Taste the sambar once and adjust the seasoning if needed. Sambar thickens slightly when it sits, so adjust the consistency according to your requirement. 
  • Heat ghee/oil in a small tempering pan and crackle mustard seeds and add red chillies, curry leaves and asafoetida and fry for half a minute and add the tempering to the sambar at the end and mix well.
Serve it hot with steamed Rice and fryums and a vegetable stir fry. You can even serve it with  breakfast varieties like idlidosavada
karnataka style sambar

Notes:
  1. You can use any other vegetable like  cluster beans,  pumpkin, chow-chow,,raw papaya,broad beans(chikkudu) etc or a combination of mixed vegetables.
  2. You can follow the same process for ladies finger sambar, in that you need to fry the ladies finger pieces in oil first and then add to the sambar while boiling.You should not pressure cook the ladies finger pieces.
  3. You can even prepare sambar with greens like amaranth, fenugreek(methi), palak or mixed greens following the same process.It tastes nice with Ragi Mudde.
  4. If you want a no onion-no garlic version skip onion in the recipe.
  5. Instead of boiling the tomato, you can even grind the tomato with the other ingredients, that gives a nice color to sambar.
  6. For a quicker version you can even grind tomato,grated coconut with Karnataka style sambar powder to a fine paste and follow the same recipe.
mixed vegetable sambar

Monday, December 22, 2014

Parle G Biscuit Cake in Microwave | Microwave Biscuit Cake

parleg biscuit cake
Few years ago,one of my aunt shared this recipe which she took it from a tupperware booklet.I was new to baking then and tried it immediately because of the simplicity of the recipe and I was really amazed by the texture of the cake .I had shared this recipe to my mom,mil and friends and everyone appreciated this cake as it is quite simple to prepare with very few ingredients available at pantry.This cake has been quite regular at my mom's place for her get togethers and kitty parties as this cake does not need oven and also the fact that it is eggless.All you need is a pack of parle-G biscuits ,a sachet of fruit salt and few basic ingredients from your pantry and you can prepare this cake in no time. I am sure many of you tried the instant version of biscuit cake in microwave.If you have not tried yet, I recommend you to try this simple biscuit recipe.It is the most easiest way to please your kids who demands for cakes with short notice.
biscuit cake

Check out other cake recipes for Christmas:

microwave biscuit cake

Parle G Biscuit Cake Recipe :
makes an 8" cake | Author : Prathibha
Prep time: 5 mins | Cooking time: 4-5 mins | Total time: under 10 mins
Cuisine: Indian  | Category: Cakes/Bakes

Ingredients:
150 gms Parle G Biscuit packet
3 tbsp Cocoa powder
1/2 cup Sugar
1 1/2 cups Milk,approx
1 Eno fruit salt sachet, plain
2-3 tbsp chopped Dry fruits(almonds,cashew nuts etc)
Butter/Oil , to grease the pan
Cocoa powder or Icing sugar, for dusting

Method:
  • Chop dry fruits into small pieces and keep them aside.
  • Take a deep microwave bowl and grease it with butter or oil nicely and keep it ready.
  • Break biscuits into fine pieces and add cocoa powder, sugar to it and run it in the mixer to a fine powder.
  • Take milk in a bowl and add the ground powder to it and mix well.The mixture should be smooth,neither very thin nor very thick.
  • Add sliced almonds and cashewnuts to it and mix well.                                 
  • Add eno to it and give a quick stir, you will see a foamy batter ready.

  • Pour this batter into the greased bowl and level it off evenly.Sprinkle few more sliced almonds on top.Microwave it on HIGH for 4-5 mins.Check it after 4 mins, as the power differs for each microwave it is always better to check it in between.Insert a tooth pick and see if it comes out clean it is ready if it is slightly battery then again microwave it for a minute or more.Repeat the tooth pick test if needed.
  • Leave it undisturbed for 5 mins.Run a knife around the corner of the cake and unmould it on to a plate.Let the cake cool completely.
Serve the cake as it is  or you can even dust it with cocoa powder or Icing sugar or pour chocolate ganache on top of it.Decorate it as per your wish with color sprinkles,gems etc.

microwave biscuit cake

Notes:
  1. You can use combination of biscuits like Parle G and Hide and seek biscuits or use just plain Parle G biscuits.
  2. You can reduce the sugar to 1/3 cup if you like it mildly sweet.
  3. As the Microwave power differs for each microwave it is always better to check the cake in between.Insert a tooth pick and see if it comes out clean it is ready, if it is slightly battery then again microwave it for a minute or more.
  4. Checck out the chocolate ganache recipe if you want to cover the cake with it.You can even use ready whipped cream or chocolate icing or simply dust it with icing sugar or cocoa powder like how I did.
  5. You can easily keep this cake for 2-3 days at room temperature.
biscuit cake

biscuit cake

Monday, December 15, 2014

Bombay Chutney | Besan Chutney Recipe | Side dish for Dosa,Poori

bombay chutney
'Bombay Chutney' is basically 'Besan Chutney' which is prepared as a combination for usually Dosa , Poori and Chapathy in South India.I personally like it with soft and fluffy Atukula dosa and chapathy.I wonder how it got the name 'Bombay Chutney' as I never came across something like that here in Mumbai.It is a simple yet delicious and can be made with the basic ingredients available in the pantry and also a perfect recipe to pair with chapathis if you run out of veggies.The addition of boiled potato to the bombay chutney makes a delicious combination with poori.

Check out other gravies that pairs commonly with Dosa, Chapathy and Poori :
                besan chutney
Bombay Chutney | Besan Chutney Recipe:

Serves 2-3
Prep time: 10 mins | Cooking time: 20 mins | Total time: 30 mins
Cuisine: Andhra - Indian | Category: Side dish

Ingredients:
2 tbsp Besan(chickpea flour)
1 large Onion, sliced thin
2 medium Tomatoes,chopped
4-5 Green chillies,slit and cut
8-10 Curry leaves
2 tbsp Coriander leaves,chopped
1/2 tsp Turmeric powder
1/2 tsp Red chilli powder
1/2 tsp Garam masala (optional)
1 tsp Lemon juice or 2 tbsp Curd,optional
1/2 tsp Mustard seeds
1 tsp Urad dal
1 tbsp Chana dal
Salt to taste
1 1/2 tbsp Oil

Method:
  • Mix the besan with 1/4 cup of water properly to form a nice paste without any lumps.
  • Heat oil in a kadai and crackle mustard seeds. Add urad dal and chana dal and fry until the dals turn slight red in color.
  • Add cut green chillies and sliced onions,curry leaves,ginger-garlic paste and fry till the onions turn translucent.
  • Add chopped tomatoes and fry until they turn pulpy.Add turmeric powder,red chilli powder,garam masala and 3 cups of water,cover it cook for 6-8 mins until you see bubbles.
  • Remove the lid,add salt and add the mixed besan mixture slowly by stirring the entire mixture continuously as we do for upma and cover it and cook for 2-3 mins until thick.
  • Add lemon juice or curd,coriander leaves and mix well.
Serve hot with Dosa or chapathy or Poori.It tastes nice with Atukula Dosa too.

bombay chutney
Notes:
  1. The addition of tomato is optional, you can skip it.
  2. You can even add one boiled potato by slightly mashing it to chunks or cut into pieces,this tastes better with poori.
  3. The addition of lemon juice or curd makes it tangy, you can skip it if you do not want it that way.
  4. You can always skip garam masala and ginger- garlic paste for simple bombay chutney.
bombay chutney

Monday, December 8, 2014

Pappula Podi | Putnalu Podi | Pappindi | Fried Gram Powder

putnala podi
'Pappula Podi' is a common accompaniment apart from 'Avakay','Gongura Pacchadi' and 'Kandi Podi' which you find in any Andhra meal in restaurants.It is mostly mistaken with 'Gun Powder aka Kandi Podi' as they both look similar,but the taste and texture for both the powders is quite different. We call it as 'Pappindi' at ur place and our version is slightly different from Andhra style Pappula Podi as the additon of dry coconut, sugar and cumin seeds makes it taste different and nice.You should not miss to add the cumin seeds at the end while grinding as it adds a nice flavor to the powder and also make sure that you do not grind it completely,you just need to run it once in whipper mode.Try this simple Pappindi and I am sure even you will love it.It is usually mixed with hot rice and a generous dollop of ghee,a combination which is definitely a heaven on plate.My most favorite way of using this podi is to mix with curd and eat with Chakli,it is infact a favorite comboat my place and we usually prepare this powder in more quantity if we have huge supply of chaklis at home during marriage season,You can even use it as a quick chutney with dosa, it tastes nice.
putnala podi

Check out other powder varieties for Rice in my blog:
pappula podi
Pappula Podi | Fried Gram Powder Recipe:shelf life:2-3 months
Prep time:10 mins | Cooking time:5 mins | Total time:15 mins
Cuisine: South Indian | Category: Accompaniments - Podis

Ingredients:
1 cup Fried gram
1/4 cup Dry Coconut pieces
7-8 Red Chillies
1 small amla sized Tamarind
4-5 Garlic pods
2 tsp Cumin Seeds
2 tsp Sugar
1 tsp Mustard seeds
a Sprig of Curry leaves
Salt to taste
2 tbsp Oil

Method:
  • Grind dry coconut,red chillies,salt and sugar to a powder.
  • Add tamarind and fried gram and grind again to a powder. 
  • Add cumin seeds and garlic pods and grind again.
  • Heat oil in a kadai and crackle mustard seeds and add curry leaves and add the ground powder and mix it once and switch off the flame.You should keep it on the flame just until you mix it,not for long.
  • Cool it and store it in an air tight container.
Serve it with hot steamed Rice,Ghee and chopped Raw onions.You can even mix Avakay to this powder,it tastes yum.

andhra gun powder
Notes:
  1. You can add more dry coconut if you wish,it adds more taste to podi.
  2. The addition of sugar is optional but helps in balancing the flavors.
  3. This tastes yum when you mix it with hot steamed rice,ghee with fryums and raw onion on the side.You can even mix it with avakai pickle and ghee it tastes nice.
  4. You should not miss to add the cumin seeds at the end while grinding as it adds a nice flavor to the powder and also make sure that you do not grind it completely,you just need to run it once in whipper mode.
  5. You can add a couple of garlic pods while running in the mixer in the last round for different flavor.
fried gram powder

Monday, December 1, 2014

Pulusu Upma | Tamarind Upma | Pulusu Pindi

pulusu upma
When it comes to breakfast,we prepare lot of varieties and there are so many recipes which are just common to our community. I have posted many of our community special recipes and today's post is also one among them. 'Pulusu Upma' is basically Tamarind upma which quite tangy,sweet and spicy and tastes much different when compared to regular upma as we use a combination of ingredients like tamarind,jaggery and sambar powder to get the balanced taste in this upma.Also, the usage of rice rava in this upma makes the texture different compared to regular upma.It is known as 'Pulusu pindi' in Andhra and it is slightly different from our version.I prefer this Pulusu Upma over the regular Sooji Upma any day because of its distinct taste,you can try this tangy Tamarind upma sometime for a different breakfast recipe.
pulusu upma

Check out more breakfast recipes of our Community style:
pulusu pindi

Pulusu Upma | Pulusu Pindi Recipe:

Serves 2 | Author: Prathibha
Prep time:10 mins | Cooking time: 20 mins | Total time: 30 mins
Cuisine: Andhra | Category: Breakfast
Ingredients:
1 cup fine Rice Rava(see notes for how to prepare it at home)
15-20 Shallots or 2 large Onions
2-3 Green chillies,slit
3 cups Water
2 tbsp chopped fresh Coriander
1/2 tsp Turmeric powder(optional)
1/4 cup Groundnuts
1 large lemon sized Tamarind
2-3 tbsp Jaggery
a sprig of Curry leaves
1 tbsp Chana dal
2 tsp Urad dal
1/2 tsp Mustard seeds
2-3 tbsp Oil
Salt to taste
1  tbsp Ghee

Method:
  • Dry roast rice rawa in a kadai until the nice aroma starts from it.Remove it from the pan and let it cool.You can even roast rawa in a tsp of ghee which also gives a nice flavor to upma.
  • Soak tamarind in 1/2 cup of water for half an hour and extract pulp from it.
  • Heat oil in a thick aluminium kadai(which is ideal for making upma) or non-stick kadai and crackle mustard seeds.
  • Add ground nuts  fry until they turn little red in color and add chana dal and urad dal and fry until they turn golden brown.
  • Add slit green chillies,curry leaves and fry them until they wilt.
  • Add shallots or sliced onions and fry them until they are pink in color.
  • Add tamarind pulp extracted and 3 cups of water (1c rawa:3c water) to it.
  • Add turmeric powder,sambar powder,salt and jaggery to it and let it boil.
  • Add roasted rava to it with one hand and keep stirring with another hand using a ladle,make sure you make this process very quickly otherwise you will end up having lumpy upma.
  • Once everything is mixed,keep the lid on and cook it on low flame for 8-10 mins.Switch off the flame.
  • Add ghee and coriander to it and mix well.
  • Cover it and let it sit for 4-5 mins before you serve.
Serve it hot with some boondi/chips/cucumber.
pulusu pindi

Notes:
  1. To prepare Rice rawa: Clean and Soak the rice for some time and drain it completely and spread over a cloth so that it will drain off excess water.Coarsely grind the pound mixture in a mixer and then sieve it(do it in whipper mode).Use the rawa which is in sieve and the flour that it is sieved can be used for dosa's or regular rice flour.
  2. This upma is sour,sweet and spicy at the same time so adjust the seasoning as per your taste.
  3. We prepare another version called 'Pulusu Biyyam' where the roasted rava is replaced with roasted rice but the rest of the procedure is similar.
  4. I highly recommend to use shallots for this recipe, if you do no have you can use thickly sliced onions instead.
             tamarind upma
Check out other Upma recipes in my blog:
tamarind upma

Monday, November 24, 2014

Garlic Podi | Poondu Podi | Podi Varieties for Rice

garlic podi
A typical south Indian meal is incomplete without a Podi(spicy powder).We prepare various podi varieties,while few are paired with breakfast others with rice.Mom makes various podi varieties and she always packs a few varieties for me when I visit her.Her Kakarakaya(Bittergourd) podi is quite tasty and is the most favorite one at our home.

garlic podi


I use more amount of garlic in my cooking as we both love it very much and this Garlic podi is no exception.It is fiery and loaded with lots of flavor and taste.As I usually stock these podi varieties sometimes it is really helpful on those lazy days. I just prepare steamed rice and mix various podi varieties with hot rice and ghee along with fryums and papads- a satisfying meal for me.


Check out other Podi recipes for rice in my blog:
                  

Garlic Podi | Velluli Karam Podi Recipe:
shelf life:2-3 months
Prep time:10 mins | Cooking time:40 mins | Total time:50 mins
Cuisine: South Indian | Category: Accompaniments - Podis

Ingredients:
1 cup finely sliced Dry Coconut
1/4 cup peeled Garlic cloves or 2 whole Garlic Pods
8 Red Chillies(Spicy Guntur variety)
4-5 Byadige Red Chillies
1 amla sized ball of Tamarind
2 tbsp grated Jaggery(optional)
1 tsp Mustard seeds
3 tbsp Oil
Salt to taste

Method:

  • Peel the garlic pods slightly and churn it in the mixer in whipper mode to a consistency of big granules.
  • Heat 2 tbsp oil and fry the churned garlic granules on a low-medium flame until they turn slightly crispy.
  • Grind dry coconut,red chillies(both the varieties),salt,jaggery and tamarind to a coarse powder.You taste the mixture at this point and adjust the taste by adding more of tamarind or red chillies or salt.
  • Heat 1 tbsp of oil in a kadai and crackle mustard seeds and add the ground powder and fried garlic granules and mix properly.Switch off the flame.
  • Let the mixture cool and store it in an airtight container and you can use it for 2-3 months.

Serve it with hot steamed rice,ghee and raw onion.You can even serve it with Idli/Dosa.
poondu podi

Notes:
  1. The addition of jaggery is optional but it balances the taste properly.
  2. I do not peel the garlic pods completely and I prefer to keep a layer on garlic.

garlic karam podi

Monday, November 17, 2014

Sorakaya Telagapindi Kura | Easy Lauki Sabzi | South Indian Curries

bottlegourd curry
A simple dry curry or a vegetable fry, along with dal or sambar and rasam makes a perfect south Indian meal for me any day. As DH is not very fond of few vegetables like bottlegourd, ridge gourd and few other varieties, I usually end up making them for lunch.During my Postnatal period, my mom used to prepare this bottlegourd curry with telagapindi a lot as it aids in good production of milk for new mothers.Telagapindi is basically the residual powder after the process of extraction of oil from sesame seeds and it is a good source for the increase of milk production for the new moms in their postnatal period.In case if you do not have it you can even use sesame seed powder or totally avoid both, still this curry tastes nice.

Check out other Andhra style Curry recipes here:
sorakaya kura

Sorakaya Telagapindi Kura Recipe:
Serves 2-3
Prep time: 10 mins | Cooking time: 20 mins | Total time: 30 mins
Cuisine: Andhra - Indian | Category: Side dish

Ingredients:
3 cups peeled and diced tender Bottlegourd
1 large Onion, finely chopped
2 tsp Garlic Chili powder
2 tbsp Telagapindi or 1 tbsp Sesame seed powder(optional)
1/4 tsp Turmeric Powder
1 tbsp Chana dal
1 tsp Urad dal
1/2 tsp Mustard seeds
1 red chilli, broken
a sprig of Curry leaves
1 1/2 tbsp Oil
Salt to taste

Method:
  • Heat oil in a kadai and crackle mustard seeds.Add chana dal and urad dal and fry until the dals turn red in color.
  • Now add red chili,curry leaves and fry until the leaves wilt.
  • Add finely chopped onion and fry until they become translucent.
  • Add the chopped bottle gourd and haldi and fry for 2 mins.Sprinkle little water and cover it and cook and until it is properly cooked.
  • Add garlic chili powder, salt and telagapindi(or sesame seed powder) and mix it nicely and cover it and cook for 2-3 mins.
Serve it hot with rice/roti/chapati.

Notes:
  1. The addition of telagapindi or sesame seed powder is optional,but it adds to the taste.
  2. If you do not have garlic chili powder, just add red chili powder.
  3. You can replace bottle gourd with ridge gourd or raw papaya and follow the same process.
lauki sabzi


Tuesday, November 11, 2014

Chettinad Kuzhi Paniyaram | South Indian Breakfast Recipes

chettinad kuzhi paniyaram
'Paniyaram' which is also called as 'Paddu' or 'Gunta Ponganalu' is a very common breakfast variety at my place. I have posted various paniyaram recipes before like Avalakki Paddu(Atukula Guntaponganalu)Instant Oats Paniyaram and Paniyaram using Dosa batter.
Paniyarams can be prepared as sweet or spicy and today I am posting a spicy version of Chettinad Paniyaram.When the dosa batter turns sour, it is ideal to use it to make paniyaram and I usually make the paniyarams at least once when I prepare dosa batter. If I have to prepare for more number of people I prefer following this method to prepare Paniyaram, though there is not much of difference in taste when you compare with the regular Paniyaram made out of dosa batter,these Chettinad Paniyarams turns out slightly crispier because of the addition of the par boiled rice.The addition of coconut and shallots makes it taste slightly different when compared to the regular paniyaram.We can either add the ingredients raw or saute them in oil slightly and then add to the batter,both versions have their own taste and both ways it tastes nice.But I personally prefer the addition of raw onions to the batter rather than frying them as the raw onions add nice crunch to the paniyarams.We even add soaked chana dal to paniyaram but if you do not like you can skip using it.
kara kuzhi paniyaram
Check out other versions of paniyaram here.
chettinad kuzhi paniyaram

Chettinad Kuzhi Paniyaram Recipe:
Serves 5-6 ppl | Author: Prathibha
Prep time:45 mins | Cooking time: 30 mins | Total time: 1 hr 15 mins + Fermentation time
Cuisine:Chettinad | Category:Breakfast/Snack

Ingredients:
for batter:
1 cup Raw Rice
1 cup Par Boiled Rice or Idli Rice
1/2 cup Whole white Urad dal
1 tsp Fenugreek Seeds
Salt to taste

to mix into batter:
2 tbsp Bengal gram/Chana dal,soaked(optional)
4-5 Green Chillies,finely chopped
1 tbsp chopped Curry leaves
2 tbsp finely chopped Coconut pieces or grated Coconut
15-20 Shallots/Small Onions,finely chopped
1/4 cup Sour Curd,beaten
1/4 tsp Cooking Soda
1 tsp Mustard Seeds
1 tbsp Urad dal
1 1/2 tbsp Oil

Oil,to fry

Method:
to make batter:
  • Wash and soak rice varieties together and urad dal with fenugreek seeds separately for 3-4 hrs.Grind Urad dal in the wet grinder till smooth and frothy.
  • Grind rice separately into fine rawa consistency.
  • Mix rice and dal mixture nicely and add salt and ferment it for 10-12 hrs.
to make Paniyaram:
  • Heat oil in a pan and crackle mustard seeds and add urad dal and fry.
  • Add chopped curry leaves, green chillies and shallots and fry until they become translucent.
  • Add grated/chopped coconut and saute for a minute and let the mixture cool.
  • Add sour curd to the batter and mix nicely.
  • Add the fried mixture and soaked chana dal to the batter and mix well.
  • In a ladle add cooking soda and 1 tbsp water and mix well and add to the batter and mix nicely.
  • Heat the paniyaram/gunta ponganalu pan/Aebliskever Pan and add 1/2 tsp of oil in each impression.When it is piping hot keep the flame on LOW and pour the batter using a table spoon until it covers 3/4th and pour some more oil over it and cover it with lid. Let it roast on low-medium flame until golden brown in color.
  • When you see the edges turning golden in color use a sharp knife and run it around the edges of  each paniyaram and turn them to the other side and roast until golden brown on both the sides.
chettinad kuzhi paniyaram

Notes:
  1. You can avoid adding curd and ferment the batter for 15-16 hrs until its sour.
  2. I like to add soaked chana dal as it adds nice bite to the paniyaram.
  3. The addition of cooking soda makes the paniyaram light and fluffy, so do not miss it.
  4. Shallots add nice taste,if you do not have them you can even add normal onions.
  5. If you are short of time you can skip tadka part and add everything raw to the batter and make paniyarams.Skip mustard and urad dal in this case.
kuzhi paniyaram

Wednesday, October 29, 2014

Gongura Pappu | Sorrel Leaves Dal | Gongura Recipes

gongura dal
I am sure everyone would have celebrated Diwali nicely and enjoyed it with lots of fun and food. I had to pull myself to post this recipe especially after a along weekend.

Gongura leaves are called 'Sorrel leaves' in English and 'Khatta Bhaji' in Hindi and 'Ambaadi' in Maharastra.Gongura leaves(Sorrel leaves) is used extensively in Andhra to prepare various recipes like Gongura Pickle, Pacchadi, Pappu(Dal),Rice and gravies.I have posted few recipes with Gongura earlier and I am yet to post the most popular recipe - Gongura Pacchadi which I promise to post it in near future.I had earlier posted a recipe of Gongura Pulusu Kura which is a stewed version of Gongura and Chana dal which is quite tangy and goes well with rice and today I am posting a simple yet delicious dal recipe with Gongura,which is again a popular recipe in Andhra cuisine.

Check out other recipes with Gongura.
gongura dal

Gongura Pappu :
Serves 3-4
Prep time: 10 mins | Cooking time: 30 mins | Total time: 40 mins
Cuisine: Andhra - Indian | Category: Side dish

Ingredients:
1 cup Toor dal(Kandipappu)
1 medium bunch Sorrel leaves/Gongura or 5-6 cups loosely packed
1 large Onion,cut into big chunks
5-6 Green chillies,slit
3-4 Garlic pods
1/2 tsp Turmeric powder
Salt to taste
1 tbsp Oil

to temper:
1 tbsp Ghee/Oil
1 tsp Mustard seeds
2 Red chillies
10-12 Curry leaves
2-3 garlic pods,slightly crushed
a pinch of Asafoetida

Method:
  • Wash and chop Gongura and keep it aside.
  • In a kadai/pan heat oil and add green chillies, garlic pods and fry for half  a minute and then add onion chunks and saute for 2 minutes until they turn translucent.
  • Add Gongura leaves and fry again for 4-5 mins until the leaves wither and become slightly mushy.
  • Wash toor dal twice and add enough water and turmeric powder to it.
  • Pressure cook toor dal and gongura leaves mixture in separate containers of the pressure cook for 3-4 whistles until the dal turns soft.
  • Once the pressure drops remove extra water from cooked toor dal and mash the toor dal with a pappu gutti(wooden masher) to a smooth paste.
  • Slightly smash the gongura mixture if you want your dal smooth or leave it as it is.
  • In a kadai heat ghee/oil and crackle mustard seeds and add red chillies and crushed garlic pods and fry until it turns slight red in color.Add curry leaves and asafoetida and fry for half a minute.
  • Add cooked and slightly mashed gongura mixture and cook for a minute.
  • Add mashed toor dal to it and add enough reserved water(from dal) and salt and mix nicely and cook for 4-5 mins.
Serve it hot with hot steamed rice,ghee and papad/fryums.
gongura pappu
Notes:
  1. You can even add onions while tempering or cook along with gongura.
  2. Sometimes the dal does not get cooked if cooked along with gongura because of the sourness of those leaves, hence cooking them separately is recommended.
    While boiling add water according to your desired consistency - add less water for thicker dal and more water for slightly running dal and boil accordingly.Also the dal thickens once its kept for long at room temperature.
  3. The red sorrel leaves are slightly tangy,so tamarind is not need.But if you are using white sorrel leaves add 1-2 tbsp tamarind pulp at the end while boiling the dal.
  4. Garlic adds a nice flavor,hence do not skip it.
gongura pappu
 
back to top