Showing posts with label Bangalore Specials. Show all posts

Monday, February 19, 2018

Sagu Masala Dosa Recipe

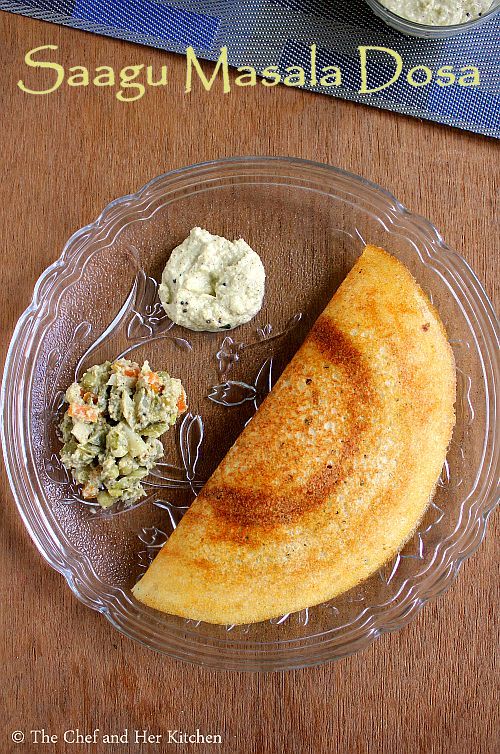
sagu masala dosa
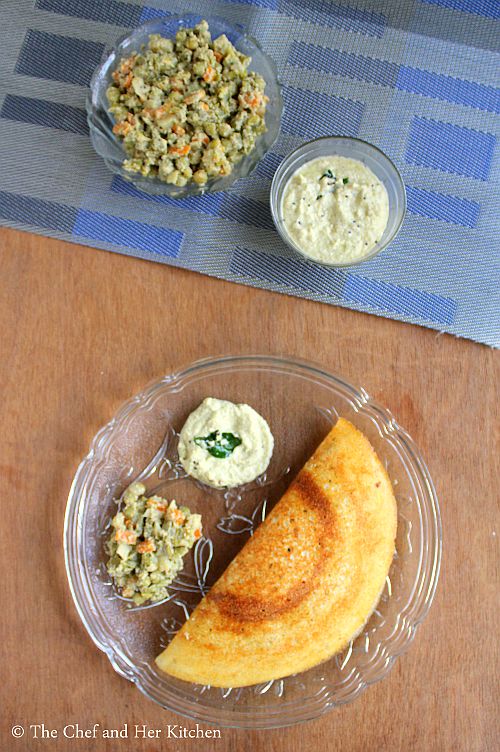
Sagu Masala dosa recipe with step by step photos.Sagu is a typical karnataka style mixed vegetable curry made out of coconut paste with few spices which makes it unique in taste.Usually Sagu is eaten with set dosa or poori and you can even pair it with simple pulav or can be eaten with chapati/roti too.
sagu masala dosa
I love to eat masala dosa any day and I try to cover many of my favorite dosa joints during my trip to Bangalore.You get the best masala dosa in Bangalore and I have mentioned in many of my earlier posts how the masala dosa available in bangalore is different from the other parts of the country.There is another version of masala dosa called Sagu masala dosa which is available only in few hotels.If I see Sagu masala dosa in the menu that would be my obvious choice than the masala dosa as I love the sagu masala dosa very much.A generous serving of thick sagu is smeared inside the dosa instead of the regular potato masala which makes it quite unique in taste.
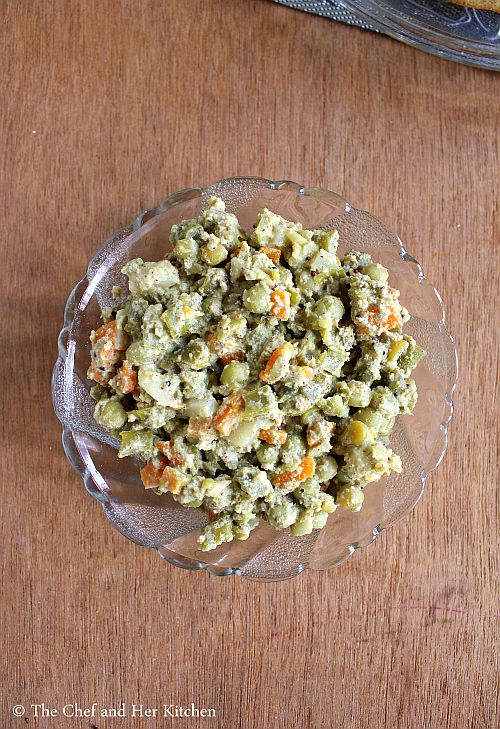
vegetable sagu
We are lucky to have MTR in Singapore to satisfy a good masala dosa craving for a Bangalorean.Most of my trips to MTR would be having this sagu masala dosa as a constant order apart from Set dosa,Bisebele bath etc.I have not clicked step wise pics for this post but will update the space when I do next.
Check out other stuffed dosa varieties in my blog:
sagu masala dosa
Here is how to make sagu masala dosa with step by step photos:
Sagu Masala Dosa Recipe:
Serves 3-4 | Author: Prathibha
Prep time: 20 mins | Cooking time: 20 mins | Total time: 40 mins + fermentation time
Cuisine: Karnataka | Category: Breakfast

Ingredients:
for Dosa batter:
2 cups Raw Rice
1 cup Idli Rice/Par boiled Rice
3/4 cup Poha/flattened Rice
3-4 tbsp Urad dal
1 tsp Methi(Fenugreek) seeds
Salt,to taste
1/8 tsp Cooking soda

for Vegetable Sagu:
2 cups of finely diced Mixed Vegetables(Carrot,Potato,Beans,Green Peas,Cauliflower)
1 Onion,roughly chopped
1/2 tsp Mustard seeds
2 tbsp Oil/Ghee
Salt to taste


ingredients to grind for Sagu:
1" Cinnamon stick
4-5 Cloves
1-2 Marathi Moggu
1/2 cup fresh grated Coconut
1 tbsp Khus khus
1 tbsp Fried gram
5-6 Green chillies
a handful of chopped Coriander leaves,optional
1 tsp Oil

Method:
to prepare dosa batter:
  • Soak both the rice together with methi seeds for 5-6 hours and soak urad dal with poha in another vessel for 3-4 hours.
  • Wash the rice and urad dal+poha separately.
  • Grind urad dal with poha to a smooth batter in the wet grinder and add rice to it and grind until smooth by adding enough water.
  • Remove the batter to a vessel and add enough salt and little rinsed water(from the grinder bowl) and mix it nicely with the hand and cover it and let it ferment for 9-10 hours.
to prepare Vegetable Sagu:
  • Heat a tsp of oil in a kadai/pan and add green chillies and fry them, but be careful as the whole green chillies might burst.You can make a small slit if you want to avoid bursting.Add cinnamon,marathi moggu and cloves to it and fry for sometime.
  • Grind the fried ingredients with grated fresh coconut,khus khus, fried gram, coriander leaves and make it into a smooth puree.
  • In a cooker,heat oil crackle mustard seeds and fry chopped onions until pink.Now add vegetables and fry until they are slightly crisp.
  • Add the ground masala and fry until the mixture leaves the oil and then add enough salt and 1/3 cup of water and pressure cook for 1-2 whistles(do not over cook).Once the pressure is released add lemon juice to it and give a good stir.
to prepare Sagu Dosa:
  • Take required amount of fermented batter in a bowl and add little water to get the pouring consistency and add cooking soda and mix it nicely.
  • Heat a thick dosa tawa and sprinkle some water to make sure that the tawa is hot.
  • Pour a big ladle of batter onto a medium hot pan and spread it in the circular motion towards the outer edge to form a uniform round shaped dosa.Do not make this dosa either very thin nor very thick.
  • Pour 1 tbsp oil/ghee approx over it and around the edges and cover it with a lid.
  • Let it roast on medium-high flame for 1-2 mins,remove the lid and spread 3-4 tbsp of vegetable sagu on the dosa and increase the flame and roast for another 1 minute.Fold it and serve.You can even spread coconut chutney on the dosa and place the sagu one side and then fold it.
  • Reduce the flame for one minute and hten start preparing the next dosa.Do not pour the batter on high flame,the batter will stick to the tawa.If you feel the tawa is over heated sprinkle some water over it before making next dosa.
Serve the sagu dosa hot with coconut chutney and sagu on the side.

Notes:
  1. As the quantity of urad dal is less this batter needs more fermentation time.If your dosa is porous you can avoid adding cooking soda else you can add little bit and then make dosas.
  2. Sagu needs to be thick as we are placing it inside the dosa and hence if you feel the sagu is slightly thin,put it on high flame until the water evaporates a bit and become a thick gravy.
  3. You can prepare masala dosa using the same batter, it comes out super crispy outside and spongy inside.
              sagu masala dosa

Monday, May 29, 2017

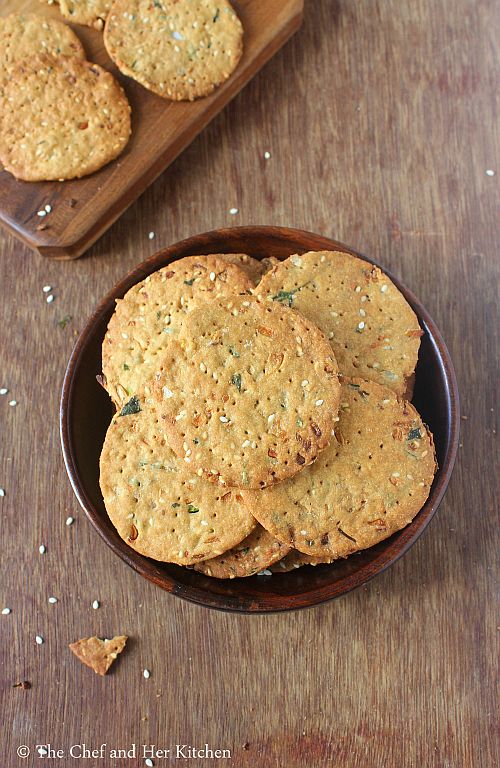
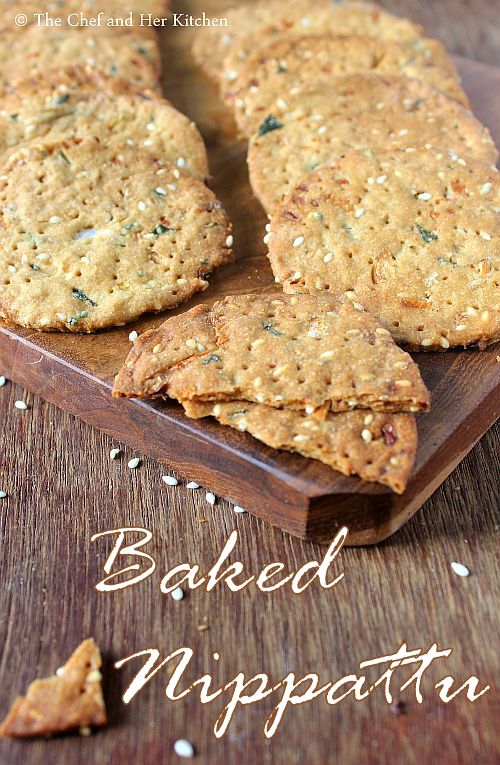
Baked Nippattu Recipe | Iyengar Bakery style Baking Nippattu

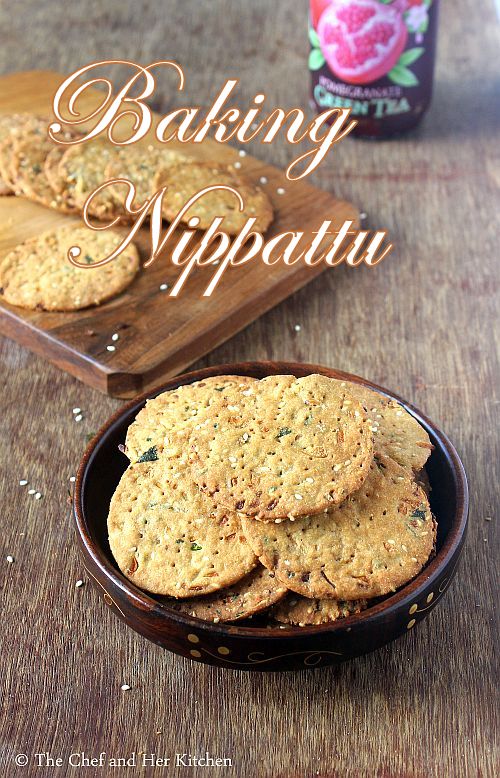
baking nippattu
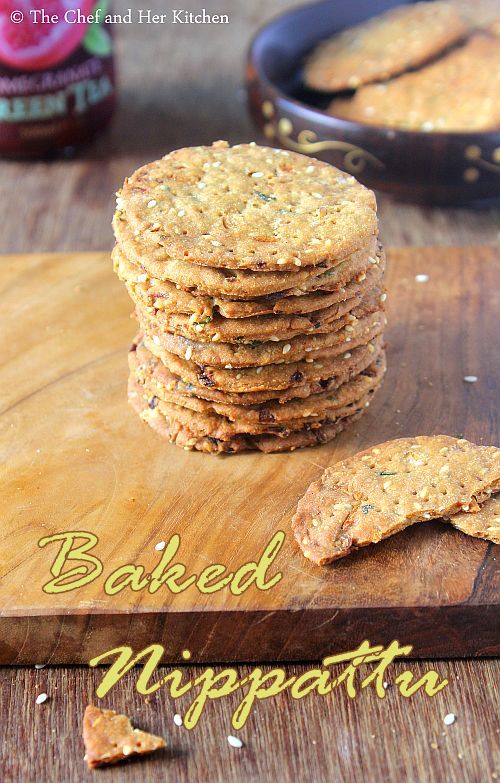
Baked Nippattu recipe with step by step photos. If you have ever visited an Iyengar bakery in Bangalore you would have been familiar with these snacks - Benne Biscuit, Khara Biscuit,Kobbari Biscuit, Palya buns, Baked Nippattu,Honey cake,Plain cake,veg puffs,Khara buns, rusk,Vegetable toast, Khara bread etc to name a few and these are all my favorite goodies among all the available items in the bakery.When ever I visit Bengaluru it is must for me to eat these goodies and carry back few with me while coming back to my place.I usually get Khara buns, plain cake, Khara bread, rusk, mixed bicuits and baked nippattu along with me.Though the shelf life of Khara buns and Khara bread is less we enjoy it as our breakfast and dinner for two days and finish them off while the rest can be stored for a couple of weeks.
baked nippattu
Baked Nippattu is a baked version of the nippattu but the main ingredients used in the regular nippattu and baked nippattu are completely different.While the regular nippattu is made out of rice flour, baked nippattu is prepared using all purpose flour.Both the versions taste good on their own and I absolutely love both the versions. You can check out how to prepare traditional nippattu recipe here and today I am posting the Iyengar bakery style baked nippattu,which is also known as Baking nippattu.
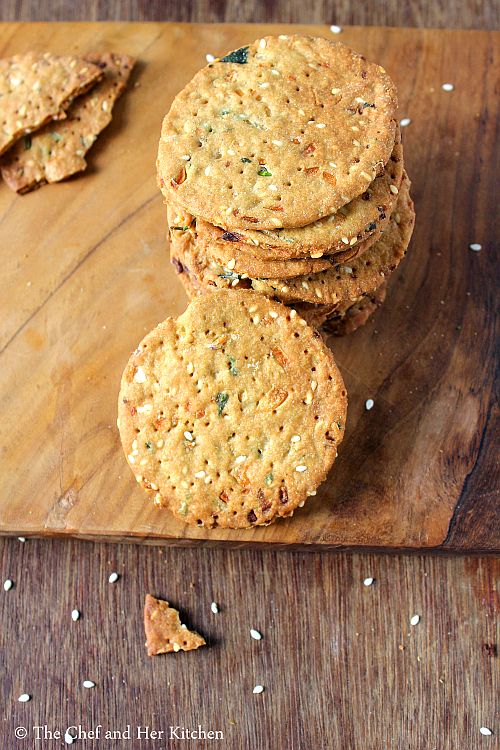
baked nippattu
The recipe which I am posting today is adapted from Red chilies and it has been tried several times and I have replaced the flour with the wheat flour and have achieved good results.Though it tastes best with the regular flour the ones prepared with the wheat flour are no less in taste compared to the regular flour ones. The key taste factor in these baked nippattus is the onions which are baked to crisp and that gives a sweet hint of taste in every bite.Also, the more thin you roll the more it tastes better.Do try out this simple and delicious baking nippattu recipe and enjoy these homemade goodies with a cup of tea.
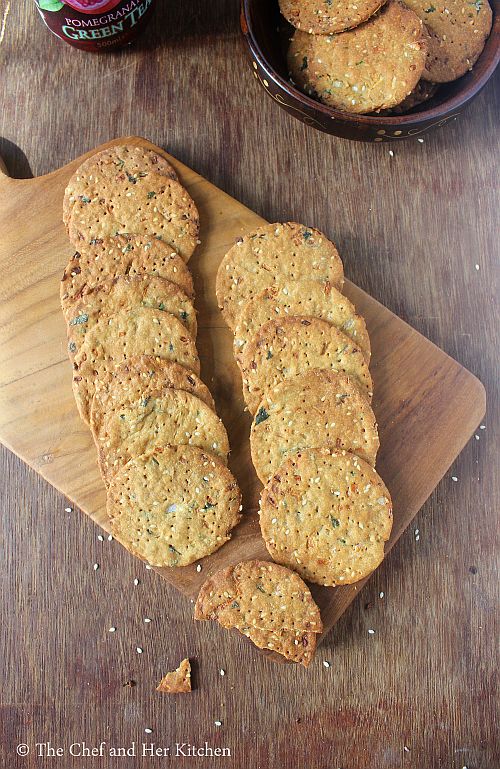
baked nippattu
Check out the other Iyengar bakery style snacks recipes in my blog: Khara Bread, Khara Buns, Coconut Biscuit, Vegetable toast.
baked nippattu
Here is how to prepare iyengar bakery style baked nippattu recipe with step by step photos.
Iyengar Bakery style Baked Nippattu Recipe:
Yields 25 crackers
Prep time: 30 mins | Baking time:20 mins | Total time: 50 mins+ resting time
Cuisine: Karnataka | Category: Snacks

Ingredients:
1 cup All purpose flour/Wheat flour
1/2 tsp Baking soda
1.5 tbsp Sesame seeds
1.5 tsp Sugar
3/4 tsp Salt
1 big Onion,finely chopped
2 Green chilies, finely chopped
2-3 tbsp finely chopped Coriander leaves
2 tbsp Butter,melted
3 tbsp Oil
2-3 tbsp Warm water

Method:
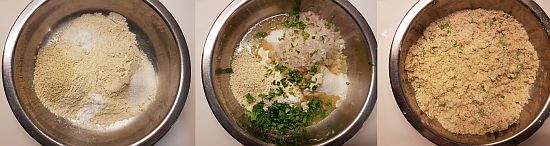
  • In a bowl add flour(or wheat flour) ,baking soda, sesame seeds,sugar and salt and mix nicely.
     
  • Add finely chopped onions, coriander leaves, green chilies, oil, melted butter to the flour mix and mix it nicely.
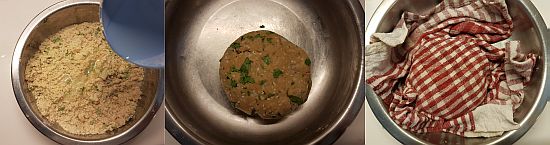
  • Now sprinkle warm water little by little and make it to a tight dough and knead it for a couple of minutes and cover it with a damp cloth and keep it aside for half an hour.
     
  • Preheat the oven at 180 deg C/350 deg F for 10-12 mins.
  • Knead the dough again for a minute and divide the dough into big lemon size balls.
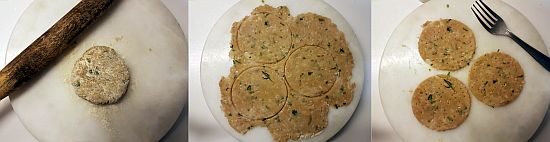
  • Take one ball and dip it in dry flour and roll like a thin chapati. If this does not work place the ball in between two plastic sheets and press it to a thin roti using a puri presser.
  • Use a 2.5" round cutter and cut the rolled roti into circular discs as shown in the picture.
  • Prick them with a fork at a couple of places to avoid them getting puffed up while baking.
     
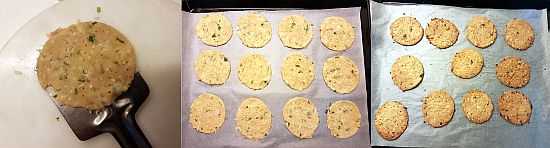
  • I used a flat spatula and lifted it carefully and place it on the parchment paper placed over a baking tray.
  • Now gather the scraps from the cut out circular discs and reroll to make the thin chapati and follow the same process with the left over dough too.Place the circular discs giving some space in between on the parchment paper.
     
  • Bake it in a preheated oven t 170 deg F for 15-18 mins until they are crisp. Keep an eye after 12 mins, do not bake it until dark brown as they get burnt and will not taste nice. 
  • I baked them in two batches and I got around 25 crackers.
  • Remove the tray and let the crackers down a bit on the parchment paper and then remove them and place on the wire rack and let them cool completely.
Store them in an air tight container and enjoy it with a cup of tea/coffee.

Notes:
  1. I have used both all purpose flour and wheat flour in the recipe and succeeded with the results.Hence I use wheat flour in the recipe instead of all purpose flour but I suggest to try with all purpose flour if you are attempting for the first time.
  2. Needless to say that Maida based ones taste better but the wheat flour one was equally good, you can take my words and try it.It was easier to roll the wheat flour one than the maida ones.
  3. I like the thin baked nippattus and hence I rolled the dough to a thin roti, if you like it thick you can keep it slightly thick. But the thinner ones turn out crispy and stay crisp even after a week when stored properly.
  4. Add little water and make it to a tight dough else you cannot roll it thin.
  5. Please do not compromise on the fat quantity used in the recipe, else it does not turn out nice.
  6. Cut the onions very finely else it will be difficult in rolling the dough.
  7. Do not forget to prick them nicely before baking.
baked nippattu

Tuesday, October 6, 2015

Bun Nippat Masala Recipe | Bun Nippat Recipe

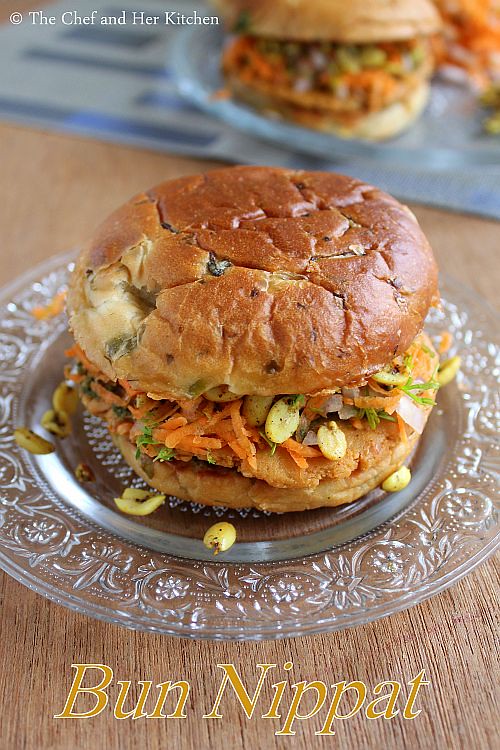
bun nippat masala
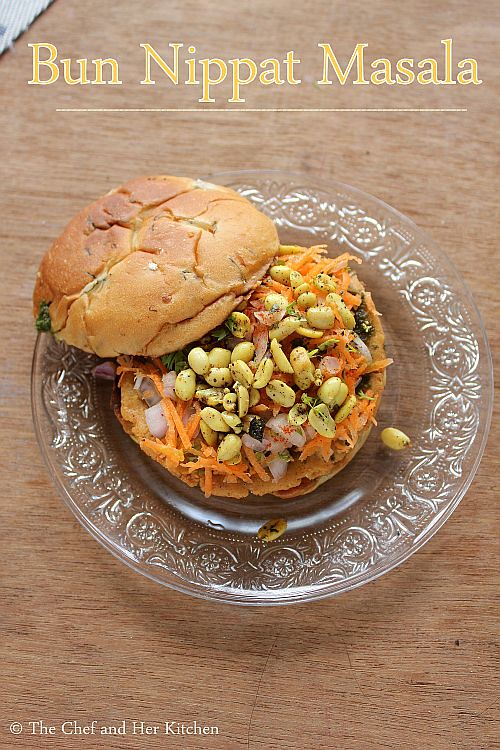
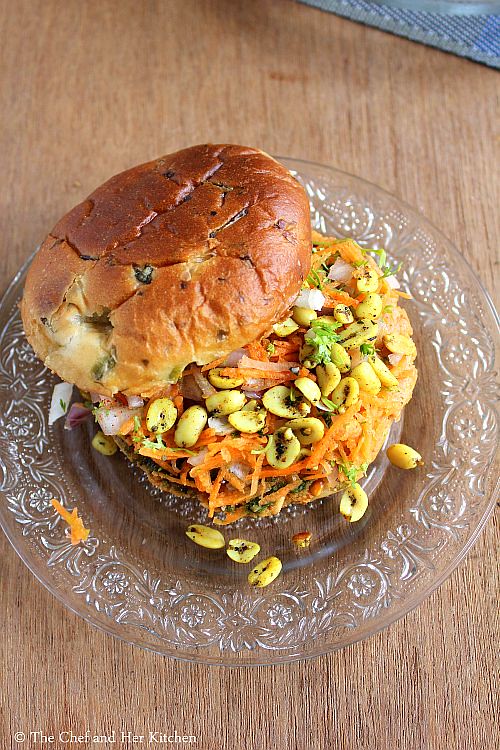
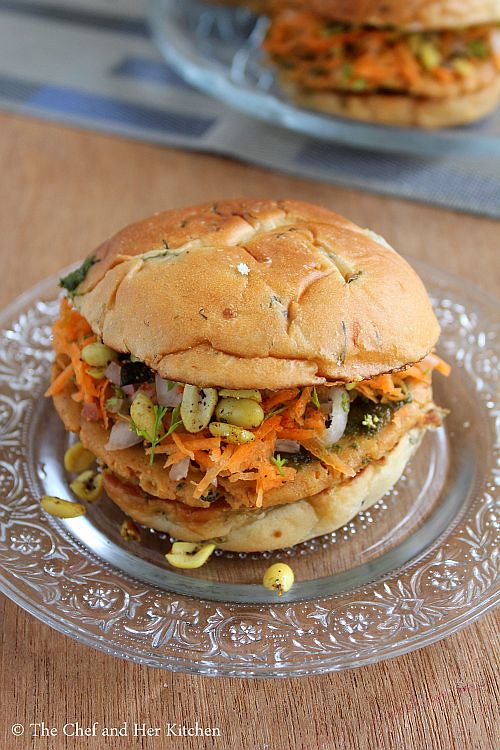
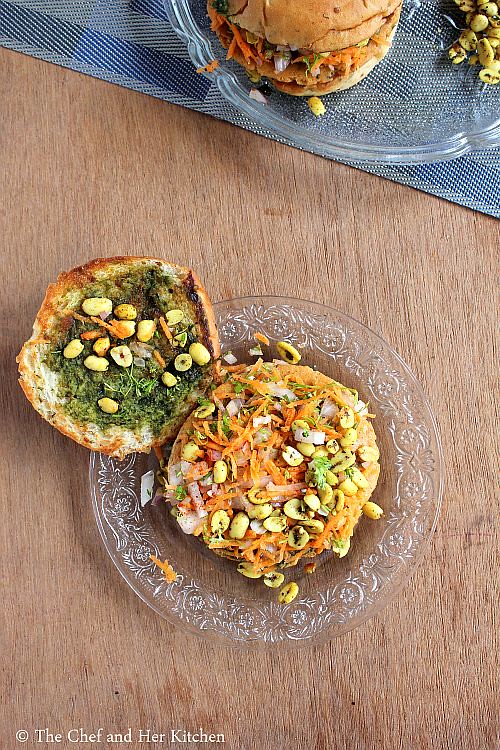
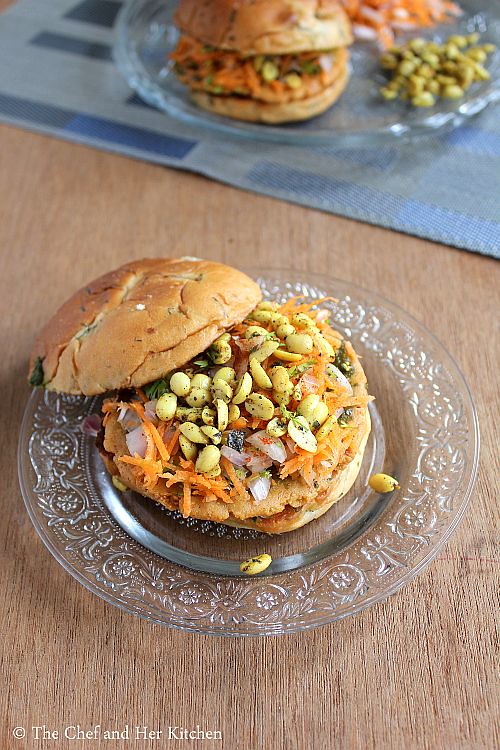
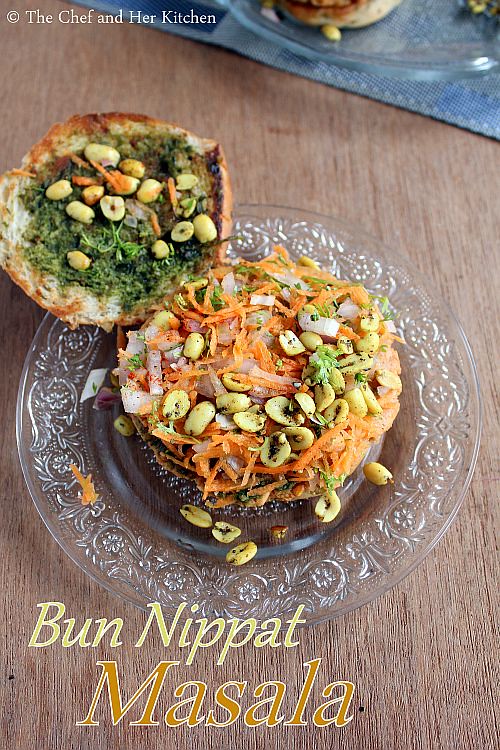
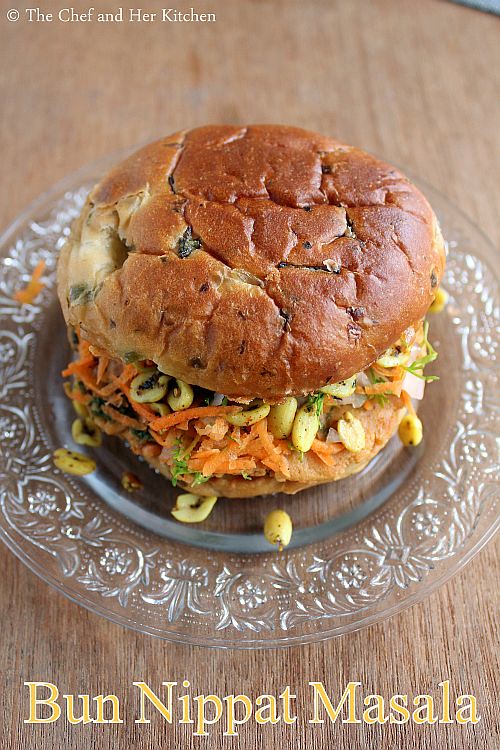
'Bun Nippat' is a typical South Indian Burger which is a typical Bangalore style of  chaat and is available only at few places even in Bengaluru.A bun is stuffed with Nippat(Rice cracker) and south Indian style salad - onion-carrot mixture and is topped with spiced peanuts and few spices.The preparation process is so simple that if you have all the ingredients ready,it hardly takes 15 mins to assemble everything but it tastes really delicious.
bun nippat masala
The secret for a good Bun Nippat is a good Nippat and tasty Congress Kadalebeeja(spicy peanuts),I usually get all these goodies from Bangalore.Whenever I get Nippats(Rice crackers) from Bangalore I do no miss preparing this Bun Nippat  and Nippat masala as I love these chaats very much. One can use regular Bun but you can replace it with khara bun if you have it in hand,I like it either ways. I usually do not add cheese to my Bun Nippat but if you are a cheese lover, go for a cheese slice and call it as 'Bun Nippat Cheese'.This chaat is quite filling and hence can be served as a snack or as a light breakfast or dinner.
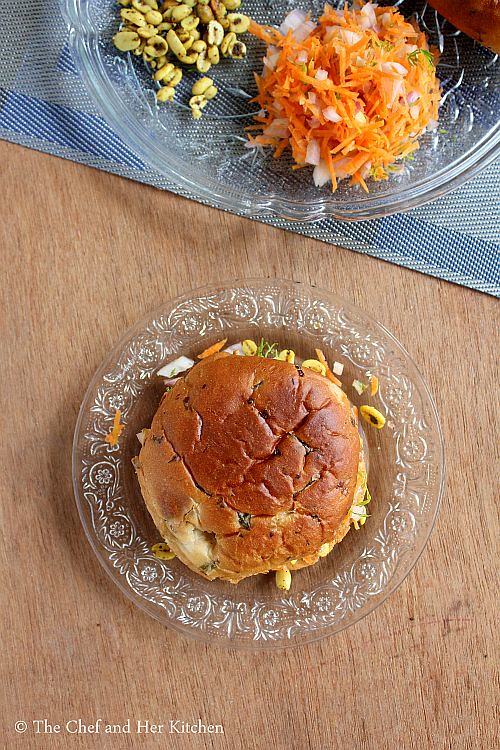
bun nippat

bun nippat

You can check out other Bengaluru style of chaats here:
bun nippat

bun nippat

Bun Nippat Masala Recipe :
Serves 2
Prep time: 15 mins | Cooking time: 5 mins | Total time: 20 mins
Cuisine: Karnataka-South Indian | Category: Chaats/Breakfast

Ingredients:
2 large Burger Buns or Khara Buns
2 Cheese slices,optional
1/4 cup Congress Kadalebeeja/spiced roasted Groundnuts
1/4 cup Sev
3-4 tbsp Green Chutney
1 Onion,finely chopped
1 Tomato,finely chopped
1 Carrot,peeled and grated
2 tbsp chopped Coriander leaves
Red Chili powder,to sprinkle
Chaat masala,to taste
Salt,to taste
Butter,to fry

Method:
  • Mix finely chopped onions with grated carrot and chopped coriander and keep it aside.
  • Keep all the items ready before plating them as these are supposed to be make quick and eat immediately.
  • Slice the Buns horizantally into two halves and apply butter and roast them on tawa until its slightly browned.Remove the buns and keep them on a plate.
  • Apply 1-2 tsp green chutney on  one side of the bun(lower side) and 1-2 tsp of  sweet imli chutney on the other side of the bun(top side).You can apply both the chutneys on both the cut sides of the buns.This quantity is personally your choice and according to your taste buds.
  • Place a nippat on each green chutney smeared bun and apply green chutney and imli chutney according to your preference.
  • Take a handful of onion-carrot-coriander mixture and place 1 tbsp of mixture on each nippat.
  • Sprinkle few chopped tomatoes all over.
  • Sprinkle a pinch of salt,red chili powder and chaat masala on it.Sprinkle them according to your taste buds.
  • Next comes the layer of sev and congress kadalekayi.Be generous with this as it gives a nice taste to the masala.
  • Now place a cheese slice if you wish on top of the masala and cover with the other half of the bun which is smeared with sweet imli chutney.
Serve the buns immediately.
bun nippat masala


bun nippat cheese

Notes:
  • There is no hard rule for the measurements in the recipe.You can play with those ingredients and also can tweak in the recipe according to your taste buds.
  • You can use jeera powder instead of chaat masala in the above recipe.
  • You can even use grated cheese instead of a cheese slice.
  • I did not use cheese,sev and tomatoes in the recipe as it was not available with me at that moment.But all these ingredients makes this chaat even tastier.
bun nippat masala

Tuesday, February 3, 2015

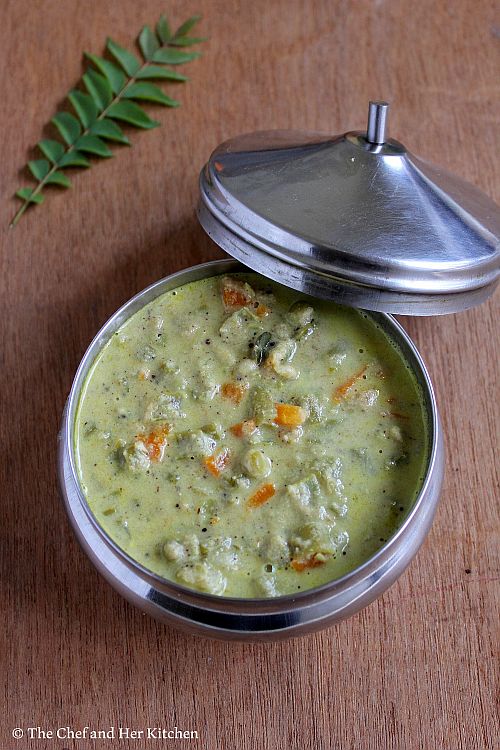
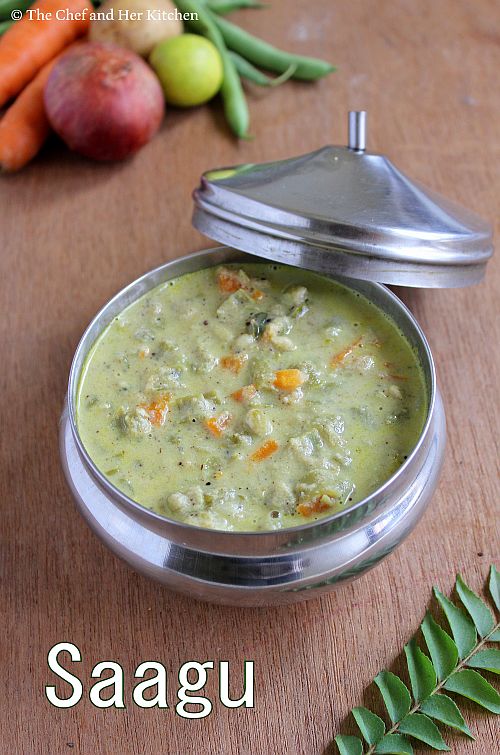
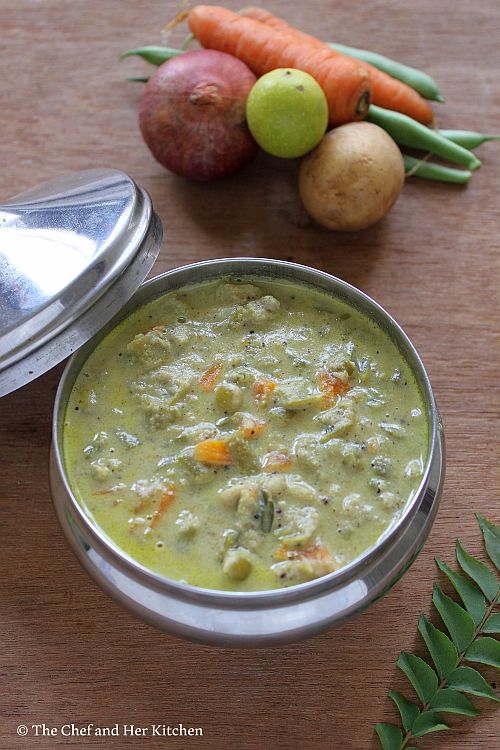
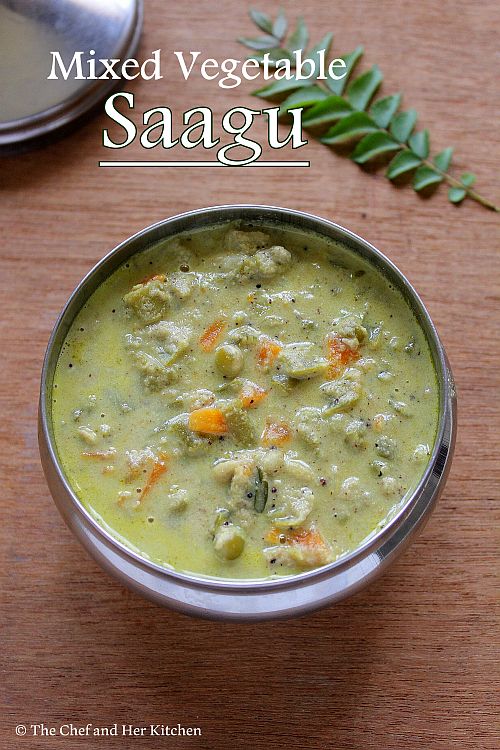
Mixed Vegetable Sagu | Vegetable Saagu Recipe

vegetable saagu
Mixed Vegetable Sagu or Saagu, as we call is a famous combination for breakfast varieties like Set dosa and Poori and is served in most of the darshinis and hotels in Karnataka.My favorite combination is with Set dosa and infact Set dosa-Sagu is my most favorite breakfast and would not miss to order it in my favorite darshinis when I visit Bengaluru. This not only tastes delicious but it is also a good way to add vegetables during the breakfast time. Saagu tastes much different from the Mixed Vegetable Kurma though we find the ingredients are much similar.
vegetable saagu

Check out other famous Karnataka Breakfast recipes here:
saagu

Mixed Vegetable Saagu Recipe:
Serves 2-3
Prep time:15 mins | Cooking time:30 mins | Total time: 44 mins
Cuisine: South Indian | Category: Side dish for Dosa/Poori/Chapathi

Ingredients:
2 cups of finely diced Mixed Vegetables(Carrot,Potato,Beans,Green Peas,Cauliflower)
1 Onion,roughly chopped
1/2 tsp Mustard seeds
2 tbsp Oil/Ghee
Salt to taste

To grind:
1" Cinnamon stick
4-5 Cloves
1-2 Marathi Moggu
1/2 cup fresh grated Coconut
1 tbsp Khus khus
1 tbsp Fried gram
5-6 Green chillies
a handful of chopped Coriander leaves,optional
1 tsp Oil

Method: 
  • Heat a tsp of oil in a kadai/pan and add green chillies and fry them, but be careful as the whole green chillies might burst.You can make a small slit if you want to avoid bursting.Add cinnamon,marathi moggu and cloves to it and fry for sometime.
  • Grind the fried ingredients with grated fresh coconut,khus khus, fried gram, coriander leaves and make it into a smooth puree.
  • In a cooker,heat oil crackle mustard seeds and fry chopped onions until pink.Now add vegetables and fry until they are slightly crisp.
  • Add the ground masala and fry until the mixture leaves the oil and then add enough salt and 1 - 1.5 cups of water and pressure cook for 1-2 whistles(do not over cook).Once the pressure is released add lemon juice to it and give a good stir.
Serve hot with Poori or chapathy or Set dosa or Atukula dosa.

saagu

Notes:
  1. You can even add vegetables like cabbage, knol-khol to saagu. My aunt suggests to add even add beetroot but I usually don't add it as it changes the color of saagu, but you can add while preparing the red color sagu.
  2. The addition of  Khus-khus is optional but it adds a nice richness to the gravy.You can even add cashewnuts if you want.
  3. This sagu would be slightly greenish because of the usage of green chillies and coriander in the recipe.If you want it to be red in color, skip green chillies and coriander in the recipe and add red chillies and tomato while grinding the paste.Also, replace lemon juice with tamarind pulp at the end.
mixed vegetable saagu

Friday, August 9, 2013

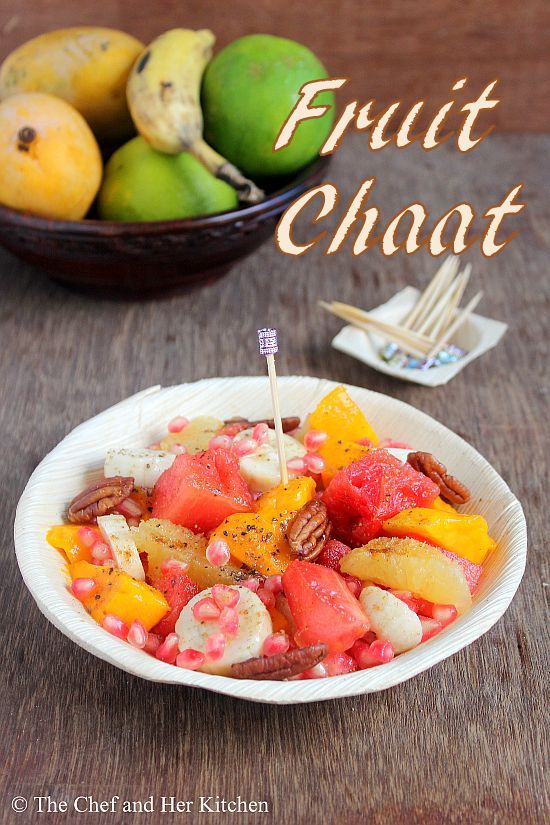
Fruit Chaat | Cut Fruits | Fruit Salad

fruit chaat

First of all I would like to wish all my readers and friends who are celebrating Eid - Eid Mubarak!!
I have seen this Fruit Chaat culture only in Bangalore and Mumbai. Do not get mistaken by the Delhi style Fruit Chaat, where the fruits and boiled potatoes/sweet potatoes are combined with various chutneys and served as a chaat- I plan to post that version later.
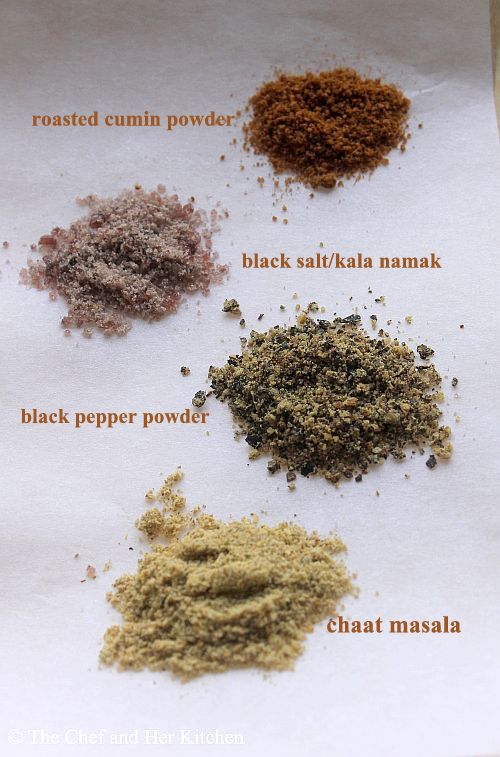
You would find the fruit carts almost in all busy public places like parks, markets etc. Fresh seasonal fruits are cut and various masalas are sprinkled on top and is topped with generous amount of honey. I used to enjoy these Cut fruits in Bangalore and I absolutely love the masala sprinkled on the top which makes the fruits tastier. After a few trials, I have come up with my own version of masala which complements the cut fruits nicely. This is not a precise replica of the masala which they use in Bangalore but somewhat closer in terms of taste.
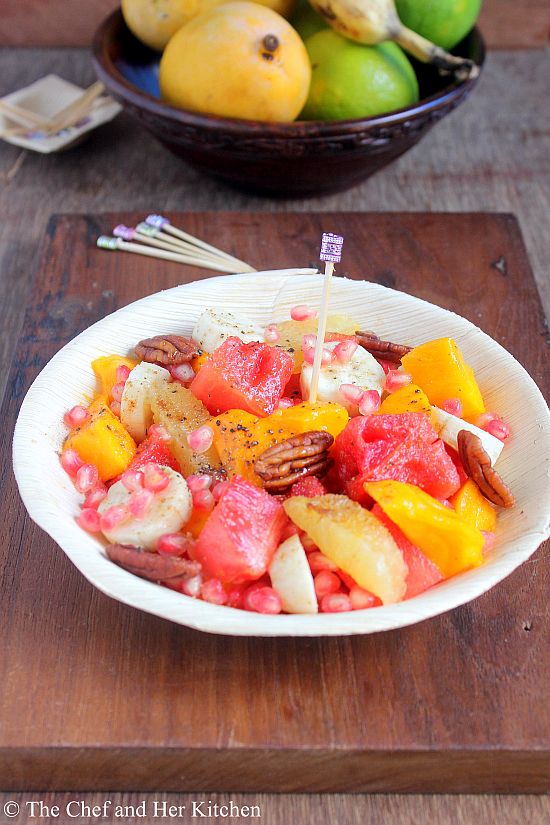
fruit chaat
When we plan for a simple and light meal, I opt for a Fruit chaat, provided I have various fruits at home. I love to add walnuts to the fruit chaat, me and TH ,both are big fans of walnuts and we both enjoy the texture of walnuts complementing the soft and juicy fruits. There are no hard and fast rules to prepare this chaat. I found the following combination of fruits make a balanced fruit chaat with various textures. One should not miss Banana in the fruit chaat. I have mentioned the combinations in detail in the recipe and in notes.
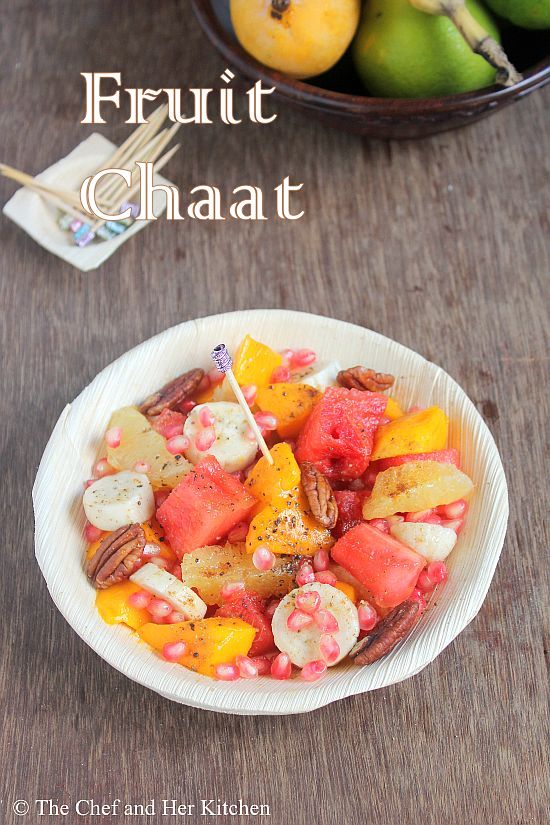
fruit chaat

Fruit Chaat | Cut Fruits Recipe:
Serves 2-3
Prep time:10  mins | Cooking time:Nil | Total time:10 mins
Cuisine: Indian | Category: Chaats

Ingredients:
2 Bananas
1 cup of cut Watermelon or Papaya or Muskmelon
1 cup of cut Apple or Pineapple
1 ripen Mango,cut
1 Sweet lime(Mosambi) or Orange
2 Chikoos(optional,I did not use)
1/4 cup Pomegranate kernels or Green Grapes
10-12 Walnuts ,roughly chopped(optional)
2-3 tbsp Honey

for masala:
1/2 tsp Chaat masala
1/4 tsp Pepper powder,freshly ground
1/4 tsp roasted Cumin powder
1/4 tsp Black Salt
1/8 tsp Salt

Method:
  • Mix all the masalas mentioned in a bowl and keep it ready.
  • Divide the various fruits equally among 2-3 bowls.
  • Add chopped walnuts on top of the fruits.I used Pecans instead of walnuts here.You can use either of them or avoid them.
  • Sprinkle two to three fat pinches of masala generously over the cut fruits and top it with a tbsp of honey all over the fruits.You can add more honey if you want.
Serve it immediately as a mid meal or a meal by itself.If you keep it for long it will leave water,hence sprinkle the masalas and honey just before serving.

Notes:
  1. You can use any variety of fruits in your hand but I have mentioned the best combination of them. Try to balance the fruit varieties by choosing a citrus variety like orange or sweet lime and fleshy kind of fruits like mangoes, muskmelon, papaya and water content fruits like watermelon, apple, pomegranate. Banana is a must for a fruit chaat. Do not miss mangoes if you have them in hand.
  2. The masala I have mentioned is my personal choice ,you can alter the quantities according to your wish.
  3. Walnuts go really well with fruit chaat and hence I always add generous amount of walnuts,again its a personal choice. I did not have them at that moment,so used pecans instead.But it is optional to use them.
fruit chaat

Tuesday, August 6, 2013

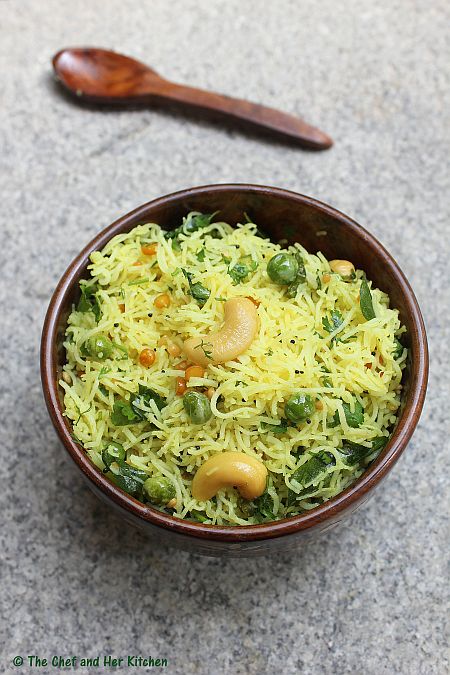
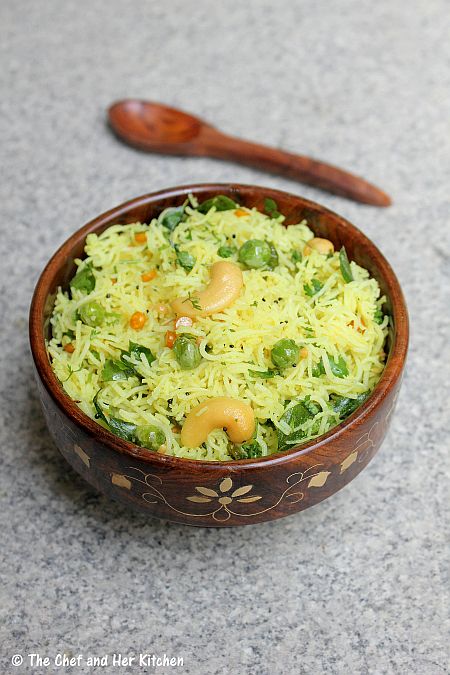
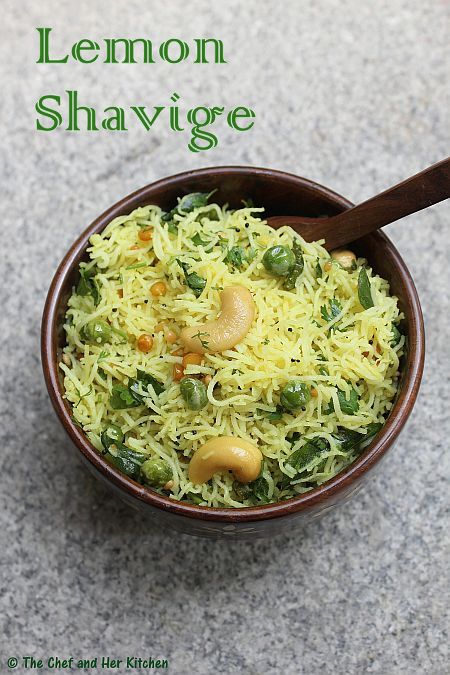
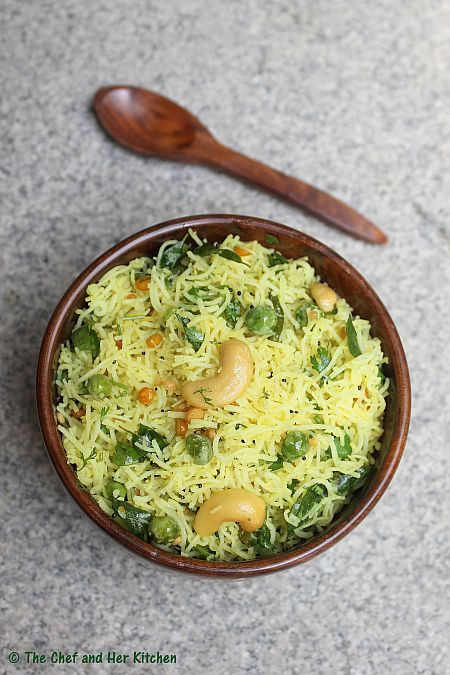
Lemon Shavige | Lemon Sevai(Idiyappam) Recipe

lemon idiyappam
I have already highlighted about my love for Ottu Shavige in my previous posts and hence don't want to repeat it again. Lemon Shavige is also known as Lemon Sevai or Shavige Oggarane.It is a ritual to prepare Lemon Shavige whenever we prepare Ottu Shavige at home.Though we prepare other spicy variations with shavige like Tamarind Shavige or Coconut Shavige,this Lemon Shavige is the one thats mostly preferred by everyone.
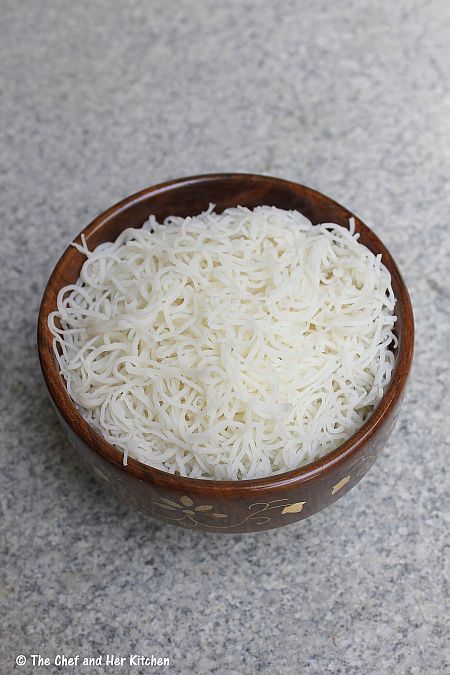
Check out the detailed process of preparation of Ottu Shavige(freshly pressed Rice noodles) here.
ottu shavige
During special occasions, Lemon Shavige along with the Ottu Shavige and its sweet variants feature in our menu.You can serve Lemon Shavige with Kaayi chutney(Coconut chutney) or eat it without any accompaniment.
Nowadays we get instant rice noodle pack very easily in the markets but somehow I don't like its taste and it's nowhere compared to the freshly pressed shavige. Using instant noodles would amount to compromising on the taste, in our view so my vote always go for fresh shavige.I have prepared this dish using freshly pressed Ottu Shavige but you can use the instant rice noodles pack and follow the same recipe.
If you are interested to learn about more Shavige(Sevai) recipes, check out how to prepare Ottu Shavige(Plain sevai/Rice noodles), Coconut Sevai and Tamarind Sevai.
lemon shavige

Lemon Shavige | Lemon Idiyappam Recipe:
Serves 2-3
Prep time:5 mins | Cooking time:20 mins | Total time:25 mins + to prepare shavige
Cuisine: Karnataka-South Indian | Category: Breakfast

Ingredients:
5-6 cups prepare Otthu Shavige or 200 gms Instant Rice vermicelli pack
1/2 cup fresh/frozen Green Peas
12-15 Cashew nuts,slit
8-10 Green chillies,slit
juice of 1 big Lemon
3-4 tbsp chopped fresh Coriander leaves
1/4 tsp Turmeric powder
a sprig of Curry leaves
1 tbsp Chana dal
2 tsp Urad dal
1/2 tsp Mustard seeds
3 tbsp Oil
Salt to taste

Method:
  • If you are using instant rice vermicelli,prepare the rice vermicelli as per the instructions given on the pack.Cool it completely.
  • Blanch the green peas in hot water for few mins and drain them.
  • Heat oil in a big kadai and crackle mustard seeds.
  • Add chana dal,urad dal,cashew nuts and fry until they turn slight golden in color.
  • Add green peas and green chillies and fry for 3-4 minutes until the green chillies wilt and green peas gets fried nicely.
  • Add curry leaves and fry and then add turmeric powder and enough salt and switch off the flame.Leave it for 5 mins.
  • Add prepared rice vermicelli to the tempering mixture and add lemon juice and chopped coriander and mix it nicely until everything is incorporated well.Taste it and adjust the seasoning according to your wish.
Serve it warm with coconut chutney,potato chips or sliced cucumber.

lemon shavige
Notes:
  1. I like to prepare this spicy and tangy and hence I add more green chillies and lemon to it,you adjust it according to your taste buds.
  2. Cashew nuts add better taste to it,so do not skip it.Alternatively you can use ground nuts instead of cashews in the recipe.
  3. If you are using instant rice vermicelli,boil a big pot of water with a tsp of oil and salt and then add instant rice vermicelli noodles and cook it for 8-10 mins approximately(see your pack for clear instructions) and strain it and give it a cold water bath and drain off the excess water.Spread it on a wide plate until it becomes cold and follow the recipe.
lemon sevai

Monday, July 29, 2013

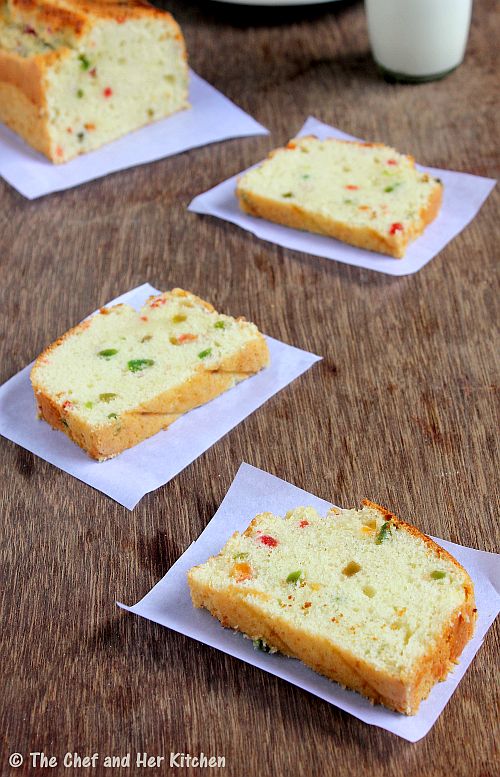
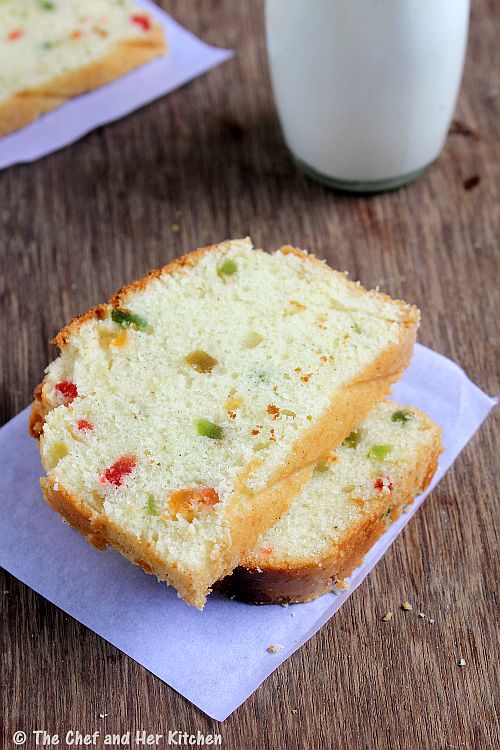
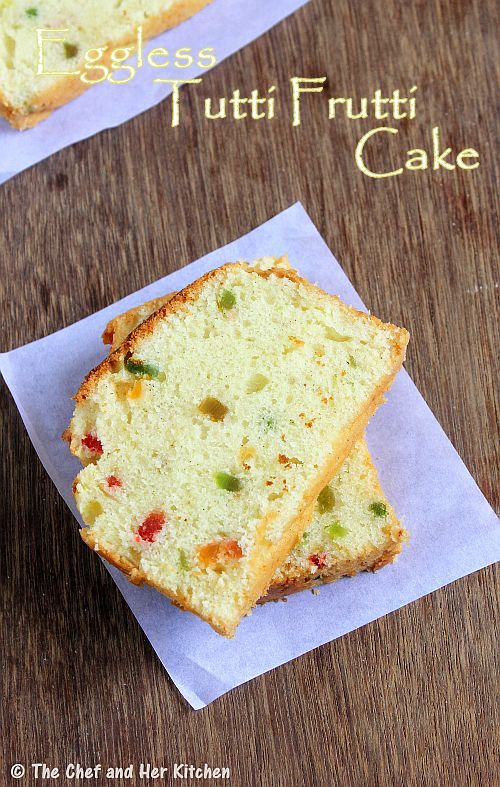
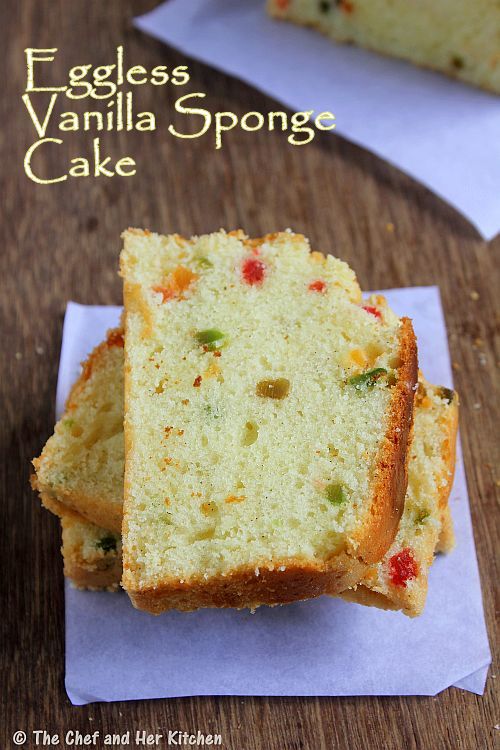
Eggless Vanilla Sponge Cake Recipe | Eggless Tutti Frutti Cake

I have never developed a liking for cakes that have cream frosting or any Icing applied on it and my preference is for the plain cake - vanilla or chocolate.I still remember those days when we used to have plain Vanilla Sponge Cake at Butter Sponge in Bangalore city; believe me that cake used to be absolutely soft and fluffy.
I do make cakes with Icing but only for specific occasions but in general I prefer to bake simple plain cakes on a regular basis as an accompaniment with evening tea/coffee or just as an anytime snack.I also use this plain Vanilla Sponge Cake for Cake Pops and also as a base for Fruit Trifle | Trifle Pudding.
A few years back when I saw this recipe in Madhuri's blog,which she tried from Nita Mehta's book,I knew that I would be baking that cake as I was in search of good Sponge Cake at that time.I am glad that I prepared that cake as my search for a good Eggless Vanilla Sponge Cake finally ended. I wonder why it took so long for me to post this beautiful cake recipe in my blog.The recipe is quite simple with no butter or any other fancy substitutes-it is a simple and straight forward recipe.You should try this recipe and am sure you would agree that it is the best Eggless Vanilla Sponge Cake recipe.
If you are in search for a good Eggless Cake recipes I would strongly recommend you to try these tried and tested Eggless Cake recipes from my blog which were appreciated by many.

Basic Eggless Vanilla Sponge Cake | Eggless Tutti Frutti Cake Recipe:
Makes one 8" round cake or 4"x7" loaf tin
Original recipe source: Nita Mehta
Prep time: 10 mins | Baking time: 30-40 mins | Total time: 1 hr
Cuisine: Indian|International | Category: Cakes - Baking

Ingredients:
1 1/2 cups All purpose flour(Maida)
3/4 cup Sugar
1 cup Curd,beaten
1/3 cup Tutti frutti(optional)
1/2 cup Oil
1 1/4 tsp Baking powder
1/2 tsp Baking Soda
a pinch of Salt
2" Vanilla Pod or 2 tsp Vanilla essence
1 tsp milk,to brush the cake
2 tsp flour,to coat the tin and tutti frutti

Method:
  • Grease an 8" round pan or the 4"x7" loaf tin with oil.Add a tsp of flour and shake it well so that it coats all the sides and bottom of the tin.Alternatively you can line it with baking paper,make sure you cut it into right size before lining it in the pan.
  • Preheat the oven at 200 deg C(400 deg F) for 10-12 mins.
  • Sieve all purpose flour a couple of time to ensure that there are no lumps in it.
  • Grind sugar to a fine powder in mixer.You can avoid this step if your sugar is fine,as the sugar crystals what we get here are very big I usually grind it before using in the cake.
  • In a bowl beat curd until smooth.Add sugar powder to it and beat again for 2-3 mins.
  • Add baking powder and baking soda to the curd mixture and mix well and leave it aside for 2-3 mins.The curd mixture will become frothy and increase in volume,you can see some bubbles forming in it.
  • Scrape the vanilla bean if you are using and keep it ready.
  • Now add the scraped vanilla pod or vanilla essence and oil to the curd mixture and mix it nicely and gently and make sure that the air in the mixture is not lost.
  • Add the flour in two batches and gently fold the flour into the mixture until you get smooth dropping consistency.Do not stir vigorously as it will loose air in the mixture,hence do it gentle.
  • In a small bowl take tutti frutti and add 1 tsp of flour and mix well.the addition of flour to tutti frutti ensures that it will not settle in the bottom of the tin.
  • Add the tutti frutti to the cake batter and fold it nicely.
  • Pour this batter into the prepared tin and keep it ready.
  • Reduce the oven temperature to 180 deg C(350 deg F) and place the tin in the preheated oven and bake it at 180 deg C for 35-40 mins.The baking time varies from oven to oven,hence keep an eye over it after 30 mins.
  • You can insert a toothpick in the center of the cake to check whether it is done or not.If the toothpick comes out clean with few cake crumbs then your cake is ready.If the toothpick has some batter stuck to it keep the tin back in the oven and bake for some more time.
  • Brush the top of the cake with milk and put it back in the oven and bake for 2 mins.This gives a shiny look on top of the cake.However this step is optional.But I recommend you to do that.
  • Remove the tin from the oven and let it sit for 5 mins.
  • Run a sharp knife around the edges of the cake and gently turn it upside down onto a wire rack and let it cool completely,approx 2 hrs.
  • Once it is completely cooled,slice the cake into thick slices using a serrated knife.
Serve it with tea/coffee or eat as it is as a snack.

Notes:
  1. The original recipe calls for 1 cup of sugar,however I followed her recipe and reduced it to 3/4 cup which is right enough quantity of sugar for a tea cake.If you really have a sweet tooth you can add 1-2 tbsp of sugar extra in the cake.
  2. You can bake the cake plain with out tutti frutti as the original recipe and can decorate with the icing of your choice.
  3. You can keep it out for 2 days and can be stored for 4 days in refrigerator.Just pop it in microwave for 10-15 seconds if you refrigerate the cake.
  4. Do not alter the measurements of the cake,these measurements perfectly yields soft and fluffy cake.I have used a cup size which holds 1 cup = 200 gms of sugar or 125 gms of flour for this recipe.
  5. I like to use vanilla pod in my baking as it adds great flavor to the cake.If you do not get them use good quality vanilla essence.
  6. I have used Saffola oil to prepare this cake. You can use any neutral vegetable oil (canola oil etc) to prepare this.
  7. This cake makes a perfect base for dessert recipes like Fruit Trifle.

Wednesday, July 17, 2013

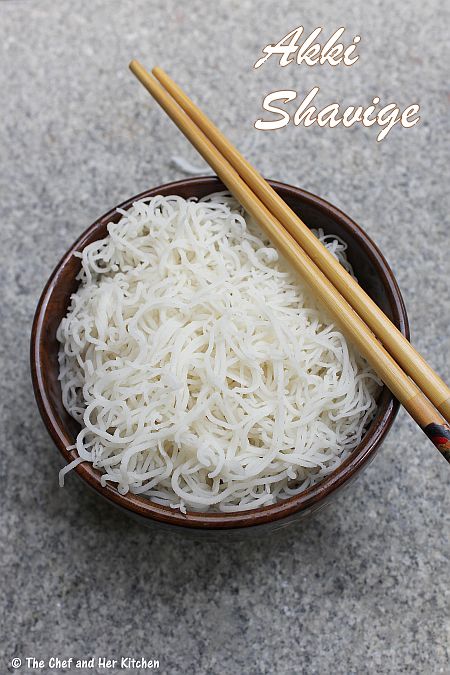
Ottu Shavige | Home made Rice Noodles(String Hoppers)

akki shavige
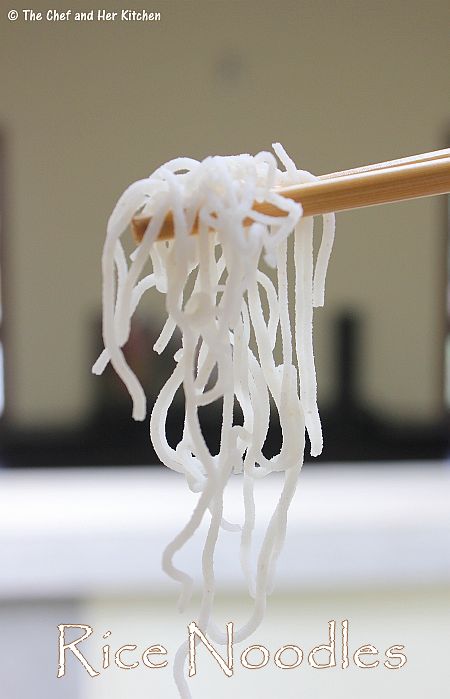
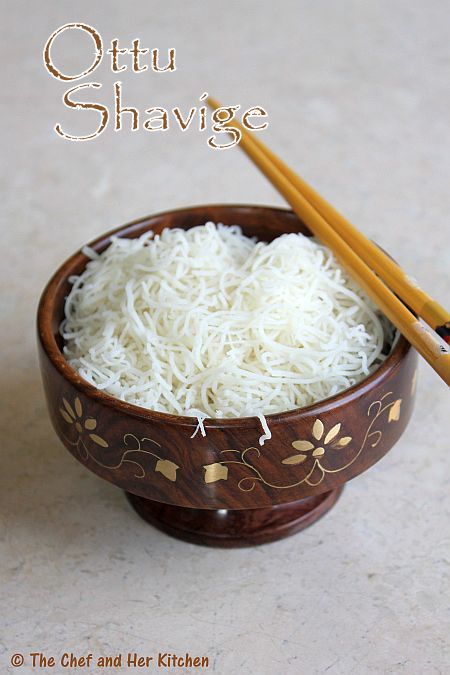
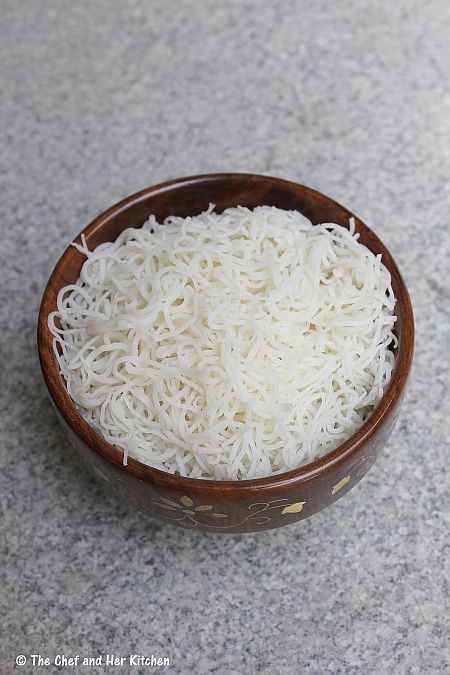
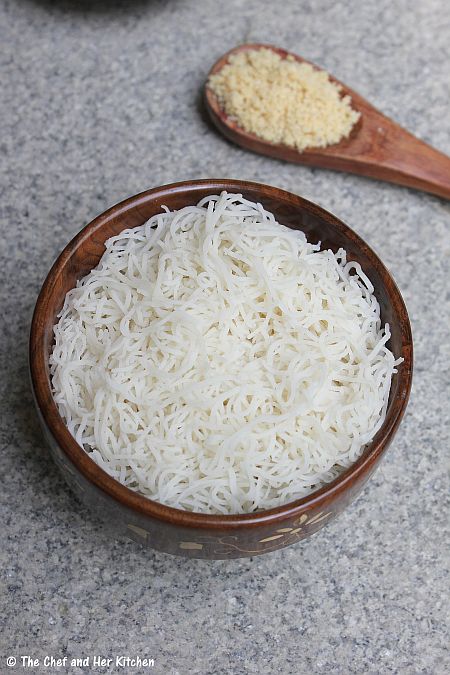
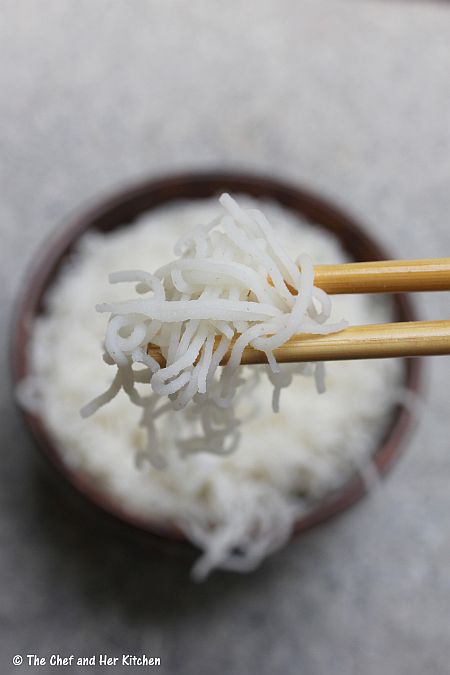
Ottu Shavige(Vothu Shavige) or Akki Shavige is a specialty of Karnataka and is also widely prepared in our family.At our place it is called 'Shastralu' or 'Saasthalu'. It is a specialty of our community and is prepared on special occasions and functions and also if we have special guests at home.Ottu Shavige of Karnataka is similar to Idiyappam of Tamilnadu though the process is slightly different.In the preparation of Otthu Shavige,rice flour is cooked and made it into cylindrical shaped balls which are then steamed and pressed into thin string hoppers while in the later process(Idiyappam),the flour is mixed to a dough and it is pressed into thin noodles and then they are steamed.Despite using the same ingredients,the resultant product of both the processes taste slightly different and my taste buds always incline towards Ottu Shavige,the one which I am quite familiar with from my childhood.Though we get instant rice noodles in market,the taste of freshly pressed rice noodles is nowhere compared to those instant rice noodles.Though the preparation process is tedious,it is worth the effort.
ottu shavige
Usually Ottu Shavige is prepared on special occasions or if you have some special guests.Preparing Ottu Shavige is quite laborious and needs at least two people to help. I still remember how we used to help our mom when she used to prepare this dish.It is really fun if two or more people do this but it is quite laborious if a single person has to handle it,you need at least two people to prepare this.
ottu shavige
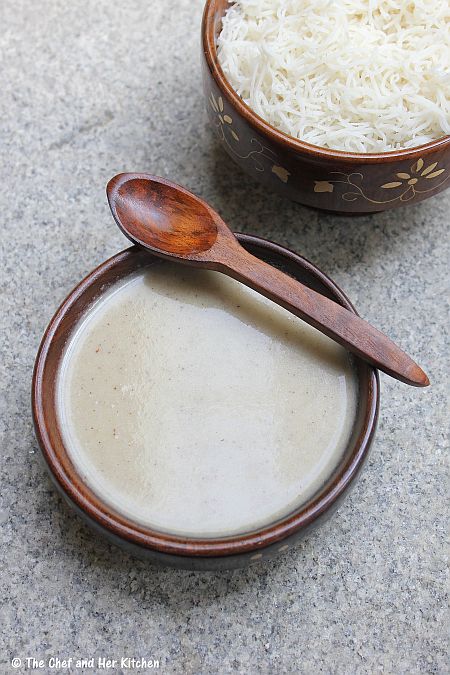
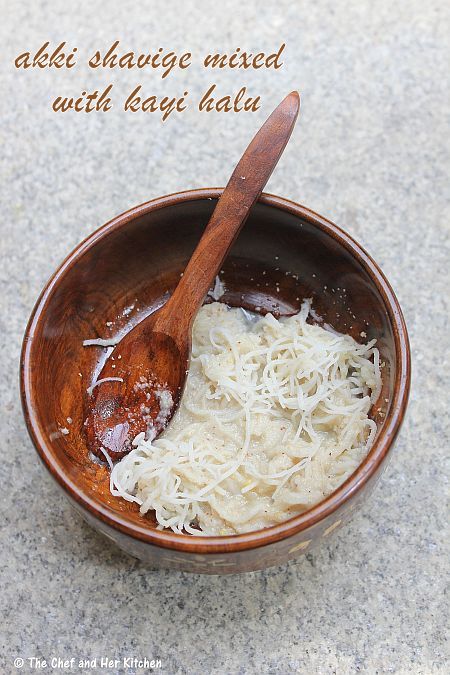
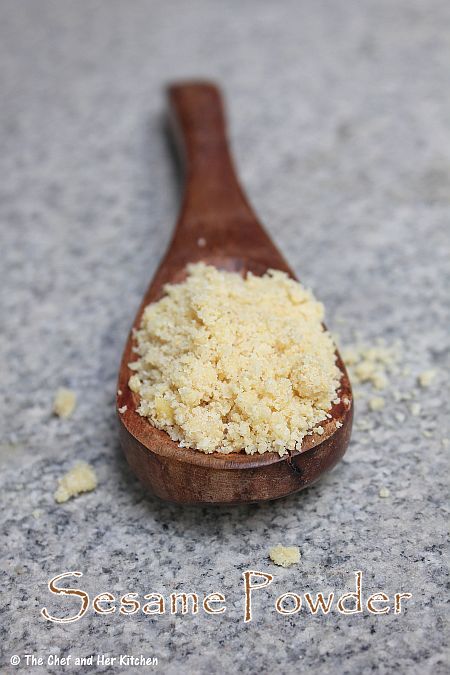
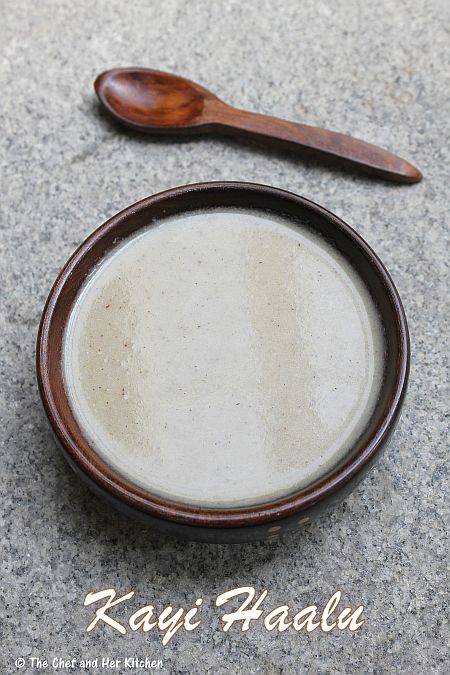
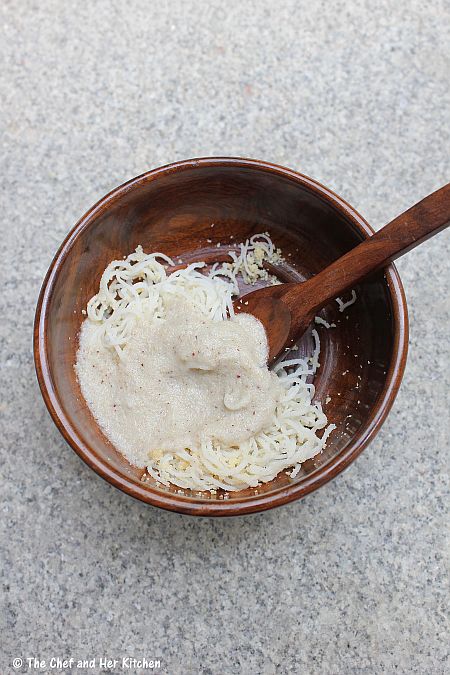
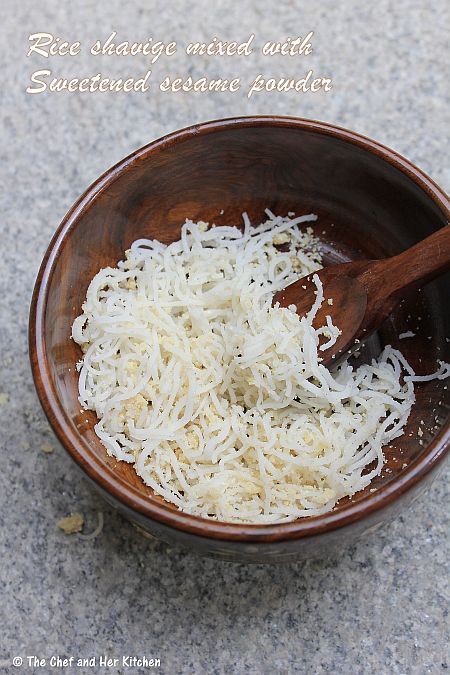
Ottu Shavige is quite versatile and we prepare sweet as well as spicy varieties with it.The usual  sweet side dishes we prepare for Ottu Shavige are Gasgase Payasa(Kayi Halu) or Nootoodi (Sweetened Sesame seed powder) or sweetened Gasgase powder or sweetened Groundnut powder.We can prepare spicy varieties like Lemon Shavige,Tamarind Shavige, Coconut Shavige, Tomato Sevai with Ottu Shavige.Among all,my most favorite is lemon shavige and the combination of ottu shavige with gasgase payasa and sesame powder.
ottu shavige
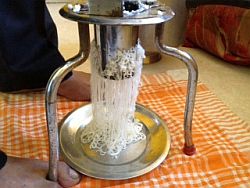
We need a special Shavige press to prepare Ottu Shavige.The picture below shows how the Shavige Press looks which is used to prepare Otthu Shavige.This machine is quite sturdy with a handle to turn and a perforated cylindrical cup and stands on its legs.
As I do not have this machine in Mumbai I usually ask my mom to prepare this when I visit her.I was able to click few pictures when she prepared last time so that I can share with you all,otherwise I don't think that my favorite recipe would appear in my blog.If you do not have Shavige press you can use the Idiyappam press(murukku press) to prepare this,but I am sure that it would not be easy to prepare Ottu Shavige in the Idiyappam press as the dough is already steamed and needs more energy than usual to rotate the handle.
ottu shavige

Otthu Shavige | Akki Shavige | Home made Rice Noodles Recipe:
Serves 2-3
Prep time:1 hr | Cooking time:45 mins | Total time:1hr 45 mins
Cuisine: Karnataka - South Indian | Category: Breakfast 

Ingredients:
to prepare Akki Ottu Shavige:
3 1/2 cups Water
1 tsp Salt
1 tsp Oil

to prepare Kayi Haalu | Coconut Poppy Seed Payasam:
1 cup grated fresh Coconut
2 tbsp Poppy seeds
6-8 Cashew nuts
1 1/2 cup Milk
1/2 cup Water
1 1/4 cup grated Jaggery
1/4 tsp Cardamom powder

to prepare sweetened sesame powder:
1/2 cup white Sesame seeds
1/2 cup grated Jaggery

to prepare sweetened groundnut powder:
1/2 cup roasted and skinned Groundnuts
1/2 cup grated jaggery 

Method:

to prepare sweetened Groundnut powder:
  • Grind roasted and skinned groundnuts to a powder in the mixie and add grated jaggery to it and run it again to get a uniform mixture.
  • Store it in air tight container.Make this on the previous day itself to ease up the process.
to prepare sweetened Sesame powder:

  • Dry roast sesame seeds over medium flame for 3-4 mins until they smell nice.
  • Grind sesame seeds to a powder in the mixie and add grated jaggery to it and run it again to get a uniform mixture.
  • Store it in air tight container.Make this on the previous day itself to ease up the process.
to prepare Kayi Halu:
  • Grind cashew nuts,poppy seeds,grated coconut and cardamom into a fine paste.
  • Mean while add grated jaggery to 1/2 cup of water and boil until jaggery melts and strain this mixture.
  • Boil the jaggery mixture again and add the ground coconut-poppy seed mixture.Cook it on low flame until it comes to a boil.
  • Add milk and cook for another 2 mins and remove it from the stove.Do not boil for more time as it might curdle.
to prepare Akki Shavige:
ottu shavige
  • Bring water to a boil in a deep pot and add salt and oil to it.
  • When the water is boiling add Home made rice flour in the center of the pot and close the lid to half(do not cover it completely,leave some space for the steam to escape otherwise the water would over flow) and let the flour(which would be floating) cook over low flame for half an hour.
how to make rice noodles
  • Stir vigorously now until you get a lump of mixture formed and all the ingredients are well mixed.You can use a long ladle or your roti belan for this process.
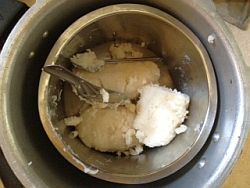
  • Divide the mixture into two parts and knead the mixture into a smooth dough on a silicon baking mat or on a clean plastic sheet.Be careful the dough would be very hot,so wet your hands while doing this process.You can even place the dough in a clean plastic bag and knead well,this is very easy and risk free process.This should take at least 4-5 minutes.It is always better to do in small portions.
how to make rice noodles
  • Make smooth cylindrical shape balls(4" lengthwise) out of the mixture and arrange them in a steamer and steam for 20-25 mins.You can even use cooker to steam them,make sure you remove the whistle while steaming them.
  • Keep the Shavige press ready and grease the inside portion with oil and also keep a plate below the press to collect the freshly pressed noodles.
how to make rice noodles
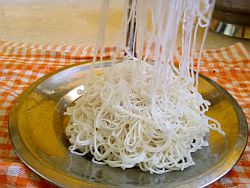
  • Keep all the balls in the hot box and take out one ball at a time and place it inside the Shavige press and press it to strings of thin noodles.This is a bit laborious process and needs bit strength as it is not easy to rotate the shavige press.You need two people to do this,as one would hold the legs of shavige press and move the plate underneath while pressing the shavige so that noodles would spread out widely and not form a lump and the other person to turn(rotate) the handle of shavige press.Also,take care while doing this process as the dough would be very hot to handle.Drop the noodles(collected on plate) carefully into a big wide vessel and keep the plate back in position to repeat the process.Repeat the process with all the balls to get the noodles.It is important to keep the dough balls in hot box so that they would not turn dry and hard and also it would be easy to press them while they are hot.
how to make rice noodles
Serve the plain Otthu Shavige with Kayi haalu(Sweetened coconut milk) or Sweetened Sesame powder or Sweetened Ground nut powder and ghee.Mix the otthu shavige with ghee and the powders and enjoy the heaven on plate.
You can even use them to prepare Lemon Shavige, Tangy Tamarind Shavige, Coconut Shavige, Tomato Sevai.The recipe for Lemon Shavige recipe would follow soon.
ottu shavige
ottu shavige
Notes:
  1. It is essential to use Home made Rice flour for the recipe,follow this link to know how to prepare home made rice flour.You can alternatively use Idiyappam flour,but you need to follow the instructions for the water measurements as mentioned on the packet.
  2. It is important to keep the dough balls in hot box so that they would not turn dry and hard and also it would be easy to press them while they are hot.
  3. This is a very laborious process and need atleast 2 people to prepare this.So attempt this recipe only if you have any help in the kitchen.
idiyappam

Check out few traditional recipes of my family which are prepared using rice flour.
rice noodles
 
back to top