Vegetables


Frankly, when I started this series I was not expecting more than 4-5 entries but I was really surprised and excited when I received lots of unexpected entries from my family members.I can say that I am more enthusiastic and excited about this series than earlier.If you have missed any of the previous posts in this series check them here.


Coming to the introduction...this post is sent to me by my eldest cousin sister 'Vanitha'.She was the eldest among all the girls in our family and was guiding us in all the matters in our childhood..The more interesting fact here is my 8-year old nephew has clicked that photo,can you believe it?? he not only clicked those photos he also uploaded them and sent to me by e-mail.When I got a mail from him, I was really surprised and flattered with his knowledge about computers.At his age I hardly knew anything and in fact I started using computers only at the age of 19. The technology is so improved that my 2-year old niece comfortably operates the i-phone and she can play songs or photos or rhymes according to her choice.
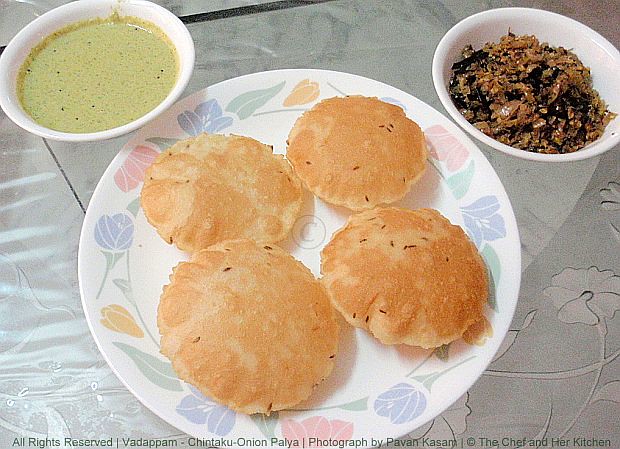
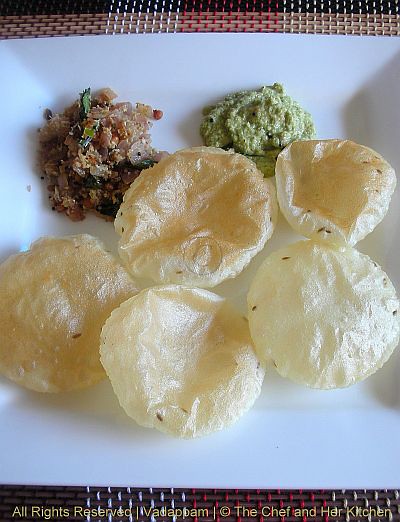
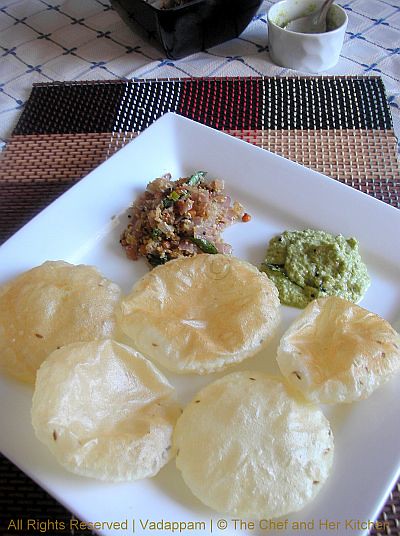 Every family has a famous recipe and Vadappam with Chintaku palya is a famous breakfast combo at my sister's place though I never got to taste at her place but I heard a lot about it from the other family members.When she sent this to me I was really excited and surprised as I did not expect an entry from her and in fact she did'nt even knew that I had a food blog.When one of my aunt's mentioned to her about my current event she made this on the very next day and sent it to me. A special thanks to my sister for this sweet surprise and my nephew who has done a wonderful job sending the photos to me.
Vadappam is our community special though it is not made in all the house holds.Even my mom never used to make it but when I heard a lot about this from my cousin sister I wanted to give a try and I made it long back...almost 5 years back but I completely messed up the whole thing.Those vadappams turned very very oily,bit hard and thick and I never dared to make it again.If you think what is a big challenge in making pooris with rice flour,you are incorrect!!It might be easy to make soft and nice fluffy pooris with wheat flour or maida but certainly not easy to make with rice flour.
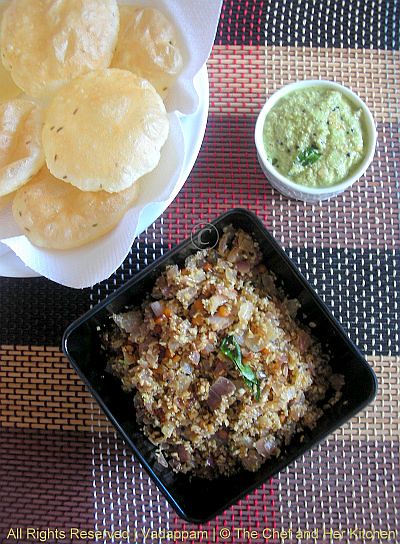
Though I saw many recipes and photographs on the net for rice flour pooris,the look of them never tempted me to try them at home.When my sister has sent this I was really excited to see those perfectly fluffed up pooris which actually looks like a maida or wheat flour poori and I could not stop trying this seeing the photos.When I called her up for the recipe she gave me all the instructions to make perfect vadappams which are nicely puffed up,soft and not oily.I just followed her instructions and crossed my fingers for perfect vadappams like her's and I was really impressed to see those vadappams rising nicely and were not oily at all.Mine turned out good and just like regular maida or wheat flour poori and they were very soft even after coming to the room temperature.My recent successful attempt gave me enough confidence to boast about this in my space.
 Vadappam(Rice Flour Poori)/Vadappi:
Ingredients:
1 cup Rice flour
1/4 cup water
1 tsp jeera/cumin seeds
salt to taste
 Method:
Every family has a famous recipe and Vadappam with Chintaku palya is a famous breakfast combo at my sister's place though I never got to taste at her place but I heard a lot about it from the other family members.When she sent this to me I was really excited and surprised as I did not expect an entry from her and in fact she did'nt even knew that I had a food blog.When one of my aunt's mentioned to her about my current event she made this on the very next day and sent it to me. A special thanks to my sister for this sweet surprise and my nephew who has done a wonderful job sending the photos to me.Vadappam is our community special though it is not made in all the house holds.Even my mom never used to make it but when I heard a lot about this from my cousin sister I wanted to give a try and I made it long back...almost 5 years back but I completely messed up the whole thing.Those vadappams turned very very oily,bit hard and thick and I never dared to make it again.If you think what is a big challenge in making pooris with rice flour,you are incorrect!!It might be easy to make soft and nice fluffy pooris with wheat flour or maida but certainly not easy to make with rice flour.
Though I saw many recipes and photographs on the net for rice flour pooris,the look of them never tempted me to try them at home.When my sister has sent this I was really excited to see those perfectly fluffed up pooris which actually looks like a maida or wheat flour poori and I could not stop trying this seeing the photos.When I called her up for the recipe she gave me all the instructions to make perfect vadappams which are nicely puffed up,soft and not oily.I just followed her instructions and crossed my fingers for perfect vadappams like her's and I was really impressed to see those vadappams rising nicely and were not oily at all.Mine turned out good and just like regular maida or wheat flour poori and they were very soft even after coming to the room temperature.My recent successful attempt gave me enough confidence to boast about this in my space.
Vadappam(Rice Flour Poori)/Vadappi:Ingredients:
1 cup Rice flour
1/4 cup water
1 tsp jeera/cumin seeds
salt to taste
Method:- Boil water in a deep vessel until it bubbles.
- Add salt,jeera and rice flour to it and mix it with a ladle and switch off the flame immediately.
- Transfer the mixture into a wide vessel and let it cool completely.This step is very important as if the rice flour mixture is hot it before proceeding to the next step will end up absorbing more oil while frying.
- Now add enough regular water and knead into a stiff and smooth dough.Knead for 3-4 mins.
- Divide the dough into small amla sized balls.
- Heat oil in a deep thick bottomed kadai for deep frying.
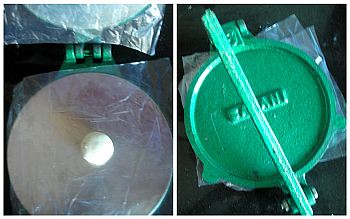
- Cut a polythene sheet into two equal squares or rounds and wash and dry them and grease one of the sides.
- Place them on one each side of a poori press and place a rice flour ball in the center and press in the poori presser as shown in the picture.Do not make it very thin or very thick,it should be of the thickness as shown in the pic.
- Slide the vadappam into the medium hot oil carefully and fry on medium flame by puffing up the vadappam with the perforated ladle(Try to slightly press the vadappam with perforated ladle after it is dropped in the oil which helps in puffing up completely).Once it puffs up properly and stiffens on one side turn to the other side and fry again for sometime.The process of frying one side completely is very important while frying vadappams as it helps in not forming holes which in turn absorb more oil.Do not turn them again.
- Remove them onto a kitchen towel and this helps in absorbing if any extra oil exists.
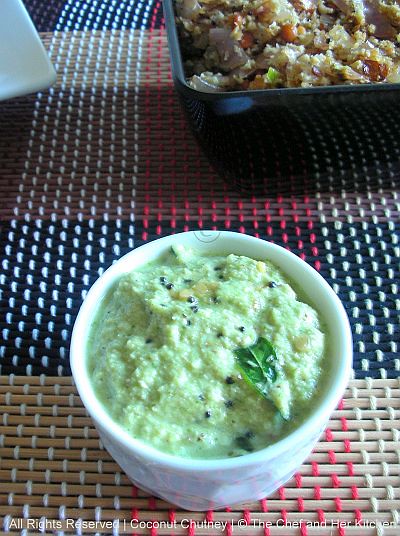
Serve it hot with Chintaku-Onion palya and Coconut chutney.
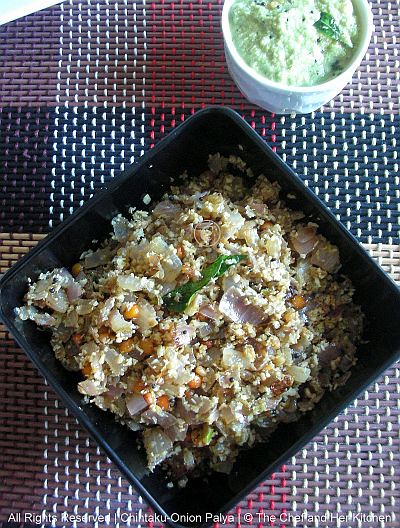
 Chintaku-Onion Palya(Tamarind leaves-Onion Curry):I made vadappam succesfully but I did'nt have dried tamarind leaves to prepare "chintaku palya" but that that did not stop me from making it.I used tamarind instead and proceeded with the original recipe. I am though eager to try with some tamarind leaves when I get them for the traditional taste of palya. While my husband tried this combination for the first time he mentioned that the onion palya perfectly complemented the soft and fluffy vadappams.
 Ingredients:
3 onions,finely chopped
2 tbsp dried tamarind leaves(dried chintaku)
1/4 cup grated fresh coconut
1/4 tsp grated jaggery
6-8 green chillies
8-10 curry leaves
1 tbsp chana dal
1 tsp urad dal
1/2 tsp mustard seeds
4 tsp oil
salt to taste
Method:
Chintaku-Onion Palya(Tamarind leaves-Onion Curry):I made vadappam succesfully but I did'nt have dried tamarind leaves to prepare "chintaku palya" but that that did not stop me from making it.I used tamarind instead and proceeded with the original recipe. I am though eager to try with some tamarind leaves when I get them for the traditional taste of palya. While my husband tried this combination for the first time he mentioned that the onion palya perfectly complemented the soft and fluffy vadappams.Ingredients:3 onions,finely chopped
2 tbsp dried tamarind leaves(dried chintaku)
1/4 cup grated fresh coconut
1/4 tsp grated jaggery
6-8 green chillies
8-10 curry leaves
1 tbsp chana dal
1 tsp urad dal
1/2 tsp mustard seeds
4 tsp oil
salt to taste
Method:
- Heat oil in a kadai and crackle mustard seeds and add chana dal and urad dal and fry well.
- Add curry leaves and add finely chopped onions and fry well until slight brown in color.
- Meanwhile grind grated coconut,green chillies and salt to a coarse powder.
- Add the ground masala to the fried onions and mix well.Add dried tamarind leaves to it and mix well and let it fry for a couple of minutes.
- Add grated jaggery to it and mix well and switch off the flame immediately.If you continue cooking after adding jaggery it will make the curry sticky,so switch off the flame immediately.
Serve it hot with hot vadappams.
Note:
 Note:
Note:
Only one photo in the recipe part of vadappam is sent by my sister and rest all are the ones from my kitchen.
Note:
- You can see those leaves in the picture what my sister has sent and do not search for tamarind leaves in my pictures as I did not have it to use it.
- I added tamarind while grinding the coconut mixture.I am eager to try this with tamarind leaves very soon.
Note:Only one photo in the recipe part of vadappam is sent by my sister and rest all are the ones from my kitchen.