Showing posts with label Milestone posts. Show all posts

Thursday, April 5, 2012

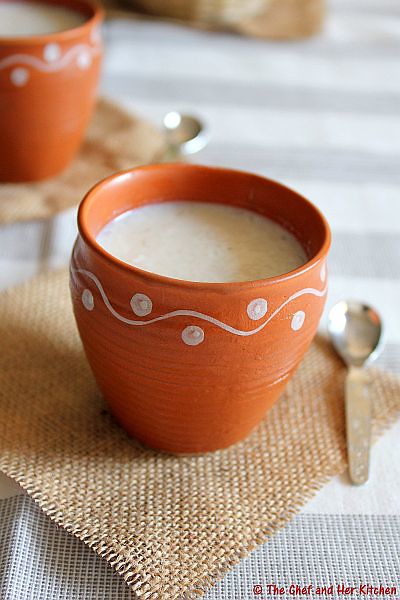
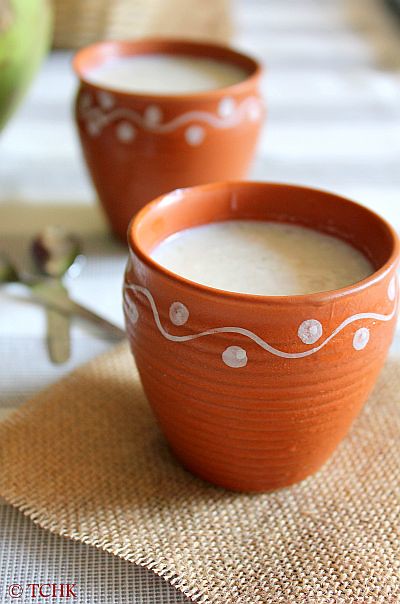
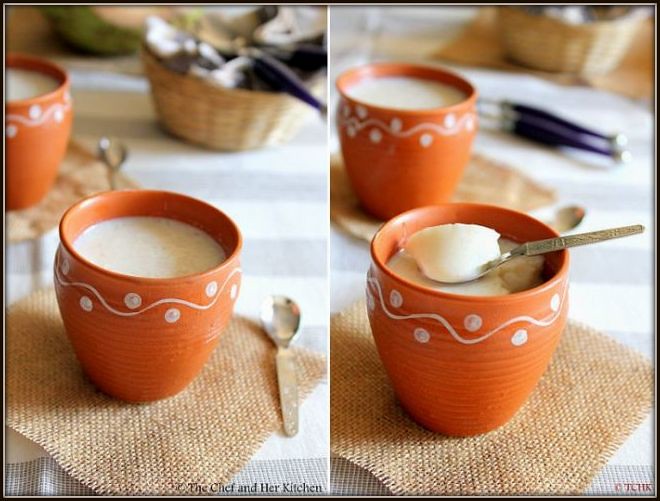
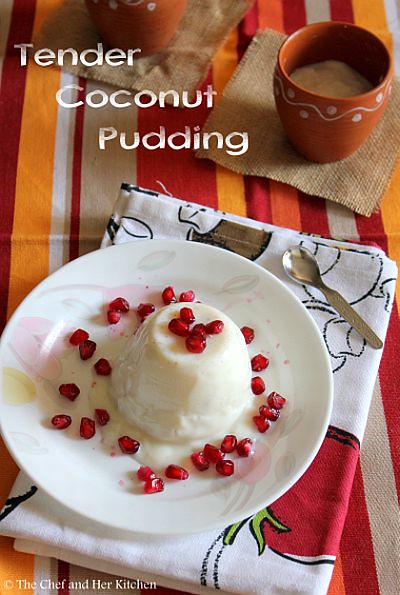
Tender Coconut Pudding | Eggless Pudding Recipes...my 300th Post!!

YAYY!!!
Yet another milestone post in my blog.Time flies so fast,my blog has celebrated it's 3rd anniversary very recently and this is my 300th post.I am posting this Tender coconut pudding to mark the 300th post in my blog.
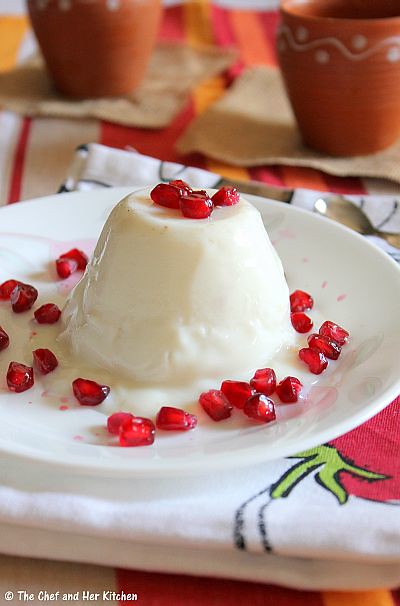
I tasted this tender coconut pudding made by the caterer we hired for a family function and just fell in love instantly with this dessert.The delicate flavor of tender coconut is very soothing and the soft texture makes it melt in you mouth. When I tasted the pudding for the first time I knew that I could replicate the same at home in a couple of trials as I knew the ingredients that went into it.I some how kept pushing forward the plan and when I saw this on Bharathy's blog, I thought my job was now much easier as I would not need to make several trials to get the correct measurements . I hence recently prepared it, for a small get together at home.I must say that this is a very easy,delicious and sinful pudding.Try this dessert, this Summer as it is a perfect way to beat the heat .
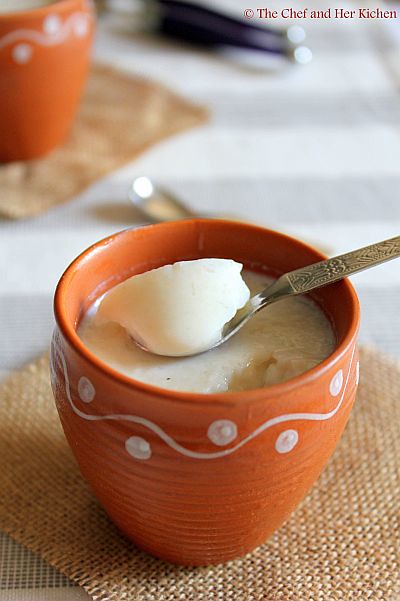
Tender Coconut Pudding:
(makes 4 large portions or 6 small portions)
Recipe Source: Spicy Chilly

Ingredients:
1/2 tin(150 ml/200gms) sweetened Condensed milk
300 ml(1 tin) Whole Milk(or regular milk)
1/3 cup Tender coconut meat(from 2 tender coconuts)
150 ml(1/2 tin) Tender coconut water
5 gms China grass/Agar-Agar
3 tbsp Sugar
Method:
  • Heat the tender coconut until it is medium hot,no need to let it bubble.Cut china grass (agar-agar) into small pieces and soak it in hot tender coconut water for 1-2hrs.Make this process ahead before you plan to make the pudding.
  • Meanwhile scrape the tender coconut meat,use only the thin and transparent variety of coconut meat.If you use the thicker flesh one the pudding would not taste that good.Cut the coconut meat into very fine pieces or run it in mixer in whipper mode for few seconds.I like to keep it bit chunky as the coconut flesh is very thin it adds a very nice taste.
  • Combine milk with condensed milk and sugar and let it come to a gentle boil and simmer for 2-3 mins.
  • Meanwhile in another pan boil the tender coconut water with the soaked agar agar strips to a medium gentle boil(for just 2-3 mins) until the strands melt,do not over boil it as the flavor of tender coconut water would spoil.Remove it from stove.You can strain the mixture as not all the strands would have melted or you can leave them as they are.
  • Immediately pour the milk mixture into the coconut water-agar agar mixture and give a nice mix.Also stir in the coconut flesh pieces and mix well until everything is mixed properly.
  • Pour into individual dessert molds/ramekins and let it sit for 10-15 mins undisturbed. Once it is cooled completely,refrigerate for 1-2hr.

Serve it chilled.
Notes:

  1. You can eat the pudding in 2 days,best to consume on the same day.The pudding might slightly harden after one day but no compromise in taste otherwise.
  2. The pudding sets beautifully in dessert molds,if you wish you can pour the mixture in a rectangular tray and cut into pieces.But I like to serve it in individual portions.
  3. The sweetness is just right for the pudding,if you like it very sweet taste the mix (milk mixture and coconut water mixture when combined) and add a couple of tbsp more if required.
  4. Always use tender coconuts which have light,thin and transparent flesh as they taste better for this pudding.
Monday, February 27, 2012

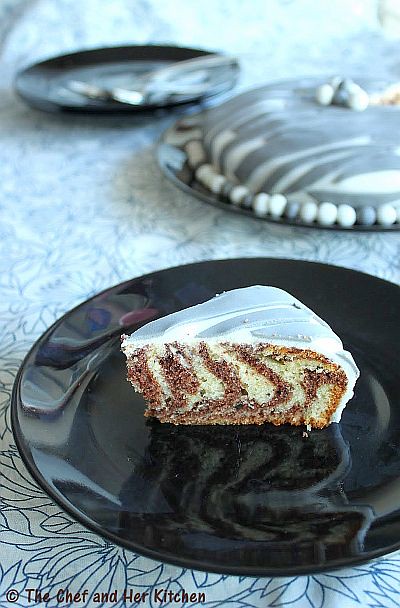
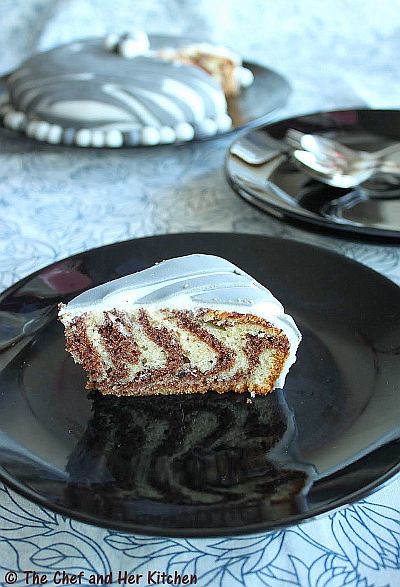
Zebra Cake with Zebra Fondant Icing...and my Third Blog Anniversary!!!

My Blog turns 'THREE' this month.
I started this blog to record my recipes online, as a hobby; which later turned to a passion and I never thought that I would reach this far.I must admit that the culinary journey has been quite interesting, exciting and a wonderful one which gave me an opportunity to learn and know more about various cuisines.
I would like to give a visual treat to my blog and all my readers and friends with a sweet post to celebrate the occasion.I made Farida's famous Zebra cake which is quite popular in blogosphere and also tried my hands on fondant for the first time.This is my first fondant experiment which turned quite nice and gave me enough confidence to work with fondant in future.Though I have adapted a simple zebra striped pattern to go with my zebra cake, playing with various colors of fondant and rolling in to various shapes is definitely a fun filled activity which I thoroughly enjoyed.One does not need to attend any cake decorating class to start with fondant,Trust me..!! when I could work with fondant I am sure even you can.I have mentioned few pointers for easy guidelines, in case you are working with fondant for the first time.Though I used a black color it did not turn out black and gave a shade of grey,I think I should added few more drops of black color.I referred Wilton's site for some tips. My S-I-L helped me while decorating it.I would also like to thank my little niece 'K' for letting me use her valuable Minnie mouse for the photographs.
Zebra Cake Recipe:
(makes one 9-inch round cake)
Recipe Source: Farida's AZcookbook

Ingredients:
2cups(300g) All-purpose flour
1cup(250g) granulated Sugar
1cup(250ml) Milk,at room temperature
1cup(250ml) Oil
4large Eggs, at room temperature
2tbsp dark Cocoa powder
1tsp Vanilla essence
1tbsp Baking powder
Method:
  • Preheat the oven to 350F (180C) for 12-15 mins.
  • Grease a 9" round tin with oil and dust it with flour evenly and remove the excess flour or line the pan with parchment paper.
  • Sieve flour with baking powder a couple of times until it is mixed well.
  • In a large mixing bowl,combine eggs(both egg whites and yellows) and sugar. Using an electric whisk or wire whisk beat the mixture until it is creamy and light in color.
  • Add milk,vanilla essence and oil to the egg mixture and continue beating until it is mixed well.
  • Now gradually add the flour mixture to the wet ingredients and beat until the batter is smooth and the dry ingredients are thoroughly incorporated. Try not to over beat the batter as this will remove the air pockets formed in the batter.
  • Divide the mixture into 2 equal portions. Keep one portion plain and add cocoa powder into the other portion and beat well until it is well mixed.Make sure you sieve the cocoa powder before otherwise you will end up having the lumps in the cocoa batter.
  • Now comes the most interesting part of assembling the cake to get that beautiful zebra pattern.
  • Scoop 3 heaped tbsp or 1 ladle of plain white batter into the middle of the baking pan.Then scoop 3 tbsp or 1 ladle(same sized) of cocoa batter and pour it in the center on top of the plain batter.You need not to wait until the previous batter spreads and also do not try to spread the batter or tilt the pan to distribute the mixture.The batter will spread by itself and fill the pan.
  • Continue alternating the batters until you finish them.
  • Bake in the oven for about 40 minutes until the cake is bake and pass the tooth pick test.If you insert a toothpick in the center of the cake it should come out clean.
  • Remove the tin from oven and let it cool for 5 mins.Run the knife slowly around the edges of the cake and invert the cake on to the cooling rack and turn the cake back and let it cool completely.
You can serve the cake as it is or you can dust it with icing sugar or you can can cover it with your favorite icings like butter cream,fresh cream or with fondant.
For eggless version follow my Eggless marble cake recipe and follow the procedure as of zebra cake.You need to divide the batter into two halves and mix in the cocoa powder in one half and follow the spreading process as of zebra cake.

Notes:
  1. You can serve this as a tea time cake with out fondant or any other icing.
  2. Just dust the cake with icing sugar or cocoa powder or serve as it is.
  3. I felt the cake was bit less sweeter,it all depends on the quality of cocoa powder.If it is dark bitter one feel free to add 2-3 tbsp more sugar to the batter.
Decorating with Fondant:
Tips : Wilton's website

Ingredients:
1 pack of ready made Fondant mix(we need just a portion of it for the recipe)
black edible food color drops to create stripes
3/4 cup butter cream icing(ready made or freshly made)

Method:
  • Take a big orange sized fondant dough and knead the fondant dough until it is smooth and shiny for roughly around 4-5 mins.
  • Take a lemon sized fondant dough and add few drops of black color to it and mix well and knead to a smooth dough.
  • Spread a tbsp batter of butter cream in the center of the serving plate and fix the cake over it.
  • Now slowly cover the cake with a thin coat of butter cream icing all over the cake.
  • Roll the kneaded white fondant dough into a big round of 1/4 inch thickness(remember it should be big enough to cover the cake completely).
  • Slowly lift the rolled fondant and cover the cake and press it slightly so that it will hold on the cake.Using the pizza cutter or knife cut around the edges (where the cake ends near the plate) and remove the extra fondant.
  • Roll the black colored fondant into a thin round of 3-4 mm thickness and cut into random stripes of different length and size and width using the pizza cutter.
  • Stick the cut stripes applying water on one side of the strip on the cake(white fondant) creating the zebra pattern.
  • Cover the bottom portion of the cake with small pebble sized balls made out of fondant.

Thursday, December 29, 2011

The Year That Was....a Quick Recap of 2011

As we bid adieu to 2011, let us also welcome the new year with a hope that it would bring more joyful and prosperous year ahead.This is the last post for the year 2011 in this blog.

While chatting with a couple of blogger friends, we came up with an idea of doing a recap post with a common theme. After a lot of discussion we decided on a theme that centered around selecting the best posts of each month.A special thanks to Lubna for the idea and for coming up with those beautiful names and thanks also to my friends Priti and Deepa for their valuable suggestions. Please also check Lubna,Priti and Deepa blogs for their round up of year 2011.

I was under the assumption that doing a recap post would be easy but I was wrong.Although the recap posts look simple, it takes a lot of time to select the best posts. While it was easy selecting the best posts for a few of the months, it was very difficult for some others.However I tried to state various reasons for selecting those specific posts,just have a look.

Joyful January:
Link

Reason:
I started the year 2011 with this sweet post,the first post of the year.

Fabulous February:


Reason:
I was quite confused in picking up the entry for this month and finally ended up choosing this post to include an Italian variety in the recap.


Marvellous March:


Reason: This is the classic breakfast combo of the year.

Awesome April:


Reason: This is the quick and easy recipe of the year and is also perfect to satisfy those sudden chocolate cravings.

Mighty May:


Reason:
Though I have posted many dosa recipes in this year,this Benne Dosa is my favorite dosa recipe of this year.

Juicy June:


Reason: A simple and easy cake which is a good start for a beginner.

Just July:


Reason: A nice twist to the regular Idli and also a good way to use the left over sour idli batter.

Adorable August:


Reason: This is one of my favorite Videshi Khana recipe but ironically I like it when made it in pakka Indian style..I mean the Indo-Chinese way.

Sweet September:


Reason: I was again confused choosing the post in this month and finally picked this Festive recipe as it was prepared for the most important festival of the year.

Overdose October:


Reason: This was a milestone post as it was posted to celebrate my 250th post.

Nostalgic November:


Reason: This is the post which I enjoyed while preparing,clicking,writing and posting it.This is the most enjoyable post of 2011 for me.

Delightful December:

Reason: This post was a surprise hit and continues to receive a good number of hits despite being a recent post.

I wish you all my friends and readers an advance NEW YEAR WISHES.I will be back soon with a sweet delight to celebrate the coming New Year.Till then enjoy your holidays and follow the mantra WORK HARD..PARTY HARDER..!!

Thursday, October 6, 2011

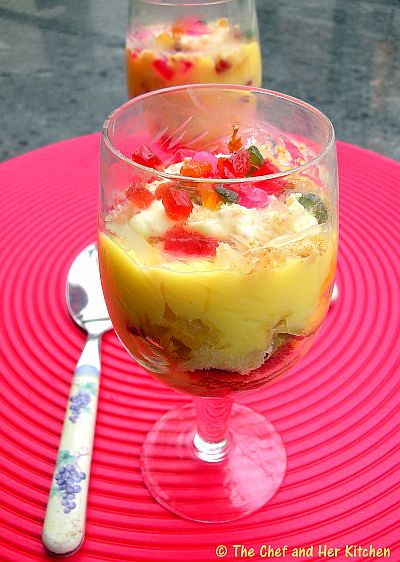
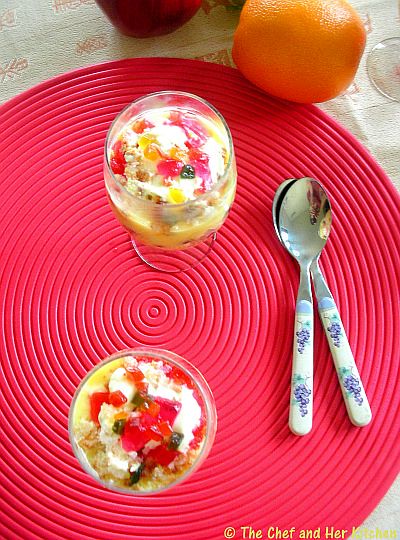
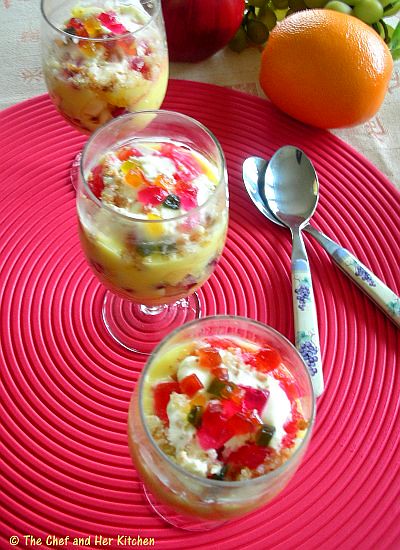
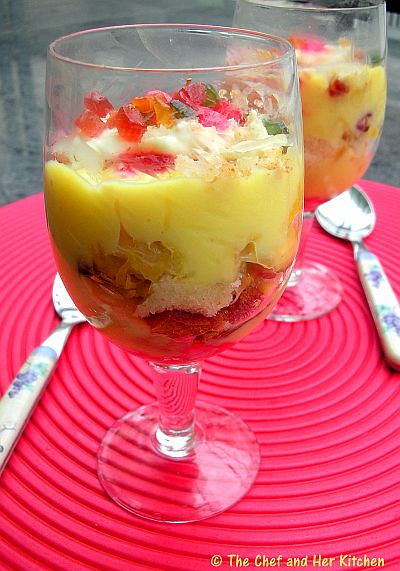
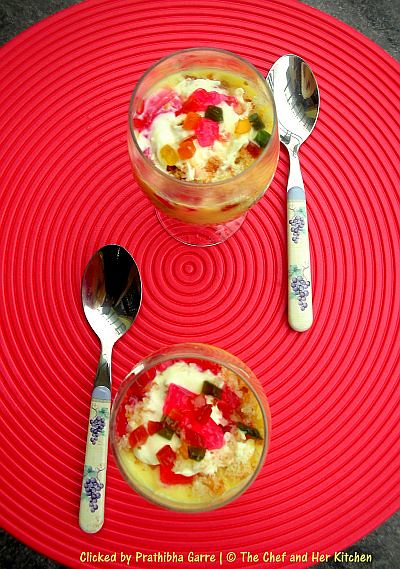
Fruit Trifle | Trifle Pudding....and my 250th post!!!

YIPPEE...this is my 250th post and I am really proud of reaching this milestone.
Milestone posts always need to be celebrated with a special post. While I didn't make this specifically for my post, I saved this to post for the milestone one, as it is apt for the occasion.

I had made this Trifle pudding for a family get together about three weeks back for a group of 12 people while I was in Bangalore. Though I could not take nice pics as it was already late in the evening and I was running short of time , I still managed to click a few pics.This pudding is a bit time consuming to prepare but it's very light and makes you feel like eating more even after a heavy meal.
This is a great party recipe and this pudding never fails to impress any one.So what are you thinking?plan to make this pudding for your next party and wait to receive the compliments.This dessert is quite colorful,light on stomach and would be loved by kids as well.Coincidentally my friend Priti also has posted the same Fruit Trifle recipe,do check her blog for her version.

Fruit Trifle | Trifle Pudding Recipe:
(Serves 4-6)

Ingredients:

to assemble:
6-8 plain vanilla Sponge cake slices
1 cup diced Jelly
2 cups Custard,medium thickness
1 cup mixed Fruits
1/2 cup Whipped cream
1/3 cup Sugar syrup or 1/3 cup fresh Orange juice
3-4 tbsp Tutti fruti or 10 glazed candied Cherries

for jelly:
1/2 pack Jelly crystals(preferably strawberry/raspberry flavor)
200 ml Water

for custard:
2 tbsp Vanilla custard powder
4-5 tbsp Sugar
1/2 litre Milk

for sugar syrup:
1/4 cup Sugar
1/4 cup Water

fruits needed:
2 elaichi Bananas/1 big Banana(peeled,diced small)
1/2 Apple(cored,skinned,finely diced)
1/2 Orange(skinned,seeded,chopped fine without pith)
1/2 Mosambi/Sweet lime(skinned,seeded,chopped fine without pith)
1/4 cup Pomegranate kernels
you can also use (Mangoes,Peaches,Blueberries,Strawberries,seedless Grapes) - Subjected to availability
Method:
for making custard:
  • Take 1/4 cup milk aside and mix in the custard powder and mix well.
  • Boil milk until it comes to a boil and reduce the flame and add custard powder mixed with milk and mix it vigorously and continuously.Add sugar and mix well.
  • Let it thicken until it coats the back side of the ladle.Switch off the flame and let it cool completely.Refrigerate it until its usage.
for making Jelly:
  • Always follow the instructions given on the pack for making,in general reduce the quantity of water to get perfect jelly.In our case even if the jelly is bit soft it is fine as we are layering it in between other layers and it is preferred to be soft than the firm jelly.
  • In order to make jelly boil the water and mix the jelly crystals and mix well until it melts completely and let it boil for a minute.
  • Pour this mixture over a flat plate(with the wall) to get 1/4" thickness and let it set for an hour or two.dice into fine cubes and keep it refrigerated until its usage.
preparing the mixed fruits:
  • While cutting the fruits always start with the citrus fruits like orange,mosambi so that it will help in avoiding the discoloration of the fruits like apples,banana which we add later.Otherwise you can add few drops of lemon juice which helps in discoloration of apples and bananas.
  • Cut all the fruits into even sized pieces and mix with a spoonful of sugar and mix well.Keep it refrigerated until its usage.
for making sugar syrup:
  • In a pan boil water and add sugar and let it melt completely and boil for a couple of minute.No need to boil this for more time.If you are using orange juice you avoid this step of making sugar syrup.
for assembling Trifle pudding:
  • Remove the brown edges of sponge cake and dice it into small cubes and keep them aside.
  • Arrange the glasses or the serving bowls in an order before we start the process.You can even use a big wide fancy bowl for this,but I prefer individual bowls as it is easy to serve and mess free as well.
  • First add a thin layer of colorful jelly cubes and then top it with a layer of sponge cake cubes.
  • Sprinkle sugar syrup or orange juice all over to moisten the cake pieces and gently press the cake down.
  • Add 2-3 tbsp custard all over the cake slices covering the gaps in between.
  • Add 1-2 tbsp of mixed fruits and again pour a layer of custard over it.
  • Now repeat the process of jelly layer,cake layer,custard layer,fruits layer and then again custard layer.You can repeat the process according to the size of your serving bowl/glass, generally 2-3 layers would be more than enough.
  • Top it with 1-2 whipped cream,you can even use a piping bag for this job to make it look more pretty.
  • Sprinkle some jelly cubes and tutti fruti over it or keep a candied glazed cherry over it.
  • Use a cling wrap and cover each and every individual mold.
  • Let this set in refrigerator for 5-6 hrs which helps in enhancing and mixing up of flavors.Do not keep this in freezer,just keep it refrigerated.
Serve it cold.
Notes:
  1. There are no hard rules while layering the pudding,you can use the quantities as you wish and also layer them in the order you wish.
  2. You can use the fruits according to your taste.
  3. I suggested strawberry/raspberry flavored jelly as it makes the trifle colorful.But there is no hard rule for it you can use the jelly flavor of your choice.
  4. Always set the desserts in refrigerator for few hours in order the flavors to get mixed and make the dessert tasty.
I am sending this to Rak's 'Celebrate SWEETS' event which was originally started by Nivedita.I am also sending this to Pari's 'Only-Sweets and Desserts' event which is being hosted by Gayathri.

Thursday, March 31, 2011

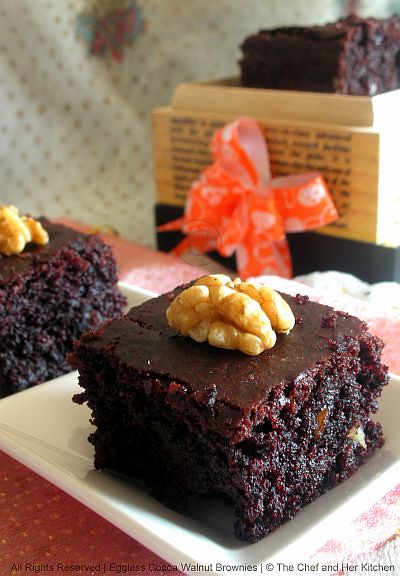
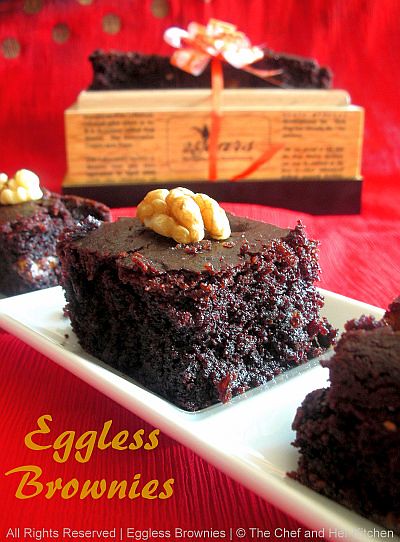
Eggless Cocoa Walnut Brownies....and my 200th Post!!

Reason no.1: This is 'my 200th post!!'
Reason no.2: 'Last Sunday was my birthday' and thanks a lot for all your lovely wishes which made my day very special.
Reason no.3: The 'temptation' created by our fellow bloggers by posting different amazing brownie recipes in the last couple of weeks for Divya's 'Best Brownie' event.
Reason no.4: And finally 'the magnificent and the most amazing win of India against Pakistan' in the world cup semi finals which made us on the way for the most awaiting finals.
These are the various reasons which forced me to make my brownies post to happen soon in my blog to celebrate and enjoy the moments.

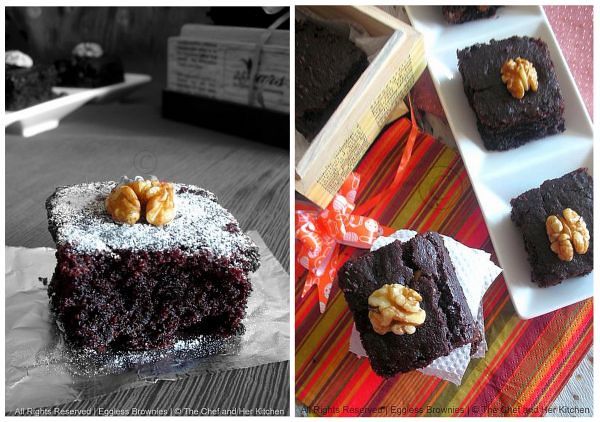
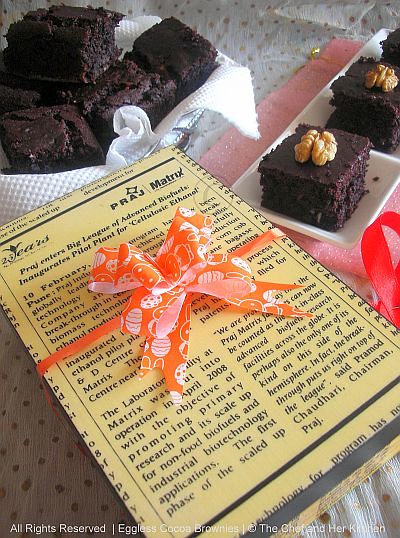
I have already posted a Brownie recipe here which has eggs. I always look for eggless recipes,not that we do not eat eggs but I can bake them for my mom who does not eat eggs. I tried this egg less version of brownies from sanjana's blog and I already made them a couple of times because of the simplicity of the recipe. Mine turned to be fudgy but slightly cakey textured ones unlike those beautiful ones of sanjana's,nevertheless the taste was amazing and loaded with chocolate.If you are looking for an egg less brownie recipe,you can blindly follow this recipe and enjoy making those gorgeous beauties.Even our blogger friend Nithya has tried these brownies recently and posted them here and if you are looking for another eggless brownie recipe check out Raks space for her brownie recipe.

And finally,these brownies along with the other version of 'Brownies with eggs' are going to participate in Divya's 'Best Brownie' event.

Ingredients:
1 cup all purpose flour
1/2 cup cocoa powder(I used cadbury's)
3/4 cup icing sugar + 1tbsp icing sugar(for dusting)
1 tsp baking soda
a generous pinch of salt
5 tbsp melted unsalted butter or 5 tbsp regular vegetable oil
1 tsp vanilla essence
1 cup buttermilk
2 tsp instant coffee( I used nescafe)
1/4 cup chopped walnuts + 1tbsp chopped walnuts(for topping)
1/4 cup chopped dark chocolate pieces or chocolate chips

Method:
  • Sift all purpose flour,icing sugar,baking soda,salt and cocoa powder together a couple of times until you get a uniform mixture of them.
  • Melt instant coffee powder in a tbsp of hot water and let it cool.
  • Melt butter in a deep pan on low heat and let it cool.If you are using oil ignore this step.
  • Whisk in the melted butter/oil into the butter milk and add vanilla essence and coffee decoction and whisk again until you get a uniform mixture.
  • Now fold in the dry ingredients into wet ingredients and mix very gently with a spatula or spoon.
  • Dust the chopped walnuts and choco chips/dark chocolate pieces with a tsp of flour and fold the dried nuts and chocolate pieces into the batter.
  • Grease an 8" square tin and line up a parchment paper or aluminum foil with the edges hanging over the tin slightly and transfer the batter mixture in it to get 1" thick layer of the mixture.
  • Sprinkle the remaining walnuts and bake for 25-30 mins at 180 degrees or till done.
  • Cool it completely and remove it from tin and cut it into squares.
Serve it warm as they are or with vanilla ice cream with some chopped nuts and chocolate sauce.Experience the heaven which melts in your mouth.

Notes:
  • I have used walnuts,you can use nuts of your choice like pecans, hazelnuts, walnuts, cashewnuts and you can even chopped dates,cranberries,raisins etc.
  • The original recipe did not have vanilla essence in it,I added to get the extra flavor to it.
  • You can pour it in a 9" square tin to get thin brownies than mine.
  • I have added more quantity of nuts and chocolate pieces as we like to bite into them in brownie,you can reduce or increase the quantity according to your wish.
  • To make buttermilk,whisk in 2 tbsp of thick fresh curds in approximate 1 cup of water to get a cup of buttermilk.
  • If you are using salted butter,avoid adding salt to it.
  • The original recipe had 3/4th cup of icing sugar,I have added extra 2 tbsp icing sugar approximately which was even perfect,not too sweet.
  • You can powder your sugar and use it for d recipe instead of icing sugar.
  • These brownies have a bit of texture of cake,but taste wise it was amazing.
If you are interested,check out my earlier 50th,100th and 150th milestone posts here.

Monday, February 28, 2011

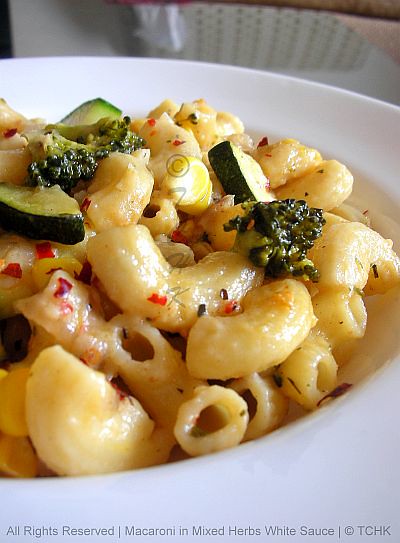
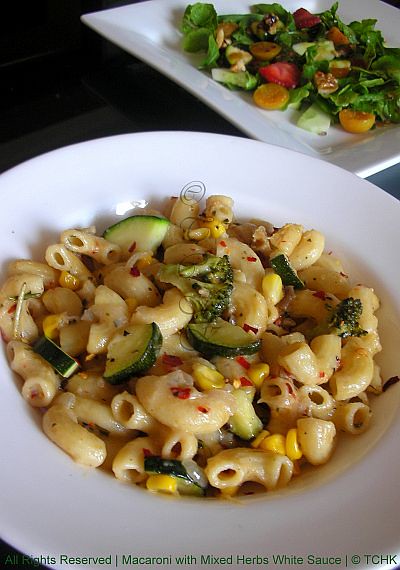
Macaroni with Mixed Herbs and Roasted Vegetables in White Sauce and a Happy Note!!

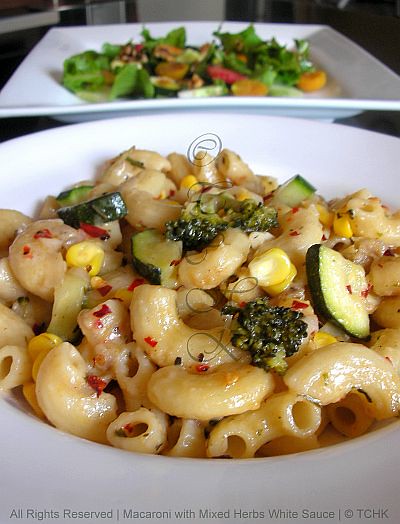
Pastas are generally our weekend dinners as I find them very easy and quick to make and can finish up the complete process of cooking in less than thirty minutes.My husband prefers a very simple pasta tossed with a good amount of EVOO,garlic and red chili flakes,which I find it a bit dry for me to eat.After lots of trials and additions I have settled upon this recipe which suited taste buds of both of us.There were days I used to buy the ready made pasta sauces and store them up in my kitchen,but after I started blogging I never bothered to buy as I find the fresh home made ones taste better than the store bought ones and are very economical too.As I mentioned earlier among all the pastas we love Basil pesto pasta and is always our first preference provided the fresh basil is available at home,if not I make pasta either with spinach,coriander or mint pesto.If there are no greens available in my refrigerator this is the second version of pasta which we prefer at home.It is very simple to make,no grinding process is required and if you are quick in cooking and good in multi tasking the whole process can be finished in 25-30 mins.I start everything simultaneously like boiling the pasta,slicing the vegetables,boiling and roasting the vegetables necessary in the order and making the sauce as well.Read my notes to get some tips on converting a high calorie pasta to a very healthy and low cal version of pasta.I am sure many of you might have implemented these tips but still I want to share for people who are not aware of them.

Ingredients:

2 cups macaroni or any other pasta
1/2 cup chopped broccoli
1/4 cup sweet corn kernels
1/4 cup sliced mushrooms
1/4 cup thinly sliced zucchini
1 onion,thinly sliced
6-8 pods of garlic,finely chopped
1 tsp red chili flakes
1 tsp mixed herbs
1/2 tsp black pepper,freshly ground
2 tbsp low fat eggless mayonnaise(secret ingredient for a low calorie version but optional)
2-3 tbsp extra virgin olive oil(EVOO)
salt to taste

for white sauce:
3 tsp extra virgin olive oil or butter
3 tsp all purpose flour or wheat flour
1 cup milk
1/4 cup parmesan cheese
1/2 tsp mixed herbs
1/4 tsp black pepper,freshly ground
a pinch of nutmeg
salt to taste

Method:
  • Bring water to a boil with salt and add a tsp of olive oil in a big pot add macaroni or any pasta and cook for 8-10 mins or follow the instructions on your package.Drain them and keep it aside and reserve the water for later usage.
  • Mean while make the white sauce.Heat EVOO or butter in another pan and add all purpose flour or wheat flour and fry well and add milk to it and quickly whisk until you get a uniform smooth mixture,add more milk or reserved pasta water to get the required consistency.Add grated cheese,required salt,mixed herbs,pepper powder and a pinch of nutmeg to it and give a boil.keep it aside.
  • Steam broccoli florets until tender,still crunchy.Boil corn kernels until done.
  • Heat a wide bottomed thick pan and heat extra virgin olive oil and add garlic and fry until light golden in color.
  • Add sliced onions and fry until transparent.Add sliced mushrooms and zucchini and fry until done.Mushrooms might leave water,cook until the water evaporates.
  • Add blanched broccoli and cooked corn kernels to it and fry for few more mins.Do not let the onions turn golden in color.
  • Add red chili flakes,mixed herbs and enough salt and give a good stir.
  • Add the prepared white sauce and mayonnaise and mix well,check for salt and add more if required.Add cooked pasta and mix well and cook for 3-4mins.
Garnish with grated parmesan and serve it warm with salad and bread.

Note:
  • I make my pastas,low calorie and healthy.I replace all purpose flour with wheat flour and butter with EVOO while making white sauce,this itself makes the pasta very healthy as there is no other ingredient which makes it loaded with calories.
  • You can use whole wheat or whole meal pastas which are available in market instead of flour ones to make it more healthy.I generally use flour one or whole wheat ones,I am not happy with the whole meal one,So I do not recommend to use the whole meal one.
  • One more thing,I avoid adding cheese to the pastas unless it is for a party.I add 2 tbsp of low fat eggless mayonnaise instead of cheese to get the richness in pasta.The addition of mayonnaise even adds special taste to pasta,try it out you wont believe that there is no cheese in pasta.
  • Adjust the chili flakes,pepper and herbs according to your taste buds.
  • Replace macaroni with any kind of pasta like fusili,farfelle,shell pasta,penne,spaghetti etc etc.
  • You can even add a pinch of cinnamon to the white sauce while making it.
  • You can even add colored bell peppers,yellow zucchini or roasted eggplant to the pasta.
  • If you are making it for a party,after you prepare the pasta transfer to a oven proof dish and cover it liberally with Parmesan cheese and dot with butter in between and bake it in preheated oven at 180 degrees for 15-20 mins until cheese melts and turns slight golden in color.

and now coming to the happy note..:)

I have completed two years of blogging successfully this feb 25th and I am really thankful to all the fellow bloggers and visitors of my blog to make this happen.Your comments and messages really mean a lot to me,a special Thanks and hugs to you all.

photo courtesy:Google

Friday, August 13, 2010

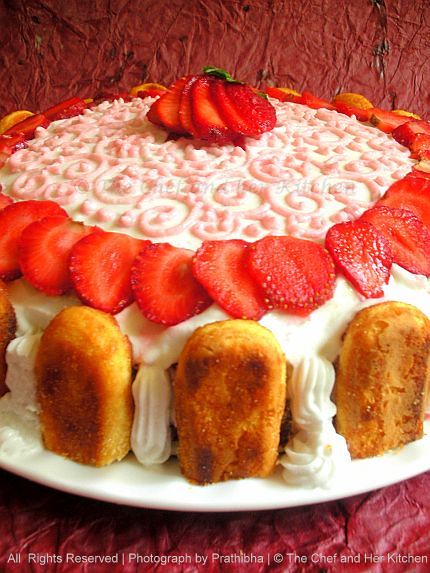
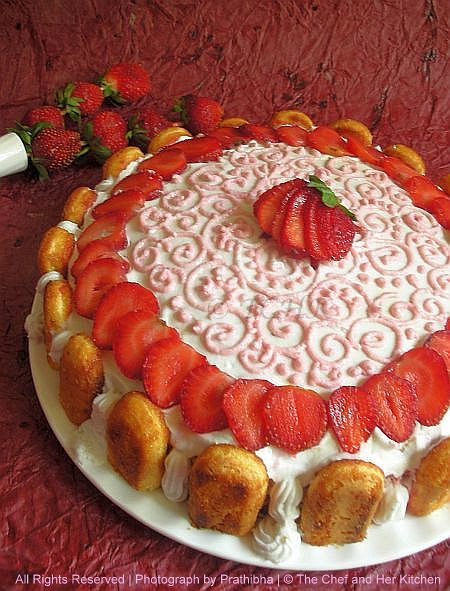
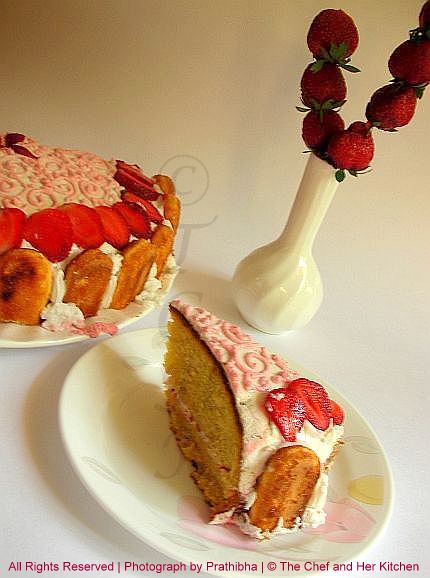
Eggless Sponge Gateau/Cake with Strawberry Cream Icing........and my 150th post!!!


Another milestone post from me,yes it is my 150th post today.

Milestone posts are very close to my heart as I try making something different or exotic to make the post more memorable.Don't assume that I made this cake specially for my 150th post,I made this cake almost 5 months before on the occasion of my birthday and when the beautiful luscious strawberries were in season.Somehow I kept post poing doing this post because of my frequent breaks in blogging and I think now I got the perfect opportunity to showcase my beautiful cake for this special post.

And now to the flash back.......hmmm.....As my In-laws were expected to arrive on my birthday I could not control myself from baking a cake for my own birthday(I really hate to bake a cake for my own birthday,but could not help it) and so I preferred a egg-less version of the basic vanilla sponge cake which I adapted from Nita Mehta's Cake book.More than baking a cake I am very much interested in learning to decorate a cake and I always get excited to see the beautiful cake decorations by our fellow bloggers.One such decoration that sat in my head was this beautiful cake done by Deeba .Eventhough I am just a beginner, I thought of attempting to decorate such a exotic one and to my surprise the outcome was so good that my inlaws were excited and happy to see that cake and showered me with lots of praisings which made me to forget the pain I took in decorating it.

And coming back to the present,I personally thank all my bloggers friends for their constant support which helps me in reaching many more milestones like this.
I hope you all enjoy this post.

Ingredients:

For Eggless Sponge Cake:
1 1/4 cups Maida
1/4 cup cornflour

1/2 tin condensed milk
1/2 tsp level soda-bicarb

1 tsp level baking powder
1/2 cup oil
4 tbsp powdered sugar

1/2 cup milk

1 1/2 tsp Vanilla Essence

For Cream Icing:
1 pack whipped cream powder(I used some imported variety available here)
3-4 tbsp powdered sugar

4 tbsp finely chopped fresh strawberries

2 tbsp strawberry crush


for Sugar Syrup:
1/2 cup water
1/4 cup sugar

few drops of lemon juice


other Ingredients for decoration:
6-8 strawberries,finely sliced
8-10 Italian finger biscuits


Method:

Eggless Sponge Cake:
  • Sift maida with cornflour,soda bicarb and baking powder.Keep aside.
  • Beat condensed milk with hand blender and add sugar gradually and beat till fluffy.Add oil to the mixture and beat well.
  • Add half the flour mixture and half the quantity of milk and beat well.Add vanilla essence,remaining flour and milk beating well after each addition.Beat well for 3-4mins till the mixture is smooth and light and attains a thick pouring ribbon consistency.
  • Pour the mixture into a greased and lined round 7" tin.
  • Bake for 30-35 mins in a preheated oven at 150 degrees until the cake is done.Test it by using a toothpick test,if the toothpick comes out clean then the cake is well cooked.
  • Remove it from the mould carefully and let it cool completely on the wire rack.It is better to prepare the cake a day before you want to decorate it.
Sugar Syrup:
Boil water along with sugar until it forms a nice syrupy liquid,strain the water and let it cool.Add lemon juice to it and mix and keep it in fridge.

Whipping up the cream to spread and for piping:
  • Beat the whipped cream powder on medium speed till thick.
  • Only after it turns thick,then add powdered sugar and continue beating on high speed till you get the soft peaks.Chill it for some time.Check the sweetness at this point as some ready mix packets have sugar already in it,so add according to your taste
  • Divide the mixture into 3 parts.Reserve one major portion for topping the cake.
  • Add very finely chopped strawberries to the other portion of the cream and gently fold in.
  • In 4-5tbsp of whipped cream add 2 tbsp strawberry crush and gently mix well and pour it into the cone made up of baking paper and tie it with a thread and let it stand in a glass and keep it in the refrigerator until its usage.
  • In another piping bag which has star nozzle fitted fill in the 6-8 tbsp plain whipped cream and refrigerate it until its usage.
Assembling and Decorating the Cake:
  • Level the cake gently using a knife(to cut) to form a uniform surface.
  • Based on the size of your cake cut it into two or three pieces horizontal to form layers.I did mine into two layers. .
  • Place one layer on the serving platter
  • Pour the lemon-sugar syrup mixture all over the cake to make it enough moist.Do not add much as it makes the cake very soggy later.
  • Apply the whipped cream mixed with finely chopped strawberries on the first layer and place the second layer over it and pour again the lemon-sugar syrup mixture all over the cake to make it enough moist.
  • Apply the plain whipped cream all over the cake and make sure that it is uniformly applied all over and on the sides using a flat spatula by dipping it in water in between which helps in spreading the cream uniformly.
  • Cut the Italian fingers into two equal sized pieces.Slice the strawberries very thin lengthwise and keep them aside.Slice one strawberry with the leaves in tact with the layers of the sliced strawberry which is used for decorating on top.
  • Stick the Italian fingers leaving some space in between around the sides of the cake.
  • Slowly using the cone make a design of your own with the strawberry flavored cream cone This step is completely of your choice and to your creativity, just do it in the way you want.
  • Using the star nozzle cream cone make the straight line and a star down the line in between the two Italian fingers.Please check the pictures for detailed decoration as the pictures themselves explain how it is done.
  • Arrange the strawberry slices around the edge of the cake as shown in the picture and gently keep a sliced and layered strawberry in the centre.
Chill it in the refrigerator and slice it gently and serve chilled.

Thursday, February 25, 2010

My Blog baby turns ONE Today...!!!

Image source:google

Time flies away so fast ,I never realized that my blog baby will turn one year old so soon!!!
HAPPY BIRTHDAY my BLOG baby!!!

I am thankful to all my blogger friends,followers and regular readers of my blog for their constant support and encouragement with their lovely words.Blogging has not only become my passion now but also gave me so many good friends who are in touch regularly.My one year of blogging made me to learn lots of tips and new recipes from our wonderful blogger friends and also had widened my exposure to different cuisines around the world.I got to meet even some blogger friends in Bangalore which was really a wonderful experience.

I know I am not regular in visiting your spaces these days as I am little busy with my In-laws who visited us for two weeks.I am missing all your wonderful recipes and I will be back soon with a new recipe,till then happy blogging!!

Wednesday, October 14, 2009

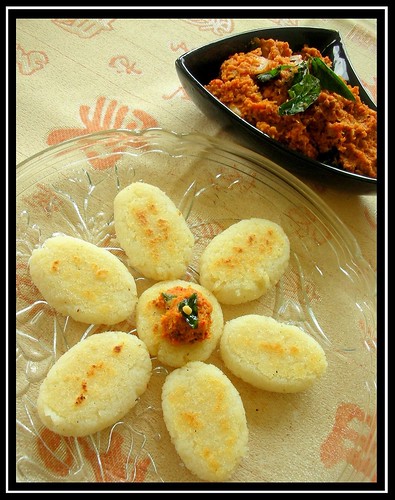
Billa Kudumulu / Rice Rava Tikkis & Onion Chutney and my 100th post..!!

Hurray....!!!!!
I have finally reached a small milestone in my blogging world...yes this is my 100th post.Before I proceed to the recipe I would like to thank all my blogger friends for their tremendous support by visiting my blog regularly and writing those lovely words. Thanks a lot girls,without your support I would not have reached my milestone so easily.Thanks a tonne..:)

As it is my 100th post I thought of posting something which is not familiar with many of you guys. This is a typical traditional food which is prepared only in few house holds of Andhra and Karnataka,so many people might not be aware of this dish.This is a all time favorite breakfast made at our place and especially my brother likes it so much that my mom makes this atleast once every fortnight.Even though the recipe sounds so simple,the preparation is bit time consuming in making the billakudumulu/tikkis and frying them,but the outcome is all worth the effort you had put in that.Do give a try once,you will definitely like it.


Ingredients:

1 cup Rice Rava /Akki tari/Biyyapu rava
3 cups Water

2 tsp oil

Salt to taste


Method:
  • Slightly roast rice rava until you could smell the aroma of it.Cool it completely.You can even fry it and keep it in advance and store it in airtight containers.
  • Bring the water to a boil and add salt and oil to it,Once it starts boiling add roasted rice rava to it and keep on stirring until it gets cooked and forms a lump.
  • Now turn off the flame.Let the mixture cool for a while(not completely) until you can handle the mixture with your hand.
  • Grease your hands with little oil and take some mixture and make it into a smooth round and flatten to 1/2 inch thickness like a round or oval patties and give a nice shape pressing at the edges.Do follow the same procedure to prepare the remaining ones.
  • Now on a heavy tawa pour 3tbsp of oil(on a medium flame)and place the prepared tikki's on it and shallow fry both sides on medium flame applying oil on both sides until golden brown and crisp.This is bit time consuming as it takes more time to get browned on both sides on low flame.so please be patient at this part.This should be roasted in such a way that when you try to tear a place it should split into two parts.
Serve it hot with Onion Chutney or Coconut Chutney.

But in our house,Onion chutney and Billa kudumulu are like made for each other combo.

Note:
  1. To prepare Rice rawa: Clean and Soak the rice for some time and drain it completely and spread over a cloth so that it will drain off excess water.Coarsely grind the pound mixture in a mixer and then sieve it(do it in whipper mode).Use the rawa which is in sieve and the flour that it is sieved can be used for dosa's or regular rice flour.
  2. Rice rawa can also be prepared directly by grinding it in the mixer in whipper mode and sieve it.
  3. Instead of 1 cup rawa,add 3/4 th cup of rawa and 1/4th cup of coarsely ground toor dal(generally they will be ground together in 3-rice:1-toor dal ratio).Even this tastes very yummy and different in taste than the regular one.They turn little yellowish in colour because of the addition of toor dal.
  4. You can add soaked chana dal(approx - 3-4tsp) and grated fresh coconut- 2tsp to the boiling water along with rice rawa.
  5. These Tikki's(Billakudulumu) can be even steamed like how we do for Idli's for healthier version,but the roasted version will be more tastier than the steamed one's.


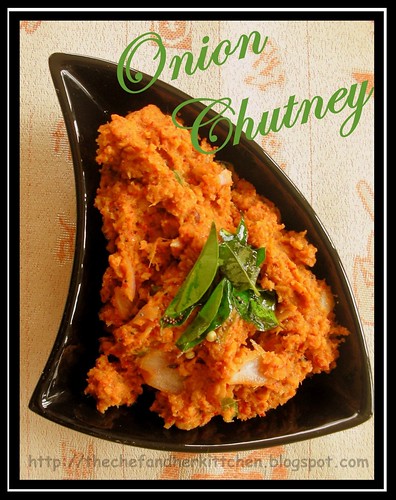
Onion Chutney:

Ingredients:
3 big onions,sliced
6-8 red chillies
1/4 cup grated dry coconut
1 tbsp tamarind pulp
1 tsp grated jaggery(optional)
salt to taste
2-3 tbsp oil

for tadka:
1 tsp mustard seeds
a sprig curry leaves
1 tsp ghee


Method:
  • Grind red chillies,grated dry coconut,jaggery and salt to a coarse powder.
  • Add sliced onions and tamarind pulp to it and pulse it in whipper mode.The mixture should be slightly chunky with onion bites.
  • In a kadai heat oil and add ground mixture and fry for 8-10 mins until brown and starts leaving the edges.
  • Heat ghee in a tadka pan crackle mustard seeds and add curry leaves and fry for a minute.Add the tadka to the onion chutney and mix.
Serve it with Billa kudumulu.

Notes:
  • This stays good for 3-4 days when stored in refrigerator.
  • This taster better with billa kudumulu, rice flour rotti/akki rotti and chapathy.
  • For a Vegan version use oil instead of ghee for tempering.
I am sending this entry for "WYF:Light Meal"-event hosted by EC.
 
back to top