Showing posts with label Cake Decorations. Show all posts

Monday, September 11, 2017

White Chocolate Sponge Cake | White Chocolate Cupcakes

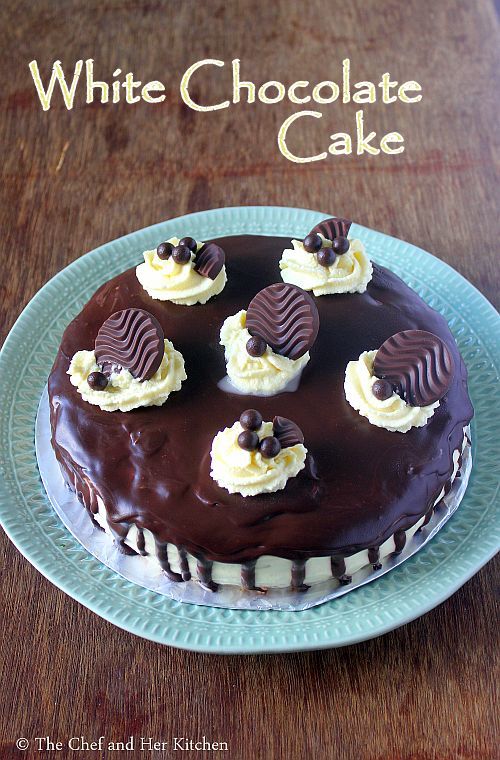
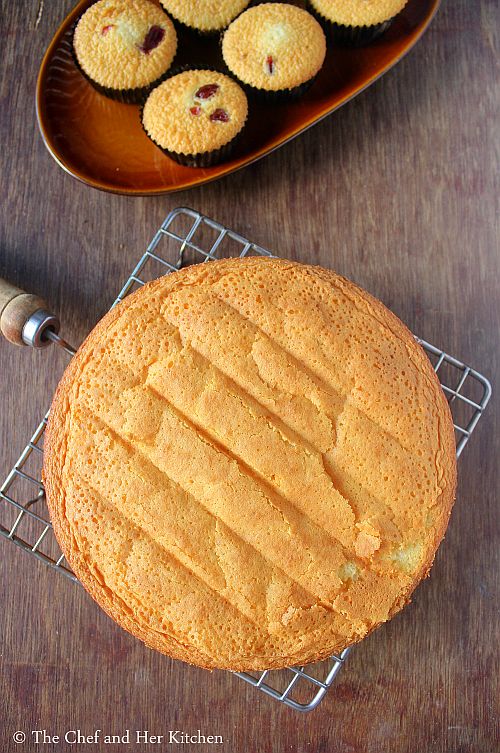
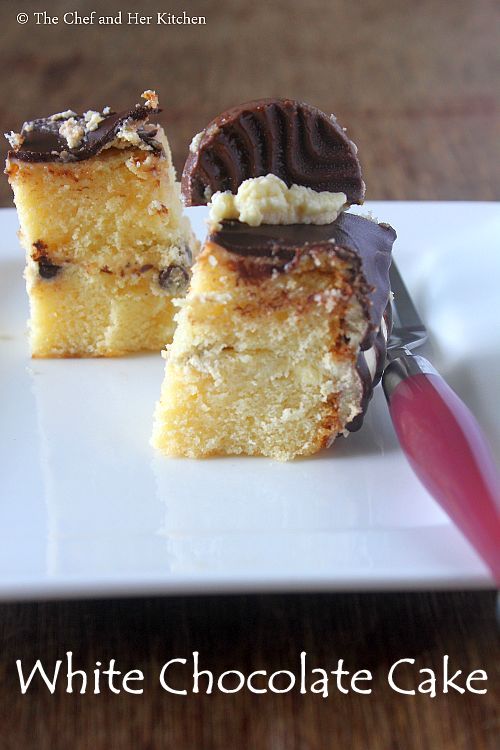
white chocolate cake
White chocolate sponge cake with step by step photos.I bake pretty good tea cakes,cookies and breads regularly for my family but I am still novice when it comes to decorate the cakes.Somehow I take an extra plunge to decorate a cake on my own to mark the celebrations at home.Though the final look of the cake is not perfect,it gives me an immense pleasure when I bake and decorate a cake for the loved ones.Don't you agree?
white chocolate cake
I follow many food groups on facebook and I must say that fb group has become a nice medium to learn new recipes.When I came across this white chocolate cake recipe from flours and frostings blog in one of the baking groups I follow I was sure that I would be doing this for my son's birthday.Though I had ordered another cake for the party celebration I prepared this on his actual birthday and also for his school to share with his friends.
white chocolate cupcakes
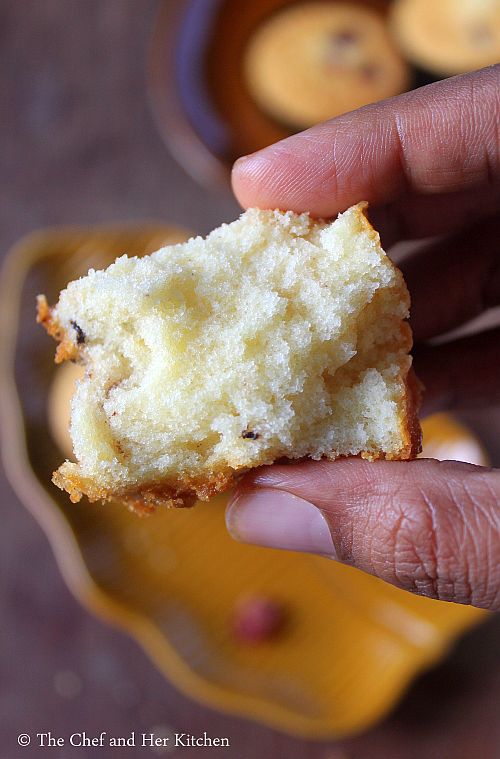
I followed the recipe to the T and it is a very simple recipe to follow and it tastes amazing with white chocolate flavor.I love white chocolate and hence it was a double treat for me,I strongly recommend anyone to try this no fail easy cake recipe.I am not an expert in decorating and hence kept it simple but I have mentioned in the recipe how I did in case if anyone wants to know the procedure.
white chocolate cake

white chocolate cake
Check out other celebration cake recipes in my blog:
white chocolate cupcakes

Here is how to make white chocolate sponge cake with step by step photos:
White Chocolate Sponge Cake Recipe:

Yields 8" Round/Square cake | Recipe source: here
Prep time: 20 mins | Baking time: 40-50 mins | Total time: 60-70 mins
Cuisine: International | Category: Desserts/Snacks

Ingredients:
1 1/2 cups(190 gms) All purpose flour
3/4 cup(170 gms) White Chocolate,chopped
3/4 cup(150 gms) Sugar
3/4 cup(180 ml) Milk
6 tbsp(80 gms) Butter,cubed
3 Eggs
1 tsp Vanilla extract
1 1/2 tsp Baking powder
1/2 tsp Salt

Method:
  • Preheat the oven at 170 deg C/350 deg F for 10-12 mins.
  • Place a parchment paper and grease an 8" round or square tin and dust it with the flour.I used a 7" round tin and 6 cupcake tin.
  • In a thick bottomed sauce pan heat cubed butter, chopped white chocolate and milk and let it cook until the chocolate and butter melts and forms a uniform liquid.Keep this mixture WARM.
  • Sieve together the flour,baking powder and salt a couple of times and keep it ready.
  • Using a stand mixer or electric beater beat the eggs with the sugar and vanilla essence until it triples in volume and the mixture should turn PALE in color.If you draw an eight on top of the mixture,you should be able to see the whole 8 before it disappears,this consistency indicates that it is right.
  • Reduce the speed of the beater/mixer and add the flour mixture gradually and mix well until it is incorporated.
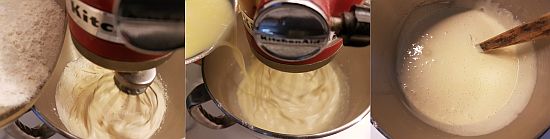
  • Add the warm chocolate-milk-butter mixture and continue beating until you get a smooth mixture.
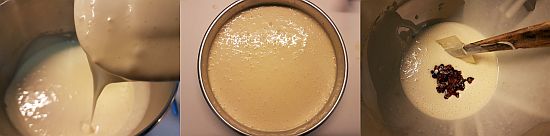
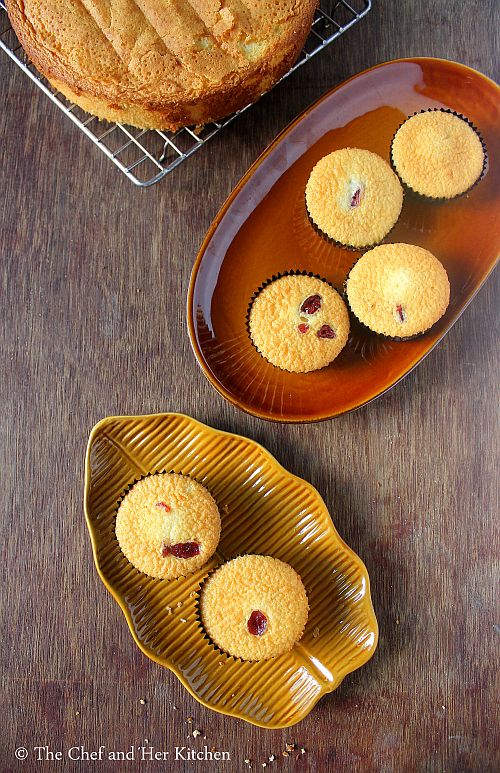
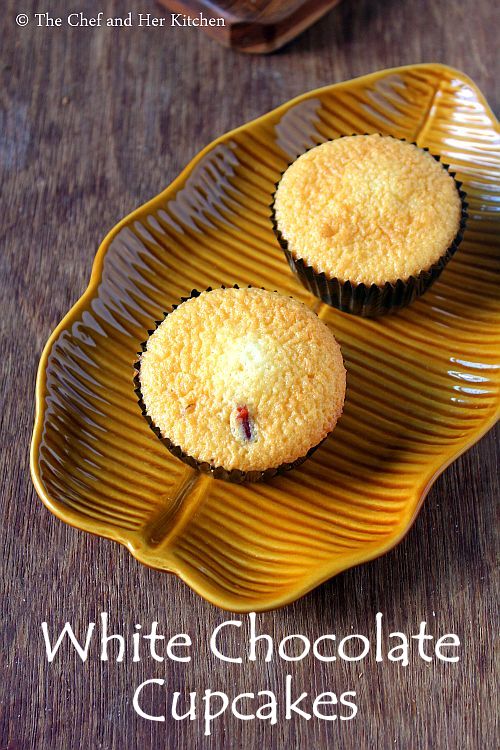
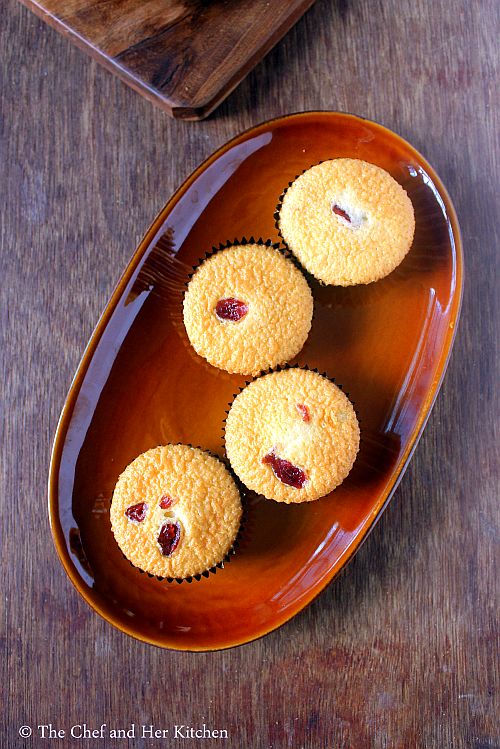
  • Now pour the batter in the prepared pan until it is 3/4 th of  the height of the pan.I added few dried cranberries to the remaining mixture and poured in the prepared cupcake tin.
  • Bake it for 40-45 mins until done.It should pass the toothpick test,if you insert the toothpick in the center and remove it should come clean which indicates that the cake is done.I refrigerated the cupcake tin while I baked the big cake and then baked the cupcakes for 15-18 mins until they are done.
  • Cool the pan nicely for 10 mins and run a knife around the edges and invert the pan and gently tap it on to a plate and then transfer it to a wire rack to let it cool down completely.
Serve it warm or at room temperature or slice and decorate with whipped cream or ganache frosting.

to decorate(how I did):
  • Sugar syrup - Boil water along with sugar until it forms a nice syrupy liquid,strain the water and let it cool.Add lemon juice to it and mix and keep it in fridge.
  • Cut the Cake into two or three pieces depending on the height of your cake.
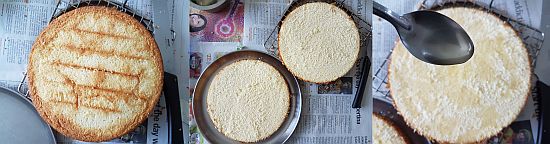
  • Whip chilled heavy fat cream in a chilled bowl and added little icing sugar and vanilla essence and whipped until it gave stiff peaks.
  • Place a cake on the serving platter.Place the butter paper along the sides from the platter so that it can be removed once the process is completely done.
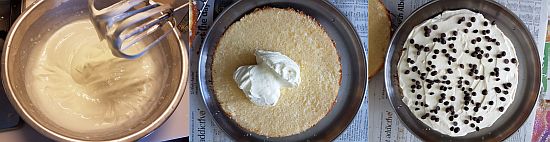
  • Soak with 1/4 cup sugar syrup.Spread some whipped cream filling on cake and add some chocolate chips over it and cover those with the other piece of cake.Soak cake again with 1/4 cup syrup.
  • You can do a crumb coat,refrigerate it and give another thick coat for a neat look.You can even apply a thick coat of whipped cream on level it nicely on the top and around the edges.
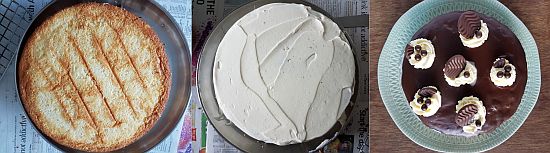
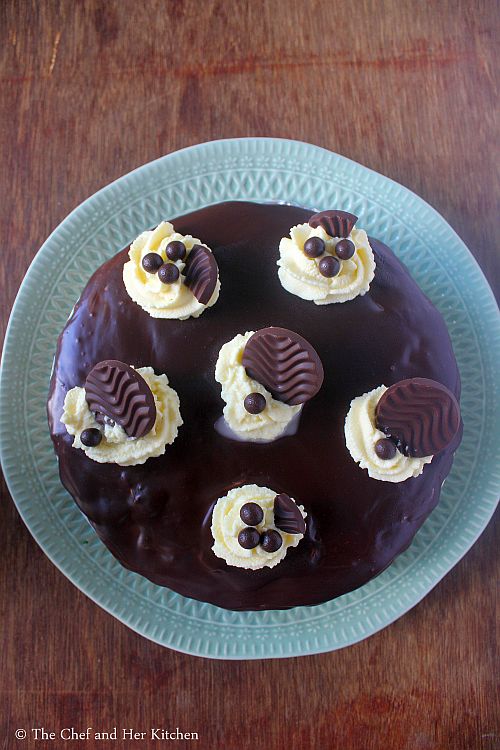
  • Melt 1 part of chocolate with 2 parts of heavy cream in a thick vessel on a stove top and let it cool down a bit.I poured this on the chilled frosted cake and let it drip on the edges and let it set.Once it is set you can pipe few patterns with the whipped cream and decorate it with chocolates.
Notes:
  1. I reduced the sugar by 1/4 cup in the cake recipe as I frosted the cake with whipped cream and chocolate ganache.
  2. They stay good for 2-3 days when stored well in an airtight container.
white chocolate cake

Wednesday, September 5, 2012

MOIST CHOCOLATE CUPCAKES with COCOA BUTTER FROSTING

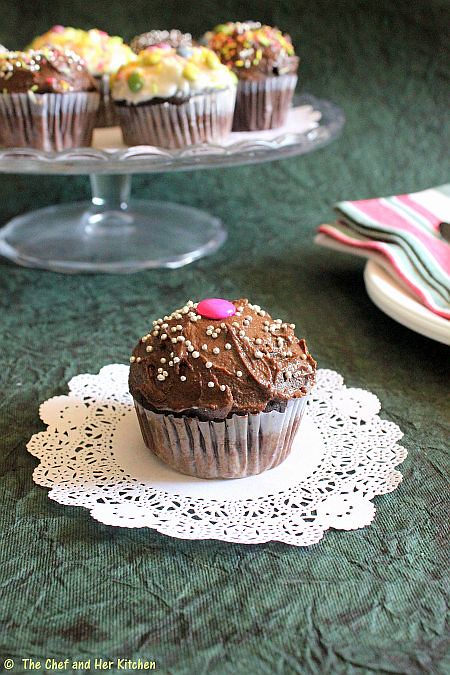
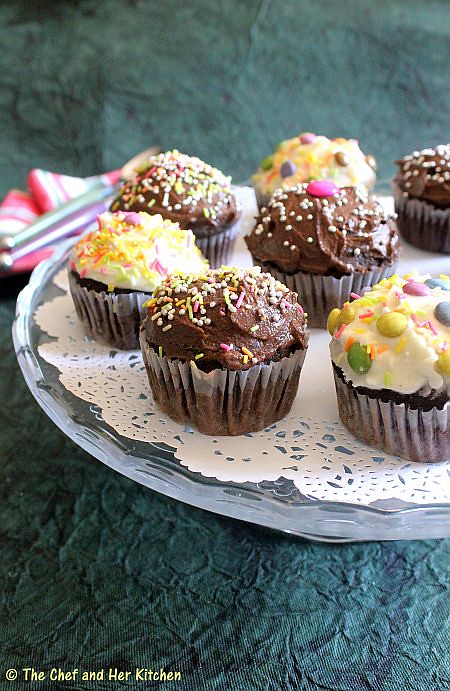
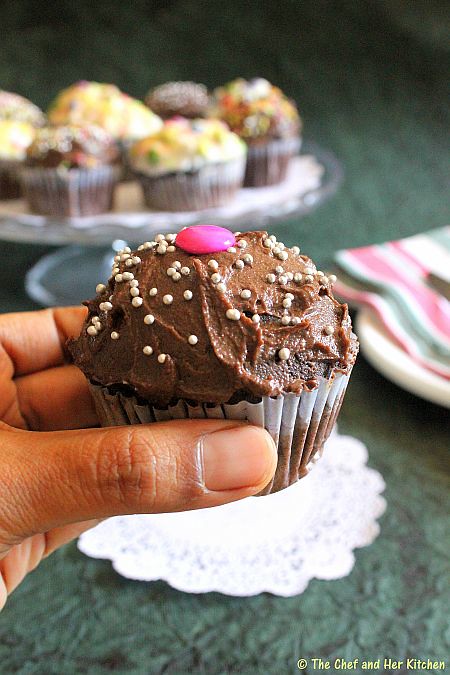
Cupcakes are a favorite for kids as well as adults.Cupcakes are nothing but a small portion of soft and fluffy cake that can be served with/without frosting.I have earlier posted 'Vanilla cupcakes with Butter cream frosting' which are again favorite for everyone and today, I am posting Chocolate cup cakes.These cupcakes are extremely moist and fluffy, I have prepared them many times and this recipe never failed me.
The chocolate cupcakes with the frosting is truly a delight for the kids. These are ideal for kids during bithday parties as they can decorate it as per their wish. It can also be a good decoration for parties -imagine a tower of cupcakes or any such form.
MOIST CHOCOLATE CUP CAKES RECIPE:
(makes around 12)
Recipe Source: Joy of Baking

Ingredients:
1 1/3 cups (175 grams) All purpose flour
1/2 cup (113 grams) unsalted Butter*,at room temperature
1 cup (200 grams) granulated white Sugar
2 large Eggs
1/2 cup (50 grams) Dutch-processed Cocoa powder
1 cup (240 ml) boiling hot Water
2 teaspoons Baking powder
1/4 teaspoon Salt
2 teaspoons pure Vanilla extract

Chocolate Butter cream Frosting:
1 cup unsalted Butter*,softened
3 1/2 cups Icing sugar
1/2 cup Cocoa powder
1/2 tsp Salt
2 tsp vanilla extract
4 tbsp Milk or heavy Cream
Method:
  • Preheat oven to 375 deg F (190 deg C). Lightly butter,or line 16 muffin cups with paper liners.
  • In a small bowl mix in the cocoa powder with the boiling hot water and whisk until you get a smooth mixture.Let it cool to room temperature.
  • Sieve together the flour, baking powder and salt.
  • Then in the bowl of your electric mixer, or with a hand mixer, beat the butter and sugar until light and fluffy.
  • Add the eggs, one at a time, beating until smooth. Scrape down the sides of the bowl as needed.Beat in the vanilla extract.
  • Add the flour mixture and beat only until incorporated. Then add the cooled cocoa mixture and stir until smooth.
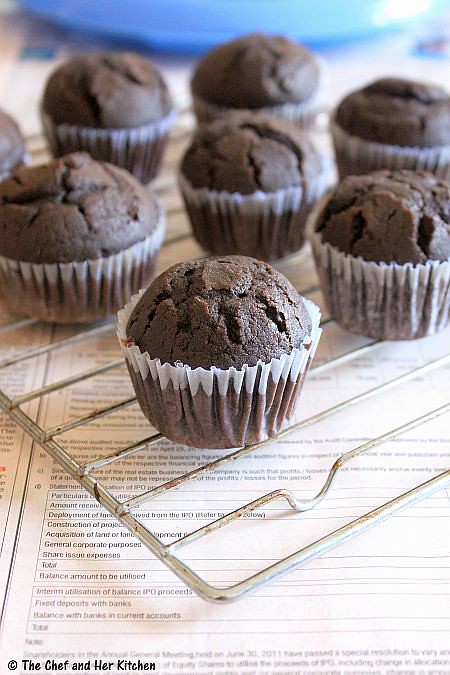
  • Fill each muffin cup about two-thirds full with batter and bake for about 16 - 20 minutes or until it is risen and springy to the touch.Test it with a toothpick inserted into a cupcake comes out clean. (Do not over bake or the cupcakes will be dry.)
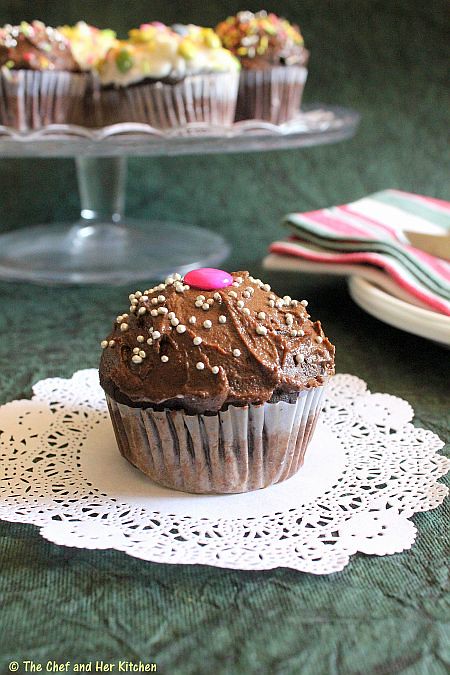
  • Remove from oven and place on a wire rack to cool. Once the cupcakes have completely cooled, frost with icing(recipe below). You can either spread the frosting on the cupcakes with a small spatula like I did or also using piping method which gives pretty patterns.
  • Decorate with various color sprinkles,m&ms,chocolate shavings,chocolate chips etc.
Cocoa Butter cream Frosting:
  • Cream butter for a few minutes in a hand mixer over medium speed.
  • Turn off the mixer and add sifted powdered sugar and cocoa into the mixing bowl.
  • Keep the mixer on the lowest speed so that the dry ingredients would not not blow everywhere.Mix with the hand mixer until the sugar and cocoa are mixed well with the butter. Now increase the mixer speed to medium and add vanilla extract, salt, and milk(or cream) and beat for 3-4 minutes until it is smooth and stiff consistency.
  • If you want still a more thick frosting add little more sugar an if you need a thin frosting add 1-2 tbsp of milk.

Serve them as a snack/dessert.You can keep them for 2 days outside and 4-5 days if refrigerated.These cupcakes were very moist and tasted really nice even if it is refrigerated.

* You can use salted butter like Amul in both the cake and butter cream recipes,in that case skip the extra salt mentioned in the recipe.

I could not control myself clicking more and posting them,how can some one resist those pretty colorful chocolate cupcakes.They were irresistible in looks as well as in taste.This is a must try cupcake for all chocolate lovers.
Notes:
  1. For frosting always use Icing sugar which gives desired results.
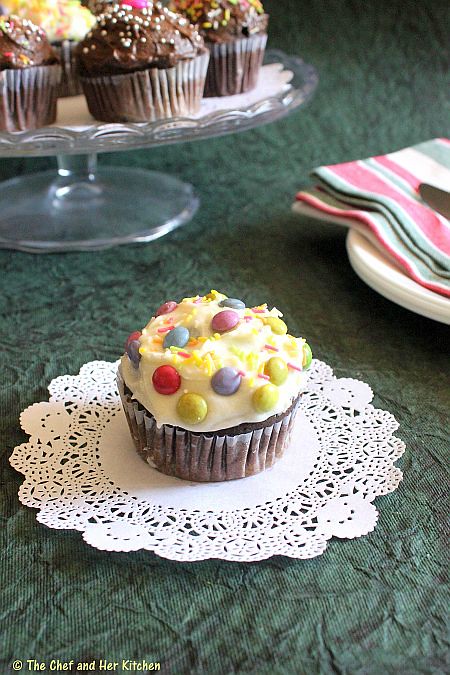
  2. You can make Vanilla White butter cream frosting using the same recipe as cocoa butter cream frosting.Replace 1/2 cup cocoa powder with 1/2 cup Icing sugar in the recipe.

This cupcake is for you people,come on grab it soon!! Try these cupcakes at home and surprise your family and kids.

Wednesday, July 25, 2012

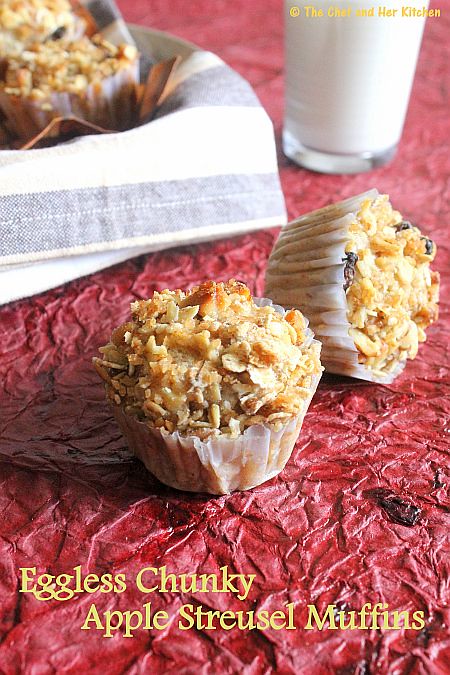
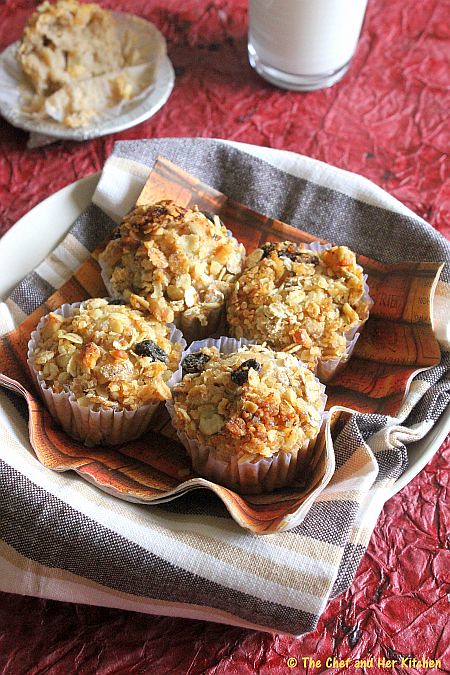
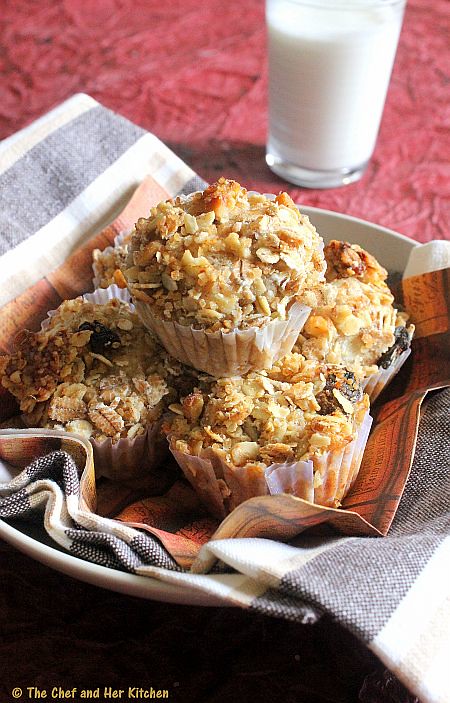
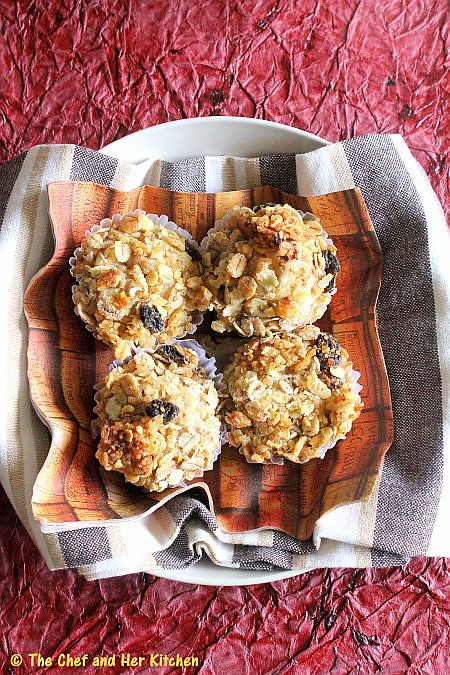
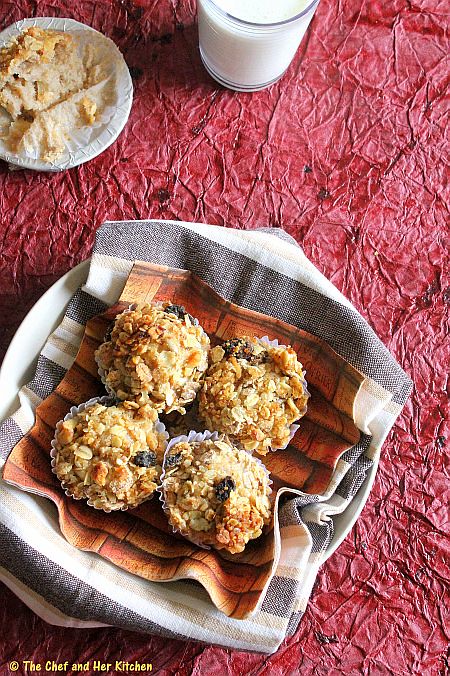
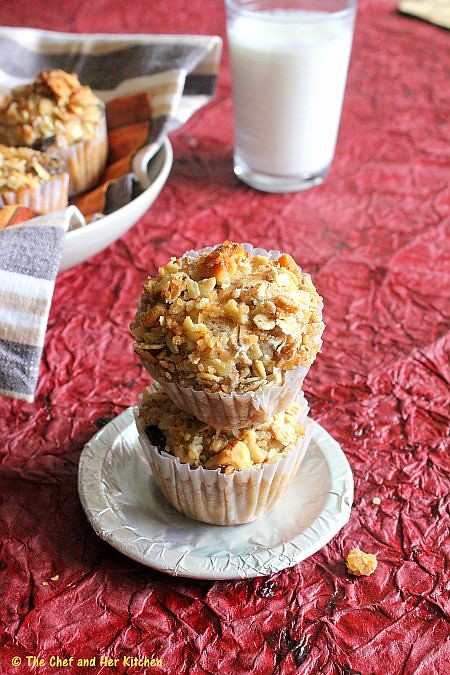
Eggless Chunky Apple Streusel Muffins

I think that I have already mentioned in my earlier posts about TH's love for muffins,as apparently his breakfast for over four years in Hong Kong was a muffin and a cup of coffee...and he never got bored of it . In fact, in his trips to Hong Kong he tries visiting the same breakfast joint. He cherishes those moments even now and always asks me to make them on a regular basis.I do bake them, but not as frequently as I am a bit worried on the amount of butter and flour that goes into them.
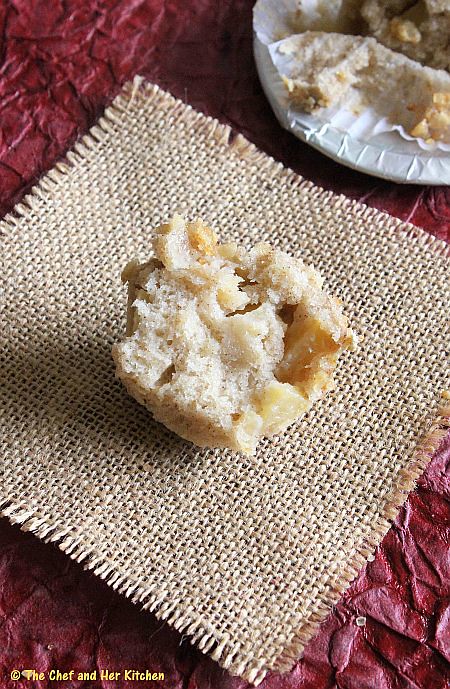
I had a pack of apples which were lying in my fruit basket for a while so I thought its better to use them in a cake/muffin. After a quick search on the net, I zeroed on Divya's chunky apple muffins.I started off thinking of making her version but changed my mind while making it and replaced egg with a mashed banana and also decided to make a healthy streusel topping and hence I tweaked the original recipe.The soft bites of the apple and a crunchy nutty streusel topping makes this muffin very tasty.Those muffins turned out so moist and fluffy that TH demanded another batch soon . I tried with the egg version next time and was happy to see that even my eggless version turned out as tasty as the egg version. Glad that my changes to the recipe worked.
I also have a very healthy version of Eggless whole wheat banana muffins in my blog,in case you are interested check out the recipe here. These are good as morning breakfast or as a snack anytime.
Eggless Chunky Apple Streusel Muffins:
(makes 9 big or 12 medium sized muffins)
Adapted from : Easy Cooking
Link
Ingredients:
1 1/2 cups All purpose flour
3/4 cup Sugar
1/3 cup Oil
1 large ripened Banana* or 1 1/2 medium sized ripened bananas
1/3 cup Milk
2 Apples,peeled cored and chopped
2 tsp Baking powder
1 tsp Ground Cinnamon
1/2 tsp Salt

for Streusel topping***:
2 tbsp Muesli
2 tbsp Oats
1/4 cup All purpose flour
2 tbsp Walnuts,chopped
1/4 cup Brown sugar
1/2 tsp ground Cinnamon
2 tbsp melted unsalted Butter**
a pinch of Salt
Method:
  • Pulse sugar in a mixer to a powder for approx 10-20 seconds.
  • Sieve flour,cinnamon,baking powder and salt together for 3-4 times until the mixture is mixed properly.
  • Meanwhile preheat your oven at 200 deg C(400 deg F) for 10 mins.
  • Line the muffin molds and grease them with oil lightly.
  • In a bowl mash banana to a smooth paste using your hand.
  • Add milk and oil to it and mix well using a hand whisker until everything is well mixed.
  • Add sugar to it and mix nicely.
  • Add the dry ingredients of flour mixture which we sieved and fold it in the wet ingredient mixture carefully.Just fold in lightly,do not mix it vigorously.
  • Fold in the cored and chopped apples in it and scoop 2-3 tbsp of batter to each muffin mold.Fill upto 2/3rds full.
  • For streusel - mix all the ingredients oats,muesli,flour,chopped walnuts, cinnamon, melted butter and salt in a bowl until you get a crumble mixture.
  • Top the muffins with 1 tbsp streusel mixture and bake them in oven at 160 deg C for 20-25 mins. After 20 mins keep an eye on the muffins and check whether they are cooked or not by using toothpick test.If your pricked toothpick comes clean then they are done.
  • Cool them in the mold for 3-4 mins and then invert them on to the wire rack.While inverting the muffin do it on a plate to avoid the mess of falling streusel(if any).You can pop it into your mouth or use as granola,it taste really yumm.
Serve them warm or at room temperature.It stays good outside for 2 days or 3-4 days when refrigerated.

*With Egg - You can replace banana with 1 large egg in the recipe as the original recipe said.I have baked both the versions with egg as well as with banana and both came out extremely moist and yummy.It is your wish to make either egg or eggless version.
**You can use salted butter and avoid the salt in the recipe.
***The original Streusel topping is made up of 1/2 cup flour, 1/2 cup sugar,5 tbsp softened butter,1/2 cup chopped walnuts and 1/2 tsp salt.You can even follow this recipe for a firm streusel topping.As I used oats and muesli in my streusel,some portion of it was falling off but had a nice and guilt free crunch of oats on top.
Notes:
  • I halved the recipe with the ingredients exactly half of the measurements in the recipe and it worked out nice.Even though you halved the recipe use 1 medium ripened banana or 1 small egg in the recipe,and the other ingredients with exactly half the measurements.It yielded me 6 medium muffins for the recipe.


Thursday, March 8, 2012

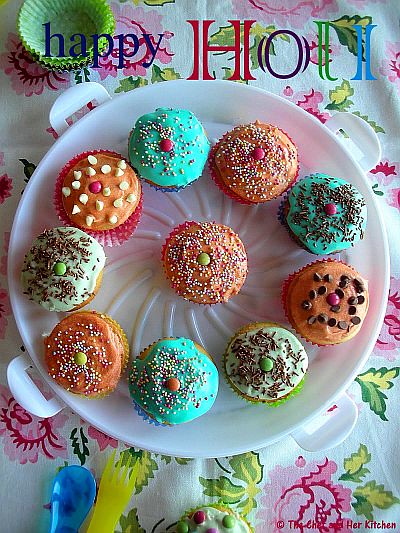
Basic Vanilla Cupcakes with Butter Cream Frosting...for a Colorful HOLI

I wish you all a Colorful and Happy HOLI!!!!
I am posting today these colorful cupcakes as a visual treat, to celebrate this colorful festival with fun.
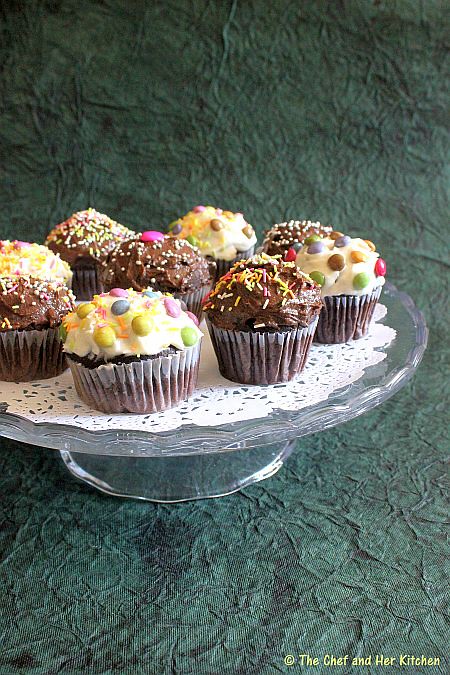
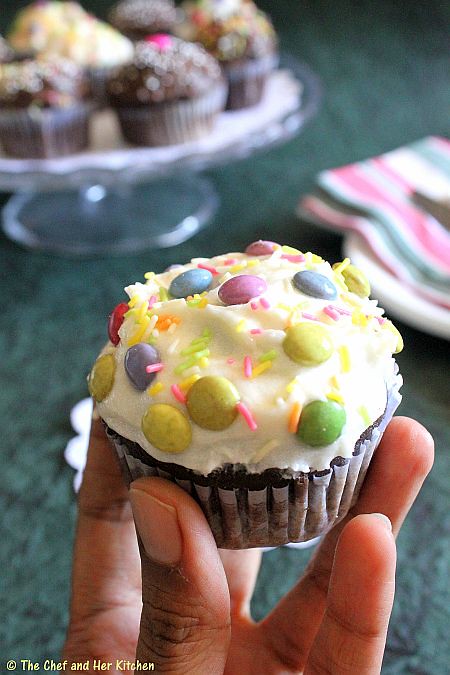
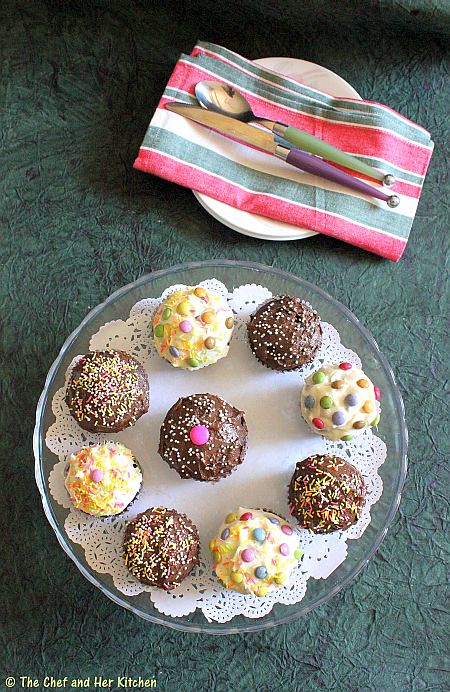
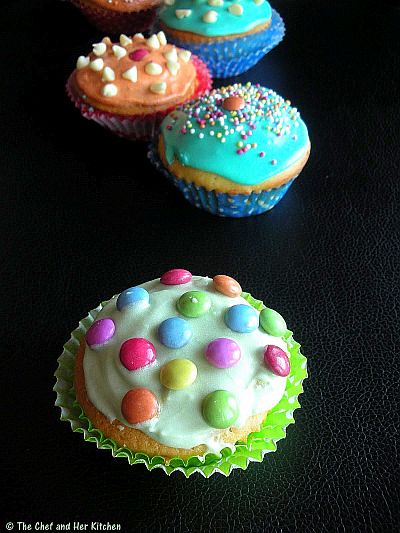
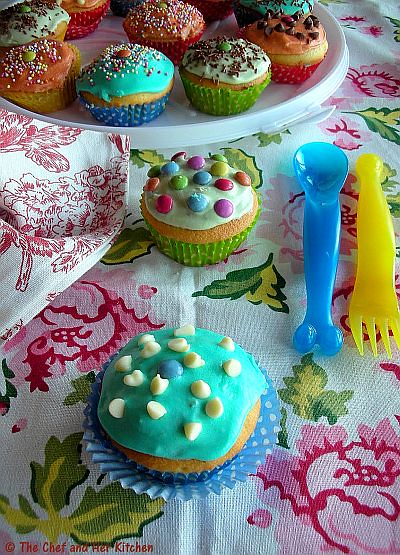
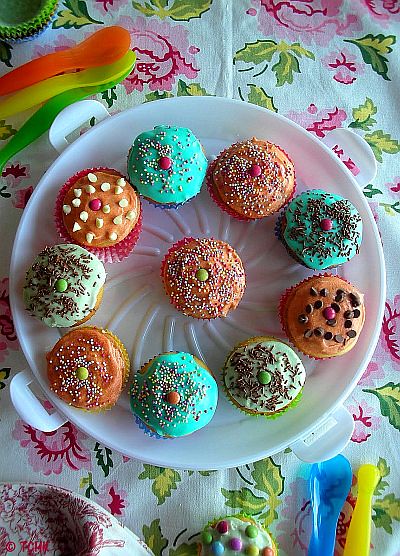
Cupcakes are a favorite among kids as well as adults. While I like to eat my cupcakes plain,this time I covered them with colored butter cream icing and decorated them with various sprinkles as we had to pack this for a friend.One can pipe the frosting into beautiful swirl patterns over the cupcakes but as I am not a person who likes to eat too much frosting I made it a bit thin and gave the cupcakes a thick coat of frosting and decorated them with various sprinkles.The whole activity of baking cup cakes and decorating them is a real fun filled one which I thoroughly enjoy. It is infact more of a stress buster for me.You can even keep your kids occupied with this kind of activity whenever you make them and more so in Birthday parties. Aren't they looking pretty?
Vanilla Cupcakes with Buttercream frosting Recipe:
(makes around 12-14 cup cakes)
Recipe Source: Joy of Baking

Ingredients:

Vanilla Cupcakes:
1 1/2 cups(195 grams) All purpose flour
1/2 cup(113 grams) unsalted Butter,at room temperature
2/3 cup(130 grams) granulated white Sugar
3 large Eggs
1/4 cup(60 ml) milk
1 teaspoon pure vanilla extract
Zest of 1 large lemon (outer yellow skin)(optional)
1 1/2 teaspoons baking powder
1/4 teaspoon salt

Buttercream Frosting:
2 cups(230 grams) confectioners sugar (icing or powdered sugar), sifted
1/2 cup (113 grams) unsalted butter, room temperature
1 teaspoon pure vanilla extract
2 tablespoons milk or light cream
Assorted food colors( I used red,blue,green)

Method:

Making Vanilla Cupcakes:
  • Preheat oven to 350 deg F (177deg C) and line 12 muffin cups with paper liners.
  • Sieve flour with baking powder and salt for a couple of times until it is mixed uniformly.
  • Beat the butter and sugar until light and fluffy using electric hand mixer.
  • Add the eggs, one at a time and beat well after each addition. Beat in the vanilla extract.Add lemon zest to the mixture and mix.
  • Add 1/3rd of the flour mixture and 1/3 rd of milk and beat the mixture in low speed.Do this step alternatively for two more times beginning and ending with the flour.
  • Scrape down the sides of the bowl as needed with a rubber spatula.
  • Scoop out the batter and fill the muffin cups evenly with the batter.
  • Bake them in the preheated oven at 180 deg C(350deg F) for about 17 - 20 minutes or just until set and a toothpick inserted into a cupcake comes out clean.It is always better to check a few minutes before the stated baking time.Do not over bake otherwise the cupcakes will be dry.
  • Remove from oven and place on a wire rack to cool.Once the cupcakes have completely cooled,we can frost with icing.
Buttercream Frosting:
  • Cream the butter with an electric hand mixer until smooth and well blended.
  • Add the vanilla extract and gradually beat in the sugar using the mixer on low speed.
  • Scrape down the sides of the bowl.
  • Add the milk and beat on high speed until frosting is light and fluffy (about 3-4 minutes).
  • Add a little more milk or sugar, if needed to get the desired consistency.
  • Divide the mixture into 2-3 portions and tint the frosting with desired food colors.I used few drops of red,blue and green food colors for the batter.
Decorating the cup cakes:
  • If you want flat topped cupcakes then slice off the dome of each cupcake, with a sharp knife before frosting.
  • If you want to pipe the frosting you can use a star decorating tip.This will give a nice swirls over the cupcakes.But I am not a person who likes to eat so much frosting and hence opted a simple and easy way.
  • I made my frosting bit thin and was easy to spread the frosting on each cup cake with a spatula or spoon and decorate with various color sprinkles,m&m's,white & brown chocolate chips and chocolate sprinkles.
  • Do not touch the frosting up to an hour,they would set properly and gives a shiny look on the cupcakes.They stay good for 2-3 days.

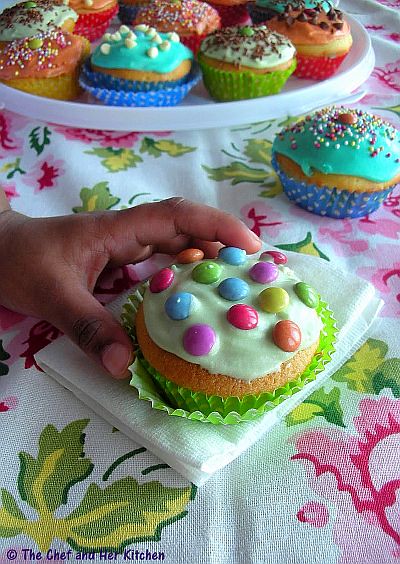
A special hug to my niece for allowing me to use her colorful spoons and forks and also her beautiful tiny hands as props in the photographs.I must say though she tried to hide her things from me while I was photographing but now she feels happy to see her things in the photographs.

Monday, February 27, 2012

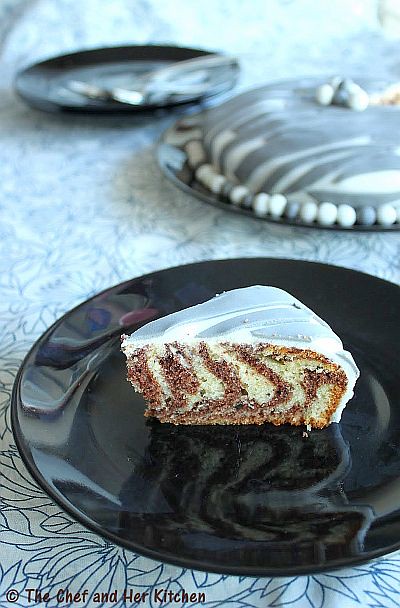
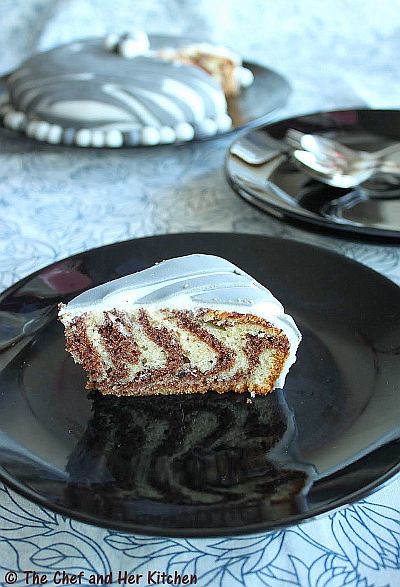
Zebra Cake with Zebra Fondant Icing...and my Third Blog Anniversary!!!

My Blog turns 'THREE' this month.
I started this blog to record my recipes online, as a hobby; which later turned to a passion and I never thought that I would reach this far.I must admit that the culinary journey has been quite interesting, exciting and a wonderful one which gave me an opportunity to learn and know more about various cuisines.
I would like to give a visual treat to my blog and all my readers and friends with a sweet post to celebrate the occasion.I made Farida's famous Zebra cake which is quite popular in blogosphere and also tried my hands on fondant for the first time.This is my first fondant experiment which turned quite nice and gave me enough confidence to work with fondant in future.Though I have adapted a simple zebra striped pattern to go with my zebra cake, playing with various colors of fondant and rolling in to various shapes is definitely a fun filled activity which I thoroughly enjoyed.One does not need to attend any cake decorating class to start with fondant,Trust me..!! when I could work with fondant I am sure even you can.I have mentioned few pointers for easy guidelines, in case you are working with fondant for the first time.Though I used a black color it did not turn out black and gave a shade of grey,I think I should added few more drops of black color.I referred Wilton's site for some tips. My S-I-L helped me while decorating it.I would also like to thank my little niece 'K' for letting me use her valuable Minnie mouse for the photographs.
Zebra Cake Recipe:
(makes one 9-inch round cake)
Recipe Source: Farida's AZcookbook

Ingredients:
2cups(300g) All-purpose flour
1cup(250g) granulated Sugar
1cup(250ml) Milk,at room temperature
1cup(250ml) Oil
4large Eggs, at room temperature
2tbsp dark Cocoa powder
1tsp Vanilla essence
1tbsp Baking powder
Method:
  • Preheat the oven to 350F (180C) for 12-15 mins.
  • Grease a 9" round tin with oil and dust it with flour evenly and remove the excess flour or line the pan with parchment paper.
  • Sieve flour with baking powder a couple of times until it is mixed well.
  • In a large mixing bowl,combine eggs(both egg whites and yellows) and sugar. Using an electric whisk or wire whisk beat the mixture until it is creamy and light in color.
  • Add milk,vanilla essence and oil to the egg mixture and continue beating until it is mixed well.
  • Now gradually add the flour mixture to the wet ingredients and beat until the batter is smooth and the dry ingredients are thoroughly incorporated. Try not to over beat the batter as this will remove the air pockets formed in the batter.
  • Divide the mixture into 2 equal portions. Keep one portion plain and add cocoa powder into the other portion and beat well until it is well mixed.Make sure you sieve the cocoa powder before otherwise you will end up having the lumps in the cocoa batter.
  • Now comes the most interesting part of assembling the cake to get that beautiful zebra pattern.
  • Scoop 3 heaped tbsp or 1 ladle of plain white batter into the middle of the baking pan.Then scoop 3 tbsp or 1 ladle(same sized) of cocoa batter and pour it in the center on top of the plain batter.You need not to wait until the previous batter spreads and also do not try to spread the batter or tilt the pan to distribute the mixture.The batter will spread by itself and fill the pan.
  • Continue alternating the batters until you finish them.
  • Bake in the oven for about 40 minutes until the cake is bake and pass the tooth pick test.If you insert a toothpick in the center of the cake it should come out clean.
  • Remove the tin from oven and let it cool for 5 mins.Run the knife slowly around the edges of the cake and invert the cake on to the cooling rack and turn the cake back and let it cool completely.
You can serve the cake as it is or you can dust it with icing sugar or you can can cover it with your favorite icings like butter cream,fresh cream or with fondant.
For eggless version follow my Eggless marble cake recipe and follow the procedure as of zebra cake.You need to divide the batter into two halves and mix in the cocoa powder in one half and follow the spreading process as of zebra cake.

Notes:
  1. You can serve this as a tea time cake with out fondant or any other icing.
  2. Just dust the cake with icing sugar or cocoa powder or serve as it is.
  3. I felt the cake was bit less sweeter,it all depends on the quality of cocoa powder.If it is dark bitter one feel free to add 2-3 tbsp more sugar to the batter.
Decorating with Fondant:
Tips : Wilton's website

Ingredients:
1 pack of ready made Fondant mix(we need just a portion of it for the recipe)
black edible food color drops to create stripes
3/4 cup butter cream icing(ready made or freshly made)

Method:
  • Take a big orange sized fondant dough and knead the fondant dough until it is smooth and shiny for roughly around 4-5 mins.
  • Take a lemon sized fondant dough and add few drops of black color to it and mix well and knead to a smooth dough.
  • Spread a tbsp batter of butter cream in the center of the serving plate and fix the cake over it.
  • Now slowly cover the cake with a thin coat of butter cream icing all over the cake.
  • Roll the kneaded white fondant dough into a big round of 1/4 inch thickness(remember it should be big enough to cover the cake completely).
  • Slowly lift the rolled fondant and cover the cake and press it slightly so that it will hold on the cake.Using the pizza cutter or knife cut around the edges (where the cake ends near the plate) and remove the extra fondant.
  • Roll the black colored fondant into a thin round of 3-4 mm thickness and cut into random stripes of different length and size and width using the pizza cutter.
  • Stick the cut stripes applying water on one side of the strip on the cake(white fondant) creating the zebra pattern.
  • Cover the bottom portion of the cake with small pebble sized balls made out of fondant.

Thursday, December 22, 2011

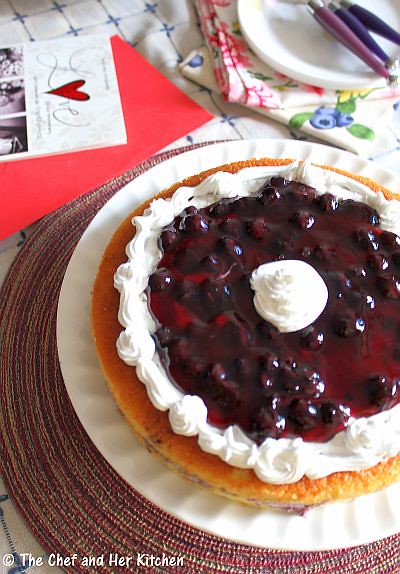
Dorie's Perfect Vanilla Cake with Blueberry Filling

Well if you are here to see my next entry of the Family Food series, I am sorry to say that I decided to break my rule of posting the Snacks/Chaats recipes non-stop until my series ends.After seeing all the beautiful festive cakes and bakes posts for Christmas by our fellow bloggers I was tempted to post few cakes and desserts recipes in my space..I would restart the series soon after a couple of posts,I am sure its fine to break few rules right? ;)While I have not baked anything for Christmas so far, I did prepare a few for some recent occasions and parties, so why not celebrate Christmas with these recipes.
As always I was confused on which type of cake to bake for our anniversary (which was just a couple of weeks back) but hubby dear asked me to bake something using the blueberry tin which he bought during his last business trip. He also wanted me to make a simple tea cake with no icing and all so initially it was very simple for me to select the recipe and I zeroed on this recipe. The confusion though started when I opened the tin and found that it was actually a blueberry pie filling and not whole blueberries.Then I suddenly remembered the Dorie Greenspan recipe which our blogger friend Simran suggested me to try earlier that day. I am yet to get a copy of this book called 'Baking from my home to yours' by this famous writer, hopefully this Christmas Santa would fulfill my wish.
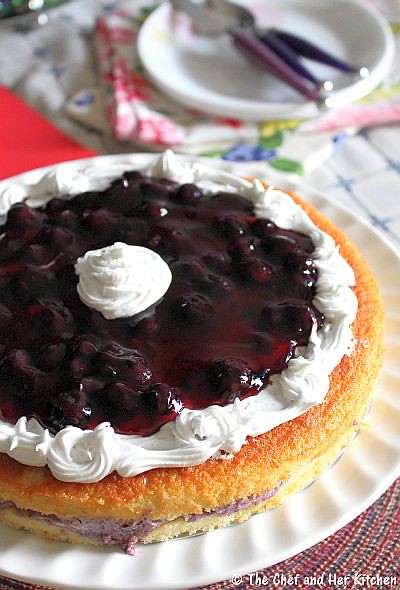
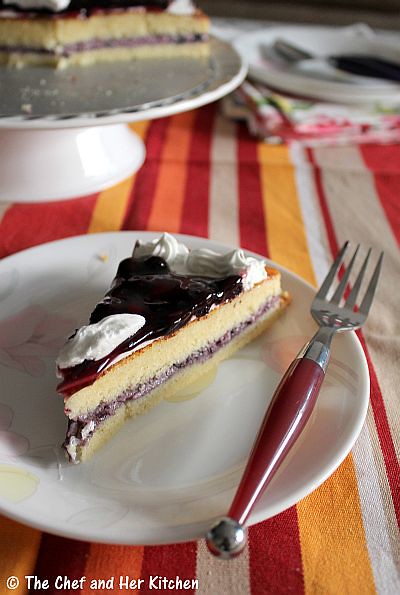
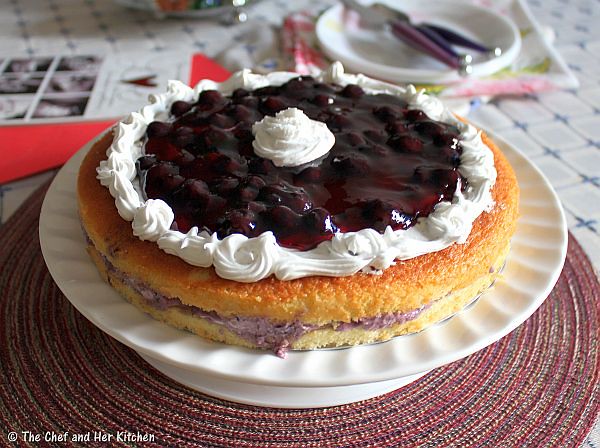
Coming to the details of the cake...because of the lack of availability of few ingredients in my pantry at that moment, I made few changes and went ahead with the cake recipe and used blueberry filling to stuff in between the layers and spread some portion on the top using very little whipped cream.To my surprise, though hubby is not fond of layered cakes,he liked this cake very much and didn't refuse even a single time when I served him.I am reproducing the original recipe here mentioning the changes I made under Notes.
Dorie Greenspan Perfect Vanilla Cake(Party Cake) Recipe:
(yields two 9" round tin cakes)

Ingredients:

2 1/4 cups Cake flour(see notes)
1 stick(8 tbsp) Unsalted Butter,at room temperature
1 1/4 cups Butter milk or Whole milk(see notes)
4 large Egg whites
1 1/2 cups Sugar
1 tbsp Baking Powder
1/2 tsp Salt
2 tsp grated Lemon Zest
1/2 tsp pure Lemon extract(Lemon juice)

to Decorate:
1 tin Blueberry Pie filling
1 pack Whipped cream powder or 1 cup Whipped cream

Method:
  • Preheat the oven at 175 deg C for 10-12 mins.Butter two 9" round tins or and line them with a round baking parchment or wax paper.
  • Sift cake flour with baking powder and salt a couple of times until it is mixed properly.
  • Whisk together egg whites and butter milk/milk until both are incorporated well.
  • In another bowl beat butter and sugar together until it gives a light mixture.Add lemon zest and lemon extract and beat again.
  • Add 1/3 rd of the flour mixture(dry ingredients) and beat again.Add half of the milk-egg mixture and beat well.
  • Add the remaining flour mixture(1/3 rd) and beat well followed by half of the milk-egg mixture and beat well.
  • Add the last of dry ingredients(last 1/3 rd portion) and beat well until everything is incorporated well.
  • Pour the cake mixture into the ready tins until 2/3rds full and bake at 175 deg C for 30-35 mins until the cake is nicely browned and also rise well.Keep an eye after 25 mins and remove it once you feel it is done.Insert a thin knife or toothpick in the middle of the cake,if it comes out clean then the cake is done otherwise you need to bake for long.
  • Rest it for 5 mins on the cooling rack and slowly run the knife around and unmold the cake and remove the paper.Let it cool completely for a couple of hours.
for Blueberry-Cream filling:
  • Make whipped cream according to the instruction given in the pack or if you are using fresh and ready made proceed further with the recipe.
  • Mix in 1/4 cup of blueberry pie filling mix in 1/2 cup of whipped cream and whisk well.This is one of the most prettiest colors I like,the filling will look so so nice.I used a thin layer of this mixture in between the cake,if you want a thick layer mix in double the quantities and also feel free to add the quantities of filling and whipped cream according to your liking.Just taste the filling for sweetness before spreading it.
for assembling the cake:
  • Use a serrated and sharp knife,carefully run it in between the cake to get two equal layers.
  • Spread a layer of the blueberry-whipped cream filling evenly.Spread more quantity to get a thick layer,I did a very thin layer.
  • Place the other half on top and spread a very very thin layer of whipped cream(just to give a even look) on top of it leaving 1 1/2" inches from the sides.
  • Pour the blueberry mixture evenly on top of whipped cream layer.Pipe the whipped cream on the cake around the filling as per your wish or like how I did it.
  • Cover the cake with a lid and rest this for 3-4 hrs in fridge and while you are about to cut it or serve it take out the cake and keep it aside thirty minutes before.
Slice and serve it.
Notes:
  • You can substitute blueberry filling with any berry fillings like strawberry or blackberry and decorate according to your wish.
The changes I made:
  1. I halved the recipe of the original recipe so I got a thin layer of cake.Exactly cut down the ingredients to half.For easy interpretation I am giving you the measurements here 1 cup + 2tbsp Cake flour,2/3 cup butter milk,2 large egg whites,3/4 cup sugar,4 tbsp unsalted butter,1 1/2 tsp baking powder,1/4 tsp salt and 1/2 tsp Vanilla extract.
  2. As we don't get cake flour here I substituted it with maida and cornflour.To make one cup of cake flour at home,take one cup of maida and remove 2 tbsp maida from it and fill those 2 tbsp with corn flour.Sift this mixture for 4-5 times until it is mixed well.Your cake flour is ready to use.
  3. I did not have lemons at that moment so could not use lemon zest,I skipped it and added our good old vanilla extract instead of lemon extract.
  4. Instead of 4 egg whites I used 3 whole eggs.But I suggest you to go ahead with the original recipe.
  5. I used salted butter what we get here,so skipped salt as butter already had it.Use it according to the availability at your place.
  6. The original recipe mentioned to make butter milk,you need a mix a tsp of vinegar in 1 cup of milk and keep it aside for 10 mins to get butter milk.I have thinned the curds with water to get the required amount of butter milk.
  7. I also ground the sugar to powder before using it in the recipe.
I know that its quite a lot of changes I made to the original recipe,but it worked well for me.But I suggest you to go ahead with the original recipe as I am again going to bake this soon with the original recipe as I am very eager to bake that perfect Vanilla cake.
Before I sign off let me wish you all 'Merry Christmas'.Enjoy your holidays and stay tuned for more desserts/cake recipes in my blog for this season.(pic courtesy : Google)


back to top