Friday, July 8, 2011

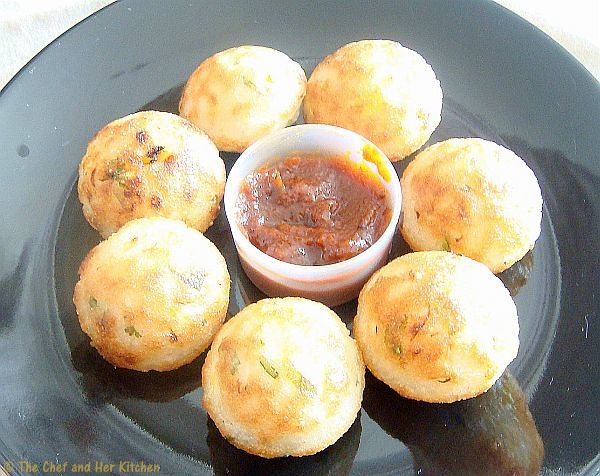
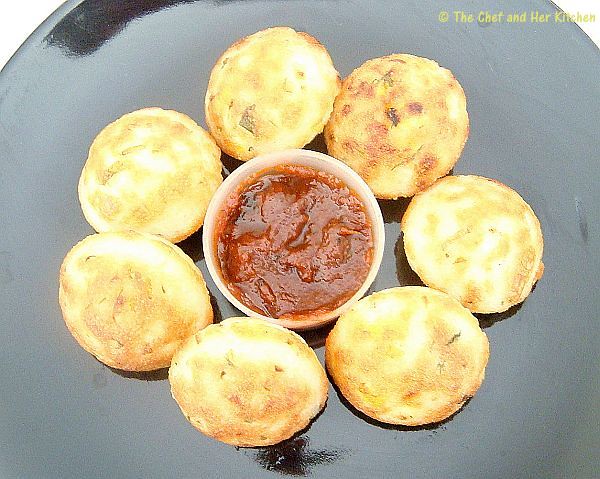
Atukula Gunta Ponganalu | Avalakki Paddu | Spicy Poha Balls...FFF#11

This is the 11th successful consecutive week of my ongoing series Cooking with Family-Family Food Friday and if you have missed any of the previous posts in this series,check them here.
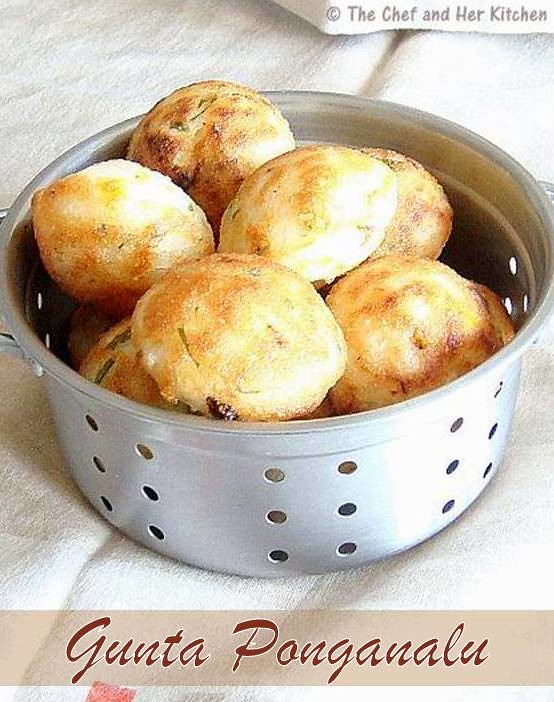
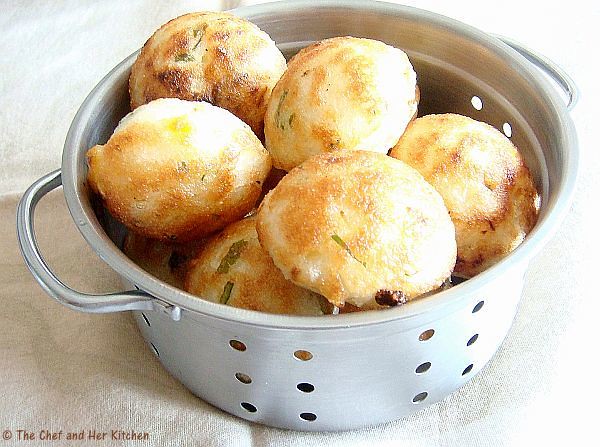
This week's entry is sent to me by my S-I-L 'Ashwini' and I assume you all know her well by now as she had already sent 2 posts earlier.As my series is loaded with lots of rice flour dishes I asked my S-I-L to send something different and I was happy to receive this one more favorite breakfast item of mine.Gunta Ponganalu is one of my favorite breakfast item and love to eat it anytime.I am sure all of you all are aware of this tasty item and is called as 'paniyaram', 'paddu','guliappa' in other languages,I have already blogged a version here and the difference here about this recipe is it is made out of poha and curds which in turn makes gunta ponganalu very plump and they also have crispy crust outside and soft and spongy inside.Few makes gunta ponganalu with left over idli/dosa batter as it is easy to make but making a batter specially for this is really worth the effort you have put in order to eat tasty,crispy,plump and spongy gunta ponganalu.

Let us see what Ashwini wants to say about this.
'As a child I never used to like this item and hence I used to ask my mom to pack my breakfast so that I would share it or rather give my full box to my friends as they all enjoy eating it. But growing up,I had to eat these Gunta Ponganalu without any lame reasons and I used to eat it as though I was punished. But one day when my mom made it, she said she is sorry for not making another breakfast item for me,I thought I have changed and I ate.When I had my first bite I just jumped up with joy and told my mom that its too good and also asked her to teach me how to make them.She was shocked when I told that and she happily taught me.Things change along with us,the ones which I used to hate as a kid made me to change my mind once I grew up and I am sure many of us would have experienced this.I was more keen to learn this as hubby loves Gunta Ponganalu and when I made it for him for the first time he thoroughly enjoyed it to the core.
I can assure you that with this recipe you can make crispy Gunta Ponganalu.I added sweet corn to this to attract my 2 1/2 yr old daughter who is a fuzzy eater.I made her play treasure hunt (sweet corn hunt) and made her enjoy her Gunta Ponganalu and complete her plate.This is a tip for those mom's who struggle to feed their fuzzy eating-little ones.'
Ingredients:
2 medium onions,finely chopped
1/4 cup chopped coriander
2 fistful fresh/frozen sweet corn (optional)
2 tsp green chilli paste,coarsely ground
a pinch of cooking soda
salt to taste
oil for frying paddu

for Batter:
4 cups long grain rice(or regular sona masuri or equivalent)
1 cup poha/pressed rice
1/2 cup sour curds
salt to taste
Method:
  • Soak the rice for 4-5 hrs. Soak poha in enough water for 1/2 hr.
  • Grind soaked rice in wet grinder until almost done. Add poha, curds and salt and grind into very smooth paste. Remove it and let it ferment for 16 - 18 hours.(Don't add more water while grinding,add about 1/2 cup water while grinding).This requires longer fermentation period,so do not skip this part of fermenting for longer hours.If you start grinding the batter some time around 12'o clock in the noon you can make this for breakfast on the next day.So plan it ahead of time.
  • Add finely chopped onions, sweet corn, green chilli paste,chopped coriander to it and mix well.
  • Add cooking soda with a tsp of water in a ladle and mix in the water and mix properly.
  • Heat the gunta ponganalu(aebleskiver) pan and add 1/4-1/2tsp of oil in it. When it is hot enough pour the batter using a spoon until it covers 3/4 th gunta(impression) and cover it with a lid. Let it roast on medium flame until golden brown in color.
  • After a couple of minutes using a fork or sharp knife run around the edges of each ponganalu and turn to the other side and roast until golden brown.Repeat the same process to make other rounds of gunta ponganalu.
Serve crispy hot gunta ponganalu with onion chutney or red coconut chutney or ginger thokku.
Note:
  • You can also make Gunta Ponganalu with left over dosa or Idli batter but it wont be as crispy as these.
  • If your batter is too thin then you will not get crispy Gunta Ponganalu, so just add little rice flour, mix it well and use the batter after 3 - 4 hours.
  • Fermentation for longer period,a minimum of 16 hrs is mandatory otherwise these will not be sour enough which they are meant to be.
  • If your gunta ponganalu does no plump up like how it is shown in photographs,do no panic just add 1/4 tsp cooking soda mixed with water and mix the batter well and start making.
  • Curds should be sour for this,ideally you can use 3-4 days old curd or keep the fresh curd outside for 8-9 hrs before using it.
  • The batter would be really thick and there would not be much increase in volume as we are not using urad dal in it,so do not panic just ferment the batter for longer time and start making gunta ponganalu.
Variations:
You can even add grated carrot, finely chopped spring onions, soaked chana dal as a variation.

Tuesday, July 5, 2011

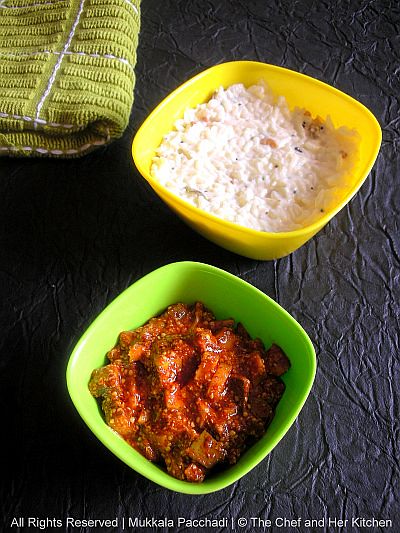
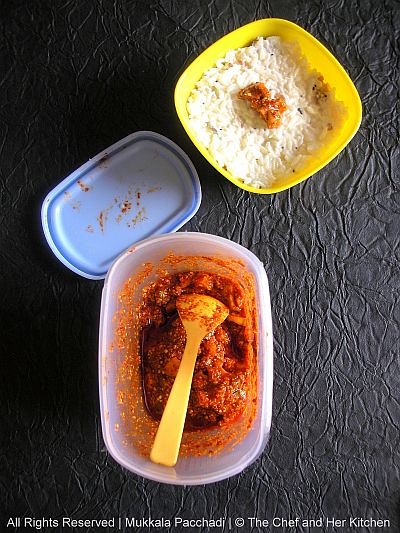
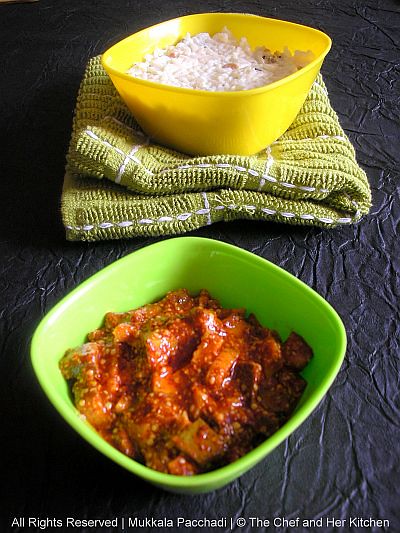
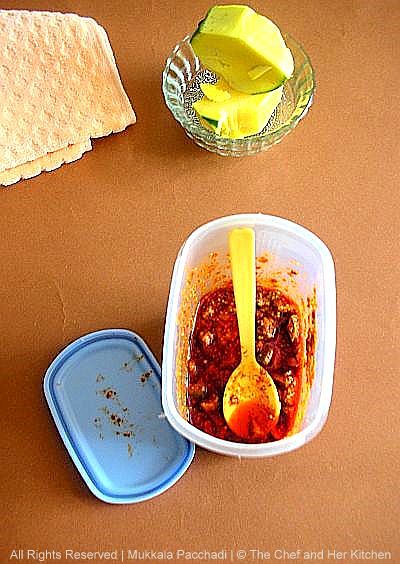
Andhra Style Mukkala Pacchadi(Raw Mango Pickle)

Andhra is a land of pickles and is known especially for its different varieties of spicy mango pickles,gongura and red chilli pickle.Every year I get a good stock of various pickles from my MIL and I can say that she is really an expert in making Andhra style and North Indian style pickles,so I never had a chance nor a necessity to prepare them.Last year during the mango season she was here with us and I helped her in pickling various varieties,we prepared different varieties of pickles like Avakay,Allam Avakay,Mukkala Pacchadi,Pesara Avakay,Nuvvu Avakay,Mango thokku and North Indian style Aam ka Achar(I must say this is her signature pickle) and I repent now for not taking the photographs for my records in blog.Among those pickles we prepared few can be stored for an year and few only for a month,so we make the quantities accordingly to finish them on time.I must admit that making pickles is really an art and is laborious process,a small mistake or a single drop of water is enough to spoil the whole effort which u had put in.
This year I attempted to make this easy pickle on my own as I am yet to receive the pickle parcels from my mom as my MIL is currently in US. Mukkala Pacchadi is made in a small quantity and is prepared along with the other pickles as this really does not take much time to marinate and the pickle is ready to use from the very next day and hence it is made in small quantities so that you can use this by the time your avakay gets ready for the rest of the year.However you can store this pickle for a month when made and handled carefully.Please bear with the pics as it was a cloudy day the pictures are not up to the mark,otherwise you would get to see those beautiful yellow mustard specs(pieces) here and there in the pickle which is really tempting.

Ingredients:
3 big raw sour mangoes
1/4 cup red chilli powder
1/4 cup mustard seeds powder(ground from 1/4 cup roasted mustard seeds)
1 tbsp yellow mustard tukda(optional,gives a nice look)
1/4 cup salt
1/2 tsp methi seeds
1/3 cup sesame oil

Method:
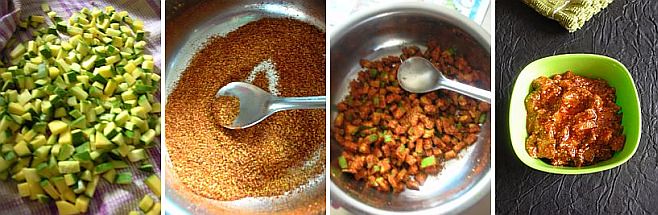
  • Wash and wipe the mangoes with a dry cloth.Cut into very small pieces along with the skin and spread on a dry cloth to dry for half an hour to one hour.
  • Slight warm up methi seeds and mustard seeds in a pan and cool them completely and powder them in mixie.
  • Heat the sesame oil until warm and cool the oil completely.
  • Meanwhile in a clean big bowl mix red chili powder,mustard-methi powder,salt until everything is mixed well.
  • Add mango pieces to it and coat well all the pieces with the spice mix and place the mixture in a clean glass jar.
  • Add cooled sesame oil over the pickled mango pieces and mix well.Cover it with a lid and rest it for a day.
  • On the second day mix using a clean and dry spatula,by now the oil would be floating on top of the pickle.You can start using it from the 2nd day itself and it still tastes better after 2 days.This stays up to a month when handled carefully.
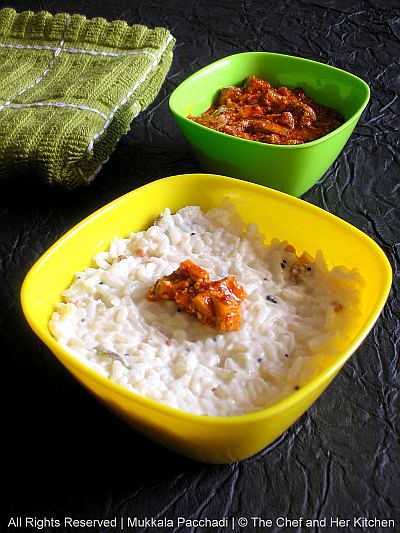
Serve it with curd rice or you can mix it with hot rice and ghee.

Notes:
  • Always use a clean and dry spoon/ladle when taking out the pickle.This is a basic thumb rule for handling any pickle.
  • This tastes like avakay and hence it can be mixed with hot rice,ghee and lentil powder.It tastes really yummy.
  • You can cut the mango pieces with the knife,for this pickle you need not to keep the hard white portion of mango like how we do for avakay.Hence the life of pickle is not as much as for avakay.
  • I added a tbsp of yellow mustard tukda to this pickle which gives a nice look to the pickles like how we get in restaurants and it is completely optional.
Check out my other Mango pickle posts:Link

Friday, July 1, 2011

Kandinooka BillaKudumu/Toor dal-Rice Rava Tikkis with Peanut Chutney....FFF#9

Finally I have entered the 10th week of my FFF-series and I am really enjoying my series with all the wonderful entries from my family members.
I had already posted a version of Billakudumulu/Rice rava Tikkis long back and today's version is a variation to it and is sent by my cousin Chaitra.This is the 3rd entry she has sent for my event and I really thank her for it.
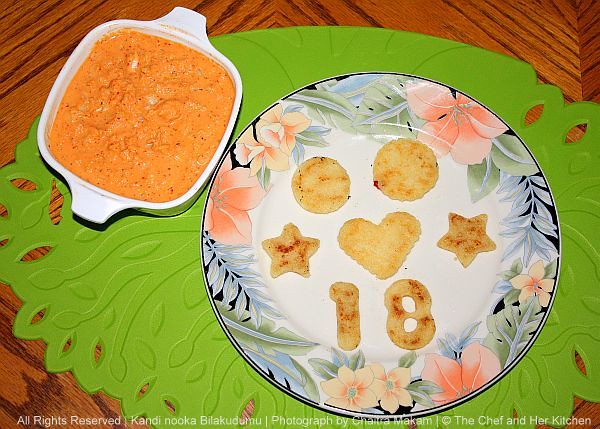
Let us see what Chaitra says about this recipe in her own words."This is a different version of the billakudumu and it is made of toor dal and rice and is made only in the particular region of Chittoor District, AP. This is my MIL's version and at my mom's place we are used to eating only the rice version.
Having tasted both of them I can frankly say that this tastes so much better and especially I find this version to be more tasty and crispier too. But this combination of the billakudumu and chutney is an amazing combination and special.It is an extra effort to make this combination of rawa. But we make 3 different types of recipes with the same rawa. With the fine powder we make the dosa and with the same rawa we can also make upma. So it is well worth the effort to get this rawa done. I usually get this rawa from my MIL and But when I run out I just make the toor dal rawa at home and mix it with the rice rawa.
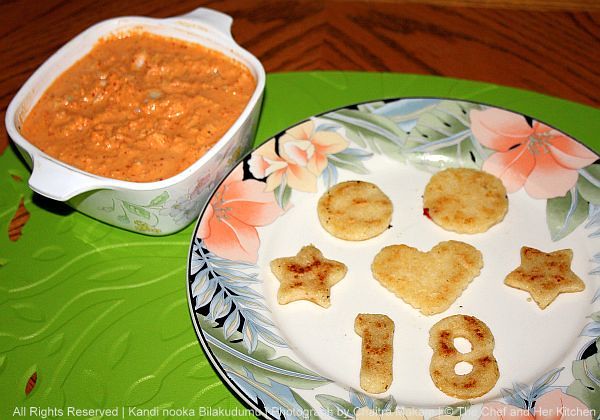
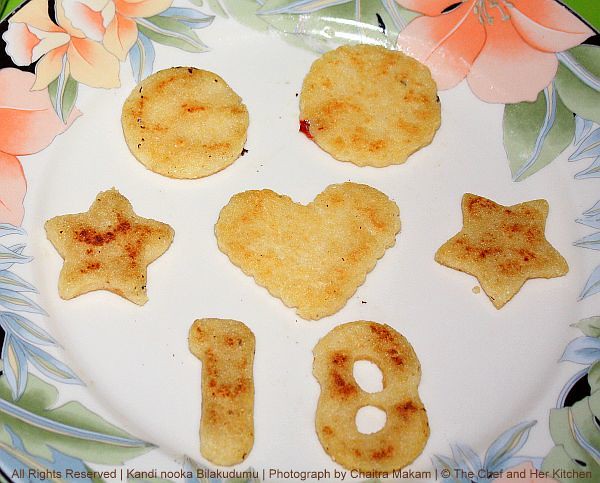
P.S: In the Photos it is my daughters plate, she is the first one to eat breakfast at our place and hence you can see the varied designs.Otherwise we just shape them in rounds".

Kandi nooka Billakudumu:


Ingredients:
1 cup toor dal-rice rawa
1 3/4 cup water
salt to taste
1 tsp oil
oil to fry the tikkis

for rice and toor dal rawa
:
1 cup toor dal
3 cups rice(sona masuri or any equivalent)

Method:
for rice and toor dal rawa:
  • For every 3 cups of rice add 1 cup of toor dal and get it done in the chakki to a coarse rawa.
  • I do it in the mixer when I run out of this mixture which I get from India. You can also buy the rice rawa and just add coarsely ground toor dal for it in the proportion of 1 cup toor dal rawa: 3 cup rice rawa.
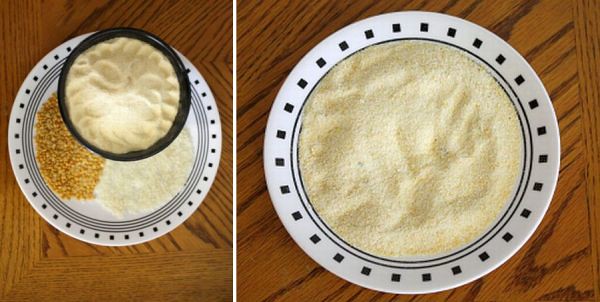
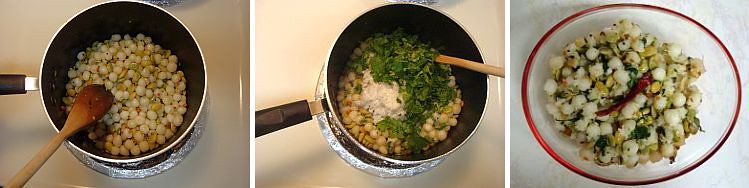
  • Then we usually sieve it with the medium size sieve and take out all the powder and use it for making a different variety of dosa and the coarse rawa is used to make these tikkis.Dry roast the the rawa mixture till it is nice and fragrant and keep aside.You can store this rawa upto 2 months if it is roasted and it would also insect free when well roasted.The rawa should be like this as shown in picture.
for making Billakudumu:
  • Heat water, oil and salt in a medium size pan. Once it starts to boil reduce the flame to medium and add the rawa mixture and continue to stir in one hand to avoid lumps.Let it cook completely and switch off the gas and let it cool till you can handle it. Then knead the mixture till it forms like a soft ball and is free of lumps.
  • Grease your hands with little oil and take some mixture and make it into a smooth round and flatten to 1/2 inch thickness like a round or oval patties and give a nice shape pressing at the edges.Do follow the same procedure to prepare the remaining ones.
  • Now on a heavy tawa pour 3tbsp of oil(on a medium flame) and place the prepared tikkis 7-8 at a time on it and shallow fry both sides on medium flame applying oil on both sides until golden brown and crisp.This is bit time consuming as it takes more time to get browned on both sides on low flame.so please be patient at this part.This should be roasted in such a way that when you try to tear a place it should split into two parts.
Serve it hot with Peanut-Coconut chutney or Onion Chutney or Coconut chutney.

Note:
I find that it is easier to make the tikkis when the dough is slightly warm. Once you refrigerate the dough it takes some effort to knead it again. Hence I make the tikkis when it is warm and then refrigerate the tikkis.It is easier this way.

Peanut-Coconut Chutney:


Ingredients:
1/2 cup roasted and skinned peanuts
1/2 cup fresh coconut
6 red chillies
1 tsp tamarind pulp
1/2 tsp grated jaggery(optional)
Salt to taste

to mix in with the chutney:
1/2 cup finely chopped onions

Method:
  • Make the chutney by grinding all the ingredients into a thick paste by adjusting sourness and spiciness according to your taste.
  • Then add in the finely chopped onions and mix it well. It is suppose to be a thick chutney. Add more onions according to your taste.
Serve it immediately with Billakudumu.

Toor Dal-Rice Rawa Dosa:(Dosa with the same rawa,but the finer version)

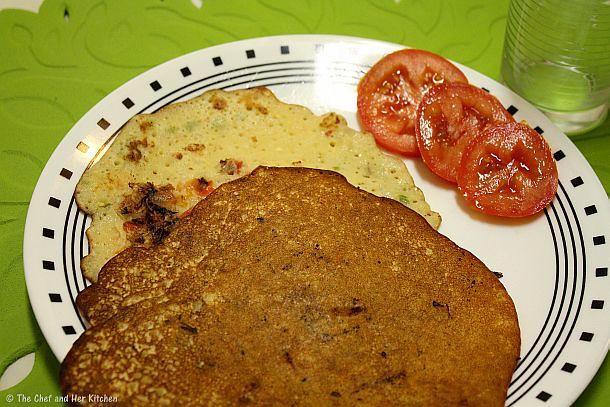
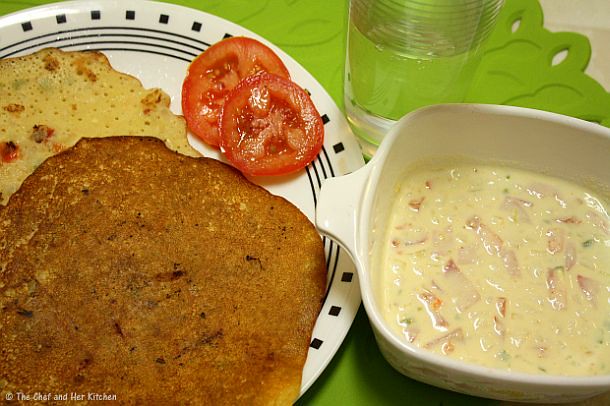
This dosa is made with the sieved portion of the toor dal-rice rawa mixture as I mentioned above. There are many versions to this dosa and this is an instant dosa as there is no soaking involved. It just tastes like omelet beacuse of its texture and in our house it is known by the name tomato Omelet.
Even if I do not have the fine rawa mixture,I use the coarse rawa mixture and then grind it little more to get finer rawa.

Ingredients:
1 cup fine rice-toor dal rawa(sieved finer rawa)
1/2 cup sour curd
1 onion,finely chopped
1 tomato,finely chopped
1 tsp green chilli paste
Salt,to taste
Method:
  • Thin the curds with another 1/2 cup of water. Add it to the rawa mixture and let it soak for 15-30 mins. Then add some more water to make it to the medium consistency batter.
  • Add the green chilli paste, salt and chopped onion and tomato and stir to combine.
  • Pour a ladle of dosa batter on hot tawa like how we do for rava dosa,but need not to be thin and there is no need to spread.Pour oil all over the dosa.
  • Make dosas on a medium high flame. Cover them with a lid and flip them over and fry on both sides.
This dosa can be served as it is and does not require any chutney.Otherwise you can serve it with the same peanut chutney or coconut chutney.

Variations:
Just like uthappam, you can add extra onions and tomato on top of the dosa.

Monday, June 27, 2011

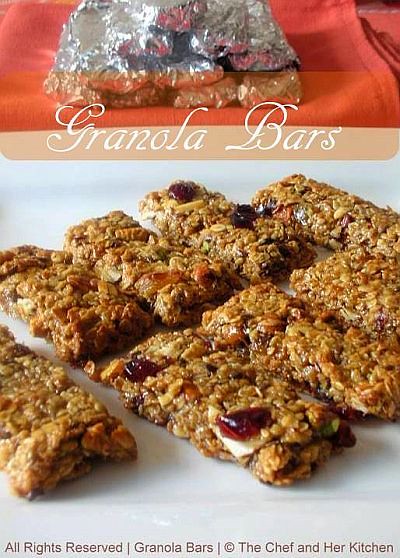
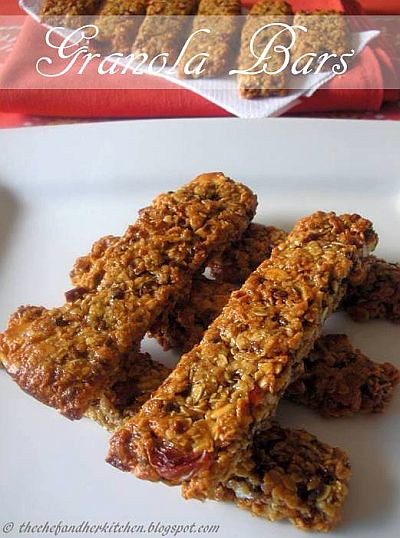
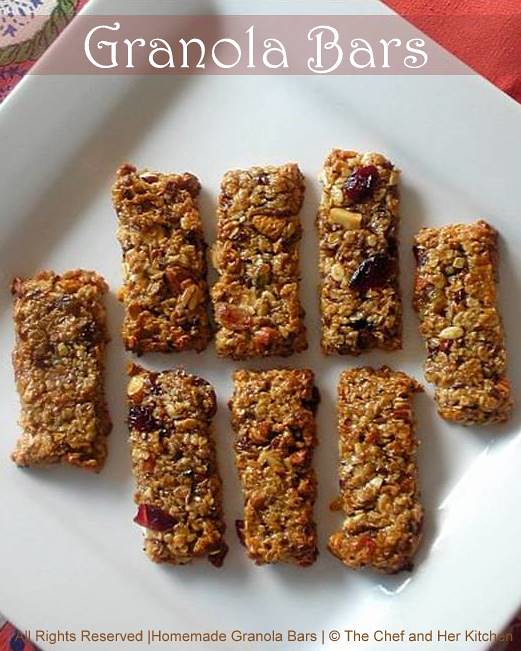
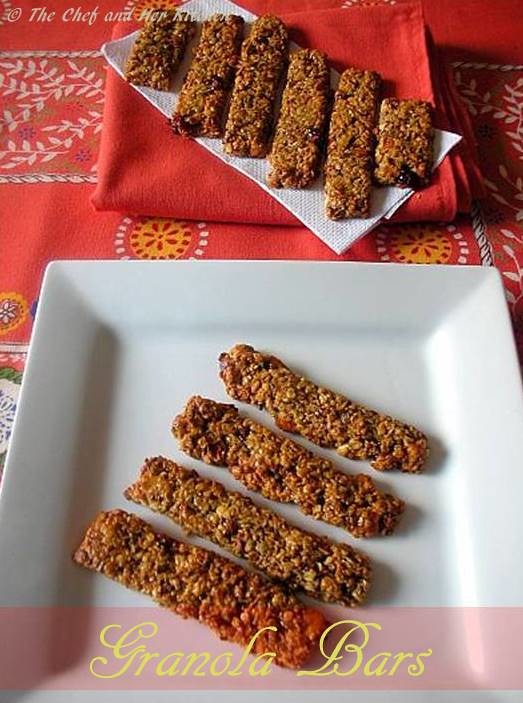
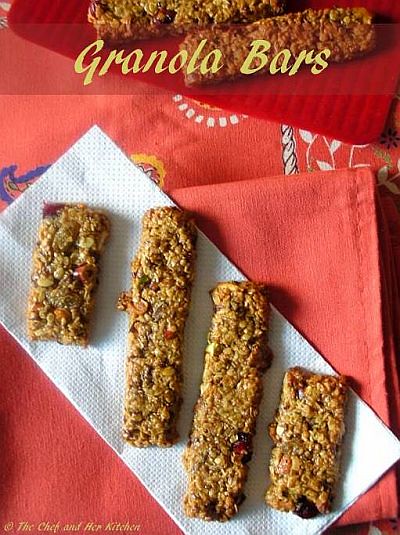
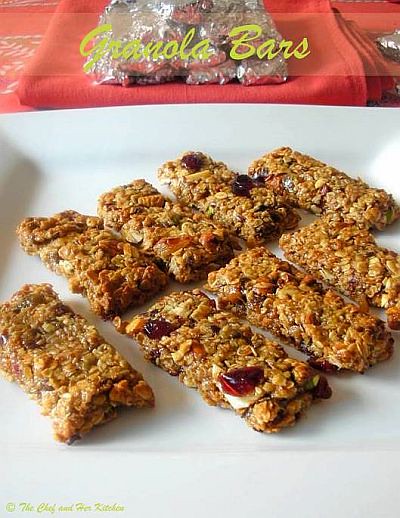
Healthy Chewy Granola Bars..Step by Step Recipe!!

Granola is one of the most healthiest options for breakfast or evening snack and can also be also had as a healthy dessert.But it is difficult to eat them on the go and hence granola bars are always a better option.I love munching granola bars for my morning or evening snack as they are easy to carry and are very healthy and filling too.
Me and my husband both love dry fruits very much and hence I added them abundantly in my granola bars,you can add the dry fruit/nuts of your choice.I can say it is always better to make these granola bars at home instead of buying those preservative and sugar loaded ready made bars.It might hardly take some extra time but the end product is very healthy and yummy bar and more importantly it is customized by you according to your preferences.
I had bookmarked this recipe from Veggie-Wiz as they looked damn tempting with all my favorite ingredients and adapted the process of stove top method and few measurements from Sharmi's space.This recipe is a cross in between both the recipes and is my favorite now with the ingredients of my choice,so do try them out with your additions and choices.

Ingredients:
(Yields around 18 big bars)

2 cups quick cooking Oats
1/2 cup cornflakes cereal
1 cup honey
1 tsp cinnamon powder
3 tbsp peanut butter
2 tbsp butter
2 tbsp brown sugar
1 tsp vanilla essence
2 tbsp water

dry fruits and nuts:(This comes around 1-1/4 cup)
12-15 almonds,finely chopped
12-15 walnuts,finely chopped
10-12 pistachios,finely chopped
2-3 tbsp raisins
2-3 tbsp dried cranberries
5-6 seedless Arab dates,finely chopped
3-4 dried figs/anjeer,finely chopped
1 tbsp watermelon seeds(you can even use pumpkin or sunflower seeds)
2 tbsp flax seeds
1 tsp sesame seeds

Method:
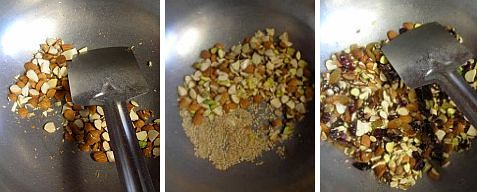
  • Dry roast oats and cornflakes separately until a nice aroma comes and oats starts slightly browning up,take care not to burn them while frying.Keep them aside.
  • Now dry roast flax seeds until they pop and followed by sesame seeds and add them to the oats mixture.
  • Add almonds,walnuts and pistachios to the pan and roast them until they are slight crisp and then add watermelon seeds,chopped dates,figs,raisins,cranberries and fry them for a minute and add them to the oats mixture.
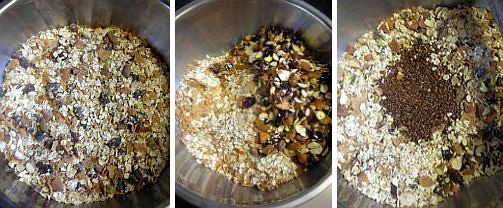
  • Mix everything well and keep the vessel aside.
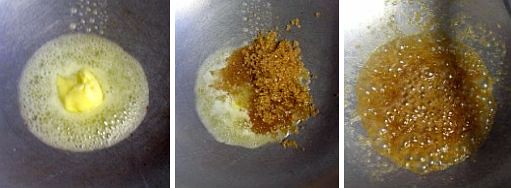
  • Heat the same pan and add butter and let it melt.Now add brown sugar to it and let ir caramelize a bit and bubbles form.
  • Add water,honey,peanut butter and cinnamon powder and heat the mixture until it starts bubbling up.
  • Add vanilla essence and give a quick stir.
  • Now add the roasted oats, cornflakes,nuts and dry fruit mixture and mix well until the honey mixture is coated uniformly all over the oats cornflakes mixture.Let it cook for 2 mins and keep stirring it in between.
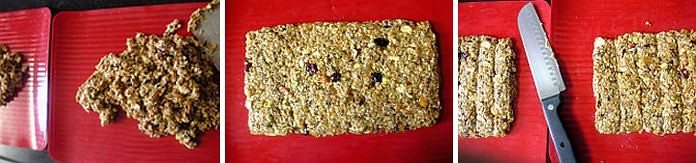
  • Divide the mixture into two portions and transfer the mixture on to a baking sheet or a butter paper and spread it using a spoon or a wooden ladle to 1/2 inch thickness.
  • Straighten the edges with the help of a spatula into a square or rectangle and let it cool a bit.Smoother the top portion using hands or a butter paper and gently make it uniform.
  • Allow them to cool for 5-10 mins and then cut them into bars.If it does not hold shape just press the sides with hands to form the clean edges.
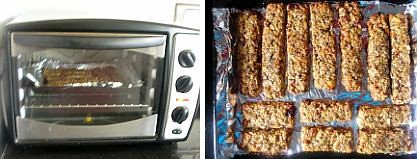
  • Arrange them on a aluminum foil on a baking tray and bake in preheated oven @ 160 degrees for 4-5 mins.This step is completely optional and you can avoid it if you do not have oven.I do this way which helps in holding its shape and can be stored for longer.Let them cool completely for 30 mins.
  • Wrap them in aluminum foil and store them in airtight container.
Have them as a morning or evening snack with a cup of milk/tea/coffee.

Notes:
  • I suggest you to wrap them in aluminum foil so that it would be easy to pack for snacks box and it does not stick to your hand.
  • The addition of nuts and dry fruits are completely left to your choice.Add them according to your choice.
  • I baked them for extra 3-4 mins and that process is completely optional but I felt they tasted better in that way and also stays crispy and chewy for long.You can completely avoid that step if you do not have oven.
  • You can even halve the recipe and make if you are trying for the first time.
  • These can be stored easily up to 15-20 days and I really wonder that they would last that long.
Last weekend was my Dad's Birthday and also today is our blogger friend Lubna's B'day and I would like to wish them through this post specially.
My dear wonderful 'Dad' and my dear friend Lubna,'Many Many Happy Returns of the Day,N'joy ur day!!'

Friday, June 24, 2011

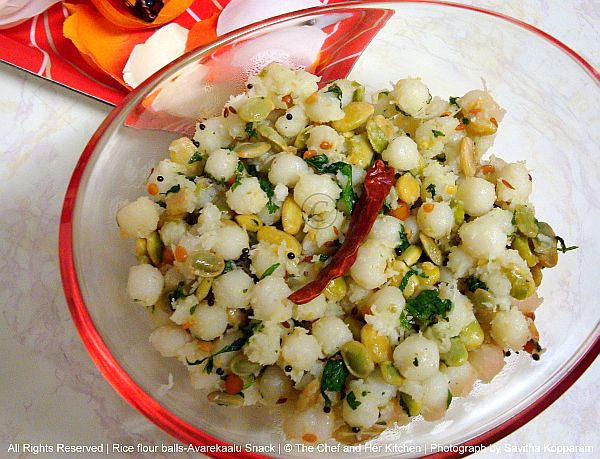
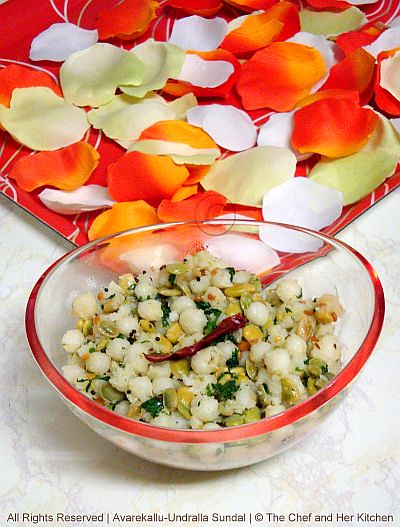
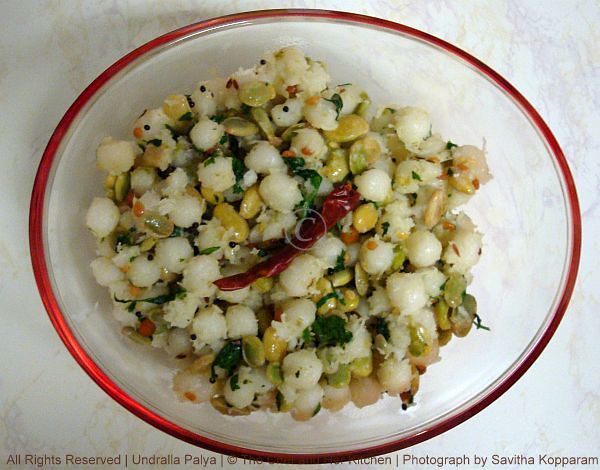
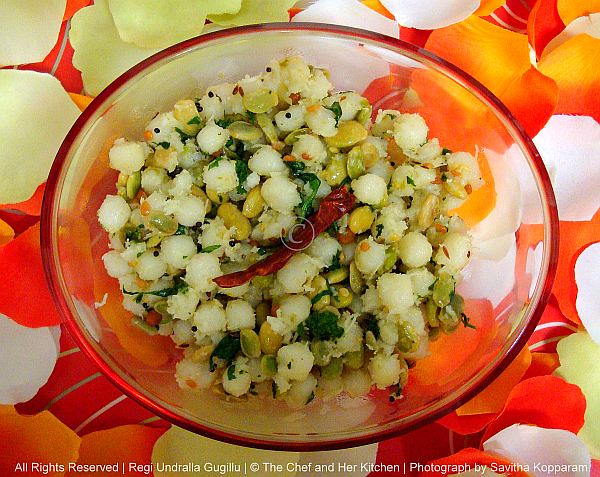
Avarekallu Kadubu/Regi undralla gugillu (Rice flour balls Avarekallu Snack) ....FFF#10

This is the 9th week of my ongoing series Cooking with Family-Family Food Friday and if you have missed any of the previous posts in this series,check them here.

LinkThis week's post is sent to me by my cousin 'Savitha' who had sent Mosaru Kodubale earlier.I had heard a lot about this dish from my aunt that this is a very famous recipe at savitha's place.Hence I requested her to send this entry for me and she was kind enough to agree to send this in spite of her busy schedule.She had even surprised me with the step-by-step pictures and I am really thankful to her for that.My mom prepares a similar version to this called 'Methi Kadabu' and this version is new even to me and I am really looking for fresh avarekallu season to try this.

This recipe does not have any fixed name as it is called with different names in different regions such as 'Kadubu' or 'Undrallu' or 'Seedai'.I have seen similar recipes in several blogs and I think every region has its own way of making it with few changes.In North Karnataka these are called kadabu and they do a variation with it and is mainly with methi and hence it is called 'Menthi kadabu' and in Tamilnadu this is called 'Seedai/Kozhukottai' which is tempered rice balls.I can say this version is native to Bangalore and is made with fresh avarekallu and hence I named it as 'Avarekallu Kadubu'.The preparation is quite elaborate and it definitely tests your patience and if you are making it for the first time,please be patient while making it and also start with smaller quantity.As I have tasted the other version I can say these taste absolutely delicious and is really worth the effort you had put in.This can be had as breakfast or snack,if you are making this for breakfast you need to have lots of patience as you have to make more quantity.

Rice flour plays a very important role in most of our community style breakfast dishes at my place,if you have observed the entries for this series half of them are based on either rice flour or rice rawa.We usually stack a big container of rice flour in our pantry and also we consume it more like wheat flour.You can check the rice flour breakfast varieties like Uttha Rotti, Akki Rotti, Bilavalige(rice flour Chapathi),Vadappam(rice flour poori), Mosaru Kodubale(Curd-rice flour rings),Billakudumu(rice rava tikkis) in my blog.
Ingredients:

for Rice Flour Marbles:
1 cup Rice flour
2 cups water
2 tsp oil
1/2 tsp salt

for Seasoning:
1/2 Cup avarekallu (Lilva/hyacinth/mochai)
1/2 cup grated fresh cocunut
1/4 cup chopped coriander
1 tsp green chili Paste
1 tsp lemon Juice(or to taste)
1/4 tsp mustard Seeds
1/4 tsp jeera/cumin seeds
1/2 tsp chana dal
1/2 tsp urad dal
2-3 tsp oil
a pinch of hing
Salt to taste

Method:

Making of tiny rice flour Balls:
  • In a vessel, add water, salt and oil and let it come to a boil.
  • After it boils, reduce the heat and add rice flour. At this point don't touch the rice flour, leave it as it is for exactly 15 mins over medium heat.
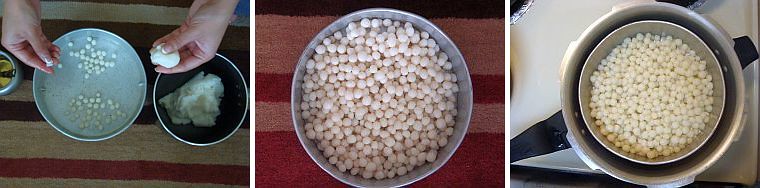
  • Switch off the flame and using a ladle mix it well until you get it into a smooth consistent dough (as shown in the picture). Once it cools a bit,you can use your hand at the end to knead into a smooth dough as shown in picture.
  • Take an empty vessel and apply oil on its base and edges.
  • Take some dough in your hand, and using your fingers make small balls as shown in picture (the smaller the balls, the better the taste.it all depends on your patience).If the dough keeps sticking to you hand, smear little oil to your fingers to continue making the balls.This is the most time consuming process but the end product makes you forget all the pain you have taken while making it.
  • After you finish making all the balls, place the vessel in a pressure cooker without any lid on the vessel. Do sprinkle one or two tea spoons of oil on the top of the balls and steam it for 10-15 min without using a weight (like you would make idly).
  • Once the pressure drops open the cooker and place the vessel aside. You should be seeing shiny balls as shown in the picture.
Boil Averekallu:
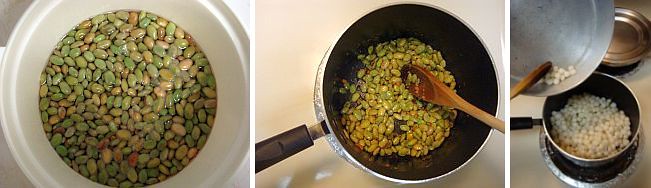
  • Boil avarekallu either in microwave or on stove top until it becomes tender and soft. Drain all the water and keep them aside.
Seasoning Part:
  • Take oil in a pan, after the oil heats up, add mustard seeds and let the, splutter, add urad and chana dal until golden brown, add jeera, hing and green chili paste.
  • Add boiled avarekallu and mix it well for 2min.
  • Add rice balls from the vessel and mix it well in medium heat for about 5min.
  • Finally switch off the stove and add lemon juice, coconut and cilantro and mix it well.
Serve it hot and enjoy the snack!

Tuesday, June 21, 2011

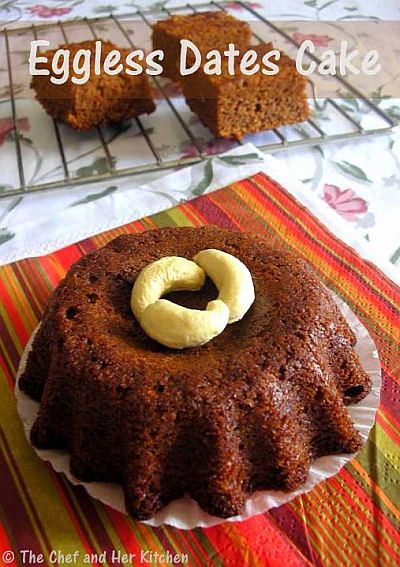
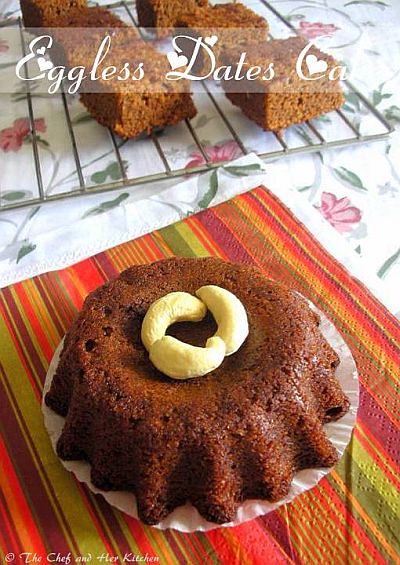
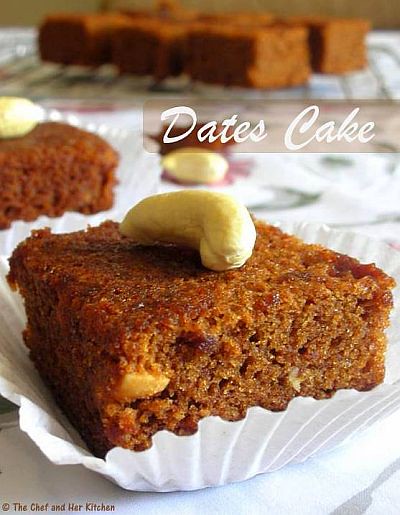
Eggless Dates Cake..a Beginner's recipe!!!

Though I helped my mom in baking cakes during my childhood,this dates cake is the first one I baked on my own few years ago and hence this recipe is always special to me as this recipe has opened the doors of baking for me.Even before entering the blogging world I used to spend a lot of time surfing for recipes and that is how I landed on various famous sites and then discovered many food blogs.I have followed this recipe from Aayi's Recipes as it seemed very easy to begin with and you know I have even messed up with it and my cake was undercooked and also stuck to the pan.Later I tried this and made N number of times by now and it never failed me though it is the same recipe.The only difference is the lack of confidence before which I gained a bit now after lots of baking and I should say even small tips really helps a lot in successful baking.

I like to try egg less recipes as both my mom and MIL don't eat egg based ones and hence I always search for new egg-less recipes.This recipe was always a hit in our family and friends and is definitely a perfect treat for all those people who are in search of a good egg-less cake recipe if you are bored of regular egg-less chocolate or vanilla cakes.

Ingredients:
1 cup all purpose flour or maida
18 seedless good quality Arab dates(Kharjoor)
3/4 cup milk
3/4 cup sugar
1/2 cup oil
1 tsp baking soda
1/4 cup chopped cashew nuts/walnuts(optional)
Method:
  • Sieve together flour and baking soda for two times which helps in even mixing.
  • Warm the milk and soak dates in it for 10-12 mins.You can even microwave them for 1-2 mins so that dates becomes soft which helps in easy grinding.
  • Preheat the oven at 180 deg C/360 F for 12-15 mins.
  • Grease an 8" inch round or square tin with oil/cake spray and sprinkle a tsp of flour over it and turn the tin to coat the tin with flour evenly on all sides.
  • Once the milk mixture comes to normal temperature grind it along with sugar to a smooth paste and pour into a wide mixing bowl.
  • Add oil to the mixture and mix using a wire whisk or hand blender until the oil blends into the batter properly.
  • Add the flour one table spoon at a time and fold in the mixture slowly using a silicon spatula. Take nuts in a small cup and sprinkle a tsp of flour and coat the nuts well.Add nuts to the cake mixture and mix with a spatula.
  • Pour the cake batter into the ready tin and tap it once.Tapping means dropping the cake tin gently from a height of 1" above the surface which helps in removing the formation of any air bubbles in the cake.But do this process very slowly and gently otherwise the cake batter will spread all over the tin.
  • Bake it in preheated oven at 180 degrees for 30-35 mins until done,do a tooth pick test always to check whether it is done completely or not.Insert a tooth pick in the cake,if it comes out clean then it is done properly.Keep an eye after baking for 25 mins as it might get burnt as well depending on the type of oven you use.
  • Cool the cake in the tin for sometime and invert it onto a wire rack and rest it.Cut into pieces of your desired shape.
Serve it warm with vanilla ice cream or as a snack at room temperature.

Notes:
  1. You can reduce the oil quantity to 1/4 cup for low cal version,I have even tried like that and the cake was still moist and yummy.
  2. You can even sprinkle some chopped walnuts or cashew nuts over the batter before baking which gives the look of a brownie.
  3. The color of the cake depends on the quality of dates you use,if you use regular ones it might be brown in color and if you add good quality dark dates it would come extreme dark chocolate color.
  4. You can even use regular dates with seeds but for that you need to soak the dates in milk overnight in the refrigerator.Remove the seeds and proceed with the same recipe.

Friday, June 17, 2011

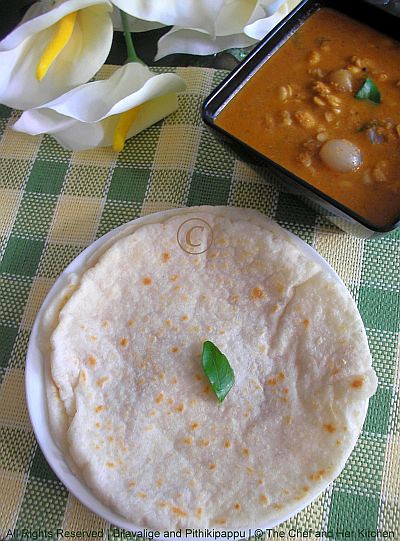
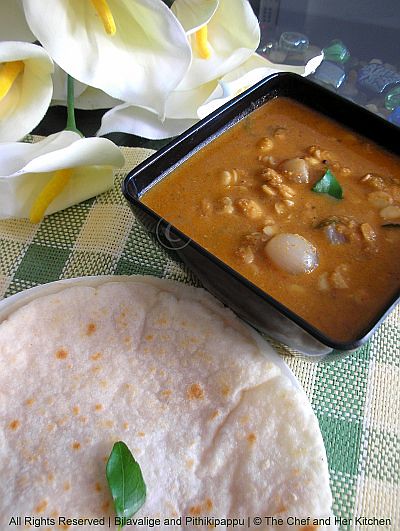
Bilavalige(Rice Flour Chapati) and Pithikipappu(Mochai Beans Dal)......FFF#8

I am sure that all of you would know that today's post would be related to my Family Food Series. This is the 8th week of this series and If you have missed any of the previous one's check them here.

This week's post is very special for me as this is from my mom.How can I not have any entry from my mom, especially when this is a family series?I was actually wondering how to get an entry from my mom for this series and when I was clearing off the photos in my folder I realized that I already had an entry from her. She had prepared this dish for me when she visited us last year and I had happily clicked the photos then.It is more than a year since then and although I have been waiting to post this for a while somehow I never posted it- could be because I wasnt with the pictures. I am glad that I didnt post them until now as this is the perfect time given the current theme.
Coming to the introduction-I don't think that one needs to introduce their mother as everyone knows that MOMs are the best. Like everyone, even I am attached emotionally to my mom and I don't want to make this post an emotional one so let us just get to the recipe.

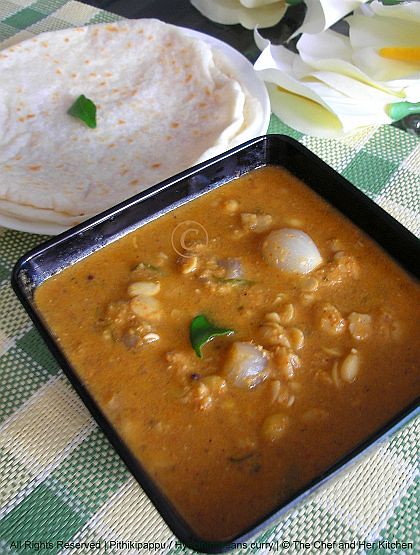
Coming to today's recipes Bilavalige and Pithikipappu is the most famous breakfast combination of our community and is considered as a very special breakfast and is must to be made for important guests.This is quite a laborious breakfast and one needs to expertize in making perfect bilavalige,after all the most laborious recipes would be the best tasting ones right??Bilavalige is nothing but rice flour chapati and is similar to akki rotti in karnataka but the process for making bilavalige is little different compared to akki rotti.Bilavaliges are rice flour chapatis which are white in color and extremely soft and they taste best when you eat them hot.
Avarekalu is very famous in Bangalore and as it is seasonal we make sure that we utilize them to the maximum extent in the season.We make various varieties with it like pithikipappu,usli, kheer,halwa,rotti,upma,rasam etc.Try this truly delicious combination in the avarekalu season.
Bilavalige(Rice flour Chapati/Akki Rotti):

Ingredients:
1 cup Rice flour
2 cups water
1 tsp oil
salt to taste
rice flour,for rolling chapatis

Method:
  • Bring water to boil in a deep thick bottomed vessel and add salt and oil to it.
  • Once the water comes to boil,mix a tsp of rice flour with 2-3 tsp water and add this to the mixture.This helps in not forming the lumps in the dough.
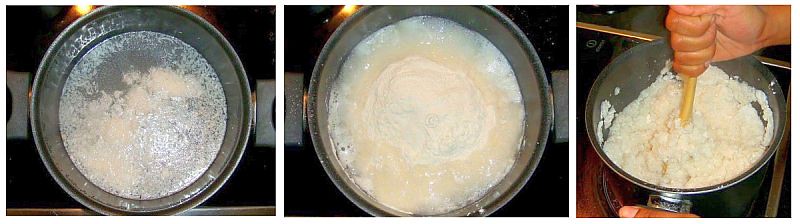
  • Pour the rice flour into the water but do not mix it at all,leave the rice flour in water.
  • Reduce the flame and let it cook for 15 mins.
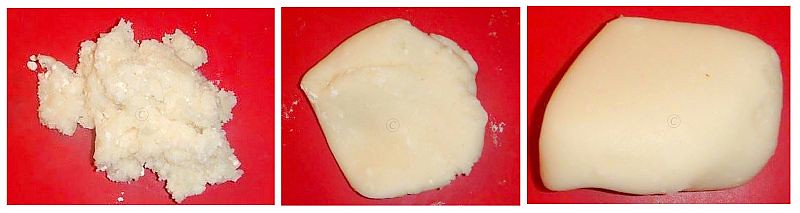
  • Now take a thick wooden stick(chapati rolling pin also works well here) and mix the rice flour into the water vigorously in one direction only.It will form a lump now and switch off the flame.
  • Wait until the mixture becomes warm.It should not become cold,the whole process is to be done when it is hot.So take care not to burn your hand in this process.
  • Wash and dry a polythene cover and place the mixture in it and knead it into a smooth dough.Place the mixture in a vessel and cover it with lid,take care not to cool the mixture.You can even knead the dough on baking sheet.
  • Pinch in the dough and take orange sized ball and again knead it on the chapati stand.Rolling a rice chapati needs a lot of practice as the rice flour chapati keeps breaking while rolling.I am explaining two different ways to roll it,follow them which ever way you feel comfortable.
  • Method-I for an experienced person:Sprinkle liberally rice flour over the chapati stand and on the kneaded round dough and roll it into a 6" dia circle using rolling pin like how we do rotis.While rolling keep pressing the edges to get a uniform round chapati and also use rice flour liberally while rolling.
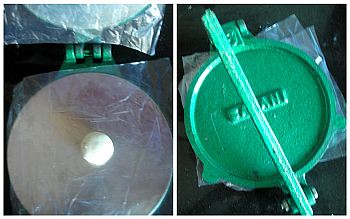
  • Method-II for a beginner:The easiest way to proceed for a beginner would be using a poori press.Clean,wash and wipe a polythene cover and cut into 5" dia rounds and grease the sheets on one side and place them on the sides of the press facing the oiled edges towards the center.Place the kneaded round dough and press it in the poori presser,you would get approximately 3" diameter round chapati.Now sprinkle rice flour over the chapati stand and on the kneaded round dough and roll it into a 6" dia circle using rolling pin like how we do rotis.
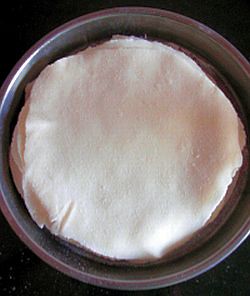
  • Follow the same process of pinching the warm dough and kneaded the ball and rolling using two options.Pile up all the rice flour chapatis in a deep plate and keep it covered until you roast them.You can roll these rice flour chapatis much ahead before making them.You can even refrigerate it and fry them on next day.
  • Heat the tawa and place the rice flour chapati on a hot tawa and roast it for a minute or so and turn it on to the other side and apply oil and once it is fried on the other side and apply oil and fry until you get to see small brown spots over it.These chapatis would be very soft and white in color with some brown spots.Do not over fry them,they will turn hard.
Serve them hot with Pithikipappu or coconut chutney or Bagara Baingan or Mixed vegetable Kurma.The ideal combination we prefer with this chapati is Pithikipappu.

Note:

  • I have included few pictorials of my old posts for better understanding the process of making bilavalige.
  • If the rolled rotis are refrigerated for half an hour before roasting them, they roast better.
  • While refrigerating cover the rotis with a kitchen towel or place them in paper bag.
Pithikipappu(mochai beans curry/Fresh field beans Sambar/Hitikibele dal):

Ingredients:
2 cups avarekalu(mochai/hyacinth beans)
12-15 small onions,peeled
3 tbsp tamarind pulp
1 tbsp grated jaggery
1 tsp mustard seeds
a sprig of curry leaves
4 tbsp ghee/oil
salt to taste

for masala paste:
1 big onion(roasted over the flame)
1/4 cup grated coconut
2 tbsp grated dry coconut
4-5 garlic pods
1" ginger,chopped
2 tsp khus khus
8 red chillies
3-4 byadige red chillies(for color)
2 tsp coriander seeds
3/4 tsp cumin seeds
1/4 tsp black pepper corns
1/2" cinnamon
3-4 laung
1 tsp oil

Method:Boldfor masala paste:
  • Heat oil in a pan and add cinnamon,laung and fry and then add red chillies,coriander seeds,cumin and pepper and fry well.
  • Add ginger and garlic and saute for a minute.Add khus khus,grated coconut and switch off the flame and just warm the fresh coconut and dry coconut and let it cool a bit.
  • Roast one big onion with skin over the flame directly until the skin turns dark brown in color.Use tongs or fork for this process.Remove the skin and grind it along with the roasted masalas to a fine paste adding little water.
for making pithikipappu:
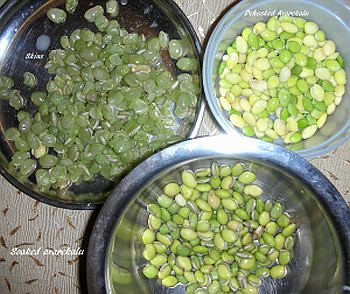
  • Soak mochai beans(avarekalu) in water for 4-5 hours or in luke warm water for 2 hrs.De husk outer skin and keep aside.
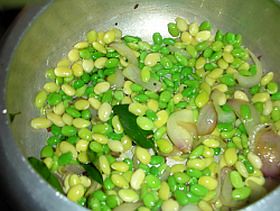
  • Heat oil/ghee in a pressure pan or cooker and crackle mustard seeds and add curry leaves and peeled small onions and fry until the onions change their shade.
  • Add the dehusked beans and fry well until they turn light in color.
  • Add ground masala and fry until good aroma comes and add approximately 1/2 cup water and pressure cook for 1 whistle.
  • Allow the pressure to drop,remove lid and add salt,jaggery,tamarind pulp and add more water if required and boil for few minutes.The consistency should be similar to flowing dal.
Serve it hot with rice flour chapati/rice/wheat flour chapati/poori.The ideal combination with this dal is rice flour chapati.

Notes:
If you do not get fresh avarekalu,you can even follow the same process with fresh peas for a variation.Even this tastes nice.

 
back to top