
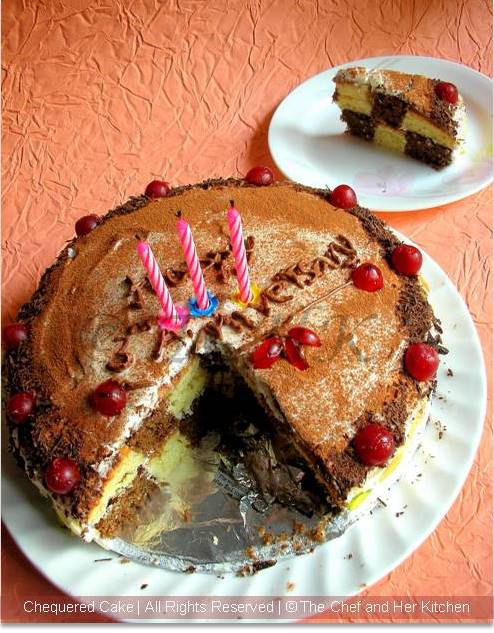
When I saw sunita's Chequered cake I just fell in love with the technique which she mentioned for making the chequered cake without the use of any special pan meant for that purpose.I loved it so much that I have decided to make that for our third marriage anniversary(yesterday,6th dec).Check sunita's Eggless chequered cake version here for a detailed description.I personally thank sunita for posting the easy version of this chequered cake which I wanted to try from so long.
I wanted to make the classic yellow sponge and chocolate sponge cake to form the chequer pattern and I simply followed Nita mehta's recipe for making the cake.As I made it on a special occasion I made it rich by applying the cream all over the cake in order to make it bit special to suit the celebrations.
This time the marriage celebrations were more fun as we did a live telecast to our parents and in-laws over the internet while we were cutting the cake.Finally there was someone to clap and sing for us and took part of the celebrations along with us even though they were not around.
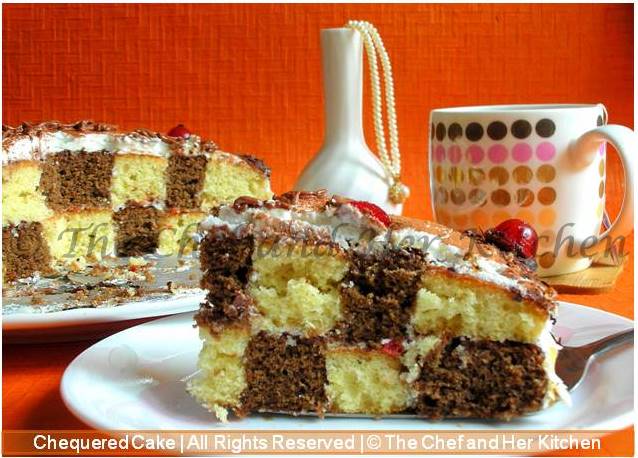
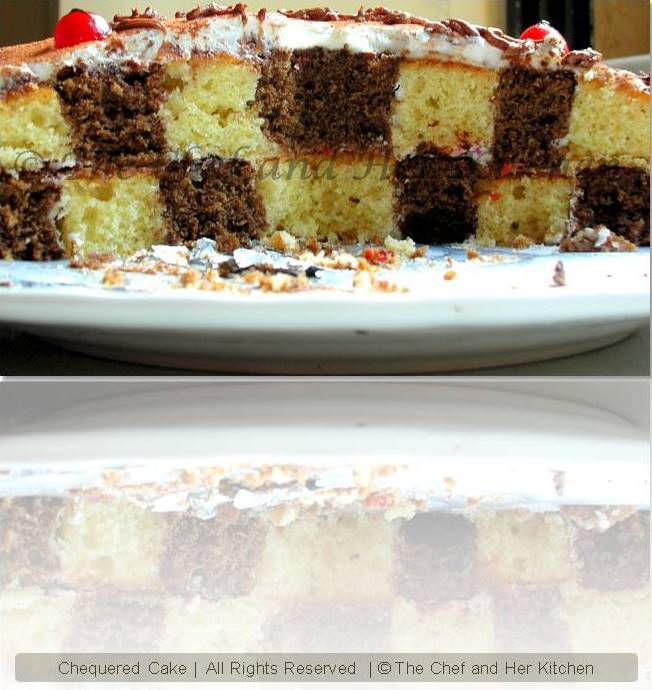
I was so tensed upto the time I cut the cake and when I saw the chequered pattern I was overwhelmed with joy and it was all worth the effort.The cake was very moist and light in taste and was a perfect cake for the special day.
 Ingredients:
For yellow sponge :
3/4 cup Refined flour/Maida
2 Eggs,at room temperature
1/3 cup oil
1/2 cup powdered Sugar
1 tsp vanilla essence
1 tsp leveled baking powder
For chocolate sponge:
1/2 cup Refined flour/Maida
1/4 cup Cocoa powder
2 Eggs,at room temperature
1/3 cup oil
1/2 cup + 2tsp powdered Sugar
1 tsp vanilla essence
1 tsp leveled baking powder
For Cream:
2 cups thick cream(chill the cream tetra pack without shaking the pack,take only thick part and discard any water content)
1/2 cup powdered Sugar
For decoration:
100 gms Chocolate
1 Pack of cherries
8-10 Almonds
8-10 pistachios
1 tbsp cocoa powder
For the Sugar Syrup:
1/2 cup water
1/4 cup sugar
4 to 5 drops of lemon(optional)
 Method:
Yellow Sponge:
- Line a 9" round tin with a baking paper and grease it with oil and as well the sides of tin.
- Sift flour and baking powder together.
- Separate egg whites from the yolks.
- Beat egg whites in clean dry bowl till fluffy.
- Add Sugar gradually,beating till thick,fluffy and retains shape.
- Beat in the yolks and essence till thick and fluffy again.
- Add oil gradually,beating till thick again.
- Fold in flour gently with a wooden or metal spoon,by sprinking evenly in 2-3 batches.
- Pour mixture into tin and level the top.Tap the tin gently to get rid of any large air bubbles.
- Bake in preheated oven at 180 deg for 20 mins.
- Insert knife or skewer in the center of cake,if it comes out clean ,remove tin from oven.After 5 mins,remove cake from tin onto a wire rack and let it cool.Cool the pan completely before proceeding to make the chocolate sponge.
Follow the same procedure as the yellow sponge cake just that add cocoa powder and sieve all the ingredients in the second step.
Sugar Syrup:
Boil water along with sugar until it forms a nice syrupy liquid,strain the water and let it cool.Add lemon juice to it and mix and keep it in fridge.
Cream to spread:
- Beat the cream on medium speed till thick.
- Only after it turns thick,then add powdered sugar and continue beating on high speed till you get the soft peaks.Chill it for some time.
- Divide the mixture into 3 parts.Reserve one part for topping the cake.
- Add very finely chopped cherries to the cream and gently fold in.
- Take out 3-4 spoons of whipped cream from the third portion and mix with 1 tbsp cocoa powder and pour it into the cone made up of baking paper and let it stand in a glass and keep it in the refrigerator until its usage.


Assembling the cake:
- Level the cake gently using a knife(to cut) to form a uniform surface.
- Based on the size of your cake take 2-3 cutters which form similar symmetric hollow circles gives 1" width for each circle.As I did not have cookie cutters I used steel containers from my kitchen cupboard.
- Gently press the cake with the cutters to get different symmetric circles and place them aside .
- Place a chocolate sponge on the serving platter.Apply plain cream to the inner circles of the cake and apply cream again.Do the same with the remaining 1-2 circles to form first layer of the cake.Follow the same procedure to make the second layer and keep it aside.
- Pour the lemon-sugar syrup mixture all over the cake to make it enough moist.
- Apply a thin layer of cream(mixed with finely chopped candied cherries) and place the second layer of the cake.
- Pour again the lemon-sugar syrup mixture all over the cake to make it enough moist.
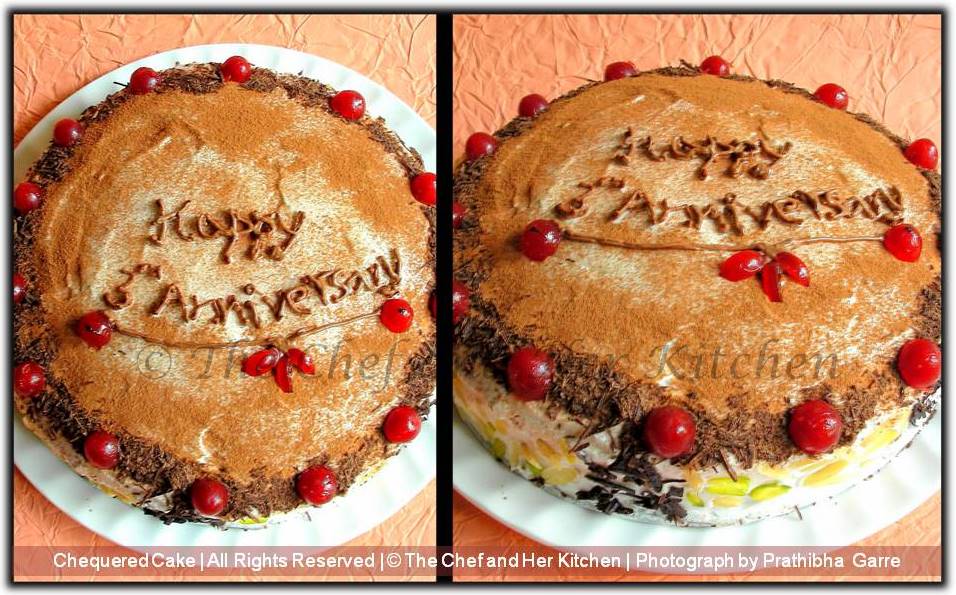
- Apply the plain cream all over the cake and make sure that it is uniformly applied all over and on the sides.
- Stick the finely sliced almonds,pistachios and chocolate shavings on the sides of the cake according to your taste or like I have done for my cake.
- Sieve gently the cocoa powder on top of the cake all over.(And slowly write the message using the cone).This step is completely of your choice and to your creativity.do it in the way you want.
Note:
- I used a ready mix whipped cream packet for making cream and it took hardly 3 mins for me to finish up the whipping process.
- Slice the cake using sharp knife dipped in hot water to get clean cake wedges.

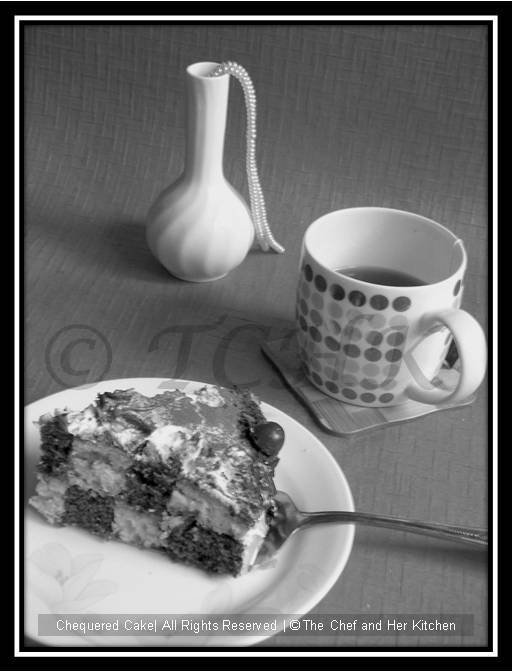
Enjoy the slice of cake with a cup of tea.
Beautiful clicks,yummy chequered cake.Anniversary wishes dear
ReplyDeleteBelated Happy Anniversary!
ReplyDeleteThe cake looks stunning.
Thanks for sharing.. Cake looks brilliant.
ReplyDeleteDo share the step by step method with pics.. It will b useful for novice starters like me... in doing it!!
wow..Awesome!
ReplyDeleteHappy anniversary to you both.... I am speechless seeing your cake... The cake is absoultely gorgeous and worth all the effort. Beatiful clicks..
ReplyDeletethat's a delicious creamy cake there, has come out perfectly spongy and nicely checked!!!
ReplyDeleteHappy belated Anniversary wishes, enjoy!!!!!
awesome..great pictures...
ReplyDeleteBelated anniversary wishes to you both...hope u had a great time..cake looks so beautiful and has come out perfect...
ReplyDeleteabsolutely brilliant!!
ReplyDeletehappy anniversary dear...lovely tempting cake
ReplyDeleteSuperb and fabulous cake...Nice clicks and presentation.
ReplyDeleteThis looks so perfect and nice click too!
ReplyDeletelots of wishes!!! and the cake looks great!!!
ReplyDeleteBelated happy marriage anniversary dear, wat an excellent way to celebrated the special day, cake looks absolutely gorgeous and prefect..fantastic work Prathy!!
ReplyDeleteHappy Anniversary. The Cake looks awesome. Very beautiful pictures.
ReplyDeleteLooks very nice! And excellent clicks and neat presentation! Bleated wishes dear :)
ReplyDeletehappy belated anniversary dear...cake is just unbeleivable..its perfect
ReplyDeleteBelated anniversay wishes prathiba
ReplyDeleteCake looks great,this is the first i am seeing and bookmarked it.But it is little confusing.how to assemble the cake?
Excellent clicks :)
Belated anniversay wishes prathiba
ReplyDeleteCake looks great,this is the first i am seeing and bookmarked it.But it is little confusing.how to assemble the cake?
Excellent clicks :)
Belated anniversary!The cake does make you fall in love..the balck and whites look beautiful and I like your B&W click!
ReplyDeleteI saw sunita;s post too, have bookmarked it o make it myself.
ReplyDeletegreat cake foe an aniversary celebrations, you have decorated it beautifully, job well done.Happy anniversary.
Happy anniversary dear.cake looks quite well.nice clicks
ReplyDeleteI'm so glad you liked the cake;yours has come out beautifully too.
ReplyDeleteI admired this at Sunita's place too. Yours looks as delicious!
ReplyDeleteHappy Anniversary Prathibha... lovely cake for the celebrations ..has come out perfect and looks so soft and fluffy.
ReplyDeleteYummy ! Well done.
ReplyDeleteWhen i saw it in Sunita's place I too have bookmarked them.
ReplyDeleteYou have done justice to her cake.
Looks beautifully checkerd.
Happy Anniversary.
Cake looks fabulous!! This is on my to do list too :-)
ReplyDeleteHappy anniversary Prathy... The cake looks gorgeous ... so perfect dear.Wish to have a slice.
ReplyDeleteNicely done Prathibha..came out superb..i did this with 3 layers,happy anniversary....
ReplyDeletehappy anniversary Parthi and the cake looks absolutely fantastic.u got the checkered pattern perfect.
ReplyDeleteMy warm wishes and beautiful cake to celebrate...
ReplyDeleteHappy Anniversary Prathibha...decadent cake...looks so good :)
ReplyDeletewell done !!!! looks yummm
ReplyDeleteHappy Anniversary Prathibha...Beautiful and so adorable cake!!
ReplyDeleteBelated Happy Anniversary. Cake looks moist and yum.
ReplyDeleteWell done! looks tempting...... :)
ReplyDeleteBelated Happy Anniversary...cake looks perfect.... I saw it few days back but forgot where I saw it..now i remember it was at sunita's
ReplyDeleteWow!Fantastic cake Prathy! You have baked and arranged perfectly . Superb cake for the special occasion.
ReplyDeleteHappy anniversary dear!
Happy anniversary ! hope you had a gala time !
ReplyDeleteCakes looks perfect for the occasion :)
wishing you all the happiness on this special occasion Pratibha !!
ReplyDeletethe cake is beautiful n it must have been a happy moment for you to make this n enjoy this...
Awesome looking cake. Have heard only abt checkerboard cookies. Belated wishes!
ReplyDeleteHappy Anniversary Prathiba. Cake looks perfect and beautiful clicks.
ReplyDeleteThat sounds like a fab celebration. Cake looks so pretty & all ur hard work has definitely paid off. Best wishes on ur anniversary!
ReplyDeleteHappy anniversary dear. I'm blown over..wow...what a beautiful creation dear!
ReplyDeletewow, great job with the cake. Happy anniversary
ReplyDeleteAwesome...!!! belated happy anniversary :-)Great job girl!!
ReplyDeleteBest wishes for your anniversary!
ReplyDeleteCheckered cake is an awesome idea and looks wonderful! :)
Thank you all for ur wishes...and I am glad that u all liked my cake..
ReplyDeleteThis is something that we have to try at home.
ReplyDeleteHappy Anniversary,cake looks so gorgeous!
ReplyDeleteWOW lovely cake and happy anniversary :))
ReplyDeleteHappy Anniversary! Lovely cake... I have to try it sometime :)
ReplyDeleteThanks for your kind comments!
Happy anniversary prathiba[I know its way to late:)].That cake looks so lovely.Until I saw method i was wondering how u baked it!Looks great!
ReplyDeleteBest wishes!That's a fabulous cake :D
ReplyDeleteBelated wishes dear....Cake..looks perfect....extremely yummy...love the presentation....
ReplyDeleteThat's so delicious and mouth-watering cake u got there :)
ReplyDeleteNice recipe...u have a lot of patience to create such a beautiful cake..
ReplyDeletelovely cake , I like the way you have formed the chequers.
ReplyDelete