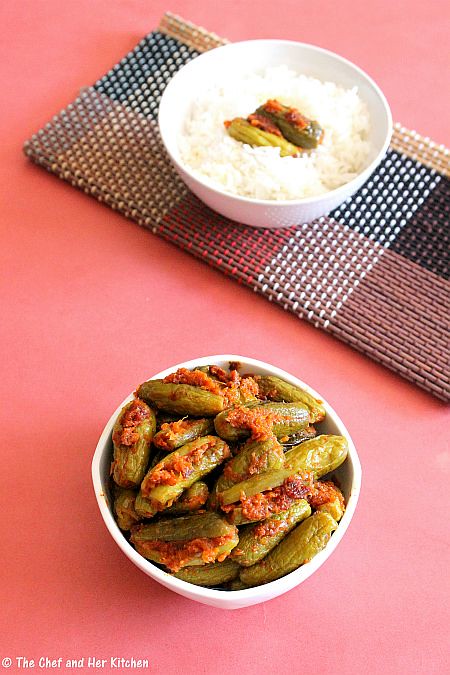
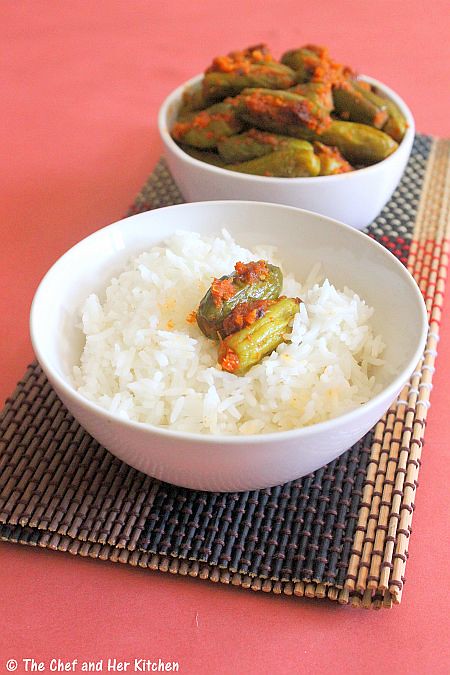
Friday, June 29, 2012

Nalla Minimulu Idli Podi | Idli Powder with Whole Black Urad

Last month when my MIL was here we prepared a lot of varieties of pickle and powder which is the reason why my blog is flooded with lots of these recipes.I thoroughly enjoyed preparing them and now that I have learnt how to make them I don't have to wait for supplies from MIL next year.
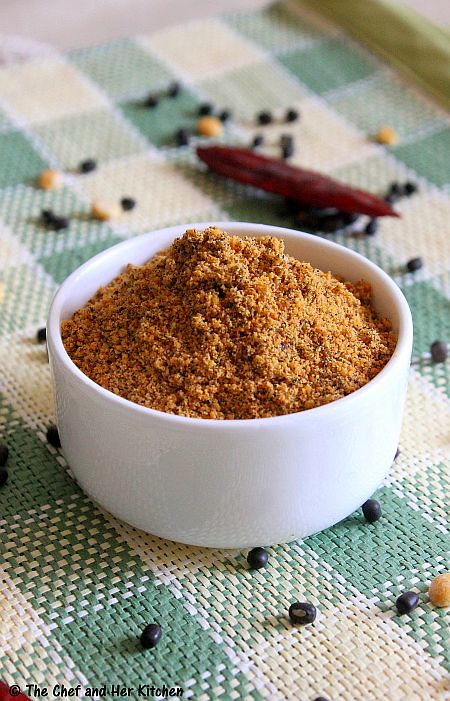
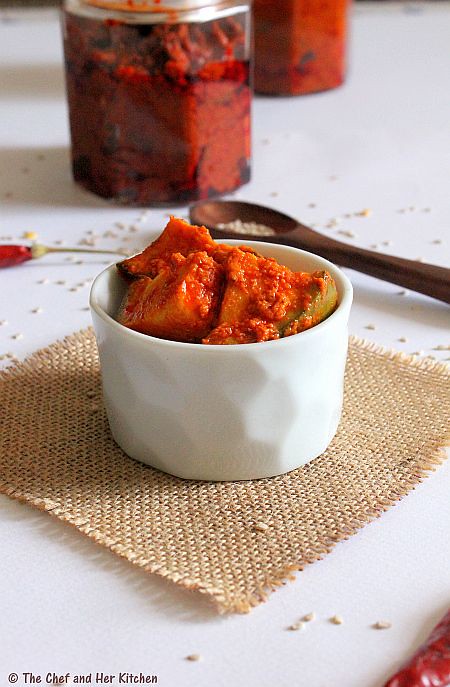
Apart from chutneys and sambar,Idli podi makes a nice accompaniment for south Indian breakfast items like Idli and dosa.In general Idli podi or Karapodi is to be mixed with a liberal quantity of ghee which makes it more tasty to relish with idli. I have already posted the famous Andhra Nalla karam podi and also Tamilnadu style Milagai podi/Idli podi.Today's version is almost like Milagai podi and uses whole black urad instead of the whiter variety which makes it more nuttier and healthy.
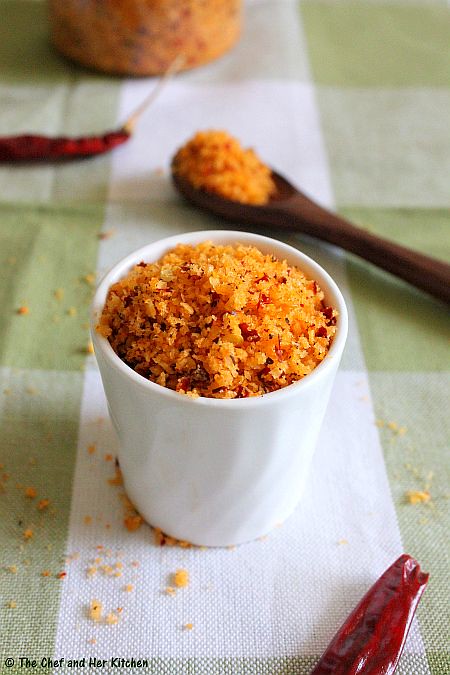
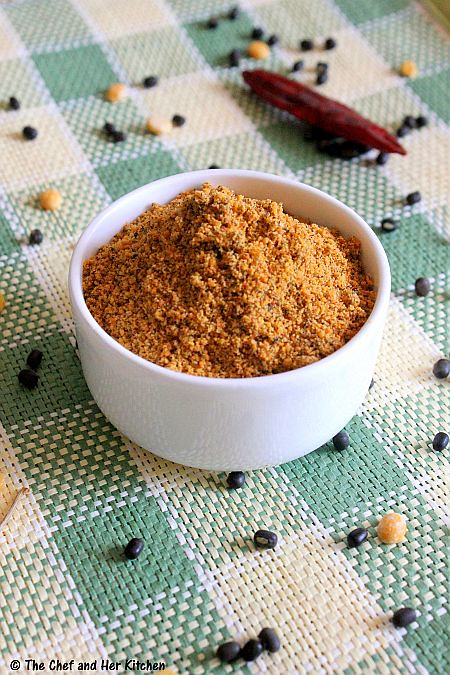
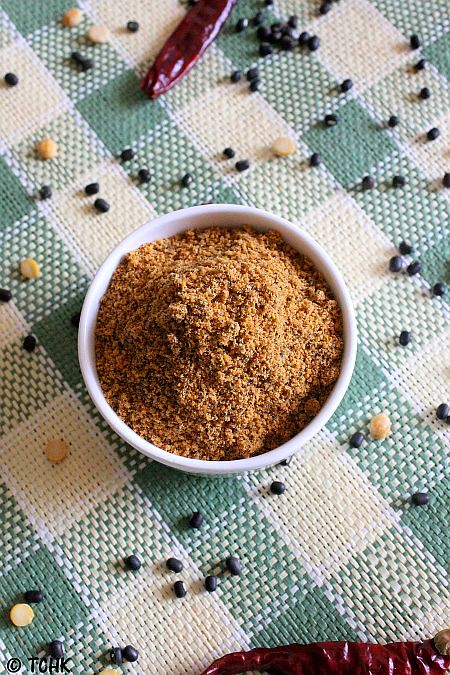
Idli podi with Whole Black Lentils:
(makes approx 1 cup podi)
shelf life: 1-2 months


Ingredients:
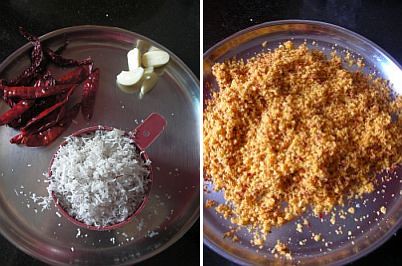
1/2 cup whole Black Urad/lentils(Minumulu)
1/2 cup Chana dal
2 tbsp white Sesame seeds
8 Red chillies
Salt to taste
2 tsp Oil

Method:
  • Heat 1 tsp oil and roast whole urad until it is roasted and crisp over medium flame.It takes roughly 5-7 mins.Remove it and keep it aside.
  • Heat another tsp oil in the same kadai and roast chana dal until red and crisp.Remove and keep it aside.
  • In the same kadai add red chillies until crisp and changes its color.Remove and let them cool
  • Add sesame seeds to the same kadai and let them pop.It takes hardly a minute or two.Remove them on the plate.

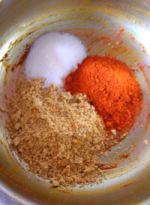
  • Once the ingredients are cooled down grind everything with salt(to taste) in the mixer to a coarse powder.
  • Spread the mixture on a plate and once it is cooled pour into the air tight container and store it for a couple of months.
Serve it with idli/dosa/upma.Mix the powder with a liberal quantity of ghee or sesame oil while serving.

Notes:
  1. You can replace whole black urad with the regular plain variety.
  2. You can add 2-3 garlic pods in the last round of grinding for a nice flavor.
  3. Addition of a fat pinch of hing also enhances the flavor of this podi.

Wednesday, June 27, 2012

Drumstick leaves Adai | Lentil Dosa with Drumstick Greens

When I saw drumstick leaves in a near by market recently I picked them as I rarely find them.I like the flavor of those greens especially when made in curries/palyas. Drumstick leaves are known to have more iron content in them and hence is very healthy to consume these greens once in a while.For a change I wanted to make something different apart from the usual palya/powder recipes with them.I usually add the tender ones in akki rotti but had not given a try in dosa/adai.
I have adapted this recipe from a cook book with some minor changes to suit our taste buds.The adai was tasty with a nice flavor added from those drumstick greens and over all a healthy dish.I like the combination of adai with jaggery and ghee and I know many of you think it is a weird combination,but for me the crispy and spicy adai tasted nice with jaggery and ghee.Who knows?? you might also fall in love with that combination,give a try and lemme know how you liked it.
Drumstick Leaves Adai:
(makes around 20-25 medium ones)

Ingredients:
1 cup Raw rice or Brown rice
1 cup Idli rice
3/4 cup Toor dal
2-3 cups Drumstick leaves
1/2 cup finely chopped Shallots/Onions
2 tbsp grated fresh Coconut
4-5 Byadige Red chillies(for color)
4-5 Red chillies
1 tsp Cumin seeds
2 fat pinches of Asafoetida
a sprig of Curry leaves
Salt to taste
Method:
  • Soak rice for 3-4 hrs and toor dal for 1 hr separately.
  • In a blender/mixer,grind rice with toor dal,garted coconut,red chillies.cumin seeds,asafoetida,curry leaves and salt to a rawa consitency batter.Try adding less water for grinding,the consistency of the batter should be similar to the idli batter,but a bit coarse in texture.
  • Leave the batter aside for an hour or two.However it is optional,you can make adai immediately with the batter.
  • Clean and remove the drumstick leaves from the stems.Wash and drain them.
  • Add finely chopped onions/shallots and drumstick leaves to the batter,the batter would be thicker than the spreading consistency.Do not chop the drumstick leaves.
  • Make small and slightly thicker adai like how we spread dosa.Do not bother about the shapes of adai,as the batter is very thick it is bit difficult to get the perfect round shape but taste wise there would not be any difference.
  • Pour lots of oil all over the adai and in the corners.It makes the adai more crispier.
  • Cover and cook it over low-medium flame until golden brown on one side which takes 1-2 mins ideally.Turn to the other side and roast it well.Turn back to the roasted side and increase the flame for 1/2 minute.

Serve them hot with spicy Onion chutney,Jaggery and Ghee.

You can even serve with Avial/Onion-Tomato chutney/Ginger chutney or Coconut chutney.

Notes:
  1. Use tender drumstick greens for this adai as they have lots of flavor in it.
  2. Adai is ideally prepared thicker and also needs lots of oil to fry,so please add more oil for a crispier and tasty adai.
  3. You can use 2 cups of raw rice instead of 1 cup raw rice and 1 cup of idli rice.But idli rice makes the adai more crispier.
  4. You can even grind onion along with rice but I prefer adding them to the batter which gives a nice crunch.
  5. Asafoetida adds a nice taste to adai,use the required quantity according to the quality of asafoetida.In generally the rock variety is more stronger than the powdered variety.

Monday, June 25, 2012

MANGO POUND CAKE | MANGO CAKE | SIMPLE TEA CAKES

This mango season, I have posted many recipes based on raw mango and although I prepared many recipes with ripened mango, I somehow forgot to take pics. This post is based on ripened mango and comes just in time before the mango season ends, so you still have time to prepare this simple and delicious cake.Also it is a special day for me today as it is my Dad's birthday and I would like to wish him a very nice day through this post.
I love pound cakes and love to eat it as a snack rather than as a dessert and the addition of fruit pulp in a pound cake gives a mild taste of the fruit which makes it even more delicious.I had planned to prepare a mango cake and I am glad that I made it before the mango season ends,it was a very simple cake with nice mango flavor in each and every bite.

Mango Pound Cake Recipe:
(makes a 8" ring tin)
Recipe source : Parita's world

Ingredients:
2 cups All purpose flour
1/2 cup unsalted Butter, at room temperature
1 1/4 cup Sugar
1/2 cup fresh Mango puree(preferably Alphonsos)
4 small Eggs or 3 large Eggs
1 tsp Baking powder
1/2 tsp Baking soda
1 tsp Vanilla extract/essence
Method:
  • Preheat the oven to 180 degrees C and grease and flour a 8" ring tin.
  • Sieve the flour, baking powder and baking soda and keep it aside.
  • Beat butter and sugar together until light and fluffy for about 3 to 5 mins.
  • Now add in the mango puree and beat until well combined,it turns to pale yellow.
  • Now beat in one egg at a time alternating with flour mixture.
  • Finally add in the vanilla essence and beat lightly just until its incorporated.
  • Pour the batter into greased cake tin and tap lightly on the kitchen platform so that the mixture is evenly spread.

  • Bake the cake for 45 to 50 mins until a knife or tooth pick inserted comes out clear.Keep a close watch after 35 mins.
  • Let the cake sit in tin for 5 mins and run a knife in the edges and remove the cake from tin.Once the cake has reached the room temperate.
  • Slice the cake and store it in an airtight box.
Serve it with a dollop of vanilla ice cream or eat it as it is.
Notes:
  1. The cake tasted better the next day,the flavor of mango in the cake is very delicious.
  2. You can add chopped and dusted walnuts to the batter before baking,I am sure it would add nice bite in the cake.
  3. You can use salted butter,I used Amul butter for this cake.

Friday, June 22, 2012

Dondakaya Ullipaya Karam | Stuffed Ivy Gourd

Stuffed vegetables are always liked by everybody at my place. The thought of biting into a soft fleshy whole vegetable with a delicious spicy mixture stuffed in it makes me hungry.
I have already posted various stuffed vegetables like Vankaya Ullipaya Karam, Stuffed Bitter gourd, Kakarakaya Ullipaya karam where the stuffing for few is almost the same and only the cooking methods slightly differ for vegetables.The stuffing of sweet and spicy mixture of onion works great for stuffed vegetables.
Dondakaya Ullipaya Karam Recipe:
(Serves 3-4)

Ingredients:
20-25 Tindora/Tendli/Dondakaya/Ivy gourd
3 large Onions,diced roughly
1/2 tsp thick Tamarind extract
1 tsp Red chili powder
a sprig of Curry leaves
1/2 tsp Mustard seeds
Salt to taste
3-4 tbsp Oil

Method:
  • Wash the ivy gourds and make a slit on one side lengthwise and microwave at high with 1/4 cup of water for 3-4 mins.
  • Pulse diced onions with salt,tamarind extract and red chili powder in a whipper mode for 5 seconds a couple of times.The resultant mixture should be very chunky with onion bits here and there.This is an important step,so please don't mess up here..we want a chunky mixture not the paste.
  • Heat 1 tbsp oil in a kadai and crackle mustard seeds and add curry leaves and fry for 30 seconds.Add the pulsed onion mixture and fry well until the mixture is completely dry and cooked,it takes approximately 8-10 mins.Fry the mixture on medium flame and stir it in between and take care not to burn the mixture.Cool the mixture.
  • Meanwhile in another wide and deep bottomed kadai heat 1 tbsp oil and add cooked and drained ivy gourds and fry for a couple of minutes.Cover it with a deep plate and pour half cup of water over it and cook the ivy gourds over medium flame for 7-8 minutes until they are cooked.Cool them.You can alternatively deep fry the ivy gourds for 2-3 minutes but I don't prefer this process for the amount of oil it consumes.It is left to your choice.
  • Stuff the fried onion mixture in the fried ivy gourds and keep them aside.
  • Heat 1 tbsp oil in the same kadai(in which ivy gourds are fried) and place the ivy gourds carefully and fry over medium - high flame for 3-4 mins until the edges turn crisp and charred.
Serve them hot with hot steamed rice.
Notes:
  1. The key taste in this stuffed ivy gourd curry is the fried onion mixture,so stuff as much onion mixture as you can.
  2. The amount of oil is completely left to your choice as the addition of more makes the entire process fast,easy and tasty.I hardly used 2 tbsp oil in the entire process.
  3. For a variation add 2-3 garlic pods while grinding the mixture,it gives a nice taste too.
  4. The same stuffing can be used to make vegetables like Brinjal,Bitter gourd,Ladies finger and ridge gourd.

Wednesday, June 20, 2012

MAAGAYA | ANDHRA MAAGAYA PICKLE | SUN DRIED MANGO PICKLE

My blog is flooding with lots of mango pickle recipes which we prepared this season and I can say today's pickle recipe is finale for my mango pickle series.
After 'Avakaya',another famous mango pickle variety from Andhra is 'Maagaya'.The preparation of this pickle is quite different from any other mango pickles as the pickle is prepared with dried mango pieces.I have posted a 'Sun dried Tomato pickle' recipe in my blog which is prepared in a similar way.This pickle is quite laborious and also needs some expertize and hence I don't suggest a newbie in cooking to try this recipe.
Maagaya is again a family favorite after avakaya.The taste,texture of this pickle when mixed with hot rice and ghee is just wonderful. We also prepare magaya pacchadi (chutney) with this magaya pickle which can be eaten with idli/dosa.I will try posting even that recipe soon.
MAAGAYA | ANDHRA MAAGAYA PICKLE RECIPE:
(makes approx 1 kg)
Shelf life: 1+ year

Ingredients:
5 raw mangoes
1/2 cup(125 gms) Red chili powder
1/2 cup(125gms) Salt
2 tsp Fenugreek seeds
2 tsp Turmeric powder
2 tbsp Mustard seeds
200 ml Sesame Oil

Method:
  • Peel the raw mangoes and cut into thin slices roughly.Here you don't need cubes,we need thin slices of pieces,the shapes are not important but make sure that the pieces are medium sized and very thin as we are going to dry the pickle.In this pickle you can even use inner shell(called 'tenka' in telugu) along with the mango pieces for the pickle.
  • Mix the mango pieces with salt and turmeric powder properly .Use a plastic container while mixing.Keep it in a porcelain or ceramic or plastic container which has lid.Leave this mixture aside for 3 days untouched.This will leave some water from the mango pieces.
  • After 3 days,on the 4th day slightly squeeze the mango pieces(reserve the water which we get after squeezing and the extra water that the mango pieces leave) and spread them on a clean plastic sheet and dry it in full sun for one complete day.The pieces should loose all the moisture but it should be slightly soft to touch.Take care that they would not turn hard.
  • On 5th day after they get dried we start the remaining process.
  • Heat sesame oil and crackle mustard seeds quickly and add asafoetida to it and remove it from stove and let it cool completely.
  • Dry roast methi(fenugreek seeds) seeds and grind it to a fine powder.
  • Add red chili powder,fenugreek seeds powder and reserved water from mango pieces(you would have got approx 1 cup) and mix well.If you have got more than 1 1/2 cups keep aside some portion and use just one cup of water in the pickle
  • Store this in an air tight tupperware/glass/ceramic container.
  • After 3 days if you see the oil is floating on the pickle up to an 1/2" height then it is perfect.Otherwise heat 1/4 cup of sesame oil and let it come to room temperature and pour over the top until the oil floats.
  • This pickle needs a week to get marinated and ready to use.This stays good for over an year.
Serve it with hot rice and ghee.
Notes:
  • Use pickle variety mangoes which are sour and also cut them in to thin slices.In this pickle you can even use inner shell(called 'tenka' in telugu) along with the mango pieces for the pickle.
  • In this pickle we are NOT adding any water to the recipe,all the while I am talking about the water released from salted mango pieces.so please don't get confused.
  • Use red chili powder which is specially used for pickles as this variety gives a nice and bright red color to the pickle and also it is not very spicy.
  • Always transfer a small portion of pickle into a small jar and use a clean and dry spoon.
  • Increase the amount of sesame oil as required in the recipe.The basic thumb rule is to make the oil float over the pickle after 3 days.So feel free to add extra sesame oil.Do remember that we need to heat the oil and let it come to room temperature before adding to the pickle
  • This pickle stays good for more than an year.
  • You can prepare Maagaya pacchadi with magaya pickle.You can take a small portion of magaya pickle and grind it coarsely with green chillies and onions.Mix in the curd and give a tempering.I will post a detailed one in near future.

Monday, June 18, 2012

Kobbari Pacchadi | Coconut Chutney for Rice

Today's recipe is not about the coconut chutney that we usually prepare for idli/dosa but a variety that is to be eaten with rice.In general,a south Indian meal would start with either a Pacchadi(Thogayal/chutney) or a kind of powder/pickle mixed with rice.While we make lots of vegetable pacchadis to go with rice-this is the simplest of all and hardly takes a few minutes to prepare. Coarsely ground coconut adds a nice taste to this pacchadi and when mixed with hot rice and ghee definitely takes it to another level.
Kobbari Pacchadi Recipe:
(serves 4)

Ingredients:
1 cup fresh Coconut pieces
1 tbsp Urad dal
5-6 Red chillies
a big marble sized tamarind
1/2 tsp Oil
Salt to taste

to temper:
1-2 tbsp Oil
1/2 tsp Mustard seeds
1/2 tsp Urad dal
8-10 Curry leaves
a pinch of Asafoetida or 3-4 crushed garlic pods(optional)
Method:
  • Heat 1/2 tsp oil in a kadai and add urad dal and fry until it is red in color.Add red chillies and fry until they are red.Cool them.
  • Grind urad dal,red chillies with salt to a coarse powder.
  • Add coconut pieces and tamarind and add little water to a very coarse paste.Do not add more water,add just 1-2 tbsps of water.A stone mortar and pestle will do a better job for this kind of pacchadi as it adds a very special taste to it.
  • Meanwhile heat 2tbsp oil in the same kadai and crackle mustard seeds.Add urad dal and fry until red.Add asafoetida or crushed garlic pods and curry leaves and fry for half a minute.I used asafoetida here.Pour this on to the pacchadi.
Serve it with hot rice and ghee,it tastes best when mixed in hot rice with lots of ghee and fryums on the side.
Notes:
  • You can flavor the tempering with the addition of either hing or crushed garlic pods which adds a nice taste to the pacchadi.How ever it is optional to add any of these flavorings to the tempering and it tastes nice even with out them.
  • You can replace red chillies with green chillies in the recipe,it gives a nice white color coconut chutney.
  • You can even add 1/2 tsp cumin seeds while frying urad dal for an additional flavor.
  • I like the coarse texture of coconut for this pacchadi as it is to be eaten with rice and hence I used coconut in pieces form.You can even use grated coconut in place of coconut pieces.
  • It can be stored in refrigerator for 2 days.

Friday, June 15, 2012

INSTANT NO OIL MANGO PICKLE | WATER MANGO PICKLE

We have prepared over 10 varieties of Mango pickles over the past month , thanks to my MIL who is an expert in preparing them . The shelf life of some of these pickles, is however less while for others is more. The water mango pickle that I have posted today is quite unusual as it is prepared without Oil and in-fact made of water-can you imagine this ! This is the creativity of my MIL and her skills reflect to the core in this preparation. I am sure even some of you might have been surprised , so was I , when my MIL mentioned that, it is made with water.Surprisingly hubby dear, loved the fact that there is no oil in this pickle and also loved the slight hint of sweetness in this pickle, He is in-fact demanding a generous portion of pickle to eat with his curd oats or curd barley which is his usual breakfast fare these days.
I would like to warn you that this pickle is quite tasty but the shelf life is very less,it does not stay for more than 15 days.It is even suggested if you want you can even refrigerate it to increase the shelf life.This pickle is perfect for those who are health conscious and also avoid oil products.You can make this simple pickle when ever you get a fresh mango.
INSTANT NO OIL MANGO PICKLE :
(makes 2 1/2-3 cups)
Shelf life: 15-20 days

Ingredients:
2 medium (approx 2 cups) raw sour Mangoes
1/3 cup Mustard seeds
12 Red chillies
2 tbsp grated Jaggery
3 tbsp Salt
1 tsp Turmeric Powder
1/4 tsp Asafoetida
1/4 cup Water
Method:
  • Cut mangoes into small pieces.Here you can keep the inner skin intact or chop roughly.
  • Grind mustard seeds,red chillies,salt,turmeric powder,asafoetida to a powder.Add jaggery and water and grind to a slight coarse paste.If it is very thick add 1-2 tbsp more water,it should be slightly runny like dosa batter.
  • Mix the ground paste with the chopped mango pieces and store it in air-tight container.Let it sit for 2 days before use.
Serve it with curd rice.
Notes:
  • Use pickle variety mangoes which are sour and also cut them in to small pieces.
  • Use red chili powder which is specially used for pickles as this variety gives a nice and bright red color to the pickle and also it is not very spicy.
  • Always transfer a small portion of pickle into a small jar and use a clean and dry spoon.
  • This pickle stays good up to 10-15 days.It stays good for 20 days if refrigerated.My pickle is prepared almost 20 days back and still it is in good condition.

Check out my earlier Mango pickle posts:Link


Wednesday, June 13, 2012

Kobbari Karam | Endu Kobbari Podi | Spicy Coconut Powder

Kobbari Karam is a very simple spice powder which we eat with hot rice and ghee.The sweetness of dry coconut when combined with spicyness and a hint of garlic makes it very tasty.Making this powder is like a breeze as there is hardly any cooking,all you need to do is fry the red chillies and grind with rest of the ingredients.The only tedious task is to grate the dry coconut,it would be lot easier if you have a helping hand or if you are lazy to do you can even cut into tiny slices.
The recipe I posted has a strong taste of dry coconut as it is the core ingredient and also has a coarse texture of tiny coconut bites the way which we like.If you want a fine texture you can add fried gram(putnala pappu) or roasted urad and chana dal while grinding which adds a better texture.Read the notes for more details and adapt the recipe according to your convenience.
Kobbari Karam Recipe:
(makes 1 1/2 cup)
shelf life: 1 month

Ingredients:
2 cups grated dry Coconut(kopra)
5-6 Red chillies(based on the spicyness)
4-5 Byadige Red chillies(for color)
4-5 Garlic pods
Salt to taste
Method:
  • Dry roast red chillies for a minute until they are warm and crisp.You can even fry them in 1/2 tsp oil.Cool them.

  • Grind red chillies with salt to a powder and then add grated coconut and garlic pods and run again to a coarse powder.Do not run for long time,we need a coarse powder not fine powder.
  • Store it in air tight container.
Serve it with hot rice and ghee.
You can even serve it with idli/dosa or you can even sprinkle this on vegetable stir fries like ladies finger,brinjal,potato,tindora etc.

Notes:
  1. You can add 1/2 cup of fried gram(roasted chana dal/putnala pappu) while grinding the grated coconut which adds a fine texture to the powder.
  2. Alternatively you can fry 1/4 th cup of urad dal and chana dal each in a tsp of oil separately and grind it with red chillies and salt and proceed with the same.This version is apt to be served with idli/dosa.
  3. You can add the chillies according to your spice levels.
  4. Do not add more garlic pods as it will change the flavor.

Monday, June 11, 2012

NUVVU AVAKAYA | TIL AVAKAY - ANDHRA MANGO PICKLE with SESAME POWDER

As I promised in my earlier post, I am posting another mango pickle recipe.Today, I am posting a variety of Mango pickle prepared with sesame powder.This pickle would be ready to eat in a day or two but does not last long, hence is prepared in small quantity to consume before the main mango pickle 'Avakaya' gets ready.
While a few make this, with out any spices like red chili powder, my MIL prefers to add red chili powder to this pickle. I liked this version better than the one without spices.Usually this pickle is mixed with hot rice and ghee.
Nuvvu Avakaya | Til Avakay:
(makes 2 1/2 - 3 cups)
Shelf life: 15-20 days

Ingredients:

2 1/2 cups Mango pieces(pickle variety,see the notes)
1/2 cup Sesame seeds
1/3 cup Red chili powder(see notes)
1/2 cup minus 2 tbsp Salt(use salt less than 1/2 cup)
1/2 cup Sesame oil

Method:

cleaning the mangoes:
  • Wash and wipe the mangoes with a dry cloth.You really need to have a sharp thick knife to cut into 1" thick mango wedges with the inner shell in tact as shown in the pictures.Here in India the shop keepers does this job during the mango season.
  • If the inner shell is in tact this will increase the shelf life of pickle.Take a sharp knife and scrub the inner shell to remove a thin white layer over it.This is another important step you should keep in mind otherwise the pickle gets spoil.
  • Now take a dry cloth and wipe the pieces from all the sides ensuring that they are cleaned and dried well.
  • Spread them over a dry cloth while you are preparing the spices for the pickle.
for making pickle:
  • Keep ready the sterilized and sun dried jars ready before you start pickling.
  • Dry roast sesame seeds until slight golden in color and cool it.Grind sesame seeds to a fine powder.Do not grind for long which makes the sesame powder to a paste which makes the pickle bitter.So take care to make it into a powder not the paste.
  • Now take a big bowl and mix the sesame powder,red chili powder and salt until everything is mixed well.

  • Add the mango pieces to it and mix well and apply the mixture all over the mango pieces with your hands.Using your hands for this step is better than mixing it up with ladle.
  • Add 1/4 cup oil to the spice coated mango pieces and mix well.
  • Put the masala coated mango pieces and all the remaining masala in the sterilized jar add 1/4 cup oil over it and cover it with lid and keep it aside for 2-3 days.
  • On day-1 check it some oil might have started floating over the pickle.Now taste the masala mixture in the pickle,it should be perfect and slightly salty as the pickle has to be yet marinated for a day or two before its usage.But if you feel the salt is less add a tsp or 2tsps of salt to it and mix well.I don't think it would be necessary if you follow the measurements accurate.
  • Mix with a clean and dry ladle all over and repeat the same process on day-3.
  • On the day-3 if you see the oil is floating on the pickle up to an 1/2" height then it is perfect.Otherwise add extra sesame oil over the top until the oil floats on top.
  • Store it in a clean air-tight tupperware container or glass bottle.This way your pickle stores for long with freshness in it and even the mango pieces do not get soft.
Serve it with hot rice and ghee.

Notes:
  • Use pickle variety mangoes which are sour and also cut them in to the pieces with the inner shell in tact.
  • Use red chili powder which is specially used for pickles as this variety gives a nice and bright red color to the pickle and also it is not very spicy.
  • Always transfer a small portion of pickle into a small jar and use a clean and dry spoon.
  • Increase the amount of sesame oil as required in the recipe.The basic thumb rule is to make the oil float over the pickle after 3 days.So feel free to add extra sesame oil.
  • This pickle stays good up to 15-20 days.It stays good for a month if refrigerated.
  • You can easily double or triple the recipe,the basic rule is to use 4 cups of mango pieces with 1 leveled cup salt,1 cup red chili powder and 1 cup sesame powder.

Check out my earlier Mango pickle posts:Link
 
back to top